We occasionally link to goods offered by vendors to help the reader find relevant products. Some of these may be affiliate based, meaning we earn small commissions (at no additional cost to you) if items are purchased. Here is more about what we do.
So you’re ready to master the fine art of grilling, but you may have some questions about what you will need to get started.
Well, luckily for you, I have a list of all the equipment you need along with an explanation of why you need each item.
Obviously, first and foremost, you need the actual barbecue grill. If you’re unsure about which type to purchase, take a look at my gas vs. charcoal article.
Fuel
Already have a barbecue grill? Let’s talk about the other paraphernalia that you might find useful. After the cooking apparatus itself, the most important thing to have is, of course, your fuel supply.
For a gas model, this is as simple as hooking up a fresh propane tank. This will run you around $20, and you can get about 20 uses from the one tank. That’s pretty cost efficient.
Of course, the costs can climb significantly if you’re using a portable gas grill model with those disposable cartridges – I’d recommend hooking up to a larger tank for these as well, unless you want ultra-portability and need the space savings.
On the other hand, if you’re using a charcoal model, you have a couple of different options to contemplate. All types of charcoal start out as wood. When wood is heated in an environment totally lacking in oxygen, it will never actually catch on fire.
Instead, everything in the wood except the carbon will melt away as either a liquid or gas, leaving behind a chunk of pure carbon – that is charcoal.
Most people will use briquettes (think Kingsford) for grilling, but those aren’t pure charcoal. They have other things added, like starch to hold them together, and sodium nitrate to help them burn better.
Because they aren’t 100% carbon, the briquettes are cheaper to buy than the all-wood variety. Also, because of their uniform size, briquettes burn more steadily than all-wood charcoal.
Additionally, it’s helpful to know that this type will not impart any strong, distinct flavors to the food, nor will they reach as high a temperature as lump charcoal, due to the additional ash created by the burning of the binders and fillers added to the mix.
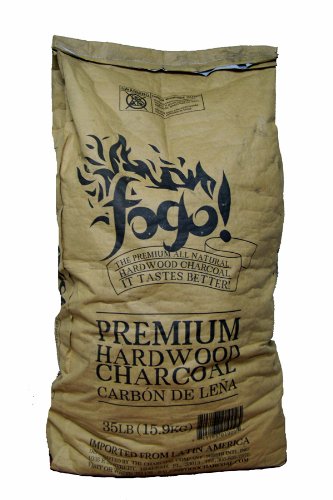
Fogo All Natural Premium Hardwood Lump Charcoal available from Amazon
We recommend Fogo All Natural Premium Hardwood Lump Charcoal due to its large chunks and complete burn leaving minimal ash
Hardwood lump charcoal, on the other hand, will burn about 20 minutes longer than briquettes, due to the lack of smothering ash the fillers create. The all-wood type also lends real wood smoke flavor to your food, provided by bits of real wood that remain after the charring process, imparting that great smoky essence without the need for added wood chips.
We prefer this type of charcoal and find that it is the best for many applications, and it will assist with temperature control.
If you are interested in adding a smokier flavor to your food, though, using wood chips, or chunks for longer-lasting smoke, is a great idea.
Applewood, hickory, and mesquite wood are the most popular for smoking. Mesquite is best used for preparing beef, because of its pungency. Applewood and hickory are great for both beef and pork, and applewood also goes well with the flavor of lamb.
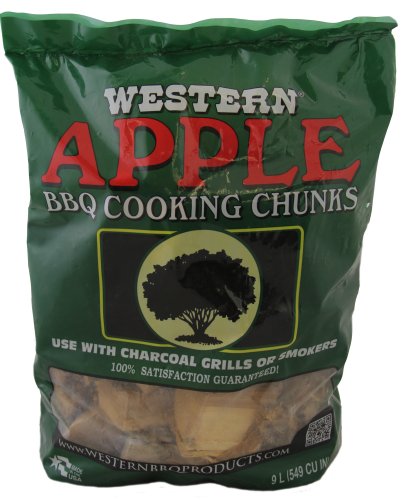
WESTERN Brand Apple Cooking Wood Chunks
Apple is one of the most favorable smoking wood’s available. We recommend Western brand’s Apple Cooking Wood Chunks, as the bags contain larger chunks than most of the competition.
Getting the Fire Started
While nothing could be simpler than just turning on a gas knob and letting the cooking surface and interior preheat, the charcoal examples take a little more work to get going.
There are a few ways to go about this:
The first option out there is the type of briquette that requires lighter fluid to start burning. I’m not a fan of those, because it just doesn’t seem right to me to be using such a harsh chemical to start a fire that will be used for cooking something that will end up in my mouth.
The better option are the briquettes that have mineral compounds added, that help them light quickly. Kingsford Match Light brand is probably the most popular of this type, and it works really well.
But, the best option in my opinion is lump hardwood charcoal. Unlike briquettes, the lump type has nothing added to it at all, and burns cleaner and faster than the preformed briquettes.
The best way to get this (or those briquettes) lit and burning well is by using a chimney starter. This is the next essential tool that you’ll need for effective barbecuing. However, it may not be the handiest thing to transport if you’re packing a portable grill on a trip.
Some of you may never have heard of a chimney starter, so I’ll give you a brief description. It’s a metal cylinder that has a grate mounted on the inside, towards the bottom. You place a little newspaper on the bottom underneath the grate, and pile your charcoal on top of the grate.
Then, you light the newspaper. The fire from that is what lights the charcoal, and the chimney effect of the cylinder causes the charcoal to light all the way to the top.
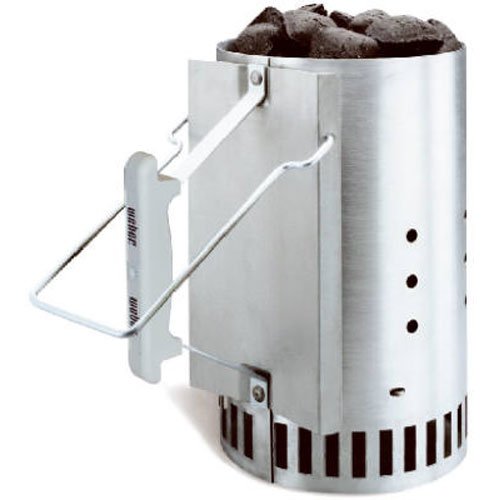
Weber 7416 Rapidfire Chimney Starter
The Weber 7416 Rapidfire Chimney Starter is the choice of many home BBQ fanatics.
You let the charcoal burn for about 7-8 minutes, until it’s glowing orange at the top of the chimney starter. At this point, you can pour the prepared coals into the fuel pit and let the grill begin to preheat.
This is the best way to get your fire going, as it ensures all the pieces have burned evenly. I highly recommend investing in one of these if you plan grill more than just a few times a year.
Keeping The Surface Clean
Strange as it may seem, the time to clean your grill isn’t right after you finish using it. Rather, once your cooking surface has preheated for a good 10 minutes, the high heat makes this the best time to scrape off the debris from the grates.

GrillPro 15513-1 Deluxe Large Head Stainless Steel Grill Brush
For this, you’ll want to invest in a sturdy, stiff-bristled grill brush like the one pictured above. Scrub every bit of the blackened bits from the grates, and you are ready to get your food on and cooking.
Grilling Utensils
Now that you are actually searing or charcoal-roasting your burgers, steaks, or whatever floats your boat, the next essential pieces of equipment will come into play. You will need a couple of pairs of long-handled tongs, a couple of large metal spatulas, and I also highly recommend an instant-read thermometer to avoid overcooking your meat.
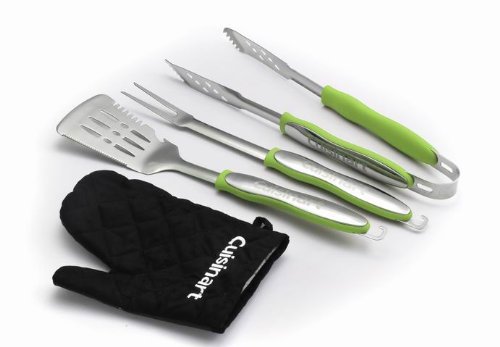
Cuisinart CGS-134G Grilling Tool Set with Grill Glove
A grilling set like the pictured Cuisinart set is always nice to have, and the fork is great for flipping steaks. A set without the fork is fine too, though, since you can always just use the tongs instead.
The spatula is a better tool to use for delicate foods like fish. I like having more than one of each, so that if my clumsy self drops one, I don’t have to waste valuable time washing it, and can simply grab the spare instead.
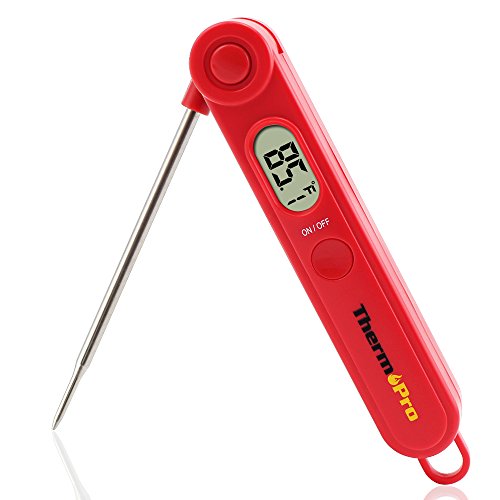
ThermoPro TP03A Digital Meat Thermometer
As far as a meat thermometer goes, it isn’t absolutely necessary to have, but it can really come in handy to help you to be able to produce the juiciest, most perfectly cooked meat. This ThermoPro Instant Read model is my favorite, but any brand will do. I tend to overcook meat when I don’t use a thermometer.
While it still tastes great coming off of the barbecue, overcooked meat is much tougher and drier than it should be. The instant-read thermometer solves that issue easily, and with minimal out-of-pocket expense.
Protecting Your Investment
Okay, now you’ve finished grilling, and hopefully you went ahead and tossed out the used charcoal and ash to save that step the next time. We’ve already discussed that you don’t need to scrape off the grill grates at this time, but what you do want to do is to protect your investment from the elements, especially moisture.
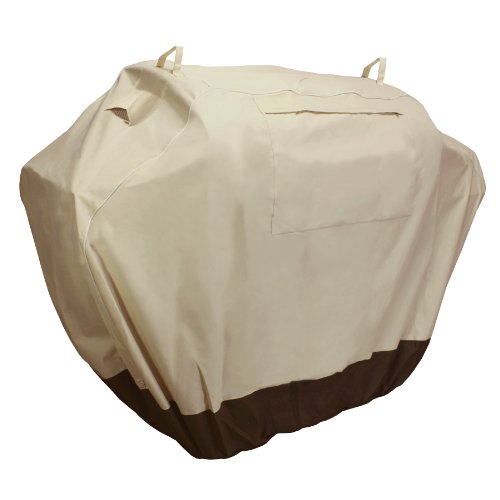
KHOMO Waterproof Heavy Duty BBQ Grill Cover.
I highly recommend purchasing a grill cover, which can cost as little as $10. Without being covered, your barbecuing surface will start rusting at a surprisingly fast rate – especially with cast iron or bar steel. Using a cover, even the cheapest model can last for years.
Of course, those made of stainless steel or covered in porcelain enamel (i.e. the grates) will last much longer in all conditions.
To Sum Up
To boil it down for you, here’s the breakdown of your barbecuing essentials:
- fuel (charcoal or propane tank)
- a chimney starter (for charcoal grills)
- a sturdy brush
- long-handled tongs
- large stainless spatulas
- an instant-read thermometer
- a cover
This list isn’t long or overly expensive, so you can see that it doesn’t take much to get started.
If you’ve never barbecued before and you’ve been hesitant to get started, hopefully seeing such a short list of the things you’ll need has put your mind at ease.
Stay tuned for the next article in this grilling series, where I’ll go over how to properly arrange your charcoal, how to gauge the heat level, and how to control the temperature on a charcoal grill.
Check out more of Foodal’s grilling and barbecuing articles now.
What’s your favorite thing about grilling? What are some of your tricks for setting up or cleaning the grill? Let us know in the comments!
About Ashley Martell
Ashley has enjoyed creative writing since she was six years old, when she wrote her first short story. She majored in English literature at the University of Montevallo. After years of professional work, she is now a stay-at-home mom of three, who uses her craft to write about her life and adventures in and out of the kitchen.

Thank you so much for your comparisons on the coals! I commented on one of your other posts about mine and my husbands fall back with our charcoal grill experience so we have been trying to find a better coal so I will definitely take your recommendations 🙂
I appreciate you going into detail about the briquettes versus hardwood lump charcoal, as well as the wood chunks. I’ve been wanting to add some chips or chunks to my fire, and it’s reassuring to do a little research ahead of purchasing them. I wasn’t aware of how the briquettes were created, and the hardwood lump charcoal definitely sounds preferable. Additionally, I wasn’t aware of the chimney starters, so have added that into my wish list.
Good list! May I add one extra item? Which is a food grade spray bottle. I fill it up with EVOO and spray it on the grill prior to cooking. This ensures that the food does not stick to the grill! You can also use it to provide a little extra moisture when grilling.
I can’t wait to get to barbecuing really soon – I’m stuck in an apartment so I don’t think my neighbours will be impressed. I’m hoping to go somewhere I can cook outdoors – perhaps the park or I might even go camping. I’m planning on using some all wood charcoal because I love that smokey wood taste!
Thanks for all these great tips! I know the basics of barbecuing, but this helped me learn some extra ways to care for the BBQ itself. I had no idea that they can rust without a cover, to be honest! … Though in retrospect I guess that should have been obvious. I’ll have to stop by the sporting goods department at Target later on and try to find a cheap cover I can afford (on a bit of a budget at the moment). This is definitely BBQ season, so anything to keep the grill up n’ running is appreciated!
We used to have an old cheap charcoal grill, and we left it uncovered in the shed all year long. We came back in the summer, and found that the ENTIRE BOTTOM of the grill had rusted out. Luckily, it was a cheap grill, but still. Whenever I have friends talking about buying a new grill, I always tell them that a cover will save you a lot of headache later on.
Thanks for this. I love cooking on the BBQ all year round. There can be snow on the ground and we will still be outside grilling. The first time we used the BBQ we realized we forgot half the stuff you listed. I wish I read this article last year. I would have been prepared.