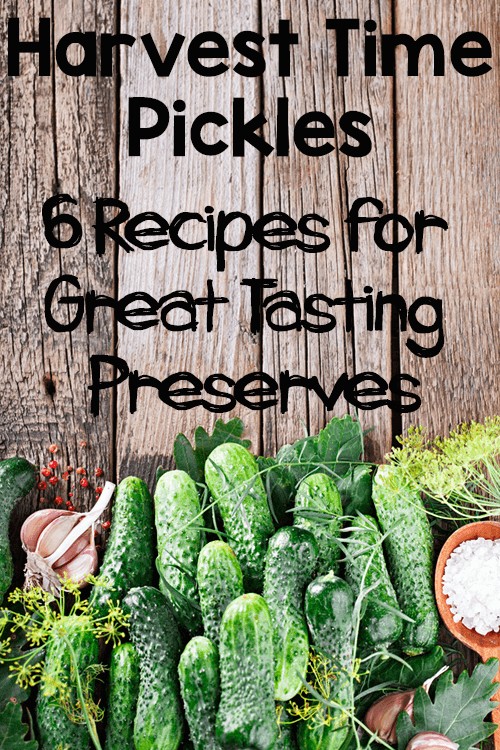
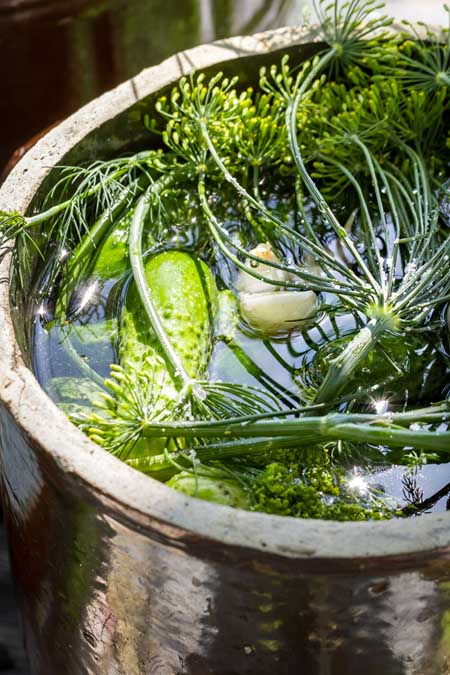
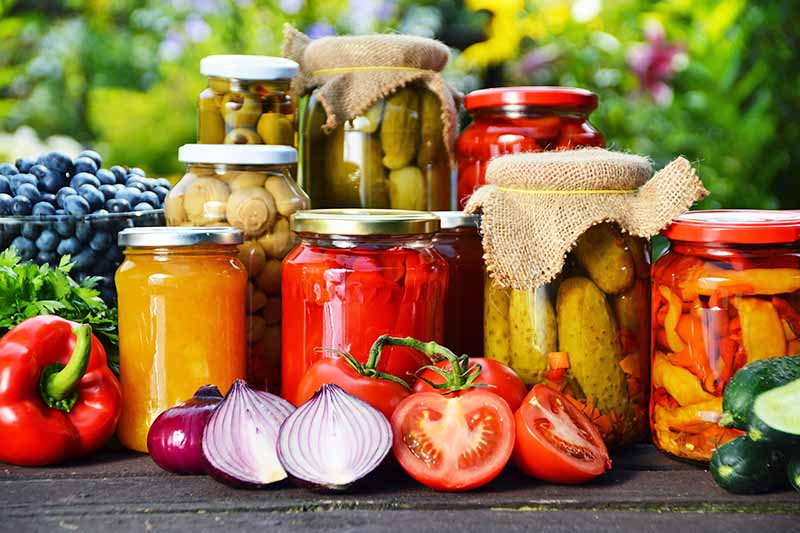
Harvest time is nigh and it’s time to start preserving some of the summer’s bountiful harvest.
Freezing, dehydrating and canning are all excellent ways to stretch out the great tastes and nutrients of locally grown produce.

Sweet jams and jellies are a delicious method of preserving berries and fruit, and pickled veggies give us wonderful sweet and sour tastes.
One of the great things about making your own pickles is that you can customize them to suit your tastes – make them sweet or sour, spicy or hot, add extra garlic, or include only the basics.
And while pickling may seem to be a magical skill known to only the wisest of kitchen wizards, it’s actually a very straightforward process with only a few steps to follow.
So, let’s explore the steps and techniques to making delectable pickles your family and friends will love. And, following up at the end of the post are 6 different recipes for you to try, featuring a variety of different flavors and ingredients.
Just remember to make enough for friends and family as homemade preserved veggies and fruit are always a welcome gift.
Introductory Pickling
While making pickles is a straightforward process, it does require some specialized equipment.
The basic kitchenware and canning utensils needed are:
• A hot water bath or pressure canner.
• A rack for the jars to sit on in the canner.
• A set of jar lifters or tongs that are strong and wide enough to grasp the jars securely.
• A good pair of oven mitts that go up to the elbow to avoid steam burns.
• Clean and sterilized jars and rings with new lids.
For a comprehensive list of equipment and accessories, more tips, and Foodal’s recommendations on canners, check out our earlier post on how to start canning at home.
And of course you’ll need the ingredients you plan on pickling. It’s a good idea to read all recipes right through to the end, to ensure that you’ll have everything you need on hand before beginning.
Basic pickling ingredients may include:
• Pickling salt.
• White vinegar or pickling vinegar.
• Spices and herbs.
• Flavor intensives such as garlic, hot peppers, cinnamon sticks, cloves, etc.
• Prepared fruit or vegetables as per your recipes.
• Soft water (please see below).
The key to successful pickling is to create an inhospitable environment for harmful bacteria, while preserving the flavor and texture of the vegetables.
And this important job is where the amazing ingredient that is vinegar comes in.
A 1:1 ratio of vinegar to water will keep brined vegetables crisp in the fridge for up to a week, and it’s also acidic enough to be used to safely preserve veggies at home while maintaining the integrity of their texture.
The Keys to Great Pickles
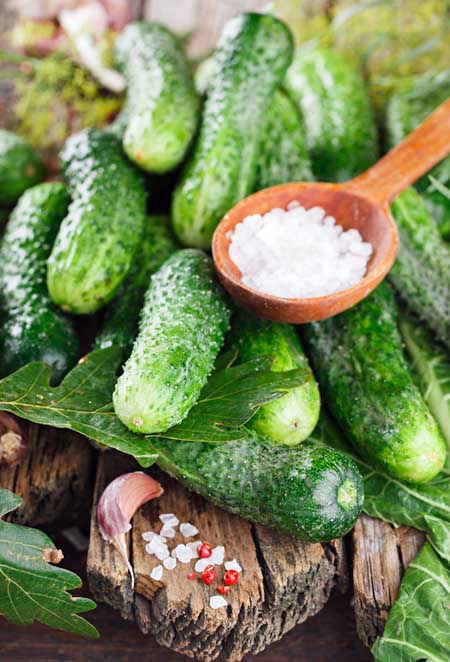
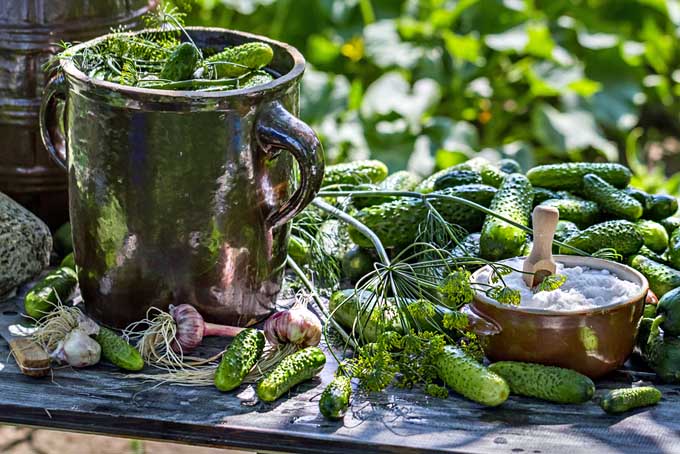
Use produce that is fresh, crisp and blemish free. If possible, grow your own ingredients or shop at local farmers’ markets to get the freshest veggies and herbs possible.
Wash all produce thoroughly in cold running water, and refrigerate if not using immediately.
When making dill pickles, ensure you’re using fresh pickling cucumbers, not salad cucs. And don’t use any that have been waxed, as this will prevent the brine from penetrating the cucumber.
Remove blossom and stem ends of cucumbers, and cut a thin slice off of the blossom end, a scant 1/16 inch – this will release enzymes that can make a cuc bitter.

Use only pickling salt, or pure sea salt free of additives, not table salt. Table salt contains iodine, an element that can darken pickles. And, anti-caking agents in table salt may cause cloudiness in the brine.
Use commercial grade white vinegar with at least 5% acidity. Cider and malt vinegars will add their own unique flavors, but they may also darken light-colored vegetables.
You can also use a pickling vinegar, which has 7% acidity, to make your pickles more sour.
Using soft water is recommended for pickles, as soft water has low levels of minerals and chlorine. Hard water (water with high mineral levels) can lower the brine’s acidity, possibly affecting food safety.
To soften hard water, boil a pot of water for 15 minutes, cover, and then allow it to stand for 24 hours. If any surface scum forms, remove it before carefully ladling the water out without disturbing the sediment on the bottom, as this is where the minerals are.
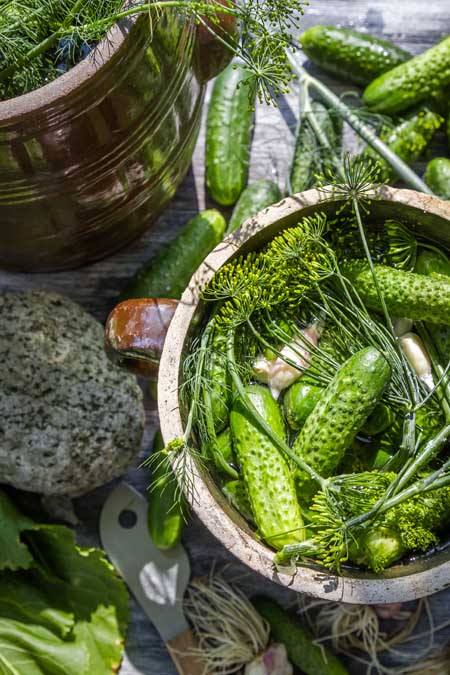
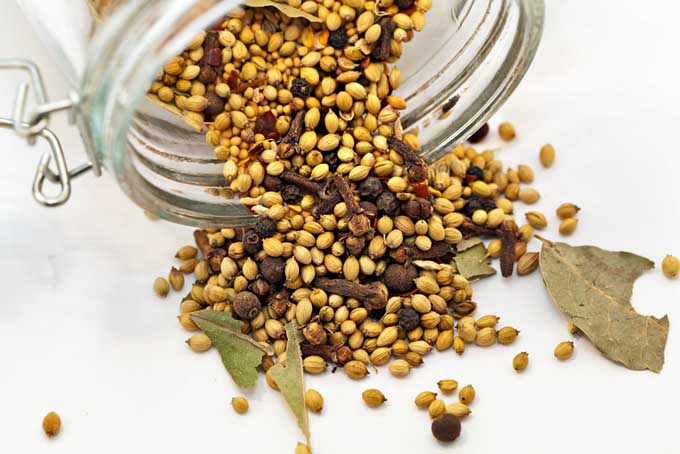
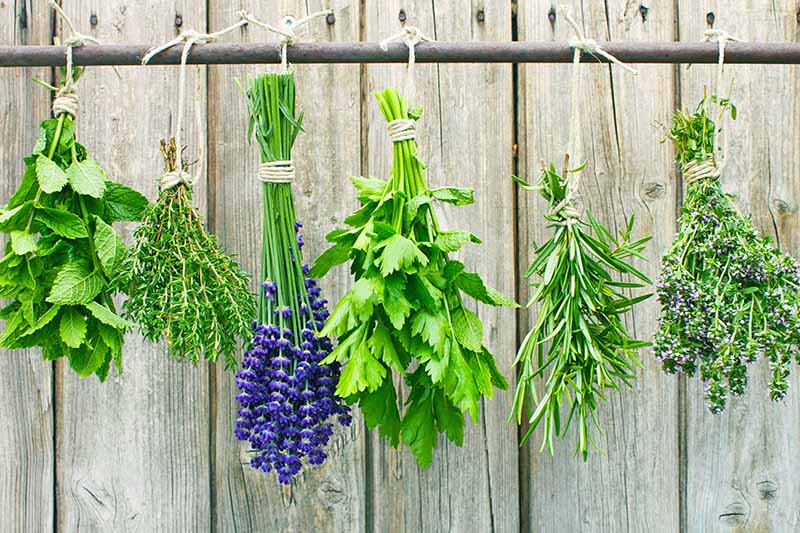
Fresh herbs and spices will impart the best flavors and can be used whole, crushed, chopped or ground. For outstanding flavor and aroma, use a mortar and pestle to grind or crush spices just before adding. Avoid any spices that have been sitting in the cupboard for a year or more as their taste will be stale and dull.
Add whole spices tied in a spice bag – use a large square of cheesecloth or unbleached muslin and knot with the spices in the center. Avoid using any fabric that has been dyed or otherwise colored.
Premixed pickling spices are convenient and available at the supermarket, but making your own mix is where the fun is. Use our recipe for Pickling Spice Mix below, or just wing it if you’re comfortable combining flavors and balancing quantities.
Some of the possibilities for your own designer spice mixes are:
- allspice berries
- basil leaves
- bay leaves
- celery seeds
- chili peppers
- cinnamon sticks
- cloves
- coriander seeds
- cumin
- dill leaves and seeds
- fennel seeds
- fenugreek
- garlic
- ginger root
- horseradish
- mustard seeds
- oregano
- parsley leaves and stems
- peppercorns
- sage
- thyme
- turmeric
If you would like to know more about utilizing spices and hot ingredients in pickling, get to know the process a little better by listening to the latest episode of the Foodal Podcast: managing editor Allison Sidhu discusses the world of spicy, fermented condiments with Kirsten and Christopher Shockey, fermentation experts and authors of the new cookbook a new cookbook called Fiery Ferments.
Steps to Pickle Making
1. Assemble equipment.
Before starting the pickles, set up all the equipment you’ll need.
• Wash and sterilize jars, lids and bands as per manufacturer’s directions and have them ready for filling.
• Set up the canning equipment.
• Pull out any mixing bowls, measuring cups, sieves, etc. that will be required.
2. Prepare ingredients.
Prepare the vegetables and other ingredients as required, then line them up on the counter or kitchen table in the order called for in the recipe.
Chop or slice veggies as required, peel tomatoes, and blanch any ingredients as needed. Prepare spices and herbs, and mix the brine or any other liquids.
3. Divide the vegetables.
Divide the prepared vegetables equally among same-sized canning jars, and have the lids and bands standing by.
4. Add flavor intensives and brine.
Add fresh or dry herbs and spices for flavor, then fill with sweet or sour pickling brine and allow adequate headspace.
5. Process
Carefully wipe rims and threads clean with a damp cloth, cover with lids and bands as per recipe directions, and process in a hot water bath or pressure canner. Do not shorten canning times.
Check out our best tips for success with pressure canners for your canned pickles, if you need some new techniques and methods!
6. Label and Store
Before putting your jars away for storage, remember to label and date them to ensure they’re eaten within a year.
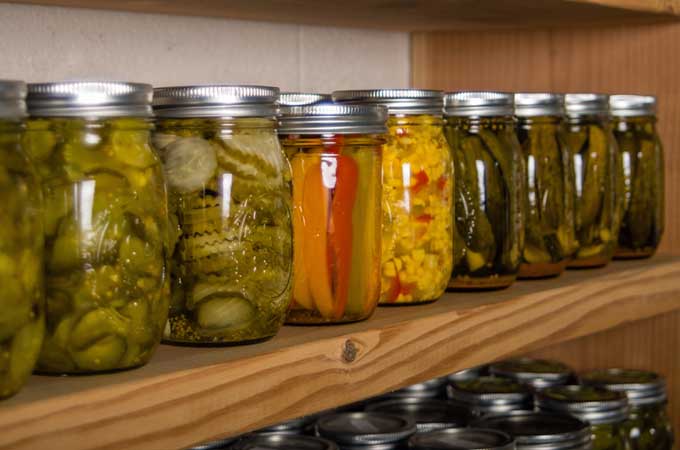
Shelf Life and Storage
Many home-canned pickles and relishes will retain their quality and integrity for up to a year, if stored under optimal conditions. To enjoy the best texture and firmness, eat your pickles within six to eight months of canning.
A number of recipes include a resting period to allow the pickles’ flavors to blend and mature for a month or so before eating. But after this initial ripening period, they don’t become better with age and should be consumed with a year.
For the best shelf life, store homemade pickles in the same manner as other home canned goods. Store pickles in a cool, dry area such as a basement, cellar, garage or unheated room to extend their longevity.
While exposure to light doesn’t necessarily make them unsafe, it can affect their quality and turn pickles soft and mushy, or cloud the brine.
Recipes
To get you started, here are 6 of our favorite recipes for brined preserves, plus one for creating your own pickling spice mix.
Pickling Spice Mix
For pickles with robust, full flavors, use your own freshly made spice mix.
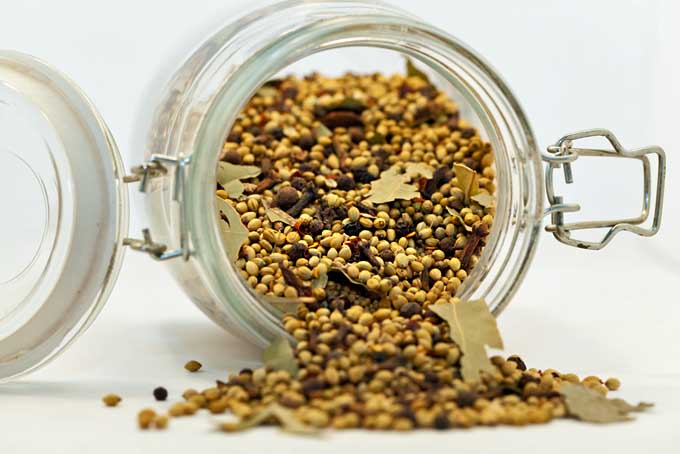
Seal any leftovers in a glass jar with tight fitting lid, and store in a cool, dark cupboard for up to two months.

- 2 tablespoons whole mustard seeds
- 1 tablespoon whole allspice berries
- 2 teaspoons whole coriander seeds
- 1 teaspoon chili pepper flakes or more to taste
- 1 teaspoon ground Ginger
- 2 bay leaves crumbled
- 2 cinnamon sticks broken into quarters
- 6 Whole cloves
- Place mustard seeds, allspice berries, coriander seeds, chili flakes and ginger into a small glass jar with a tight-fitting lid. Shake to combine.
- Add the crumbled bay leaves and quartered cinnamon sticks to the jar, seal and shake well to combine all ingredients.
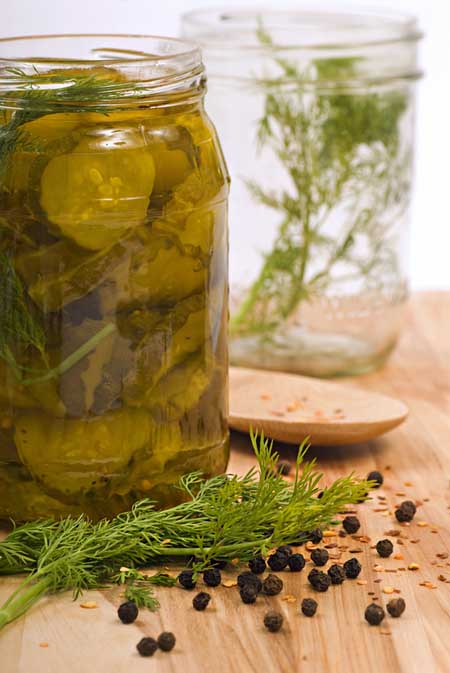
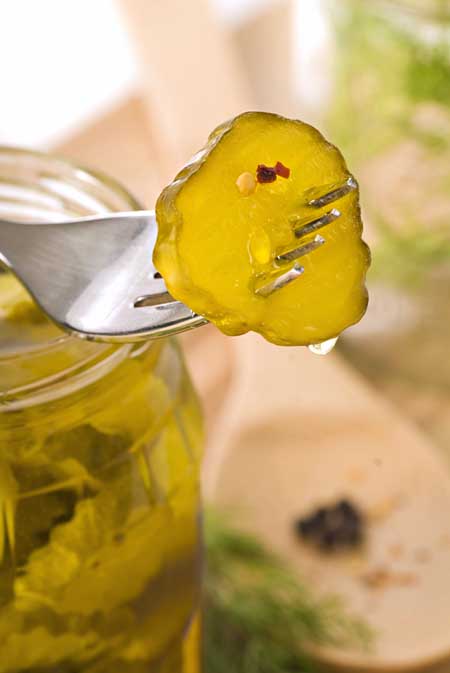
Garlicky Dill Pickles
A classic in the pantry, these dill pickles are crisp, juicy, tart and garlicky! The perfect garnish on sandwiches and burgers, they’re also great as a side dish at most meals.
And, minced finely, they add a unique flavor to tartar sauce, deviled eggs, tuna salad, etc.

- 4 quarts Kirby or other pickling cucumbers approximately 6 pounds
- 3 cups apple cider vinegar
- 3 cups softened water
- 4 tablespoons pickling salt
- 16 garlic cloves peeled and stem end removed
- 3 tablespoons dill seed
- 4 teaspoons whole black peppercorns
- 2 teaspoons red chili flakes
- 4 quart jars plus fresh lids and bands
- Wash jars and bands thoroughly in warm, soapy water then prepare a water bath canner. Put clean, unused canning lids into a small saucepan with a few inches of water, and bring to just a hint of a simmer. Let them sit in the water until you’re ready for them.
- Wash and dry the pickling cucumbers. Remove a thin slice from the blossom end. Prepare cucks as you prefer – slice into chips, cut into quartered spears or leave whole.
- In a non-reactive, medium saucepan combine vinegar, water and salt, and bring to a boil.
- Divide equally among the jars the cloves, dill seed, peppercorns and chili flakes. Tightly pack in the prepared cucumbers, taking care not to crush them.
- Pour in the prepared brine, leaving 1/4 inch headspace between the brine surface and the rim of the jar.
- Remove air bubbles with a gentle tap, or use a wooden chopstick to dislodge any stubborn bubbles.
- Wipe rims and threads carefully, apply lids and screw on bands.
- Add the jars to your canner and when water returns to a boil, set a timer for 10 minutes.
- After processing, remove jars from the canner and allow them to cool. When cool enough to handle, check seals.
- Apply labels with canning dates, and store in a cool, dry and dark location. Let pickles rest for at least one week before sampling.
Dilly Green Beans
Dilly green beans are crisp and sour like their dill pickle cousins, and can be used in the same manner.

Pickled Dilly Green Beans: Get the Recipe Now
However, they do have the advantage of being a perfect garnish for a Spicy Caesar or dry martini!
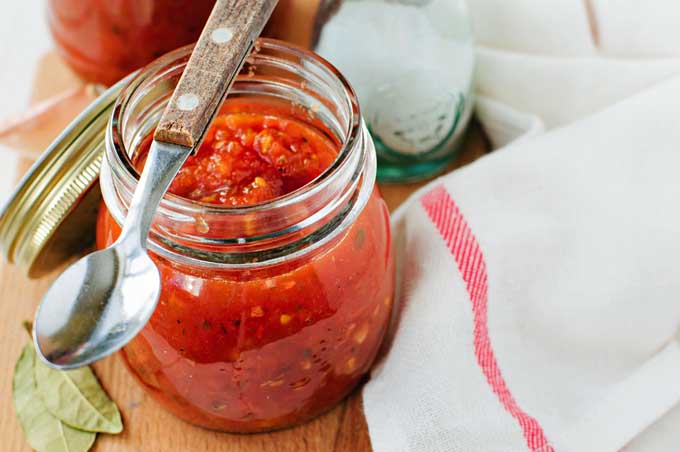
Spicy Red Tomato Relish
If you enjoy the flavors of the Southwest, you’ll love this spicy red tomato relish. Increase the heat of this tasty condiment with some extra jalapeños or even habaneros.
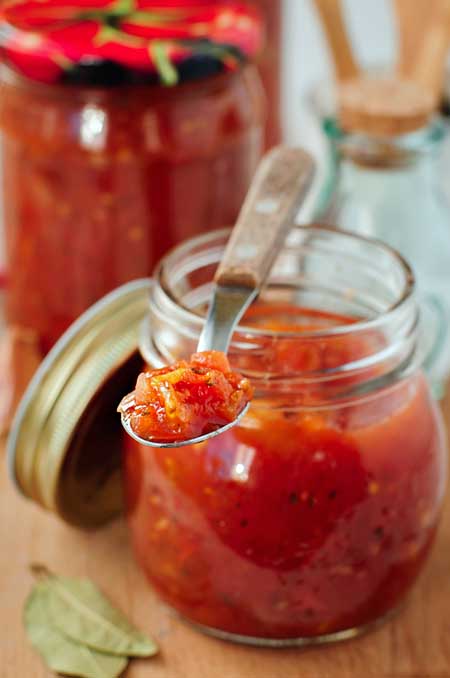
Wonderful served with any sort of meat, or as a pickle with a cheese and cracker platter.

- 25 - 30 medium tomatoes peeled and chopped (about 6 – 7 pounds)
- 2 cups onions chopped
- 1 cup green pepper chopped
- 1/2 cup jalapeno peppers minced
- 1 tablespoon celery seeds
- 1 tablespoon pickling salt
- 1 teaspoon cinnamon
- 1 teaspoon clove
- 1 teaspoon allspice
- 1 teaspoon ginger
- 1 1/4 cups distilled white vinegar
- 1 teaspoon red pepper flakes
- 1 1/4 cups sugar
- 6 pint jars with fresh lids and bands
- Peel tomatoes by scoring the blossom end with an X, blanch briefly in boiling water, and then immediately immerse into a sink of cold water. The skins should peel off easily and the stem core can be removed with a sharp paring knife.
- In a large saucepan, mix all ingredients and bring just to a boil.
- Reduce heat and simmer over medium for up to two hours, or until desired thickness is reached. Stir occasionally to prevent sticking.
- Carefully ladle mixture into sterilized pint jars leaving 1/2” headroom, wipe the rims and threads clean with a damp cloth and seal with lids and bands. Be sure the bands are loose and not screwed on tightly.
- Process in a boiling water bath for 15 minutes.
- Remove from the bath and allow to cool before handling. When cool, label and date the jars. Store in a cool, dark cupboard for up to one year.
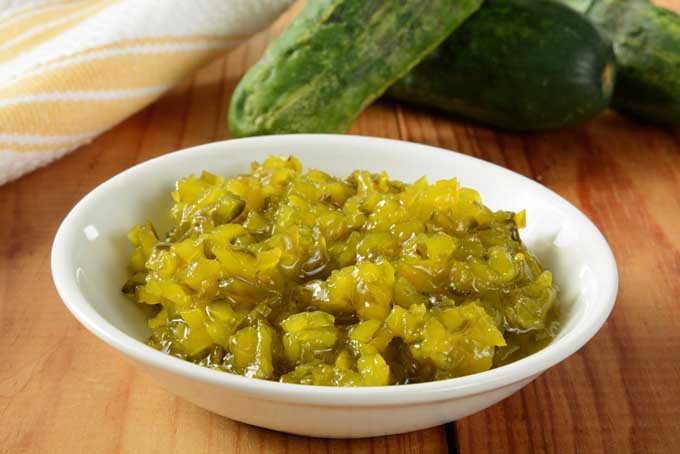
Sweet Pickle Relish
A tasty condiment for any type of meat, this sweet relish is particularly good on hamburgers, hot dogs or brats – really, anything done on the grill.
This recipe doubles up nicely, and makes a great gift for family and friends.

- 8 cups pickling cucumbers chopped and deseeded
- 4 cups onions chopped
- 2 cups green bell peppers chopped
- 2 cups red bell peppers chopped
- 1/2 cup pickling salt
- 3 cups sugar
- 1 1/2 cups cider vinegar
- 2 tablespoon celery seeds
- 2 tablespoon mustard seeds
- 1/2 teaspoon cinnamon
- 1/2 teaspoon ground cloves
- 1/2 teaspoon ground allspice
- 6 pint jars
- To deseed cucumbers, cut them in half lengthwise and scoop out the seeds with a spoon, then chop to size.
- Place all the vegetables into a large mixing bowl. Sprinkle the salt over the veggies, cover with cold water and let stand for 2 hours.
- Drain vegetables well, then press out as much liquid as possible. Or, give them a spin in the salad spinner to remove excess liquid.
- In a large pot, combine sugar, vinegar, seeds and spices and bring to a boil. Add the veggies and bring back to a boil, then reduce heat and simmer for 10 minutes.
- With a slotted spoon, ladle into pint jars. Add more brine if needed, leaving 1/2" head room. Wipe rims and threads with a damp cloth, seal with the lids and bands (screwed on loosely) and process in a boiling water bath for 10 minutes.
- Remove from water and allow to cool. Label and date, then store in a cool, dark cupboard.
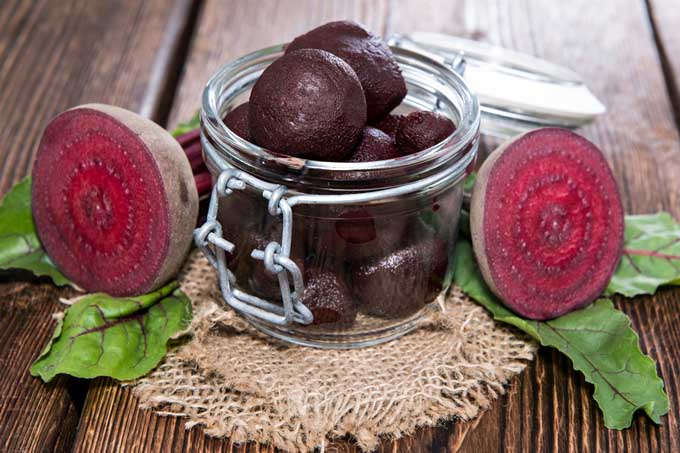
Spicy Sweet Pickled Beets
These beets have a robust flavor that’s sweet and spicy at the same time
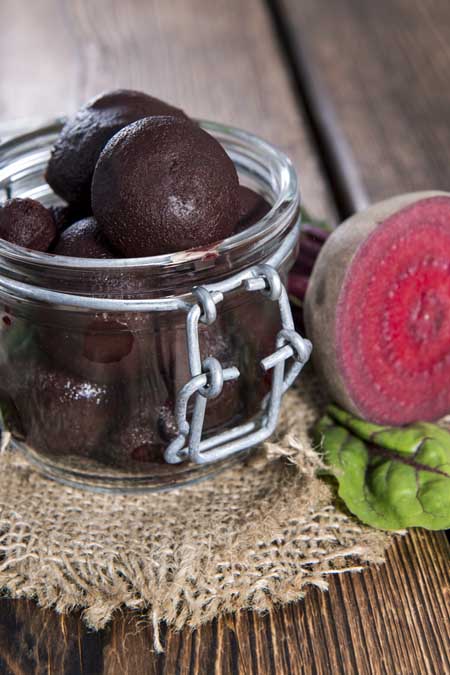
Mandatory for family picnics, they’re great on a salad or sandwich, and serve up well as a savory side to complement meat, poultry and fish.

- 35 -40 small beets stems and roots trimmed
- 2 cups sugar
- 2 cups softened water
- 2 cups distilled white vinegar
- 1 teaspoon ground cloves
- 1 teaspoon Whole cloves
- 1 teaspoon allspice
- 2 cinnamon sticks broken into thirds
- 1 cinnamon stick whole
- 6 pint jars with lids and bands
- Bring a large pot of water to a boil and cook the unpeeled beets just until fork-tender. Immerse in a sink of cold water, then remove the skins.
- Slice beets about 1/4 inch thick, and pack snuggly into to the jars, taking care not to bruise or crush them.
- In a large saucepan combine the sugar, water, vinegar, ground and whole cloves, allspice, and 1 whole cinnamon stick. Bring to a boil, then reduce heat and simmer for about 10 minutes.
- Add one third cinnamon stick to each jar then pour the brine over the beets, leaving 3/4 inch headroom between the brine surface and rim of the jar. Wipe rims and threads clean with a damp cloth, then add the lids and bands.
- Add jars to a water bath canner, bring to a boil and process in a boiling water for 12 minutes.
- Cool on a rack, then label and date. Store in a cool, dark, dry cupboard.
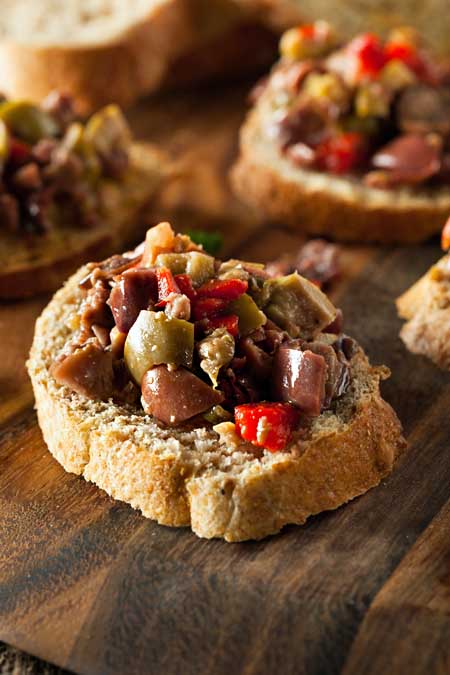
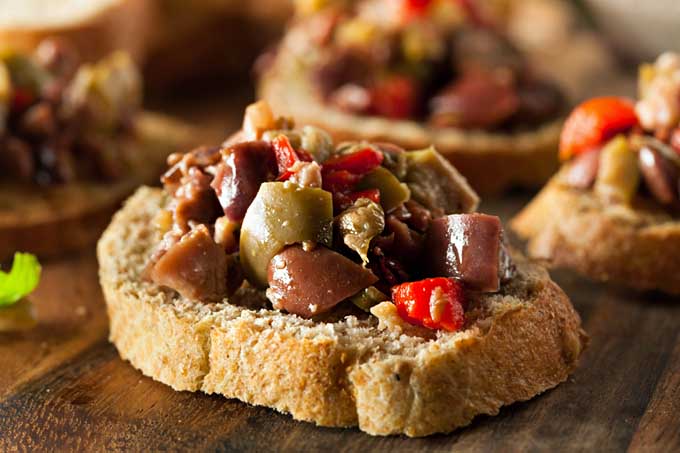
Wickedly Good Antipasto
This is a slight adaptation from the old Best of Bridge recipe book – a tried and true preserve that always gets rave reviews, it’s a highlight of holiday entertaining. Superb served with crackers, toasted baguettes and flatbreads along with a variety of cheeses.
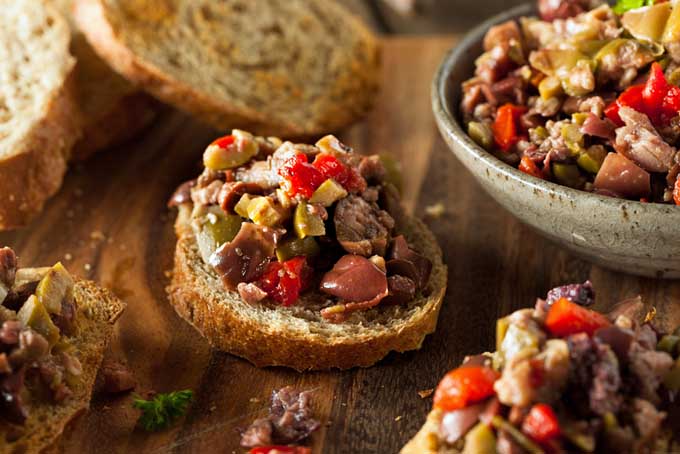
Use what you can from the garden and buy the rest of the ingredients when they come on sale. There’s a lot of chopping involved, but don’t succumb to the urge to use a food processor – plan an antipasto-making party instead.
Invite friends and neighbors to share in the cost, labor and rewards of this delicious appetizer. Just double or triple the recipe as required, have your guests bring another canner and their favorite knives, and plan for a fun afternoon spent together in the kitchen.
A bottle of grappa doesn’t hurt either!

- 2 large green peppers deseeded and chopped finely
- 4 large carrots scrubbed and chopped finely
- 1 large cauliflower florets broken into small, bite-sized bits
- 5 cloves garlic smashed and minced
- 2 tablespoons fresh oregano minced
- 1 cup fresh basil leaves shredded finely
- 2 8 oz. cans pitted black olives drained and coarsely chopped
- 1 16 oz. jar broken green olives drained and coarsely chopped
- 2 12 oz. jars pickled pearl onions drained and coarsely chopped
- 2 4 oz. cans pimientos drained and coarsely chopped
- 1 48 oz. jar sweet pickles drained and coarsely chopped
- 2 14 oz. cans artichokes drained and coarsely chopped
- 2 10 oz cans mushroom pieces drained and coarsely chopped
- 1 cup olive oil
- 2 15 oz. bottles ketchup
- 1 15 oz. bottle hot or spicy ketchup
- 1 cup dry red wine Burgundy works well
- 3/4 cup distilled white vinegar
- 2 5 1/2 oz. cans tomato paste
- 2 cans cans anchovies drained and minced
- 3 7 7 oz. cans solid tuna drained and rinsed
- 16 pint jars with fresh lids and bands
- Heat a heavy skillet to medium high and add about 2 ounces of olive oil, 2 teaspoons of the minced garlic and the cauliflower bits and sauté lightly for 2 minutes. Remove from heat and set aside. Heat a large pot to medium high and add the remaining olive oil and garlic, sautéing for a minute or so then add the ketchup, wine, tomato paste, 1/2 cup vinegar, oregano and basil and mix together well.
- Quickly add the chopped vegetables, pickles, olives, artichokes, pimento, cauliflower and mushrooms and bring to a boil.
- Reduce heat and simmer for 10 minutes, stirring frequently.
- Add anchovies and tuna to the mixture and return to a boil, stirring constantly to prevent sticking. If needed, add the remaining 1/2 cup vinegar.
- Ladle into pint jars leaving 1/2” headroom. Wipe rims and threads with a damp cloth, seal with lids and screw bands on loosely then process in a hot water bath for 25 minutes.
- Remove from bath and let cool. When cool enough to handle, label and date and store in a cool, dark cupboard for 6 – 8 months.
- Or, for immediate use, refrigerate for up to 2 weeks.
About Lorna Kring
Recently retired as a costume specialist in the TV and film industry, Lorna now enjoys blogging on contemporary lifestyle themes. A bit daft about the garden, she’s particularly obsessed with organic tomatoes and herbs, and delights in breaking bread with family and friends.

What wonderfully detailed instructions! My mother is always so organized and pickles many things. I would love to have a try myself this season though. There’s something extra special about homemade jars. They taste so much nicer than those that are store-bought, plus you can be reassured that there are no nasty preservatives in them.
Yes, mothers are powerful pickle influencers! And I couldn’t agree more about the taste of homemade vs. commercial products… hope you give them a try, it’s a very rewarding practice in many ways.
First off – thank you for providing instructions on how to make soft water so effortlessly! I have previously stumbled upon recipes and such that require soft water, and I often assumed that if it didn’t happen at the tap, then it didn’t happen. This is a tremendously helpful note in the article.
Secondly, pickles are beloved in our home. The problem being that no one agrees on one type of pickle. You could say we are picky pickle people. I think making them at home could be a fun way to spend time together and make our own personal pickles that are perfect to each of us.
You’ve really broken down the steps in a less daunting manor. My last harvest will occur this weekend and now I am excited to try this!
Glad you liked the tip JossZen, it’s always nice to have a choice. And a family preserving party for picky pickle people is fun for everyone! It’s a great family tradition to create and pass on. Let’s us know how your preserving turns out.
Wow, I’ve been wanting to make pickled items for years now, and have read various articles over that time. Your article brought up several issues I wasn’t previously aware of, and I’m so glad I read it. Regarding using only non-waxed cucumbers, is it possible to remove the wax from cucumbers that have been waxed? I’m not sure stores here sell unwaxed cucumbers, unless perhaps the organic ones are wax free. Also, I have hard water, and wouldn’t have been aware of the food safety issue without reading this post. Your recipes and pictures look absolutely delicious, and I’m saving this article, so I will have it handy when I’m ready to embark on my pickling adventure.
Glad you enjoyed the post Diane.
Yes, remove the wax from cucumbers by bathing in the sink in a mixture of: 1 cup of white or cider vinegar, 1 tablespoon baking soda, and the juice of one lemon. Let them sit for 5 – 10 minutes, turning to so that all sides are covered. Rinse with cold water to finish.
Have fun on your adventures!
I love the thought of the antipasto but, my word, how much stuff do you need! An antipasto co-operative is definitely the way forward here! I bet it knocks spots off the stuf I buy at Aldi (which is actually rather good BTW!).
LOL, it is a bit of a production missbishi, and helping hands make it so much easier (and more fun)! But, you’re right about the taste… well worth the time and effort.
Lorna, you rock. It’s like you were reading my mail. I promised my husband I’d learn how to make some pickles for him, and then you posted this. haha. He’s been craving them lately for some reason, even though he’s never really been a fan before. So, I’ve been looking around for good, easy, ways to make them. I love the idea of making my own spice concoction for the brine.
These relishes also sound terrific. I can’t wait to try my hand at these!
Ah, the pickle angels must have been on the job! Hope you and your husband enjoy your efforts… let us know how they turn out.
I love pickles. The sour ones are the best. I hate things like sweet relish or sweet pickles. I would make pickles, but I’m afraid I might eat some before I get a chance to pack some as gifts! For those that can resist the urge to eat it all alone, I salute you.
Resistance is futile…. I just make bigger batches now!
I’ve never tried making my own pickles before. The notion of having to go through all these steps and still possibly not ending up with a good batch has always made making pickles seem daunting to me. But this article has helped me see pickle making in a new light. I guess it’s like everything else, you try and then you get good. I’d be silly for thinking I’d ever be able to make my own pickles like a pro if I never tried. Why only white vinegar or picking vinegar? Does it impart some kind of special flavor? I never knew there was specifically pickling salt. I’m glad I read this here because I definitely would have added regular table salt. Instead of adding horseradish to the pickles can I use wasabi instead? All these recipes look so good I just want to try them all, but I don’t have pressure canner or a rack for the jars though so I think I’ll hold off until I get those.
Absolutely right NN, it just takes a bit of practice to become a proficient pickler!
White and pickling vinegars contain higher levels of acetic acid than the others, and this is necessary for food safety – to eliminate bacteria.
I should have paid better attention at first read. I think I need to buy different vinegar.
I’m also curious about which peppers (really hot ones) might produce the best flavor. I’m sure that some are better than others.
I’d also love a recipe for giardiniera, if you happen to have one handy.
I’ve wanted to try pickling for a while. I’ve heard it’s much more inexpensive than buying them in jars at the store, and that homemade pickles taste better, too. I haven’t seen pickling vinegar at any of my local grocery stores, so I guess I’ll order some online and try to make some nicely pickled cucumbers. I bet thin slices of those Garlicky Dill Pickles would taste amazing on a veggie burger… mmm. Thanks for sharing!