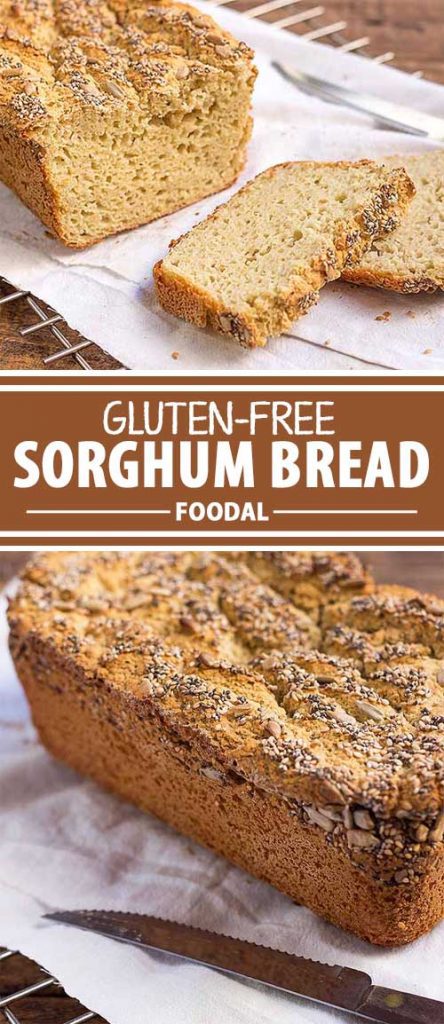
Looking for a go-to, gluten-free bread? Bake a loaf of our sorghum-based recipe!
Sorghum is an ancient grain native to central and south Africa. Because of the plant’s high tolerance to drought and heat, it has gained global popularity as a staple cereal crop.
And since it doesn’t contain the proteins that make gluten, the ground form of this grain (as well as many others!) is perfect as an alternative flour in baked goods for those suffering from gluten sensitivity and celiac disease.
With its high levels of protein, iron, and fiber, it’s a great addition in a nutrient-dense diet.
The protein content also helps to provide more substance and structure in this baked treat.
The dry base of our recipe combines this tasty ground grain with other gluten-free favorites like cornstarch, tapioca starch, and xanthan gum.
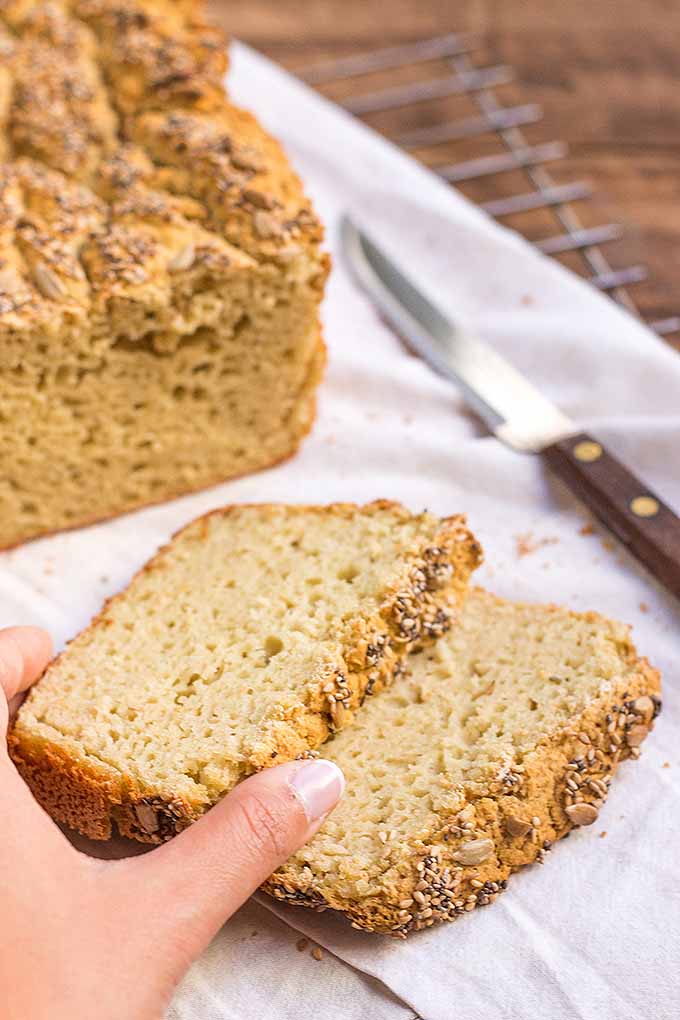
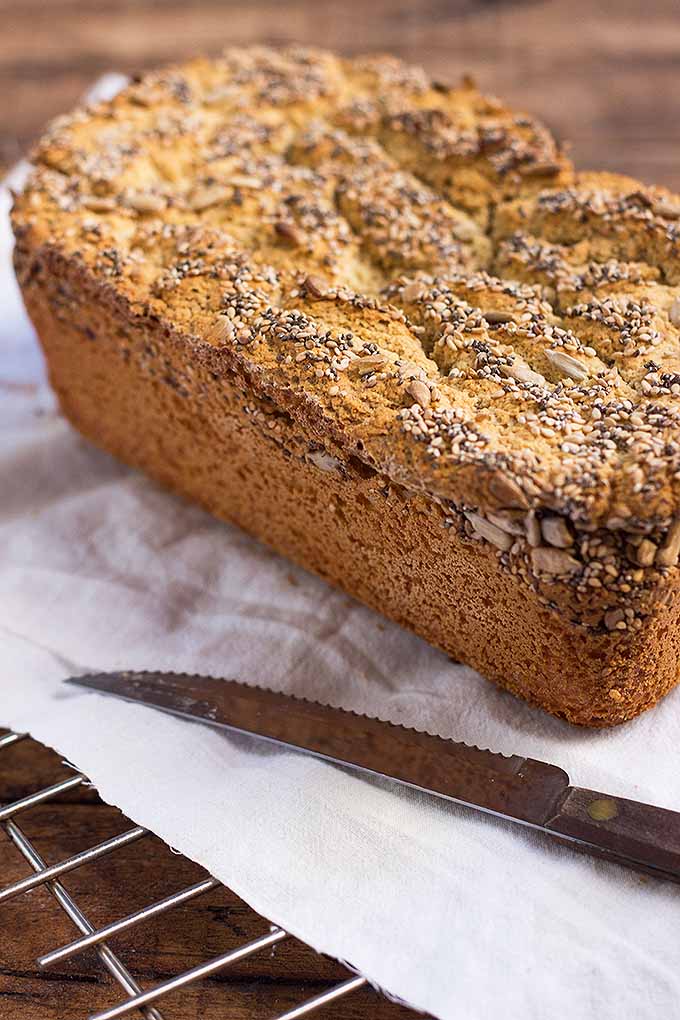
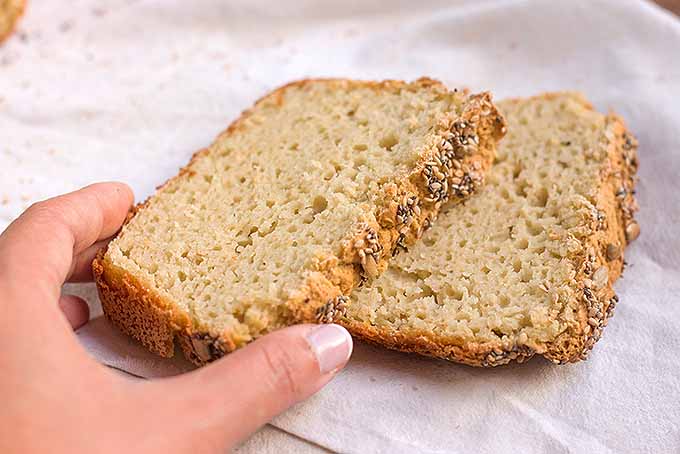
Mixed with yeast, sugar, and eggs, topped with a crunchy mix of seeds, and baked until it’s beautifully golden in color, you’ll have a simply flavored and perfectly fluffy loaf of deliciousness that you can enjoy to your hungry stomach’s content.
No wheat? No problem. Make our recipe now:
Gluten-Free Sorghum Bread
- Total Time: 1 hour, 55 minutes
- Yield: 1 loaf
Description
If you follow a gluten-free diet, you can still enjoy delicious baked goods, like our recipe for homemade sorghum bread.
Ingredients
- 3 teaspoons active dry yeast
- 2 teaspoons granulated sugar, plus 1/8 cup
- 1 1/2 cups warm water
- 2 1/2 cups sorghum flour
- 1/2 cup cornstarch
- 1/2 cup tapioca starch
- 1 teaspoon salt
- 1 teaspoon xanthan gum
- 4 large eggs
- 1/2 cup mix of seeds of your choice (optional)
Instructions
- In a medium bowl, mix the yeast, sugar, and warm water together. Let the mixture sit in a warm place for 5-7 minutes, until it becomes frothy with small bubbles.
-
In the bowl of a stand mixer, combine the sorghum flour, cornstarch, tapioca starch, salt, xanthan gum, and the remaining 1/8 cup sugar. Mix well with a hand whisk to fully incorporate before attaching the paddle attachment.
-
Beat the eggs in a separate small bowl. Pour both the egg and yeast mixtures into the dry ingredients. Mix everything for a minute or so, until you get a homogeneous dough (it will be the texture of a thick cake batter).
-
Grease a 9-by-5-inch loaf pan. Spoon the dough mixture into the pan. Smooth the surface with the back of a wet spatula. If desired, sprinkle the top with a mix of your favorite seeds – pumpkin, sesame, sunflower, etc.
-
Allow the dough to rest in a warm place without any drafts (either in a microwave that is not in use or in an oven that is switched off) until the dough has doubled in size, approximately 40 minutes.
-
Preheat the oven to 350°F about 15 minutes before the dough has finished proofing. Bake for 45 minutes to 1 hour on the middle rack, until the loaf is light golden brown on top and sounds hollow when tapped on the bottom.
-
Cool completely before slicing into it. Store in an airtight container in the refrigerator for up to 1 week.
- Prep Time: 10 minutes
- Cook Time: 1 hour
- Category: Bread
- Method: Baking
- Cuisine: Gluten-Free
Keywords: sorghum, sorghum bread, gluten-free, gluten-free bread
Cooking by the Numbers…
Step 1 – Prepare the Ingredients for the Dough
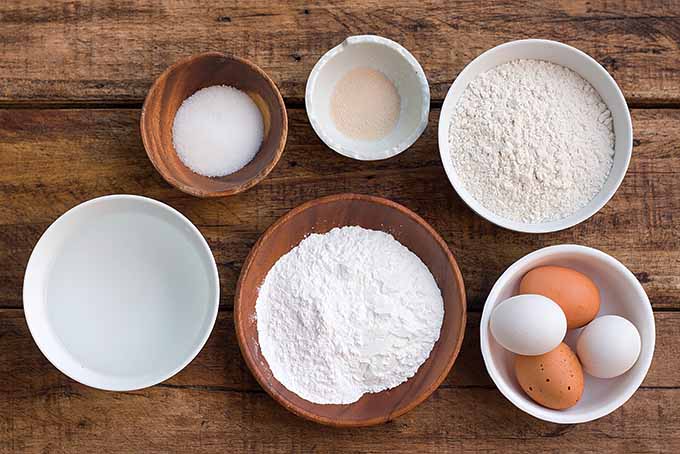
Measure the active dry yeast, sugar, warm water, sorghum flour, cornstarch, tapioca starch, salt, xanthan gum, and seeds.
Set out the eggs.
Step 2 – Combine and Mix
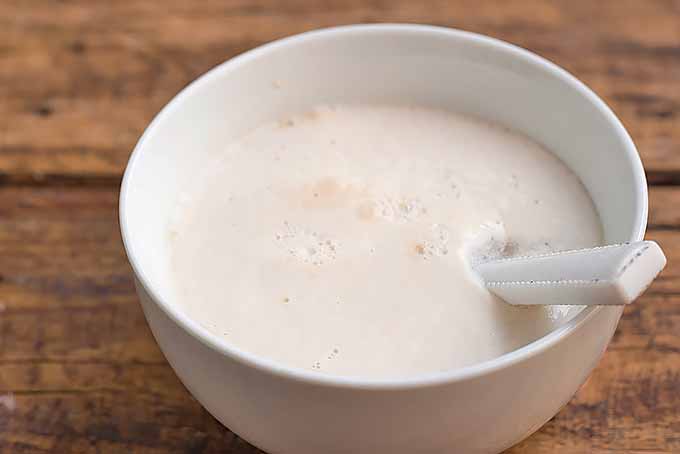
Mix the active dry yeast, sugar, and warm water together in a medium bowl. Allow it to sit in a warm place for 5 to 7 minutes until it becomes frothy with tiny bubbles.
Note: If the mixture does not become frothy, it means the yeast is not working. The yeast may have expired. If it is not frothy, prepare another mixture with new yeast.
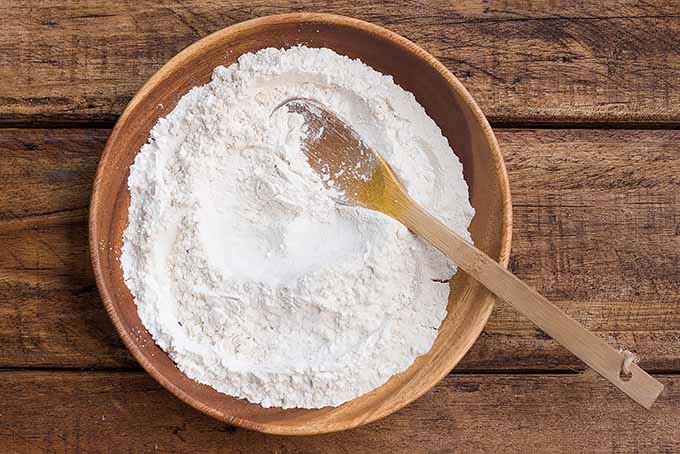
In the bowl of a stand mixer, whisk together the sorghum flour, cornstarch, tapioca starch, salt, xanthan gum, and the remaining sugar. Mix well to ensure that the ingredients are evenly dispersed before attaching the paddle attachment.
Beat the eggs together in a small bowl, then pour the egg mixture and the yeast mixture into the large mixing bowl with the dry ingredients. Mix on medium speed for a minute or so, until the ingredients are thoroughly mixed and a homogeneous dough forms.
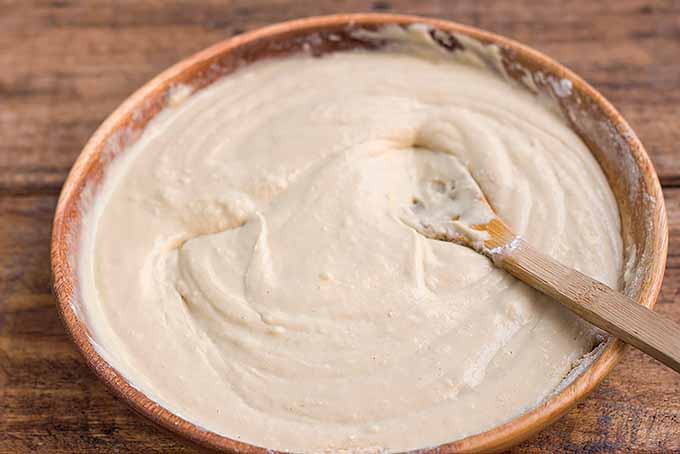
The dough will look like a thick cake batter, unlike normal bread dough. But don’t be alarmed! That is exactly how this dough should look. Resist the urge to add more flour or starch.
You can also choose to mix the ingredients together by hand. Be sure to mix thoroughly to create a uniform mixture.
Step 3 – Let the Dough Rise
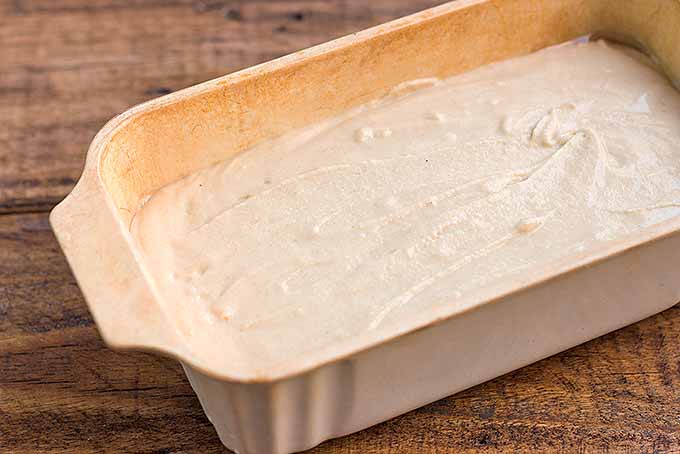
Grease a 9-by-5-inch loaf pan and spoon the dough into it, smoothing out the top with the back of a wet spatula.
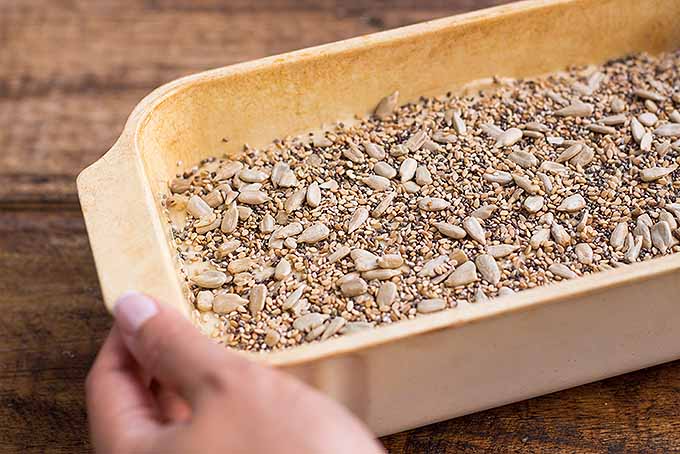
If desired, evenly sprinkle the top with the mix of seeds.
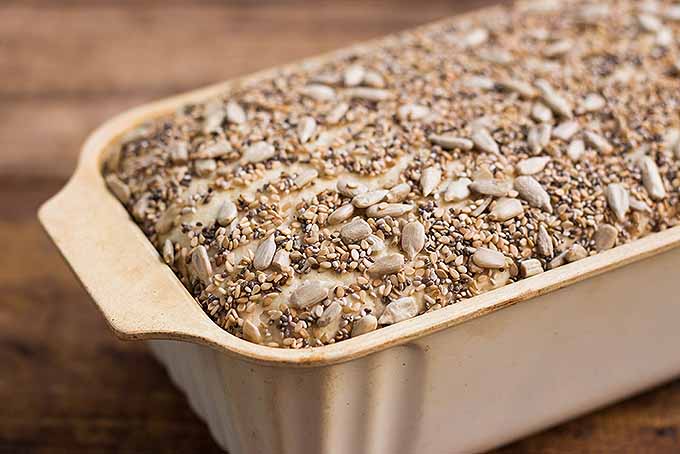
Allow the dough to rest in a warm place without any drafts until it has doubled in size, approximately 40 minutes. I usually place the loaf pan in either a microwave or the oven, switched off.
Fifteen minutes before the dough is ready to be baked, preheat the oven to 350°F.
Step 4 – Bake and Cool
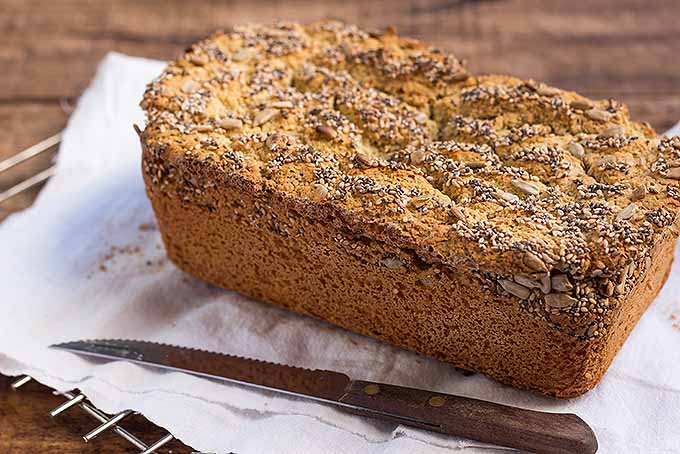
Bake the dough for 45 minutes to 1 hour, until the surface is golden brown and the loaf sounds hollow when tapped.
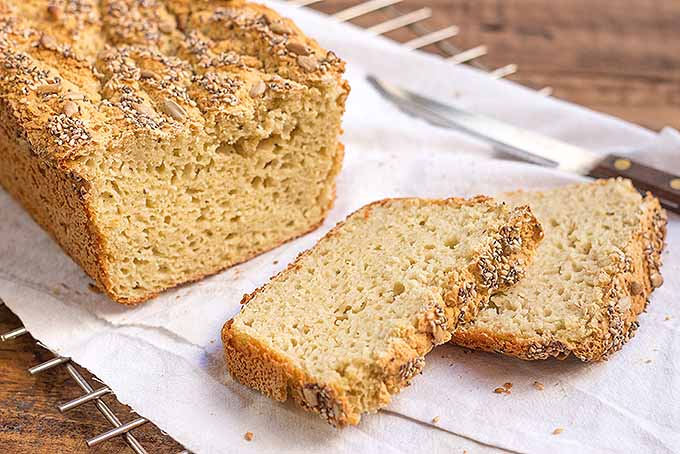
Allow the loaf to cool completely before slicing into it.
Letting the loaf cool fully is fundamental, as the dough will continue cooking with the residual heat, so resist the urge to cut into it any earlier.
Store the loaf in an airtight container for up to 1 week in the refrigerator.
A Basic Bread to Use for Everything
This easy recipe will be the perfect base for any gluten-free feast!
Whether you use two thick slices for an epic sandwich, or simply slather some butter and homemade jam on a thin toasted wedge, you’ll love having a fresh loaf of sorghum bread in your kitchen.
Want even more gluten-free goodies to enjoy?
For a start, try our recipe for pizza topped with zucchini, or our paleo chocolate chip cookies.
And don’t forget to read all about the fundamentals of gluten-free cooking and baking.
Do you have a favorite baked base that you like to make if you follow a strict diet? Have any of you used sorghum flour for other baked goods? Let us know in the comments below.
Don’t forget to Pin It!
Photos by Felicia Lim, © Ask the Experts, LLC. ALL RIGHTS RESERVED. See our TOS for more details. With additional writing by Felicia Lim.
*Nutritional information derived from a database of known generic and branded foods and ingredients and was not compiled by a registered dietitian or submitted for lab testing. It should be viewed as an approximation.
About Felicia Lim
Felicia Lim is a Singaporean who moved to Argentina for love. Based in Buenos Aires, also known as “the Paris of South America,” she fills her days with freelance writing, recipe development, and food photography – three passions that give her endless joy. When she isn’t typing away at her computer, cooking in the kitchen, or shooting in her balcony-studio, you can probably find her curled up on the couch, lost in the pages of a good book.


I have tried this once but made the following subs: potato flour for cornstarch, 1 heaping spoon of maple syrup for sugar, slightly less instant yeast (added to the dry ingredients) for active yeast and chia seeds for xanthan gum. I am not keen on using xanthan. I also did not have enough sorghum flour and so used part sorghum and part millet flour. I was quite impressed wih how moist the bread was and how it stayed moist for days. It was not at all crumbly and held together well. It was a bit bland so I am thinking I need to add more sweetener and salt but it toasted beautifully, and tasted great with some coconut oil drizzled on top. I erred in using a pan that was too small so the dough overflowed and I had to cut down the wait before baking but it still worked out well. I thank God the Father for leading me to this recipe and blessing me with a good outcome even though the overflow looked like it ruined everything. Thank you for sharing it.
Hi
Loved the recipe. Will be surely trying it this week.
Is there a specific ratio of the gluten free flours that you follow?
Secondly, I see that the dough is shaggy. This means that unlike other APF/WHEAT flours which have to be proofed twice, this dough needs only one proofing in the final baking pan. Great
Are the above amounts correct because 1 1/2 cups of liquid to a total dry ingredients of almost 5 cups does not seem enough even taking into account the eggs? Mixture was very dry and I had to add further water. It has produced the worst bread I have ever seen – this recipe is definitely not recomended.
Thanks for letting us know, Susan. Gluten-free dough (and bread dough in general) often has a lower moisture content than other recipes. Did you use large eggs? And can you describe how the bread turned out more specifically, and how much additional water you added? Substituting milk (dairy-free or cow’s milk) may also help to improve the structure and flavor. We’d love to try to troubleshoot this for you!
I had the same experience. Following the recipe the dough was like a gluten bread dough. I added 1 cup more water. The fresh ingredients were at room temperature. It was 81 degrees and 62% humidity when I baked the bread. I live at sea level in the Caribbean. I let the bread raise for 60 minutes and it was not fully doubled. I baked the loaf for 60 minutes. It turned out as a brick. It’s cooling now and then I will taste it.
Thanks for the detailed updates Betts, and sorry it sounds like the texture didn’t turn out well for you. We’ll look into it and will post a future update to this recipe.
The level of humidity that you described is on the high side, but not excessive. Dry ingredients will generally hold more moisture from the air in high humidity conditions, but this usually calls for adding less liquid and increasing baking time. Do you store your gluten-free baking ingredients in the fridge or freezer? This can help to keep excess moisture out as well.
Humidity and high temperatures also affect proofing. Were these the weather conditions outside, or the conditions in your kitchen? Overall, higher humidity and temperatures are usually great for proofing, so it sounds like the recipe itself may need further testing and adjustment.
You are right about too much flour for the amount of liquid. It was my first try at sorghum flour for bread and I would say the recipe is calling for about 2 cups too much flour. Glad I have a flock of chickens who will eat the finished brick.
★★★★★
I also thought the same. Using 1 1/2 cups of liquid and 4 large eggs the consistency was that of a gluten bread loaf. I added almost 1 more cup. The bread is rising now. I will update when it is baked.
I agree with EVERYTHING in your comment, Susan! THIS recipe is terrible! After mixing all of the ingredients listed, the mixture was so very dry (hard). One cup of cornstarch seems grotesquely inaccurate!!! My baked bread turned out rock hard, dry and tasteless. Sorry, but I won’t be trying this again.
This sounds like a fabulous beginning. My wife and I have just discovered sorghum and use it a lot for morning cereal (cracked in our blender). But my wife is super sensitive to corn starch. Any ideas?
Thanks for your question, Jack! Arrowroot or potato starch could be used as substitutes. Gluten-free baking is of course a delicate balance of ingredients, but a 1-to-1 swap should work here. Let us know how it goes!
This is the most delicious GF bread I’ve ever made. It tasted so good and even my husband who is not on a GF diet ate it. The only thing is that the bread tuned out a little dry, so I assume the I didn’t do the right measurements for the dry ingredients. I usually prefer to measure on a scale with grams or oz, not cups. So it would be nice if you could provide the recipe with other measurements. Also I would like to use less eggs. My child is sensitive to them and I have to use only 1. What can I do?
Thanks.
Thanks for getting in touch, Dolly. Glad you liked it! Please check out our article on egg substitutes (How to Bake Without Breaking Any Eggs) for some suggestions to swap those out. A simple flax egg is one of my favorites.
As for the measurements, I agree with you. Though many bakers find it easier to work with cup measurements, going by weight is definitely more accurate for baking. This should work:
444.5 g sorghum flour
120 g cornstarch
40.66 g tapioca starch
If you have any more questions, please don’t hesitate to ask! And let us know how the next batch turns out. Happy baking!
If you were to make this with flax eggs, how many would you use? I am allergic to eggs and need a recipe without them. Thanks!
★★★★★
Though a flax egg makes an easy 1:1 substitute for one egg in baking, the final outcome might be significantly different if you try to use this substitute for four eggs in a bread recipe like this one. We haven’t tested this, but you might like to try a combination of half flax eggs, half whipped aquafaba (canned chickpea water) with a little cream of tartar added.
Check out our article on how to bake without breaking any eggs for more egg substitute suggestions.
Same thing happened to me with not enough liquid. I read the ingredients over and over and confirmed I followed it to a T. The mixture was dry not wet like it was described in the recipe. Needless to say, it didn’t do what it was supposed do. I was looking forward making this bread. 🙁 Not to mention a terrible waste of ingredients.
Sorry to hear this didn’t work for you, Irene. Even ambient temperature and humidity in the kitchen can make a difference, and whether or not you started with your ingredients at room temperature. Did you experiment with adding any liquid?
Why are you using Cornstarch and Tapioca starch? I am trying to learn about grain-free flours. Is the nutrition label for the whole loaf?
In combination with flours, which typically provide more protein, starches help to contribute to the blend of dry ingredients by improving chewiness, elasticity, and structure- something that needs a bit of help in gluten-free baking.
Yes, the nutritional information included for this recipe is for the whole loaf- I would estimate that you can probably get 8-10 slices each. Hope this helps!
Attempting to make this recipe is a complete waste of ingredients! I followed exactly and there was not enough moisture to absorb all of the dry ingredients. I added water one tablespoon at a time and it was a lumpy mess that I ended up tossing in the trash. Stop posting recipes that are not realistic.
Sorry to hear the results of this recipe were disappointing for you, Donna. Thank you for your feedback! We’ve had a few complaints about this one recently from several readers, and though it worked for the writer, results seem to be mixed.
Gluten-free baking can depend a lot on various factors, like humidity and temperature of the kitchen and of the ingredients, age of the ingredients, etc. We will be adding this one to our list to re-test, and we will include troubleshooting tips with our update. Stay tuned!
Will not make again. So bland and lacking any real flavor. It looked very nice, just like the photos on this site, but oh my goodness if this is how gluten-free bread tastes in every recipe, then I give up. Recipe needs a complete overhaul. Even cream cheese or strawberry couldn’t improve this cardboard-like bread.
The conversion for this recipe is bonkers! Only after making it did I realise that I had to cut the quantity to 0.5 servings. Having 800+ grams of only 1 of the flours SHOULD have given it away. Please fix this!!!
Did you use the unit conversion on the recipe card, Paige? Unfortunately, you are correct- the version of the recipe that you made and attempted to convert included an older format on the recipe card that we no longer use. Since various ingredients weigh different amounts and this auto-converter does not take that into account, the automatic conversion to metric that it generated for you is far from accurate – and weighing ingredients is definitely more accurate for baking!
We have updated the recipe card as of today, with metric measurements by weight in parentheses. Stay tuned- we will be retesting and modifying this recipe soon, with any necessary updates and additional troubleshooting tips.
I was looking at the listing for nutritional information. It states that each slice has 42 grams of carbs? Is this true, or is it for the entire bread? That’s a LOT OF CARBS. I have to watch my carbs and be gluten free.
Just curious. Lots of gluten free items are high in carbs, but I was hoping this bread wasn’t one of them. Any idea?
I would like to try it inspite of all the lack of liquid comments.
dsl
That does seem like quite a lot! This should be per slice with 12 slices/loaf, and the nutritional information that we’re able to provide is based on averages for each of the individual ingredient- it doesn’t represent testing of the actual bread. We’ll look into our calculations and post an update if we notice any errors that we can fix with the resources available. Thanks for bringing this to our attention!
I did add a couple extra tablespoons of warm water to get the right consistency and my loaf came out fine. I did forget the salt, but it still came out. Next time I might try adding more xanthan gum or making the water warm enough to use psyllium husk powder, but not too warm for the yeast. All my flours were Bob’s Red Mill.
★★★★
Baked this without reading the comments here first. My loaf turned out alright, looks fantastic, tastes fair. Seeds on top add personality. I used honey. Very tight/dense texture and will try it again and probably add another quarter cup moisture. Not a waste of ingredients and will try again. The recipe didn’t call for lining with parchment, but I found it helpful.
★★★
Thank you all for your helpful comments! We took these concerns into serious consideration, and I personally reviewed and re-tested this recipe. Here are the updates that were made:
1. I reduced the amount of dry ingredients, notably the sorghum flour and cornstarch.
2. I added more sugar to the dry ingredient base to enhance the flavors.
3. Rather than mix by hand (which is still an option!), I opted for a stand mixer with a paddle attachment. Not only is it a more efficient option for a thick and wet dough, it also helps to better form a homogenous mixture with more aeration. This is exactly what is needed for a dough that does not rely on gluten for structure. Mixing in a stand mixer leads to a slightly lighter texture, since air is being incorporated into the eggs while mixing.
The resulting dough and bread will look just like the pictures: it should look like and feel similar to a thick, cake-like batter. When baked, it will yield a spongy bread with a very light-golden crust. It’s delicious. I’ve been enjoying it with eggs in the morning!
We hope you try to make this recipe again – as always, we appreciate your opinions, and enjoy learning from your experiences!
I made this recipe twice. The first time I let it rise too high which caused the batter to spill over in the microwave and make a mess. I should have turned on the gas oven sooner, my bad. I popped it in the oven and it spilled over again. It did bake nicely though it’s not pretty. The second time I only let it rise to the top of the pan and preheated the oven much earlier and longer. I popped the bread in the oven and it rose quickly and overflowed again. I used a Pyrex loaf pan because the sides are higher than my metal pans and set the oven at 325 in stead of 350. If the pan sides were a lot higher I think the overflow problem would not happen. I used a French yeast and I think it is stronger than regular supermarket yeast. That might be the problem though I have used it in other GF bread with no problems. The bread has a nice texture and taste. My husband, who only will eat white bread, ate a piece and “it’s OK” which is high praise from him.
★★★★
I substituted corn starch to another 1/2 cup of tapioca starch. It came perfectly. Thank you for sharing the recipe.
★★★★★
I substituted arrowroot for the cornstarch and this recipe has been working perfectly for me. Definitely enough liquids for the dry ingredients when I’m making it. I did let it rise too long the last loaf and it sunk in the middle but it was still delicious!
Also I forgot to add, I do wish that the recipe were in grams for accuracy.