
It’s time to bring onions into the spotlight with this German onion tart.

Onions are often relegated to the role of add-ins, and they rarely get a chance to play the leading part in a recipe.
But this tart is going to change your perspective!
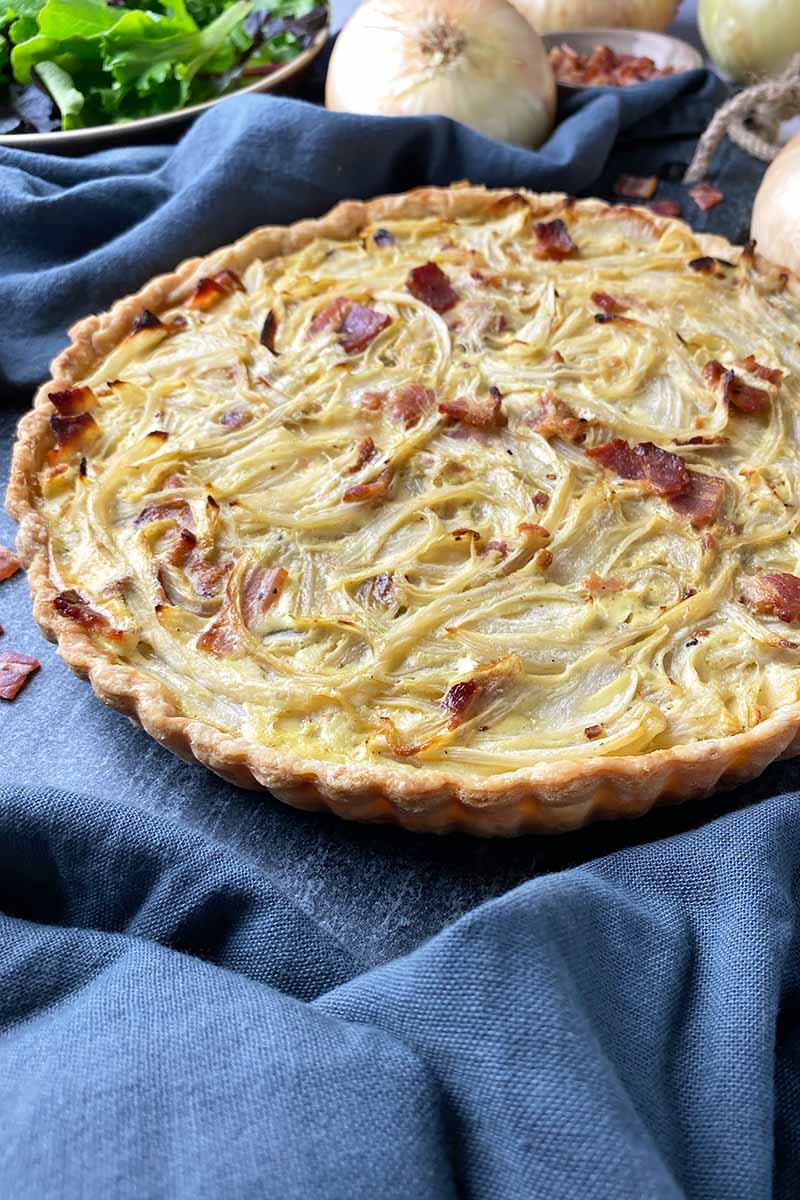
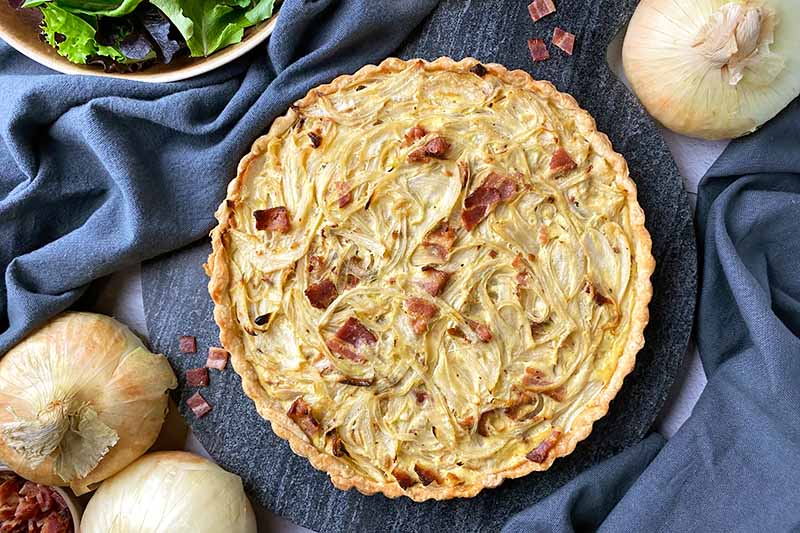
Also known as Zwiebelkuchen, this German onion pie is a hearty, oven-baked dish filled with onion and bacon that is perfect to serve throughout the fall months, and on the first cold nights of winter.
This savory pastry is well-loved in Germany, especially in wine-growing states like Rhineland-Palatinate. The area has an excellent reputation around the world for its cuisine and festivals.
During autumn in the US, you will find many wine festivals and restaurants that serve a version of this onion pastry with white wine – and they definitely make an excellent duo!
While there are multiple interpretations of the dish to choose from, from deep-dish pies to rustic flatbreads, I love balancing the hearty flavors of the filling with a more delicate pastry crust to serve it as a tart.
The flaky, buttery crust, given a tasty boost with creme fraiche, is the ideal vessel to house all of the rich and savory ingredients.
I render bacon fat to lightly saute the sliced onions in my version. While caramelizing them, the sulfurous scent and pungent flavor of the onions takes a delicious turn in a softer, slightly sweeter direction.
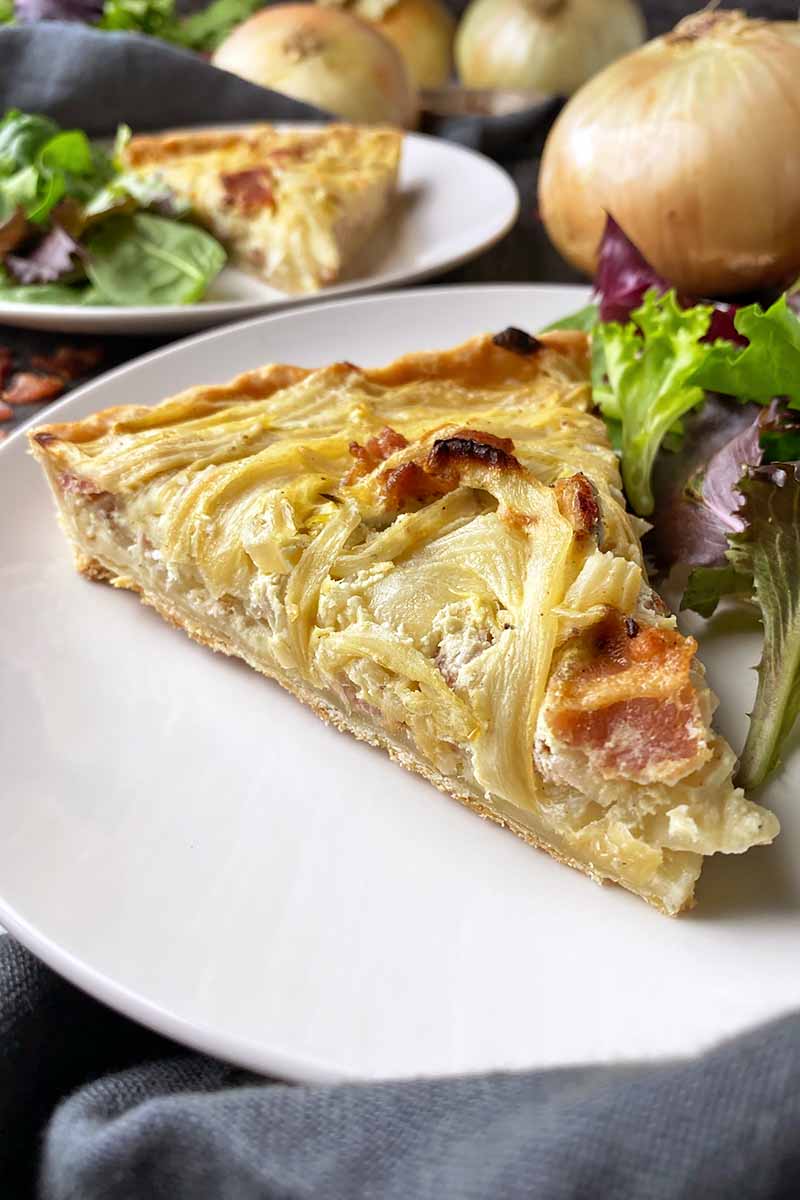
The cooked onions and bacon are combined with eggs and creme fraiche to create a custardy, mouthwatering filling.
After baking and cutting into slices it’s traditionally eaten warm, but this tart can also be consumed after chilling in the refrigerator or at room temperature. The tart also freezes well, and can be warmed in the oven after it has thawed.
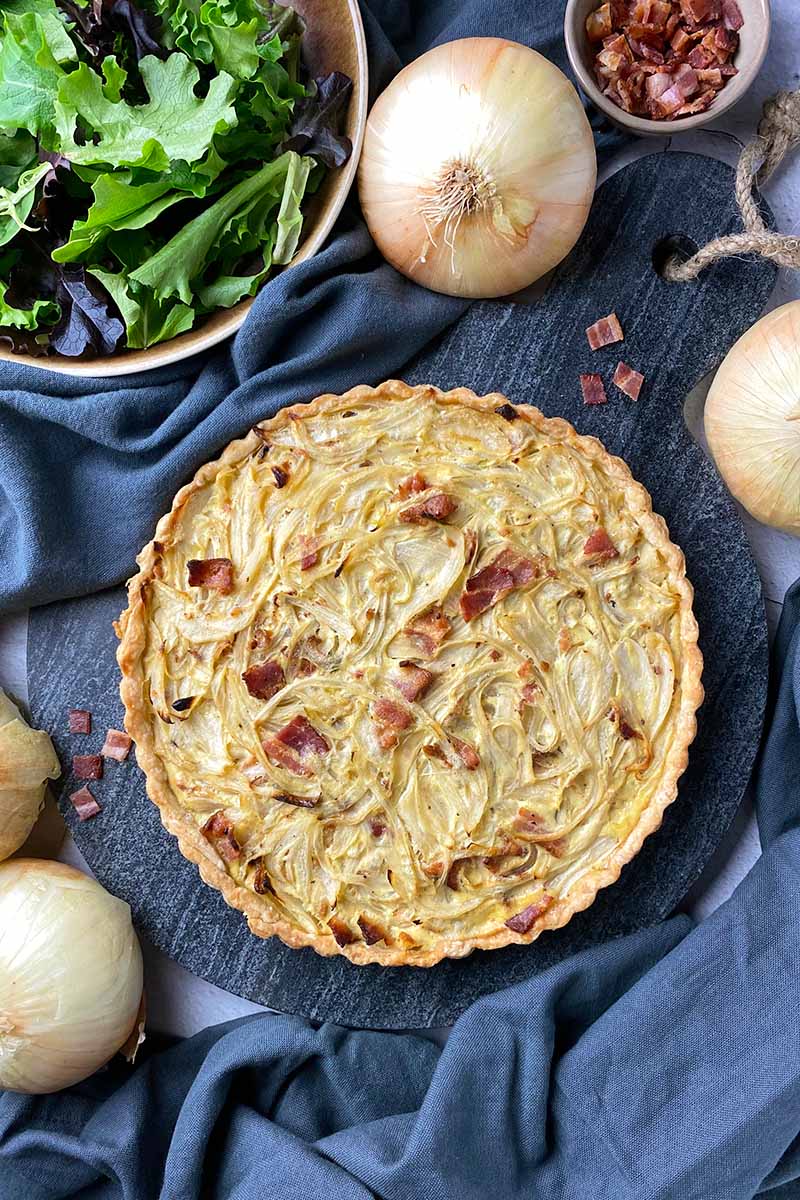
Concerning side dishes, there are many tasty options available to you.
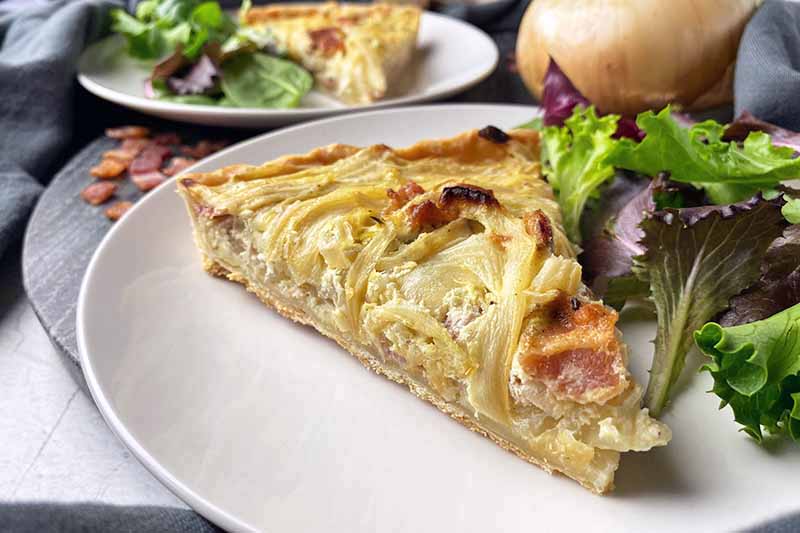
A fresh, green salad is a nice complement to the big flavors in the tart. But I highly recommend serving it with roasted root vegetables and a glass of wine so you can really enjoy and experience the celebratory theme of an autumnal festival!
Print
Savory German Onion Tart (Zwiebelkuchen)
- Total Time: 4 hours, 30 minutes
- Yield: 1 9-inch round tart (8 slices) 1x
Description
This homemade German onion tart is the perfect dish for a cozy night in. Enjoy the mix of onions, bacon, and creme fraiche in every delicious, savory slice.
Ingredients
For the Crust:
- 1 1/4 cups all-purpose flour
- 1/2 teaspoon salt
- 1/2 cup (1 stick) cold unsalted butter, cubed
- 1/4 cup creme fraiche
- 1 tablespoon cold water, if needed
For the Filling:
- 6 ounces thick-cut bacon (about 6 slices)
- 2 medium white onions, thinly sliced (about 1 pound)
- 1/2 teaspoon salt
- 1/4 teaspoon ground black pepper
- 2 large eggs
- 1/2 cup creme fraiche
Instructions
For the Crust:
- Whisk together the flour and salt in a large mixing bowl. Using a pastry cutter, cut the cold butter cubes into the flour mixture until the butter pieces are pea-size and coated entirely in flour.
- Using your hands or sturdy spoon, knead in the creme fraiche just until a thick dough begins to form. If there is an excess amount of dry ingredients remaining at the bottom of the bowl, gradually pour in the water as you mix to bind the dough together.
- Turn the dough onto a clean counter dusted with flour and press lightly to form a smooth, flat disc. Tightly wrap the disc in plastic wrap and refrigerate for at least 1 hour.
- Set out a 9-inch tart pan with a removable bottom. Remove the chilled dough from the refrigerator and let sit at room temperature for 5-10 minutes, until it has softened slightly and is pliable. Remove the plastic wrap and place the disc on a clean counter dusted with flour.
- With a rolling pin, roll and flatten the dough until it is about 1/8 inch thick and is large enough to cover the bottom and sides of the tart pan with an inch of excess around the edges.
- Carefully transfer the dough to the tart pan. Press into the bottom of the pan, then press into the sides. Trim any excess dough around the edges so the dough is flush with the top of the sides of the pan.
- Pierce the bottom of the dough several times with the tines of a fork. Place the pan uncovered in the freezer and chill for 1 hour until very cold and firm.
- Preheat the oven to 400°F. Cover the bottom and sides of the tart pan with a sheet of parchment paper and fold the excess over the sides for easy lifting later. Gently press the paper against the bottom and sides of the pan, and spread pie weights out evenly to cover the bottom.
- Transfer the pan to the oven and bake for 20-25 minutes. Lift the parchment paper to remove the hot pie weights and set aside to cool.
- Place the pan back in the oven and bake for another 10 minutes or until very lightly golden brown. Remove the pan from the oven and let cool completely on a wire rack as you prepare the filling. Keep the oven on, set to 400°F.
For the Filling:
- Cook the bacon in a large skillet on medium-low heat until browned and crispy, flipping once, about 5-7 minutes.
- Set the cooked bacon aside on a paper towel-lined plate to collect grease and cool. Drain the majority of the bacon grease from the pan, wipe out any brown or burned bits of bacon, and leave a thin film behind to coat the pan. Place the pan back on the stovetop over medium-high heat.
- Add the onion to the skillet and season with the salt. Saute, stirring occasionally, until the onions become translucent, soften slightly, and just start to caramelize, about 5 minutes. Remove from heat and transfer the onions to a plate to cool.
- Roughly chop the bacon.
- Whisk together the eggs, creme fraiche, and black pepper in a large bowl. Whisk in the cooled onions and chopped bacon.
To Assemble and Bake:
- Pour the filling into the parbaked tart crust.
- Immediately transfer the pan to the oven and bake for 40-45 minutes, until the mixture is bubbling and the crust is deep golden brown.
- Remove the tart from the oven and place on a wire rack to cool and set for 30 minutes..
- Release the removable sides of the pan and serve warm. Leftovers that have cooled completely may be refrigerated for up to 5 days, or frozen for up to 6 months, in an airtight plastic container or wrapped tightly in plastic wrap.
- Prep Time: 30 minutes
- Cook Time: 1 hour, 20 minutes
- Category: Tart
- Method: Baking
- Cuisine: Baked Good
Keywords: onion, tart, Zwiebelkuchen
Cooking by the Numbers…
Step 1 – Prep the Dough
Set out a rolling pin and a 9-inch metal tart pan with a removable bottom.

Measure out the all-purpose flour, salt, creme fraiche, and water for the crust.
Cube the stick of unsalted butter using a sturdy cutting board and sharp knife.
Keep your cold ingredients as cold as possible! Your water, creme fraiche, and butter should be chilled and they should stay in the refrigerator until you’re ready to use in the recipe.
A cold temperature for these ingredients will ensure your tart dough will bake into a flaky, yet sturdy, well-formed crust.
Step 2 – Make and Chill the Dough
In a large mixing bowl, whisk together the flour and salt.
Use a pastry cutter to cut in the cubes of butter until the pieces are pea-sized and evenly coated in flour. Using your hands or sturdy spoon, mix in the creme fraiche until a thick dough starts to form. Don’t overmix the dough, or else it may toughen and shrink while baking.
Do you see an excess pile of dry ingredients at the bottom of the bowl that is not incorporated into the main mound of dough? Gradually pour in the cold water as you mix to bind everything together, using only what you need.
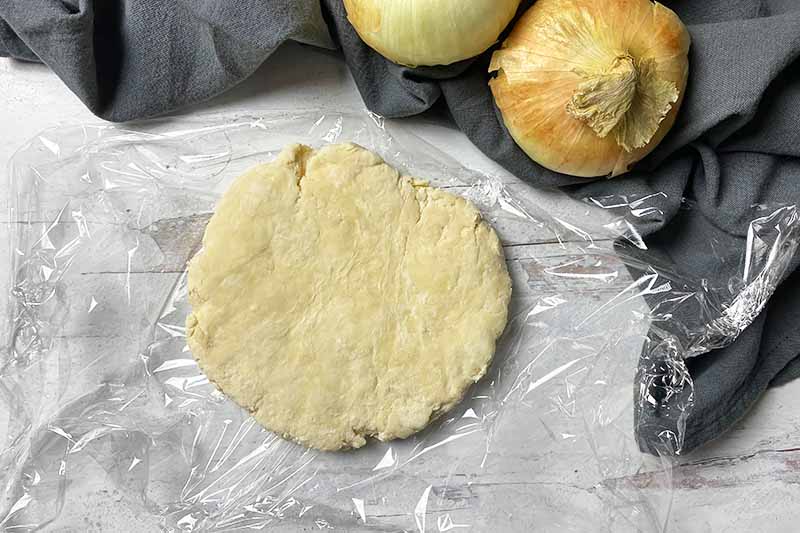
Dust a clean work counter with flour and place the dough on top. Press lightly to form a smooth, flat disc.
Forming the dough into a disc is an essential step you can take now to help you later! The flat disc is the best shape to start with before rolling it out into a large, flat circle to fill the tart pan in the following steps.
Tightly wrap the disc in plastic wrap and place in your refrigerator. Chill for at least 1 hour.
Step 3 – Roll the Dough
Remove the chilled dough from the refrigerator and let it sit at room temperature for 5 to 10 minutes.
You don’t want to attempt to roll it out immediately as it will be too cold and stiff, and will rip easily. Letting it sit for a few minutes will soften the dough to an ideal temperature that’s pliable enough for rolling.
Remove the plastic wrap and place the disc on a clean countertop dusted with flour.
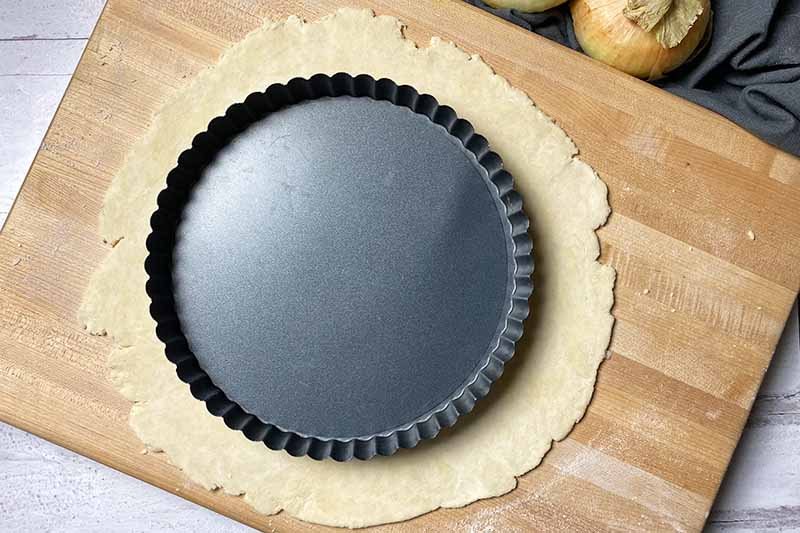
Roll and flatten the dough into an even circle using a rolling pin until it is about 1/8 inch thick. It should be large enough to cover the base of the tart pan, with about 1 inch of excess dough around the edges.
Do you need some help determining if you have reached the right size? You can hover the tart pan over the dough to see if you need to continue rolling.
Step 4 – Form into the Pan, Dock, and Chill
Carefully transfer the dough to the tart pan. An easy way to do this without disastrously ripping the dough is to gently fold the dough in half, quickly transfer it to one half of the tart pan, and unfold it over the other half.

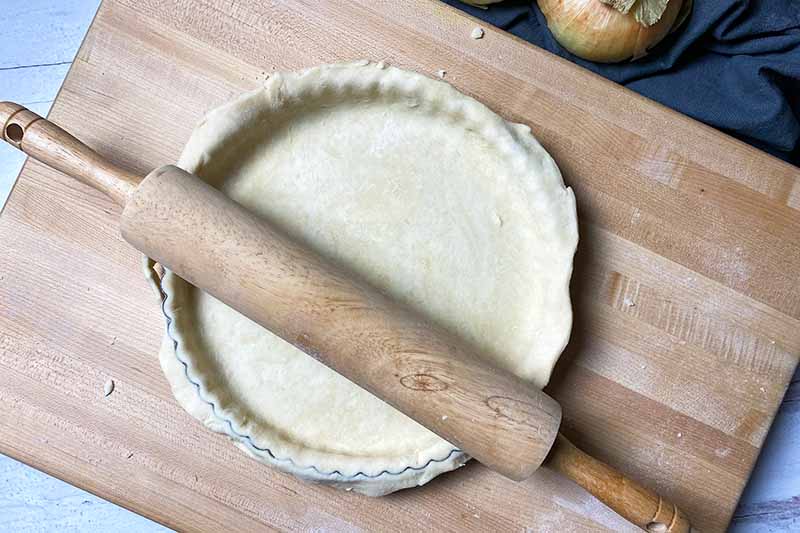
Using your hands, gently press the dough into the bottom of the pan, then press it onto the sides of the pan.
Trim all excess dough around the edges so the dough is flush with the top of the tart pan’s sides. A quick technique for this is to roll a rolling pin over the edges of the tart pan to create the cleanest cut.
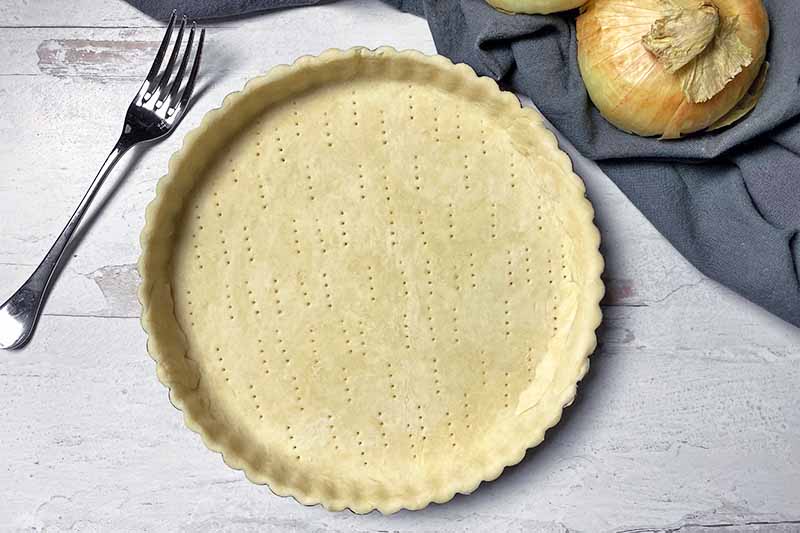
Evenly pierce the bottom of the dough multiple times using the tines of a fork. This will help air escape from the bottom of the pan, allowing the dough to remain flat and bake evenly without forming large air bubbles.
Place the pan uncovered in the freezer and chill for 1 hour until very cold and firm.
Don’t be skimpy with this chill time! This helps to set the structure of the dough in the tart pan so the butter won’t melt prematurely and cause the dough to collapse while baking.
Step 5 – Blind Bake
When the crust is nearly finished chilling, preheat the oven to 400°F.
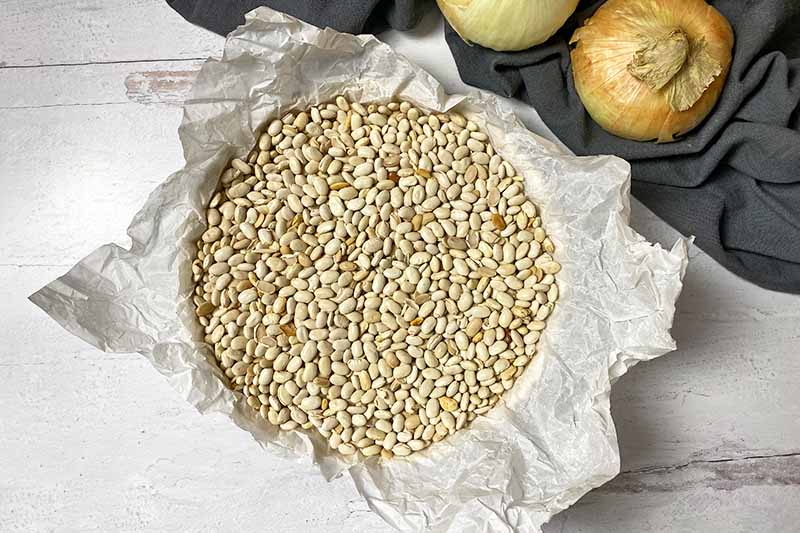
Take the pan out of the freezer and cover the tart pan with a sheet of parchment paper to cover the bottom and create a bit of an overhang that goes up and over the sides. Place pie weights on top of the paper.
For pie weights, you can use uncooked rice, dried beans, or granulated sugar. You can also purchase ceramic pie weights, available on Amazon. I would advise buying two containers so you have enough to weigh down your crust as it bakes!
Take your pick. As long as you use enough to reach as close to the top of the tart pan as possible without the weights spilling over, this will ensure the sides of the dough will stay in place and won’t collapse.
Transfer the pan to the oven and bake for 20 to 25 minutes.
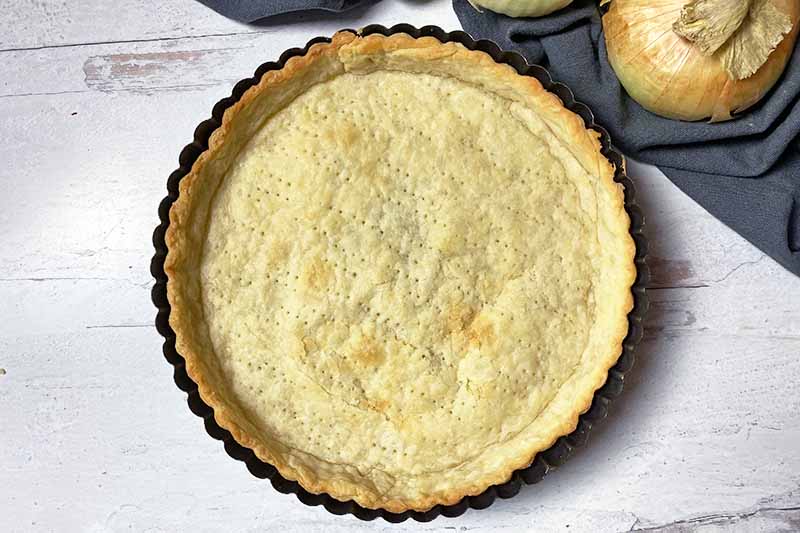
Take out the tart pan and carefully remove the parchment paper, lifting it up around the edges so it holds the weights – be careful, because they will be hot! Transfer the pan back to the oven and bake for another 10 minutes, or until the crust is very lightly golden brown.
You don’t want to develop too much color with the crust at this stage, since it will continue to bake after filling.
Remove the pan from the oven and let the crust cool completely – keeping it in the pan – as you prepare the filling. Keep the oven on.
Step 6 – Prep the Filling
As the crust is cooling, you can now prepare and make the filling.
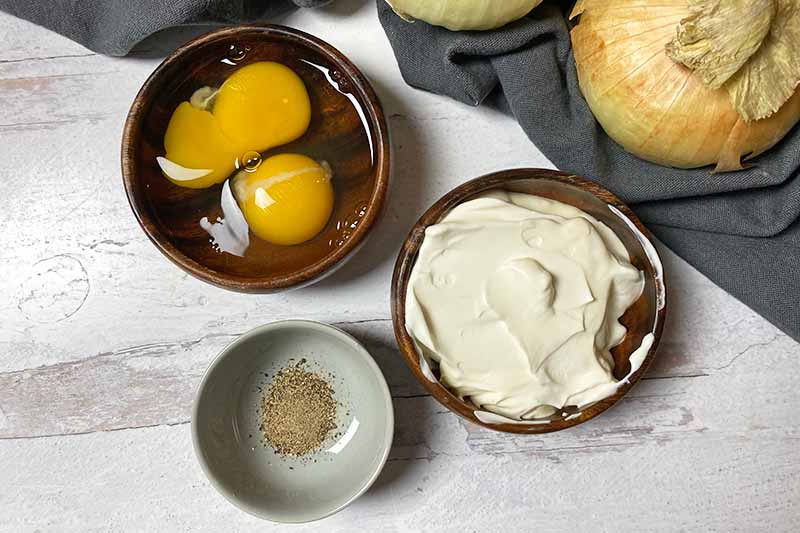
Measure out the salt, black pepper, and creme fraiche. Crack the two eggs into a small bowl, checking for shell fragments.
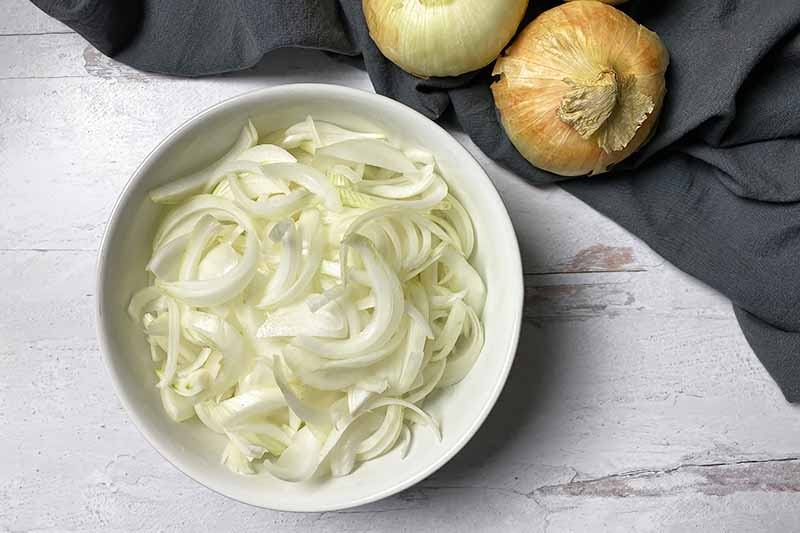
Thinly slice two white onions. Learn how to avoid the tears, and how to properly select, store, and prep an onion.
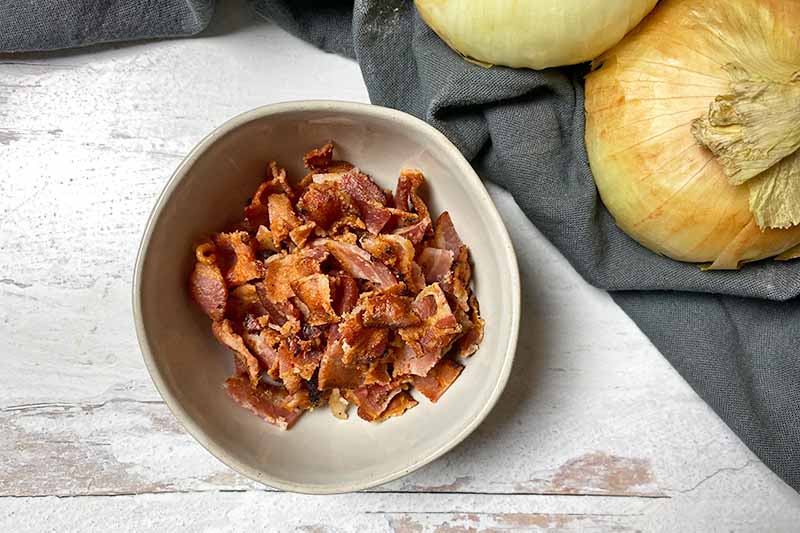
Take out 6 ounces of thick-cut bacon. This will equate to about 6 slices of bacon.
Step 7 – Cook the Bacon
Place the bacon in a large skillet in a single layer. If it doesn’t all fit, you can cook the bacon in batches.
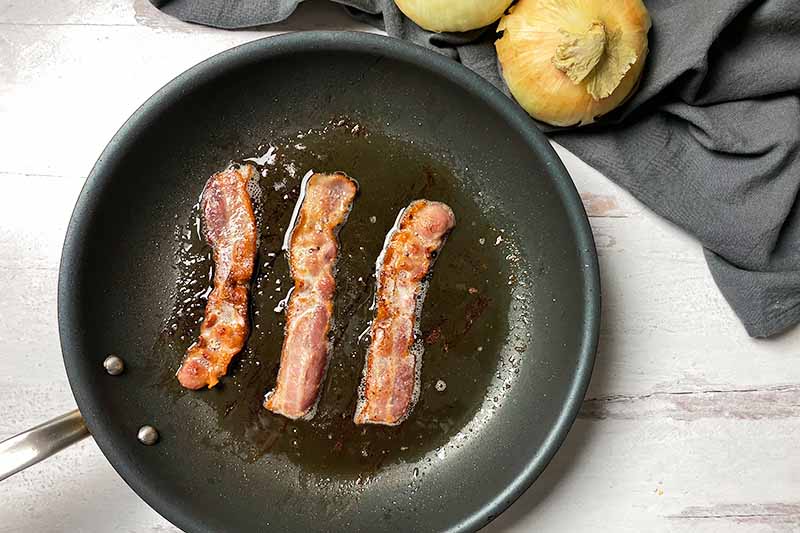
Cook on medium-low heat, flipping once for even cooking, until the bacon is browned and crispy. This will take about 5 to 7 minutes. The bacon will be mixed into a wet filling, so the bacon should be well-cooked to maintain some texture.
Remove the bacon from the skillet, and place the slices on a large plate or platter lined with paper towels to soak up any excess grease. Allow them to cool as you cook the onions. When cooled, roughly chop into small pieces.
Drain the majority of the bacon grease from the pan, and wipe out any burned pieces of bacon. Leave a thin film for sauteing the onions in the next step. You can reserve the extra grease for another recipe, like Foodal’s whole wheat flatbread with salad and bacon honey mustard dressing.
Place the pan back on the stovetop and increase the heat to medium-high.
Step 8 – Cook the Onions
Combine the onion slices and salt in the skillet.
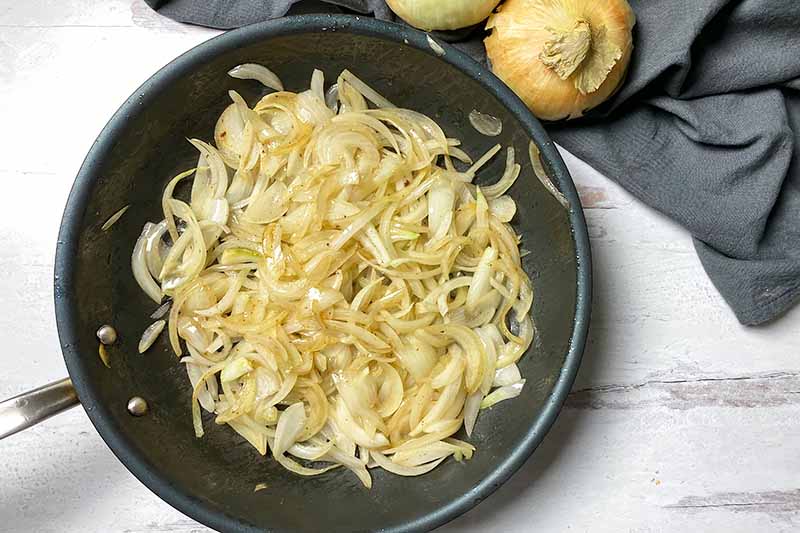
Saute the onions until they soften slightly and just start to develop some color, about 5 minutes. Stir the onions occasionally while they cook. You don’t want them to become too soft or too deeply caramelized, as they will continue to cook in the tart.
Transfer the onions to a large plate and set aside to cool completely. You do not want to add hot onions to the custard filling, or the eggs may curdle.
Step 9 – Make the Custard
As the onions are cooling, make the custard by whisking together the eggs, creme fraiche, and black pepper together in a large bowl until combined.
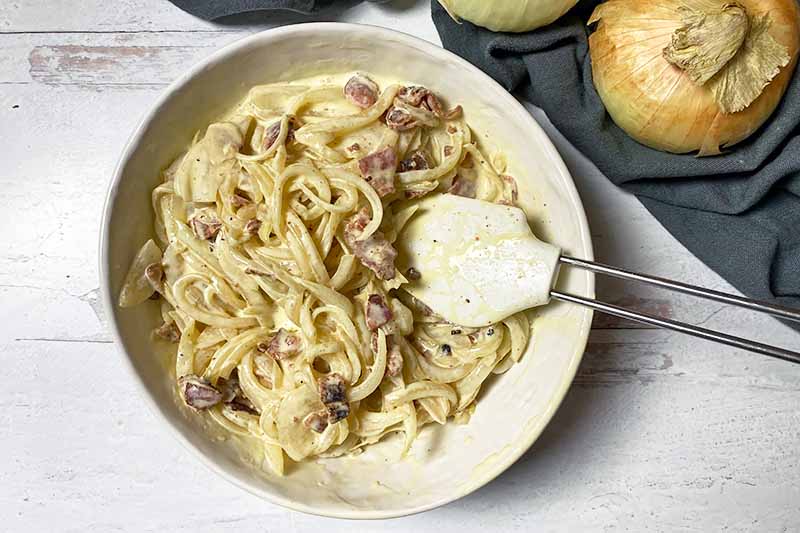
Whisk in the onions and bacon until distributed evenly throughout – you can reserve about 1/4 cup of the chopped bacon to sprinkle on top of the tart just before serving for some extra crunch! Otherwise, add it all in now!
Step 10 – Assemble
Pour the filling into the parbaked tart crust. You can use a spatula to spread the onions evenly around the pan if they have collected in the middle.
Use a soft utensil like a rubber spatula to avoid scraping the bottom of the dough!
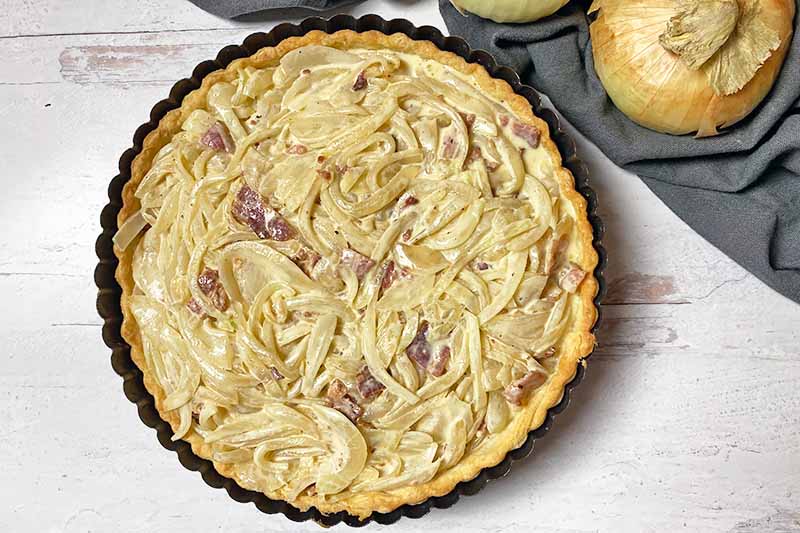
Step 11 – Bake, Cool, and Serve
Immediately transfer the pan to the oven. Bake until the mixture is bubbling and the crust is a deep golden brown. This will take about 40 to 45 minutes.
Remove the tart from the oven and let it cool for 30 minutes on a wire rack in the pan before carefully releasing the sides.
And don’t forget to gaze upon the beautifully golden crust, the end result of all your hard work making tart dough from scratch!
You can serve slices while they’re still warm, or allow the tart to cool completely and store it in the refrigerator for up to five days wrapped tightly in plastic or in an airtight container.
For freezer storage, allow to cool completely at room temperature before wrapping in plastic wrap, and freeze for up to 6 months.
Have We Whetted Your Appetite?
If you enjoy baking but would like to try something a little different, why not start with this savory German onion tart?
It’s a fun spin on your typical sweet pies and pastries that use a lot of the same baking technique, and it’s a delicious alternative to the oven-baked casseroles that you might serve for dinner.
Making this recipe will surely lead to a delicious result you can share with your family and friends on a chilly fall or winter night.
What are your favorite dishes to eat during the fall? Are you interested in other savory German favorites, like my savory potato cake? Let us know in the comments below, and feel free to share any questions you may have as well.
We love savory pastries! Try some of these delicious recipes next:
- Roasted Tomato Tart with Aged Gouda
- Tomato and Egg Tart with Goat Cheese and Herbs
- Gruyere Quiche with Caramelized Onions and Peppers
Photos by Nikki Cervone, © Ask the Experts, LLC. ALL RIGHTS RESERVED. See our TOS for more details. Originally published on December 1, 2016. Last updated on September 30, 2022. With additional writing and editing by Nikki Cervone.
Nutritional information derived from a database of known generic and branded foods and ingredients and was not compiled by a registered dietitian or submitted for lab testing. It should be viewed as an approximation.
About Nina-Kristin Isensee
Nina lives in Iserlohn, Germany and holds an MA in Art History (Medieval and Renaissance Studies). She is currently working as a freelance writer in various fields. She enjoys travel, photography, cooking, and baking. Nina tries to cook from scratch every day when she has the time and enjoys trying out new spices and ingredients, as well as surprising her family with new cake creations.

I would love to try your recipe: Savory German Onion Tart, but I’m a Canadian, and we measure in cups and teaspoons, not by weight. Can you convert for me? Thanks!!
Canadian living in Romania here… purchasing an Ikea scale for less than $10 is soo much better than measuring by volume. Takes a bit to get used to but way more accurate and faster then the old way. If not use Google….how many grams to cups and you can go from there.
Seriously?
Hi Nina,
Would your recipe be the same as Zwiebel Kuchen? I lived in Germany for four years and a friend and I would go for Zweibel Kuchen and Neu Wein after our visits to the Spa. We lived near Baden Baden. I’ve been up in your part of the country as well, as I have a nephew there. I would have the same problem as Rebecca if I were to try your recipe and I really want to do it!
For those who are trying to convert the ingredients to US Imperial or Metric measurements, this website does that for you. Look at the bottom of the recipe, right under the number of servings. There’s a drop down menu there that lets you choose your measure style.
Nope. I do not see any options to convert. However there are multiple tools on the internet to do this conversion for you!
This looks wonderful for Autumn. How long should the onions be sauteed? 10 minutes? 20 minutes?
Hi Teresa,
The onions should be sauteed (or “sweated”) just until they begin to soften and are translucent, for about 5-7 minutes. Enjoy!
Is it possible to make the tart crust and onion mixture the day before and put it together the next day? I’m trying to serve it fresh for a luncheon.
Absolutely, Nancy! You can complete the first two crust steps to prepare and shape the dough, and the first and second filling steps to prepare the onions. Let the onions cool completely and transfer to a lidded container, and store both the shaped crust and the vegetables in the refrigerator overnight until you are ready to use them. Enjoy!
This turned out great! It’s on the make-again list definitely!
★★★★★
Made this and it was delicious
I did change the recipe somewhat, using both egg whites, and my 3-2-1 crust
★★★★★
My tart doesn’t look like yours. Instead, the custard created a golden baked layer on top. I added the bacon. This is sooo delicious. Will definitely make again. Thank you!!
★★★★★
My egg mixture did not sink down and formed a crust that browned quickly and looked horrible. I think the onion mixture should be mixed with the egg not poured over them.
★
Can you freeze this?
Love this.
I just wanted to point out that the bacon is incorrectly listed as a crust ingredient, not a filling ingredient. I mixed chopped bacon into the crust because of this. I thought it was unusual, but went with it. I would have MUCH RATHER it be in the filling where it belonged.
Thanks for catching our error, Rachael. The recipe has been updated. Sorry about that!
This was excellent, both the filling and crust. But I would note that you should gently toss the egg mixture with the onion mixture and not just pour the egg mixture on top. At first I did it like that and noticed the crust forming on top, so I opened the oven and tossed it so that all the ingredients were mixed together and it worked out beautifully.
★★★★
We’re so glad you enjoyed it, Elle! This is a wonderful suggestion. Thank you for sharing.
Do you cook the bacon first? Or put it in uncooked and let it cook in the oven?
In this version Nina simply warms it with the caramelized onions and then allows it to cook the rest of the way in the oven. Personally, I prefer crispy bacon and I would brown it first, rendering out some of the fat as well. We plan to make this change in a future updated version of this recipe, when we revisit it after further testing.
Can I just use refrigerated pie dough?
Yes, that should work! Just be sure to follow the same chilling and baking instructions.