To me, do you know what one of the best indications is that you really loved a homemade meal, and that the recipe is a keeper?

When you enjoyed it so much the first time around that you had seconds, savored every bite of the leftovers that you ate for lunch the next day, and were really sad when all of the leftovers were finally gone.
I had these delicious vegan sandwiches for dinner once and then lunch twice, and it was amazing each time.
I’m really excited about this cilantro and cayenne tahini sauce that’s drizzled on top. In fact, it’s my new favorite thing. I’m also sad that it, too, is allllll gone.
In addition to the sauce, there are just a few components to these pitas, and they come together to make something totally glorious.
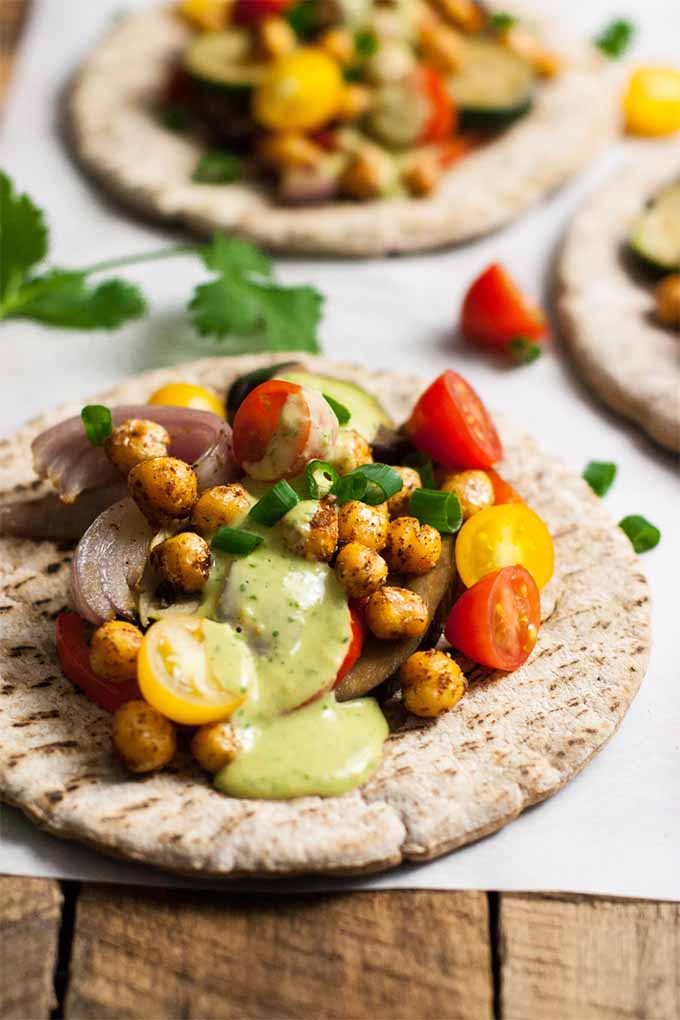
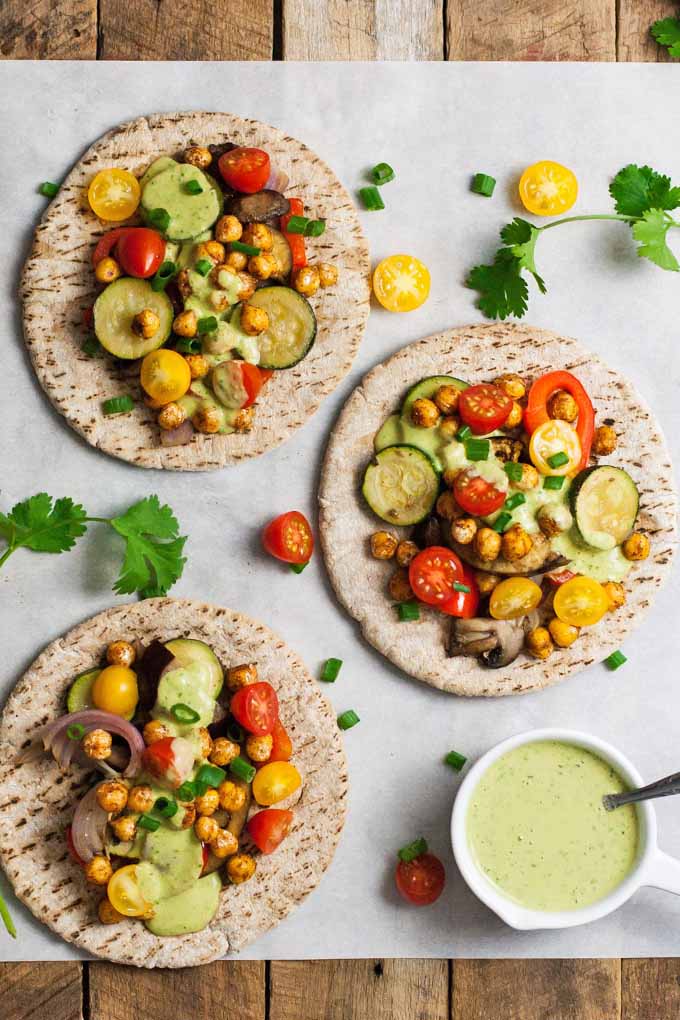
You’ve got the roasted vegetables, the spicy chickpeas, and your toppings. The toppings might seem like they don’t really count, because they’re just chopped green onions and tomatoes. But trust me, you don’t want to skip these.
There’s barely any prep required to add these to your sandwiches, but they’re crucial, adding a fresh burst of flavor that contrasts so well with the roasted caramel notes of the other vegetables.
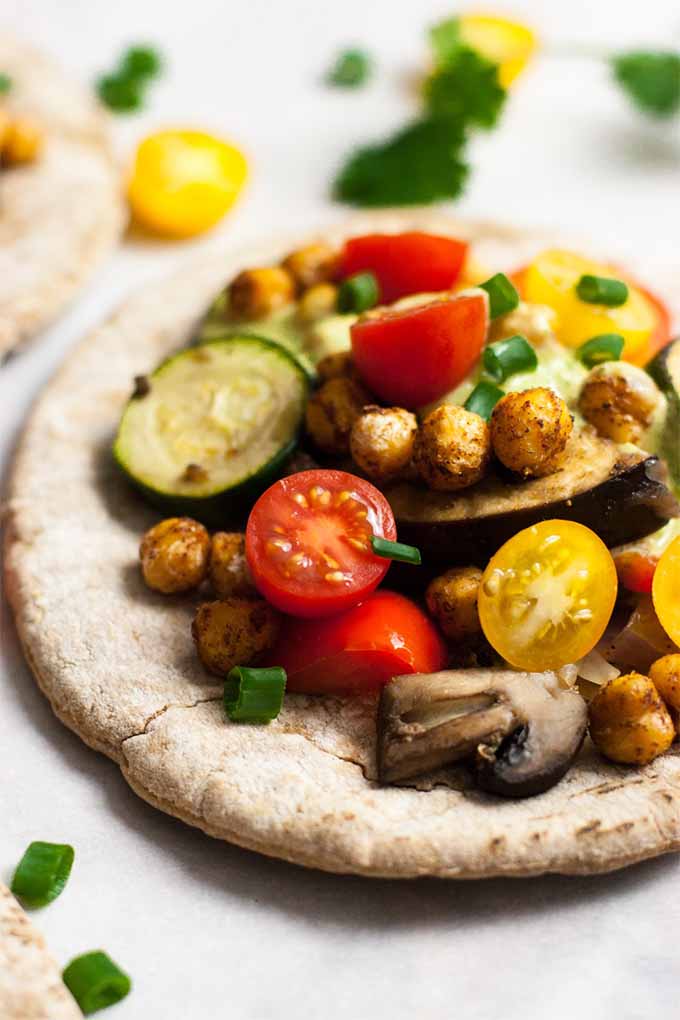
First, you chop the veggies and pop them in the oven. They’ll take about 35 minutes to cook. While the veggies are roasting you’ll whip the sauce up in your blender or food processor. And after that’s done, you’ll cook up the spicy garbanzos in a skillet and prep the toppings.
Then pile it all up on top of a pita and you’re ready to go! If you wanted to go really over the top, you could even make your own fresh pita bread at home with our recipes for sour barley pita or einkorn flour pita bread.
This was the first time I made pita-type things and decided to NOT try to split open the pita and shove it all in there. Instead, we made these like little open-faced sandwiches, and then folded them in half like a taco. I’m telling you right now – this is the way to do it. No more holes in the side of your sandwich, no more hoping you’ll be able to separate it perfectly. Taco-style is the way to go!
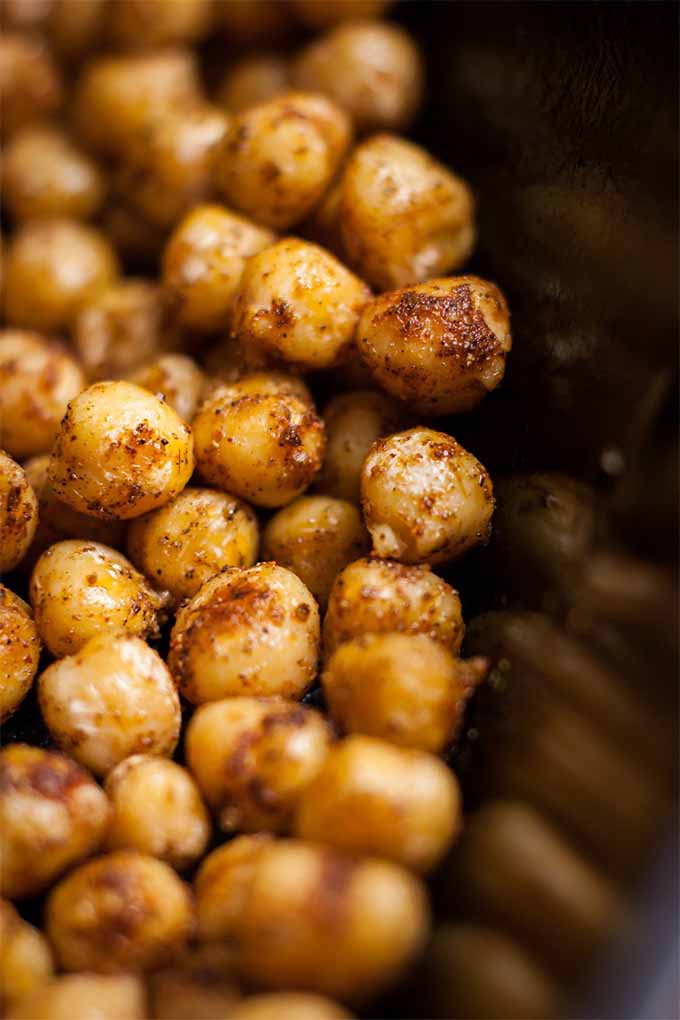
And finally, let’s talk about the flavors. Flavas! The garbanzos and the sauce are where it’s at.
The garbanzos have a magic combo of paprika, cumin, coriander, and cayenne. It’s just enough to be a bit spicy and hugely delicious. And I already told you guys about the sauce… But yeah, it’s so good. Cilantro + cayenne + tahini + garlic = LOVE.
And when you pile it all together, I think it’s my new favorite dinner. Sorry, spicy portobello mushroom sandwiches – you’re so last year.
Print
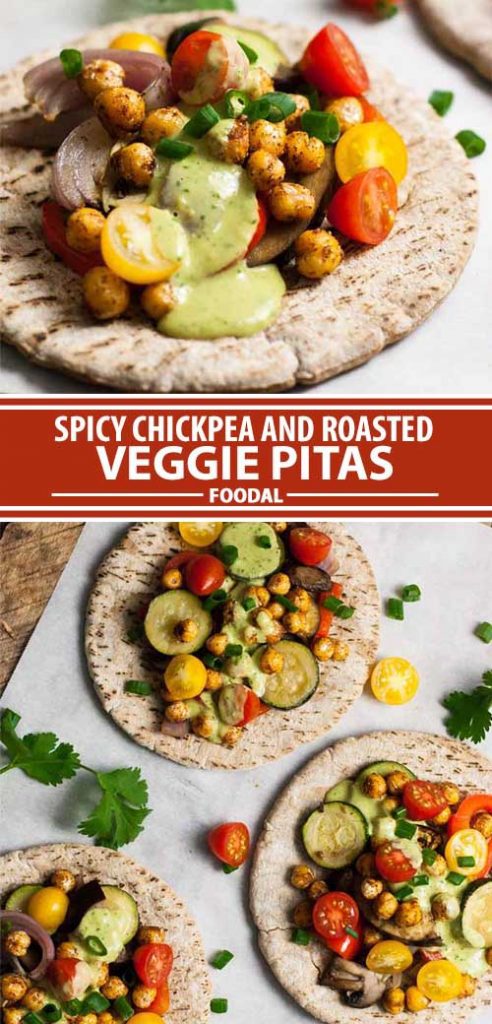
Spicy Chickpea and Roasted Veggie Pitas
- Total Time: 45 minutes
- Yield: 8 servings 1x
Description
These pita sandwiches are stuffed or topped with roasted veggies, spicy chickpeas, and a cilantro and cayenne tahini dressing. Perfect for lunch or dinner, they make great leftovers.
Ingredients
For the Veggies:
- 1 red bell pepper
- 2 small zucchini
- 1/2 red onion
- 2 tsp olive oil
- 1 medium eggplant
- 10 oz sliced mushrooms
- 1/4 tsp salt
For the Garbanzo Beans:
- 1 15-oz can chickpeas, rinsed and drained
- 2 tsp olive oil
- 1/2 tsp paprika
- 1/4 tsp ground cumin
- 1/4 tsp coriander
- 1/8 tsp cayenne pepper
- 1 recipe cilantro and cayenne tahini sauce
- 1 cup halved cherry tomatoes
- 1/2 cup chopped green onions (dark green tops only)
- 8 whole-wheat pita breads
Instructions
- Preheat oven to 400ºF and grease a 9×13″ baking dish.
- Slice the bell peppers, zucchini, and red onion into 1/4″ strips. Place in the baking dish and drizzle with the olive oil. Use your hands to evenly distribute the oil.
- Cut the eggplant into 1/4″ thick bite-sized pieces and slice the mushrooms. Add to the baking dish along with the salt and toss with the other ingredients. Bake for 35-45 minutes until everything is soft, stirring once.
- While the veggies roast, prep the sauce if you haven’t already.
- To cook the garbanzos, place a large skillet over medium-high heat. Add the oil and let warm, then stir in the garbanzos. Cook, stirring frequently, until heated through and starting to brown on some parts. Add the spices and cook for another minute or so, until everything is really fragrant.
- Warm the pitas either in a dry skillet on the stove or in the microwave.
- Pile some veggies on top of each pita, then top with some garbanzos, cherry tomatoes, green onion, and the sauce. Alternately, slice and stuff inside. Eat immediately.
- Prep Time: 10 minutes
- Cook Time: 35 minutes
- Category: Sandwiches
- Method: Stovetop, Bake
- Cuisine: Lunch
Keywords: vegetarian, chickpea, vegetable, sandwich
It’s time to get psyched up for this delicious meal, and it’s an excellent way to feature produce that’s fresh from the garden or the farmers market.
Be sure to let us know how you enjoyed it and what you did to make it your own in the comments below, and leave the recipe a five-star rating as well if you loved it! And if you’re craving even more chickpea goodness, these roasted garbanzo beans are perfect for snacking.
For more of our favorite sandwiches, both veggie and meaty, try these:
- Go-To Black Bean Burgers
- Greek Chicken Pitas
- Chicken and Fig Panini with Goat Cheese
- Peach and Basil Grilled Cheese
Don’t forget to Pin It!

Photos by Raquel Smith, © Ask the Experts, LLC. ALL RIGHTS RESERVED. See our TOS for more details. Originally published on January 11th, 2016. Last updated: December 31, 2019 at 21:01 pm. With additional writing and editing by Allison Sidhu.
Nutritional information derived from a database of known generic and branded foods and ingredients and was not compiled by a registered dietitian or submitted for lab testing. It should be viewed as an approximation.
About Raquel Smith
Raquel is a whole foods enthusiast, an avid mountain biker, and a dog lover. She works by day at Food Blogger Pro and formerly maintained her food blog "My California Roots" (now merged into Foodal).
LOVE this so much <3 and your extension tube is TOTALLY working for you, Raquel! Beautiful!! I will definitely be checking out your affiliate link to see if it will work with my camera!
★★★★★
Thanks so much, Brittany!!
I’m going to have to look into this extension tube thing… never heard of it, but it sounds like something I need in my life. Looks great!
It’s so great Sarah! I was so amazed at the difference it makes. I’m loving the close-up shots I can get. It’s definitely not something I would want to use on every shoot, but I love having the option.
Yum, that sauce looks to-die-for. I think I’ll make it and just keep it in the fridge to slather on everything! Love the extension tube idea – keep the photography tips coming.
Thanks, Karen! The extension tube is still my favorite thing ever. I use it almost every shoot! And yeah, that sauce… so good.
This looks so fresh and delicious, like a filling meal that won’t leave you feeling too weighed down.
I love chickpeas, and combined with that tahini sauce I don’t think I could ever stop eating them =)
Thanks so much Teffy! I LOVE these pitas.. super filling but just like you said, not too heavy. Perfect!
Made sandwiches for 4 friends. They Loved them. One friend put a couple of green olives on top. That was good too.
★★★★★