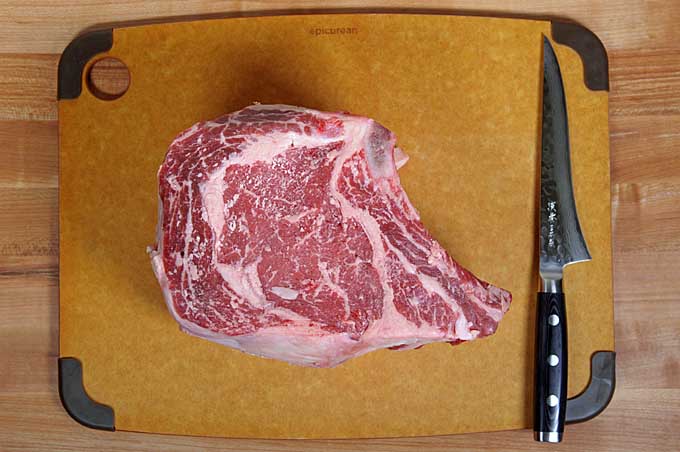
There is no better cut of meat from beef than a standing rib roast, aka bone-in ribeye, aka prime rib.
This cut of meat is sourced from the back of the upper rib area of a steer or heifer and has more marbling (splotches of fat mixed into the meat which appear kind of like veins in a slab of marble) than most other cuts of meat – making it super tender with very little cooking time required.

If fact, anything beyond very rare is frowned on by most connoisseurs.
Why Remove Them?
Bones Don’t Add Flavor
When protein is prepared via roasting or smoking, the bone provides very little flavor.
Some people will argue that bone-in provides better flavor, but I’m here to tell you that in dry cooking methods, the gain is not worth the miniscule (and theoretical) flavor improvement.
I’d prefer to save the bone for making au jus where the marrow and connective tissue and meat scraps can make a HUGE difference in terms of flavor.
When meat is boiled, braised, or otherwise submerged in water and simmered or boiled for hours, the connective tissues and marrow are able to dissolve into the liquid or wine – both of which serve as solvents that assist in pulling out the flavor compounds found in the bones and tendons.
Crust is Important
The goal of any cook preparing prime rib is to have a nice, crusty, seared bark on the outside and as much pink as possible on the inside.
When a quarter of the surface is made up of ribs, getting that perfect seared surface is much harder.
Which brings us to:
A Square (or a Cylinder) Shape is Better
The ideal shape for getting maximum surface area for the crust AND for even cooking when inside an oven or a smoker is a cube. If you end up with a roast that is as wide as it is long, by all means, use butcher’s twine and make a cube.
Oftentimes, though, you’ll end up with a shape that is longer on one side, or shorter in one dimension than it is long in the other, and it’s better to shape the meat into a roll.
How to Remove the Bones
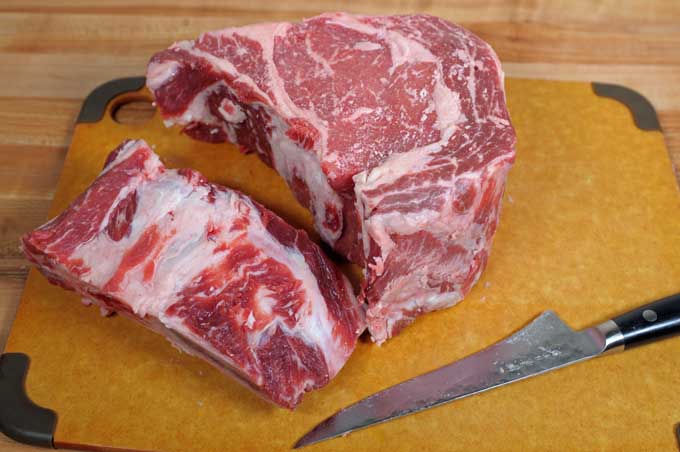
But what happens if you get home and realize that you forgot to ask the butcher to remove the rib bones for you?
Never fear. It’s a super easy process to do yourself. You’ll need a sharp, thin boning knife to do the best job. In a pinch, a blade designed for filleting will work.
Here’s how you do it:
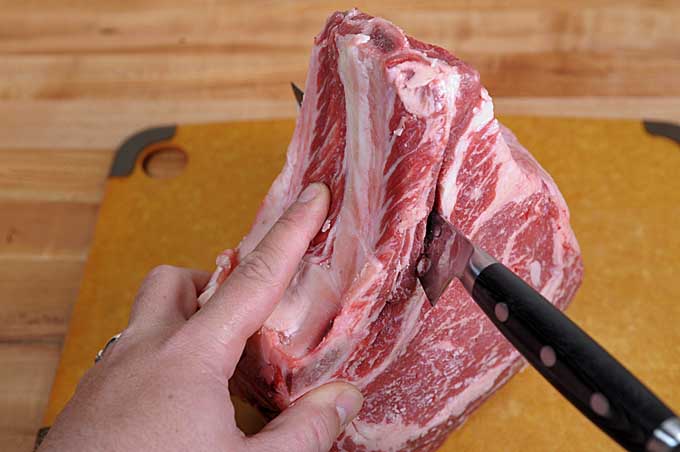
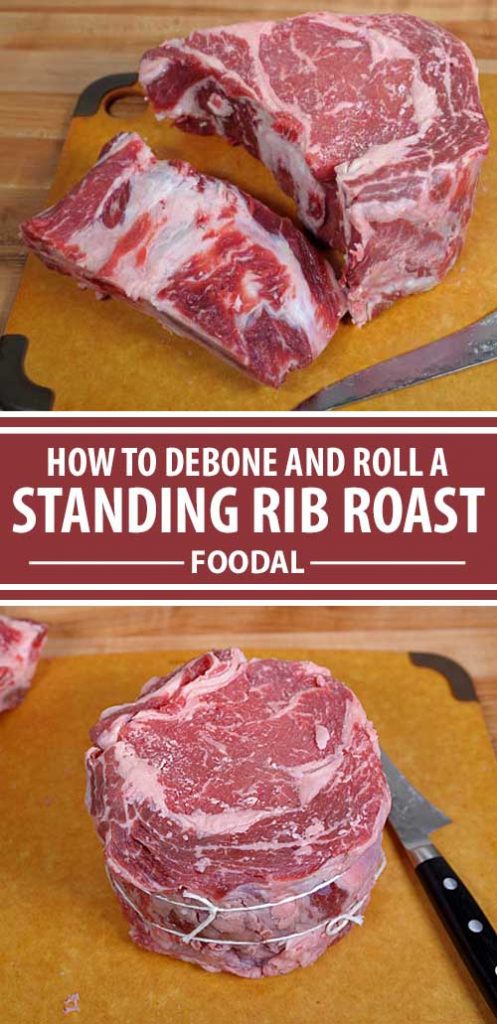
Step 1 – Cut Upwards
Turn the meat toward you so that the thin side is up and you can see both the ribs and the flat side as shown below.

Insert your boning knife into the flesh along the bone with the sharp edge facing up. Slice upward along the bone. If your roast is wider than your knife is long, you’ll need to flip the meat and repeat on the other side.
Make sure you are using steady and firm pressure as you make your cuts. You’re looking for an even and fluid slice. A sharp knife minimizes jerky motions and rough cuts. With a sharp blade, you should only need to apply minimal pressure.
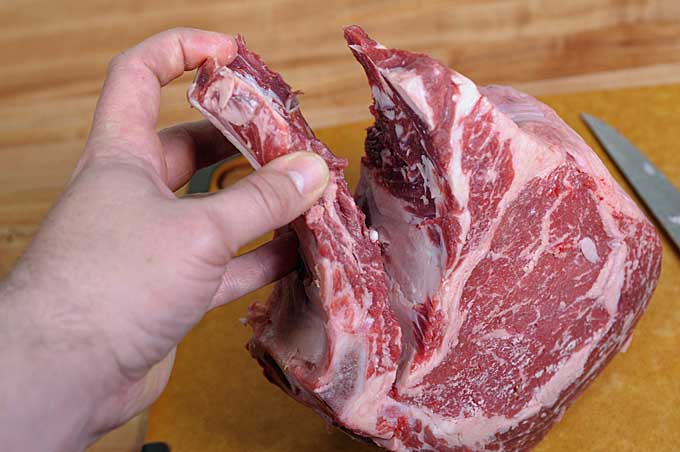
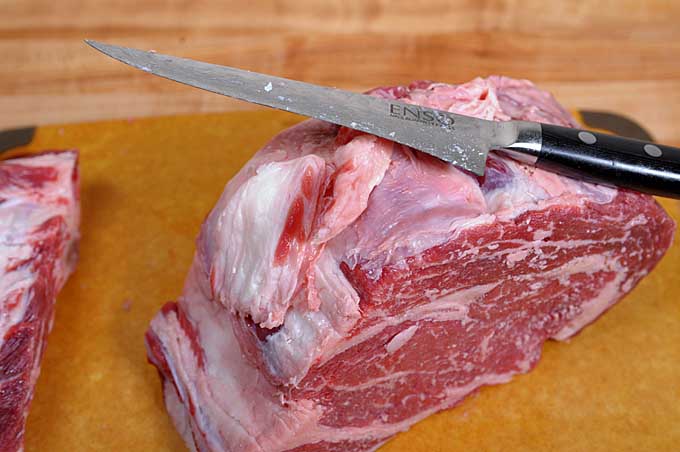
Step 2 – Cut Downwards
Once you’ve cut the top portion free, reverse the blade and slice downward to separate the flesh from the rib bones as shown below.
Cut downwards until you hit what is called the “top rib.” This will be a chunk of rib bone that extends farther into the flesh at the thicker end of the roast.
Step 3 – Cut Around the Top Rib
Using your boning knife, work your way around the “top rib” in a sort of inverted “L” motion.
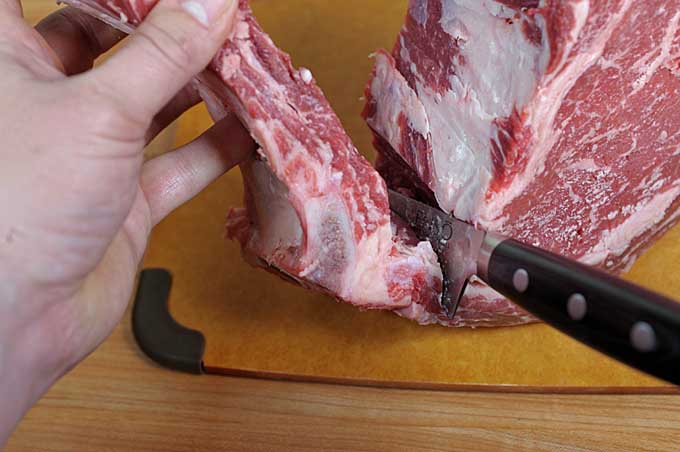
There, now your bones have been removed from your roast.
I told you it was easy.
You can also reverse this process, starting at the top rib and working your way down. I’d recommend doing it the way I describe and illustrate here on your first try, to better help you locate where the top rib actually lies, and to avoid leaving excess meat on the bones.
Some folks that are under the belief that bones add flavor will tie the bones back into place with butcher’s twine. Then, after preparation, they cut the twine away and remove the ribs prior to serving.
Once again, I recommend removing them completely for all the reasons listed above, and use twine to “square up” or “roll” your meat.
How do you do that?
Glad you asked:
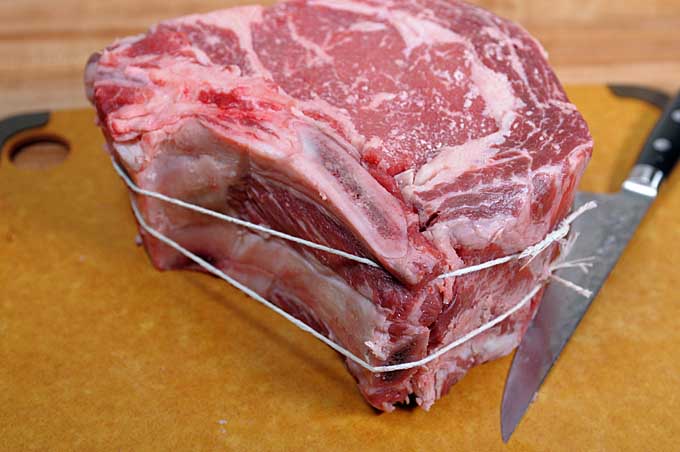
How to Roll the Roast
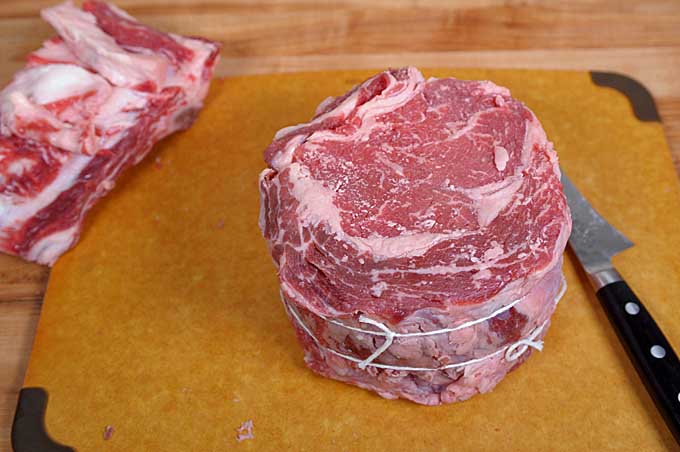
Step 1 – Remove Excess Fat
This is another contentious area of discussion, often hotly debated by professional cooks and home gilling aficionados alike.
I like to trim excess fat (the fat cap) from the top of the roast. Most folks don’t like it, don’t eat it, and it is detrimental to forming a good crust. And no – it does nothing for flavor.
Yep, you’ll probably argue that all the flavor is in the fat. And to some extent that is true.
However, this surface fat adds nothing. It does not melt, it does not soak into the meat, it just make the surface too moist to properly form a crust.
The subcutaneous fat, aka “marbling,” is the kind of fat that provides flavor.
Get rid of the fat cap. You’ll thank me and your guests will thank you.
Step 2 – Fold, Roll, and Tie
Bend the roast into a circular shape and tuck one edge under the other as shown below. Wrap with cotton butcher’s string and tie.
Now your roast is better shaped to ensure even cooking on all sides. Remember, for this type of cut, it is very important to minimize overcooking on any area of the piece of meat. Forming it up into a cube (preferred) or a roll helps to accomplish this.
Do you have an opinion on bone-in versus deboning? Be sure to let us and the other readers know your take in the comments below.
And be sure to check out our other protein-related cooking guides now.
Don’t forget to Pin It!
Photos by Mike Quinn, © Ask the Experts, LLC. ALL RIGHTS RESERVED.See our TOS for more details.
About Mike Quinn
Mike Quinn spent 20 years in the US Army and traveled extensively all over the world. As part of his military service, Mike sampled coffee and tea from all virtually every geographic region, from the beans from the plantation of an El Salvadorian Army Colonel to "Chi" in Iraq to Turkish Coffee in the Turkish Embassy in Kabul, Afghanistan. He spent nearly a decade in the Republic of Korea where he was exposed to all forms of traditional teas. Mike formerly owned and operated Cup And Brew, an online espresso and coffee equipment retail operation.

I would really love to try that meat on a Philly Cheesesteak. Please bring one to me 🙂
You don’t say how to cook this roast. I bought two smaller cuts of standing rib roast. Both are rolled individual pieces, about the size of a man’s fist. How do I cook them?
Great question, Linda! You’re lucky that your butcher did the prep work for you- makes your job easy!
You’re right that we don’t yet have a recipe for standing rib roast on Foodal, but the basic cooking directions are relatively simple. However, this depends on whether you have a boneless or bone-in standing roast. And of course, cook times also depend on the weight that you’re working with. Most recipes recommend baking at a high temperature for 15 minutes to sear, then turn the oven down to 325°F or so and continue to roast until the internal temperature reaches about 140°F, then let the meat rest on a platter tented under aluminum foil for about 1 hour. Keep in mind that the meat will continue to cook as it rests and reabsorbs its juices into the meat.
What about Sous Vide and Bone in?
I have done a few sous vide roasts, I always remove the bones as described. It comes out to the exact temperature you want. After sous vide I let it cool for an hour or so. Then I put it in a 400-degree F oven. I use Montreal steak seasoning on the outside and some butter. Then I sear under the broiler for a couple minutes to get the deep browning. Works for me.
What can I do with the rib bones that I’ve trimmed off the roast? Can you cook them and have the meat to eat?
Sure, or you could make a bone broth or soup!