We occasionally link to goods offered by vendors to help the reader find relevant products. Some of these may be affiliate based, meaning we earn small commissions (at no additional cost to you) if items are purchased. Here is more about what we do.
Having read some comments on other major cooking and kitchen blogs, I feel compelled to dispel many myths on the proper way to season your cast iron pans – some of which are destructive and should never be used.
I’ve been using cast iron cookware for the past 33 years (since the age of five) and have a significant collection of vintage and some newer pieces so needless to say, I’ve seasoned my fair share and have an in depth knowledge on the subject.
If you have just bought a brand new cast iron pan or have a complete knowledge of piece’s history, then you can skip to Part B.
Otherwise, if you’re completely new to these rustic relics (or only have experience with pans of other types) and have a used skillet to restore, read on for the full scoop in both parts A and B.
Part A. Stripping.
If you’ve discovered a vintage piece of cast iron at the local good will or a garage sale it is imperative that you strip it down to bare metal.
Why?
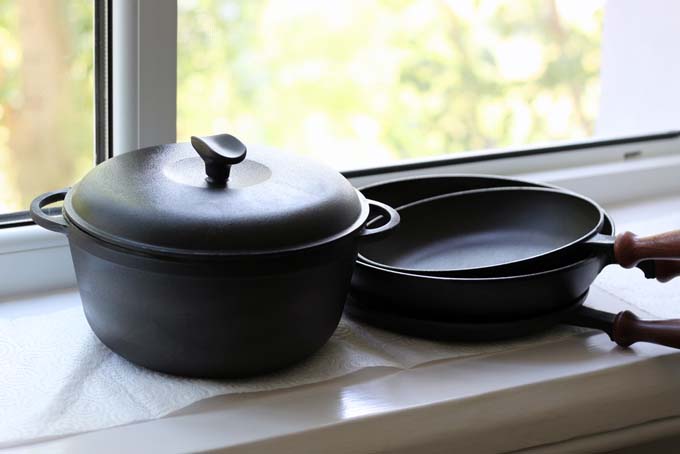
You don’t know the history. The nice Dutch oven that you’ve just acquired may have a real good coat of plasticized black oil just like we all like to have and which makes this form of cookware relatively nonstick.
Unfortunately, this coating of oil may be derived from the underside of 1981 Ford Mustang II or from a Krylon rattle can rather than from years of use on the stove. You just don’t know how the pan was used.
Step 1. Rust Removal.
For built up hard rust there is only one method of removal that should be used and that is good old fashioned elbow grease…with a little modern chemistry thrown in to lighten the load.
Fill your sink with about 2/3rds water and 1/3 cheap white vinegar. Use a green scratch pad to remove a moderate amount of rust or a S.O.S. type pad to remove a heaver concentration. The vinegar is an acid and will help to quickly remove the rust.
I’ve recently read a blog comment where an “expert” recommended against using vinegar for this purpose as she claimed that it will eat holes in the cast iron. I call poppycocks on this. Unless your cast is absolute junk with a number of impurities, vinegar cannot harm it. In her case, she was a dealer of Chinese made cast iron woks so perhaps her products did have issues with a vinegar solution.
IMPORTANT: Never, ever, ever use a powered steel wire brush to remove rust. Steel is harder than iron and will leave deep scratches that a proper seasoning will not cover. You might get be able to get away with a copper or brass brush but I wouldn’t do it.
Step 2. Old Seasoning Removal.
There are only four “safe” ways (safe being applicable to the pan) to remove an old finish from a cast iron pan. The first of these is electrolysis and I have no real experience with this method.
The second method is only partially effective – stick the pan in your oven, lock it, and turn on the self-cleaning cycle. This will burn off some of the old seasoning but not all of it if it is old and crusty. Finish off with scrubbing.
The third way to remove the old seasoning is to soak the pan in a lye solution that one can mix up by using either Red Devil Lye (getting very hard to find) or pumbling clog removal liquid such as Drano which is a lye based chemical. This method removes the old finish incredibly fast – in as little as 20 minutes.
Food Grade Red Devil Lye available through Amazon.
However, lye is VERY caustic and can cause skin lesions and you can easily blind yourself by getting some splashed in your eye. I take no responsibility for anyone attempting this at home – you are responsible for yourself, your children, pets, and other people. Always take proper precautions, use personal protective equipment such as heavy rubber gloves rated for chemical exposure, etc. Keep out of reach of children and animals.
The fourth method (of which I personally do) of removing the seasoning from a cast iron pan is actually a derivative of the first. I use “easy off” oven clean which also contains a lye but in a somewhat diluted state.
Since heat helps lye to work its magic, I normally spray down the pan and leave it on the BBQ grill (ours is gas) set on low with the lid closed and let it bake for a while.
After cooling, I then scrub off the loose particles with a green scratch pad and repeat if necessary. You can also do this in an oven.
Again, I assume no responsibility with folks using a lye based product including oven cleaner or the use of any other chemicals in a non-prescribed manner. I’m merely describing how I and others that collect vintage cast iron cookware normally strip our goodies so that it doesn’t damage the cast iron pan.
If you don’t want to deal with chemicals, you can also take a piece of coarse steel wool or an SOS pad and remove it by hand but it is very labor intensive.
IMPORTANT – I’ve seen it suggested many times on different venues on the internet that you should burn off the old seasoning in a bon fire. This will most likely get your cast iron way too hot and will open up the pores in the metal (which will not close).
If this occurs, the pan is pretty much ruined. It will never take a good seasoning again – ever.
You can easily spot a piece of cast iron cookware that this has happened to by a brown patina (almost like rust but not quite) peeking through what little seasoning has managed to stick.
Some folks have had luck with this method but I’ve seen the results of a too hot of a fire and it sucks when you find one of the older, higher prices collectable examples that have been ruined in such a way.
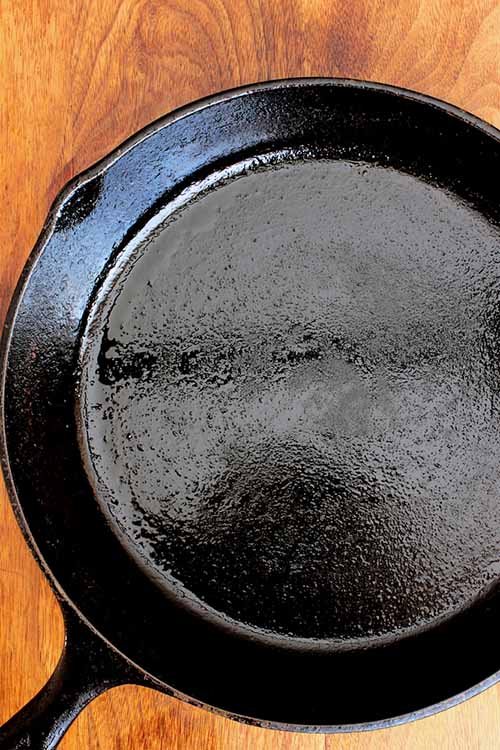
Part B – Seasoning.
Now that we’ve gotten the old finish off, it is now time to properly season the cast iron. If you have a new piece, the first thing you’ll want to do is remove whatever protective finish that it was shipped with – normally this some form of mineral oil and comes off quite easily with some soap and hot water.
NOTE: Some new cast iron ships already seasoned – in particularly the Lodge brand and I’d recommend just a light cleaning with water and ONE drop of dish soap (please don’t make this a habit – more on this latter) and then simply use the cookware as you normally would.
The next step is removing the surface rust. Bare iron will develop a very light patina of rust when exposed to the air for as little as a couple of minutes. Apply some common undiluted white vinegar on a kitchen towel like in Part A and merely wipe down the pan.
Next you will need to immediately apply a thin coat of your cooking oil of choice – I’d highly recommend either coconut oil or grape seed oil – both have a very high smoking point and this ensure that you not accidentally burn off the seasoning at a later point.
Historically, lard has been used for purpose but who keeps this around anymore? Plus it is obviously not Kosher if that matters to you. In a pinch, olive oil, soybean, and canola can be used but all three have lower smoke points.
We want to apply several coats of cooking oil that will plasticize into a more permanent coating. This word may scare you but it is not that serious – we are not forming a plastic coating on our cast iron cookware.
Cooking oil is made up of relatively simple carbon chains. What we are trying to do in applying heat is to fuse some of these chains together so that they are longer and more complex. This gives them a tougher and more solid surface that behave sort of like plastic but the carbon chains in actual plastic are much more complex by orders of hundreds of magnitudes.
This more complex oil film is what gives cast iron is relatively nonstick surface as the coating is still partially regular cooking oil.
The next step is to heat your pan up and this is where the methods of serious collectors and users of cast iron differ in techniques and opinions. Some do it on the stove and others in the oven. I’m going to give you my method but please feel free to adapt it to your particular living arrangements.
Since we have a nice Weber gas grill, this is my preferred location to season my cast iron as it keeps the smoke out of the house. Since we have a thin coat of oil (please notice that “thin” is continually emboldened), I merely fire up the grill, plan the pan(s) on the racks upside down, and close the lid.
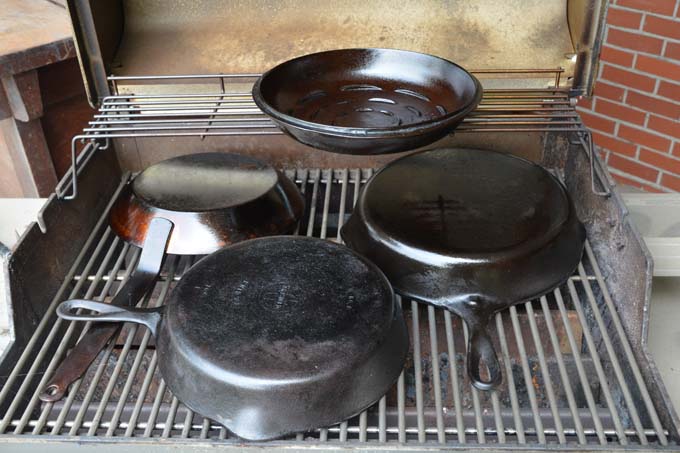
I like to do three coatings but one or two is probably enough. For the first coat, I normally adjust the grill so that I’m at about 375°F and I let the cast iron “cook” for about 30 minutes. After this initial coating, I then take some paper towels (and with a pot holder/gloves) and carefully apply a second thin coat of oil.
I then adjust the grill to about 450-500°F and let the pan(s) (I normally do several at once) bake for 15-20 minutes – again in an upside down position. This keeps the oil from clumping on the actual cooking surface and any pooling will occur on the bottom of the pot where it doesn’t really affect anything.
I normally do a third coating at around 550-600°F for 10-15 minutes. During this step, you should notice smoke coming off the pot(s). This is normal. However, you can easily overcook the oil which can cause flaking later on.
Another source of flaking may be too thick of a final coat which is why I have been emphasizing thin coats. This is especially true on very early vintage examples that have thinner castings and a much finer, ground finish.
The more modern variants, made after WWII to the present, feature a much rough final finish and the plasticized oils stick easier to these as there are more nooks and crannies for the oil to seep into and grab a foothold.
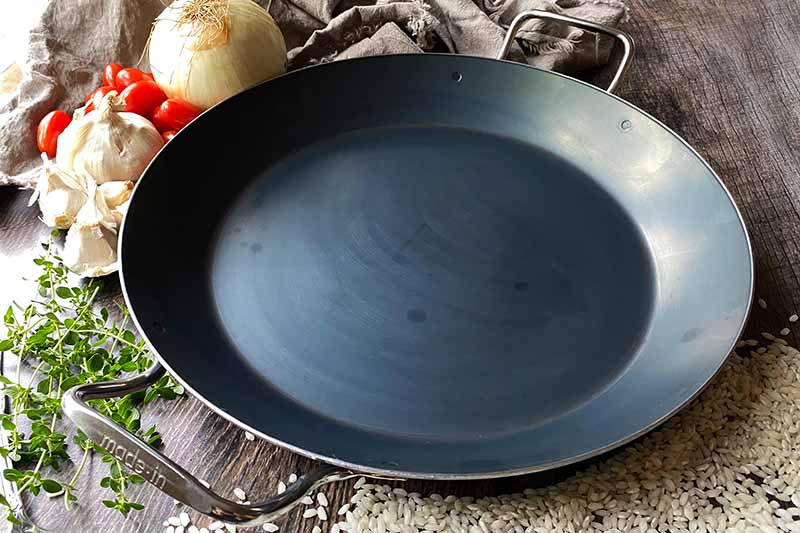
That being said, there is something magical about the smooth steel of the earlier cast iron cooking implements (the older you go back, the thinner the cast iron becomes).
Once you have gotten a good seasoning on your cast iron, the next trick is to keep it on the pan. This is not that hard and we cover the proper care of cast iron in this article.
About Mike Quinn
Mike Quinn spent 20 years in the US Army and traveled extensively all over the world. As part of his military service, Mike sampled coffee and tea from all virtually every geographic region, from the beans from the plantation of an El Salvadorian Army Colonel to "Chi" in Iraq to Turkish Coffee in the Turkish Embassy in Kabul, Afghanistan. He spent nearly a decade in the Republic of Korea where he was exposed to all forms of traditional teas. Mike formerly owned and operated Cup And Brew, an online espresso and coffee equipment retail operation.

I have a couple of cast iron skillets and have never used them because I wasn’t sure of the proper way to season them. Now that I have something to go by, I’ll bring those babies out of hiding and start using them!
Ria,
For frying purposes, searing steaks, some stovetop casserole type dishes, and making pizza and cornbread, you’ll never want for another pan – I guarantee you. I love my collection
Cheers
Lynne
This brings back memories! My mother used to have a cast iron skillet when I was a little girl. I come across plenty of cast iron piece when I am at thrift stores and rummage sales but I have not bought one because I wasn’t sure how to go about seasoning them. Next time I find a good piece, I will buy it and I will try your methods to season it. I might even become a collector.
Nids,
I plan on doing a fairly in-depth article on what to look for when buying used – stay tuned.
Cheers
Lynne
My Lodge was really easy to get set and going with, the instructions were really clear too. The advice was to wash in warm water, dry well, and coat with a thin layer of oil as you suggest. What it also said on my instructions was the you could give it a quick wash in warm soapy water (if you really couldn’t stand the thought of using something that hadn’t been thoroughly “washed”) but that you must dry it well to avoid rust, before applying a thin coat of oil
I’ve only done one coat of oil and baked it on in the oven, and I do this each time I use it: wash with warm water, apply oil, bake on. Should I be doing more than one coat of oil?
Thanks for such good information on cast iron equipment.
I used this method to season my beloved stove-top iron grill. The grill was stored wet by the help lady and rusted. I was so sad about the thought of having to throw the grill away, but it came out pretty well after a good wash, as you described and a long time seasoning in the oven. Now I use it everyday to make my Paleo pancakes, eggs, etc!
What am I doing wrong? Whenever I re-season mine, they’re always sticky and I have the hardest time getting rid of it, so that they’re just smooth…..
@Torreyy-
This could be a sign that you used too much oil. When you season, try wiping the pan with a clean paper towel before you let it cool, to remove any excess.
I have never seasoned a cast iron skillet myself, I usually wait until my mother start seasoning her pots. And I give her my pots to season. I guess since I have learned a proper process, I will be doing it myself, thanks.
Is there ever any reason to re-season your pans? Does the seasoning wear down after a lot of use? I have an older cast iron pot I don’t use as much as my regular one. I wonder if I need to give it a little love before I use it for thanksgiving. It has been sitting in a cabinet for quite some time.
I have enjoyed reading this article and have had cast iron pans all my life. They were past on to me from my grandmother and mother. Before they past theirs on to me I had purchased a few myself. My mother seasoned her pans every once in a while but I had never paid much attention to the details. I had forgotten the temperature she use to season her pans so was glad to find it in this article.
Thanks for the helpful advice and the temperature in this article. I have re-seasoned my pans in the oven but I was only baking them for 175 degrees for one hour. Of course these are old and well used and I have never gone to any ex-streams in cleaning them. Most of the time they do a good job for me.
You stress a thin coat of oil and I want to comment on this. Years ago I had a boyfriend that purchased some cast iron pans and put them in the oven to bake. Not sure exactly what he did but using too much oil was definitely part of it. It came out a gummy sticky mess. He was angry with me because of the way they turned out. I only told him what my mother had been doing for years and I could not think of what happened. So I asked Mom. She said well only a small amount of oil is needed just wipe some on and put it in the oven to bake.. I scrubbed his pans (which was not easy) I put the oil on the pan and put it back in the oven to bake. It turned out just fine. A THIN coat is definitely important.
Well, just reading Part A is very interesting. I had to stop because I’m going to check my cast iron skillet. It’s hanging on the wall next to my stove, I felt compelled to have one. It just feels right for every kitchen to have at least one cast iron skillet.
Thank you so much for this hugely useful article! I recently got a bunch of net cookware, including some cast iron, and so far all I’ve done is look at it. Growing up my mom never used cast iron so I’ve been so confused about how to even start. Thank you for the clear and detailed instructions on how to season the pans, especially the tip on how many coatings are necessary/ideal. I will definitely use 3 coatings. Thanks again!
Thanks for this post. My cast Iron Pans are a couple years old, they have a few surface rust on the bottom and a few scuffs on the pan surface. Do you think it is worth me stripping them down and re-seasoning them? How often would you do this process with your cast iron pans?
Thanks for this, Lynne! I have several cast iron skillets and dutch ovens that I had not been able to use because I didn’t known how to season them. I wanted to cook meals like my grandmother used to prepare. Thanks to this, I will now be able to use them when I cook for my own family. Thank you so much!
I don’t have any cast iron pans, but have seen them used for cooking steaks and searing other meats, and they seem to do a great job. After reading this, I would definitely not buy used, since I don’t have the physical strength and endurance to go through the process of stripping off old layers. If I’m ready to buy one or more in the future, I will buy them new, and use this procedure to season them, since it seems manageable for me.
My roommates ruined all of my cast-iron at my last house. Thank you for this in-depth article. They are the greatest cooking materials I have ever used. I love looking through the Lodge catalog. You can do anything with them, and you don’t have to put them through a dishwasher. I actually find the cleaning to be almost enjoyable since you know the flavors are sticking and adding a unique profile to your cookware. I love cooking small cuts of steak in mine
My dutch oven is going to be so hard to clean 🙁 (it has the metal bumps on the top that are totally rusted).
Bookmarked for later use!
Thank you for the valuable information on cast iron products. I have never used one before. I now intend to buy a Pyrolux skillet sold by ‘Spotlight’ outlet in Malaysia. I am a Malaysian. Do you know if this is made in China? Mention was made about the extra care to be taken if it comes from there. What do I need to look out for and do, if so? Thank you again. Looking forward to you response soon. Mrs.Leonawati.
Hi, Mrs. Leonawati. Thanks for your question! After doing a bit of sleuthing, it looks like Spotlight is an Australian company and Pyrolux products are in fact made in China. US-based manufacturers are known for producing top-quality cast iron pans, and quality standards may differ in other countries. But as far as reports of production practices that may in fact be hazardous to health go, such as producing pans that contain lead, we were unable to find any verifiable information in connection with these products. Reviews of Pyrolux items vary, so be sure to check the terms of any available warranty before you buy. Hope this helps!
Thank you for this article, it’s very useful and informative..!!