Is your garden going wild? Do you have so much produce (or extra food scraps) that you don’t know what to do with it all?

If so, don’t fear. I have the perfect solution… dehydrate it!
If you have one of these handy kitchen tools, then there is really no reason to ever let a zucchini, tomato, or even an apple go to waste ever again.
Now, if you don’t have one, you’ll need to read Foodal’s Food Dehydrator Buying Guide.
I guarantee you this will be one of the best investments that you’ll ever make for your health and food security as well as you budget.
Before I go into my best tips, let me share some of the reasons why you might want to start drying your fruits, vegetables and even herbs yourself at home.
Save Money
One of the main benefits of having a garden is that you can grow the freshest produce right in your backyard, which can save you a lot of money. And, when you preserve that harvest, you save even more.
For example, at the grocery store, organic sun-dried tomatoes run for about $4-8 per pound, depending how they’re stored (i.e. in oil vs. water). At home, you can make your own for a quarter of the price.
Not only that, but you can make other convenience items too, such as your own dried soup mixes – which typically cost $2-4 at the store – for less than $1 homemade.
You can also make your own herb and spice blends, by simply drying your own herbs, combining them with whole dry spices if you wish, and grinding them into powder using a spice grinder.
Side note: never ever use your good burr-based coffee grinder for this unless you want to be tasting a herbal coffee blend for the remainder of the grinder’s life.
Herbs can be rather expensive at the grocery store, and dry store-bought spices need to be replaced every six months or so (not to mention that it can be difficult to tell how long they’ve already been sitting on the store shelf).
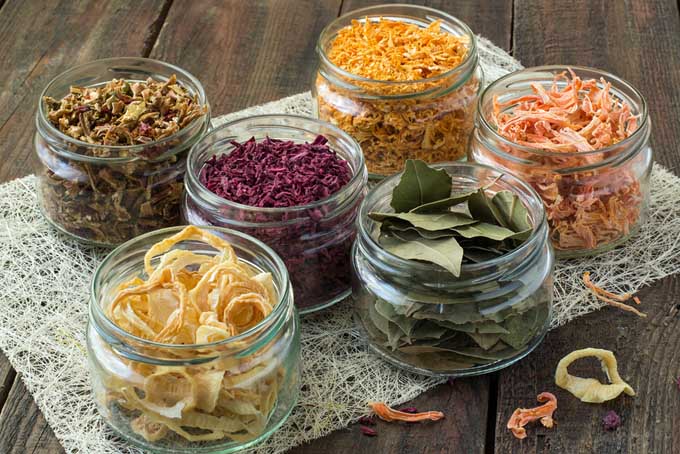
By creating your own, you’ll know exactly how fresh they are. Plus, you can save a significant amount of money in the process.
It could be us, but we think spice blends and dehydrated fruits and veggies taste a lot better when we make them ourselves. No matter what you decide to try, it’s a surefire way to save money (especially if the alternative is letting good produce go to waste!).
Convenience
Prep once and eat for days.
That is exactly what you’ll experience, once you start drying your own food. A little time spent up front equals easy and nearly effortless meals later on.
Set some time aside and think of it like a project. In one day, harvest, wash, slice and start drying. You can save a lot of time later, in the weeks and months ahead, by doing it all in one go.
You’ll find one can quickly and easily make a pot of vegetable soup by adding dried vegetables of your choice in a large pot of broth, plus any noodles or protein you’d like – no chopping required!
You’ll be able to easily top pizza with dried vegetables, too – like mushrooms and onions. Just be sure to put the vegetables directly on the sauce rather than on top of the cheese (if using), as they’ll need to absorb some of the liquid so they can rehydrate.
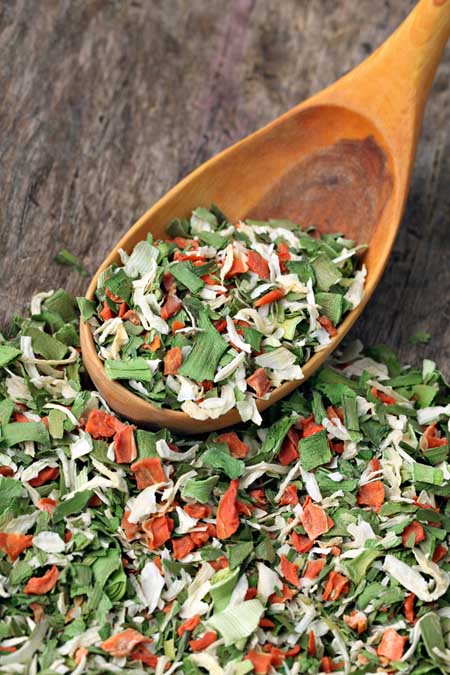
I find having a large amount of dried produce in the pantry saves us from having to take extra trips to the grocery store, and makes dinner prep a breeze.
Once you start drying, you’ll always have some vegetables in the pantry, and that’s a really nice feeling.
Preserve the Flavor
You know the taste that you get to experience when you take a bite of that first tomato of the season?
It’s ripe, super sweet, and tastes much better than the ones you were buying in the off-season at the grocery store.
Well, that’s the same experience you’ll get with homegrown dried tomatoes. By drying them as soon as you pick them, you’ll be able to enjoy tomatoes that were picked at the peak of ripeness all year round, and that’s a real treat.
I also love drying fruits like apples, strawberries and peaches – ones you most likely can’t get locally throughout the year. Once you get your pantry stocked with peak-season produce, it’s like winning the lottery – and your friends will be shopping at your pantry!
This year we noticed that when we dried green beans, they tasted a lot better than the frozen kind we used to buy in the winter months.
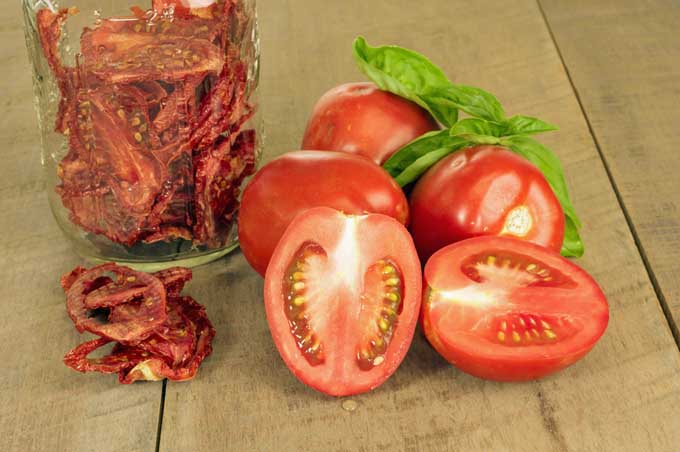
If you cook often, you know how much of an impact freshness can have on your recipes. It’s actually surprising that more cooks don’t take advantage of drying seasonal produce.
If you really wish to lock in the flavor of your recipes, be sure to dry things like: apples, peaches, pears, berries, tomatoes, green beans and zucchini.
Retain Nutrients
One of the main reasons that more and more people are growing their own food is because it’s the only way to know exactly what’s in it.
Nowadays, pesticides and GMOs are so common that the best way to avoid them is by taking matters into your own hands.
If you become your own farmer, you’ll also know when your produce was picked.
Studies done at the University of California have shown that vegetables can lose 15-50% of their vitamin C content after harvest, and some types of spinach were actually shown to lose a full 90% of vitamin C within just 24 hours of being picked!
By drying your produce, you’re able to lock in some of the nutrients and healthy enzymes.
If you’ve been trying to get healthy, or maybe lose weight, a good way to do that is by increasing your vitamin and mineral intake.
Though individual nutrients aren’t necessarily responsible for weight loss, eating healthy whole foods like fruits and vegetables help to crowd out less healthy options like processed foods that are high in salt, sugar and fat, and low in beneficial vitamins and minerals.

Improve your own nutrition by increasing your fresh fruit and vegetable consumption.
Use drying as an affordable way to get nutrients into your body – even when certain types of produce aren’t in season in your area.
If you don’t have your own veggie patch or fruit trees, you can still apply these tips to dry the produce that you buy.
While it’s fantastic to be able to grow your own food, the farmers’ market (or a CSA or farm share) is the next best bet for purchasing nutrient-heavy produce – you may be able to obtain both organic and locally grown.
Now that you know some of the benefits of preserving your food by using a dehydrator, I want to share some tips to help you make the most of your drying experience.
Foodal’s Top 11 Food Dehydration Tips
If you’ve been nervous or confused about how to get started, this advice should be enough to help you get going right away!
#1 – Pick When Your Produce is in its Prime
You’ll want to harvest fruit and vegetables when they’re at their peak.
This is because, as soon as you pick the fruit or vegetable, it will start to lose nutrients and the flavor will start to change. In order to lock in the flavor, you’ll want to harvest it and prepare it for drying as soon as it’s ripe.
If you harvest green, under ripe produce, that’s exactly how it will come out of the machine – and you really don’t want that. Do not put any under-ripe produce in the machine.
I like to think of the process of drying as preserving the flavor, although sometimes things do taste sweeter when they come out, especially fruit. Drying removes all of the water and the sweetness of the fruit is more concentrated. Talk about nature’s candy!
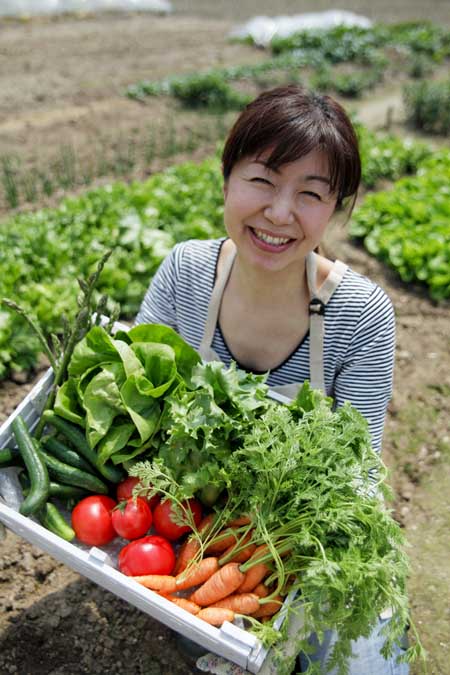
That being said, if you harvested a few pounds of juicy tomatoes and planned to eat them but never got around to it, consider drying them instead. Just be sure to remove any soft spots, and do not dry anything that’s moldy or rotten.
#2 – Preparation
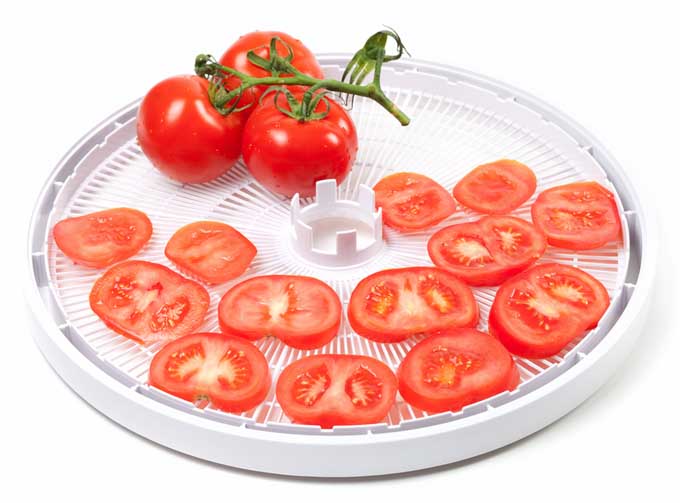
Once you harvest, you should start prepping your produce. Juicy fruits and vegetables (think: peaches, plums, tomatoes and strawberries) need to be cut before placing them on drying sheets.
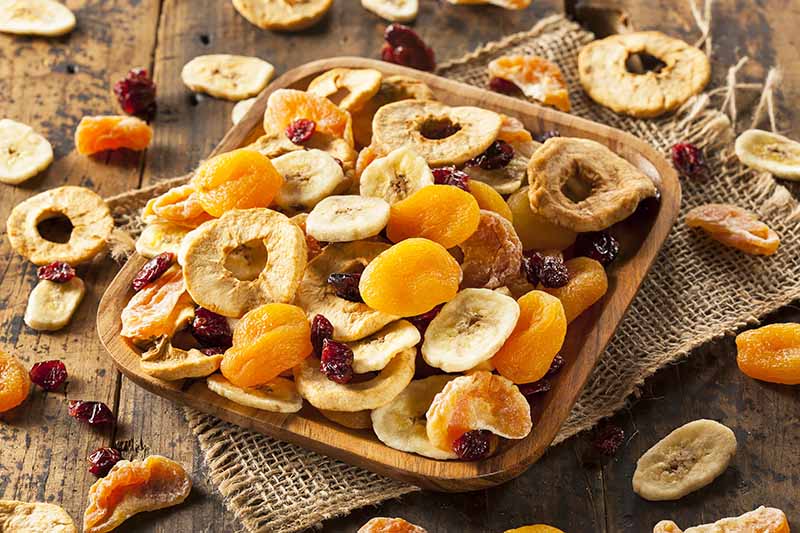
I like cutting apples and stone fruit into slices, but I’ve also seen them cut into rings. You’ll have to do some experimenting and see what you like best. Whatever style of cut you pick, just be sure to stick with it for the entire batch – that way the drying time will be consistent throughout.
Since most of these machines come with multiple drying racks, you can dry different types of fruits and vegetables at once.
Just be sure to keep all of the same type on one tray – that way you can easily remove the ones with less water and keep the juicier produce in for longer, until it’s completely dry.
When it comes to vegetables, I recommend washing and slicing most of them. Things like zucchini, beets, carrots, and sweet potatoes should all be thinly sliced – which is where a good quality mandoline comes in handy.
Leafy greens like kale and chard should be washed, de-stemmed and then torn into big pieces about the size of your palm. They can then be seasoned and turned into kale or chard chips.
I will warn you though – they shrink up quite a bit. A full head of kale ends up being about the size of a small bag of chips that you might see at your health food market, roughly two cups in total.
Greens beans, on the other hand, don’t need to be sliced. You can wash them, trim the ends and stick them on the sheet.
When it comes to preparation, once you start drying your own produce, you’ll find out what works for you.
As you go along you’ll develop your own systems, and before you know it you will be able to cruise through the process quickly.
#3 – Enhancing Flavor and Color
Drying can be as easy or as complex as you want it to be. You can chop and wash your produce, pop it into the machine, and that’s it.
Or, if you don’t mind devoting a little more effort to it, you can enhance the flavor and protect the color too.
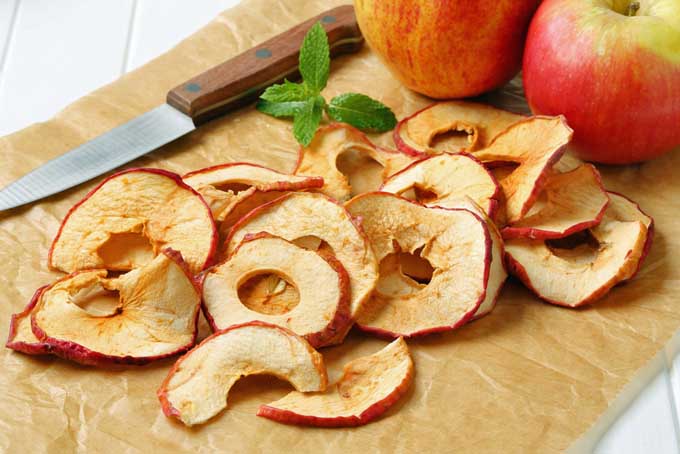
For example, things like apples, pears, and potatoes will turn a dark yellow/ brownish color after drying.
However, if you want them to stay white with no brown or yellow spots, you can quickly soak them in an acidic solution made of lemon juice, or vitamin C tablets crushed up with water. Dip them and then shake them off quickly – it won’t affect the flavor.
Another technique is to use a food grade plastic spray bottle to lightly mist the lemon juice over the top of the sliced fruits and veggies.
Speaking of flavor, use your imagination and creativity to come up with delicious seasonings and spice combinations, to give your produce a tasty flair. Here are a few of my favorite combinations:
- Apples taste great marinated in a little bit of coconut oil and cinnamon.
- Green beans are delicious with a touch of paprika and cayenne
- Season sliced beets with a bit of olive oil and Himalayan sea salt before drying.
- Slice sweet potatoes like fries and marinate them overnight in soy sauce, drain in the morning and place in the machine overnight.
Once you feel more comfortable, you’ll see the possibilities are endless when it comes to flavor combinations. Some of the best results come from trying different things out and being adventurous in your own kitchen.
#4 – Investing in the Right Equipment
First, of course, you’ll need a dehydrator. Our number one recommended model is the Excalibur.
It’s not cheap, but it’s the very best option on the market, and I fully stand behind it. Once you have that, there are a few more key tools that we recommend to make the process easier:
First, you’ll need something to lay the produce on once it’s inside the machine. Most come with racks, but they don’t come with anything to hold the actual food in place without pieces falling through the cracks.
This is where reusable nonstick sheets come in handy.
I recommend those sold by Excalibur, but no matter what model you have, you’ll need some good sheets to place your food on.
Trust me, this will save you from a lot of headaches in the future.
You can use parchment paper instead, but it can be a little tricky because of the fan in the back of these machines. They can sometimes blow the paper around, and that’s the last thing you want.
However, if you cut the sheets to a perfect fit, you shouldn’t have a problem.
We also recommend a good knife or a mandoline like I mentioned above, as it’s going to be really important that you cut thick produce like potatoes, beets and even carrots thinly, so that they dry evenly and completely.
The better your tools are, the simpler this process will be.
#5 – Dry Your Food Completely
Why is thorough, even drying so important? Drying is the equivalent to cooking in the raw preserving world, and drying times are going to vary depending on the product and the recipe you’re using.
Some standard drying times are included at the end of this post.
You should keep in mind that the climate you’re drying in will affect your drying times. The drier the air, the faster your produce will dry.
You should also consider how long you plan to store your harvest once it’s dry. If you won’t be eating your finished product for a while, dry it for a little longer. The crispier it is, the longer shelf life will be.
Most dehydrators have a fan in the back, so you’ll want to rotate the trays, from back to front and top to bottom.
This will help to guarantee that everything is completely dry. Keep in mind that the fuller your machine is, the longer it will take for items to finish.
#6 – Store in Mason Jars or Bags
The way you store your food is so important. If any of your produce isn’t all the way dry when you store it, it will mold and go rancid over time, ruining all of your hard work. (Been there, done that.)
When you finish drying, allow the food to cool down completely. Because you’re drying at around 100°F, your food will come out fairly warm. I recommend waiting at least 30 minutes before putting your food into bags or containers. Some produce may need a little longer.
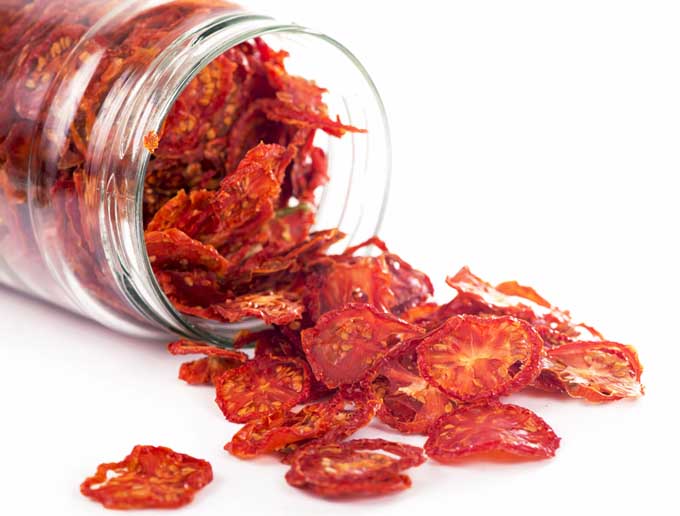
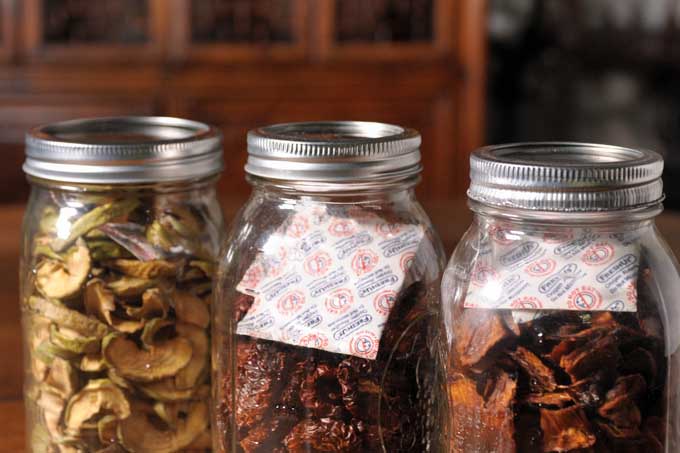
You can store in glass jars, airtight containers or even freezer bags. If you do go with freezer bags, make sure you remove all of the air before sealing. I suggest storing the dried foods you plan to eat right away in mason jars.
If you notice any condensation in your bags or jars (which means the produce wasn’t dry enough) and you catch it right away, you can put the product right back into the machine and dry it some more. If it’s been a while, I recommend disposing of the food.
Store your jars of dried food in a cool, dark environment, like a pantry cabinet or shelf.
If you plan to use your dried goods regularly, mason jars are nice because they’re easy to get in and out of.
If you dried a bunch of food that you’d like to last a year or two, put it in freezer bags and remove all of the air before storing in the freezer.
However, if you remove the bags from the freezer and let them repeatedly thaw and refreeze, condensation will build up on the inside and it could lead to spoilage or worse.
There’s a better way:
Once you start getting into this form of food prepping, you may want to look into getting a nice vacuum sealer that will let you remove a great deal of the atmospheric gases.
You can use them with branded or generic bags made for vacuum sealers or in most cases, the sealers will come with (or have available as a separate purchase) a jar adapter that let you remove a bulk of the air from a canning jar.
To extend the life of your dried foodstuff even further, you can look into food grade oxygen absorbers.
These are little packets containing iron shavings that you place into a sealed environment. The iron filings oxidize and turn into iron oxide (rust) to further remove oxygen from the inside of the sealed container.
Once the oxygen is gone from atmosphere within the container, most of the gas that remains is nitrogen which is completely inert and won’t harm or react with your food.
#7 – Dry Your Food, Don’t Cook It
It’s easy to confuse drying with cooking. Both methods use heat, but the difference is in the temperature. With the dehydrator, you’re preserving the enzymes and retaining the nutrients.
When drying, you want to keep food at the lowest temperature that will do the job. If you wish to speed up the drying time, you can turn the dryer up to 145°F for the first 30 minutes, and then turn it down to the recommended temperature for the remaining time. Doing that will heat up the machine, but it won’t cook the food.
In order to keep things raw, you want to keep the main cooking temperature under 118°F for the majority of the time. That being said, if you do heat your produce to a higher temperature, the outcome will still be delicious.
There are a few items that you’ll want to dry really, really well, like herbs and certain recipes such as kale chips and crackers.
If you ever over-dry your produce, like apple rings or pear slices, you can always spritz them with water from a spray bottle to lightly rehydrate them.
#8 – Don’t Be Afraid to Experiment
You’ll never know what you like until you try it.
Think of this process as a big experiment, one where you stay open minded. You’ll be surprised to discover many things that you may enjoy dried, even items that you don’t care for fresh.

One example that I’ve heard mentioned many tips is figs – some people really dislike fresh figs, but once they’re dried, they really enjoy them.
If you consider all of the different types of frozen and dried produce and herbs that you’re currently buying and using, this will jog ideas for what you should dry, and how you should dry it.
Another thing you’ll want to experiment with is marinades, as well as a variety of different recipes.
Here’s one of my favorites, to make a sweet fruit leather (aka Fruit Rollup) that everyone will love:
Place juicy persimmons or mange (or both) and a bit of lemon juice in a high-speed blender and blend until smooth. Spread this mixture on a sheet and dry at 118°F.
Fruit leathers can be made from most any fruit and I suppose even vegetables.
You’ll learn quickly that the blender and dehydrator are two tools that pair very well together.
#9 – Fill Up Your Dehydrator
If you’re going to break out this tool, make good use of it.
What I mean is, prepping and cleaning is a lot of work, but making one or five batches of kale chips yields about the same amount of cleanup.
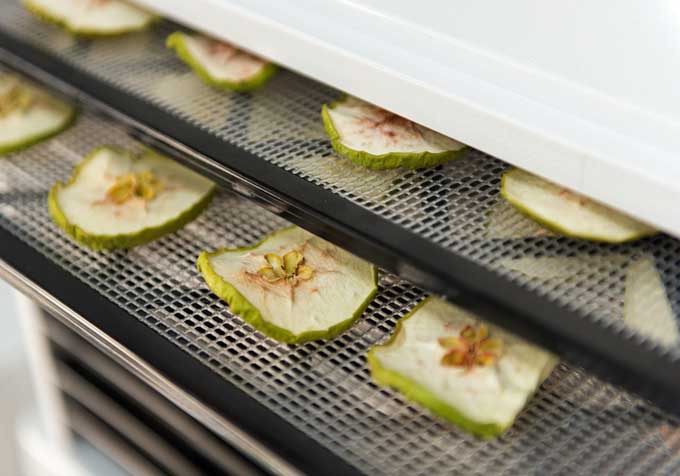
Also, drying food uses up electricity, and this machine will surely heat up your house. When you plan to use it, fill up all of your trays and turn it off as soon as everything is dry.
Drying food takes anywhere between four and 24 hours, so dry in batches. That way you’ll have a lot of food ready when you’re finished. It’s not worth a six-hour wait if you’re going to finish eating everything you made in less than 30 minutes.
#10 – Use a Timer
Since a lot of produce takes multiple hours to dry, use a timer. Some brands have them built in, others don’t. If yours doesn’t, you can buy a timer that your machine plugs into, so it will automatically shut off when time is up.
This is really helpful if you like to get set up to dry before bedtime, so it can run while you sleep. Or, if you start it in the morning and have to go to work, it can run while you’re away – and you won’t have to worry about rushing home to turn it off.
That being said, dried food can sit in a machine that is powered off for a few hours after it finishes without spoiling, so there’s no need to worry about storing what you’ve made right away.
#11 – Keep Your Home Safe While Drying
It’s really important that you pick the perfect spot to use your machine. It will get hot, and needs room to breathe.
You definitely don’t want anything directly above or behind it, and I suggest keeping it away from the cabinets. Your kitchen counter is fine, as long as there is space all around it.
Living in Southern California, I’m able to keep mine outside on the patio – that way it doesn’t heat up my house, and I don’t have to worry about putting it under my cabinets.
If you live in a warm, dry climate, using it outside might be a good option for you. Just keep critters and insects (especially ants) in mind, because it will really start to smell like food out there!
If you do use it outside, make sure you don’t store it outside – bugs and the weather will start to wear on it.
Fruit and Vegetable Drying Times
Use this as a guide. You may need to adjust the times based upon the juiciness and size of your produce, but this should give you a good starting point.
Remember, produce should be dried between 105-118°F to keep it raw.
Popular Fruits to Dry
- Apples (7-15 hours)
- Apricots (20-28 hours)
- Cherries (13-21 hours)
- Figs (20-25 hours)
- Peaches (8-16 hours)
- Pears (8-16 hours)
- Persimmons (10-19 hours)
- Strawberries (5-15 hours)
Popular Vegetables to Dry
- Asparagus (5-6 hours)
- Green Beans (6-12 hours)
- Beets (7-12 hours)
- Carrots (6-10 hours)
- Corn (6-10 hours)
- Eggplant (5-8 hours)
- Leafy Greens (3-7 hours)
- Mushrooms (3-7 hours)
- Onions (4-8 hours)
- Peas (4-8 hours)
- Peppers/Chili Peppers (4-8 hours)
- Potatoes (6-14 hours)
- Pumpkin/Winter Squash (8-11 hours)
- Summer Squash (10-14 hours)
- Tomatoes (5-9 hours)
- Yams (7-11 hours)
- Zucchini (6-11 hours)
And of course there’s the ever ubiquitous jerky, which can vary in drying times depending on the type of meat on thickness. But in general, beef jerky is usually finished in 8-10 hours.
Conclusion
Drying your food is a great way to enjoy seasonal produce all year long. In the process, you’ll discover that you save money, and improve your health too. When you enjoy fruits and vegetable at their peak, you gain the nutrients and flavor that imported varieties lack.
So get your self a good dehydrator and start preserving!
Once you start, I guarantee you’ll become addicted to drying and storing the wonderful foods you grow – I sure have!
If you have a question about something I didn’t cover, please leave it in the comments below and I’ll be happy to answer it.
First published January 27th, 2016. Last updated: January 1, 2020 at 21:35 pm.
About Sarah Hagstrom
Sarah is a health food advocate and loves to spend her time whipping up something healthy and delicious in the kitchen and then sharing either on Foodal or on her own blog "The Seasonal Diet" (www.theseasonaldiet.com). She lives in Sunny San Diego with her husband, where they enjoy running on the beach and weekend adventures.


We just bought my mother-in-law a dehydrator for Christmas. She absolutely loves it. I think I will need to bring some of my produce to her this summer. Our garden grew like crazy! I ended up composting more veggies than we ate. I had no idea that you could use dehydrated vegetables in a soup, or that dehydrating preserved the flavor. Great tips. I can’t wait to try this!
Wonderful, I hope you’ll give it a try!
So many great ideas here! I can’t even remember how long it’s been since I wanted to learn how to dehydrate food and it was just one of those things that I never got around to trying.
I am stunned at the amount of information in this article! I knew some of it, of course, but it’s so much more… things that I wouldn’t have thought of, and ideas that I’d love to try out.
Okay, I’m pretty well convinced that I would indeed enjoying doing this… I guess my next step is to follow the link to the article that helps us choose a machine… this is exciting for me! It’s so important that my family starts eating healthier and I have a feeling that this will be a huge step in the right direction.
Hi Kate. I’m glad you found this article helpful. And yes, I would recommend checking out this article: https://foodal.com/kitchen/kitchen-appliances/dehydrators/features-benefits-well-designed-food-dehydrators/
I’d love to know what you end up with:)
Some great tips here! I love dried fruits and tomatoes, but I don’t have a dehydrator. I have dried aples and pears before in the sun and it worked great, but only in summer. I had the problem once that the fruit wasn’t dried completely and I had to throw the batch away after mould was formed 🙁
Thanks for the tip about the lemon juice, it is easy and the fruit will look better if it doesn’t turn brow.
So glad you liked the article. I’ve used the sun a few times as well, and you’re right, it’s really hard to get everything all the way dry. Good Luck with the lemon juice.
I’ve had a food dehydrator for a few years now but I’ve never really used it for anything besides apples and apricots. It never crossed my mind that I can use it to dry my own herbs, I’m going to try that this week for sure…I always buy fresh parsley, basil, and cilantro at the grocery store and it’s such a waste because I never manage to use more than half of it before it starts to wilt!
Drying Herbs is the best, give it a shot!
Bookmarked and Pinned!! I have been waffling about buying a dehydrator because I’m from the Alton Brown school of “unitaskers are a waste of money”, but this just seems too good to pass up. We just bought our first house and are going to start gardening this spring. It’ll be great to have some soup mixes ready to go for those days where everything’s cold and the whole family is sick. Thank you!
Congratulations on your new home. Oh and you’ll love being able to dry all of your fresh veggies- good luck with your garden!
This is so informative! I’ve always wondered how to do this, especially as it seemed like something that should be relatively easy to do. It’s great that it conserves both the nutrients and flavour. Unfortunately, I don’t have a dehydrator at the moment, but I may think about purchasing one! I feel like this would be perfect encouragement to eat slightly healthier, especially as you can prep once and eat for many days after.
Hi Dana! It does make healthy eating easier. If you’re looking for a machine, be sure to check out the article mentioned above:)
This looks absolutely delicious! I love buying dried fruit chips and if I get a dehydrator it would definitely be so much cheaper :3 I never even noticed that you could dry vegetables as well, that’s an awesome tip for saving them when you can’t eat them all! Thanks for the tips 😀
No problem, Happy to help!
Hi, I am interested in finding the best food dehydrator currently on the market, also if anyone has recommendations on sun drying that would be awesome – The information on this site is amazing, thanks to all of you for sharing your photos, tips and ideas – U Rock!!!!
Hey There, I recommend checking out this article for the best machine https://foodal.com/kitchen/kitchen-appliances/dehydrators/features-benefits-well-designed-food-dehydrators/
As for sun drying, it can be rather difficult if you don’t live in a very hot climate. Like mentioned above, if the food doesn’t dry all the way you run the risk of it going rancid. If you live somewhere with 100+ temperatures and low humidity, you could give it a try. Depending on what you’re drying it will take between 2 and 4 days.
Hi Sarah, Thanks for the guide and great tips. I can’t eat bananas in their ripened state because I’m allergic to them, but I can eat them ripened though if they have been dried first, and they are delish! I don’t know what happens to the bananas when they are dried, but my body agrees with them, and is the only way I can have them.
Since buying dehydrated bananas can be pricey at times, learning how to make them at home has always called my attention. I really had no idea how it was done.
I know it sounds crazy, but for some weird reason I thought they were put out in the sun (pardon my ignorance). LOL I didn’t even know dehydrators existed.
Anyhow, quick question Sarah, if we don’t have a food dehydrator can we replicate the process in the oven? Thanks again for this great article.
Excellent guide! Mastering dehydration is the best way to make your own trail mixes. I used to have an actually food dehydrator, and it was okay, but you don’t really need one. I find it’s just as easy to put produce on a cookie sheet in the oven at a very low temp with oven door slightly cracked – works like a charm.
Since I’m currently cooking for one, this helps me out tremendously. Now I don’t have to worry about wasting food! The supermarkets here often have certain fruits and vegetables in pre-packaged quantities so it makes it hard to buy sometimes when I only want, say, 1 carrot, not 4. But, now I’m seeing that all I need is a dehydrator and I don’t have to worry about that. I’m also working on starting a garden, so when the produce starts rolling in, I don’t have to worry about any of that going to waste, either!
Thanks for this article! It has opened my eyes to a whole new world of possibilities with food! 😀
I’ve been looking into investing in a dehydrator to make sweet potato chips for my dogs as a more natural treat than the flour filled ones that they sell in stores. I have never really given much thought to dehydrating by food as well! Although I don’t grow much, due to a lack of space, I often over buy the amount of produce that I think we’ll go through, and end up having to freeze a lot of it. I never even had a spark of an idea to turn the leftovers into dried soup mix or dried herbs. Also drying leftover fruits would be amazing to add to my cereal and oatmeal in the morning. I also think I’d love the look of little dried fruits and vegetables lining my pantry shelves in mason jars. I’ll have to look more into getting one of those!
And yet again a splendidly timely article from Foodal! I bought a dehydrator towards the end of the last growing season, so haven’t used it much yet. I was successful with apples , especially when I was given a mandolin (slicer) which slices them really thinly. The mushrooms I tried weren’t quite dry enough – either that or the seal on my Mason jar wasn;t too good – and they went mouldy, so I’ll be sure to keep checking my dried produce this year to be sure it’s OK. Thanks very much for the list of suggested drying times too – very useful.
You are completely right that if you go to the store and buy dried food it will cost more. I have seen some dried bananas at the store that I wanted to try out but the price steers me away. The exact same thing goes for dried pineapple even though it is one of my favorite fruits. I bet dried foods don’t even take as much space as it did before drying.
I’ve been looking into ways to make preserves, and this is an amazingly thorough article – pinning it. I have a couple of questions though 🙂
What should I expect in terms of electricity use? Dried fruit and vegetables are indeed expensive, so making my own would save me money -provided using the machine won’t tip the scales. After all, mass producing things tends to be more cost effective. which is why so many things are no longer made at home. If it’s not expensive electricity wise, however, I’m definitely looking into getting a dehydrator!
Hello Sarah, I’m very interested in trying a variety of fruits to add to add to herbs and make my own spices. 1) What do you recommend for drying time for mango and pineapple and 2) Is it better to slice the fruit and dry it or put the fruit in a blender and then place it on a tray and dry it?
These sound like some delicious ideas, Doreen!
First, recommended timing on the tropical fruits that you’ve suggested largely depends on how large you’ll be slicing them, as well as the equipment that you’ll be using since processing temps can vary. In all cases, it’s better to keep an eye on the fruit and remove smaller pieces when they are ready to avoid overdrying. For slices, 12-16 hours at 135 degrees is the general recommendation for both fruits.
As for blending, this is a great way to make fruit leather. But processing the fruit puree on its own might yield mixed results, especially for the high-fiber produce that you have in mind. Add lemon juice and the sweetener of your choice, and you’re good to go!
Hi Sarah!
I have a question for you:
I have been dehydrating food from my garden and from local organic farms for a year and a half now. I never know when the products are dry enough. I see that you tell us that they may look like leather (tomatoes). I always over-dehydrate fruits or vegetables because I fear that some moisture has remained. However, it helps me a lot to see each and every one of the tips you give us. I just want to be sure when they are already enough dry, but not too dry and I want to understand when I can leave them with some softness (like leather) and no danger of moisture.
Great question, Mar. Dehydrating to the correct level can certainly feel like a bit of an experiment!
A few tips to avoid over-drying your fruits and vegetables are to make sure the pieces that you put onto the trays don’t have any overlap (to allow for proper air circulation), don’t use a heat setting that’s higher than you need, and as you mentioned- don’t dry them for too long.
Fat, a high sugar content, and high humidity can all lead to the need for longer drying times. Taste and check the texture of whatever you’re drying as you go, and aim to follow the recommended drying times for whatever you’re processing, while keeping the overall humidity and conditions in your kitchen in mind as well. Since one piece of produce might contain more moisture than another, and the climate and weather can change throughout the year, what works on one day might not work exactly the same on another. Over-dried produce will begin to burn, resulting in an unpleasant taste and texture.
In addition to tasting and observing visual queues (such as shrinkage and a leather-like appearance), most fruits will dry to a pliable texture. To determine if they’re done, press a piece firmly with your finger- if your finger comes away wet or you see moisture beading on the surface, it isn’t done yet. Vegetables and herbs have a lower sugar content, and will typically dry to a more firm, crisp texture.
If you’re happy with the taste and texture of whatever you’ve dried overall but you’re still concerned that some moisture may remain, consider freezing what you’ve made for storage rather than keeping it at room temperature.
My banana slices stick to my dehydrator shelves – do you have any idea why this happens? Thanks!
Certain foods tend to stick to dehydrator trays, and this is not an uncommon problem. As for why they’re sticking, are you cutting the bananas very thin, or coating them in any added sweeteners like honey or maple syrup? Both of these things can cause them to stick.
To prevent sticking, you can line your trays with a piece of parchment paper, and they should pop right off when drying is complete. A light spray of cooking oil can also help. Some brands of dehydrators actually have custom tray liners available that are reusable and that will prevent sticking. Finally, make sure your slices aren’t too thin, and leave plenty of space between each piece. Try turning them occasionally during the drying process. Hope this helps!
This is just one more valuable skill to add to our “tool boxes”. We need to have the mindset that our grandparents and great grandparents had, and that is to preserve what we harvest from our gardens or buy. Waste nothing and always be prepared and self-sufficient.
Lindo día!!! Estoy haciendo merengues ( suspiros) pero aunque quedan secos por dentro, por fuera quedan muy húmedos y pegajosos, podrían ayudarme diciéndome cómo lograr que también salgan secos por fuera igual que por dentro??? Muchas gracias.
Meringues will become sticky on the outside when there’s a lot of moisture in the air. See our guide to mastering the perfect meringue for tips. Buena suerte!