We occasionally link to goods offered by vendors to help the reader find relevant products. Some of these may be affiliate based, meaning we earn small commissions (at no additional cost to you) if items are purchased. Here is more about what we do.
If you’ve always thought canning your own produce would be difficult, labor intensive, time-consuming, and require a lot of expensive equipment you don’t have in your kitchen, well, I used to think the same thing.
But I also thought it would be really wonderful to buy fresh, local produce in season and preserve it for the winter.
I could save money and have better tasting food than I could buy at the supermarket. Plus, it would be better for my health and for the environment.
This summer I decided to give water bath canning a try and I discovered it’s really not that hard. I was also able to do it using mostly supplies already in my kitchen; I only had to buy a few things. If you’re interested in giving it a try, here’s how I do it.
It really is easy.
To start with, you’ll need a few supplies.
Canning jars with rims and lids. You can purchase canning jars of various sizes, including pint-sized (two cups) and quart-sized (four cups). You can purchase new jars and they aren’t too expensive, but you can sometimes find them at yard sales or on Craig’s List for even less.
You can use used jars and rims, as long as they appear to be in good condition, but you need to use new lids every time because used lids may not seal properly and then your food will spoil.
You can purchase new lids separately if needed. Never try to reuse old glass jars like mayonnaise jars or applesauce jars for canning, because they are unlikely to seal properly.
A really big pot with a lid. You can purchase a water bath canner fairly inexpensively (less than $40, probably), but you can also just use a big stock pot with a lid, which is what I use. It just needs to be big enough that when you put the jars in the pot, you can completely cover them with water.
You really don’t need a pressure canner for this method.
A jar lifter. This is one piece of equipment I really recommend you purchase. It’s a simple tool that you use to grip jars and lift them out of boiling water.
I guess you could just use regular tongs you might have in your kitchen, but they won’t grip the jars as firmly and if you drop one, you risk breaking it, making a mess, and cutting or burning yourself. I bought a jar lifter on Amazon quite affordably.
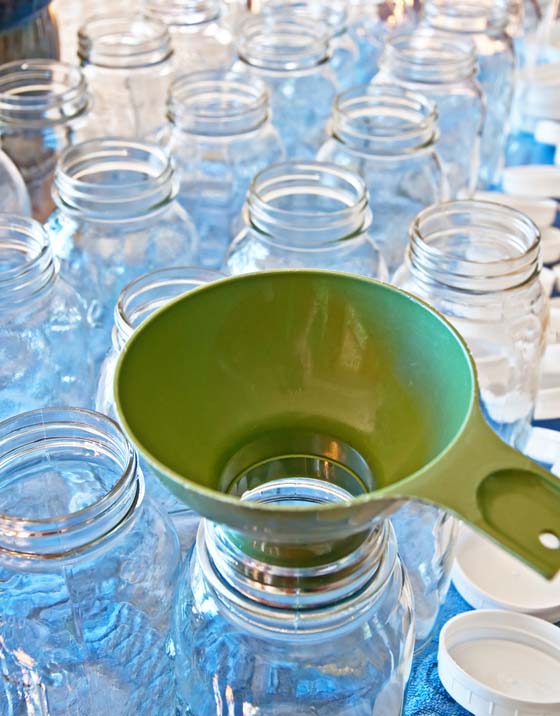
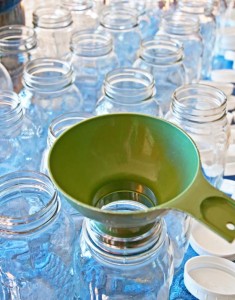
A wide-mouthed funnel. If you don’t have one of these, you can still can stuff. It will make filling the jars a lot easier and less messy, though. I bought an inexpensive one on Amazon and it was definitely worth the investment.
A ladle or measuring cup. You need something to use to scoop the food into the jars.
Now that you have your supplies, you’re ready to get started. Prepare the fruits, vegetables, salsa, tomato sauce, whatever it is you’re going to can.
Prepare your jars, lids, and rims by sterilizing them (by boiling them) for about 10 minutes.
Remove them from the boiling water and place them on a clean dish towel. If you have a dishwasher, you can sterilize them by just running them through a cycle in the dishwasher.
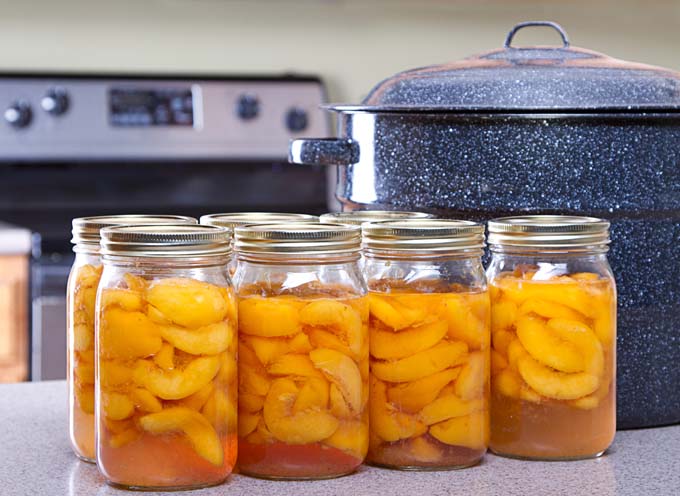
 Now you’re ready to fill the jars. Place your funnel on top of a jar and use the ladle or measuring cup to fill the jar with food. Leave about half an inch of space at the top of the jar, known as “head room.”
If you’re following a specific recipe, such as for making and canning salsa, the recipe should specify how much head room to leave.
Run a butter knife around the inside of the rims of the jars, to make sure the contents of the jar settle.
Use a clean cloth to wipe the tops of the rims of the jars to make sure no traces of food or moisture remain that could prevent the lids from sealing properly.
Put lids and rims on the jars. Tighten the rims, but not as tight as you can make them. Tighten them just enough to secure them. This is sometimes referred to as “fingertip tight.”
Put the jars in the big pot. You can put as many jars in the pot as will fit comfortably, but the jars should not be touching. Leave a little bit of space between them. Fill the pot with water until the water covers the tops of the jars by an inch or two. Make sure the tops of the jars are completely covered.
Bring the water to a boil. Once it boils, put the lid on the pot and boil for about 15 minutes. If you’re following a specific recipe, such as for making salsa, the recipe should specify exactly how long you need to boil the jars.
Turn off the burner under your pot. Spread a clean dish towel on your kitchen counter. Using your jar lifter, carefully lift the jars out of the boiling water.
Place the jars on the towel, leaving a couple inches between jars. Make sure they are not touching each other. Let the jars cool for at least eight hours. Leave them alone during that time.
When the jars are cool, check to make sure the lids are properly sealed. To do this, use your index finger and push firmly on the center of the lids. You should not hear any noise and the lid should not move up and down at all.
If a lid appears to not be properly sealed, you can refrigerate the jar and eat the food in the next week or so. Never boil a jar a second time in order to try to get the lid to seal properly.
Label the jars and store them in a cool, dry place. If food ever looks, smells, or tastes odd in any way when you open a jar, don’t eat it.
About Lynne Jaques
Lynne is a stay-at-home mother of two boys. As a former US military officer and the spouse of an active duty US military member, Lynne enjoys traveling the world (although not the moving part!) and finding new cuisine and methods of preparing food. She also has the habit of using parenthesis way too much!

I love canning and I really feel like a homemaker when I can fruit and veggies for my family. And I love to receive it as a gift, the canned fruit.
You’re right Kael, receiving or giving as gifts is an awesome idea and always kindly received.
I procure most of my jars from products I have bought and used,
I’ve never done this before honestly, but this post really makes me wanna try it. You make it seem so easy.
I didn’t realize that water bath canning is so easy and not too complicated to follow. The steps are basic, fantastic and easy to understand. It gives me confidence after viewing your article. Now, I would wanted to try pineapple and strawberries. Wish me luck!
This year was actually the first year that I planted too much in my garden. I will definitely be canning next year. Thank yo for the tips! I have really great memories of my grandmother’s cellar of canned goods and I want to recreate them for my family. I hope I am successful, wish me luck!!
I really like the idea of canning, I just don’t like all of the work, even this modified version seems a bit much for me. My mom used to can all of the time when I was little, so I grew up watching the whole process and I have a certain fondness for it. Maybe I’ll try this canning made easy just to see how easy I find it.
I have been interested in canning for a long time now because the price of fruits and vegetables at the grocery store at this time of the year is ridiculous and I can’t afford to do it much longer really. I am going to try this out in the summer for the winter and am very excited after reading this easy recipe/way! Maybe it isn’t so scary after all! 🙂
I taught my nephews how to can pickles and jam. It was so much fun, and it gave them a greater appreciation for the food they put into their bodies. They also gain confidence in their abilities to cook and create things from scratch. I have yet to can fruits and tomatoes, the latter of which I grow in my garden each summer. You have to be really careful, I think, when canning tomatoes.
Wow, this is really cool. I definitely need to try this. I’m assuming that you can do this with pretty much any kind of food, so where do I even start?
I think this is possibly one of the most useful things I’ve learnt on the internet to date… Whoa.
I’ve always been concerned about canning. This article dissuaded my concerns a tad. I get a little paranoid when pickling as well. I’m just concerned (sometimes without warrant) about botulism & other bacteria style issues.
Joan, there is really no concern about botulism with acidic foods – just be sure to follow USDA canning guidelines (or your country’s equivalent) and you should be good to go. I grew up with canned food and never ever got food poising from it or in the least bit sick. Popeye’s Chicken? Yes. Burger King? Yes. Home canned food? No.
On a side note, if you ever get food poisoning you will know it. You’ll wonder when your going to die and hoping for it to happen soon. The bad part (and I mean really bad) doesn’t usually last that long…1 to 3 hours. Chills and fevers continue for the next 8 hours or so.
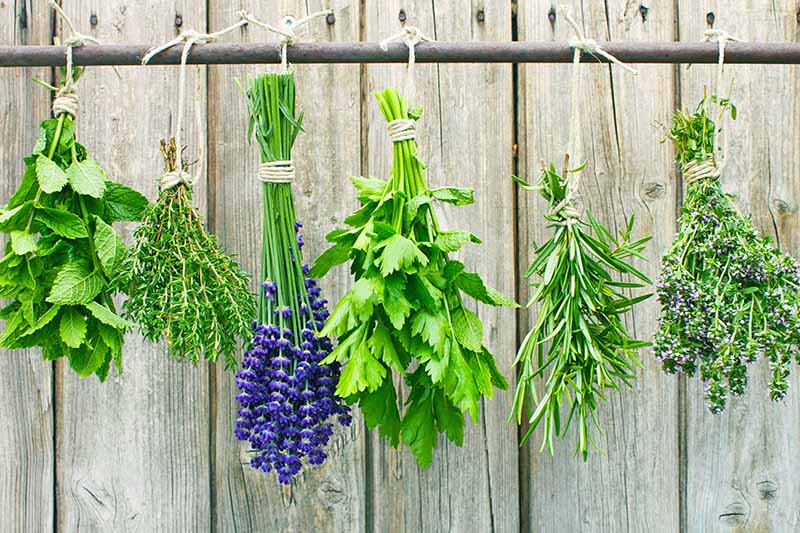
Canning fruits like this is almost unheard of in the UK. Some people preserve excess fruits in syrup, in sterile jars, similar to the ones opictured in this article. Canning seems like an excellent idea though and certainly seems more healthier than buying tinned goods and preserves from the store.
Water canning is my favorite method. It is the simplest and quickest way to do a large amount at one time. We use our large stock pot and lid. Most of our jars were purchased used at yard sales and flea markets, but even when we had to buy them brand new they were not overly expensive. Once you get a good stash of jars and lids you can keep re using them after you have finished the contents.
I’ve always wanted to try this…does anyone know how canning this way affects the nutrition of the foods? Even if some nutrients are lost, having my own canned summer fruits or salsas would certainly be a boost.
I freeze berries and kale, but I’m not sure freezing salsa would work as well as canning. Anyone have an opinion?
I was just talking about this with a friend a couple of days ago. She recommended buying a pressure canner, but I think it is also possible like this. Thank you for the detailed explanation. My friend is worried about the temperature control if you use a simple big pot, could we use a thermometer to check the temperature while canning?
Great post! I’ve done some canning in the past when the wild apple trees at the camp I was working at produced more apples than I (and the horses) knew what to do with, so I made a few batches of applesauce. However, I just used old jelly jars and they actually did seal back up properly, so I think I got lucky.
I’m expecting to have a good harvest of Roma tomatoes pretty soon, so I’ll be buying some canning jars and trying to make my own sauce. Since it’s been a while since my previous canning adventures, I wanted to make sure I knew what I was doing. This post was super encouraging that I don’t need to worry about getting fancy equipment to can my tomato sauce, so all I really need to pick up are some jars! 😀
I’ve got a spin on this for the folks here with kids young enough to drink formula.
My mother and dad both learned how to can when they were kids. When I was born, I couldn’t breastfeed, and had to drink store bought formula but it was terribly inconvenient to mix on demand.
My dad would save glass bottles with metal lids, mix up the formula, and then ‘can’ it in large batches. The kind of glass bottles that had a fitting nipple, I mean. He’s still proud of how much time that saved him then, and always made note of how anyone that saw them begged to know where to buy them. It’s a pretty handy trick, and will allow you to practice canning without having a garden of your own.
Wow, I’ve never heard of water bath canning. Reading this article makes me want to try canning this year. It looks like we’re going to have a good crop of tomatoes, so i think I’ll try this method of canning. Our blackberry bushes are flooded with berries and there are also some wild blackberry bushes behind the house. I hate to see any of the berries go to waste. I may try canning some of these too. My mom used to can with a pressure canner when we were kids, but those things scare me. That’s why I’ve never had an interest in canning. I’m excited about it now. Thanks!
I feel really silly now – my mom and I have always enjoyed making pickled onions and sometimes apricot jam back in the days when we had an over-achieving apricot tree that used to produce tons and tons of fruit, and to preserve them we would follow my grandmother’s method of sterilizing the jars in a hot oven. It had never occurred to me that we could simply boil the jars or – gasp! run them through the dishwasher… Thanks for turning on the light and for all the great tips too! I think we’ll give the next batch a go by boiling the jars fresh out of the dishwasher just to be safe. Thank you!