
We occasionally link to goods offered by vendors to help the reader find relevant products. Some of these may be affiliate based, meaning we earn small commissions (at no additional cost to you) if items are purchased. Here is more about what we do.
I wouldn’t call myself a hoarder.

I mean, at least I’m not as intense as my mother, with her 30+ nativity sets, or her large mystery bins in the attic each filled with a chaotic mess of travel-sized toiletries.
But when it comes to kitchen equipment and attachments…
I want them all. All of them. Every. Single. One.
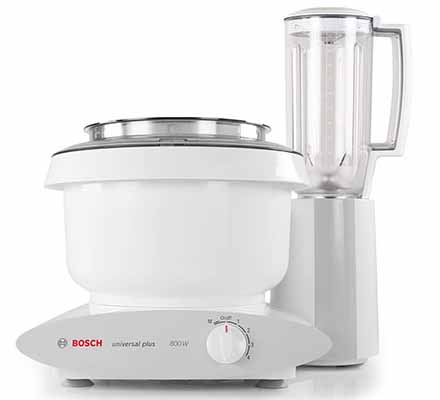
In my earlier review of the Bosch Universal Plus Mixer, I was very enthusiastic with the basic accessories that come included with this brand of high-powered mixer, like the wire whips, dough hook, and dough hook extender.
While the accessories that are already included with this purchase are a solid start to a range of baking prep needs, there are so many additional options to buy and use beyond just baking.
With attachments like a food processor, cheese grater, pasta maker, ice cream maker, citrus juicer, and much more, Bosch is a reliable source for limitless kitchen prep tasks.
Bring on the whosits and whatsits galore – you’ll love this do-everything mixer!
In this review, I will provide you with a thorough round up of all of the available attachments you can purchase to use exclusively on the Bosch Universal Plus Mixer. I will also give you assembly procedures, advice, warnings, and triumphs from my own experience of testing some of these attachments.
Sometimes, especially with Bosch, more is better!
Bosch Universal Plus Mixer Attachments Review
We’ll start of by reviewing the whips and paddles attachments you can use with the main Bosch Universal Plus Mixing Bowl.
Whips and Paddles
The Bosch Universal Plus Mixer comes included with a plastic drive, wire whips, dough hook, and dough hook extender. This is a great start, but you can go even further down the baking and pastry rabbit hole with the following attachments you can purchase separately. Bosch has created whips and paddles methodically designed for cookie doughs and cake batters. Take a closer look now:
Metal Whip Drive
Similar to the plastic drive included with the Bosch Universal Plus in overall design, the metal drive is used as the attachment base for the cookie and cake paddles.
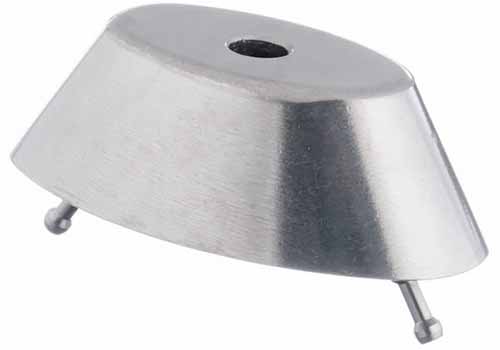
Metal Whip Drive, available from Bosch
It weighs about 5 ounces, a few ounces more than the plastic drive.
The paddles firmly attach to two metal prods that protrude in opposite angled directions from the base of the metal drive.
The metal drive and the cookie and cake paddles are specifically designed to mix heavier/thicker doughs and batters that should not be mixed together by the lighter plastic drive and whisks.
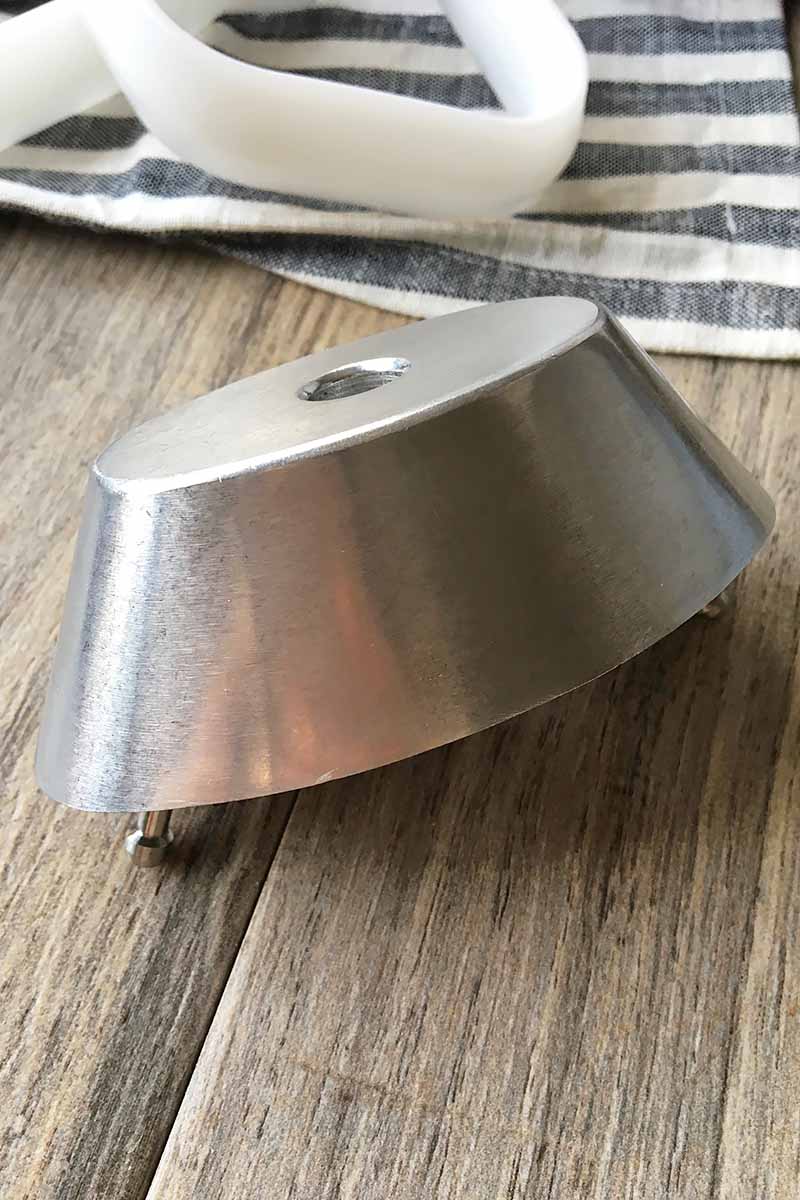
The metal drive firmly attaches to the center driveshaft of the mixing bowl. It should be washed by hand to prevent corrosion.
Bowl Scraper
Not making too many big batches to feed a crowd? The bowl scraper will be your go-to accessory.
If you don’t need to make pounds upon pounds of batter or frosting all the time when you’re baking, Bosch is still a cool option for a machine, especially with this cool attachment.
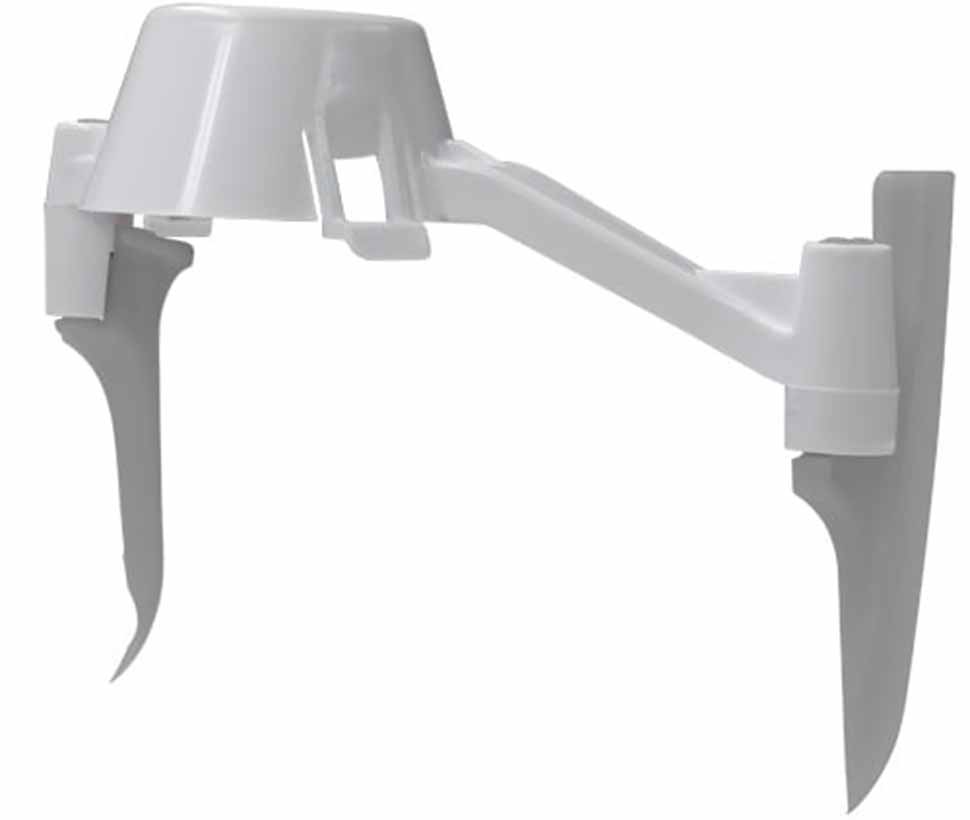
Bowl Scraper, available from Bosch
The bowl scraper includes the plastic scraper blade base driver, one set of plastic scraper blades, and another set of scraper blades as a spare.
It snaps onto the top of your metal or plastic whip drive along with the cookie paddle, whip or batter whisk attachment. With the two scraper blades, the bowl scraper scrapes both the inner post and sides of bowl while the bowl turns. It will continuously mix the bowl as the motor is running.
I’ve used it for batters and doughs, and it does a semi-decent job of scraping the bottom and side. I wouldn’t call it perfect or thorough, however.
There still is unmixed product on the bottom that needed one final, firm scrape from my own spatula. Perhaps if it was a better, more durable material, rather than being a super thin and lightweight plastic, it would work a little better.
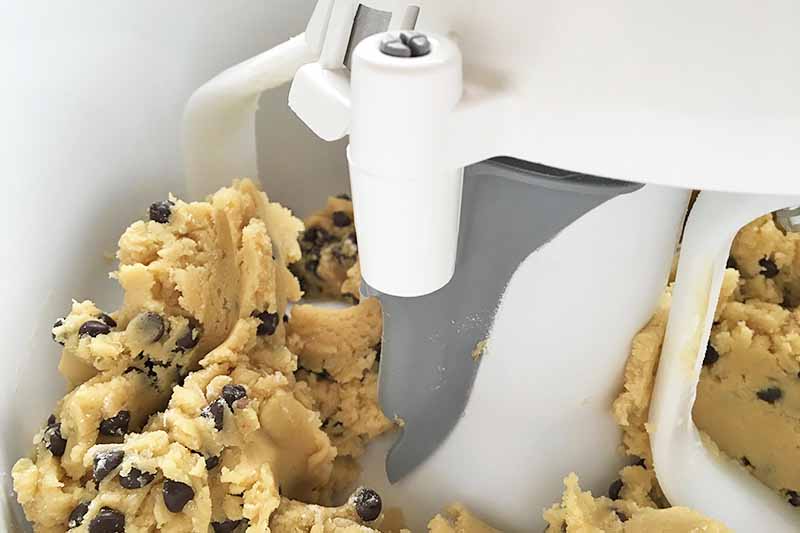
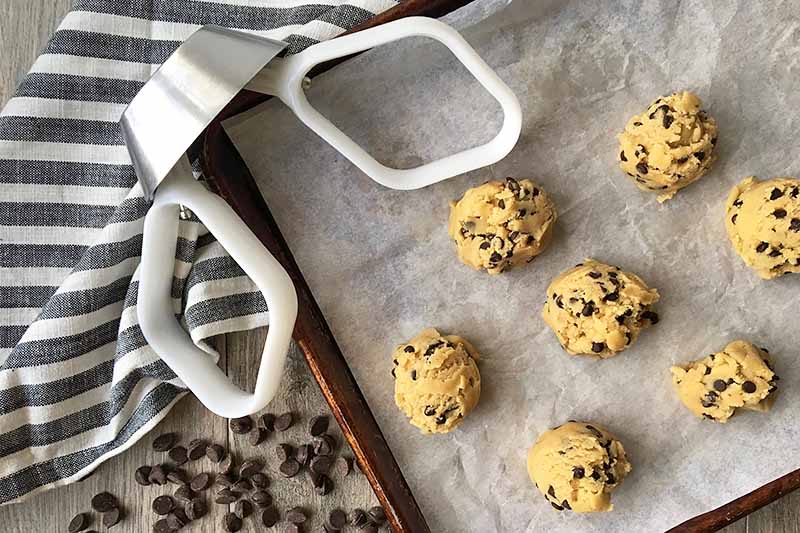
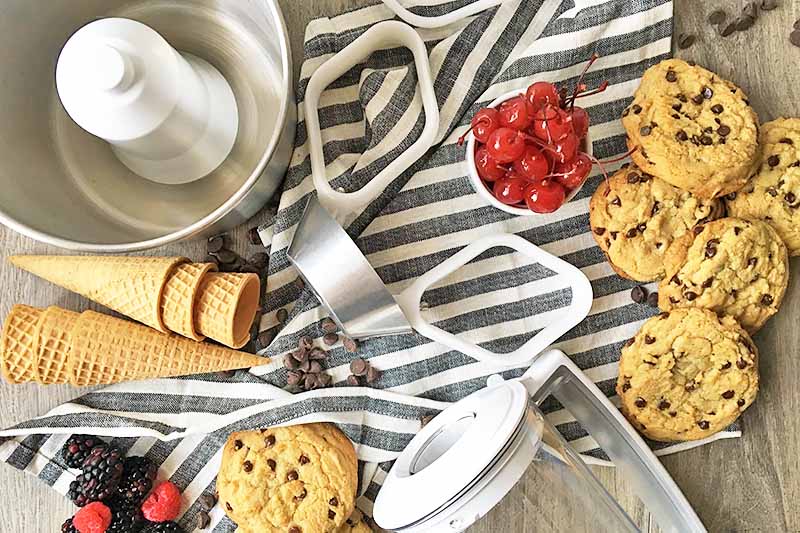
Universal Cookie Paddles
The dual cookie paddles work well with thicker doughs, like frostings and cookie dough.
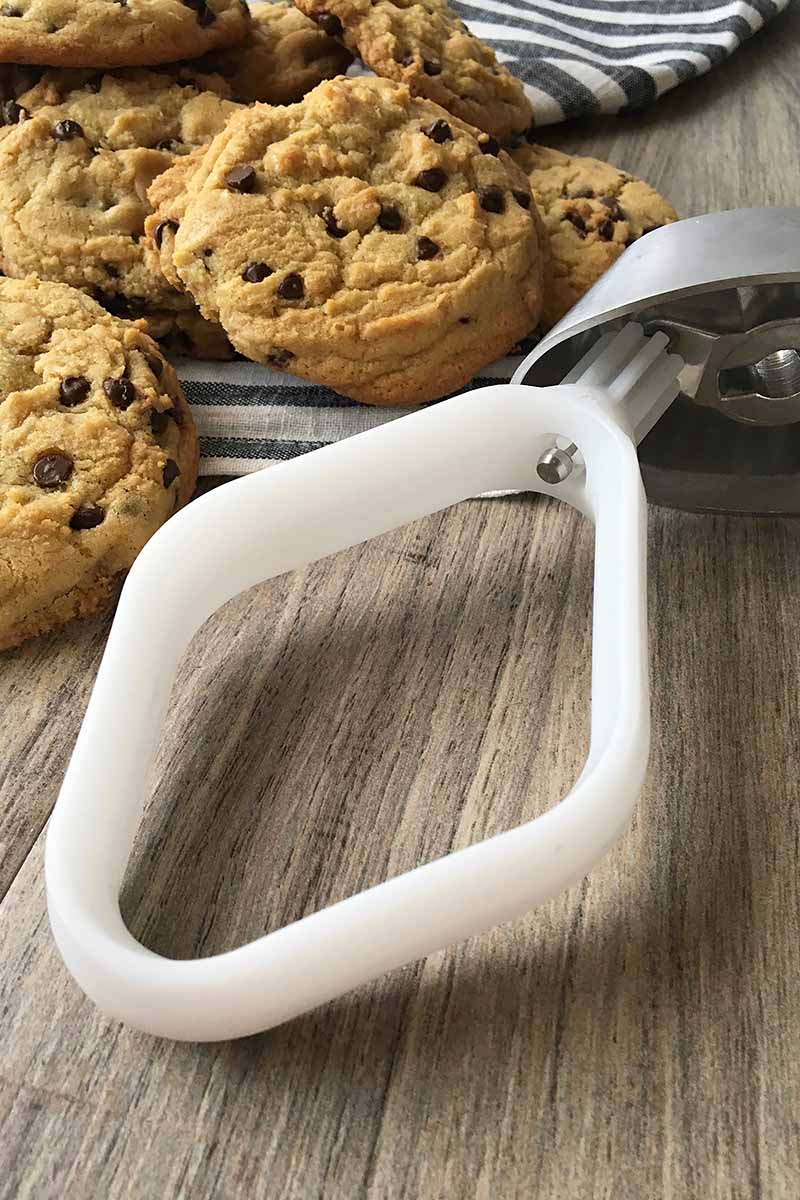
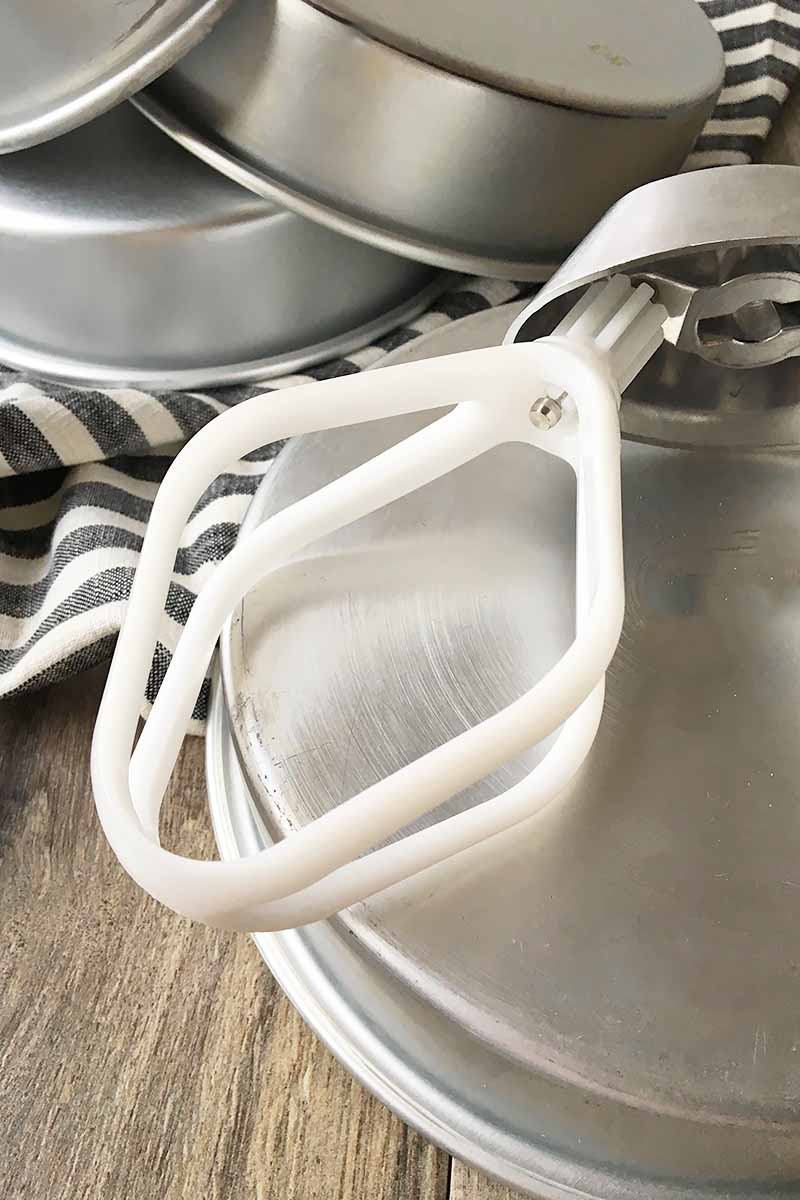
With thick white plastic and a narrow diamond-shaped design, these cookie paddles will be your go-to attachment for your favorite cookie doughs.
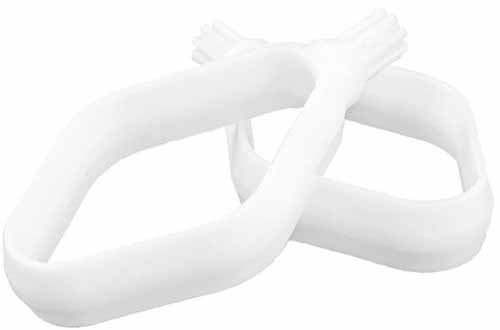
Cookie Paddles, available from Bosch
You also have the option of purchasing a combo of the cookie paddles and the metal drive.
Cake Paddles
The dual cake paddles are great for frosting, pourable batters for cake, as well as quick bread batters for muffins and sweet breads like banana, pumpkin, and zucchini.
They are a diamond-shaped design with four thick plastic tines. The fewer tines, compared to the wire whips, help thoroughly mix pourable batters or light mixtures without incorporating too much air.
This makes it ideal for cakes, quick breads, muffins, and pancakes, which can become tough and chewy if mixed too much.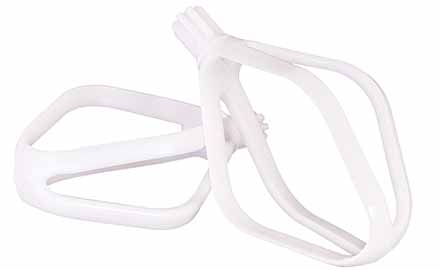
Cake Paddles, available from Bosch
You also have the option of purchasing a combo of the cake paddles and the metal drive.
The Baker’s Package
For all you bakers who like a good deal, consider purchasing the Baker’s Package!
It includes the following items:
- Bowl Scraper
- Cookie Paddles
- Cake Paddles
- Metal Whip Drive
More bang for your buck, and more cookies and cakes to make!
Whips and paddles: check. Let’s take a look at the other attachments you can use with the Bosch Universal Plus motor base.
As explained in my original review, the motor base features dual drives – two attachment points used for different purposes. In the next section, I’ll review the attachments used on the main drive.
Return to the Table of Contents
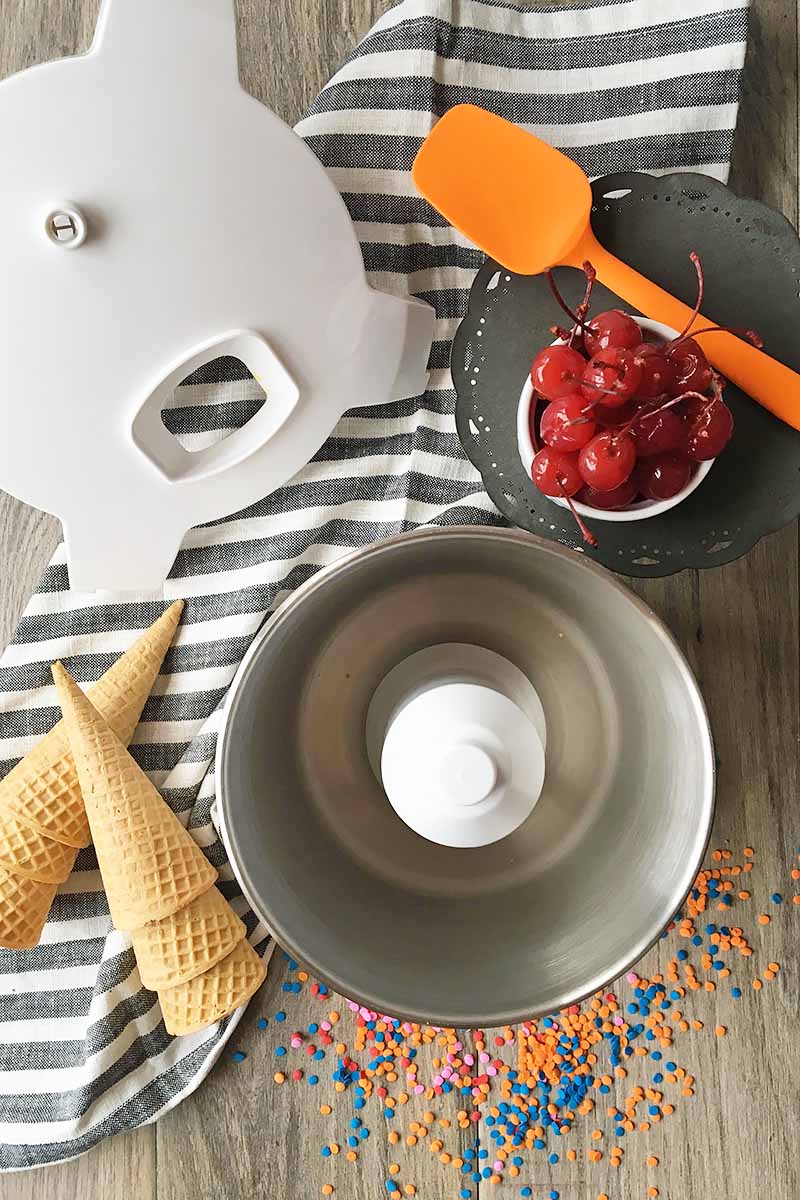
Ice Cream Maker
Making ice cream? On your mixer? When it comes to making homemade desserts, Bosch has thought of everything.

With the brand’s Universal Ice Cream Maker Attachment, you can freeze ice cream in less than 30 minutes. Unlike most ice cream makers, you do not have to freeze the canister overnight. Instead, you use ice cubes to freeze your ice cream base. You can make up to 1.5 quarts of ice cream per batch.
Here’s what is included with this purchase:
- Plastic cover with detachable plastic stir stick
- Churn canister
- Rubber spatula
To assemble, place the large Bosch Universal Plus mixing bowl in the center driveshaft of the motor base. Pour your ice cream base from a chosen recipe into the churn canister. Lock the churn canister in the center driveshaft of the large mixing bowl. Place the plastic cover with stir stick over the bowl, locking it into place.
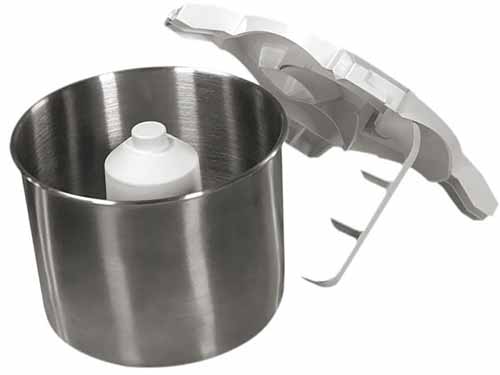
Ice Cream Maker, available from Bosch
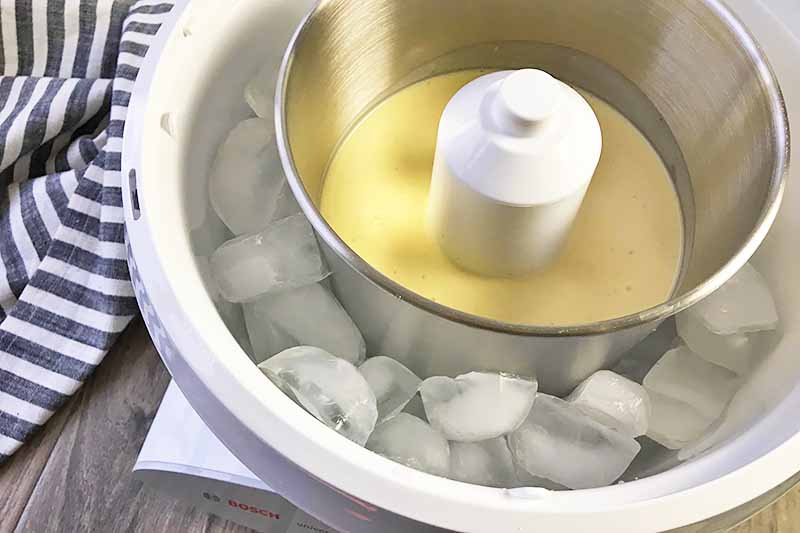
Add cubed ice around the canister to fill the large mixing bowl. Salt the ice generously, using large granular salt, like ice cream salt or rock salt.
Turn the mixer onto Speed 2 for about 20-30 minutes, until you reach your desired frozen consistency. Continue to add more ice as necessary.
Serve immediately, or store in the freezer to continue to stiffen the ice cream.
But wait! Before you mix your first batch of ice cream, take heed of my personal woes:
The instruction manual provided with the ice cream maker does not specify how much ice you will need, though there is an instruction indicating that you may need to fill the bowl with more ice cubes as it is churning.
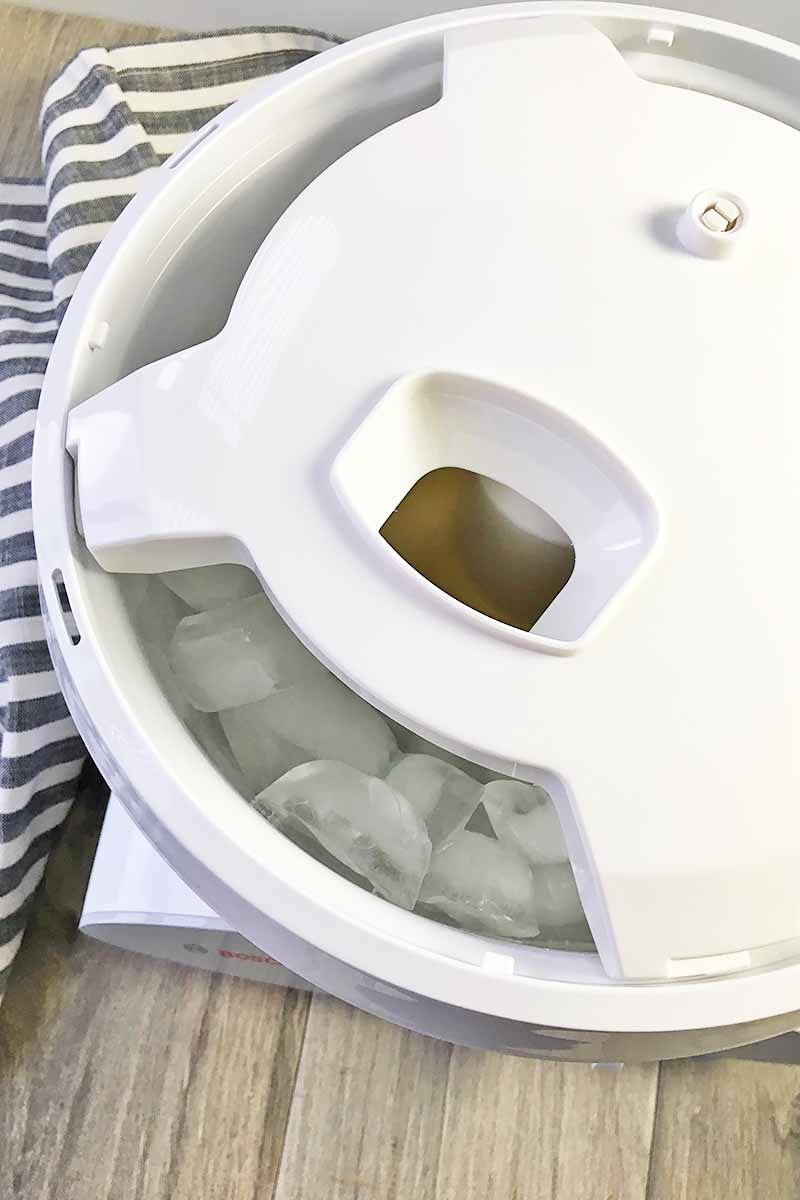
Like many home cooks, I only have two ice cube trays. So that’s all I used for the test round, out of curiosity to see if it would be enough to last through the 20-30 minutes of churn time.
Nah.
My ice was already half-melted midway through churning. And in the end, my ice cream was still a liquid mess.

The goal is to keep the bowl as cold as possible as it churns so the ice cream freezes quickly. This can only be achieved by having enough ice cubes to always reach 3/4 of the way up the bowl at all times.
I estimate that you will need at least 6-8 trays of ice cubes to last through the entire length of time needed to churn.
So make sure you prep and freeze all the ice that’s needed beforehand!
Slicer Shredder
Despite attending culinary school, my knife cutting skills are still mediocre. It’s been a few years since I’ve had to worry about the perfect julienne cut, or having every single slice of potato cut exactly the same size. And many of my friends who aren’t professional cooks don’t really enjoy the time it takes to prep their ingredients for recipes.
Slicer Shredder, available from Bosch
So finding shortcuts to slicing a larger quantity of veggies has always been a personal mission of mine.
Bosch’s Universal Series Slicer Shredder is the attachment we all need!
The 12-cup capacity clear plastic bowl comes with a metal disk holder piece, a lid with a funnel, a tamper, and 3 different styles of disks:
- Shredding
- Slicing
- French Fry Cutter
You also have the option of purchasing a julienne disk separately.
The shredding disk is reversible for coarse or fine shreds (perfect for shredding cheese!), and the slicing disk is reversible for thick or thin slices. You can use the French fry disk to make all kinds of veggie fries like potatoes, sweet potatoes, and zucchini.
Wish I had this in culinary school…
To assemble, place the slicer shredder plastic bowl on the center driveshaft of the motor base. Choose what disk you want to use, and place it on top of the metal disk holder piece before securing these two pieces on top of the middle drive in the bowl. Place the lid on top and lock it in place.
At this point, you can slice, shred, or cut French fries with your chosen food item. Be sure to cut the vegetable to size so it easily fits down the funnel. Use the tamper tool to push it down.
To clean, you can clean the stainless steel disks in the dishwasher. The plastic bowl and lid can also be put in the dishwasher. However, you will need to remove the middle driveshaft from the bowl before placing in the dishwasher.
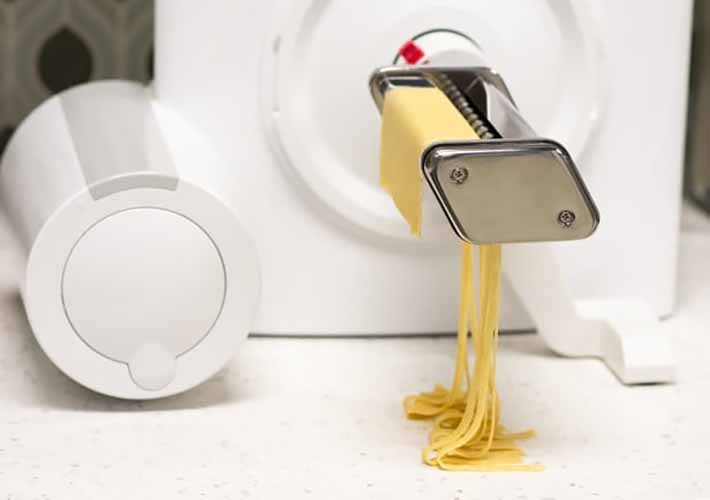
Pasta Maker
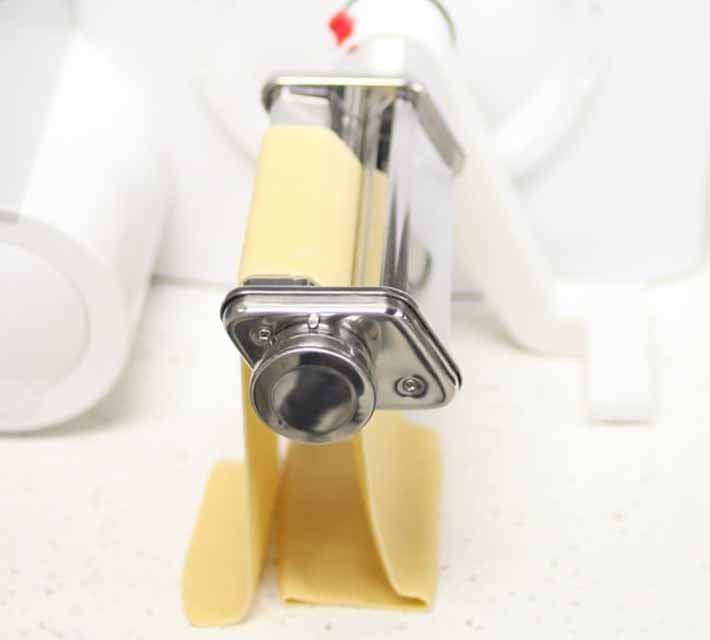
The Universal Pasta Set for the Bosch Universal Plus will give you all the basics you need to make fresh pasta at home.
The set includes the following:
- Pasta roller
- Fettuccine cutter (6.25 mm)
- Angel hair cutter (1.6 mm)
- Adapter leg
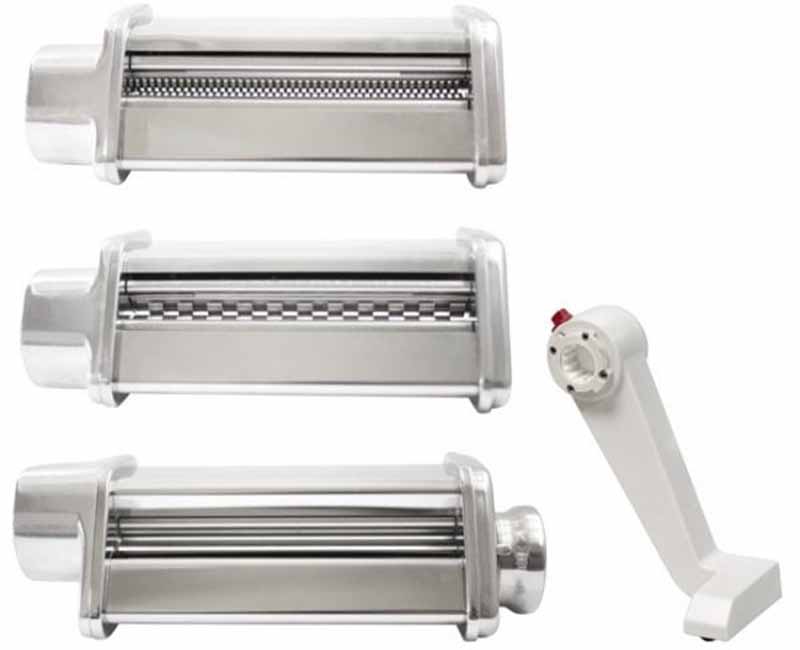
Pasta Maker, available from Bosch
To assemble, lock the adapter leg into the center driveshaft of the motor base. Then, tightly screw the roller or cutters into the leg.
Once everything is tightly secured, turn the entire motorbase onto its side, so that the roller is parallel to the counter and the small extender on the adapter leg is resting firmly on the counter.
Don’t limit yourself to just making pasta! Use the pasta roller for rolling out crackers dough, fondants, and wonton wrappers.
I recommend washing all of the pieces by hand and drying immediately.
Meat Grinder
If you’ve ever wanted to start grinding your own meat right at home, The Universal Meat Grinder is a super useful and versatile tool to own.
The grinder includes the following pieces:
- Grinder base
- Auger
- 4-blade circular knife
- 4.5 mm disk
- Threading ring
- White plastic filler tray
- White plastic tamper
The 4.5mm disk and a 4-blade circular knife helps grind the meat finely and uniformly.
To assemble, place the auger inside the hollow insert of the metal grinder base. Insert the 4-blade knife over the auger, then place the 4.5 mm disk over the knife. Screw the threading ring over the assembled pieces to secure everything in place. Insert the grinder base directly into the center driveshaft of the motor base, with the “leg” of the grinder facing away from the dial. Press the lever on the grinder base down to lock the grinder to the motor.
The next part of the assembly process is topsy-turvy. Literally!
Turn the motor base on its side, with the speed dial facing up. It’s true! Do it!
The bottom leg of the grinder should now be touching the counter, keeping the grinder firm and steady on the counter. Place the plastic filler tube on top of the grinder.
Assembly complete!
With the plastic filler attached to the grinder and the tamper in place on top, the entire tool is 17 inches in height, and weighs close to three pounds.
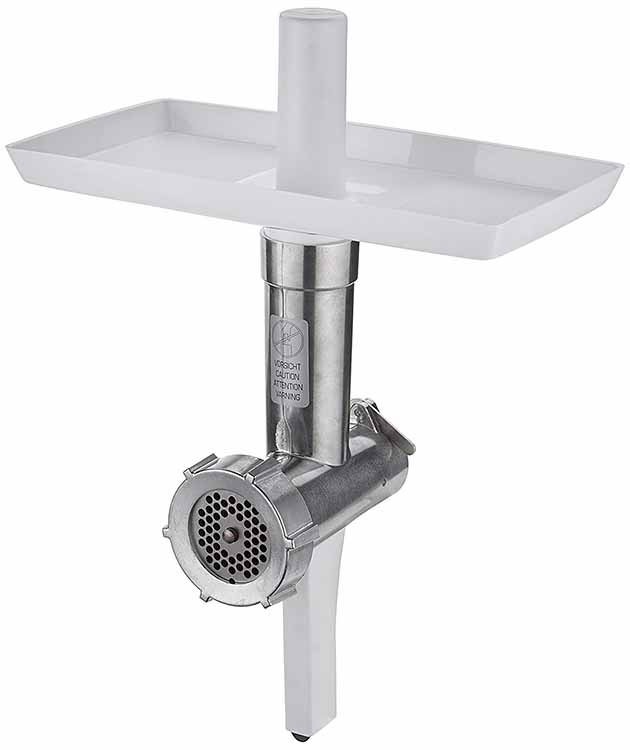
Meat Grinder, available from Bosch
One of the main complaints I’ve read regarding this attachment is that it does not feel as secure as it could be when it use – it moves, shakes, and wobbles as the meat is being ground.
To ensure that you are using this attachment as safely and effectively as possible, I recommend chopping your meat into smaller pieces, and to maintain a firm hold on the motor base as you are grinding.
I definitely suggest washing the aluminum alloy grinder by hand rather than in the dishwasher. All of those little holes won’t get properly cleaned out in the dishwasher! Use a soft dish sponge and dish detergent, and be sure to thoroughly dry afterwards.
Grinding meat is not the only task this particular attachment can do! With separately sold pieces, you can use the grinder as a berry press, noodle maker, pastry press, and cheese grater.
Take a closer look at this attachments within attachments:
Berry Press
The 800-watt, 7.5-inch Universal Berry Press quickly purees small fruits and berries and small, softer vegetables like cooked tomatoes and spinach.
Ideal for pureeing berries, apples, and pears, it’s a useful tool to have if you like to make homemade jellies and applesauce.
While Bosch uses the term “juice,” on the website, please note that this is not a juicer. Though the skins and seeds will be separated, most of the pulp remains along with the juice. You can squeeze the pulp to extract more of the juice, or use a strainer to thoroughly remove the pulp.
Made of rugged plastic with a stainless-steel cone drive, the press disassembles easily for cleaning.
Alright. Assembly. Like with the meat grinder itself, it can be confusing at first, but Bosch provides helpful charts to walk you through the process.
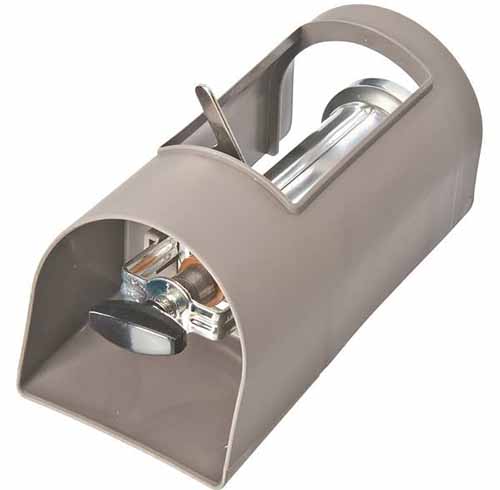
Berry Press, available from Bosch
The press, weighing about 1.5 pounds, is made of 4 separate parts:
- Auger
- Pressure plate
- Adjusting screw
- Splash cover
The press attaches on the front section of the meat grinder. You will need to remove the grinder’s threading ring, 4.5 mm disk, and the 4-blade knife before attaching the juicer.
Once the disk and knife are removed, screw the auger into the meat grinder, firmly attaching the berry press auger to the meat grinder auger. Then, place the pressure plate over the auger, using the threading ring that comes included with the grinder purchase over the plate to secure the pieces together. The adjusting screw fits into the front of the pressure plate. Finally, place the large, curved splash cover over the plate.
You will use the filler tray and tamper provided from the grinder to insert and push the fruit through the grinder.
You will need two bowls – one to catch the juice and pulp directly below the press, and another to dispose of the skins and seeds that are extracted from the side of the press.
You can slowly tighten the screw while using until juice and pulp come out as you want. The screw should be looser when pressing harder fruits, like apples and pears.
Bosch suggests to cook hard fruits to soften them before pressing them, in order to prevent brown discoloration and to increase the amount of juice that will be extracted.
Wash by hand using warm, soapy water. Avoid using caustic or abrasive cleaners.
Noodle Extruder
For another fun tool using the meat grinder, buy the Universal Noodle Attachment. 11 disks are included to make the following pasta shapes:
- Linguini
- Angel hair
- Macaroni
- Spaghetti
- Thin spaghetti
- Wide noodles
- Rigatoni
- Spiral (fusilli)
- Shell
- Jumbo shell
- Lasagna

Noodle Attachment, available from Bosch
In addition to these 11 disks, there are three more included parts necessary for assembly:
- Small metalauger
- Metal disk holder
- Small metal threading ring
To assemble, first remove the meat grinder’s large threading ring, the 4.5 mm disk, and the 4-blade knife. Lock the small auger in the meat grinder’s auger. Place the metal disk holder over the auger. Once these pieces are all in place, then you can attach the noodle disk you will be using (I’m in the mood for spaghetti today…) on the disk holder. Screw the small threading unit around these items to lock the disk. Finally, tighten the larger meat grinder threading ring over the smaller ring to secure everything together.
Phew!
It certainly is a confusing mash of metals and pieces at first, but they are all essential to the successful and safe operations of your machine. And once you learn the process, you’ll be able to quickly and easily assemble these pieces.
Grating Attachment
Another option to purchase in conjunction with the meat grinder is the Universal Grating Attachment.
With its sharp metal blades, you can easily grate hard cheeses like parmesan or aged goudas. You can also use it for grinding nuts and spices.
The attached protective cover helps maintain safe and clean operations.
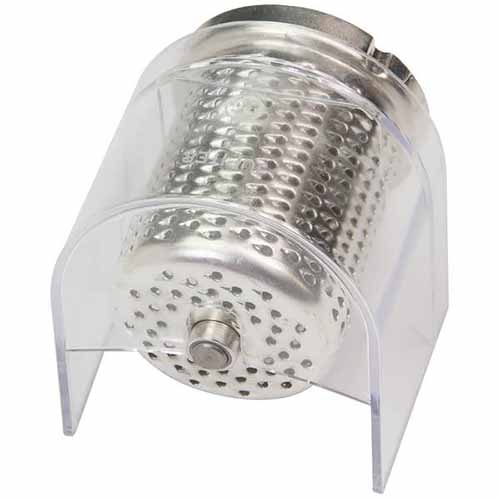
Grater, available from Bosch
To assemble, first remove the threading ring, the 4.5 mm disk, and the knife from the grinder. Lock the grater into the grinder’s auger, and secure everything together with the threading ring.
Use the plastic tray and tamper to guide the cheese cleanly and carefully down to the grinder. And be sure to use a bowl to catch all the delish goodies!
Now that we’ve gone over the attachments used on the main drive of the motor base, let’s next review the attachments uses for the upper drive, the attachment on the side of the base that is an 800-watt, high-speed drive directly coupled to the motor.
Return to the Table of Contents
High-Speed Motor Drive Attachments
Blender
Because the Universal Plus Complete Blender utilizes the 800-watt motor, it is strong enough for many pulverizing tasks, from crushing ice to grinding nut butters.
Blender, available from Bosch
The 6-cup capacity blender is a great size for a few servings of smoothies.
For assembly, simply attach the blender on the high-speed drive and secure in place before blending.
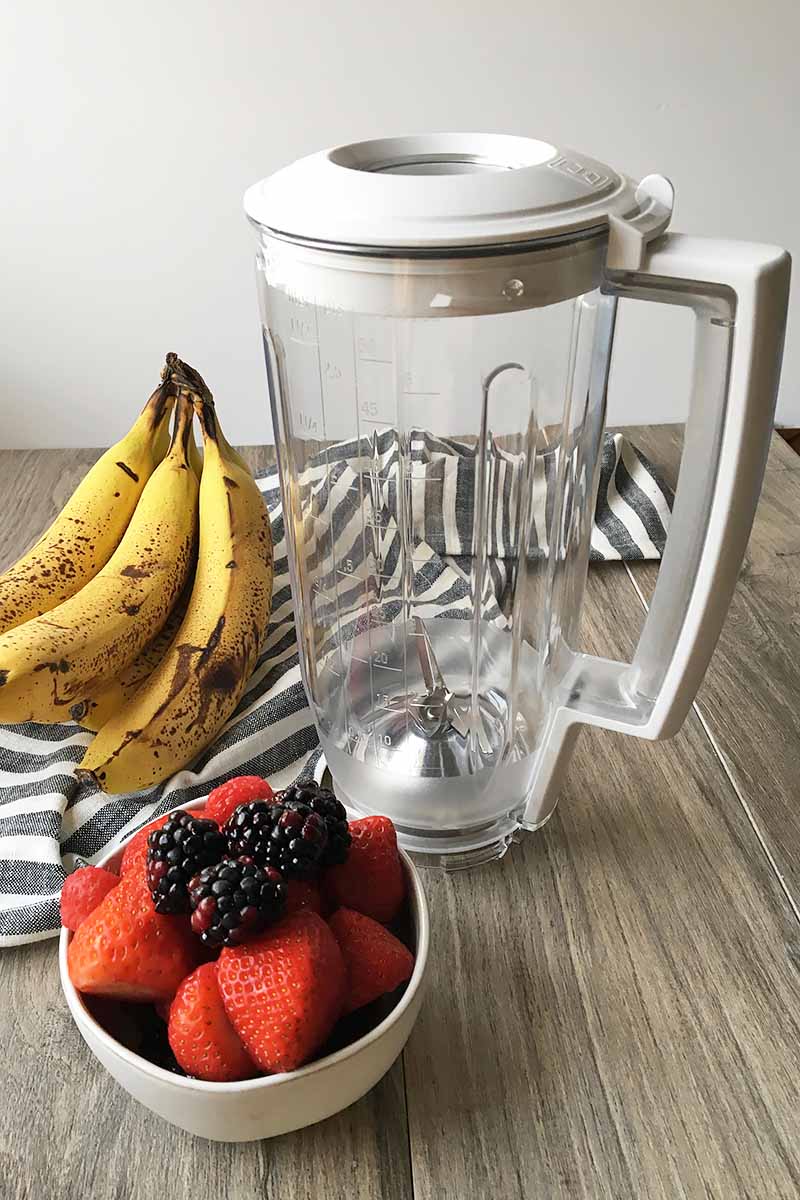
For cleaning purposes, the stainless steel blades are removable for easy cleaning by hand. You clean place the blender and lid in the dishwasher.
Citrus Juicer
Love the smell of freshly squeezed orange juice first thing in the morning?
Give your hands a break from trying to squeeze out all the juice, and buy this Universal Citrus Juicer.
Perfect for oranges, lemons, limes, and even small grapefruits, this powerful juicer fits onto the high-speed drive of the motor base.

Citrus Juicer, available from Bosch
There are two dishwasher-safe parts to the juicer: the white plastic strainer basket and the clear plastic base.
The strainer is removable, making for easy cleaning after each use. The plastic base has a pour spout – less mess when pouring out all that delicious juice!
The juicer has a capacity of 3.5 cups, and weighs a little less than 1 pound.
To assemble, place the clear plastic bowl directly on the center driveshaft of the motor base. Place the strainer basket on top, and you’re ready for some fresh oj!
Food Processor
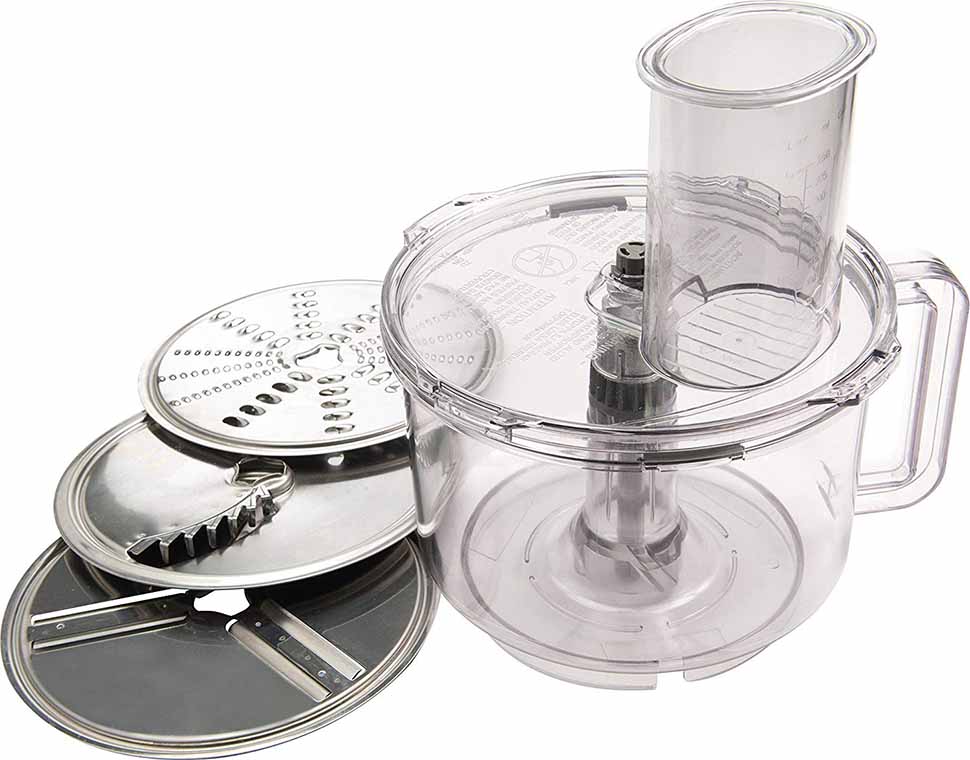
The Universal Food Processor is useful attachment made with BPA-free material that attaches to the high-speed motor drive of the mixer base.
These are the following pieces included with your purchase:
- 5-cup capacity clear plastic bowl
- White plastic attachment drive with handle
- Stainless steel processing blade
- Three stainless steel disks
- Plastic lid with funnel
- Plastic tamper tool
In addition to the chopping and mixing capabilities of the blade, the processor includes three removable disks for slicing, shredding, and grating all kinds of ingredients.
The slicing disk is reversible – you can choose between thick or thin slices. The grating disk is reversible, as well – choose between coarse or fine.
The assembly is very important to note before use. Before placing on the high-speed motor, there are a few initial steps to take:
Lock the clear plastic bowl on the white plastic drive with the handle. Then, insert either the blade or one of the disks. Lock the lid on top, turning it counterclockwise. Place and lock the entire attachment on the high-speed motor drive.
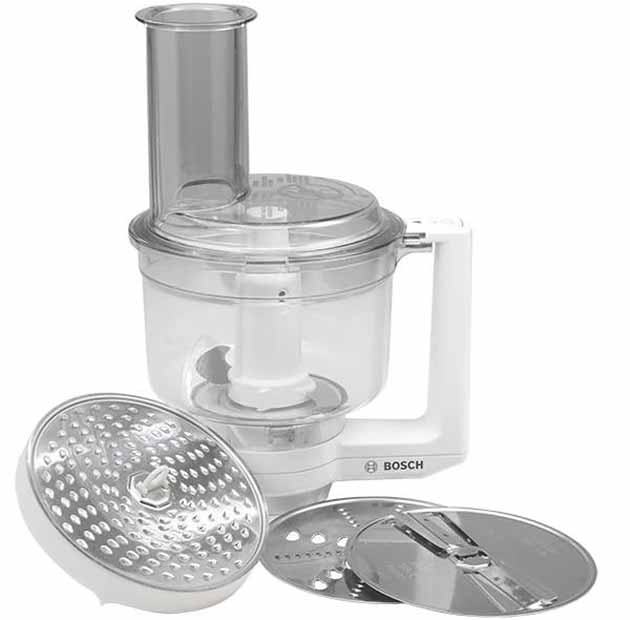
Food Processor, available from Bosch
As a safety feature, the food processor cannot attach to the motor unless the lid is locked on top.
Because of this safety feature, the lid cannot be removed while the food processor is on the motor base. This may lead to a few annoyances as you’re first getting used to the machine, since most stand-alone food processors allow you to remove the lid while in use. You’ll have to use the funnel feature on the lid if you need to process any additional ingredients.
Except for the handle drive, all of the parts to the food processor are dishwasher-safe on the top rack. To clean the handle drive, I recommend using a wet towel with a little dishwasher soap for cleaning.
Care and Keeping
While I’ve provided cleaning procedures for each attachment, let’s review here!
Any other metal products made from aluminum alloy should definitely be washed by hand only to prevent corrosion and discoloration.
You can clean any plastic or stainless steel materials in the dishwasher on the top rack.
However, because there are many small pieces with many little holes, the dishwasher will not do the trick on its own. It is best to wash by hand first, before the dishwasher does the final clean.
So here is the major complaint I have regarding this line of cookware: cleaning is a nuisance.
The nooks. The crannies. Alllll of the small attachments.
It has been a burden to clean each individual piece and rid it of all debris. Especially if you don’t own a dishwasher to help with the final clean. If you are used to the simple attachments and smooth, lip-less bowl of a KitchenAid, prepare yourself to take time for the longer cleaning process of the Bosch attachments.
Remember to thoroughly dry every attachment after washing it, before storing or using again.
Return to the Table of Contents
The Warranty
While Bosch offers a 3-year warranty for both the motor base and transmission, all of the attachments listed in this review come with a 1-year warranty. If you have any issues, or need to make return, be sure to have a copy of your receipt for proof of purchase.
If you have more specific questions regarding the warranty, return, and replacement policies, you can contact their customer service center during their business hours. I was able to get in contact with a live representative immediately, without being put on hold.
Return to the Table of Contents
Mixing Together the Final Thoughts
Based on all of the information provided, I can summarize the three main reasons why purchasing a base mixer with optional attachments is right for you:
Money!
It is a cost-effective choice to buy attachments. As long as you have purchased the mixer base from a reputable company with superior products, like Bosch, you will be saving money going with the mixer’s attachments, rather than purchasing separate appliances. And that way, you can buy so much more fun stuff!
Space!
Again, because you are buying smaller attachments rather than individual, heavy, bulky appliances, you will save a significant amount of space. You only need one mixer base, one outlet, and one plug. Not much else will be crowing your counter.
Because, seriously. Who really has room on the counter for a mixer, a food processor, a blender, a pasta maker, an ice cream maker, etc. etc. etc. Certainly not in my tiny one-bedroom apartment.
When not in use, simply store all of the attachments together in a small bin.
Fun!
The most important part of all, of course! With these attachments, Bosch gives the home cook so many delightful opportunities to create a range of food that you wouldn’t have thought possible to make at home.
Gourmet ice cream? Freshly ground meat? Homemade pasta of all shapes and sizes?
No, this isn’t an artisanal restaurant… it’s your kitchen! Surprise!
Keep in mind my complaints I’ve had through my own experience with using this product, though. The time dedicated to cleaning, or some of the flimsier plastic attachments may outweigh your decision to buy this particular model.
As always, I recommend you do your own research to gain an even better understanding of the Bosch line. Check out the Bosch company website to get more thorough information on all that they offer with their mixers and attachments. We definitely recommend that you buy directly from the company, to get the best deals and appliance selections.
What do you think of this long line of attachments? Which ones are you thinking about buying first? Let us know in the comment section below.
Photo credit: Credited photos by Nikki Cervone, © Ask the Experts, LLC. ALL RIGHTS RESERVED. See our TOS for more details. Product photos via Bosch. Sample products provided by the manufacturer.
About Nikki Cervone
Nikki Cervone is an ACS Certified Cheese Professional and cheesemonger living in Pittsburgh. Nikki holds an AAS in baking/pastry from Westmoreland County Community College, a BA in Communications from Duquesne University, and an MLA in Gastronomy from Boston University. When she's not nibbling on her favorite cheeses or testing a batch of cupcakes, Nikki enjoys a healthy dose of yoga, wine, hiking, singing in the shower, and chocolate. Lots of chocolate.
One correction. The base is the LOW speed drive. The citrus juicer connects there.
If the ice cream maker would fit my old machine I’d buy that, but it doesn’t.
Been using mine for 25+ years, replacing only a blender top (My fault. I now have the drive removal tool), drive coupling (again my fault), and gaskets and a set of grinding burrs in that time.
I have the low speed adapter to connect the grain/coffee grinder/cracker, meat/nut grinder with 2-8mm (round and square holes) discs, pasta discs, *cookie/pastry extruder, *sausage spouts, TS5 /w mini dough hook and blender.
I also have the cylindrical food processor and flaker mill, both now sold under the Family Grain Mill brand. Check PleasantHillGrain dot com.
Since I used to camp for extended periods under the trees in the US national forests, like the Kaibab, (solar doesn’t work there and I hate generators) I have the wood base with hand crank for the grinding/flaking attachments (check PleasantHillGrain.com) and a *handle to drive the dough hook.
They still come in handy occasionally where I live.
I still can’t figure out why anyone would buy a KitchenAid stand mixer. Same with cheap cookware, cutlery and other kitchenware. My *Calphalon Professional Anodized, and Lodge cast iron cookware still look almost new and nothing sticks to them.
*No longer sold
How can I get a price list of the different attatchments.
I would love to have this mixer, I fell in love with it when I saw a chef make a cheesecake in it.
We’re a review site rather than a retail seller, but you can follow the links to Bosch to check current prices!
Who can answer questions I have about the smaller Bosch and its attachments?
I have a classic machine, purchased in about 1985. It works great! But, I can’t find a spiralizer that fits the bowl … I am willing to purchase the universal machine as an update, but I want to be certain all my other accessories will fit. Will they? I use a blender and a food processor often!
Julie
Good question, Julie. I sent an inquiry to customer service at Bosch earlier today and Bonnie just got back to me. She says, “The MUZ6TS5 Bosch slicer shredder and MUZ6 MM3 Bosch food processor will fit both. The blender MUZ6MX3 will not fit both, only the Universal Plus.” I’m not certain about the spiralizer.
Hope this helps!
I have 2 Bosch machines one from about 1973 and the other from about 1990. I have a lot of attachments, which I am absolutely in love with like the meat grinder, grater, fruit/vegie strainer, sausage thing, 2 kinds of food processors one for each machine.
The thing I noted was that the attachments worked best for balance on the 1973 model. the other model has a slanted base. The other thing is both of them have a terrible time keeping the whips and paddles intact. The middle mechanism was repaired on the 1973 machine, and at that time, a new bowl was purchased, somewhere about 2000. Both machines now have the same issue, with the blades scraping the bottom of the bowls, actually putting grove marks in them. As a result, multiple sets of blades have been purchased, and I must have about 10 or so all mashed up, and only one good set of each kind left. For that reason, I am switching to Kitchen Aid. I am hoping some of my attachments can fit the ends of the new ones, but together with the low number of speed options, and this problem which causes me not to use it for pie crusts, that is my reason. Can anyone tell me if the Bosch strainer can be used on the Kitchen aid meat grinder? Thanks a lot. PS I am keeping my Bosch for those tough once a year canning jobs, like pushing 60 quarts of roma tomatoes through the food strainer, and one of them I am taking to the lake so I can make bread up there. So I am not ready to cut my ties with Bosch all together.
Hi, Betty! What an amazing review detailing your personal experiences with Bosch! As with most brands, they continue to build and improve their newer models.
Because most brands design their attachments to fit exclusively on their own devices, I seriously doubt the Bosch strainer will be able to fit properly or work appropriately on a Kitchen aid meat grinder.
Happy canning and baking!