We occasionally link to goods offered by vendors to help the reader find relevant products. Some of these may be affiliate based, meaning we earn small commissions (at no additional cost to you) if items are purchased. Here is more about what we do.
Find me someone who doesn’t want the creamiest purees, smoothest sauces, and most efficient kitchen prep, and I’ll keep the Nutribullet Immersion Blender all to myself.
But I have a feeling that person will be incredibly tough to track down. Better share all I can about this cool prep tool, right here and now.
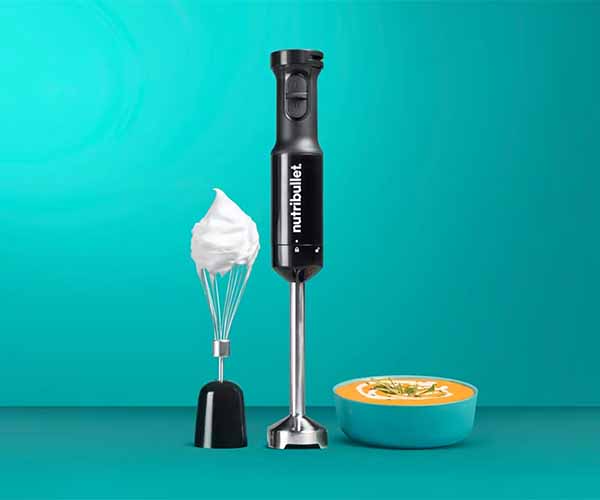
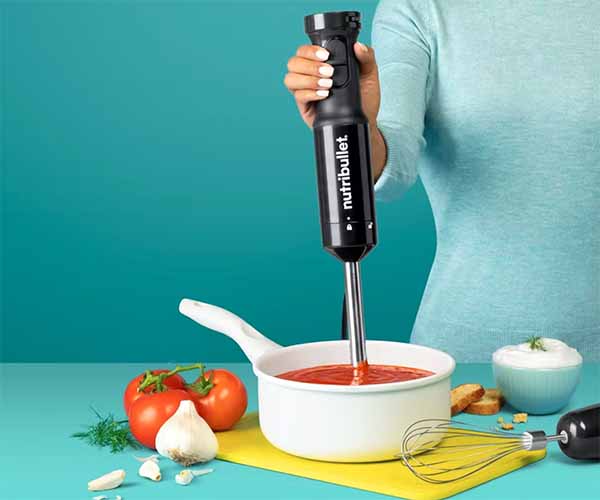
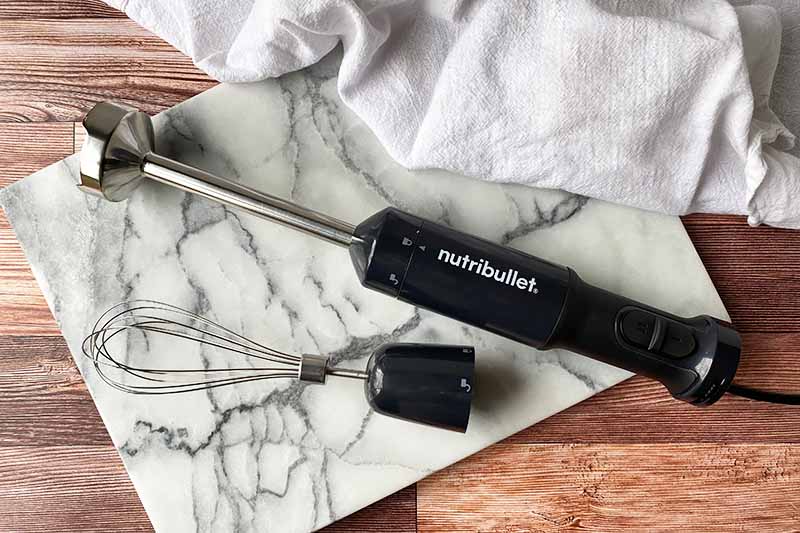
The Nutribullet Immersion Blender is a convenient appliance to keep in your home kitchen – with its long blending arm and sharp blade, you can blend ingredients directly in a bowl, cup, or pot to take your recipe from chunky to smooth as efficiently as possible.
But that’s certainly not all it offers.
A whisk attachment gives you even more food prep range than blending alone.
I’m going to risk sounding like a broken record here, but even that is not all the Nutribullet Immersion Blender offers.
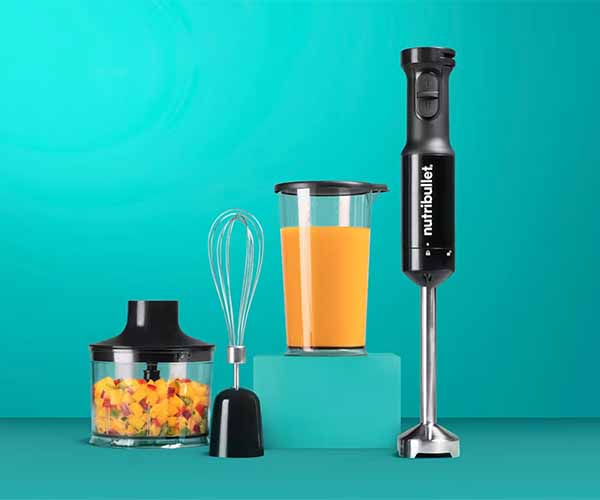
You can also purchase a Deluxe set with even more accessories to increase your kitchen prep capabilities with a single handheld, easy to use appliance.
Interested in learning more? Currently shopping for a new immersion blender?
Continue reading below – I’ll summarize all the details for you regarding main features, all of the accessories, reading materials, operating tips, and cleaning information.
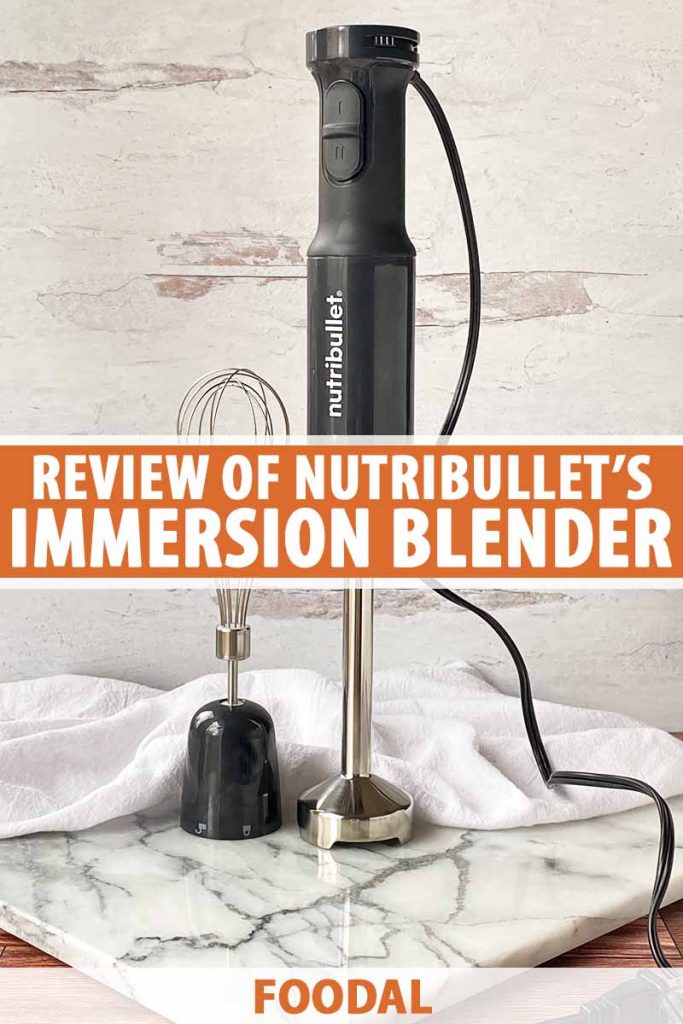
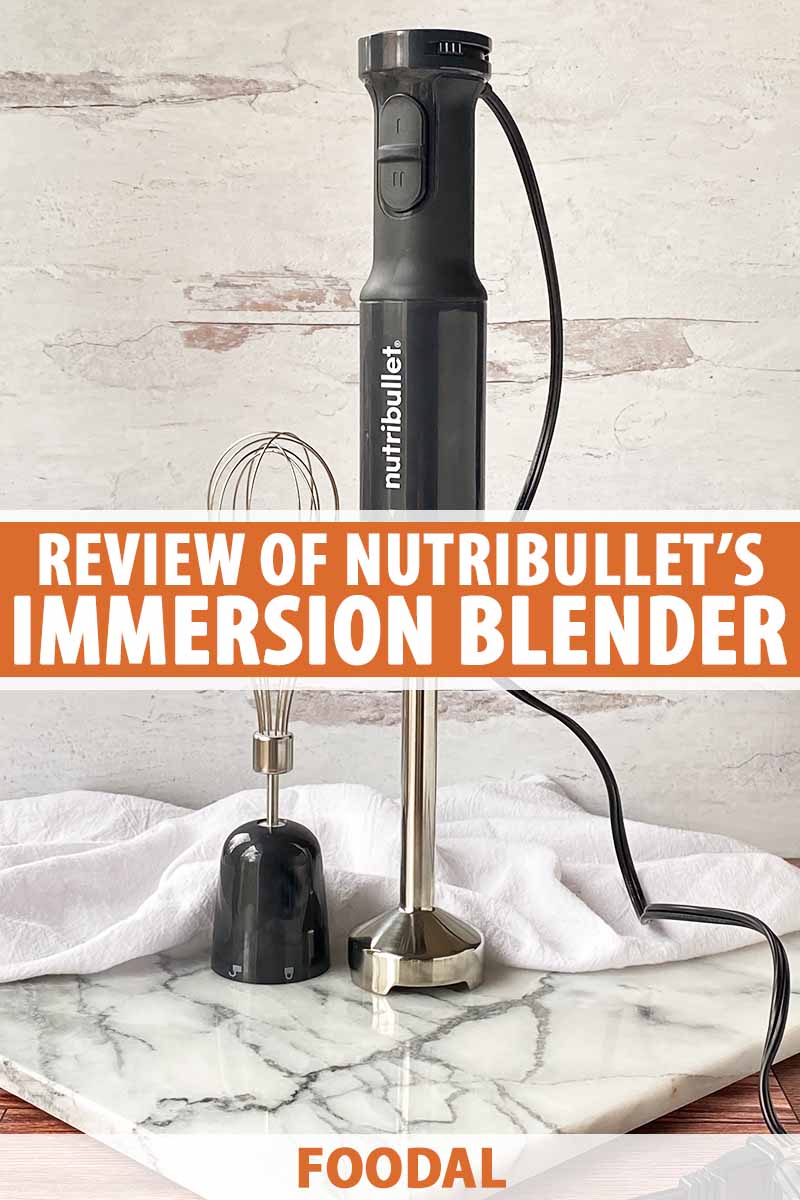
Nutribullet Immersion Blender
Features and Specs
There are currently two different sets you can buy, depending on how many accessories you want: the Standard set and the Deluxe set.
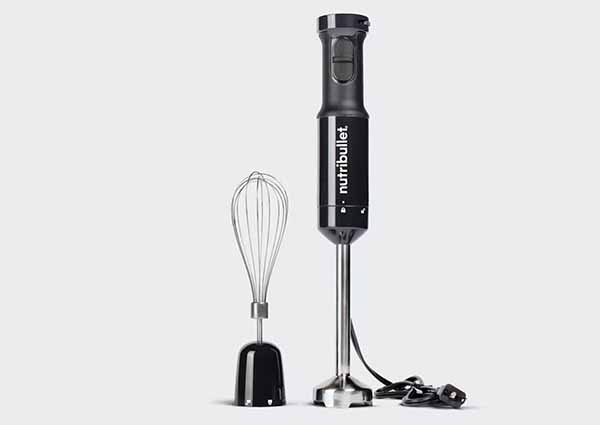
Nutribullet Immersion Blender, Standard Set, available on Nutribullet
The Standard set includes the following:
- 1 350-watt motor body
- 1 stainless steel blending arm
- 1 whisk attachment
- 1 whisk holder
- 1 user guide
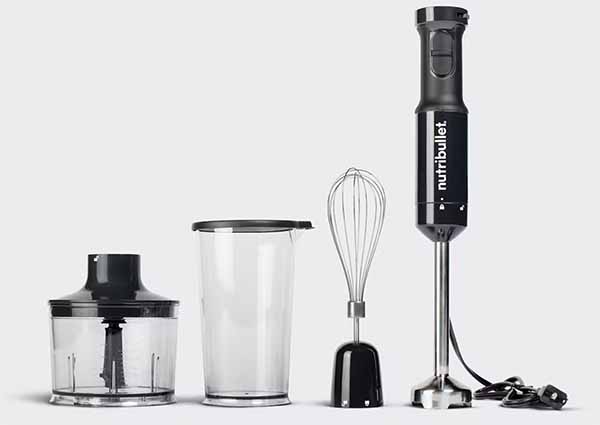
The Deluxe set includes all of the pieces in the Standard set, as well as:
- 1 20-ounce chopper bowl
- 1 chopper bowl lid
- 1 chopper blade
- 1 30-ounce blending and measuring cup
- 1 blending and measuring cup lid
The motor body, stainless steel blending arm, and the whisk attachment and holder are the same exact accessories in both the Standard set and the Deluxe set. And all accessories are compatible with the motor body.
Nutribullet Immersion Blender, Deluxe Set, available on Nutribullet
Currently, the immersion blender is offered only in one color, with a black motor body.
The electrical cord, which powers the motor body and is attached to the top of the motor body, is 39.3 inches long.
The blending arm is 8 inches long. When the blending arm is attached to the motor body, the total dimensions of the assembled appliance are 16 inches long and 2 inches wide. The assembled appliance weighs a total of 2 pounds.
The whisk holder is 2.5 inches long, and the whisk attachment is 7.75 inches long. They are both 2 inches wide.
Parts and Accessories in Detail
Learn everything you need to know about each of the main components and accessories available in both the Standard set and the Deluxe set right here!
As of the date of this publication, customers are not able to purchase any of these accessories separately. You must buy the Deluxe set if you are interested in purchasing the additional accessories.
Motor Body
The motor body provides 350 watts of power.
All of the accessories attach at the bottom of the motor body. There are images printed on both the motor body and the accessories to help you with the assembly process.
To assemble: Using a clockwise twisting motion, the accessory will click into place when the locked lock image printed on each accessory aligns with the arrow image printed on the bottom of the motor body.
To disassemble: To unlock and release the accessory, use a counterclockwise twisting motion, moving the arrow towards the unlocked lock image printed on the accessory.
The ergonomic design of the body is easy to hold with your hand, so you can have a firm and stable grip when you are holding and using it.
All of the functions are located on the motor body, which I’ll describe in more detail now:
Low-Speed and High-Speed Buttons
There are two separate power buttons you can press, with one positioned vertically on top of the other and located on the side of the motor base.
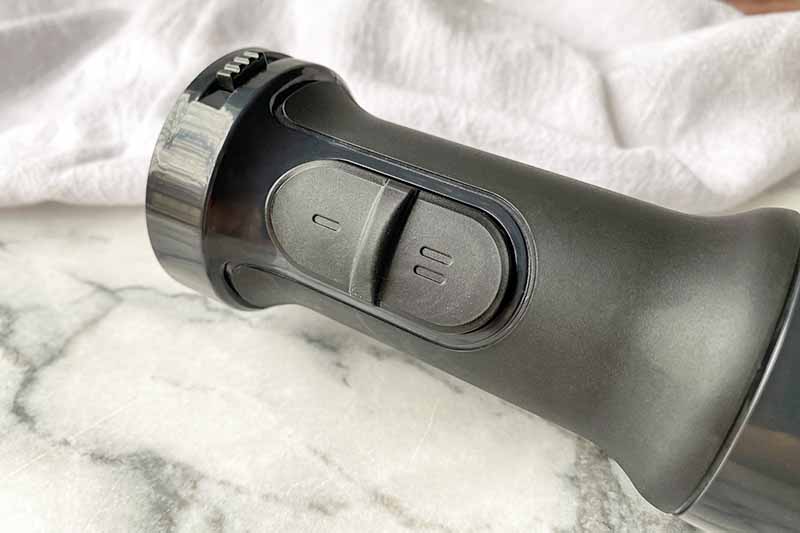
The low-speed button is indicated as a single “I,” and the high-speed button is indicated as a double “II.”
The low-speed setting has 11,000 RPM, and the high-speed setting has 16,000 RPM.
Pressing either the low-speed or the high-speed button motor body activates the motor. It will not power on unless you press one of these buttons.
Releasing the button stops the unit, shutting off the blender. The button must be held continuously for the blending operation to continue.
Variable Speed Dial
You are not limited to only two speeds with this appliance!
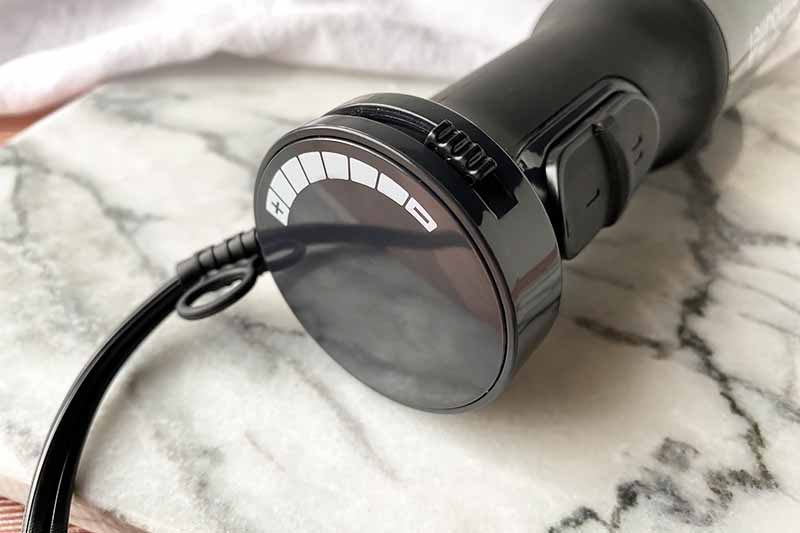
A variable speed dial is located on the side of the motor body, right above the low-speed and high-speed power buttons.
The plastic dial slides back and forth anywhere within the speed range, which is indicated as a printed image from “-“ to “+,” on the very top of the motor body.
There are no separate speed gauges, so you can freely and smoothly slide anywhere along this spectrum to adjust the speed as desired within the range of 11,000 to 16,000 RPM.
Note that you can only adjust the speed with the low-speed button engaged. It won’t adjust the speed when pressing the high-speed button. The high-speed setting remains at the same constant speed, even though you can still move the dial.
You can adjust this dial in two different ways:
First, you can fine-tune the blending speed on the variable speed dial while pressing the low-speed power button as the motor is in operation.
Second, you can adjust the blending speed before pressing the low-speed power button while the motor is off. When you push the button after you have adjusted the dial, the speed will shift to the new setting.
Blending Arm
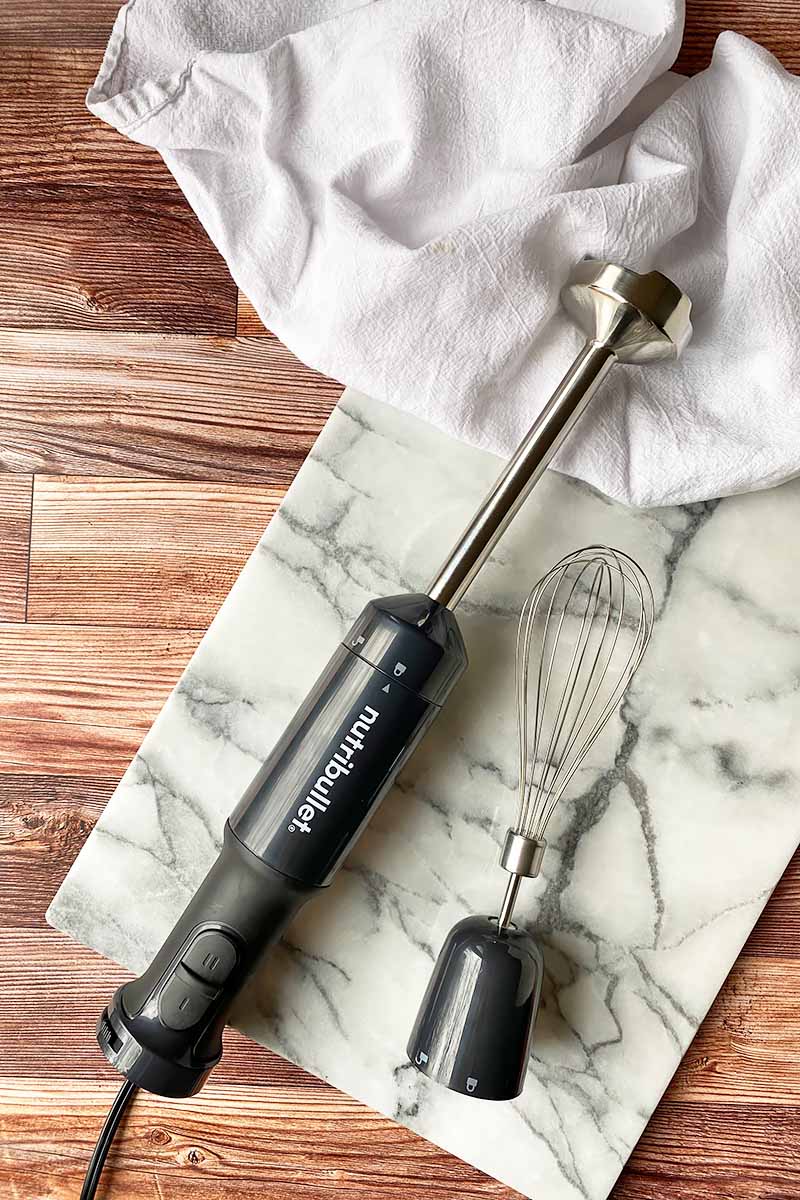
Simple and sleek, the 8-inch blending arm is made of stainless steel.
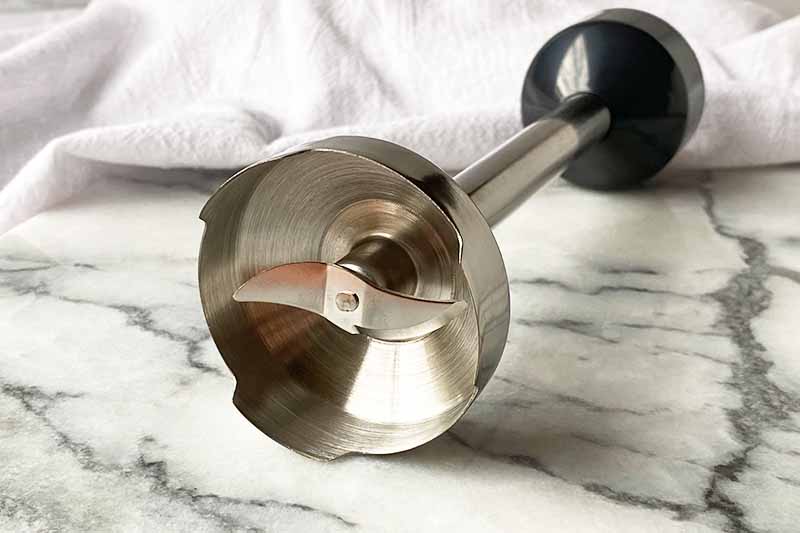
The sharp S-blade, also made of stainless steel, will quickly blend and puree your ingredients.
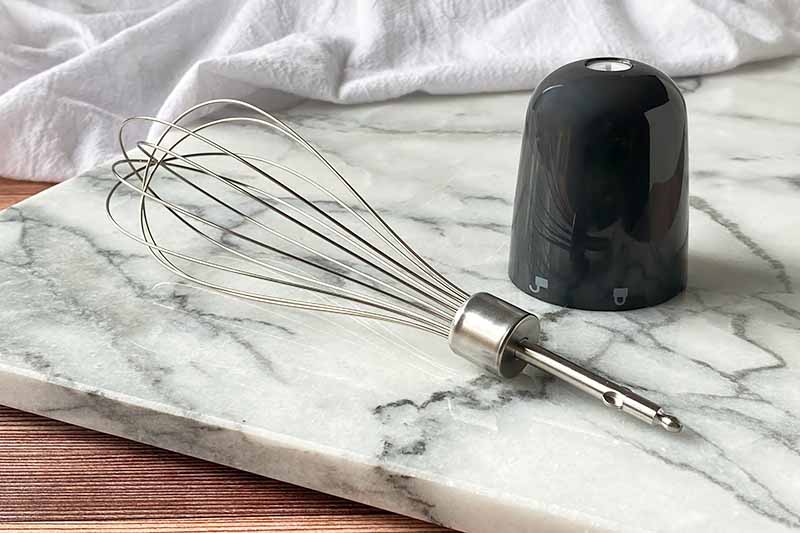
Whisk Attachment and Holder
The whisk attachment gives your immersion blender extra utility beyond simply blending ingredients.
This isn’t a one-trick pony!
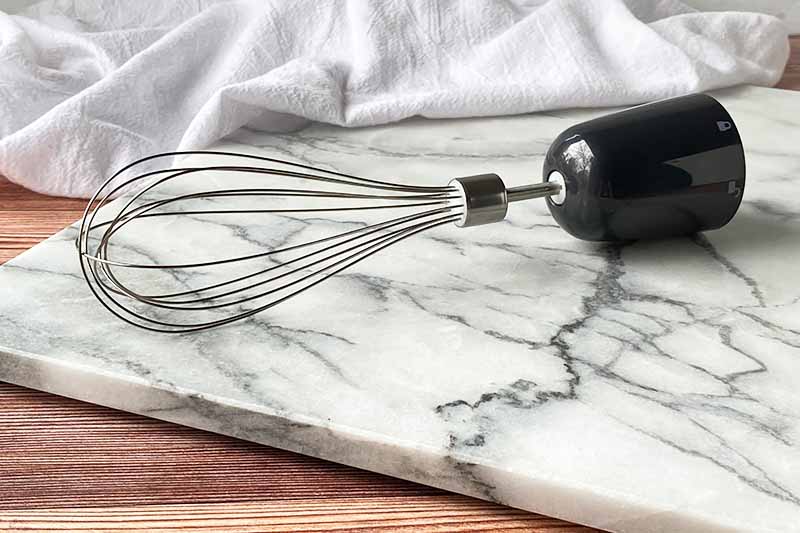
The whisk attachment will flawlessly aerate food items like heavy cream and egg whites without straining an arm muscle, breaking a sweat, or dirtying all of the attachments from another appliance.
The whisk is very flexible so it can easily move with your ingredients, and slightly bend to the curves of the bowl in use.
And with the range of speeds, you can control how quickly you are whipping air into your ingredients.
The whisk attachment does not attach to the motor body on its own. You need to first insert the stem of the whisk attachment into the whisk holder, then attach the holder to the bottom of the motor body.
Chopper Bowl, Blade, and Lid
The 20-ounce chopper accessory can coarsely process different ingredients, a perfect tool to use if you aren’t confident – yet – with your basic knife skills or for whenever you want to save a little time with prep work.
Ingredients like onions, carrots, celery, herbs, garlic, shelled nuts, and more can be prepped in the chopper.
Note that it should not be used for very hard food items like ice cubes, whole spices, coffee beans, and grains.
To assemble, place the stainless steel blade onto the center pin of the clear plastic chopping bowl, pressing down and locking it in place. After loading your food items in the bowl, place the lid on top and turn it clockwise to secure it.
After attaching the motor body to the lid, you are ready to chop, chop, chop away!
Nutribullet recommends only using the low-speed button when operating the chopper accessory, so as not to overwork the motor.
You can hold the low-speed button for a constant chopping motion, or you can pulse the button for quick bursts of chopping – treat this accessory as you would a small food processor.
Blending and Measuring Cup and Lid
The 30-ounce clear plastic blending and measuring cup is practical for using your immersion blender to process smaller quantities of liquid and other ingredients. You won’t always need to blend or whip in a large mixing bowl or soup pot!
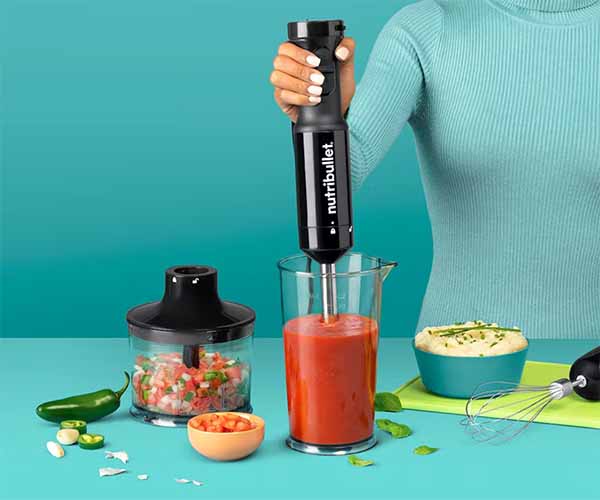
It features a spout for easy pouring, and comes with a lid that securely attaches on top if you want to store dressings, purees, or whipped items in the refrigerator.
While the cup holds up to 30 ounces, Nutribullet advises against overfilling any container you are blending in to prevent spills and splatters. Working with a smaller amount of liquid at a time will also help you blend your ingredients more effectively.
Start with filling the container about halfway before blending, then gradually adjust as needed from that point.
Reading Materials
The following are reading materials you can access as a hard copy provided with purchase, or via the company website.
User Guide
A physical copy of the user guide comes with your purchase. You can also access and download a digital copy of the user guide for both the Standard set and the Deluxe set via the company’s website.
The user guide includes all of the instructions for operating your appliance and its accessories, general safety information, an assembly guide, storage suggestions, care and maintenance information, and warranty and return information.
Recipes are also included in the user guide, giving you some tasty ideas for how to use your appliance in a variety of fresh and healthy applications. Be inspired by from-scratch recipes for banana bread pancakes, veggie frittata, roasted garlic aioli, balsamic vinaigrette, and ginger mint nice cream!
Warranty Information
A 1-year limited warranty is provided from the date of purchase. You can also register online for 3 additional months of coverage at no additional charge. A 3-year extended warranty is available for an additional fee.
The warranty excludes normal wear and tear, and it does not apply to damage due to accident, abuse, misuse, misapplication, or improper maintenance of the product.
As mentioned above, warranty, registration, and customer service information are all located in the user guide, but you can also download a digital copy of the warranty via the company’s website.
Operating Tips
This appliance can be integrated in your kitchen prep easily, but make sure you are following the correct guidelines for safe operation. Here are a couple points to keep in mind:
Focus on Your Blending Techniques
Always unplug your appliance when it is not in use, or before assembling, disassembling, changing accessories, or cleaning. You don’t want it to turn on accidentally and catch you off guard!
Make sure whatever mixing vessel you are using – whether it’s a pot, a mixing bowl, your blending cup, or your chopper – is on a flat surface.
Double check that your selected attachment is fastened properly to the bottom of the motor body.
If using the blending arm or whisk, make sure the blade or whisk is fully submerged into the ingredients. Don’t press the speed button until after the blending arm or whisk is fully submerged to prevent splattering – very crucial when working with hot ingredients that could cause injury!
When you’re done blending, make sure you wait for the motor to come to a complete stop before removing the blending arm from the ingredients to avoid splattering.
And obviously, keep your hands away from the blade. I don’t need to explain why…
Understand Your Appliance’s Limits
To prevent the motor from overheating, Nutribullet recommends that it should not be powered on for more than one minute at a time.
If the motor stops working and feels hot, unplug the appliance and let it cool for at least one hour before you operate it again.
The motor has an internal thermal breaker that shuts off the motor if it overheats. The thermal breaker will reset when the unit is unplugged, after it cools down sufficiently.
You should never blend using the blending arm accessory without at least some liquid – without any liquid to help blend the ingredients, you may cause damage to the blade or motor.
You should not use the blending arm for grinding dry ingredients such as grains, cereal, or coffee, as this may damage the motor, the blade, or the whisk.
Here’s another reminder to not chop extremely hard food items in the chopper accessory – this means no ice cubes, no whole spices, no coffee beans, and no whole grains.
Cleaning and Storage
To avoid the risk of electric shock, never immerse the cord, plug, or motor body of the blender in liquid.
Always keep the motor body dry, and do not place it in the dishwasher or immerse it in water. If the motor body is dirty, clean it with a damp cloth only and dry it immediately and thoroughly.
The blending arm, whisk holder, and chopping bowl lid are not dishwasher safe. To avoid damaging the internal gears of these specific accessories, clean them with warm and soapy water, and avoid submerging or soaking these parts in water.
Only the chopping bowl, whisk attachment, blending and measuring cup, blending and measuring cup lid, and chopping blade are dishwasher safe. But they can also be cleaned with warm and soapy water by hand.
Once clean, immediately and thoroughly dry each part.
When not in use, store the motor body and accessories in a safe and dry place. The immersion blender is narrow enough that it can fit in a kitchen drawer, but you may need to make room for the attachments elsewhere.
Slow, Fast, and Everything in Between
If adjustable speed is the name of the game as you’re shopping for a new immersion blender, you should seriously consider purchasing the Standard set or the Deluxe Immersion Blender from Nutribullet.
The Standard set is also available on Amazon.
The variable speed dial gives you the freedom you desire to modify the RPMs as you wish, without losing a basic sense of control. But the preset low and high speed settings will still be there for you when you don’t feel like playing around with power.
What seems more appealing to meet your needs in the kitchen: the basic Standard set or the well-equipped Deluxe set? Do you think you’ll use all of the accessories, or would you rather stick to the fundamentals?
Leave a comment below – I’m happy to answer any questions you may have!
We love gear talk, especially when it comes to essential kitchen appliances! If you’re looking for other immersion blender options for a comparative analysis, read some of our other reviews:
Credited photos by Nikki Cervone, © Ask the Experts, LLC. ALL RIGHTS RESERVED. See our TOS for more details. Product photos via Nutribullet. Sample product provided by the manufacturer.
About Nikki Cervone
Nikki Cervone is an ACS Certified Cheese Professional and cheesemonger living in Pittsburgh. Nikki holds an AAS in baking/pastry from Westmoreland County Community College, a BA in Communications from Duquesne University, and an MLA in Gastronomy from Boston University. When she's not nibbling on her favorite cheeses or testing a batch of cupcakes, Nikki enjoys a healthy dose of yoga, wine, hiking, singing in the shower, and chocolate. Lots of chocolate.