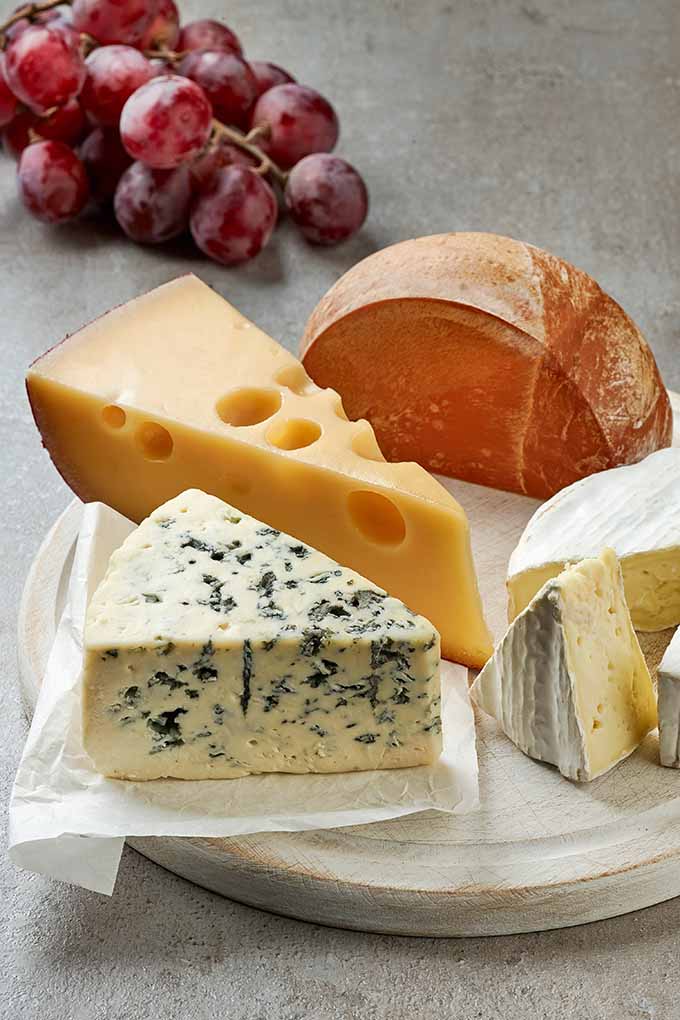
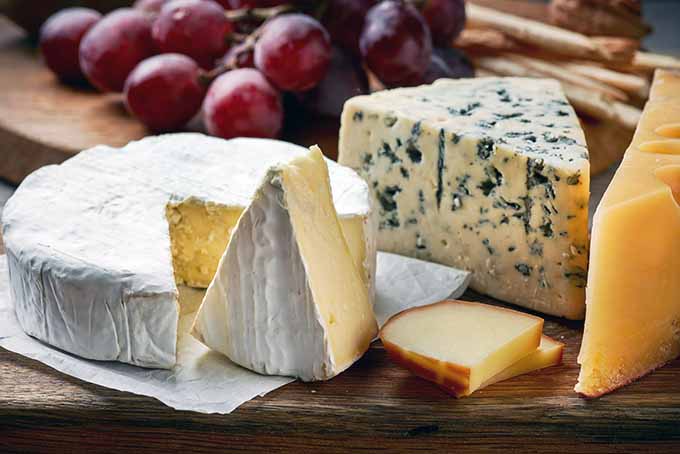
So, you stopped by the gourmet grocer on your way home and spent a not-insignificant portion of your hard-earned food budget on some enticing artisan cheeses.
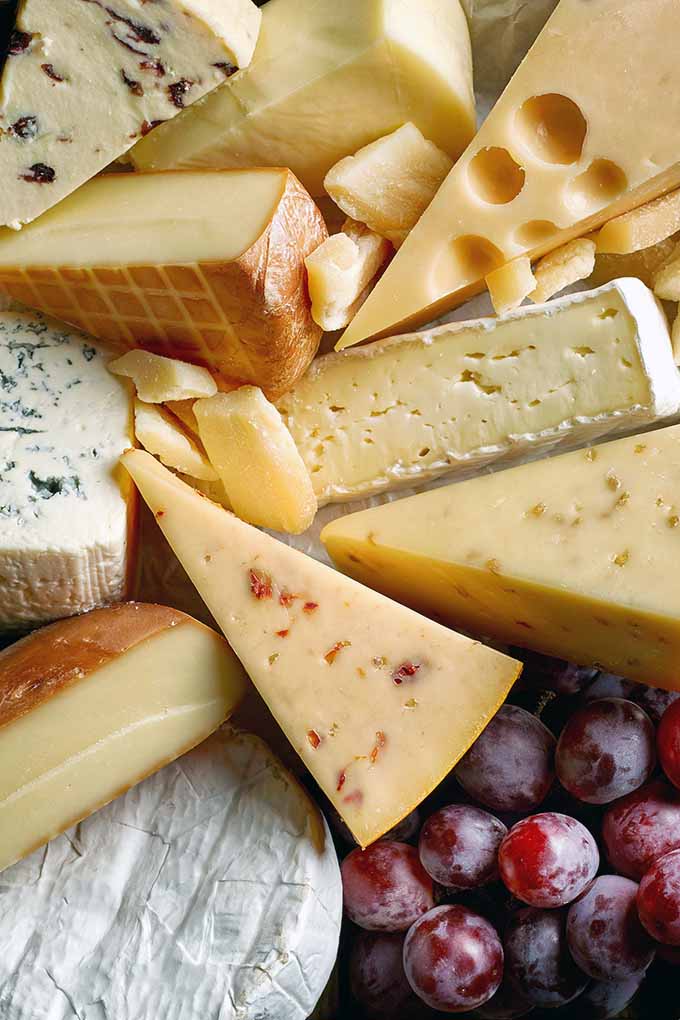
To get the most bang for your buck, it’s important to store them properly so that they stay fresh and delicious from the first bite to the last.
With this guide, you’ll learn why and how to properly wrap and store these products after you’ve served them up.First, we’ll cover what’s so special about those delicious wedges, and why they taste best when packed up with care. We’ll follow that with a step-by-step guide to wrap your dairy-based favorites with care.
Immortal? Not Quite
There’s a famous quote from Clifton Fadiman that calls cheese “milk’s leap towards immortality.” But the idea that this food will last forever is a bit misleading.
While it’s true that this transformation extends the life of the food and does something truly amazing to its flavor, aroma, and texture, your cheese still has a shelf life.
By definition, it’s a way to transform fresh milk into something with a shelf life of weeks, months, or years rather than days.
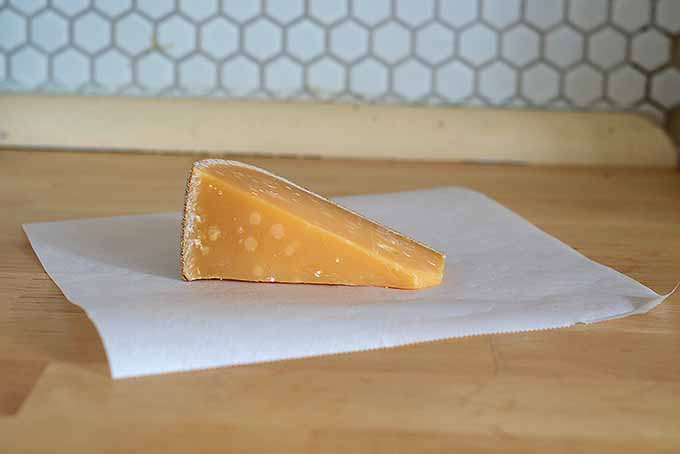
This goes for cheeses in their original state – that is, uncut wheels. Once a wheel has been cut open and the interior has been exposed to the air, the wheel acquires an end date.
But cheese is a living food.
The microbial life that makes cheese happen remains present in every variety more evolved than a Kraft single. That means that it can continue to develop – or deteriorate – in flavor and texture, depending on the type and various attributes like storage conditions.
Intact hard-aged varieties will continue to deepen in flavor and develop a firmer texture as moisture is lost over time.
Bloomy rind and soft washed-rind types, which typically have a shelf life of a few weeks after they’re released to consumers, will also continue to develop funkier flavors and advance in texture – usually in the direction of creamy and oozy.
But they will eventually develop off-flavors and aromas as well as undesirable molds if left to their own devices.
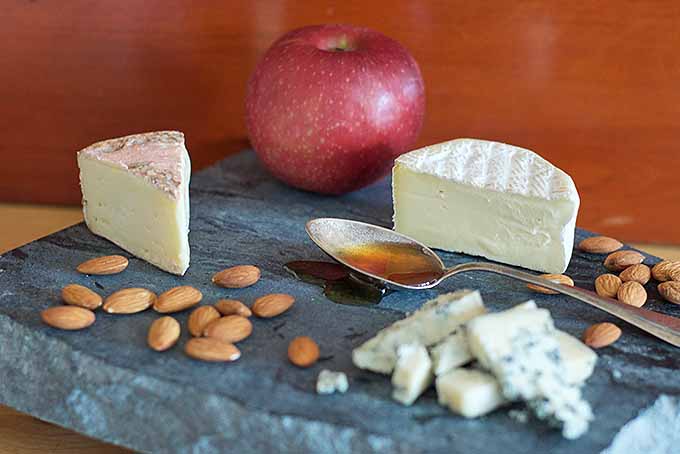
Fresh varieties, like chevre, fromage blanc, mozzarella, and ricotta, extend the shelf life of milk or whey by at least a week, depending on the recipe. But these are the most perishable.
Those made without artificial preservatives (check your labels!) or higher levels of salt, or that aren’t stored in a very cold fridge (34o°-36oº F in some cases) may mold prematurely.
If you’re purchasing fresh cheeses, plan to use them up within one week. Otherwise, they may develop unappetizing mold growth (more on this later) or an unpleasant spoiled-milk odor and flavor that no kitchen tricks can salvage or reverse.
Toss the Plastic
Depending on where you purchased your wedges, they may come wrapped in a variety of different materials.
Your mainstream supermarket, gourmet grocery store, or food co-op probably stocks wedges, rounds, and blocks that are packaged in plastic.
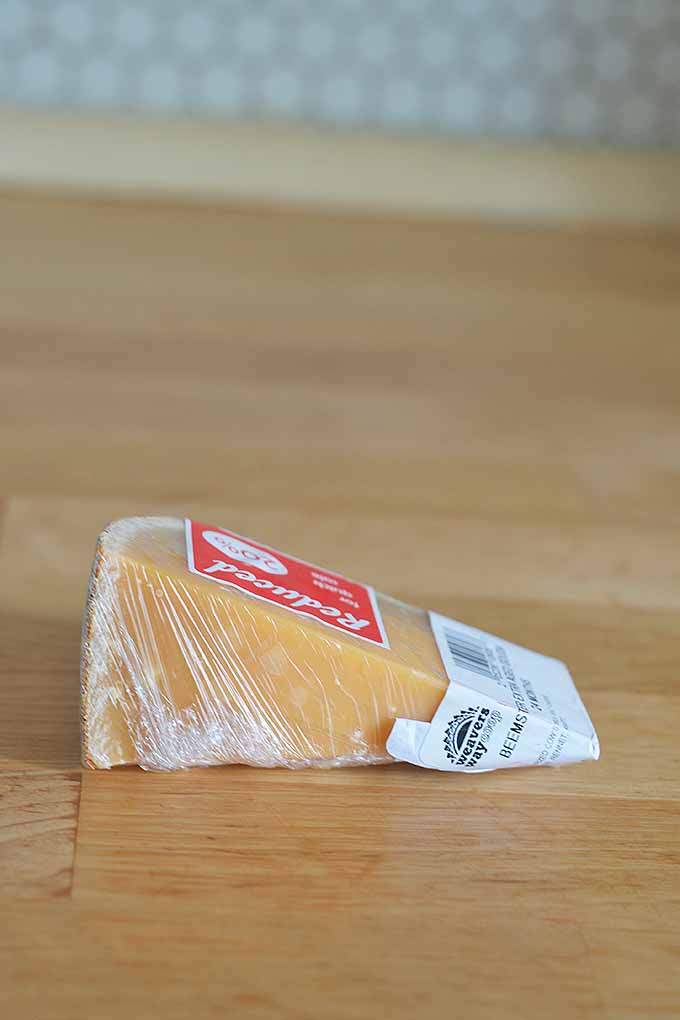
Whether plastic wrap stretched taut or thicker, vacuum-sealed plastic is used, this is an easy (and very cheap) way to protect cut wedges or wheels from the elements.
Even high-end cheese shops that would never sell you pieces cut to order wrapped in anything but cheese paper will sometimes wrap odd ends and other small bits or popular, quick sellers in a promotional display in plastic wrap.
Unfortunately, plastic will suffocate your cheese. It can also transfer a plasticky flavor to the surface of the product, which must be scraped off before eating. (Don’t worry – I’ll describe how to do this a little later!)
If you buy the occasional block of Cabot cheddar (my go-to for cooking and sandwiches), which is sealed so hermetically in plastic that the manufacturer doesn’t even require it to be refrigerated, it probably won’t taste that different if it stays in plastic.
And in my house, a good sharp cheddar doesn’t usually last more than a few days.
There’s no need to transfer your utility cheeses to fancy paper, but you do want to make sure you protect them from the air.
A zip-top baggie, plastic wrap, or upcycled plastic bread bag (a thrifty habit passed down from my grandparents) will keep those everyday favorites fresh for snacking, melting, sandwiches, or cooking.
Paper Works – But Not Alone
A few times when I’ve bought cheese cut to order, the shop has wrapped my wedge in unlined butcher paper – basically just kraft paper.
While this is adequate to keep my purchase from picking up crud from my backpack (and a really cheap option), it’s not ideal for longer-term storage.
Cheese paper – or freezer paper, a more affordable alternative – is actually a waxy paper fused with a porous plastic coating on one side.
This combination allows the cheese to “breathe” and give off gases and moisture while keeping outside moisture or the dry climate of your refrigerator at bay.
So double check that your monger is using a paper that will keep the right kinds of moisture in and out. Shiny on the inside means you should be good to go.
The Wrap
When you bring home your dairy deliciousness, you may need to rewrap, or you may not.
If your cheese has come home with you wrapped in plastic, as sometimes happens, you’ll want to remove it from its plastic prison before stashing it in your fridge.
Unwrap your cheese and discard the old wrapping. Gently scrape the blade of a sharp paring knife across the cut surfaces (the “face” of the cheese) to pick up a very thin layer from the outside. Wipe your knife between scrapings.
This should remove any remnants of plasticky flavor. Sliver off a bit of the cut surface; if you don’t taste plastic, you’re good to go.
Next, you’ll need to rewrap in new, appropriate material.
Cheese Paper Is Your Friend
If you want to take extra special care of your wedges – and if you’re reading this, there’s a good chance you do – you may want to invest in some cheese paper for your home.
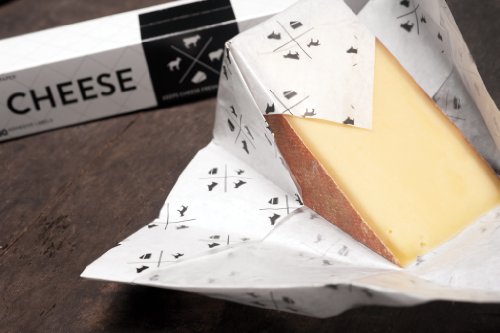
Formaticum Cheese Paper with Adhesive Labels
This breathable, moisture-wicking paper is what the professionals recommend to keep your cheese fresh. Formaticum makes precut sheets printed with their adorable logo, perfect for consumer-size pieces. These are available on Amazon.com.
If you’re looking to save a few bucks and want your wrapping material to do double duty in the kitchen, you can also simply go with freezer paper, which some cheesemakers I know use to wrap certain types of products.

Formaticum Cheese Storage Bags
(Or, if you make it all the way to the end of this tutorial and worry that your wrapping skills won’t be up to snuff, Formaticum also makes cheese bags for the origami-challenged.)
How to Wrap Cheese
The primary purpose of wrapping your cheese for storage, whether you’re stashing it in the fridge until you need it next or taking it with you on a picnic, is to protect it.
You want to keep your cheese safe from the elements: the dry, cold air of your refrigerator; dampness and off-flavors; dirt, debris, and germs that your wedges may come into contact with as you store or transport them.
So there’s no real right or wrong way to wrap your cheese, as long as the wrapping is snug and all surfaces are completely covered.
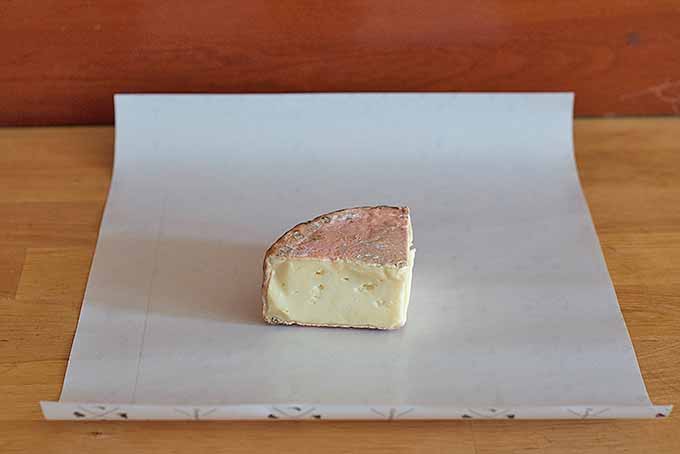
Take a look at these example wraps I made using whole and half sheets of Formaticum’s 11-by-14-inch cheese paper.
Wrapping a Wedge
This size of Formaticum paper is pretty substantial – your average half-pound hunk will have no trouble getting full coverage from these sheets.
A hefty whole-pound wedge would also be covered with some strategic folds. It’s good to know that these sheets should be able to handle all but the biggest retail cuts.
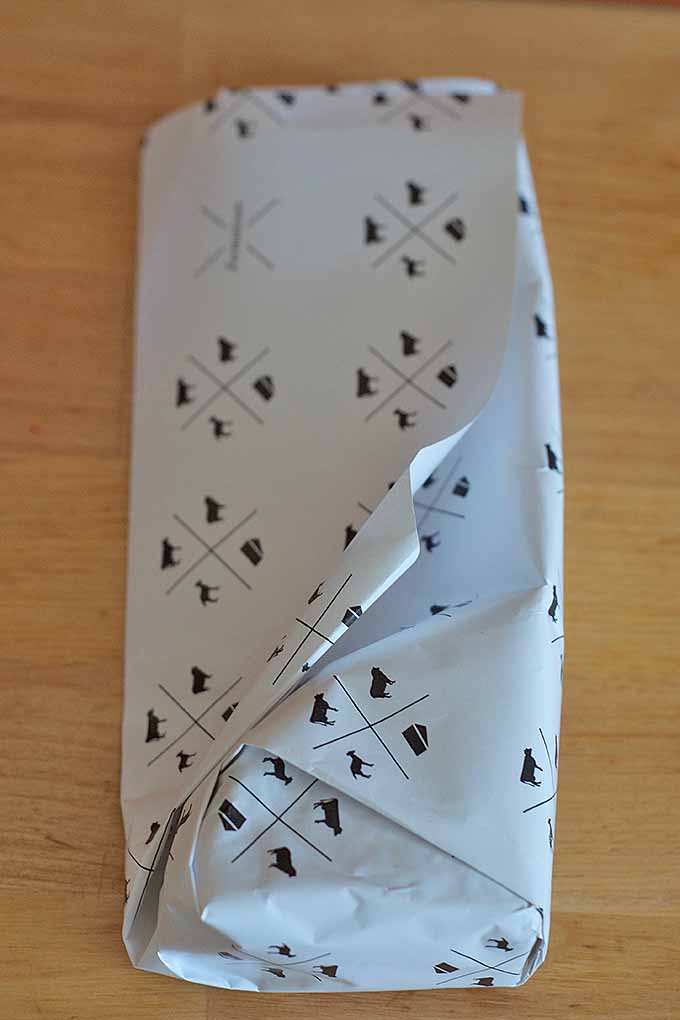
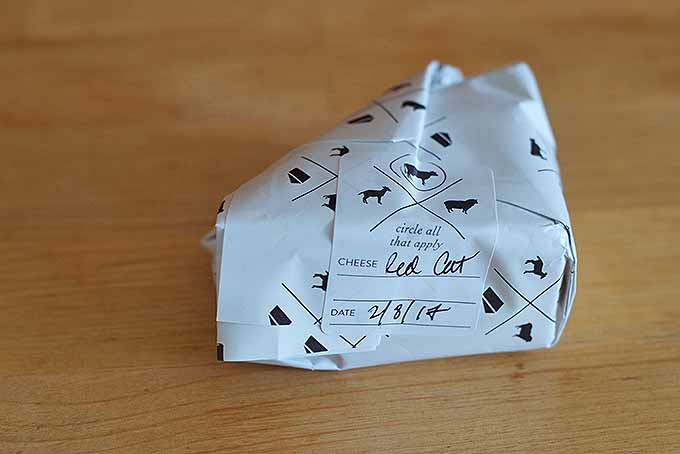
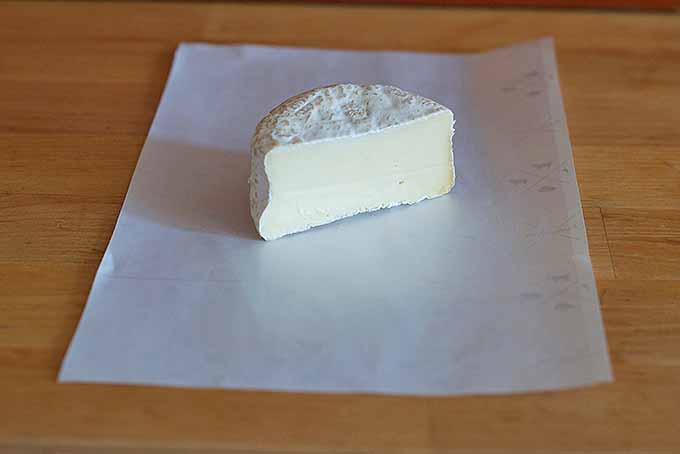
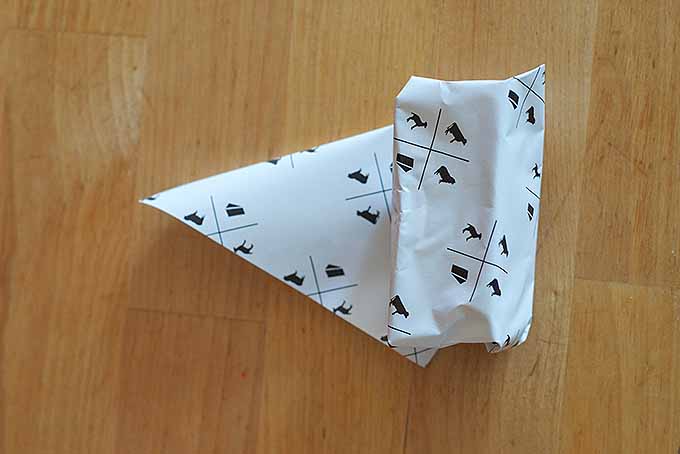
First, we’ll try this wedge-shaped piece of Red Cat, a raw milk washed rind made in Pennsylvania by Birchrun Hills Farm. Lay out your cheese paper, printed side down, on a flat surface.
Folding Paper Around Your Fromage
Place the cheese on the paper, centered from side to side but in the third of the sheet closest to you.
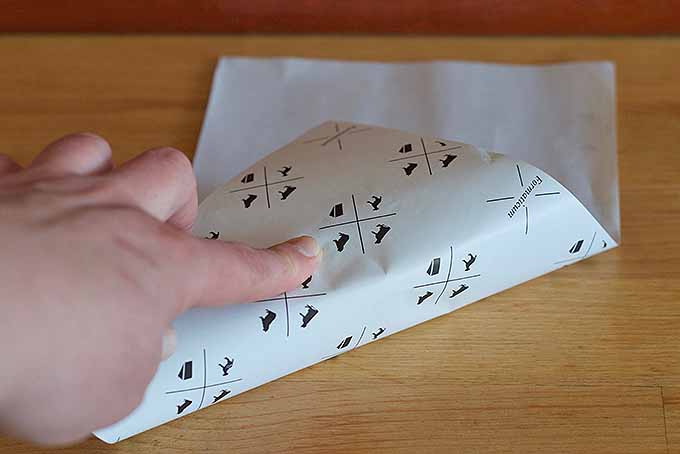
Fold the side of the paper that’s parallel to the cut side of the cheese facing you over the wedge.
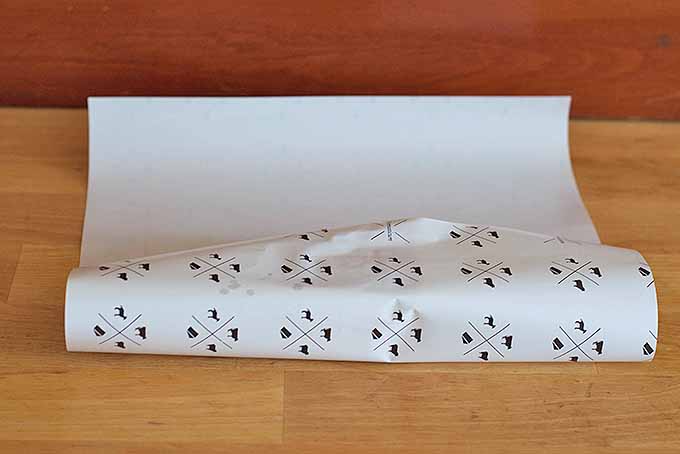
In this example, I’ve situated one of the cut sides of the wedge towards me.
But you could also turn the point towards you, and then wrap each corner of the cheese paper closest to you across the cheese at a 45° angle.
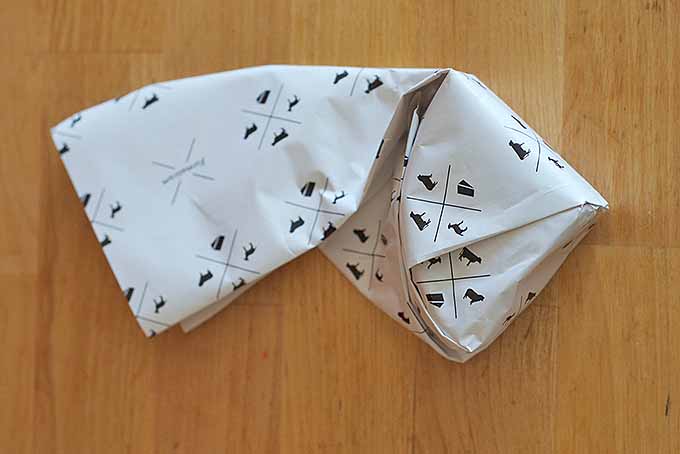
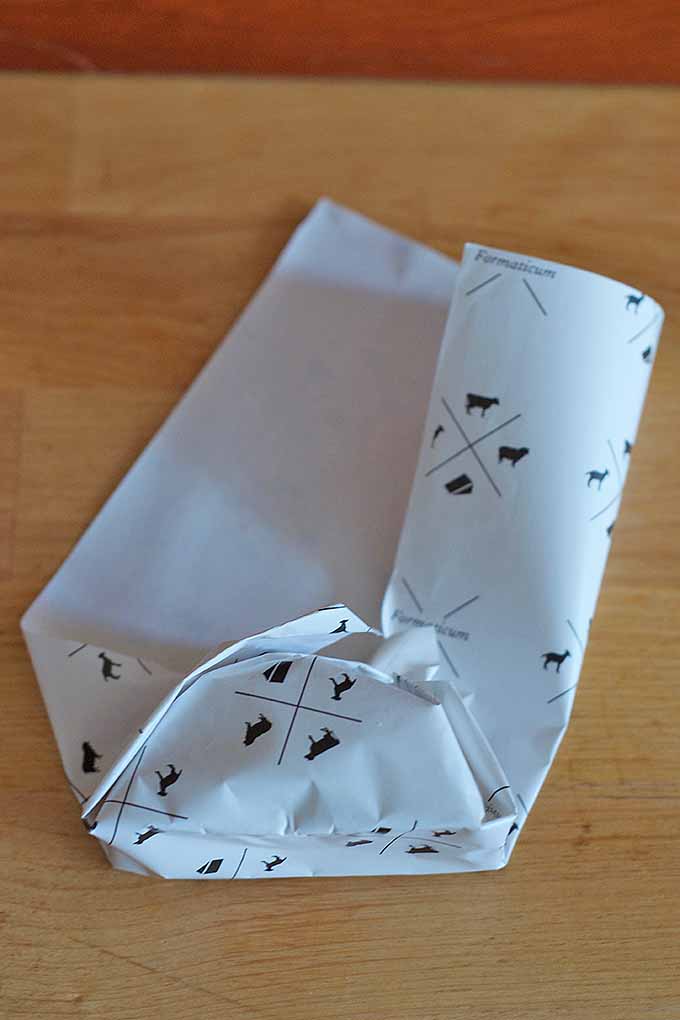
Next, bring the right side of the cheese paper – the one parallel to the other cut face of the cheese – over the wedge, squaring off the paper at the point of the wedge.
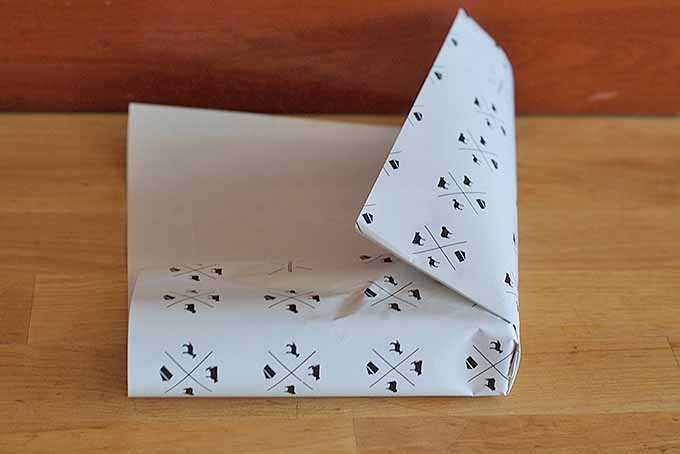
Next, flatten and fold each side of the paper against the curved end of the wedge.
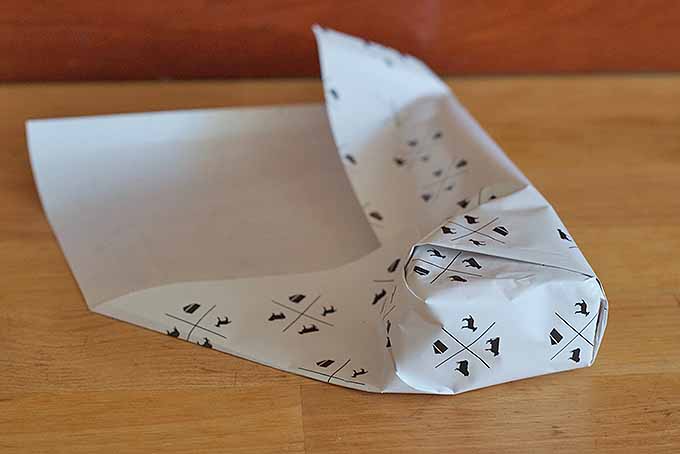
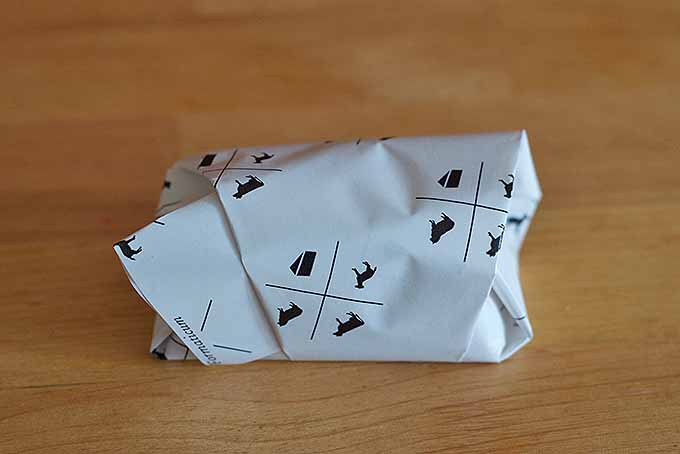
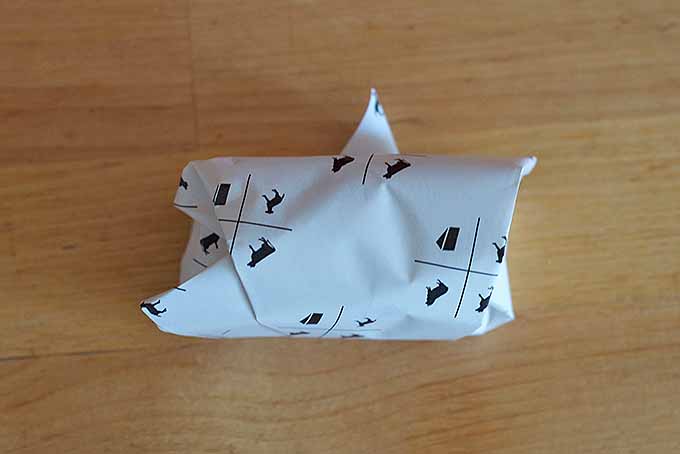
Now that the wedge is fully covered, we’re simply tightening the paper around the cheese and folding up the excess to keep air out, making a nice little package.
Fold one side of the excess paper at a 45° angle against the curved portion of the cheese.
Fold the section of excess paper in half the long way, to make the extra paper easier to tape down once it’s all folded up.
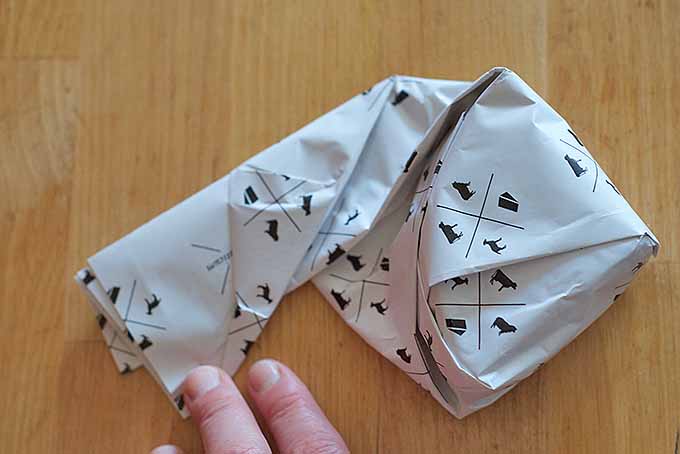
Turn the wedge back onto its curved side, taking up the excess tail of cheese paper, and turn it over so that you can fold the excess paper flush with one of the flat surfaces of the wedge.
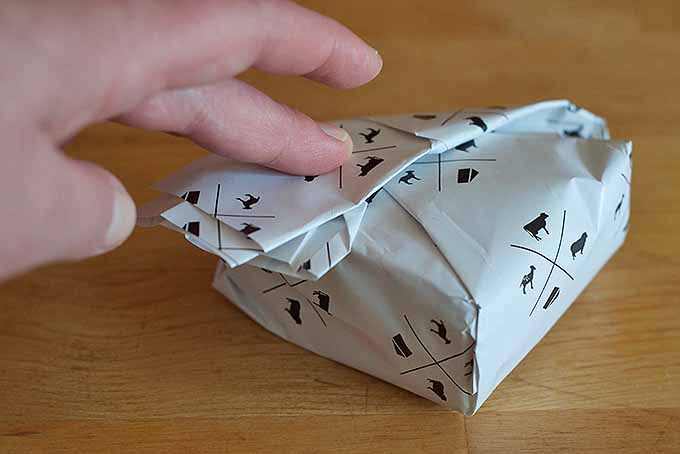
Now you can finish the job with a piece of tape – or the cute labels that are included with Formaticum papers.
Wrapping Smaller Pieces
But not all cheeses need a full sheet; it’s a thrifty idea to use a smaller paper when you can, as long as you can cover all the surfaces of the cheese and wrap the piece tightly.
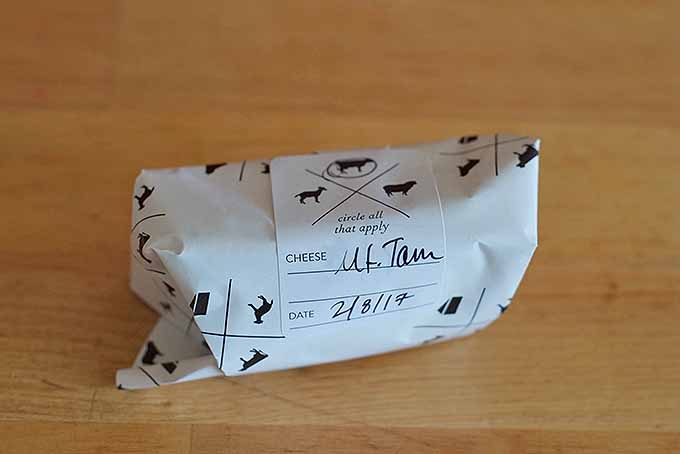
Here’s another example, using an 11-by-14-inch Formaticum sheet cut in half to make an 11-by-7-inch sheet, which I used to wrap a half-round of Cowgirl Creamery’s Mt. Tam.
Again, set the paper on a flat surface, with a short end towards you.
Center the cheese from side to side, placing it on the third of the sheet closest to you.
Notice that the cut face of this round is facing the right corner of the paper, approximately a 45° angle from the short side.
Fold this corner of the paper snugly over the cut side of the round.
This next step is a two-parter:
First, smooth the folded-over corner of the paper down around the curve of the back side of the piece of cheese.
Then, using both hands, fold the open ends of the sheet on either side of the cut face away from you and around the curved side. Be gentle – this is a soft cheese, after all – but make sure the paper is nice and snug after this step.
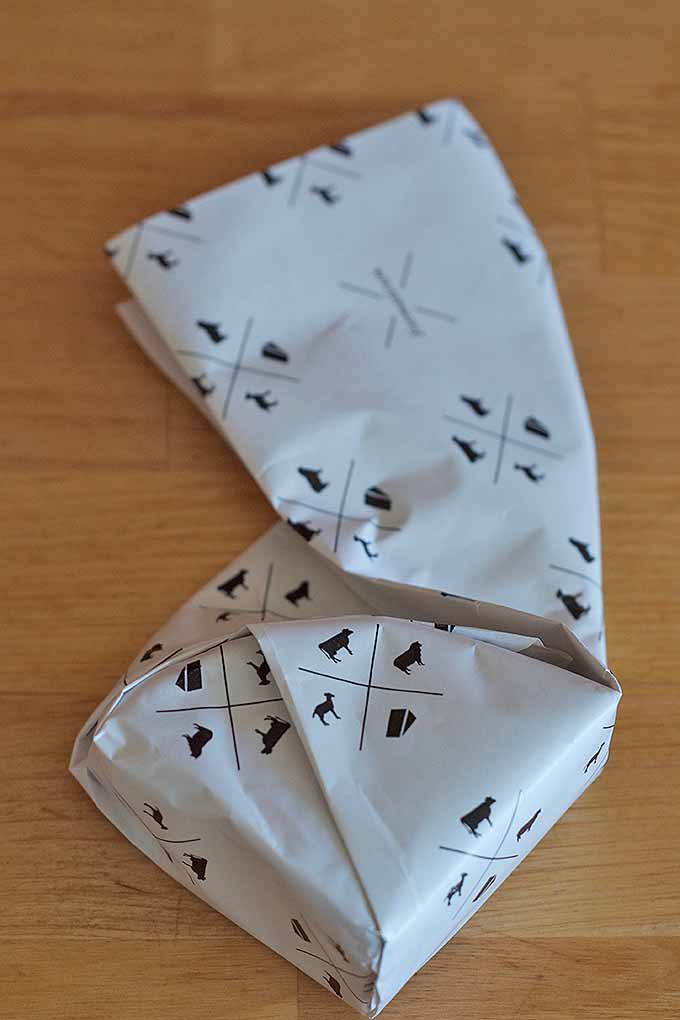
Now it’s time to close up the wrapping. Turn the cheese backwards onto its curved side so that the excess folds of cheese paper are taken up, pressing gently against the curved rind so that the wrapping folds snugly.
Roll it back one more time to take up that last bit of excess paper.
Then seal the bundle with a small piece of tape or a label.
Homemade Hacks
If you don’t want to spend the extra scratch, you probably have what you need to make a suitable substitute already in your kitchen.
A layer of wax paper or parchment paper folded tightly around the cheese, then placed in an unsealed plastic baggie, is probably your best bet.
For blues, regular aluminum foil like you’ll find at the grocery store or on Amazon.com can also be an effective packaging.
Some wheels of blue are stored in foil towards the end of the aging process; this is said to help regulate further mold growth as well as protecting from the drying effects of the air.
If your purchase was cut to order and wrapped in cheese paper by your friendly local monger, it’s not necessary to rewrap it once you get home.
But keep in mind when you first unwrap that you’ll want to reuse that paper. Open your presents carefully!
Depending on the shape of the piece (and how much you went through), you may simply be able to rewrap along the creases that your monger already made.
Just be sure to fold the wrapping tightly around the smaller piece and re-tape the wrapping shut to keep it closed if possible.
Your Fridge vs. Your Cheese
As mentioned above, the cold air that is blowing on your foods will dry them out.

For veggies, the process of evaporative cooling robs their cells of moisture and makes them limp and soggy.
That same cold wind blowing in your fridge will also turn your beautiful blocks into waxy, dried-out bricks of disappointment.
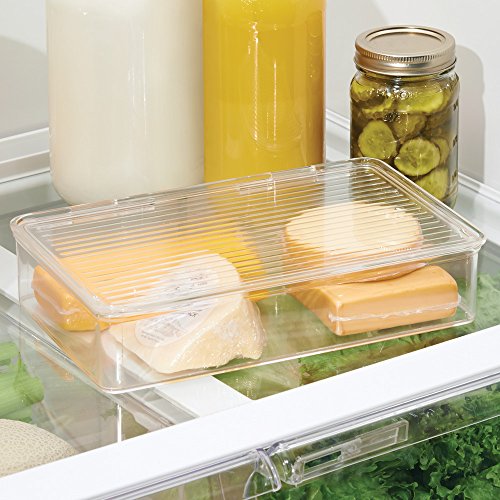
To avoid this sad outcome, store your well-wrapped wedges in the cheese drawer, if your refrigerator has one.
This offers some humidity (but not too much) as well as protection from the too-dry environment caused by the air circulating in the main fridge compartment.
Don’t have a drawer in the fridge for this purpose? The butter compartment or a crisper drawer also works for this, if they’re not already too full.
No space in either of those?
There is a solution, and this is especially important for delicate bloomy rinds: use a plastic storage container a la Tupperware or Gladware. Store loosely covered with the lid, but not fully sealed.
InterDesign Kitchen Storage Container with Hinged Lid
A refrigerator organizer like this container from InterDesign works even better, since the hinged lid does not create an airtight seal. This will provide adequate protection from the harsh breezes of your fridge while allowing for airflow.
If you want a task-specific tool for this purpose, check out the Capabunga Cheese Vault, which boasts moisture-wicking bottom grooves and a seal that allows the contents to breathe. Available from Amazon.com in a variety of colors – biscuit, butter, green, orange, and white – you can pick your favorite to match your kitchen decor.
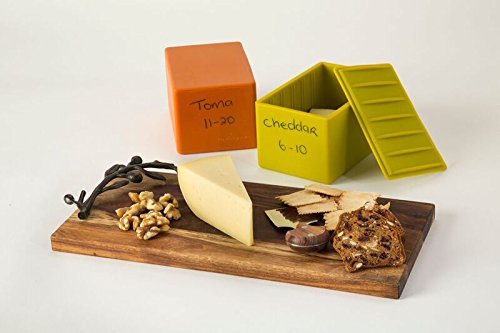
Capabunga Cheese Vault in Orange and Green
This silicone storage container also has a polished outside wall on one end where you can write what’s stored inside in ballpoint pen, then wipe away when you change out your wedges.
A Note on Mold
Even the best-wrapped cheeses can grow additional mold during storage, especially on their cut faces.
That’s right, additional mold.
In case this fact has been hidden from you, mold is what separates the milk from the cheese.
Mold growth on a cut piece usually manifests in the form of a thin white film on the paste, the interior of the wedge beneath the rind and, in soft, ripe varieties, the cream line.
Mold like this is the same as the mold that makes up the snowy white rind of bloomy rinds, and it is nothing to fear. Simply scrape or trim away the mold and enjoy.
The same goes for green or blue molds. You may wish to remove these for the ick factor, but they are considered harmless when they grow on cheeses.
These may also grow on the rinds of bloomies during advanced stages of aging – when they’re at their ripest, stinkiest, and most delicious. They are fine to consume.
Red, pink, yellow, or black molds, however, are a sign that something’s not right. THROW OUT any portions that contain these molds. If the rest of the wedge is untouched, it should be safe to eat.
Slice Away!
Now that you know how to protect your investment, I hope you feel more confident about treating yourself to these fine fermented dairy products.
You’ll know exactly what to do when you have a leftover piece of sharp cheddar after grating it for a creamy mac and cheese, or a few pieces of brie that you want to save from your dinner party cheese board.
What are your favorite varieties to splurge on? Have any tips or tricks to keep them looking and tasting their best? Share with us in the comments!
Don’t forget to Pin It!
Photos by Alex Jones, © Ask the Experts, LLC. ALL RIGHTS RESERVED. See our TOS for more details. Uncredited photos: Shutterstock, Formaticum, Capabunga, InterDesign.
About Alex Jones
Alex Jones is a local food consultant and writer based in Philadelphia. Evangelizing about local food is second nature to Alex, whether she’s working an artisan cheesemaker’s farmers market stand or developing growth strategies for her favorite small-scale artisans. Her favorite areas to work in currently are the artisan cheese and pastured meat supply chains. When she’s not working, Alex spends her time managing her usually-overstuffed fridge, growing vegetables, foraging for fruits around the city, playing tuba in a disco cover band, and hanging out with her partner Dr Thunder, Philadelphia’s karaoke superhero, and their two cats, Georgia and Li’l Mama. Alex’s favorite food is some kind of cheese on some kind of bread.


Have you tried “Forever Cheese bags”? I have had excellent results for years.
What about feta? How do you keep it from going slimy in the brine?