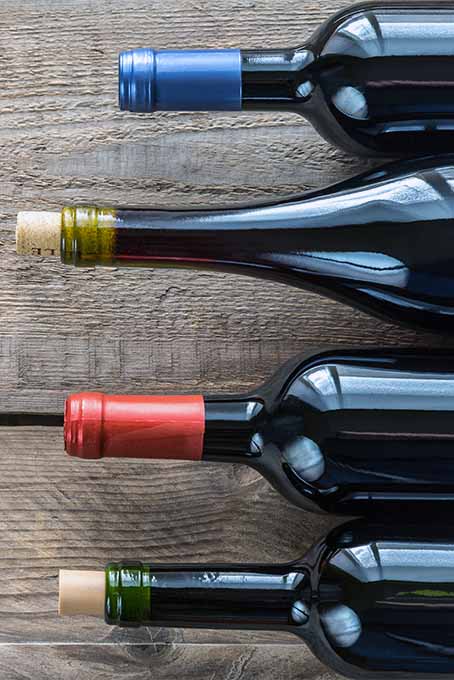
While I realize that the idea of leftover wine is foreign to many of us, it does happen.
And for those instances when an open bottle of vino doesn’t get finished, a great option is to make your own vinegar.
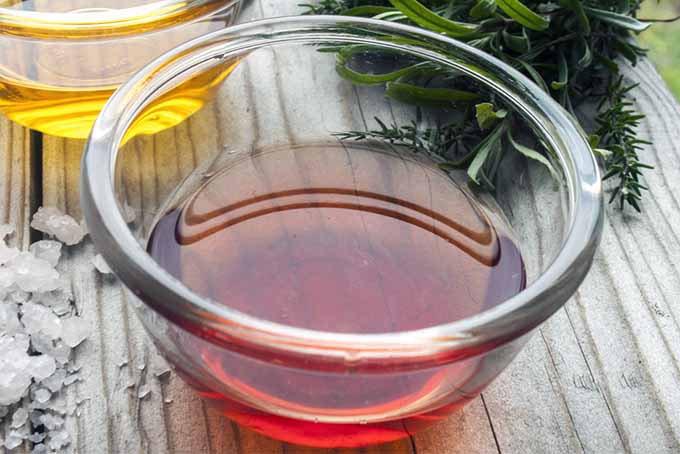
Finding a nice, full-flavored wine vinegar in the supermarket can be difficult, as they often have bland and acidic flavors due to quick production. And the ones found in specialty food stores are usually expensive.
For a taste and fragrance that’s clean, sparkling, and fresh, it’s hard to beat a homemade batch.
Easy to make and inexpensive, crafting your own is also a lot of fun.
How it Works
According to Brian Clegg at the Royal Society of Chemistry, creating vinegar is a simple process.
Once a bottle of wine has been opened and exposed to the atmosphere, the alcohol (ethanol) interacts with the naturally occurring bacteria found in the air (acetobacter), and is converted into acetic acid. And in a relatively short time, the taste will begin to sour.
But, in order for the wine to successfully morph into a useable vinegar, it needs a live starter component, or a cultured acetobacter bacteria which is known as the “mother of vinegar” (MOV) like in what you would find in store-bought raw apple cider vinegar, for instance.
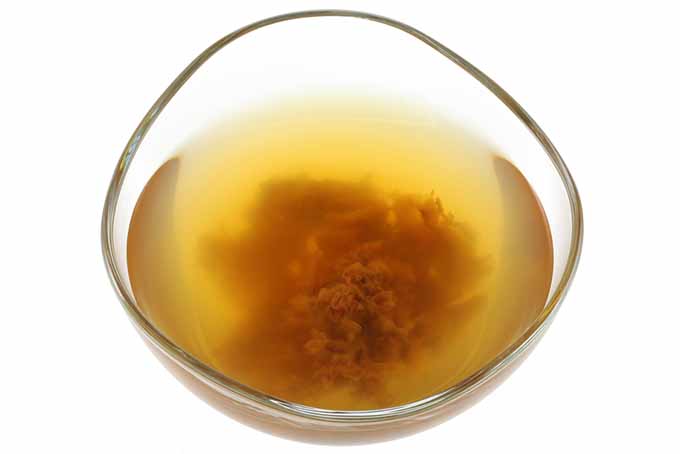
MOV is cellulose that forms in unpasteurized brews. You’ll often find it at the bottom of bottles of balsamic, malt, or cider vinegars – it’s that mass of jelly-floggle goop. Though a bit odd looking, it’s perfectly natural and harmless.
To make your own vinegar, you can introduce the necessary MOV by purchasing a tub of it at beer or wine making stores or online, or simply use raw, unpasteurized vinegar instead, which will contain the acetobacter bacteria.
Once the MOV is mixed with some wine, it needs to ferment in a warm, dark spot where it can breathe, as it needs access to the airborne bacteria.
After fermentation, you can strain and bottle your creation for immediate use, or allow it to mature in the bottles for a deep, mellow flavor.
Tools of the Trade
Here’s a list of the basic equipment you’ll need:
- A large earthenware or glass crock, preferably with a spigot for easy bottling. Try to find one that will hold at least a gallon so you can make a large batch.
- A piece of cheesecloth large enough to cover the crock, which allows it to breathe.
- A large elastic band to secure the cheesecloth.
- Sterilized bottles with airtight stoppers.
- A funnel for bottling.
- Some form of MOV, as outlined above.
- Leftover wine, but from bottles only please! Don’t use the dregs left in glasses, for obvious reasons… that’s not the kind of bacteria that you’re going for!
- A funnel for bottling.
Avoid using metal fermentation vessels as they’ll react with the acids and impart a metallic flavor, and plastic should be avoided as well, unless it is food grade and BPA free.
For a good read on making your own fermented products at home, pick up a copy of “The Art of Fermentation” by Sandor Katz.
Taking the Necessary Steps
While most recipes you’ll find are pretty loose, a good rule of thumb is to use 2 parts red wine to 1 part vinegar.
- Add 1 cup of leftover wine to your crock.
- Add 3 tablespoons of vinegar along with the live starter or MOV. Or simply use raw, unpasteurized cider vinegar.
- Mix it all together, then cover with the cheesecloth and secure it in place with a rubber band.
- Over the next two weeks, add another 2 cups of wine twice a week, stirring well with each addition.
- Let your brew ferment for about 8-10 weeks, and when it tastes and smells like vinegar, it’s ready.
- Strain through layers of cheesecloth or a paper coffee filter to remove any MOV, as this will inhibit further fermentation. Continued fermentation after bottling can lead to corks popping, and exploding bottles. But do reserve any remaining MOV for your next batch.
- Bottle into clean, sterilized jars and seal securely with caps or corks.
- Add a label, and store in a cool, dark cupboard.
For a white wine, you will need to cut it with some water, as a result of its high acidity.
Follow the recipe outlined above, but use 2 cups white wine plus 1 cup water. Add another cup or so of wine every week for 4-6 weeks, stirring well.
This type will take a bit longer to ferment, so you should wait to start tasting until 12 weeks have passed.
According to the Penn State Extension Food Preservation and Quality Team, to ensure the longevity of your stored vinegar, pasteurization is recommended. This can be done before or after bottling.
If already bottled, use a hot water bath to head the contents. In both cases, the vinegar needs to be heated to at least 140°F but no more than 160°F, so use a cooking thermometer to ensure that you reach the target range. Cool and bottle, or cool the bottles and store as described above.
Once you’ve made your vinegar, why not transform it back into a drink again? Check out our post on shrubs and get the recipe here.
Conclusion
Once you’ve made your first batch, you’ll be hooked. The taste is so much richer and fuller than store bought, you’ll want to start experimenting with new dishes just for the chance to use it.
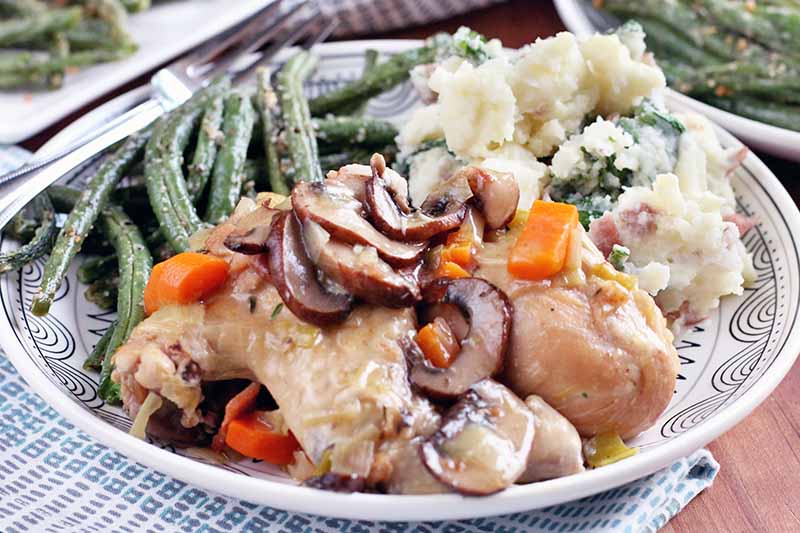
Try it in a classic herbed vinaigrette, use it to dress steamed greens like kale or spinach, deglaze a pan, make a sauce, or French braise a chicken. And of course, it makes an appealing gift at any time of the year, so you can never make too much.
Stop throwing out your leftover wine – there’s a delicious vinegar just waiting for you to create it! Tell me about your adventures in vinegar-making and share your questions in the comments.
Photo credits: Shutterstock.
About Lorna Kring
Recently retired as a costume specialist in the TV and film industry, Lorna now enjoys blogging on contemporary lifestyle themes. A bit daft about the garden, she’s particularly obsessed with organic tomatoes and herbs, and delights in breaking bread with family and friends.
I totally didn’t even know this was possible, I’m so trying it! My boyfriend and I received several bottles of wine over the holidays and I don’t think we’re going to be able to finish them while they’re all still good…I don’t drink wine at all and my boyfriend only every once in awhile. I love cooking with different oils and vinegars though so this is going to be a really fun way to use up all those bottles 🙂
Sounds like you’ve got the ideal scenario for starting a vinegar brew cupcakekitty! It’s a great way to recycle and a lot of fun!
I don’t purchase enough of the stuff to even consider trying this at home. In fact, this would probably be the last thing on my mind to do, however, it does sound like an interesting experiment to try.
If you enjoy a bit of science, making your own vinegar is an interesting experiment… and it doesn’t have to be restricted to using wine. You can create a wide variety of home brews from fruit too. The book mentioned above, The Art of Fermentation is a treasure trove of info.
I’ve had some leftover Valpolicella Ripasso sitting on my counter for a while – I have no idea if it’s still good or not. I’m seriously excited to try this out, however I’m a bit paranoid about accidentally introducing some microorganisms that don’t belong… I’m afraid of some little creature releasing toxins during the process, and I’m not sure if pasteurization kills those too… Is this a legitimate concern or am I just being paranoid?
Most unfriendly bacteria would occur if left to over-ferment you_are_beautiful, and pasteurization would kill them off. Thanks for the question.
I can see myself making some lovely salad dressings with this idea. It’s true, there usually isn’t much left over when we enjoy a bottle, but I’ll definitely keep this in mind.
This would make a nice gift indeed. I can see putting it in a pretty bottle and pairing it with a nice bottle of good olive oil or something. I think it would be well-received by anyone who enjoys cooking.
Salad dressings take on a whole new flavor with a home brew Zyni. And they always make a well-received gift – as you say, in a nice little bottle with some oil, a small cellar of salt, or a bouquet garni of fresh herbs… creative and useful, foodies love it!
I bought some local blueberry wine a while back, but did not drink all of it. I have seen blueberry vinaigrette in the grocery store, so this might be a great way to use what is left. The resulting concoction might go well with some grilled chicken, blueberries, pecans, and salad greens.
Since I am not a particularly patient person when it comes to ordering something that I am dying to try online, I think one of the local organic stores in my neighborhood offers raw, unpasteurized vinegar.
Hopefully the store will have it and I can give this a try in a day or two!
Blueberry vinaigrette sounds like a great solution CStansbury. Let us know how it turns out for you!
I was aware that wine is used to make vinegar, but I had no idea how to do this or that the process was so simple. I will certainly have to try this a s I love to try new things. I would like some recipes that include flavors and herbs etc.
Simple and fun oraclemay! Lighter wines such as white or rose are best for herbs, and ‘twiggy’ herbs work better than leafy ones. Try tarragon, rosemary, thyme or sage. And garlic or hot peppers always work too.
This is so cool! Sometimes we get rid of all kinds of leftovers without really knowing that they can be used for something really productive, and this is one of my favorite examples about it, I had no idea that this was possible! And it’s also always good to try new things, and I’m pretty sure that this vinegar would add a really peculiar taste to… any food! which is great.
Thanks for sharing!
It’s definitely a fun little recycling project ae, and produces some lovely, unique flavors. Thanks for your thoughts!
I love red wine vinegar, but never knew it was possible to make it at home. I’m really glad I ran across this information because good red wine vinegar is quite pricey at retailers in my area, if you can find anything decent at all! I am definitely going to try to make my own soon, since we usually have some leftover wine at the end of the weekend.
It is pricey Lisa! Making your own is economical, and it’s fun to come up with different flavors. Enjoy!
While leftover wine is most certainly a rarity in my life (haha!) I think this would be a lovely experiment, especially for older children learning about biology and microbes. If you compare the price of a bottle of balsamic with that if a relatively cheap wine I can see how this could make a great hobby, and with increasing information about the health benefits of vinegar you may even turn it into a bit of a money maker! Thanks for the great info Lorna!
Hmm, I do like the idea of making it into an experiment, cafwen… Probably not the best activity for a group of cub scouts though 🙂
I know. Sourcing the leftover wine can be a bit of a challenge! Love the idea for a science experiment cafwen… it really is a fun hobby for all. Glad you enjoyed the post!
I really like the idea of making my own wine vinegar (partly to avoid the waste and also to get the flavours) but there’s no way we have that much spare wine, lol!
I’m not sure we use enough wine vinegar to warrant the effort of getting some mov and buying wine for that purpose, but it’s not tucked into the back of my mind for “one day”!