All the modern “nonstick” cookware available today just does not have the same level of character for cooking on (or in) as good old cast iron. I have found that many things never taste quite right if they are cooked on anything else.
Sausage, bacon, and many other types of meat really need to be cooked in cast iron skillets to have the correct flavor, and to make the perfect sear.
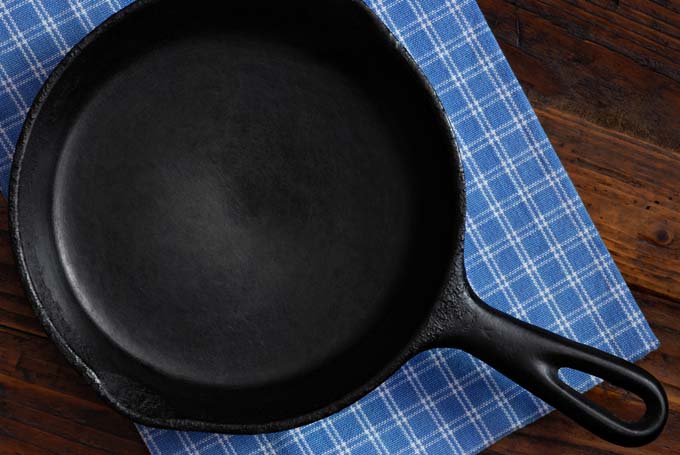
And I’ve recently discovered that it’s also great for baking a giant chocolate chip cookie, with a perfectly buttery, crispy crust and ooey-gooey center!
Porcelain-covered cast iron Dutch ovens are perfect for “pot roasting” and braising.
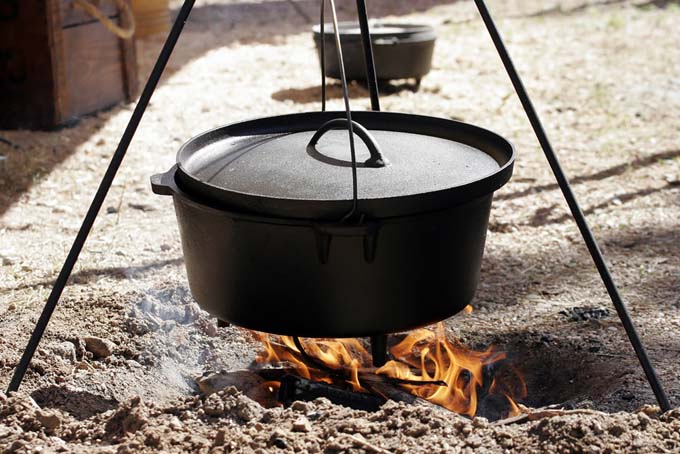
In addition, cast iron camp ovens (often erroneously labeled as “Dutch” ovens) make camping trips a real treat, since you can cook dishes that most people would never dream of serving away from the vicinity of a modern kitchen.
This material is versatile and can do a lot more than most modern cookware. In fact, you can still purchase new, made in the USA cast iron skillets, frying pans, and Dutch ovens.
This is fairly inexpensive (but not as inexpensive as buying used, in most cases).
Where to Find It
I look for old examples at flea markets, yard sales, and junk shops. Some of my best cast iron skillets belonged to my great-grandmother, and they have been handed down from various family members.
These skillets have a date of 1894 molded into them, and they are still perfectly usable today. Find me a piece of modern cookware that will last like that – Good luck!
I would have to say that frying pan was well worth the money my great-grandfather paid for it.
The problem with almost all of these pieces is that they have often sat unused for years, because they are “nasty looking.”
I will not argue that point.
My own were nasty looking when I got them. In fact, some of them were very nasty looking, but today they are clean and usable.
How did I do this?
No, I did not use a small mountain of steel wool and gallons of oven cleaner, or scrub until my arms fell off.
In fact, I watched TV while ages of old gunk was stripped off these wonderful old pieces. When the process was done, it took me about an hour to “cure” the freshly stripped cast iron, and ten minutes to clean up.
If you’re looking for a thorough purchasing guide on cast iron cookware (along with other types of skillets), do feel free to explore our thorough review on the subject!
Restoring with a Self-Cleaning Oven
In order to clean cast iron in this manner, you will need a self-cleaning oven. If you have one, you are in luck.
Your restoration efforts will be a snap!
Your first step is to inspect the pans before you even purchase them. Make certain there are no cracks or breaks – otherwise you are just wasting your time.
If the piece is sound (just cruddy from years of gunk and crud buildup), you may be able to get it for a good price.
Once you get your bargain home, knock off any excess buildup outside, using a stiff wire bush. Then prepare your oven for cleaning, in accordance with the oven manual directions.
My oven says to remove both of the wire oven racks. I leave one in for the cast iron to sit on, and have never had any problems.
Once the oven is prepped, I place the wire rack on the next to the bottom guide rails, and then place the cast pieces on the rack.
Each piece should be turned upside down and, while you may place them as closely together as possible to get as many as possible into the oven, they should not be touching each other or the sides of the oven.
I can usually get four pieces in my oven, unless I am restoring large Dutch ovens.
Once you have placed your frying pans and/or Dutch ovens inside, close the door, lock it, and set the timer. While most ovens can be set from 2 ½ to 5 hours I have that found that 3 ½ to 4 ½ hours seems to work best for stripping the pans.
Of course, you are also cleaning your oven while doing this, and you need to consider how dirty it is to start. I doubt the cast iron will be hurt if you leave it in for the full 5 hours; I have just never tried it myself.
During the course of a self-cleaning cycle, the oven works by using very high heat to burn away built up gunk and mess. It is this heat that will burn away the gunk on your pans.
The cycle can produce strong odors, so I usually turn the ventilator fan on high and place a window fan in the kitchen window, sucking air out of the kitchen.
When the cycle is finished, you will need to allow the oven and the cast iron time to cool before you try to handle them.
In addition, I recommend utilizing some very good hot pads. You will find a pile of black ash in the bottom of your oven, which will need to be wiped up.
This ash will be loose, not stuck to the oven floor. It is all that remains of the gunk that covered your cookware.
Seasoning and Curing
The cast iron should be bare metal iron now. It looks nice, but it is not ready to use. If you leave it like this it will rust quickly. You must first “cure” or “season” it.
While it is still warm (not hot), use a folded paper towel or clean cotton cloth to grab a scoop of shortening (such as Crisco or any generic brand) and spread it evenly over the pan.
You want to coat the entire surface of the iron, inside and out. Make sure you do not miss any spots or you will have rust in these areas. Ideally, your pan is still warm enough at this point for the shortening to melt into the metal.
If not, you will need to turn the oven back on to about 300ºF, and bake the vessel(s) just long enough to melt the shortening after each of the first three coats.
Be careful to put a drip pan of some sort beneath the pan(s), or you will mess up your freshly cleaned oven by dripping shortening all over it.
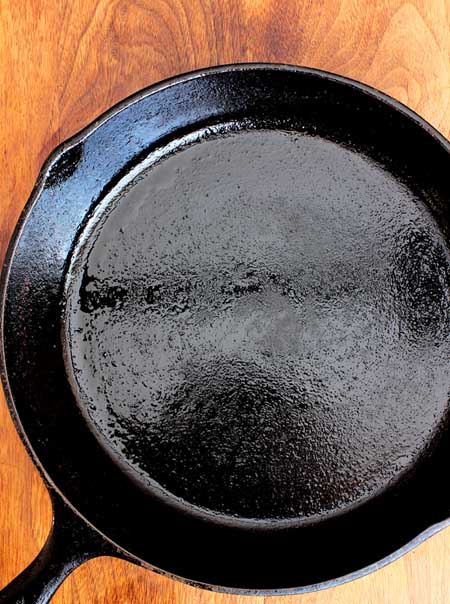
After three coats, I put one VERY thick coat on my iron and place it in the oven, at 300ºF for about 20 minutes.
This sometimes produces smoke, so again, I usually turn the ventilating fan on high, and put a fan in the kitchen window, sucking air out of the room.
After 20 minutes I shut the oven off, open the door, and allow the iron to rest until it is cool to the touch. Then I take it out and wipe it down. It is now ready to use, and as good as new.
Your only task now is to ensure that you properly care for and clean it.
Conclusion
Using this method, old “junk” that was purchased for next to nothing can quickly become valuable and usable cookware.
I have even been considering picking up some old cast iron cheap, restoring it, and taking it to the flea market to sell.
Who knows, it might work to bring in a few bucks!
No matter what, I still have a nice collection for my own use, which I keep up and use regularly.
I hope this helps some of you to save old pieces and put them back to use, rather than seeing them thrown out for no real reason, only to be replaced by cheap “made in China” crap. Good luck!

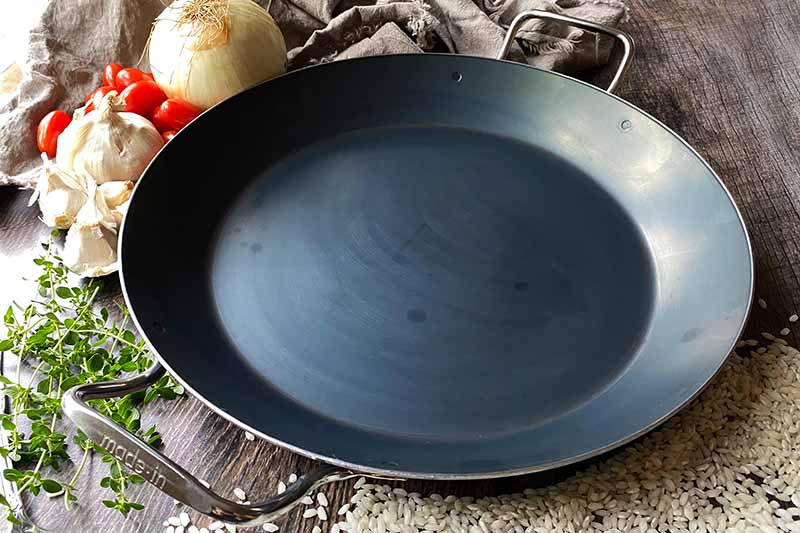


When I was a kid we always had a black cast iron skillet in the kitchen. When ever I see one I try to get one. I season mine by rubbing it with oil and baking it for a few hours in the oven. Good information here.
I’ve seen cast iron ccokware at yard sales before but was always discouraged from buying it due to the amount of elbow grease I thought I’d need. I had no idea that they could simply be cleaned in the oven. Next time I see one, I’ll be buying it and giving this method a try!
I’m 80 years old and I decided I wanted to get rid of the black build-up on my cast iron pans I put them in the self cleaning oven when is it 10 and 1/2 in made in Taiwan that I’ve had myself for 80 years and another one is a little 6-inch 100 my God I cannot believe when I open that oven and I saw those pants I am shocked they are beautiful can’t wait to get them seasoned
Hooray, thanks for your message, Marie! Enjoy your good-as-new pans!
The cast iron skillet was always king in our house too. It is so true that the food taste better when it is cooked in the cast iron. perhaps it is the environment created from the thickness, the warmth it circulates and its nature to just lock in the flavors.
As of a few years, I have been without cast iron in my kitchen. I am so inspired by these insights and just want to get started using one again. Knowing how to clean and cure it is priceless! It is also encouraging in the purchasing of one, so it can be in my kitchen for years to come.
There is a lot of good information here for someone wanting to learn how to clean/season their cast iron pans. We just received a set of cast iron pans and skillets that seem to be really good quality. However, I don’t think we used enough layers of Crisco when seasoning the pans, since it seems to disappear whenever we cook in them. I will have to try adding a few more layers, as you described.
Mdrogge, try coconut oil. It’s nearly as good as lard and other animal fats and has one of the highest smoke points. Lard is the absolute best but some folks can’t use it for health or religious issue.
The problem is not the number of coats, it’s the type of oil. Flaxseed oil dries/bakes to a harder grade finish than usual vegetable oils and animal fats, which results in a softer, more wear prone finish. Flaxseed oil will provide a harder, significantly more wear resistant coating.
I tried flaxseed oil but finally stopped because of the terrible smell. The entire house would stink horribly and my family complained. I also wasn’t getting great results after more than 10 seasoning layers. I’ve since switched to palm oil – the saturated kind (a tub of Spectrum palm oil is <$8). There's very little smell, though my husband likes it and says it smells like someone's making pancakes. The results are even better. I noticed an improvement with the first use.
Thanks for your suggestion, KD. Flaxseed oil has a higher smoke point than palm oil, and I’m also curious – why were 10 layers required? After trying 2-3, the usual recommendation would be to gently remove any sticky residue and start over. I’m glad you were able to achieve the results that you were looking for eventually!
I wonder if the smell may not be the flaxseed oil itself, but rather, oil that has gone rancid. This type of oil spoils quickly and should be refrigerated after opening. In fact, some sources recommend refrigerating it at all times, even sealed bottles.
I did the self-cleaning method last night for the second time, and it worked so well I had to come make sure the internet knew! Now I’m stuck in these comments rehoning my knowledge of smoking points, and ideal cleaning methods on freshly reseasoned cast iron pans. 33 must be right around the corner the way I’m riding the adrenaline these days!
Online is a list of different oils and their smoke level. Also the different oils you can use when seasoning iron. Don’t rush the process of seasoning. Allow the pieces to cool after each round of seasoning.
I found an old cast iron pan half buried in my backyard. It was a mess so I just tossed it into the garage for another day. Now I know how to restore it. Thank you!
I have been wondering for the longest time how I could clean and restore my cast iron pans. Now thanks to your article I have got the information I need. I have several pans that need a little love and attention!
I love the self cleaning oven suggestion. Kills 2 birds at same time!
I heard from my mother that those “non-stick” pans generally have chemicals that leech off into your food while cooking and are actually not safe. As a result, I have used nothing but cast iron products for cooking. This article was especially helpful to me as I have two twin cast iron skillets that have rusted over that I used to love making omlettes in. They have not been in use for years because of this. Thank you so much for these tips!
There’s something about coke that’s true. FYI, I had corrosion on my car battery. My mechanic poured coffee over one of the battery terminal. The corrosion just washed away. A few mouths later. I notice the corrosion that the coffee was poured on was lean as a whistle. While the other terminal that wasn’t treated had a new build up of corrosion. There seems to be a connection between coke & coffee. Maybe something to do with their acidity!!
Cola is also used to tenderize tough cuts or pork too. Amazing we can use things created for something else (drink flavoring in this case) instead of chemicals and a whole lot of elbow grease.
“Amazing we can use things created for something else (drink flavoring in this case) instead of chemicals and a whole lot of elbow grease.”
“Instead of chemicals”? Cola, just like everything else, is a chemical. By using Cola, what you are exploiting to avoid the “elbow grease” is indeed a chemical reaction.
This is absolutely brilliant! I have used cast iron cookware off and on for most of my adult life, and sometimes it’s been a struggle to keep it clean. For some reason, it never occurred to me that my self-cleaning oven could take care of it for me! LOL It sure is good to know this.
Thank you so much! I’ve spent so many hours with brillo pads and scourers trying to bring my older iron pots and pans back to life, because the non-stick ones just don’t last as well. This sounds as though it is a lot easier, simpler, and so much less painful. Now I just need a larger oven since I can only really fit one pan in at a time.
The only problems I can see is that I’d be worried about a couple of the vessels that have wooden handles. They are older pots so I can unscrew the handles and will probably take them off first. Are yours all solid, or do any of yours have different handles, and how do you handle it? (pun intended)
I have a Lodge Cast Iron Sportman Grill, that’s basically a miniature BBG grill. It is mainly rusty, and not much “crud” build up, and wondered if this technique would work for cast iron that is mostly rusty.
Try using Coca-Cola as a rust fighting agent. I can’t give you the exact directions, but you can look it up online.
Bridgette, Rusty cast iron can be cleaned by using a white vinegar and water solution. Google it and it will give you explicit directions on how to take the rust off. Cast Iron Collector is a good site to use for finding out exactly what you have and how to clean and care for it.
Great info!!! Thanks Tim.
Vinegar will take rust off of a skillet also. It is acid and will eat away the rust but be careful – it will also start to eat away the iron of the skillet too if left too long. Mix a solution 50/50 of plain white vinegar and water in a container large and deep enough to cover the skillet. It will depend on how much rust is on the skillet how long it needs to soak. It may take anywhere from an hour to four or five. I would check back after an hour. Once the rust starts flaking off easily, take it out and rinse it off with hot water, and scrub with a good stuff brush or plain steel wool. That should work well on the rust.
Thank you for this article. Someone told me several years ago to use vegetable oil to cure my cast iron skillet and Dutch oven and what I got was a sticky mess. I was discouraged and just put both away and not looked at them since. Now, since my oven needs cleaning, I can do both at the same time.
I did the self cleaning last night and my 3 skillets now have a coating of what looks like dusty rust. Now what do I do?
Scrub off the rust and then immediately season the pans. The rust will form if there is no protective layer of oil but you can easily remove it and the pans are good as new.
Save the elbow grease & countless steel wool pads! Use a coarse drill cup wire brush attachment on a drill. It worked like a charm removing all rust and restoring the iron back to original. Clean skillet thoroughly then season as needed.
*Safety Note: Make sure that you’re in a well-ventilated area and using safety glasses and mask because you don’t want to breathe in the rust/iron dust. It can cause a terrible headache for days among other issues.
The thing with this method is that the steel in the wire brushes are slightly harder than the cast iron. It will leave scratches. It’s an ok method for common pans, but please don’t do this on anything collective (i.e. early Erie, Wagner, or some of the other brands).
What is the alternative to wire brushes of any kind? I have a big, deep skillet with slight rust on 1/4 of the bottom. What should I use to remove it with the vinegar & water?
You could try giving the bottom a quick soak in the vinegar and water solution, and then use the scrubby side of a dish sponge to remove it.
Love my cast iron. I’m trying the self-cleaning method today. I think cast iron is superior to all those nonstick pots and pans – food tastes great and no fear of chemicals. No matter what you do, nonstick always seems to peel and chip.
Thanks for your comment Lynn. We love it too!
I have a set of Calphalon cookware I bought in the 80s that I still use. The nonstick insides have never chipped or peeled. The outside looks terribly worn but the inside is pristine. Maybe I just got lucky. YAY……..finally!
A product called evapo rust will work. It is pour down the drain safe too. Used it many times for all sorts of stuff. 20 a gallon tho… Reusable until it’s depleted. I’d clean, then soak cast in it.
Thanks for these instructions. They restored my crusty, decades-old cast iron dutch oven to beautiful condition. After leaving the pot and cover in the self-cleaning oven for three hours plus cooling time, both pieces had a coating of powdery rusty stuff, so I scrubbed them all over with plenty of salt and oil and then wiped the salt away with a paper towel. Even after repeated wiping, the paper towels looked rust-colored. None the less, I proceeded with the oil coatings and placement in a 300 degree oven, and the pot and cover look great today. I assume I’ll still see rusty residue in the first few uses, but it’s just iron so who cares. The dutch oven looks great right now.
BTW, after using any cast iron cookware, I heat it on the stove, put in a few drops of peanut or coconut oil, wipe it around with a bit of paper towel, and leave it on the heat till it smokes. (The intense heat polymerizes the thin coating of oil.) This treatment leaves my pots and pans almost totally non-stick. It’s much more effective than just wiping the pans with oil at room temperature.
Hi Jonny,
If you get them down to bare metal, the paper towels will always likely have a bit of that rust color because they normally oxidize vary quickly (the older, milled and polished ones do it less). I like to wipe them down with vinegar (you can get higher concentrate vinegar in Asian food stores) to remove as much of that as possible and then immediately add a light coat with oil to stop it. It doesn’t have to heated at this point, the oil is just to stop the oxygen in the air from making contact with the iron.
Can I use this method to restore old carbon steel skillets?
I happened onto this post and have decided to ‘give it a go’ with my grandmothers 1925 Cast Iron fry pan. My mother used this pan all the time. Always made the loveliest fried chicken! I inherited it when mom passed and have used it for over 40 years myself. But, I have never cleaned the crud from the exterior. The interior is great and very non stick. The piece probably has never, ever been cleaned in nearly 100 years. I probably should have saved this post for AFTER – but I cannot imagine it not working if the directions are followed. :0) Thanks for this post.
I just did 4 of my cast iron skillets and after the 30 or so minutes at 300* and cooling when I tried to wipe them off they are very sticky…. what did I do wrong? I used Crisco to oil them up….. should I reheat then to a higher temp?? Thanks for any response from y’all out there….
It sounds like you may have used too much oil, Gene. When you apply the oil, you want to remove most of it with a clean cloth or paper towels before heating, to create a very thin layer on the surface of your pans. It’s also possible that if you tried to season all of your pans at once, the temperature may not have been hot enough or applied long enough to polymerize the oil.
You have a few options. One is to gently remove the sticky residue and then reason. Warm up your pans, and give them a gentle scrub with coarse salt or baking soda. Rinse, and allow to dry completely. Then apply a very thin layer of oil or vegetable shortening with paper towels. Season again, leaving the pans in the oven longer this time- up to an hour. Then, you can try shutting the oven off and allowing them to cool more slowly to room temperature in the oven overnight. Some cooks like to flip their pans upside-down and put a pan or aluminum foil underneath to catch any excess oil that drips off – this will prevent it from pooling in the bottom of your pans. Repeat one or two more times as needed, and that tacky surface should be replaced with smooth seasoning.
Another option is to try seasoning your pans at a higher temperature. Apply a very thin layer of oil, and turn your oven up to 500°F. Bake for about 30-45 minutes, shut off the oven, and allow to cool completely in the oven. This should help to smooth the sticky surface, but if you’re still having a problem, try gently scrubbing and starting again.
Hope this helps and that your skillets are back in business soon!
I just followed your method of cleaning. I put in the oven for a 4 hour cycle (part of that was a cool down). I took it out and it was rusty/dusty. I scrubbed it with steel wool and then put in a 300 degree oven to dry. After it was up to temperature, I wiped it down with coconut oil. I repeated this twice and allowed it to sit and cool. So far it is looking good. I can’t wait for it to be ready to cook in, I am thinking cornbread for its first run. Thanks for the how to.
You’re welcome, John. Enjoy the cornbread!
For the seasoning: Do I put it in the oven for 20 minutes at 300F after EACH coat of crisco or after just the fourth coat of crisco?
Hi TayTay,
I haven’t tried this method myself, but as I understand it, you need to work quickly between layers so the pan will still be hot enough to melt the Crisco. If it doesn’t melt after each addition, you may need to pop the pan back in the oven for a few minutes between layers before baking the fourth layer on for the full 20 minutes.
I want to try this method for an old cast iron frying pan I was given but I also don’t want to leave the racks in my self-cleaning convection oven. I’m concerned about putting the frying pan directly on the bottom of the oven. Would it be okay if I turned the pan upside down so there was less contact with the base or should I find some stones or bricks and set it on that? I don’t want to damage the base of the oven.
If you like, you could put a baking sheet in the bottom of your oven and line it with aluminum foil, and place your pan on top of that while you are seasoning, or you could line your oven racks with foil.
The coating of oil that you put on your pans for seasoning and to restore a shiny finish should not be enough that it drips off when you turn the pans upside down. But a layer of aluminum foil should do the trick to catch any drips, if there are any. Please see this supplemental article on seasoning cast iron for more tips.
I am so happy to read this article, AND your comment. Last summer I accidentally left my favorite cast iron skillet in the oven while on the cleaning cycle. I was dismayed when I opened the oven and discovered my pan…I figured it was ruined forever and I should probably throw it out. Well, I’m not one to throw things away easily, so I’ve kept it, and now I have hope I can return it to its former seasoned glory! 🙂
I bought some new cast iron pots, but they always rust. I put several layers of seasoning and use them mostly to boil water or cook vegetables in and the seasoning always comes off. Any idea why?
am going to try this method and maybe sand them after the oven cleaning.
cast iron is not for boiling water. not sure what your method for cooking veggies is but is saute then should be fine boiling no. If you are boiling water you are boiling off the finish.
Stews and such that have a fat content will allow the finigh to stay on.
You also need to oil every time you use. Light thin coat, put away in cabinet.
The “Dutch” in Dutch Oven refers to a process using sand as the casting mold. It is not a reference to the lid or lack of legs. What you call a “camp oven” is still a Dutch Oven.