Ever wondered if you could roast your own coffee beans? Well, you can – and if you’re just getting started, you can even do it at home with minimal equipment!
Roasting your own beans is a fun way to experiment with your coffee until you find your ideal brew. Plus, the freshness of home-roasted coffee can’t be beat!
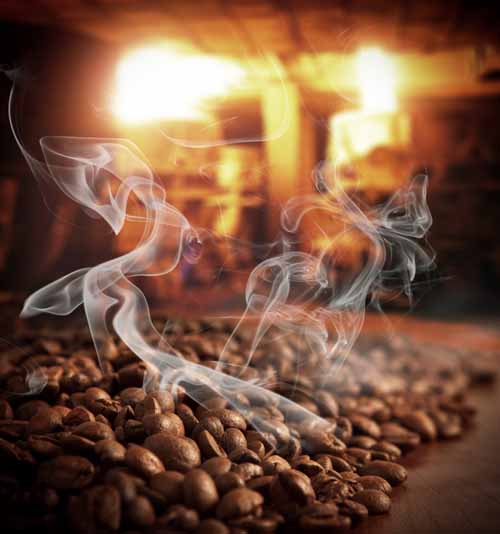
Note: it will create some smoke (and make your whole living space smell like coffee), but it’s a small price to pay for the fun of DIY and the endless options for customization.
Make sure to do your research and take necessary precautions – you can find lots of different guides online – but if you want an overview, here are the basics.
1. Buy some green, unroasted coffee beans.
2. Choose your roasting vessel. Some electric, hot-air popcorn poppers work really well (but check online for suggestions – others can pose a fire hazard).
If you can’t find one, you can also try oven roasting on a cookie sheet or stovetop roasting in a skillet (these methods won’t result in as even of a roast and require more work).
You can also invest in a roaster if you plan to make home-roasting a habit! Remember that whatever method you choose, coffee roasting will make a bit of a mess and give off smoke, so find a well-ventilated area to begin your experiments.
3. Decide on your target roast. Even though they taste stronger, darker roasts actually contain less caffeine (and less of the individual coffee’s character) than lighter roasts due to the breakdown of the sugars and other compounds in the bean.
Roasts range from “first crack” (an audible “pop” that occurs as the beans heat up), through to “second crack” (a more violent pop that can actually send hot coffee bean shrapnel across the room!).
Stopping before second crack will give you a City, City+, or Full City roast depending on the level of caramelization. You’ll have a “Vienna” roast if you stop soon after the second crack begins and a “French” roast if you wait a little longer.
The beans will give off more smoke and the internal sugars will begin to burn at this stage though, so don’t wait too long, or you’ll be brewing a thin cup of expensive charcoal!
Between first and second crack, City and City+ roasts offer a good balance of flavor from the coffee variety and the caramelizing effects of the roasting process, but if dark roasts are your thing, hold out (cautiously) for that second crack.
Whichever method you choose, make sure to do your roasting safely. Home roasting is extremely rewarding – you’ll be shocked by how much fresher your coffee tastes.
But roasting anything at high temperature does pose some risks, so use common sense and take care not to burn yourself on your equipment or the beans themselves as they cool.
Once roasted, try waiting a few hours before brewing, as roasted beans will hit their peak after 4 to 24 hours (though they’ll stay fairly fresh for up to five days).
Want to know more? Check out Foodal’s Coffee Roaster Buying Guide.
Tell us – have you ever tried roasting your own beans? Did you like the flavor?
About Mike Quinn
Mike Quinn spent 20 years in the US Army and traveled extensively all over the world. As part of his military service, Mike sampled coffee and tea from all virtually every geographic region, from the beans from the plantation of an El Salvadorian Army Colonel to "Chi" in Iraq to Turkish Coffee in the Turkish Embassy in Kabul, Afghanistan. He spent nearly a decade in the Republic of Korea where he was exposed to all forms of traditional teas. Mike formerly owned and operated Cup And Brew, an online espresso and coffee equipment retail operation.


Great article. I’m wondering if the Air Popper can reduce most of the smoke vs. roasting the coffee on a stovetop.