How would you like to make the best poached eggs, ever?
I know, I know – you can boil, fry, and scramble, but seldom, if ever, poach. Right?
Not to worry. You’ve come to the right place.
Poaching is simply cooking in water that has come to a boil and then been reduced to about 180°F.
The eggs float freely with their shells removed, suspended in the liquid and cooking evenly on all sides. Then, you scoop them out to serve as an entrée, or they can be used to add a protein-rich garnish to a wide array of dishes.
We’ll start with our easy stovetop recipe. Then, read on for more cooking tips and serving suggestions, as we explore poaching eggs to perfection.
Print
The Best Poached Eggs
- Total Time: 15 minutes
- Yield: 1 serving 1x
Description
Do you know how to poach eggs?It’s easy to prepare them on the stovetop with these easy instructions.
Ingredients
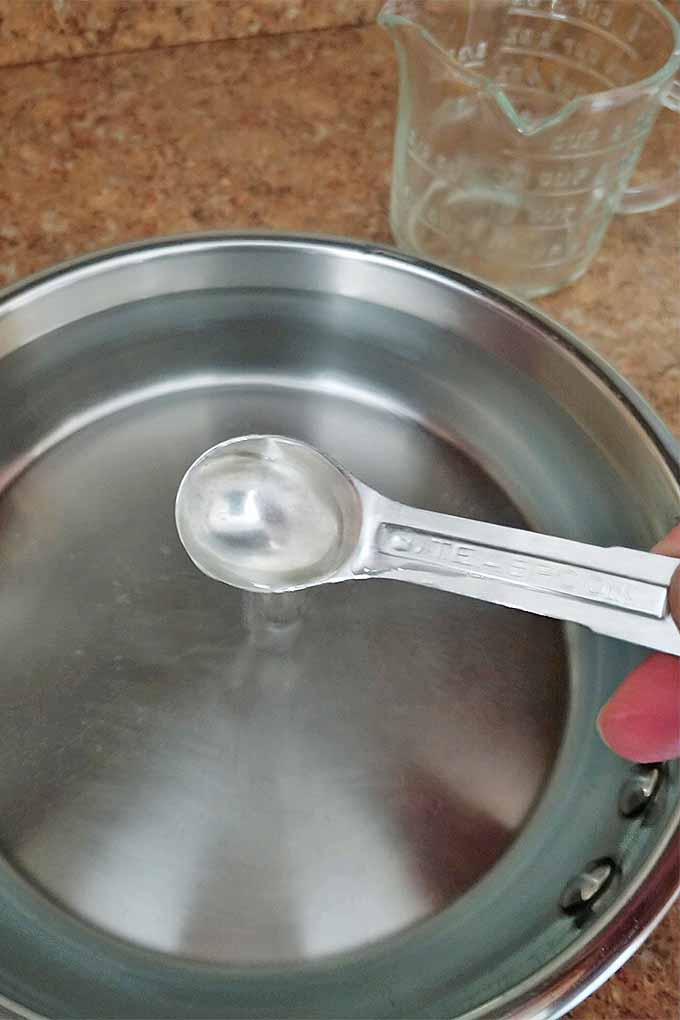
- 3 cups water, or more as needed
- 2 teaspoons white vinegar (optional)
- Pinch of salt (optional)
- 2 large eggs
Instructions
- Combine the water, vinegar, and salt in a small pan with shallow sides, using enough water to fill the pan do a depth of 1-1.5 inches.
- Bring to a boil.
- While the water is heating, break each egg into a custard cup.
- As soon as the water reaches a boil, turn off the heat but keep the pan on the hot burner.
- When boiling stops, swirl the water. As you do so, ease the custard cup into the center of the swirl, and let the egg slip out. Repeat this for the second one, leaving space between them.
- Cover immediately, and poach 3 minutes for soft yolks, and up to 5 for firm.
- Remove eggs with the slotted spoon immediately when they’re done how you like them, and drip briefly drip dry. Serve warm.
- Cook Time: 15 minutes
Cooking By the Numbers…
Step 1 – Assemble Supplies and Ingredients
Collect your pan, two custard cups, measuring cup and spoon teaspoon, slotted spoon, vinegar, salt, eggs, and water.
In place of custard cups, ramekins, mugs, or dessert dishes could also be used. You’re looking for something that you can crack the eggs into and then gently slip them into the water without breaking the yolks.

You may premeasure the ingredients, or measure as you go along since everything will be going in to the same pot at the beginning of the recipe.
Step 2 – Prepare the Water
Combine the water, vinegar, and salt in your pan and bring to a boil.
The vinegar in the mix helps to firm the whites, making for a more compact and less wispy consistency.
The use of salt here is optional. Some cooks say salt thins the whites, others say it accelerates boiling and enhances flavor. It’s up to you, and we recommend trying it for yourself, and seeing which method and ingredients you like best.
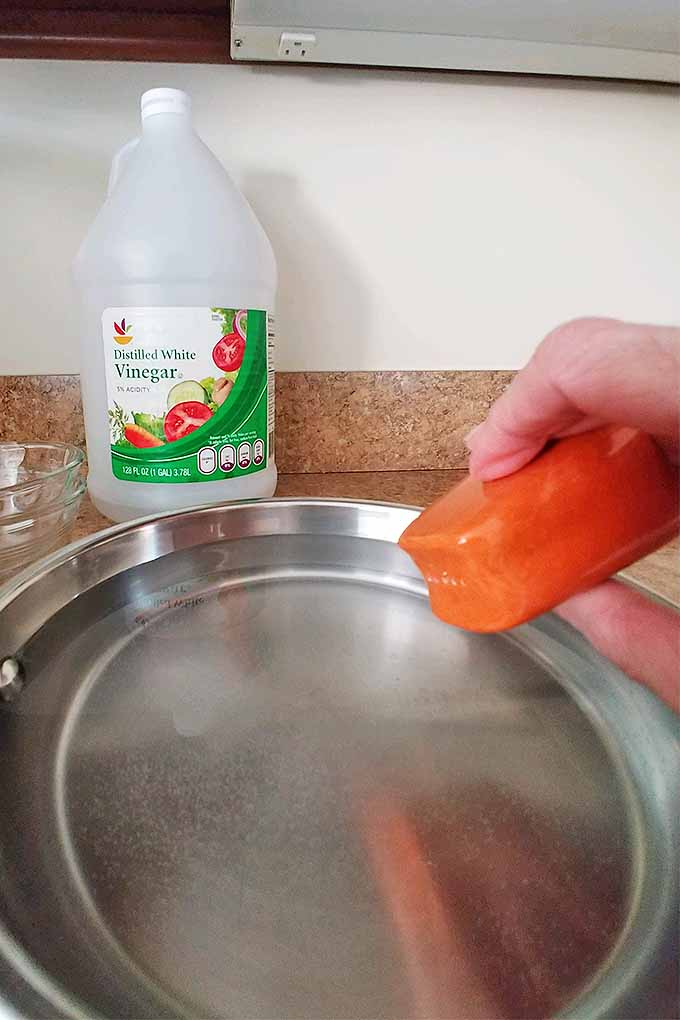
The use of vinegar is also optional. It aids in firming up the whites, but you may detect a faint hint of vinegar flavor in the final product.
Step 3 – Prep
While the water is heating, break one egg into each custard cup. Crack them carefully, so you don’t break the yolks.
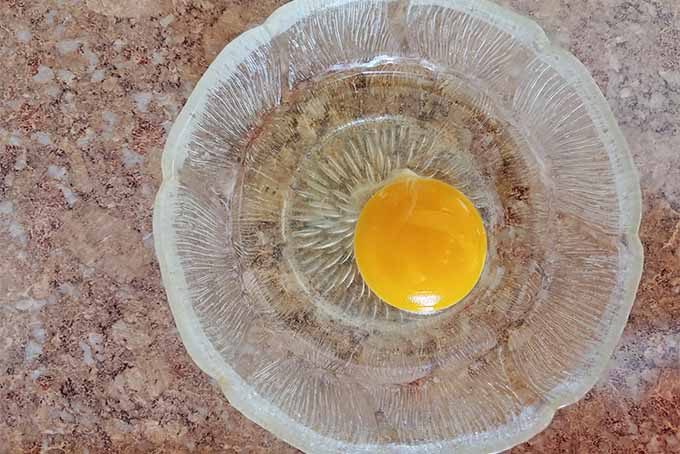
They will be added to the water individually.
Step 4 – Place in the Pan
Turn off the stove as soon as the water reaches a boil, or 212°F. Allow the bubbling to subside, and the temperature to decrease to around 180°F, but not cooler.
You can check it with a digital thermometer if you like, especially the first time you make this recipe. But visual cues and timing should be enough to let you know that the water is no longer at a rolling boil, but still very hot.
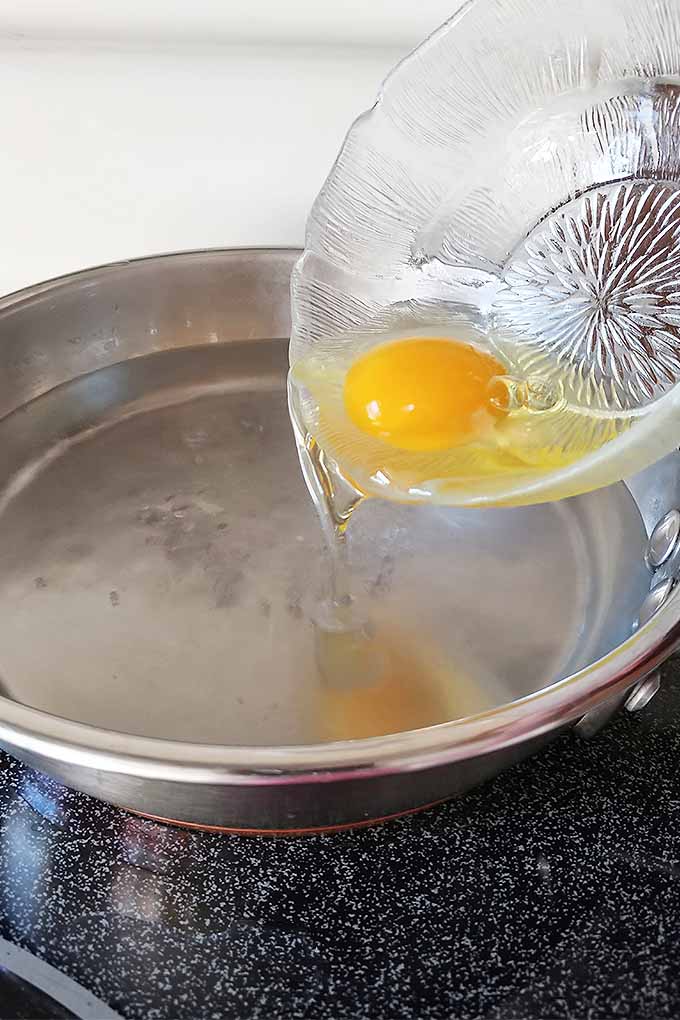
Swirl the water with your slotted spoon and ease the first custard cup into the center, letting the egg slip out.
Repeat with the second one, leaving space between the two.
Adding them in this way keeps the whites compact.
Step 5 – Poach
Cover and poach in the pan on the hot burner for three to five minutes. The burner should remain off – residual heat is enough to do the cooking here!
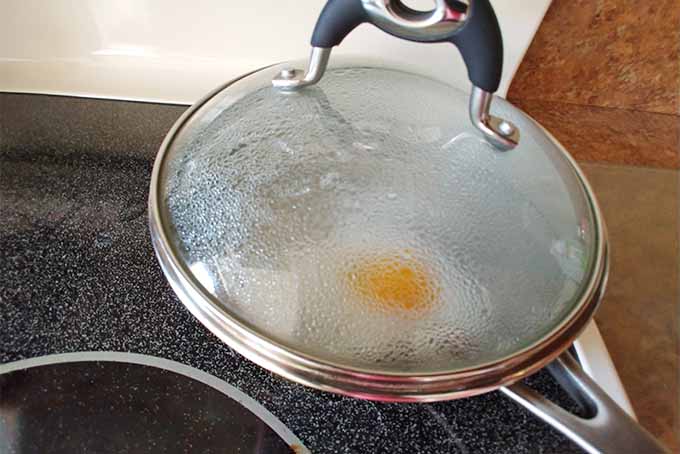
The longer they cook, the firmer the yolks will be. Try not to peek, because you’ll let the heat out.
Clear pot lids can be helpful if you’re impatient (or if you’re cooking with the kids, who will enjoy seeing the transformation from translucent to opaque whites), though they will gather condensation and become a little bit difficult to see through.
Step 6 – Test for Doneness
You may test for desired doneness by pressing the yolk area gently with your slotted spoon.
A soft-cooked yolk will give easily, medium will dent slightly, and firm yields very little.
Step 7 – Remove and Serve
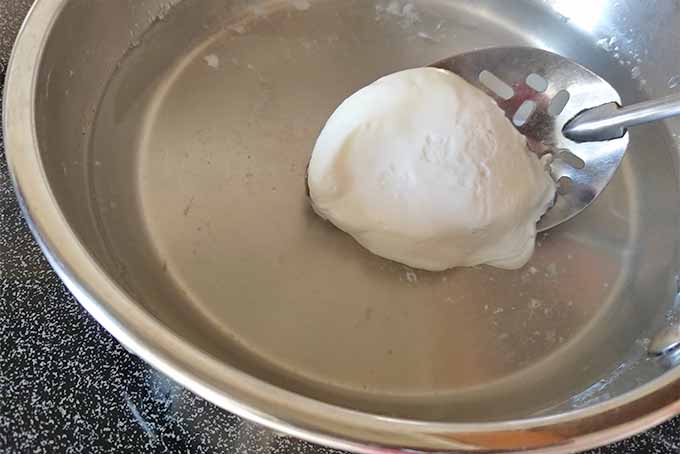
Using your slotted spoon, gently remove each egg from the pan.
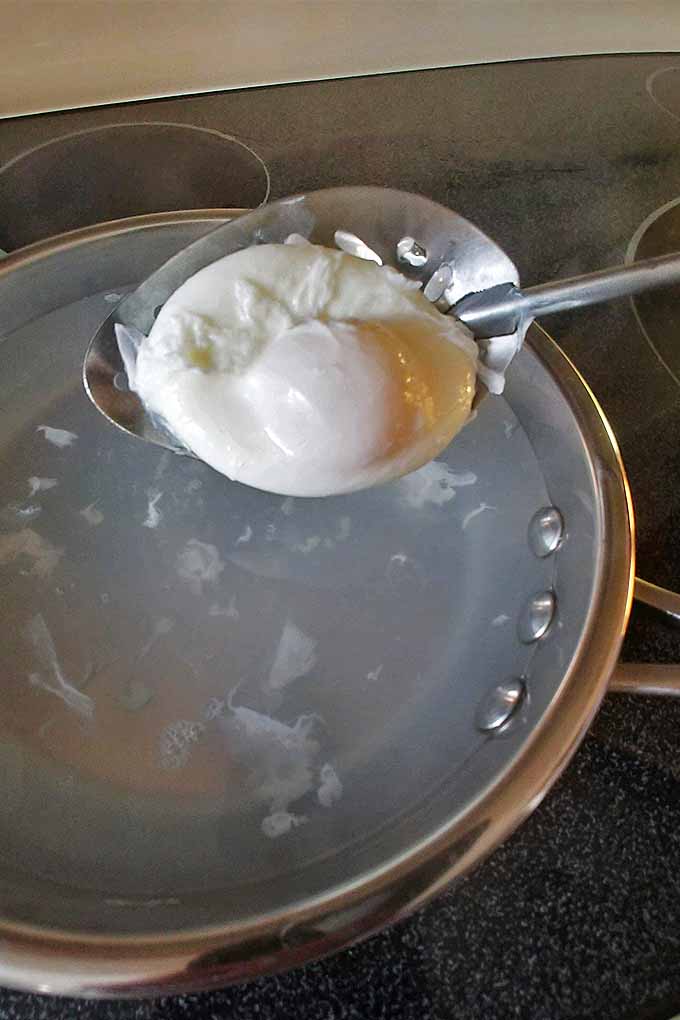
Drip dry and serve warm.
Cooking Tips
Are you still with me?
Great!
Here are some handy tips to hone your poaching skills:
1. Use a Shallow Pan
A good quality shallow pan will cook evenly and allow you to ease your custard cups into the water. If the pan has high sides, they will plop into the water and fan out widely, creating many drippy threads and a less compact shape.
And, when cooking a large quantity, use a pan large enough for free floating without attaching to one another while they poach.
2. No Fuss with Nonstick
Even the perfectly poached leave some white behind. For easy cleanup, use nonstick cookware.
3. Simmer Down
For the smoothest whites, always add eggs to the pan after you turn off the burner and the boiling has died down. Otherwise, you may have small indentations in the whites from the tiny water bubbles.

4. Trim into Shape
If you find that you have irregular, drippy edges on your whites, just trim them away before serving, and enjoy them with a little salt and pepper as a cook’s treat.
5. Drip or Towel Dry
In addition to a quick drip dry, you may dab the bottom of the slotted spoon with a paper towel to absorb excess moisture. Just be careful not to break the yolks!
6. Fresh Is Best
Above all else, home and professional cooks agree that when it comes to poaching, the fresher the eggs, the better they will cook, and the better they taste.
Serving Suggestions
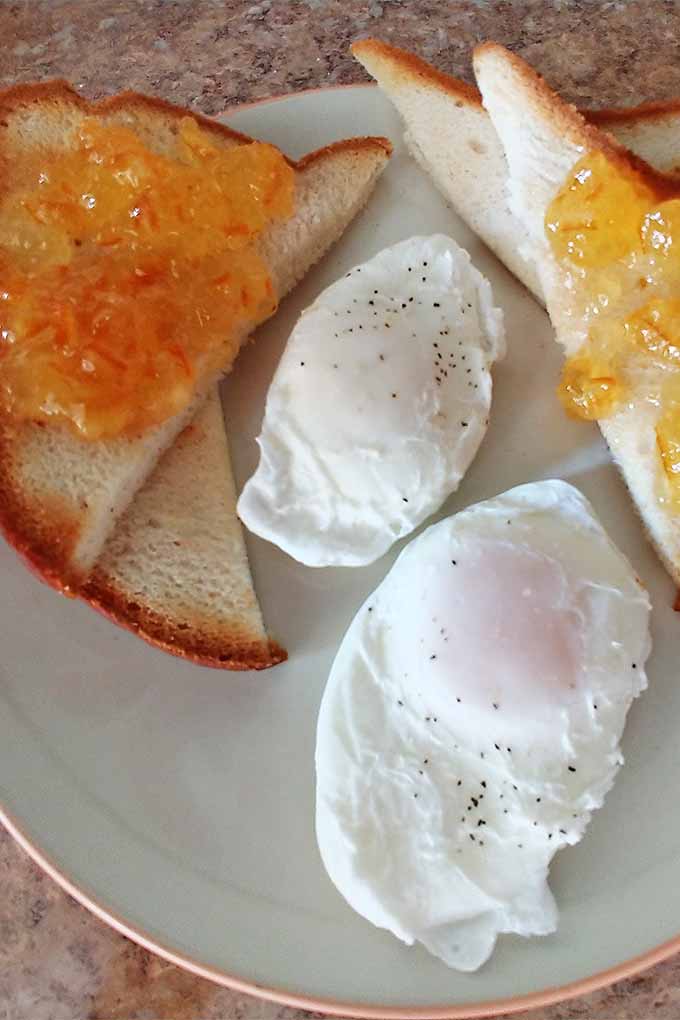
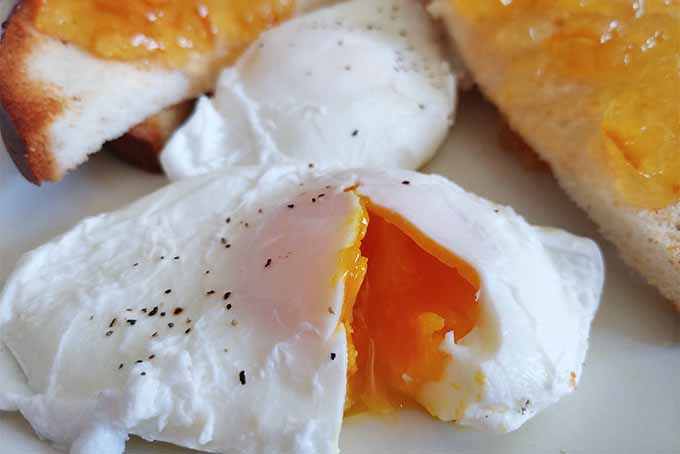
I have recently sought out new breakfast horizons and am happy to report that I’ve traded in my red jam for orange marmalade on my toast. And nothing goes better with it than two medium-poached eggs to get my day off to an energetic start.
But for a company brunch, when I need a little more panache, my go-to favorite is Eggs Benedict, the classic dish that features hollandaise sauce, ham, and a crusty English muffin.
Another dish my family often asks for is a savory sweet potato hash. It’s especially delicious saturated with warm yolks and makes for a festive breakfast that brings everyone to the table.
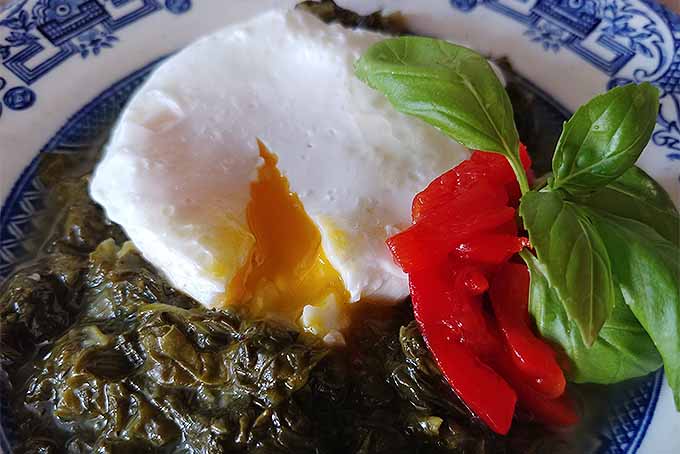
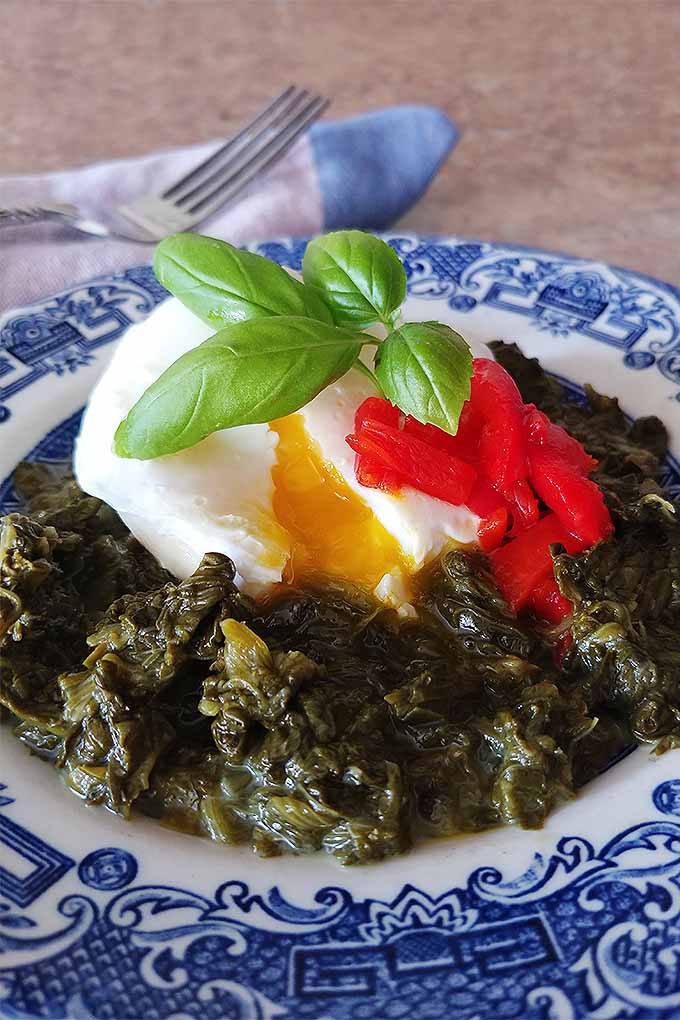
And don’t limit yourself to breakfast. Try serving them Florentine-style over a bed of spinach for lunch, or nestled in salad greens in the French Lyonnaise tradition for a romantic dinner for two.
And for a portable meal, firmly poach and layer with ham and cheddar on an English muffin in the fast food style.
The next time you make a hearty chowder for a chilly evening, why not top it with an attractive and nutritious high-protein garnish? The yolks and whites blend marvelously with fish and vegetable recipes.
Let’s Eat!
Are you ready to start poaching?
Now that you’re armed with a new (or improved) cooking skill to add to your growing culinary repertoire, it’s time to get cracking.
What’s your favorite way to feature poached eggs in your cooking? Let us know your creative serving suggestions in the comments section below, and don’t forget to rate this recipe while you’re at it! For more creative ideas, see our article, “Mix Up Your Eggs with These Easy Cooking Methods.”
Don’t forget to Pin It!

Photos by Nan Schiller, © Ask the Experts, LLC. ALL RIGHTS RESERVED. See our TOS for more details.
Nutritional information derived from a database of known generic and branded foods and ingredients and was not compiled by a registered dietitian or submitted for lab testing. It should be viewed as an approximation.
About Nan Schiller
Nan Schiller is a writer from southeastern Pennsylvania. When she’s not in the garden, she’s in the kitchen preparing imaginative gluten- and dairy-free meals. With a background in business, writing, editing, and photography, Nan writes humorous and informative articles on gardening, food, parenting, and real estate topics. Having celiac disease has only served to inspire her to continue to explore creative ways to provide her family with nutritious locally-sourced food.

Something I’ve found I really enjoy is topping a pasta dish with softly poached eggs. The runny yolks add so much richness to a meal.
I use as small an egg cooker as possible for cooking eggs. I don’t know where the colour is coming from. I am just thinking that chemistry changes caused by the heat and the pressure are giving the colour. Also I think the flavour is affected by the cooking process as in pressure and the heat rather than the colour itself. I have to say, it does taste different to the average Poached egg. Everyone who tested the recipe so far, including my family, preferred the taste of this egg more than the average boiled eggs. I think you will get the same result from any shell colour (brown or white). I hope this helps.