
Beer.
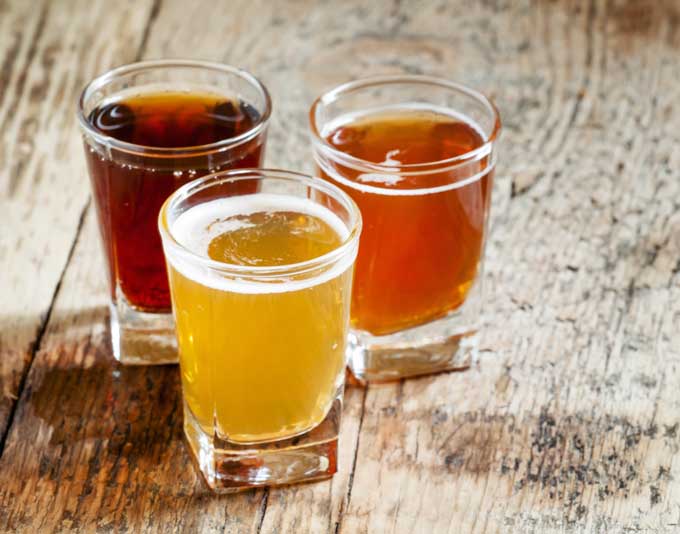
That tasty beverage that come in a hundreds of hues, varieties, and flavors. The drink that provides so much pleasure to most of mankind from the blue collar factory work to the overworked (but highly paid) wall street trader.
I’m talking about that sublime taste of the craft brew which is undergoing a sort of renaissance throughout much of the word.
Getting back to simplicity. Getting back to taste.
Beer. Real Beer. Hops, Barley, and Malt. Combinations and flavor.
But with a six pack of craft brew going for close to nine dollars is there a better way to get your fix than stopping by the local liquor store?
You betcha. Make your own. It’s not as daunting as it seems.
Now, I do want to point out that there are whole books dedicated to this subject, and it was actually kind of tricky trying to decide what I needed to include here and the more detailed parts that I could leave out without compromising the actual process.
For example, I could have gone into all the different malt and hops varieties there are to choose from, and which ones are better for what ales or lagers.
That would have made for a VERY long article, though, and one that not everyone would have wanted to read.
Instead, I give you this shortened and simplified brewing guide that is much shorter than one you would find on websites or in books dedicated to the craft.
Check out our infographic showing the overview and then see more detailed instructions below.

Share this Image On Your Site
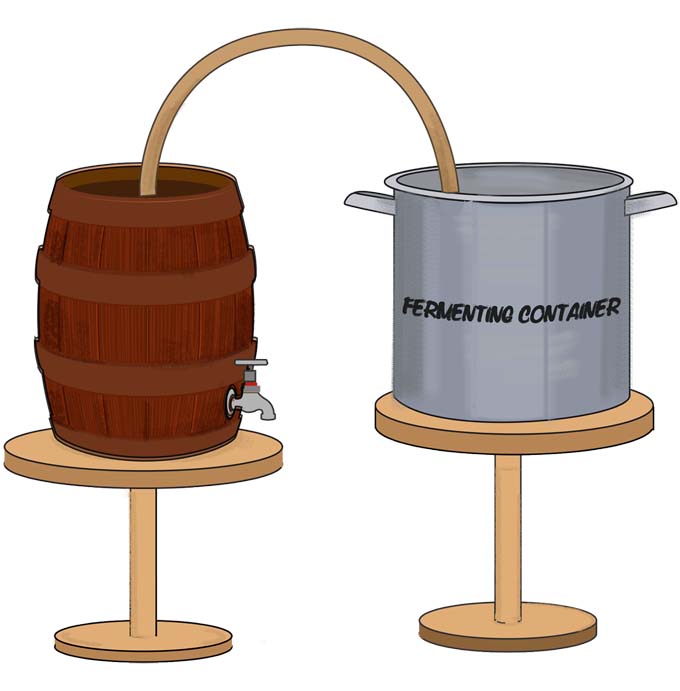
There are just three main parts to the home brewing process: brew day, fermentation, and bottling day broken down into 8 total steps. Brew day is the most labor intensive segment of the process, involving boiling the wort, cooling it to room temperature, and getting it into the fermentation vessel with the yeast.
Let’s begin by going over this step of the beer-making process.
Learning Point: The Importance of Sanitation
Throughout every step of this procedure, it is absolutely imperative that you sanitize every single piece of equipment that will be coming into contact with your beer, no matter how short the length of time.
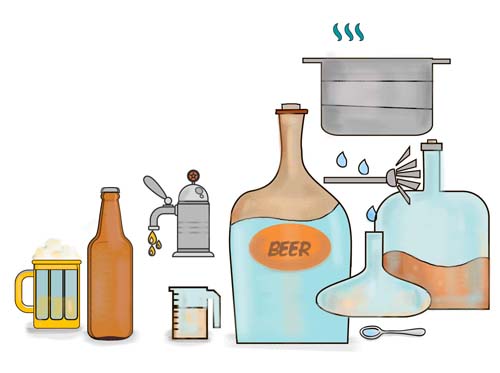
Brew kettles, spoons, siphons, air locks, fermentation vessels, etc. They all need to be as free from contamination as possible. Even one tiny microbe can alter the taste of your final product, and you do not want that to happen.
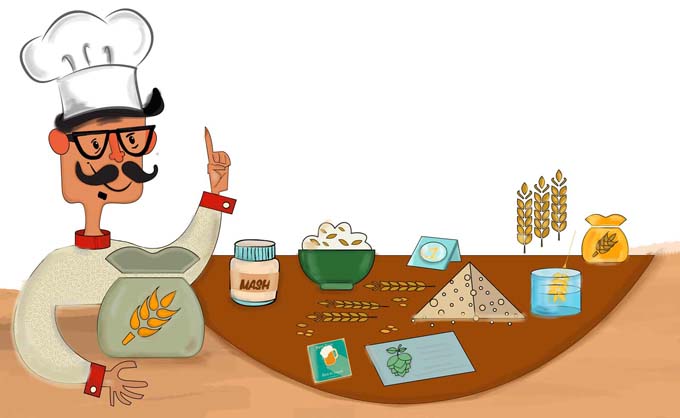
To Mash or Not to Mash?
The first step to brewing is boiling the wort but to do that you need malt syrup, which is produced by making what is called mash from malted barley.
Now, a true beer enthusiast will want to go the route of making his own mash, meaning buying the dry malted barley, milling it (or buying it pre-milled) and soaking it at a very specific temperature of hot water for one hour.
After that period, the resulting malt syrup is separated from the spent malt grains.
For most first timers, it seems like it would be easier to buy one of the many recipe kits available that include the specific malt syrup that you need for the style of ale or lager you are making.
Also included in recipe kits are the right kind of hops required for the beer you are brewing. Not only that, but they come with an actual recipe that tells you when to add the hops, which, as you may know from my newbie’s guide to beer, can drastically change the flavor of the end product.
Some types of beer also require specialty grains, which need to be steeped in the water prior to adding the other ingredients and boiling. If that’s the case with the beverage you will be making, the kit includes what you need and will tell you how long to steep them.
All in all, a kit like this is probably the best choice for your first go-round with home brewing.
Boiling the Wort
At this point, you will have bought your recipe kit or made your own mash. If you are using specialty grains, you should have already steeped them in hot water. Now it’s time to actually begin to make beer (yay!).
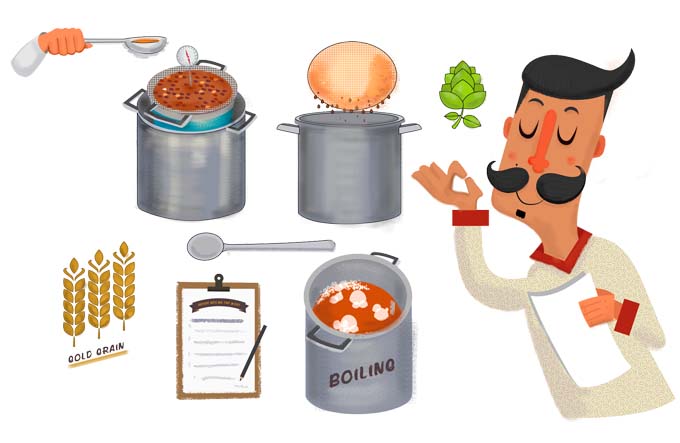
Fill your sanitized brew kettle with the appropriate amount of water and bring to a rolling boil. Once the water is boiling you can add your malt syrup and mash.
Now you have wort!
Most recipes require that the wort boils for an hour. Just follow the recipe as it is stated. You can cover the kettle to begin with to reach the boiling temperature more quickly, but then continue the process without the lid.
Use a long-handled stainless steel spoon to stir the wort occasionally to ensure that it doesn’t scorch. This will help prevent boil overs, as will laying the spoon across the top of the kettle.
During the first part of the boiling period, foam will start to form on the top of the wort. During the foaming stage, keep a close eye on the pot and stir frequently- this is the prime boiling over period.
Depending on the recipe you are making, you will add your hops at the beginning of the boil, in the middle, or towards the end. Just make sure you have read your recipe so you know when to throw in the hops.
Pitching the Yeast
Once the wort has boiled for the appropriate amount of time, it has to be cooled down enough to add in the yeast. If you add your yeast when the liquid is too hot, it will kill the yeast. No yeast means no alcohol, so we definitely do not want that to happen.
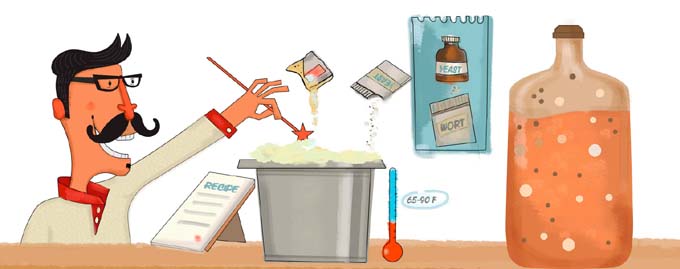
The correct temperature for adding the yeast is 65-90ºF or, in other words, room temperature. When yeast is added to cooled wort, it is called pitching the yeast.
You can let the wort cool to room temperature on its own, but that will take quite a while. To speed up the process, create an ice bath in the sink and plop your full brew kettle down into it after you finish boiling it.
Make sure you have the lid back on by this time to prevent any of that cool water or other outside contaminants from getting into the wort.
While you are waiting on the wort to cool, sanitize your fermentation vessel so it is nice and clean when you are ready to move on to the next step.
Before we move on to fermentation, I want to go over the types of yeast you can use. Wet or dry yeast is available for beer brewing, and certain types of beer do better with one or the other.
When you buy a recipe kit, the best option comes with it- another reason to go the kit route. If you are using wet yeast, it will come in a little pouch. You will need to prep the liquid yeast a few hours beforehand or even the night before brew day.
Smack the packet firmly to break an inner seal in the pouch to activate the yeast. Leave the pouch sitting at room temperature while that process is going on.
If you are using dry yeast, it will need to be activated by pouring it into a cup of warm water in a covered, sterilized container during your boiling period. Then, boil about ¼ cup of water with one teaspoon of sugar.
Once the sugar solution has cooled down, add it to the yeast mixture. Let that sit for about 30 minutes to “proof” the yeast.
You should see some foaming going on here as well. If the yeast doesn’t start to foam, it’s dead and is no good to use. Repeat the process with more yeast.
Once your wort is at the right temperature, you will “pitch” your cup of proofed yeast and water into your fermentation vessel, and then add the cooled wort to the container. The only time that you will want the liquid to be moved vigorously is during this transfer.
Pour the wort somewhat harshly so that it splashes in the container a little bit. This will add oxygen to your baby beer, which will help the yeast to do its work.
Fermentation
All fermentation needs to be done in a dark space, but depending on whether you are making ale or lager, you will need either a room temperature spot or a cooler area.
Ales like warmer environments than lagers do. Once you have your yeast and wort in your fermenting container, seal it with an airtight lid, and be sure to use an air lock to let carbon dioxide escape and help prevent any possible explosions (see my brewing equipment guide).
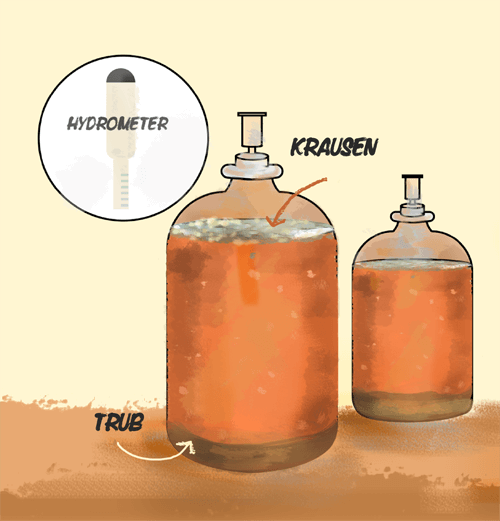
Within a day or two you will start to see bubbles forming in the airlock. If you are using a clear fermentation vessel like a carboy, you will also be able to see a tan foam (called krauesen) begin to form on the top of the beer.
Once you see that bubbles have stopped forming in the air lock and the foam begins to lessen, you will know that the fermentation period has ended. This takes one to two weeks. The spent yeast, hops, and other particles will have settled in a layer at the bottom of the container.
This is called the trub.
You do not want your beer sitting on the trub for very long because it will start to alter the taste of the final product.
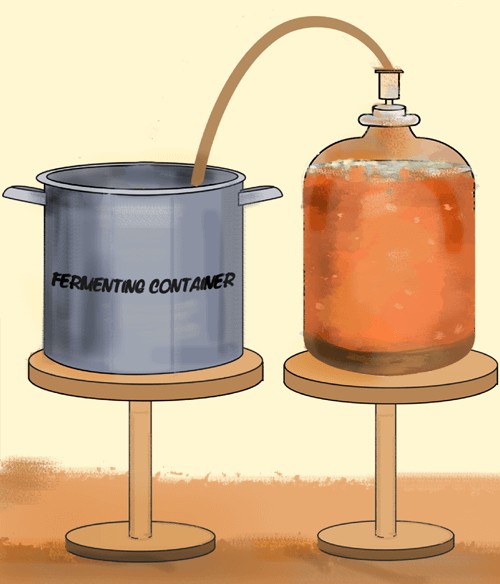
So, as soon as you see that the bubbling and foaming has subsided, be prepared to siphon out the beer.
If you are making a lager, you will need to siphon your beer into a second, sanitized fermentation vessel and allow it to continue to sit for the time prescribed for the particular recipe you are making.
Bottling Day
Once the fermentation stage is over you have beer, but it’s flat beer. We all know that part of beer’s charm is its refreshing fizziness, also known as carbonation.
To get your flat beer carbonated, you are going to use a siphon to move the liquid from the fermenting container to a bottling bucket that contains a priming solution- a.k.a. sugar water.
Just like you used sugar to proof the yeast prior to pitching, the remaining yeast in the beer needs sugar to re-activate and start releasing carbon dioxide again, only this time instead of releasing the carbon dioxide with an air lock, you will be keeping the carbon dioxide inside to make those nice little fizzy bubbles.
To create your priming solution, boil two cups of water with 2/3 cup of sugar and let cool. Pour the solution into the bottom of your sanitized bottling bucket.
Then, placing the bottling bucket 2-3 feet lower than your fermentation vessel, connect a sanitized siphon to the latter, and begin to slowly drain the liquid out of it into the bottling bucket. You want to go nice and slow to disturb the beer as little as possible.
Keep the end of the siphon under the surface of the liquid – first the priming solution and later the beer – as it fills the bucket. This will prevent the beer from splashing around. The less movement now, the clearer it will be later.
As you siphon the beer out of the fermenting container, keep an eye on the inside of it when the beer level starts getting low. You will want to be sure to stop siphoning before you get to the trub layer. You want to leave as much of that debris behind as possible.
Then, once you have filled the bottling bucket, allow it to sit for another 15-20 minutes to let any trub that ended up in there to once again settle to the bottom. That way, only the smallest amounts of sediment, which could make your finished product hazy, will remain once you start filling your bottles.
Bottling buckets have a spigot that you will use to fill your bottles. Be sure to wash and sanitize all of your beer bottles and bottle caps prior to this step. A typical batch of homemade beer makes 5 gallons, which will result in 4-4 ½ gallons of actual beer.
This will fill approximately 48 12-ounce glass beer bottles. You will want to leave a little room at the top so that the pressure created during carbonation doesn’t become too great.
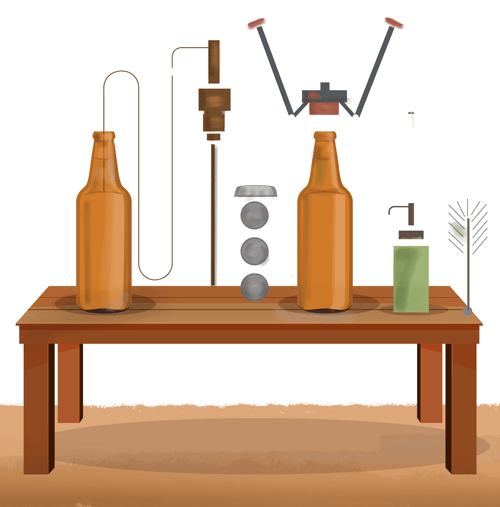
You don’t want to leave the filled bottles sitting out without caps on them because airborne contaminants could get in and ruin your bottles. As each bottle is filled, you need to use the bottle capper to crimp the caps closed.
This step is easier and faster if you have someone there to do the capping as you fill the bottles.
Once all the bottles are filled and capped, they will need to sit in a dark place at room temperature for two weeks to become fully carbonated. This time period also allows the flavors in the beer to deepen and meld together.
Bottled beer can be stored in this manner for up to 6 months.
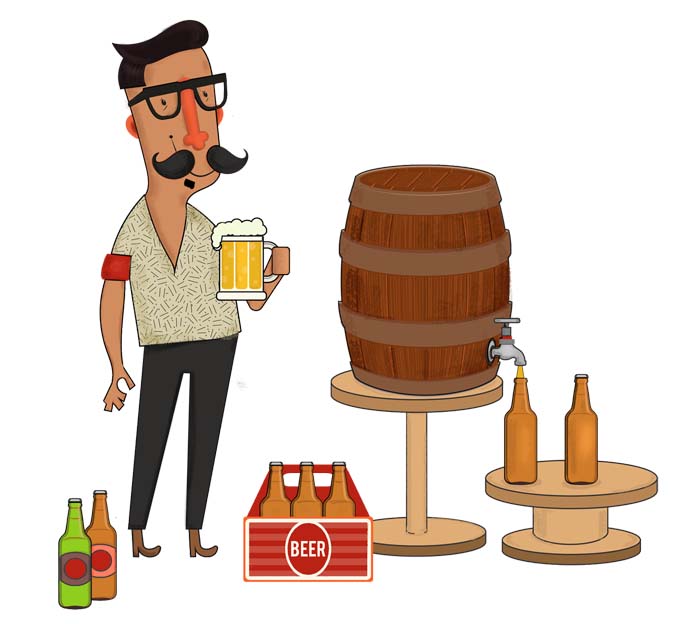
Bottoms Up!
After the two-week carbonation period, you will finally be ready to have a glass of your own homemade beer. Isn’t that awesome? First, though, you will need to chill it.
Beer should be served between 40-55ºF. Generally speaking, the darker the beer the less cold it should be served. Once the beer is as cold as it needs to be, you are ready to pour it into a glass, mug, etc.
There’s a specifically shaped glass for almost every style of beer, but that’s a story for another day. For now, any glass or mug will do.
Now, you will notice that there is a thin layer of yeast on the bottom of each bottle. You want to keep as much of that spent yeast out of your glass as possible. To do that, you will need to tip your bottle slowly and pour it just as slowly to keep from disturbing that layer.
You should be able to get all but the last ¼ inch or so of beer into your mug without any of the yeast getting in there. The clearer your glass of beer, the better job you have done of siphoning out the trub prior to bottling and pouring without getting any yeast from the bottle.
Now all that’s left to do is take a deep and satisfying drink from your glass. Savor that flavor of malt, hops, and hard work. Good job, you!
If you’re fascinated with the history and present food culture around beer and its creation today (as well as in the past), be sure to check out Foodal’s inaugural podcast: an interview with Simran Sethi, author of Bread, Wine, Chocolate: The Slow Loss of Foods We Love.
About Ashley Martell
Ashley has enjoyed creative writing since she was six years old, when she wrote her first short story. She majored in English literature at the University of Montevallo. After years of professional work, she is now a stay-at-home mom of three, who uses her craft to write about her life and adventures in and out of the kitchen.

Home-brewed beer is really, really tasty! My friend had a whole bar set up for it and he taught me a lot of his secrets, it was actually quite fun to learn. The taste is very, very different from the beer you find on the market.
If you ever go and tour a brewery, one thing you will noticed is somethings are so clean they are clinical.
One little contaminate can spoil your brew. Clean clean clean!
Your hipster home-brewer in the infographic gave me a chuckle too =)
I remember going to a brewery in Brooklyn and I saw how incredibly neat everything was. It got to where the guide made everyone in our group had us wash our hands when sampling the beer and not touch anything as we walk around. I would love to experiment and make my own beer, though I would try to have different flavors rather than just plain beer, like chocolate beer perhaps….
This is such a cool, detailed post on making your own alcohol. I’m not exactly into drinking beer so I might not try this myself. Though I know for sure that there are quite a few enthusiasts out there who do. I saw that keeping everything clean is emphazied alot. I know how it feels when you have worked so hard to cook ( or brew) something only to have it ruined by contaminants.
This is some great information, and I like the infographic. I have been curious about making beer and wine at home for a while. The only thing that’s really stopping me is the supplies. I don’t mind seeking out unusual ingredients, but I’m reluctant to buy the equipment needed for the brewing, bottling, and capping. I’m still waiting for someone to open a business that allows customers to brew their own beers, sort of like those take-and-bake pizza restaurants.
I applaud you for this guide. It simplifies the process, yet still gives the gravity of the process. It sure seems like there are endless possibilities as far as the outcomes. So many different options and timing involved.
I remember when I was a teen and tasted beer, I hated it. Later in life, I tasted a home brewed beer and it was so different and much tastier. Now I can see why.
I actually don’t drink beer (I’m not to keen on bitter flavors) but with those illustrations and article I will find the will to make it! My boyfriend will be happy, that’s for sure 🙂
I’m more of a sweet cider type of gal. So if you ever find the will and the time to repeat this beautiful piece with cider in the title I would thank you for the rest of my life.
I don’t generally drink alcohol, but I read this out of curiosity. I would have thought it would be much more complicated. I may give it a go as an experiment and see if I can get some of my friends that do drink to try it. Yeah, I know, experimenting on my friends may not be kind especially if I wont try it. I make a great frenemy!
I worry that it won’t come out tasting the same. Always worth a try though.
This is great, Ashley! My husband is really going to enjoy this. He’s been wanting to try creating his own brew, but it is very intimidating. This break down makes it much less so. Thanks for this. I’ll show him tonight.
I think it would be a lot of fun to DIY some brewskies for friends and family. I know I’m always impressed when other people make their own (well, when they are actually good, of course, haha).
Hmm… now to tackle the equipment and supply lists!
I’ve always wanted to try this but every time I think of home-brewed beer I associate it with a horrible taste. My uncle has really gotten into brewing his own these last couple of years and I feel like no one in the family has the heart to tell him that it’s not very good. Maybe I should send him this article to make sure he’s doing it right…
While I’m skeptical about home brews, I love trying local micro breweries and sampling the local flavor of the places I visit. There’s an awesome brewery that opened recently near where I live in Bellingham called Aslan Brewery and it’s awesome. Does anyone else frequent any of their local micro breweries?
That infographic is really good for breaking down the process. I absolutely love beer (especially pilsners and IPAs) but I’ve never thought about venturing into brewing my own. It seems like there is a decent amount of set up, but it would be worth it for the satisfaction. I think the part I would struggle the most with is the temperature control due to my location. One day I might give it a try if I have more disposable income. At the moment I’m relying on others to do all that hard work!
I’m a beer fan, but don’t think I would have the patience for this. I tried buying green coffee beans for a while and roasting my own coffee, which was fun, but I gave that up after a while. I’m one of those people who enjoys the beauty and art of the craft as I’m enjoying the end results, not so much the process. This is a fantastic article that leaves no room for guesswork. Always amazed by the quality information found here..
This is by far one of the best and simplest brewing guides I have ever read! Your illustrations are not only adorable, but helpful as well! I’m curious as to how forgiving beer brewing is- I have experience brewing Meade, and found it very kind to mistakes in flavor. I’ll keep this in mind when brewing my own twist on a coffee- chocolate porter I had once. Coffee, chocolate, and beer? It can’t get much better than that!
Wow thanks Ashley! I’ve always wanted to brew my own beer but always found the idea too daunting, and was afraid it would just be a waste of time and resources. This article breaks it down into manageable steps and provides amazing illustrations! I’m definitely going to give this a go, it will be great to hand out at dinner parties!
I absolutely love the way these illustrations teach the process – kudos! I am bookmarking this article because I am actually making homemade wine currently and beer is my next project. I love to learn visually and I think these illustrations will be a great help. Thank you!
The title of this post caught my eye and I just had to read this article. It’s really amazing the way you broke the process down step-by-step and made it easy for anyone to be able to do it. I’ve only ever seen home-brewed beer on TV and now I can make my own. Wonderful!
After touring and tasting this summer, my husband really has the urge to do this. I’m just wondering where we will put everything. I barely have enough storage for all my stuff, which he has noted. He says I should just “make room.” Yeah, but I love my cooking equipment and gadgets. I guess I’ll have to find a compromise.
Have you made any of your own special varieties, Ashley? How did they turn out?