Jump to the Recipe
If you’re just getting started with homemade pasta, this is the perfect recipe. Not only does it use just a few simple ingredients, it’s easy to form into a variety of shapes, or to adapt for different recipes.
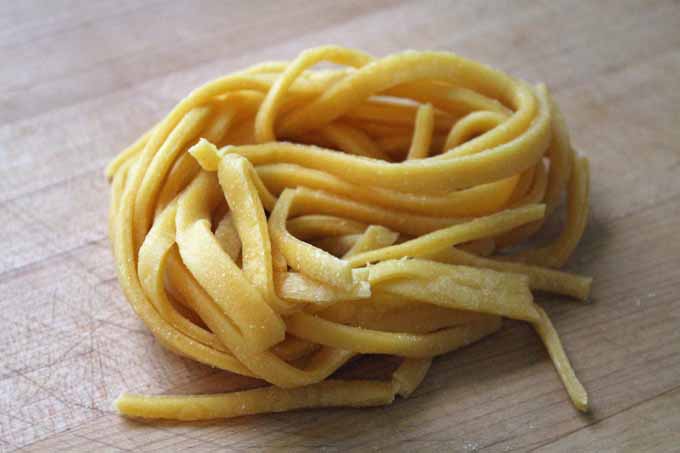
I prefer pasta made with semolina flour to the regular “00” pasta flour, in terms of both texture and taste.
Semolina flour comes from durum wheat, and it is made by removing and purifying the coarse centers of the grain. You can also find semolina-type flour made from rice or corn.
Since my Italian friend never wrote down exact ingredient measurements for her recipes, I also referred to this article, just to confirm and standardize a few things when I wrote my own adaptation, which you will find here.
This basic recipe can be used to create a huge variety of different types. You can roll and cut your pasta into the styles and shapes that you prefer by hand, or you can choose to use a pasta machine. If you do choose to go the pasta machine route, it is worth the investment to purchase a good one.
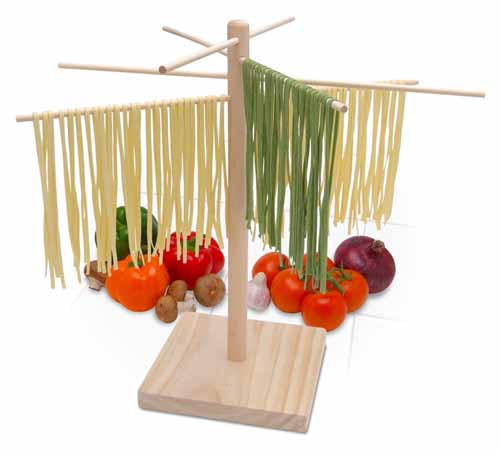
Bellemain Large Wood Pasta Drying Rack
Once your pasta is rolled and cut, you might also consider trying a pasta dryer, which is sort of like a wooden tree. I love these, and think they are very cute!
The Recipe
- 400 grams Semolina flour (14.1 oz) plus more for rolling the dough
- 4 large eggs lightly beaten, preferably organic and free range
- 1/2 teaspoon fine sea salt
- Put the flour on a well-cleaned kitchen counter and form it into the shape of a nest.
- In the well in the center of the flour, add the lightly beaten eggs and the salt.
- Start blending the mixture together with a fork, slowly adding the flour from the outer edges of the nest into the center until all of it is well incorporated.
- After the flour-egg mixture is completely incorporated, cover the counter and your hands with a sprinkling of flour. Knead the dough for approximately 15 minutes until it is about the consistency of modeling clay.
- Form the dough into a ball and wrap with plastic wrap and chill for around 30 minutes in the refrigerator.
- After chilling, plop the dough onto a clean surface dusted with semolina flour (again, to prevent sticking) and divide it into two even pieces.
- Sprinkle more flour on your counter and on a rolling pin. Flatten the dough ball with the rolling pin (or with a pasta maker if you have one available).
- Roll the dough with the pin unit it becomes translucent. Add dust to the countertop, your hands, and the pin as required. This is a quite lengthy process requiring up to 20 minutes.
- Set aside, and do the same with the other half. Then let the dough rest for another 10 minutes.
- Slice the pasta into thin strips or into shapes suitable for ravioli or other types of noodles.
- Dust the finished noodles with flour and hang them unit they are semi-dry. Once they are partially dry, you can freeze them or store them for up to four days in the refrigerator.
Cooking by the Numbers
Step One – Nest Up Your Flour
Place the flour on a cool, smooth surface. A stainless steel prep table, marble slab, or a large wooden cutting board works best.
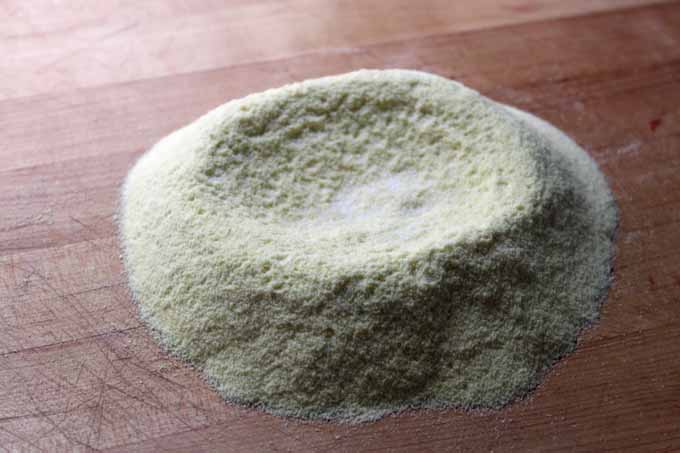
Mound up the flour and make a slight depression in the center so it forms what resembles a bird’s nest or a volcano.
Step Two – Add the Protein Structure
Beat the eggs (if you haven’t already done this) and add them and the salt (I like to use sea salt for this) to the well that you formed in the flour pile.
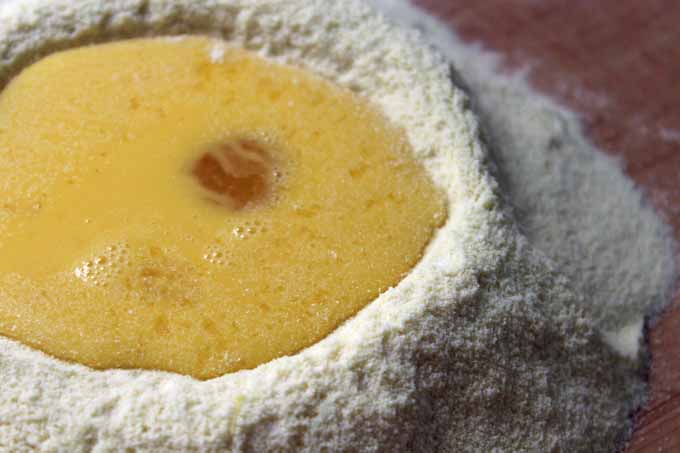
Step Three – Mix the Eggs into the Flour
Blend the egg and salt mixture into the flour with a fork. Be sure to incorporate the edges and ensure that the dough is well blended.
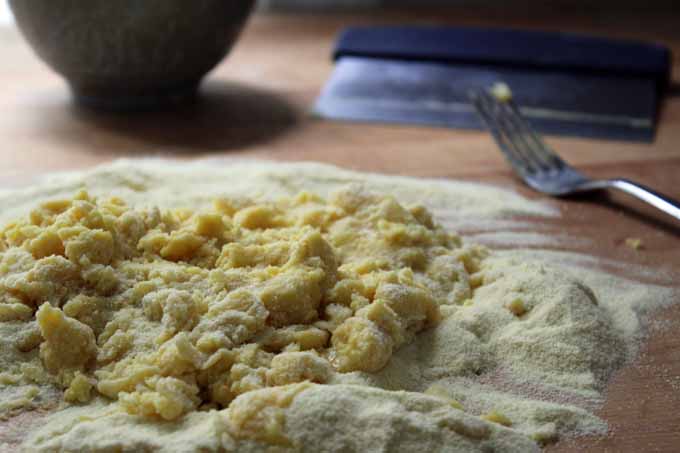
Step Four – Kneading
When the dough is well blended and has a firm consistency, dust the counter with semolina flour. Knead the dough with lightly floured hands until you are sure it is completely blended, and pliable enough to make the noodle or ravioli shapes you plan to use. This should take about 15 minutes.
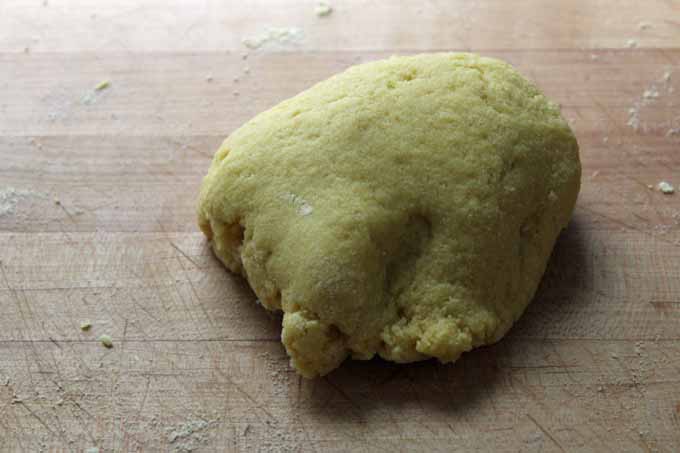
You can also knead your dough with a powerful stand mixer, but I prefer the hands-on method.
Step Five – Rest
Form the dough into a ball and wrap it nice and tight with plastic wrap. Refrigerate for about half an hour.
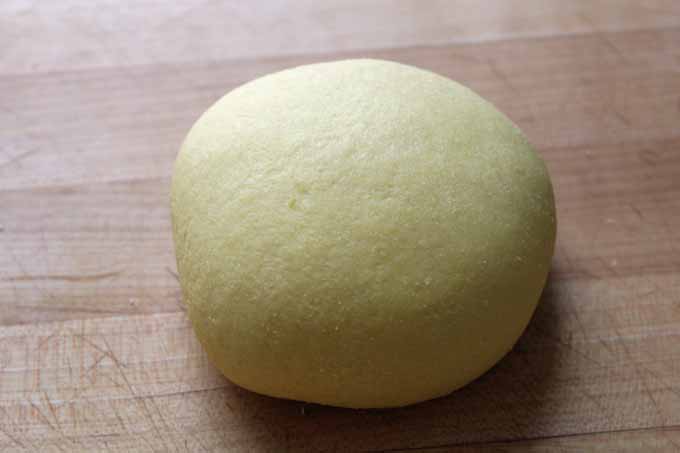
This will further help to produce its elastic qualities, which will make it easier to form your pasta.
Step Six – Divide & Conquer
Dust your countertop with flour and split the dough ball into two parts, to make it easier to work with.
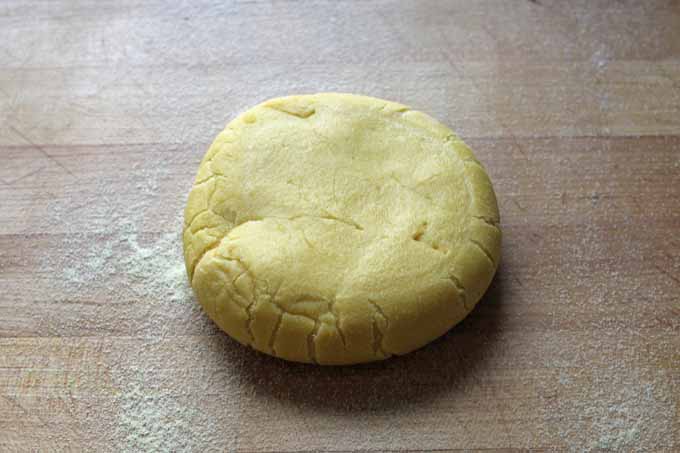
Flatten the ball until it is under an inch thick.
Step Seven – Dole It Out, Roll It Out
Dust a rolling pin with semolina flour, and place half of the dough on your floured counter. To roll it out, start by applying pressure while rolling the rolling pin away from you, and applying a little less pressure when rolling it back towards you.
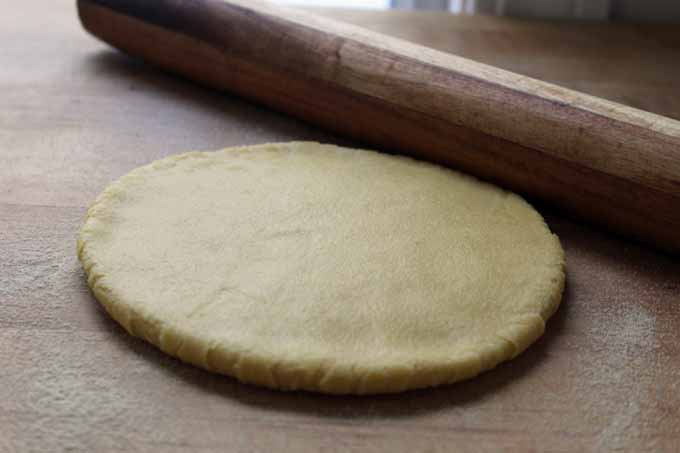
If you will be using a pasta machine or a Kitchenaid mixer pasta maker attachment, you only need to roll your dough out a little. You might even be able to get away with just pressing it into a flattened rectangle that you can feed into the machine.
Extruders are a little different, usually requiring that you feed small balls of a tough-textured dough into the intake chute – my best advice is to refer to the manufacturer’s directions, if you will be making your pasta this way.
Step Eight – Keep Rolling Until You See Daylight!
Back to the handmade method: continue rolling the dough while rotating it and turning it over, until it is thin enough to see through it when you hold it up to the light.
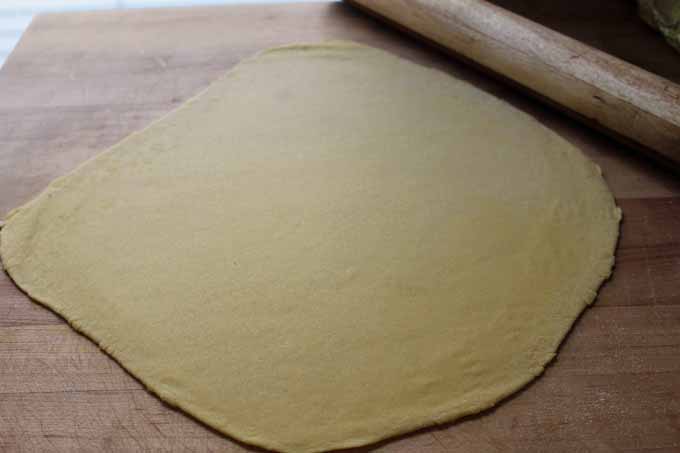
Continue to dust your hands, counter, and rolling pin as needed. This should take about 15 to 20 minutes. This might be a nice time to enjoy a glass of wine!
Note that if it gets too tough to roll, or if it springs back into place, let it rest for a few minutes.
Step Nine – Double the Trouble: Flatten Both Halves with Some (Optional) Help
Once you’ve got it thin enough, now you get to do the same thing to the other half! This is where a small child that still thinks such things are “fun” comes into play. If you don’t have one of your own, acquire one from a neighbor.
Once your are finished, let both sit and rest for ten to twenty minutes (the dough, not the child… put him or her to work doing something else. “Make hay while there is sunshine,” my dad always said).
Step Ten – Cut Up or Shut Up
Cut your pasta into the desired shapes, by hand or using a pasta machine. Be sure to use lots of flour, so it does not stick.
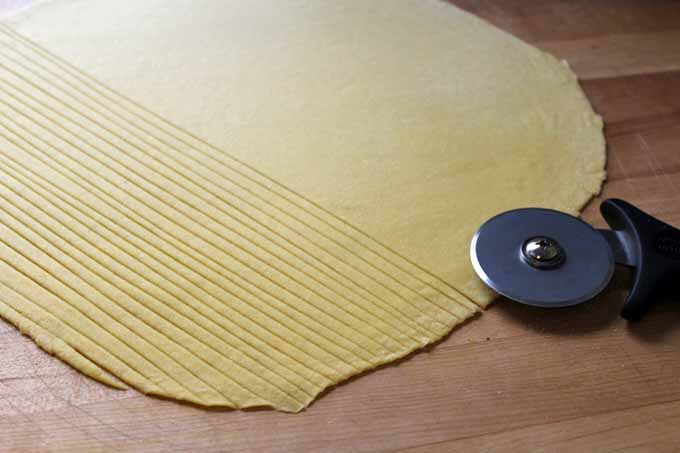
Depending on your machine, you should usually begin with the widest setting. Keep folding it and rolling the dough back in until it is the width of the pasta machine, and decrease the width setting until you reach your desired thickness.
Step Eleven – Don’t Be a Wet Noodle! Dry Them Out
Sprinkle the cut pasta with semolina one more time, and allow the pieces to partially air dry. If they are long strands, you can hang them from a dowel, clean hangers, the back of a chair or the aforementioned pasta dryer – anything in your kitchen, really (as long as it’s clean)!
You are now ready to cook the pasta, fill it if you are making tortellini or ravioli, or freeze it.
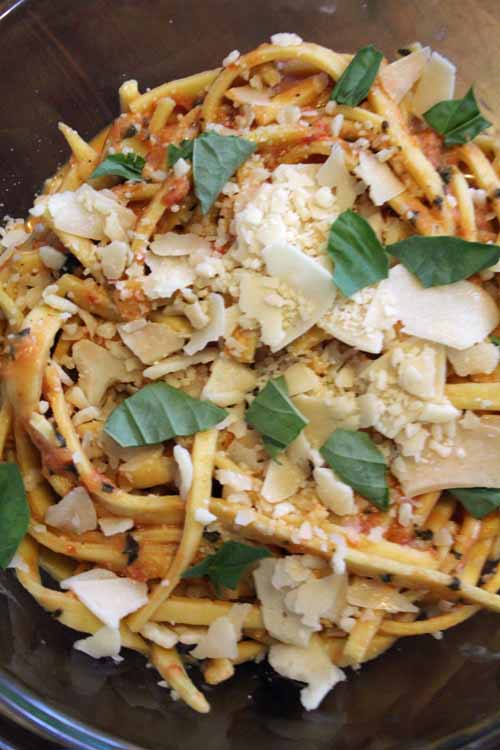
For a quick and easy meal, I like to mix in a light dosing of a red sauce or tomato cream sauce, along with some Parmesan, and some spinach. Simple, fast, and tasty!
Of course a great pesto always works as well. Or get a bit adventurous and try this broccoli and garlic sauce.
So, what do you think? Will you make fresh, delicious pasta for dinner tonight?
Once you have the basic technique down, the possibilities are endless. Tell me about your own pasta making adventures in the comments, and don’t forget to check out our other super simple Italian pasta recipe for Malfatti.
Photos by Kendall Vanderslice, © Ask the Experts, LLC. ALL RIGHTS RESERVED. See our TOS for more details. Additional writing and editing by Allison Sidhu, Mike Quinn, and Kendall Vanderslice.
About Lori Jo Hendrix
Lori was born in southern California and currently resides in Mexico. She is an actress and model who also writes in the fields of nutrition, wellness, and cuisine. Her passions include working as a volunteer with various groups in the rescue and rehabilitation of orphaned and injured animals.




This immediately took be back to my college days when I dated a girl whose family was VERY Italian and her grandmother would make her own pasta. It was really really good, too, and I am not sure how similar the technique was but I am assuming that most homemade pastas are much more rich and flavorful than anything that you can find at the store. I will have to really find a good time and place to give it a try sometime, but it is nice to have a little tutorial at my disposal. For that, I say thank you for sharing.
Hi rz3300,
Yes, nothing like having an Italian relative or almost relative around who loves to make pasta.
You must try it and let us know how it turns out.
Welcome!
I have never tried it but i can’t wait to make one ^^ Love Italian food and Italia too <3
Well it’s really easy and I am so pleased that you can try something new being such an Italian food fanatic!
I have never been to Italy, unfortunately, but Argentina is full of Italians and I imagine it to be similar. I do want to go.
That really works well with Semolina Flour…..I loved it…!
I’ve never used semolina flour so I will have to go and hunt for some. For a long time I have wanted to make my own pasta because I think it’s healthier and one day I will try it. From the recipe it does seem straightforward, but it does look as if it takes time, and patience.
I can’t wait to try it out.
Hi Bella,
You are going to love semolina flour. It is not so difficult because pasta is fun to make! And so economical you freezes perfectly so in on setting you can prepare and freeze extra portions which will actually make your life easier. And yes, it is delicious!
Enjoy and I look forward to hearing about your first experience with it.
You’re so right, there’s nothing like the taste of homemade pasta. I’ve made pasta plenty of times and I’m still amazed at how simple it is.
Hi atlmom5,
Have you made it with semolina flour before? Yes, it is much simpler than people imagine. Thanks for posting this!
Yes, I have and your welcome!
Hi atlmom5,
Is semolina your favorite?
I used to make homemade pasta with my grandmother when I was little and I highly prefer it. People don’t realize how easy it really is. I now only buy the boxed or dried variety when I’m short on time or it is a shape that is hard to make. If you have never done it before, you should. It is well worth it.
Hi Lisa Davis,
I love it that you used to cook with your Grandma when you were a little girl, that is so awesome!
I buy pasta that way as well, I have yet to make Penne Regatti at home.
Thank you for your post!
I am really new to homemade pasta and just really new to the cooking world in general, but this blog always makes things looks so easy, so thanks for that.
I have an aunt who makes her own pasta, and I don’t know what’s exactly her method but it’s definitely quite of a long process for her, but at the end of the day those noodles end up tasting really good! And another benefit of homemade food is that you actually know what you are really eating.
Hi anorexorcist,
Welcome.
The thing about homemade pasta as I mentioned above, is that is is fun to make and you can freeze it, saving future work, hehe.
And you know your kitchen is nice and clean as well. You never really know when at a restaurant. I love those restaurants with open kitchens, that always makes me feel better and I love watching them cook.
This is great. Not only is this pasta easy to make but it also doesn’t require any complicated ingredients. Simple and fast, which is exactly how I like it. As a newbie to cooking, I’m so excited about all these things that I now know I can make at home. I can’t wait to try this recipe. Thanks for sharing.
Hi NormaD,
Welcome to the world of cooking! I am happy we are here to be of help.
Enjoy and let us know how it turns out!
I’ve never really made any homemade food before, unless you count eggs as homemade. I don’t have that much time to prepare my food, so whenever I make pasta, I usually just buy the ready to boil packs and eat that as quickly as possible. I never really thought to put in any effort into preparing my own fresh food, because I figured it couldn’t taste THAT different to store bought food.
But wow, the difference is absolutely crazy! I’m not much of a cook, but my friend was raving about this recipe and I figured it wouldn’t be the worst thing in the world if I tried to make it myself. Now, I was really worried that I wouldn’t have the skill necessary to make my own pasta, but this recipe seriously doesn’t take that much skill! I already had a pasta maker in my house for a few months, but I’ve never actually used it up until this weekend, believe it or not! The process was super easy and the final product was delicious! I don’t think I’ll ever be able to go back to store bought cardboard they call pasta, and I’ll definitely be recommending this to my friends.
Hi joshuakaton21,
Yes! Eggs, anything counts. You don’t have to start big. We are here to inspire you into making many more dishes yourself, and we have so many delicious ones to chose from.
Congratulations on making and enjoying your first homemade pasta dish, that makes me so happy!
Congratulations on having a go at making pasta, and learning that home made is possible and yummier! I hope you enjoy trying some different pastas and sauces over time, too!
Growing up, this was something my grandmother was known for; making noodles from scratch. We always had some made up, or even some stashed in the freezer, yes, they freeze very well too! This is one of the best recipes out there!! Thanks!
Hi ASHLEY0323,
Lucky you! Welcome!
Oh that looks amazing! I haven’t had homemade noodles in years. My grandmother used to make them and she did a poor job cutting them so they would vary in width which made them even more special and delicious. She would hang them everywhere in her kitchen, the backs of all her chairs! Everywhere!
This semolina pasta is very reminiscent of her pasta and really makes me want to make my own pasta! Nothing beats homemade!
Hi melanie,
Thank you!
I hope you make it soon, just like your Grandma did, and please let us know when you do!
I love how almost everyone has the memories of their grandmother making homemade noodles. I know I sure do, and it is kind of sad knowing that will come to an end here pretty soon, as of course we do just not do it anymore all that much. Might be nice to make it more of a routine.
I always wanted to try my hand at making my own, but I have to admit that I’ve always been a bit intimidated by the idea of actually doing it. This makes it seem like it isn’t quite all that. I think I could actually do this. It doesn’t seem nearly as tough as I thought it might be.
How delicious would it be have your own, homemade and fresh, to pair with lovely sauces? You could even boast a bit, “I made that!” Now, I’m definitely going to have to try it. One more thing on my list.
Hi Zyni,
I think most are intimated by making their own pasta but once they make it they realize is fun and really that not hard and delicious and continue to make it!
Let us know how it turns out 🙂
I’ve never made pasta (or anything else!) with semolina flour but I’ll give it a go. I also didn’t know semolina flour was made from different grains – I’d be interested in learning more about semolina and how it differs from other flours.
That drying tree is cute I have plans for our new kitchen to have some long racks under the high cupboards so I can pull them out for things like drying pasta.
I would love to get the nutritional facts about this.
How many calories per serving ? Etc
Also I would love to learn to make marinara sauce.
Thank you
Thanks for reaching out, Magali! We’re currently working on transferring our archive of older recipes over to our new recipe card application to include nutrition facts. In the meantime, I can tell you that this homemade pasta is about 100 calories per serving. We do have a homemade marinara on our list as well- stay tuned for that! In the meantime, please check out our recipes for tomato cream sauce, slow cooker spaghetti meat sauce, or homemade tomato jam. Happy cooking!
After I make the dough and wrap it and chill it, can I wrap it even better and freeze it like that, and thaw in the refrigerator till ready to roll out and cut?
To prevent your dough from cracking, a better option would be to cut the noodles, portion them in little nests, and freeze these on a baking sheet. Then transfer the frozen noodles to an airtight container or zip-top plastic bag, and take out what you need when you’re ready to cook. Transfer the frozen pasta straight to a pot of boiling water – no need to defrost first, just add a few minutes to your total cook time.
Hi,
My great-grandmom used to make a simple dough from eggs, flour, salt and a little sparkling water. It was quite wet so you could let it drip from a fork into a tomato soup she made. She used just ripe tomatoes, lemon juice, salt, butter, cooked all well, made a very fine purée from it, made it cook again and dripped the dough into the boiling soup. That was my first pasta-like experience. I loved it. I still cook it.
Later we made our own noodles for noodle soup using 5 eggs for 500 g flour. This dough was rolled out very thin and left to dry before cutting fine strips from it.
By now I have tried a lot of filled pasta. It is a big difference in taste when you make it yourself. I like the taste of semolina. This dough here is cool for tagliatelle, linguine, spaghetti, lasagne, etc.
Thanks for your recipe.
Thanks so much for sharing your stories and recipes, Sylvia. The pasta cooked in boiling tomato soup sounds like a delicious treat- reminds me a bit of the technique that my grandfather used to use for making egg drop soup at home, and brings back memories of other grandparents and great-grandparents in the kitchen as well. I’d love to try this!
Homemade pasta really is something special. 🙂
Getting ready to make, can the pasta be refrigerated overnight shaping into ball and before rolling flat?
Yes, you can make it in advance and keep it in the refrigerator until you are ready to shape the dough. Be sure to wrap it tightly in plastic wrap, and allow it to return to room temperature on the counter before you roll it out.
Yeah. Convert to cups. Useless. Everyone does not want to convert.
You don’t use yeast??? Any pasta recipes I’ve used called for yeast!!!! It would be great if not!!!
What about mixing with regular flour? Much loss of quality going 50/50 with the semolina?
Semolina is very high in gluten, so it helps the pasta to keep its shape. Other types of flour like durum wheat could also be used, or “tipo 00” which is more refined than all-purpose. Using all-purpose flour to make pasta may result in noodles that fall apart in the boiling water, or lose their shape altogether to form a blob of dough.
I made half the recipe. I did not roll it thin enough because after hanging, the pasta would stretch near the bended area then drop on the counter. Only about 6 of them did this. You should specify how long to dry these for the climate this recipe originated in. I just put them in the fridge after about 2 hours.
Humidity and local climate can certainly have an effect in pasta making! It’s best to adjust to your own local conditions as needed. However, pasta that stretches and breaks while you are hanging it to dry may indicate a failure to knead for the recommended amount of time as well as humidity issues.