We occasionally link to goods offered by vendors to help the reader find relevant products. Some of these may be affiliate based, meaning we earn small commissions (at no additional cost to you) if items are purchased. Here is more about what we do.
Do you ever get aggravated at the price or quality of the products available from the local supermarket?
You open a can of whole tomatoes, and there’s skins and stem ends still on them. Do you ever wish that you could just can your own veggies or fruits, so you’d know what you have?
Wouldn’t you love to feel the pride of accomplishing something wonderful, like canning your own products? Then home canning is for you!
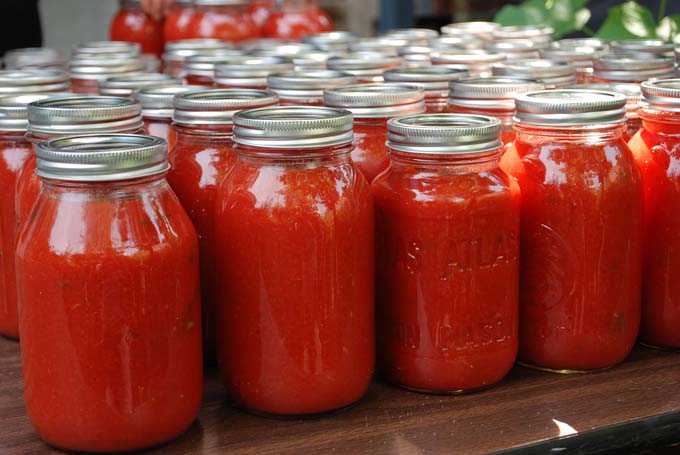
It is a wonderful thing to be able to say, “I made it myself. I canned 30 quarts of tomatoes and green beans this year.” Yes, I’ve been there and done that myself, and it is something to be proud of… and it’s so fulfilling.
I started canning about five years ago, and it was a wonderful feeling. I had just gotten out of the Army, and I wanted to be able to contribute to the household more, save some money, and accomplish something, too. Plus, I was feeling a little homesick, and we used to can when I was growing up.
There are some basic rules you must learn first, before starting on your new adventure in home canning.
First, you have to have a supply of the type of vegetables that you want to can, whether it is tomatoes, green beans, beets, or a multitude of other veggies that may be available. Almost every kind of vegetable can be home canned with great results.
Equipment
Secondly, you must purchase or borrow the equipment for this adventure. If you want to just try it out first, before investing in your own supplies, there may be a friend or relative that you can borrow the necessary equipment from, if you can catch them when they themselves are not using it.
You must have at your disposal: a pressure canner, a wide mouth funnel, a jar lifter, and lots of large kettles, pots and pans, among other things.
Here is a list of things you will need to get started:
1. Pressure canner
2. Several large pans or kettles (with a large one for sterilizing the jars)
3. A jar lifter (for lifting jars to and from the canner)
4. Jars, of course
5. Lids and rings of appropriate size, either new or clean, rust-free and unbent (lids cannot be reused, but rings can)
6. Tongs (for lifting lids and rings from boiling water)
7. Several pot holders, rags, and maybe some cheesecloth
8. Miscellaneous utensils like large, long-handled spoons, knives (for paring and chopping), a ladle, measuring cups, measuring spoons, etc.
9. A very large stainless steel bowl is a great asset as well, but yours may also be plastic
10. Kitchen timer
11. Jar funnel
12. Canning salt (using regular salt will make your foods cloudy)
13. A few helpful but not absolutely necessary items you may want to use include: a food processor, food chopper, colander or food press, or even a blender.
Kits
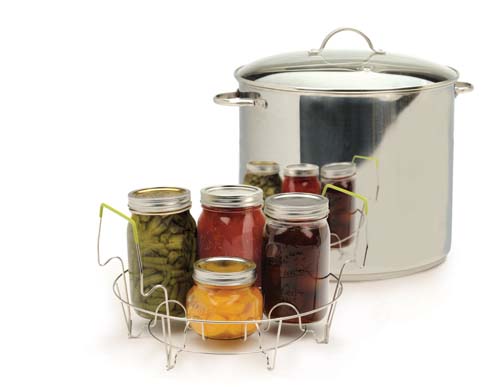
The easiest way to collect much of this in one go is to get a kit that contains many of the necessary pieces (i.e. the jar lifter, large porcelain pan for sterilizing/water bathing, colander, etc). Many of these kits will advertise themselves as “canners.”
Please bear in mind that these are only suitable for water bath canning high sugar or high acid food items such as jelly. For most applications you will need a pressure canner (more on this later). However, the “canner” that is included in the kit is very useful for pre-boiling your jars, to ensure that no bacteria is left alive prior to adding the food.
For getting most of your accessories at the lowest price point, the larger Graniteware kit is a good option, although I’m not really fond of the included colander design.
Granite Ware 0718-1 Enamel-on-Steel Canning Kit, 9-Piece
If you want to spend a little more and would like your large pan to serve double duty as a stockpot, then I’d recommend buying this:
The Endurance 20-Qt. Water Bath Canner Set available at Amazon.
The stainless steel pot included in this kit has a tri-ply bottom, meaning that it will have much more even heat distribution than the older style porcelain-on-steel examples, and you will have much less of a chance of burning any soups or stews that you may want to prepare.
Then you could add a simple canning kit to the Endurance, such as this one from Presto:
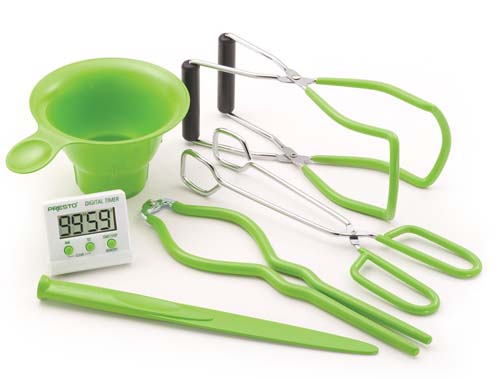
Presto 09995 7 Function Canning Kit
Colanders, Food Strainers, and Food Mills
If you want to put up some juice, sauce, or condiments such as ketchup or BBQ sauce, you’ll want a good quality canning colander (also called a food press) such as this unit from Mirro.
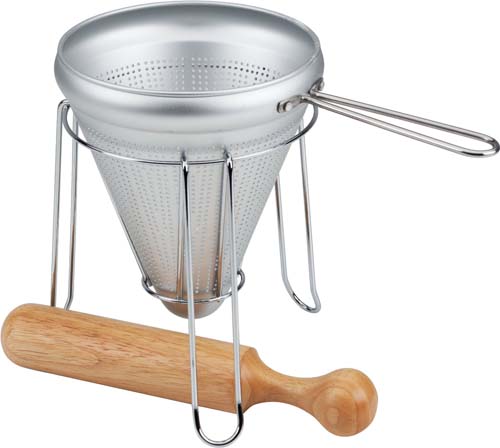
Mirro 9605000A Canning Accessories Food Press with Wooden Pestle, Silver
A canning colander is designed to allow you smash soft fruit such a blanched tomatoes against the sides of the unit, to easily extract the juice from the pulp. As an alternative, you could use a good juicer if you already have one, or even consider a food mill or sauce maker.
A note on food mills/strainers: don’t buy a junk one. As I always say, buy once, cry once.
I would suggest the Victoro as being the strongest available. It’s mostly made of metal and will last you a lifetime.
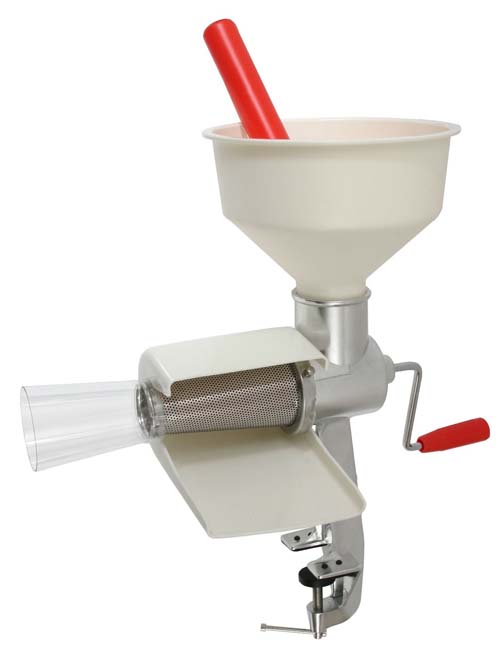
Victorio VKP250 Food Strainer and Sauce Maker
Accessories are also available for the Victorio, such as a kit that includes a salsa, pumpkin, and berry screen, as well as a grape spiral.
If you really want to go wild and don’t feel like cranking on the handle (or having your kid do it) an optional 250-watt motor is also available.
Pressure Canners
A pressure canner is considered the only safe way to process meat, poultry, seafood, and vegetables these days. Open kettle canning, like Grandma used to do, is not considered safe, and should never be used for most things other than jelly. Your health is the most important asset you have, and you should always insure the utmost safety when home canning.
There are cheaper options out there, but I really prefer the All-American Brand which is, well, still made in America. More than that, they have manufactured it with heavy duty aluminum castings that require no replaceable seals, unlike all other models on the market.
The issue for me with other makers is not the cost or even hassle of replacing the seals – it’s the fact that I don’t want to worry about being down a canner when I’m in the middle of a 30-jar run of tomato juice that I’ve used a lot of my labor in producing, both in the garden and in the kitchen.
The All-American comes in a variety of sizes from 10 1/2-quart all the way up to 41 quarts. If you are just starting out, you definitely want one of the larger ones. The biggest one may be a bit much for some stoves (i.e. glass tops), so the 30-quart is a really good option.
Later, you can add a smaller one, which is very handy for making smaller batches, as they are lighter and easier to move around.
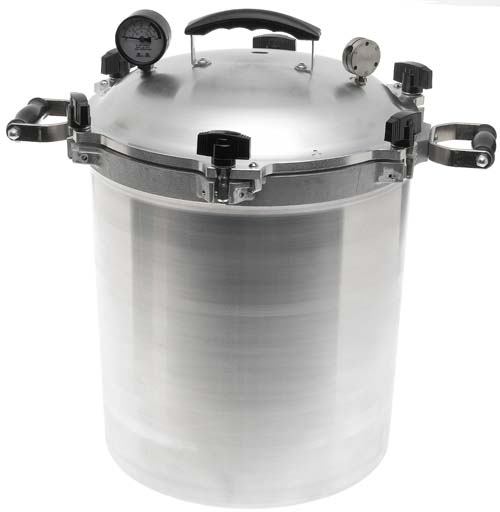
The All American 30-Quart Pressure Canner is available on Amazon.
If you don’t really want to spend that kind of money, there are other options for a pressure canner that is made of thinner stainless steel, but these require gaskets (however, they are lighter, which is a plus). But you should be prepared to shell out about $50 (in today’s money) whenever it needs a gasket or pressure plug replacement.
This is not necessarily a huge deal – you’re talking once every 7-10 years or so. The Presto shown below is the standard when it comes to these lower priced units, and the 1200 or so Amazon reviews attest to its popularity.
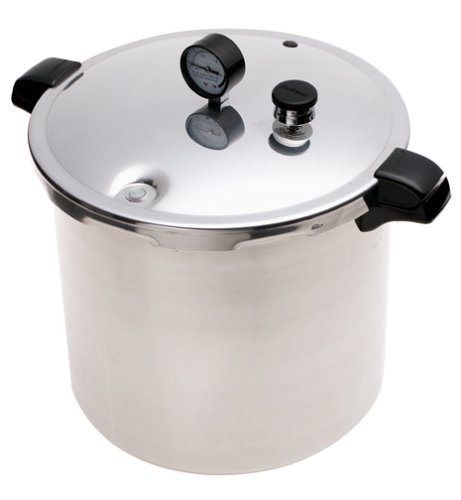
Presto 01781 23-Quart Pressure Canner and Cooker
Supplies
As you can see, home canning is not without some startup costs. But once you have your equipment and a good supply of canning jars and rings, the cash outlay is minimal, with the lids being the only recurring cost. And there are ways that you can reduce that expense.
Jars
You’ll want a good stock of canning jars to start. The best places to pick these up are at flea markets, yard sales, and auctions – as long as the seller doesn’t think they are sitting on a gold mine of “antiques.”
Some folks are under the illusion that these aren’t made anymore, and they are worth money. For the most part, older jars aren’t worth any more than newer ones (with a few exceptions, and you have to know what you’re looking at).
Pay no more than 30-50 cents each. I used to pick them up regularly for 10 cents each, but that was a decade or more ago.
However, if you don’t want to contend with haggling and a long, drawn out search for the number of jars you need – and you can never have too many – the easiest option is just to purchase them new.
Jars come in four basic configurations: pints, quarts, wide mouth, and regular (small mouth). I apologize for the nuclear colors of some these example photos – somebody got happy with the saturation slider in Photoshop.
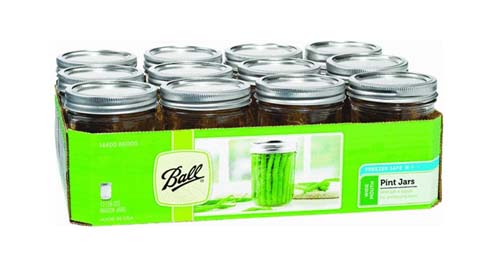 Ball Mason Jars Wide-Mouth Can or Freeze – 16 oz 12pk
Some jars are marked as being made for both canning and freezing. If buying new, I tend to try to get the ones that are marked as being okay to freeze. I rarely ever need to freeze them (coffee beans being the only thing I can think of that I would do this with), but it is always nice to have that option, and I don’t believe that they cost any more than the regular kind.
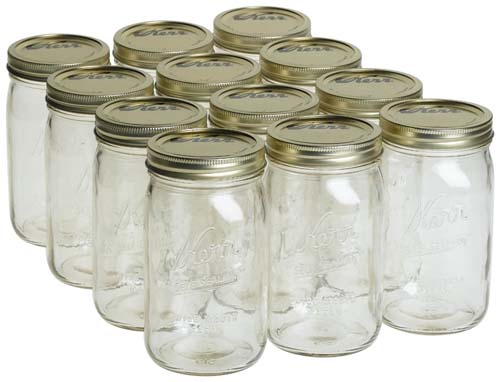
Kerr 0519 wide mouth jar quart, 32oz (case of 12)
Wide mouth jars are easier to get stuff out of, whereas small mouth jars are cheaper for both the jars and their lids. Most people tend to have a mixture of both.
I normally reserve my pint wide mouths for jelly, and my quart wide mouths for stews and other “convenience” foods that I can plop onto the stove if I don’t have much time to cook. Small/Regular Mouth Quart Jars are good for stuff like stewed tomatoes, green beans, and so on.
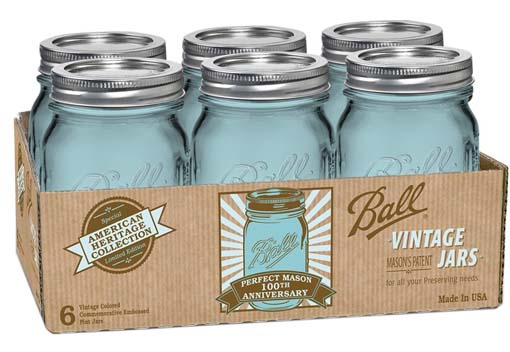
Ball Jar Heritage Collection Pint Jars with Lids and Bands, Set of 6
Ball has also introduced their “heritage” line, which has a blue tint to the glass that’s reminiscent of some of the actual antique jars. The blue color is formed by adding a trace amount of cobalt to the glass as it is molded.
There are a few other sizes available as well, such as half pints (usually used for small containers of jelly), half gallons, and gallons (both usually used for dry storage or fermentation). But I encourage you to start the bulk of your collection with pints and quarts, which is where you’ll find the most payoff in feeding the average sized family.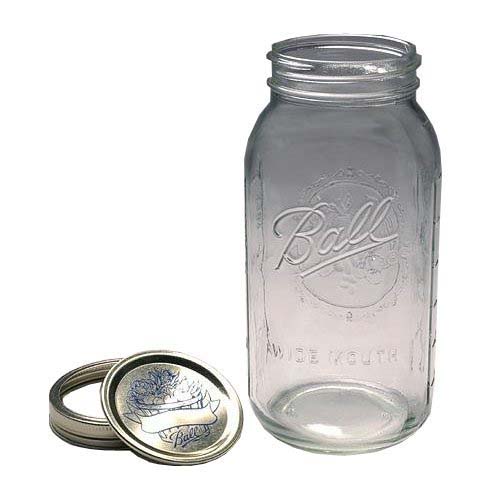
Also, you should be warned that Walmart sometimes sells some Chinese made off-brands, but I’d highly suggest that you pay up for Kerr or Ball (they are the same company – Jarden) as every single off-brand that I’ve tried is thinner and much easier to chip around the mouth area, which renders the jars useless.
For more tips on stocking up on jars, please see our article, “Where and How to Buy Canning Jars: How Many and in What Sizes.”
Lids and Rings
In addition to the mason jars, you’ll need a large assortment of lids and rings. The rings are reusable, but the lids are generally not. The one advantage to buying new jars is the fact that they come with a lid and a ring on each.
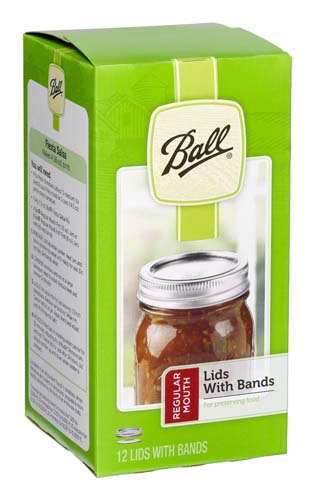
Ball Regular Mouth Lids and Bands – 12 pack
You can buy the lids and rings (or bands) separately or together, as in the example shown above. Once you have a decent stock of rings, you should be able to purchase only the lids as needed for the next couple of decades (or until they start corroding – this tends to happen more quickly on the East Coast of the US, and is negligible in most of the West).
There is a newer style of lid that is reusable, and seals with the help of a replaceable O-ring. These are the Tattler Lids, and they are made of a BPA-free plastic. However, they are much more expensive than the traditional disposable kind, and some folks don’t have the best luck sealing them – though this is usually attributable to over-tightening issues. These lids require a much looser fit of the rings, as compared to the disposable metal type.
Tattler Reusable Wide Mouth Canning Lids & Rubber Rings – 12/pkg
Cold/Raw Pack vs. Hot Pack
What about cold or raw pack versus hot pack methods?
In cold or raw packing, unheated foods are packed into hot jars and boiling liquid is poured over the food. With this method, the foods may be placed in the jars more easily, but the foods tend to shrink and float when processed, and trapped air may cause discoloration. Raw or cold packing can only be used for meats or vegetables that are processed in a pressure canner.
For the hot pack method, the cooked foods and liquids are packed hot into sterile jars. It is a bit harder to pack the foods hot, but since some of the air is removed by cooking, the foods turn out with better quality, color, and flavor. This also improves the vacuum seal and increases shelf life.
Hot pack is the best method for foods that are going to be processed in a boiling water canner (the blue granite kettle you often see). With this method, the jars must be covered with water extending 2 inches over the tops at all times during the cooking process.
More boiling water is added to keep the water two inches over the jars, as needed. And cooking times are longer with the boiling water canner. I always use the pressure canner instead, which is safer, quicker and easier, by far. The pressure canner is the only recommended way to can.
Safety
Here are some safety rules to always follow for home canning:
1. Always use clean, chip-free jars. Examine each jar for chips, especially around the top where it will be sealed. Also, never use bent or rusted lids or rings. They should always be “new” lids and rust-free, clean, unbent rings. Rings can be reused, but lids cannot as they will not seal properly.
2. Always use foods that have no bad spots on them, or this may cause spoilage to the whole batch.
3. Don’t cut short the recommended times for processing. If you’re not sure that you used the correct processing time, always boil your opened canned foods for 10 to 15 minutes before tasting. This should kill any microorganisms in the foods that could make you sick.
4. Make sure all jars are sealed within 12 hours of processing. Press on the top of the jar with your finger – if it “pops” down and stays down, or if it is already down, then it is sealed. If the lid pops back up, it isn’t sealed and should be refrigerated and used as soon as possible.
5. Home canned foods should always be wiped with a clean, wet cloth to insure that there is no leakage on the jars that could draw ants or mice. Then the properly sealed jars should be stored in a cool, dark, dry place to help retain color and quality.
6. Be sure to follow the manufacturer’s directions with your pressure canner or boiling water canner. Never take any chances with your health. You can also check out our list of top pressure canning tips here for the best results and safety as well.
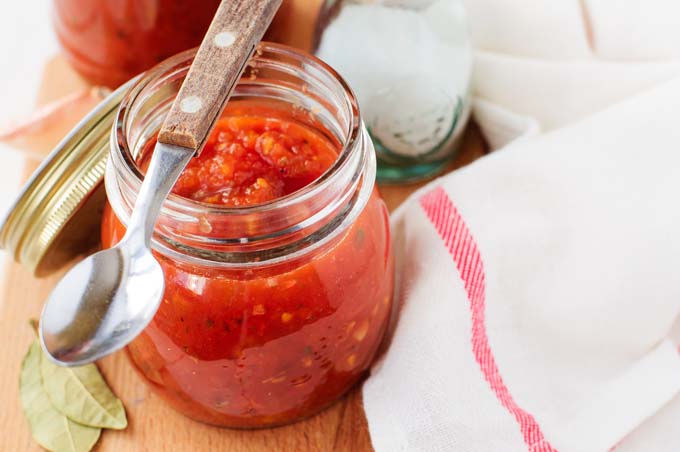
Canning Tomatoes
Here is how I “can” tomatoes (and remember, this is my own personal preference). I like to dice my tomatoes before canning. That way, when it’s time to make a pot of delicious chili or some great spaghetti, the tomatoes are ready to be made into some great sauce without any further preparation required.
Gather your tomatoes, wash off under running water, and remove stems. Dip the tomatoes in boiling water for about 30 seconds, and lift out into a bowl or pan of ice water. This will loosen the skins for easy peeling.
Remove cores, skins, and any hard or white spots, dice the tomatoes, and drop into a large bowl.
You should have the pressure canner on the stove with about 4 inches of water heating up in it, and the jar rack in place. You should also have a large pan of boiling water on the stove in which you can place your jars for sterilization, and a smaller pan of boiling water for sterilizing your lids and rings.
Next, using a jar lifter, pick up a jar, dumping the water out as you do, and sit it on a towel beside you, near the stove. Put the jar funnel in the top of the jar, and using a ladle, fill the jar within ½” of the top. Add 1 teaspoon of canning salt to the jar, remembering to use only canning salt (not regular table salt).
Run a non-metal object like a wooden spoon handle or plastic knife around the inside of the jar, to remove any air pockets. Remove the funnel and wipe the top with a wet cloth, to make sure nothing is on the top to keep it from sealing.
I know you may not want to do this, but it is a very important step. Never cheat on doing this, as it could keep your product from sealing, or cause it to come unsealed later and spoil.
Then, remove a flat lid from the boiling water with the tongs, and put on the clean jar top. Then do the same thing with the ring. Screw it down, just hand tight without overdoing it, and lift the jar into the pressure canner.
Do this with each jar, until your canner is full. Then put the lid on, and let the heat build up until steam comes out the hole for 10 minutes, then put the jiggler gauge on. Set your timer for 10 minutes to cook and seal the tomatoes. If your jiggler has a choice of pressure settings, set it to 10 pounds of pressure. If not, this is alright because it’s pre-set.
This is the process for using a pressure canner only. The processing time for a boiling water canner for pints is 40 minutes, and for quarts it is 45 minutes. And jars must be covered with water, with two inches over the tops.
This is considerably more time consuming than using a pressure canner. I consider pressure canning to be much easier and quicker, and also safer.
When the proper time is reached, let the pressure off the canner with great care. You can either let it go down on its own in due time, or you can gently move the jiggler a bit and let the steam off yourself, being very careful not to overdo it or to get burned from the steam.
Be careful not to let the jiggler fall off, or the pot could let the steam off too soon, too fast, and it could erupt. If you’re afraid to let the steam off yourself, then don’t do it. Let it go down gradually by setting the canner off the hot burner and cooling on its own.
When the lid is off, use the jar lifter to lift the jars out onto a waiting towel. Keep away from any drafts until they are cooled and sealed. You may hear them sealing with a slight sound of a “pop” or “ping.”
When 12 hours are up, you should check for a seal by pushing the lids down with your finger. If it pops back up, it is unsealed – refrigerate and use any that have not sealed properly as soon as possible.
Wipe down jars with a wet cloth and store in a cool, dark place. These should be good for several years.
Never use any home canned food that smells “off” when opened, or that looks bad. Never taste any boiling water canned foods without boiling in an open pan for 10 to 15 minutes, to be safe.
I hope you enjoy your adventures in home canning, and that you will remember that safety should always come first.
Take the time to check out recipes, canning books, and other information. A lot of things can be accessed on the Internet, like recipes, how-to’s, and lots of other items pertaining to canning. I myself consider the Ball Complete Book of Home Preserving to be the bible of home canning, as many others do. It tells you everything you’d ever want to know about this great and fulfilling quest.
Ball Complete Book of Home Preserving
I hope your love of home canning will be a great adventure that lasts you a lifetime, and that you pass along to others. Good luck, and have a great time learning! Tell me all about what you accomplish in the comments.
About Lynne Jaques
Lynne is a stay-at-home mother of two boys. As a former US military officer and the spouse of an active duty US military member, Lynne enjoys traveling the world (although not the moving part!) and finding new cuisine and methods of preparing food. She also has the habit of using parenthesis way too much!

Thanks for this useful guide! I have a lot of fond memories of my grandma canning foods. She always had a stockpile in her cellar. I used to love going down there and looking at her jars. I always have a bunch of tomatoes in my garden every year. We try to give them away to neighbors but still never eat them all. I’ve been wanting to can them but just haven’t started yet! Perhaps now is the time. I’d love to have home grown tomatoes for sauce year round.
Yes I remember my mum and her canned foods as well! The art of making your own sauce has been lost a bit in this generation. I sometimes pick up the home-made canned foods at the market and they taste just as good as fresh!
Whilst I don’t usually buy many preserved goods, I do agree that some of the home made sauces you can pick up at farmers markets can be utterly delicious!
I’ve always been afraid of making jams for the winter, since I’ve heard you can easily can foods wrong and they may end up getting bad or have a disease in it. Having read this I’m now more informed, will bookmark this to check out later, probably at the end of summer, to re-read and try to follow these tips. Thanks for the post, Lynne.
What a great article. It is just the start of the growing season here and I will soon be planting my tomatoes and other veg so reading this helps with my planning. Last year I tried making green tomato chutney with my excess tomatoes. I realise now I would have been much better off just canning them. Thank you.
One great source of ‘new’ jars that I stumbled on a couple of years ago when I was making a lot of jam was actually the cheapest supermarket jam or orange/lemon curd. The really nasty cheap stuff that only vaguely ever resembled the contents in passing! Well those contents make the jars really cheap and here in the UK you can buy 5 of these jars for every brand new ‘Jam’ jar that is empty. And because the cheapest produce has been used, the glue on the label is really cheap as well and dissolves in hot water leaving you with a clean jam jar ready to sterilse. It’s the next best thing to car boot sales and searching around for jars. Plus they are all identical and easier to stack that way.
This sounds like a good project for when I get a bigger kitchen. I can’t imagine having space for the jars, let alone all the equipment in my current place, but I can certainly picture having a nice time working on this with family or friends in a large, sunny kitchen, as we catch up. What a treat that would be, to take home canned food that we’d put up together, while making memories. I love how detailed the article is, and I plan to bookmark this for the future.
This seems like such an amazing idea. I spend so much money every month on jarred sauces and such that don’t even have a huge amount of flavour and are quite expensive for what they are. The only thing is that they are handy because sometimes when I come home and want a tomato sauce dish I want it within ten minutes not waiting an hour or so in order to make a decent homemade sauce. This means that I can make it in bulk and have amazing tomato sauce whenever I want!
Incredible! Thanks so much for such a detailed guide! You know, I’ve always wanted to make my owned canned goods at home, and frankly had no idea how it was done. Many times I thought about how other people made businesses out of their own canned goods and wanted to give it a try as well, but didn’t know who to ask about it. It looks like quite the investment, but definitely worth looking into. Thanks again for all this great information.
My Grandma is a master at this. I’ve always loved how she had a basement full of canned food. Too bad that I rarely see her, and when I do, there’s no time for her to teach me her canning secrets! I’m glad that I can learn this helpful skill from you – who knows, maybe I’ll be able to surprise my dear Grandma. From what I noticed, she has a different technique than you.
This was a really informative read! I’ve always wanted to can my vegetables from my garden, but I wasn’t very confident that I could learn how. I’ve also been wary of canning on my own because of possible diseases that can grow in your jars if you don’t follow the process correctly. This article was written in a way that I can understand the process and I now feel a little more confident in trying it out. I can’t for the end of summer so I can start!
Yes! Godsend! My mother has been looking into canning a lot lately. She has realized that she has a green thumb and now wanted to preserve her garden treasures. Having never canned before I couldn’t advise on what to get online. Therefore this article was the perfect thing to encounter while browsing the internet. Thanks a bunch Lynne. Can I get any information on what various websites say about the pressure to can at? It has mentioned that it depends on your altitude etc.
I am really interested in home preserving. As I am currently on the waiting list for an allotment near my home, this is particularly pertinent as I’m hoping I’ll have an abundance of fruit and vegetables next year!