If someone had told me there were a way to spend $10 to $20 and get (rich, flavorful) dinners for an entire week, I’d probably have imagined some sort of magic with rice and beans. But, speaking from day five of soups for dinner, I can tell you there’s another option—one that is crazy high in easy-to-absorb calcium, magnesium, and phosphorous, as well as healing for our bones, teeth, and guts: perpetual bone broth.
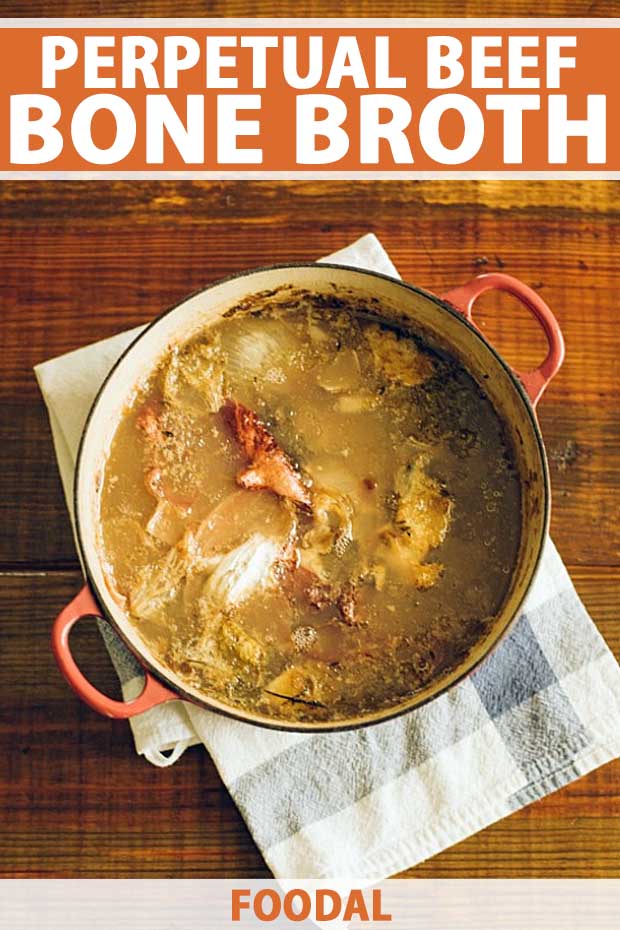
As I mentioned in the last post, Tim and I left Little Seed Farm last week with more than good memories. James and Eileen had sent us home with a bag of grass-fed beef bones, too, and so first thing Saturday morning I set them on the stove to cook.
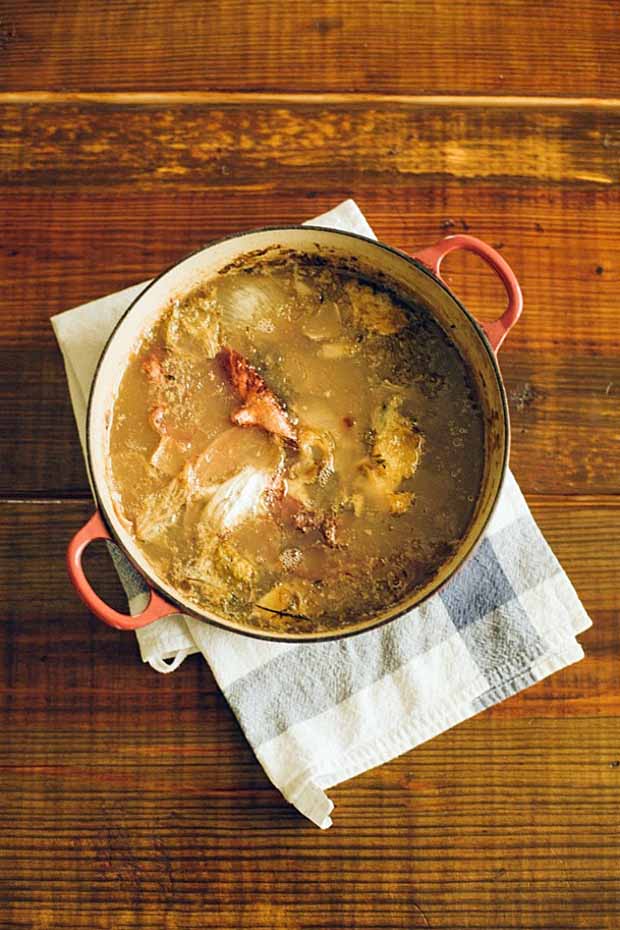
Making homemade perpetual bone broth truly is as simple as the phrase “set them on the stove to cook,” because all it involves, literally, is placing a pot on the stove (or turning on a crockpot), inserting bones, covering them with filtered water, adding a little apple cider vinegar if you like (to pull out minerals), and adding any other vegetables or vegetable scraps you have on hand.
Bring the mixture to a simmer, skim off scum as it collects on the top, and replenish the water as it goes down. In return you get rich, nutrient-dense broth to use in soups as you like.
Over here in the Mallon household, we make broth or stock fairly regularly, almost every time we have meat for dinner I guess, but this week has been my first experience with perpetual broth.
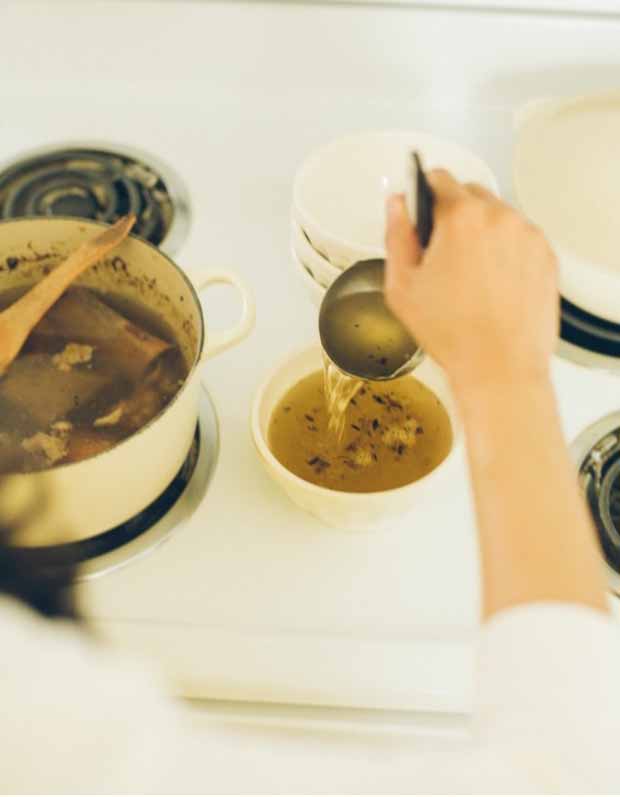
Whereas usually I let the bones cook for six to eight hours before straining the bones and storing the stock in the refrigerator or the freezer, this time I let it keep cooking, deciding instead to ladle out stock each night for soup from our perpetually cooking pot.
The experience has been such a positive one, with comforting, pot roasty soups every night, that I wanted to share about it here. Whether you’ve been making bone broths for years or the idea is entirely new, I hope this post will provide a solid framework for how to do it, why it matters, and ways to use it once it’s bubbling on your stove.
Print
Perpetual Beef Bone Broth
Description
Making perpetual beef broth could not be simpler, but it does require time. Before you get intimidated, know that in return for your efforts, you’ll gain rich, flavorful stock that is high in minerals, nutrients, gut-healing gelatin, and more. Bone broth is also super affordable when you consider that a handful of bones becomes the base of dinners all week.
Ingredients
- Beef Bones*
- Filtered Water
- 2 to 3 teaspoons Apple Cider Vinegar
- Optional: any herbs, fresh vegetable peelings, etc. you have on hand
Instructions
- Start by setting your largest stockpot on the stove and setting your beef bones inside. Add enough filtered water to cover the bones completely, and bring the water to a boil over medium heat.
- Add a few teaspoons of apple cider vinegar, and reduce heat to low, letting the pot simmer, uncovered –for several days and up to a full week. As it cooks, scum will rise to the top; use a spoon to skim it off and discard. Whenever the liquids get low, add more water.
- Whenever you want soup for dinner, ladle some broth out of the pot and use it as you like.
- Continue this process until the bones are completely brittle and dried out, so that you could crumble them between your thumb and your forefinger. Brittleness is an indication that the minerals and amino acids you’ve wanted to pull from the bones have been removed, and the bones have done their job for you. (I did this in two pots, and, in one, the bones were dry, brittle, and full of holes in 3 full days. In the other, it took a few days longer.)
- Strain the mixture and discard the bones and scraps. Set in glass jars, broth may be refrigerated (for use that week) or frozen (for later use).
Notes
*You can easily buy these from a butcher (just ask about soup bones!) or, sometimes, they’ll be pre-packaged at better grocery stores.
**The amount of stock varies based on the length of time you let the stock go, how much water you add and ladle out for weeknight soups, etc.
If you want to speed up the process, you can use a pressure cooker, either the stove top variety or an electric version such as an instant pot.
Step One: Get Your Hands on Some Bones
You can check your local butcher or get them from a better grocery store (HEB, Whole Foods, etc).
If it’s from your farmer, you can bet he has bones available. If it’s from your local grocery store, you might find soup bones packaged up in the meat department, but, even if you don’t, you can always ask and see if they’ll wrap some up for you from the back.
We look for bones from organic and/or pastured animals that have not been fed GMO grains. A pack of soup bones usually costs $4 to $10, depending on the type and quantity of bones, but especially when compared with expensive cuts of meat, it’s a bargain.
Step Two: Carve out Time
Being that Tim and I both work from home, I prefer to use a stockpot on low heat on the stove rather than a crockpot for stock. That said, Jenny from Nourished Kitchen uses a crockpot method, and she keeps it going all week long.
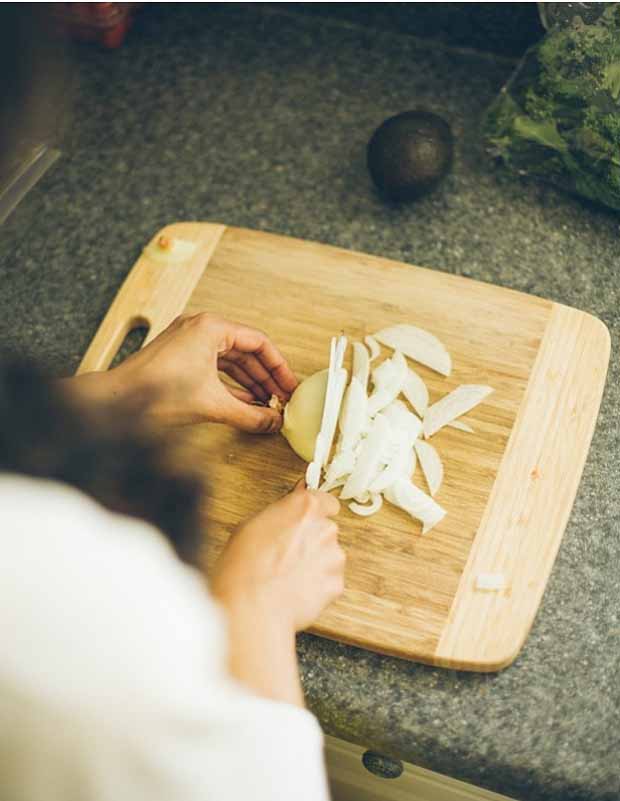
Whichever method you use, two important things to remember are to skim off scum, “Otherwise the broth will be ruined by strange flavors,” says Weston A. Price (think of scum as the undesirable stuff in the food, i.e., impurities, what you don’t need to eat) and to replenish water (as the soup cooks, water will evaporate, and you’ll need to keep adding more so the bones’ minerals can fill it).
You can also use a pressure cooker to speed up the process. It won’t be as good as the slow cooker or stove top version as you can’t easily pause to remove the scum but it is an option.
What about when I leave the house? go to sleep?
We took two approaches here. At night, we covered the stock pots, turned off the heat, and went to bed. This may not be necessary, but we’re paranoid about burning the house down, so it’s what we did.
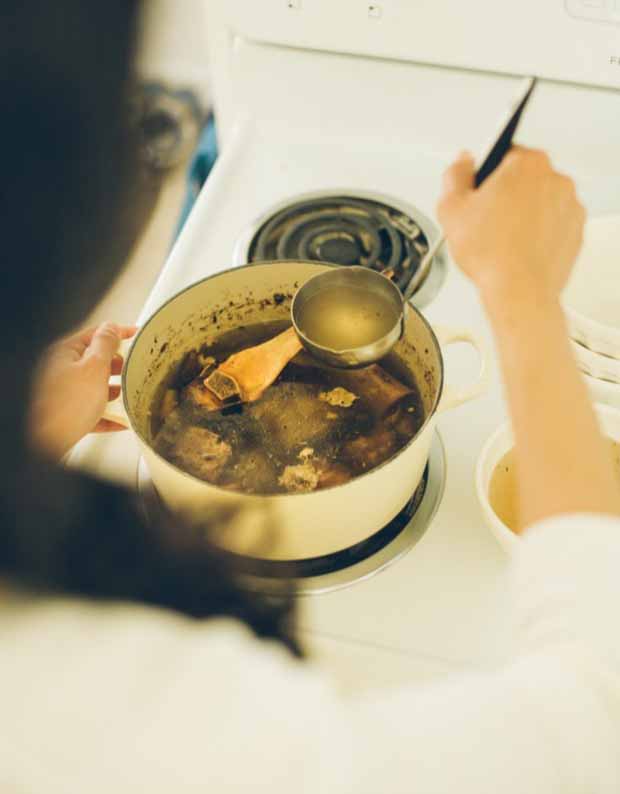
In the morning, we brought the soup to a boil before returning it to a simmer to cook all day. You could also refrigerate the pots while they’re not cooking if you prefer. Bonus with this method: The soup’s fat will rise to the top, making it easy to remove if you prefer a clearer stock (again, it’s a preference thing).
For shorter windows of time, when I’d run outside or be gone for a little bit, I’d leave the soup filled high with water on super-low heat, returning it to a simmer when I was home.
Why make stock?
The layman’s terms answer is that stock is super good for you. The more detailed, lengthy explanation would be that it’s high in several things that help your health, such as:
1. Glycosaminoglycans (you may have heard of glucosamine supplements) are good for your joints, according to Dr Shanahan of Deep Nutrition: “The health of your joints depends upon the health of the collagen in your ligaments, tendons, and on the ends of your bones. Collagens are a large family of biomolecules, which include the glycosaminoglycans, very special molecules that help keep our joints healthy.”
2. Gelatin (which we’ve talked about a little here and here) is incredibly healing to the gut, so anyone with digestive issues of any kinds (former Crohn’s patient here!), listen up. According to an article at Mind Body Green by Dr. Amy Myers, “The gelatin in bone broth protects and heals the mucosal lining of the digestive tract and helps aid in the digestion of nutrients.”
3. Amino Acids have a long list of benefits, according to this “Why Broth Is Beautiful” article from Weston A. Price, which I’ll just point you to for more information because it is detailed!
In sum: There’s a reason greater than tradition for why grandmothers always told us to eat chicken soup when we had a cold. Bone broths can be wonderfully healing, as they are both nourishing and easy to digest.
Especially for women: One last thing about the benefits of bone broth I want to add is that I’ve read a lot about the ways it’s good for women’s health especially (example here.)
What to do with perpetual bone broth?
You can sip bone broth on its own, salted to taste, but probably a lot of people won’t be into that. Next best option is soup.
This week, for us, every night, that’s been sliced onions cooked in a little bit of broth until caramelized-esque in smell and color, then added to fresh kale and bone broth, with salt to taste. It’s wildly simple and yet wildly deliciously because the bone broth does most of the work for you. We call it Pot Roasty Kale Onion Soup.
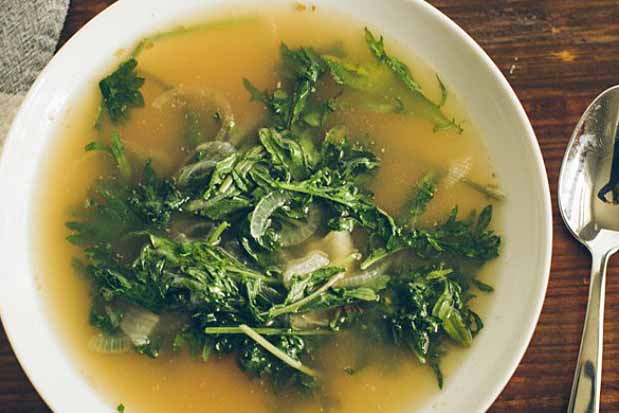
You can also use it in any other soup or stew that you’d use veggie or beef stock in. Some of our favorites include:
What does bone broth taste like?
It depends on type of bones, but this time I thought it tasted like pot roast. Rich and meaty and satisfying.
How do I know when the bones are done?
At some point, your bones will become super brittle and dry, and they will no longer be useful. We have had two pots going since Saturday, and, in one, the bones started to disintegrate—enough so that the bones looked like what can be described as cheese or spongey bread.
If you’re not sure if the bones are done, try feeling them with your hands and see if they’re dry and crumbly; if so, strain the soup and quit!
How to store leftover broth?
We like to strain the stock and pour it into mason jars. If we’re going to use them within the week, we put the jars in the refrigerator. If we want to save them for later than that, we freeze them (word of caution: don’t fill them too full as the liquids will expand and potentially break your jars in the cold; likewise, let them cool to room temperature before freezing) and thaw when we’re ready to make soup.
So that’s bone broth! Such a marvel to me. Every time we make it, from the simplest to the most elaborate soups that come as a result, I think about that famous quote from Hippocrates, “Let food be thy medicine and medicine be thy food.”
Photos by Shanna Mallon, © Ask the Experts, LLC. ALL RIGHTS RESERVED. See our TOS for more details. Originally published on March 26th, 2014. Last updated: January 28, 2019 at 18:18 pm.
Nutritional information derived from a database of known generic and branded foods and ingredients and was not compiled by a registered dietitian or submitted for lab testing. It should be viewed as an approximation.
About Shanna Mallon
Shanna Mallon is a freelance writer who holds an MA in writing from DePaul University. Her work has been featured in a variety of media outlets, including The Kitchn, Better Homes & Gardens, Taste of Home, Houzz.com, Foodista, Entrepreneur, and Ragan PR. In 2014, she co-authored The Einkorn Cookbook with her husband, Tim. Today, you can find her digging into food topics and celebrating the everyday grace of eating on her blog, Go Eat Your Bread with Joy. Shanna lives in Nashville, Tennessee, with Tim and their two small kids.


You can also reduce it down further, and if you need to, add gelatin to make bouillon cubes. Saves space in freezer. It’s been such a time saver to throw into dishes that require some flavor or when I want to make a quick soup.
Ooooh good idea!
Anyone who wants to get into something like this should try to get his/her hands on a copy of “Better than Store Bought” by Helen Witty and Elizabeth Schnider Colchie . It is hard to find, because it is out of print. It was written in the 70’s and is full of recipes for things most people only buy at stores, one of them is bouillon. Some things are kind of dated, like how to make you own yogurt(there were no yogurt makers back then), but there is a lot of good, timeless stuff in there for people who really want to start from all-the-way scratch.
I misspelled one author’s name: Schneider. Sorry.
Thanks for the tip. A similar book (that is in print) is Nourishing Traditions. It’s full of healthy recipes in a similar vein to the bone broth posted here. It’s also related to the Weston A Price Foundation, which is mentioned in the link about amino acids. Just sharing in case it helps someone else find nutrient-dense food to improve their health; I have no connection to the organization other than being a fan.
★★★★★
No way! I love the idea of having a pot of stock bubbling away at all times, full of nourishment and goodness. I’ve not come across this idea before but it’s absolutely wonderful.
Thanks, Kathryn! I know, it’s such a food stretcher, and I love that.
i have been making vegetable stock with vegetables scrapes each week and its such a comforting thing to do..
We do that, too, Dixya! It makes me feel like I’m getting food for free 🙂
Shanna, it’ll be thanks to you that sometime this autumn/winter, I’ll be having a perpetual pot of bone broth simmering on my stove. I can imagine coming home from the chilly outside to the welcoming smell of homemade goodness, one especially rich in all the minerals that are good for us!!
Yay!
Your wealth of knowledge on good-for-you-foods continues to astound me.
Oh, you. The wealth of good-for-you foods in the world is what is truly astounding! There is so much to learn!
Your beef broth is so light! Even our chicken broth is way dark. How do you do it?
I wish I knew the secret to why one of our pots was light and one was dark… I know when you roast the bones, the broth tends to be darker, but we didn’t roast them this time. I wonder if it just depends on the bones and the time or something?
Color is usually attributed to caramelization. Roasting bones caramelizes the protein creating a darker color. This produces a deeper more molassesy flavor as well.
I can’t wait to try this! I can almost smell the long-cooked broth from these lovely photos 🙂
Haha! I almost believe that! It’s a pretty potent (but wonderful!) scent. : )
this looks deelicious i mean ive tried this several times and i have forgotton alll about it thanks
I use an electric roaster to make large batches. When I begin I roast the bones in the roaster then add the cold water and let that go until the water is simmering, then add the spices, Himalayan pink salt, vegetables and vinegar. I will simmer the stock continuously for up to 2 weeks. I cannot emphasize enough that you must keep the broth simmering at the low boiling point at all times, bacteria and spoilage will not happen if the broth is kept at a low simmer. The reason a roaster is best is because it is electric, no fire, it can be set at a precise temperature, it can hold enough water to prevent evaporation and if you’re going to be using the broth as a warm drink (I have a mug before bed), it is available 24/7. You can also add to the broth as it cooks. Using whole vegetables you can pick them out and add fresh ones, add spices, pick out the bones and add freshly roasted bones, or strain everything out and add a new batch of ingredients. Just let it simmer for at least 6 hours. I will add fresh ingredients in the evening (after pouring my mug of bedtime broth) and let it simmer all night. You can add chicken or pork bones as well – all bones have glycosaminoglycans, amino acids and minerals. People have been making perpetual soup for hundreds of years – this is not a new technique, it is a time-proven method of safely cooking food for immediate meals. Think of a medieval tavern always having a hot bowl of stew ready for travelers.
Tasty
★★★★★
I’ve made plenty of stocks, but never like this. I don’t know why it never occurred to me. I’m starting one right away!
★★★★★