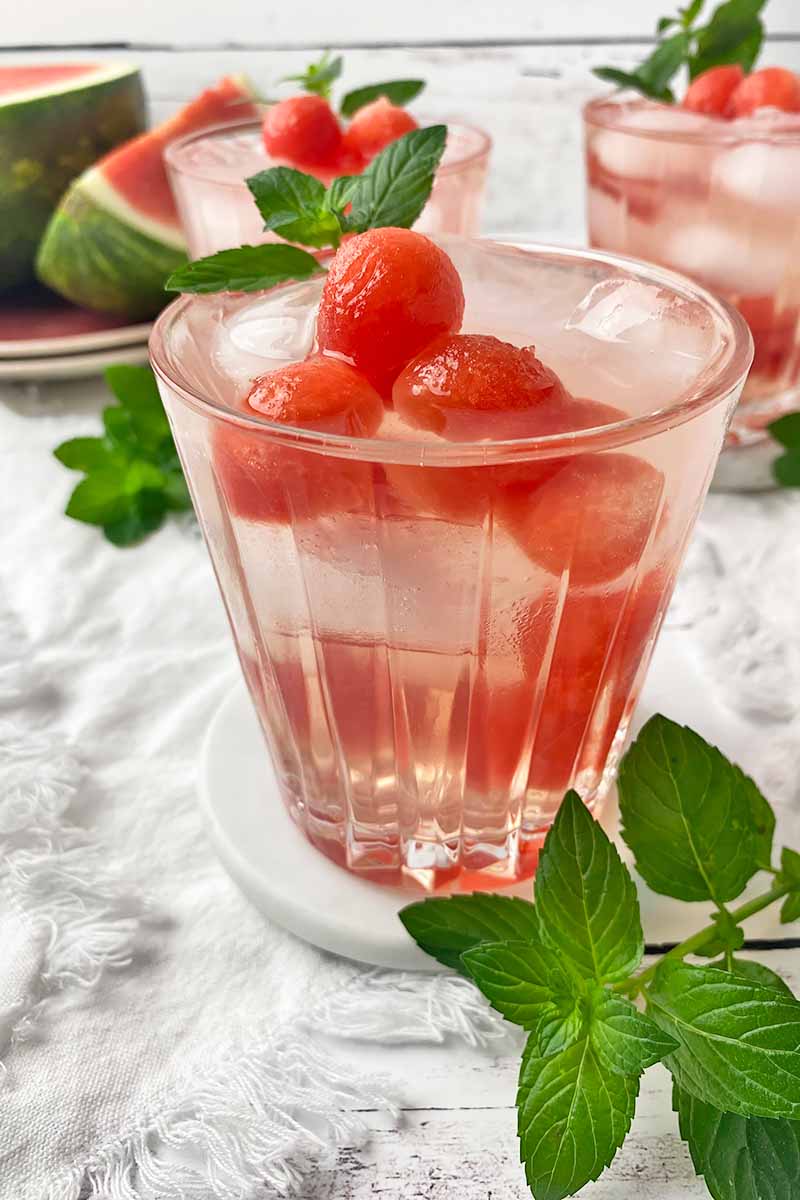
With our watermelon and mint infused water, quenching your thirst this summer will be so easy!

If water alone isn’t enough to satisfy you on certain days when you’re craving something a little more entertaining for the taste buds, then a generous addition of pure watermelon with fresh, green herbs will bring a refreshing flavor boost.
As with all infused waters, this basic version is simple to make right at home, with just a few ingredients.

And since watermelon and mint are always in abundant supply at this time of year, you can enjoy our pretty pairing in this drink throughout the summer.
Mint and melon – what a marvelous delight!
Your typical sources for summer produce are sure to have what you need, whether you have multiple varieties of mint plants happily growing in your home garden, or you rely on a favorite store or local farmers market with a fresh new lineup of fruits and herbs each week.
Bring this cool companion with you to all your sunny day activities – you’ll be glad to have a pitcher ready to pour at picnics in the park, fun pool parties, and outdoor brunch gatherings.
It’s a fantastic beverage option for anyone who loves the lightly sweet flavor of watermelon, but doesn’t particularly like its grainy texture. And this drink captures the juicy essence of the fruit without having to deal with the annoyance of spitting out seeds!
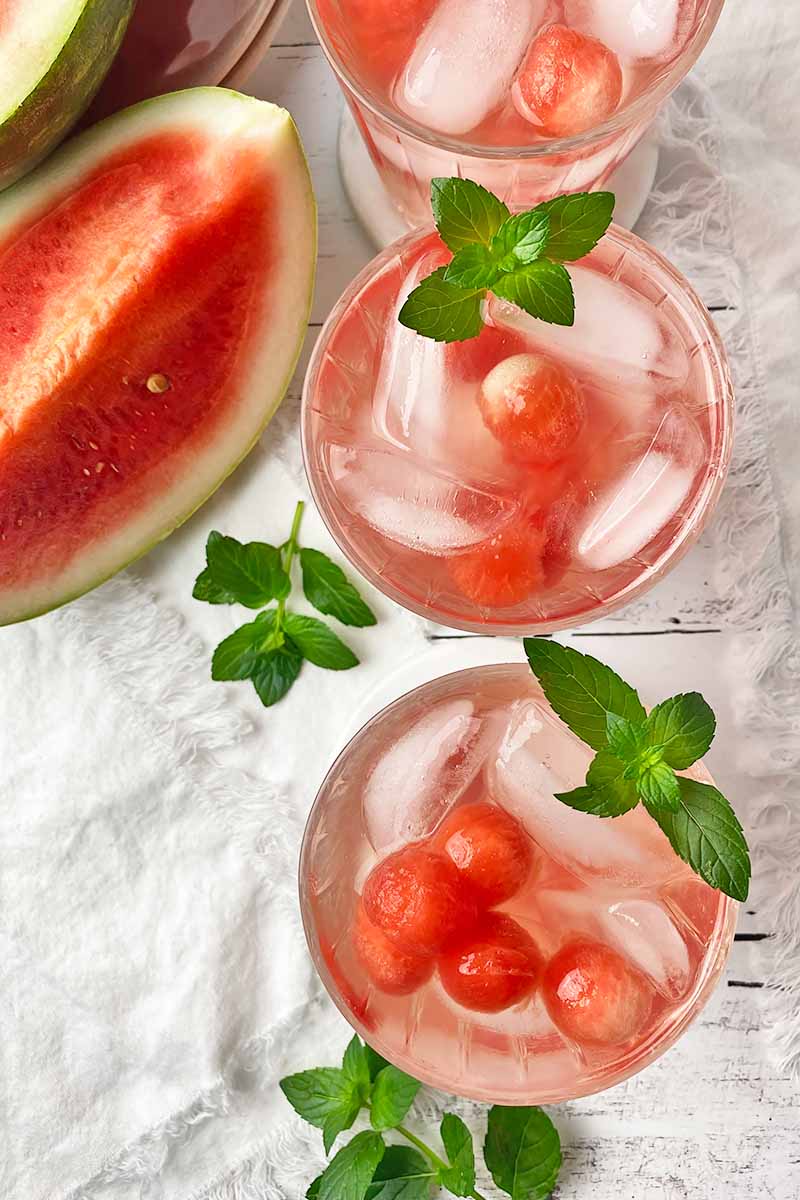
For the pickier consumer, you can strain the liquid to remove the fruit and herb leaves before serving – but for those who cherish a simply accessorized drink and don’t mind the fruit’s texture, it’s nice to place a few of the cubes in the glass.
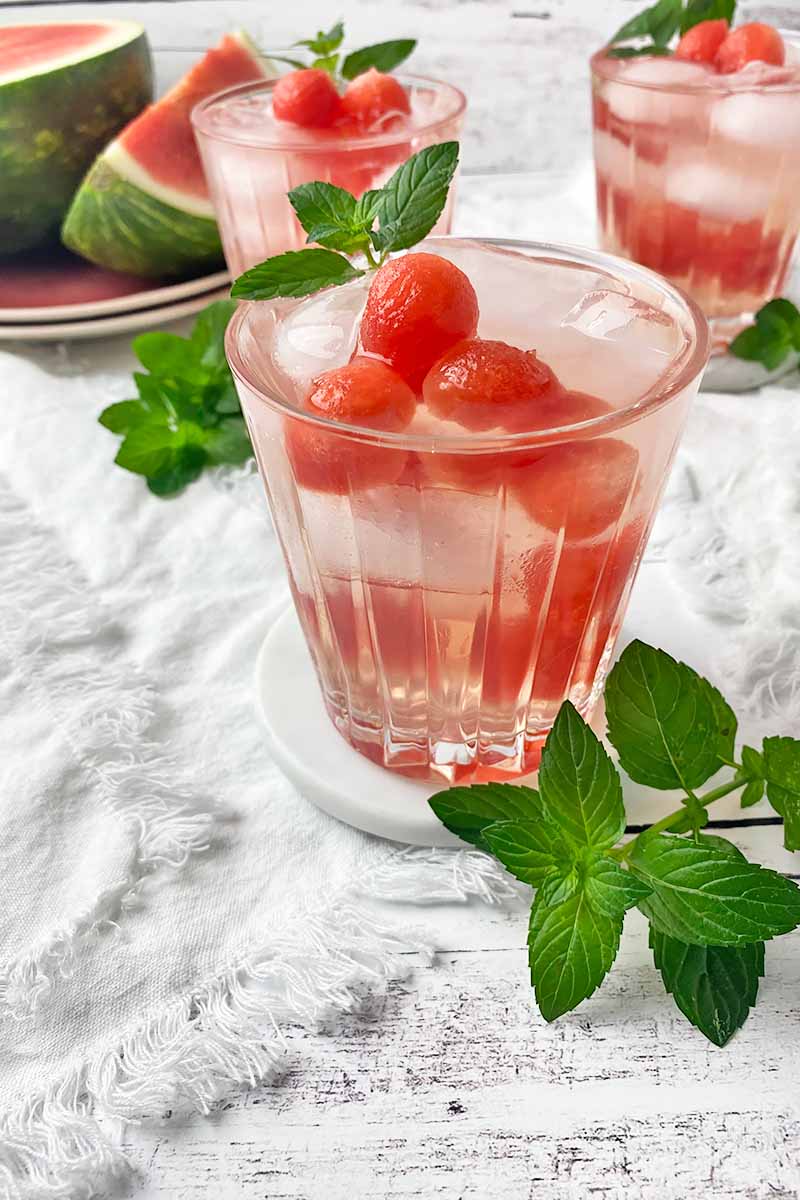
Pink, pretty, and perfect!
Print
Watermelon and Mint Infused Water
- Total Time: 4 hours, 10 minutes
- Yield: 2 quarts (8 1-cup servings) 1x
Description
Melon and mint make a marvelous pair as a refreshing combination for a simple drink. Learn how to make our watermelon and mint infused water recipe.
Ingredients
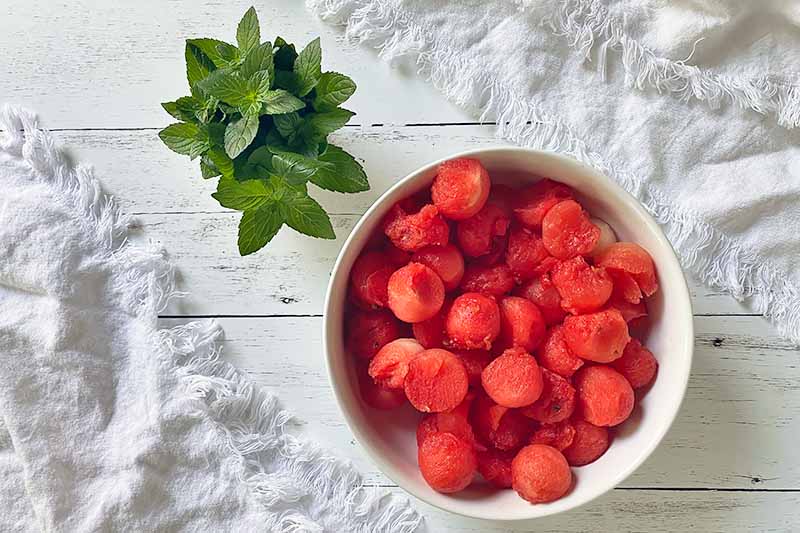
- 3 cups cubed watermelon (about 16–18 ounces)
- 1/4 cup loosely packed mint leaves
- 2 quarts filtered water
- Ice, for serving
Instructions
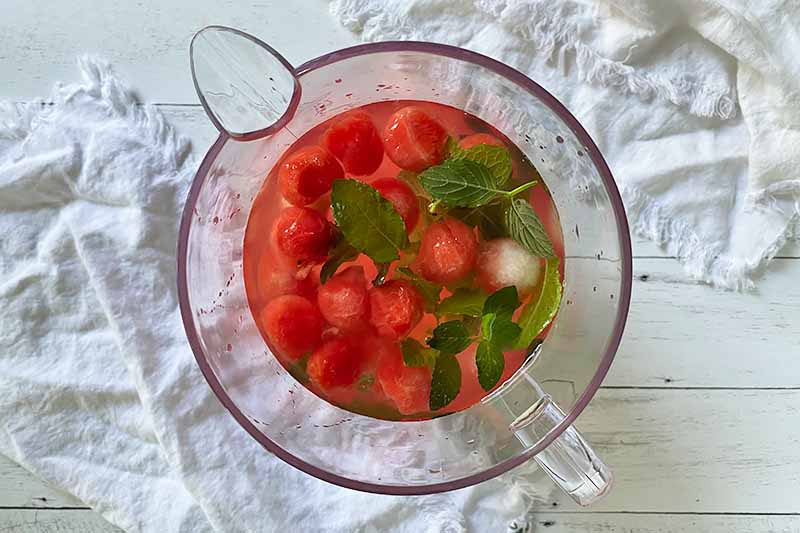
- Place the watermelon and mint in the bottom of a large pitcher. Pour the water on top.
- Cover the top of the pitcher tightly with a lid or plastic wrap and refrigerate for 4-10 hours.
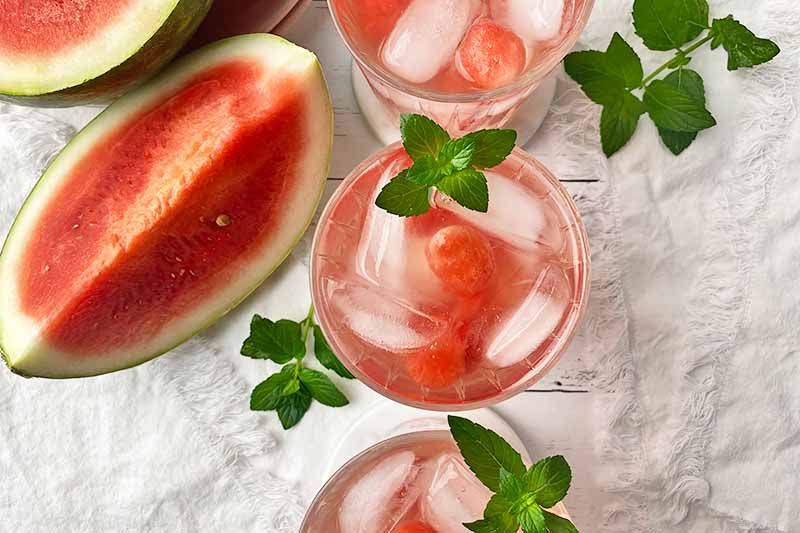
- Pour the water into individual glasses filled with ice and serve immediately. You may strain out the fruit and mint before serving if desired. For longer storage, strain out the fruit and mint after the initial infusion. The infused water will keep in an airtight container in the refrigerator for up to 2 days.
- Prep Time: 10 minutes
- Category: Infused Water
- Method: No-Cook
- Cuisine: Beverage
Cooking by the Numbers…
Step 1 – Prep
Set out a pitcher, one that’s large enough to hold 2 quarts of liquid. Set out the lid for the pitcher, or a roll of plastic wrap if the pitcher does not have a lid.
Make sure you have enough ice in the freezer for 8 drinks.
If using pre-cubed fruit, buy about 18 ounces when you are at the market. A little less will be fine, if your store sells the prepped fruit in 16-ounce, or 1-pound, containers.
If you are cutting the chunks yourself and need some guidance on what size fruit to purchase, you’ll need most of a small, 4-pound seedless melon.
Before slicing, wash and dry the exterior of the melon. And be sure to use a large, sharp chef’s knife and sturdy cutting board to stay safe as you prep in the kitchen!
You can also use a melon baller to make perfect spheres – what a beautiful sight to see in a clear pitcher!
Any leftovers can be wrapped tightly and stored in the refrigerator for another use – or you can use it to make additional wedges, cubes, or spheres for an optional garnish upon serving the drinks.
Measure about 1/4 cup of loosely packed mint leaves, and give them a gentle wash under cold, running water.
Measure out your water – use your favorite filtered option at home, obtained from a filter pitcher, faucet, or refrigerator dispenser. You can also choose your preferred brand of a bottled product.
Step 2 – Add Fruit and Water to Pitcher
Gently place the fruit pieces and herbs in the bottom of the pitcher.
Did you take the time to prep evenly cut squares or beautiful spheres of fruit? Be gentle!
To preserve the shapes of your delicate pieces for serving, avoid aggressively pushing or pressing them down.
While gently muddling your fruit and herbs will release more flavor into the liquid, it would be a shame for all that hard work to be squished and squashed into a mushy mass!
Pour the water into the pitcher over the melon and herbs.
Step 3 – Infuse and Chill
Cover the pitcher with the lid, or tightly wrap the top with plastic wrap. Transfer the pitcher to your refrigerator.
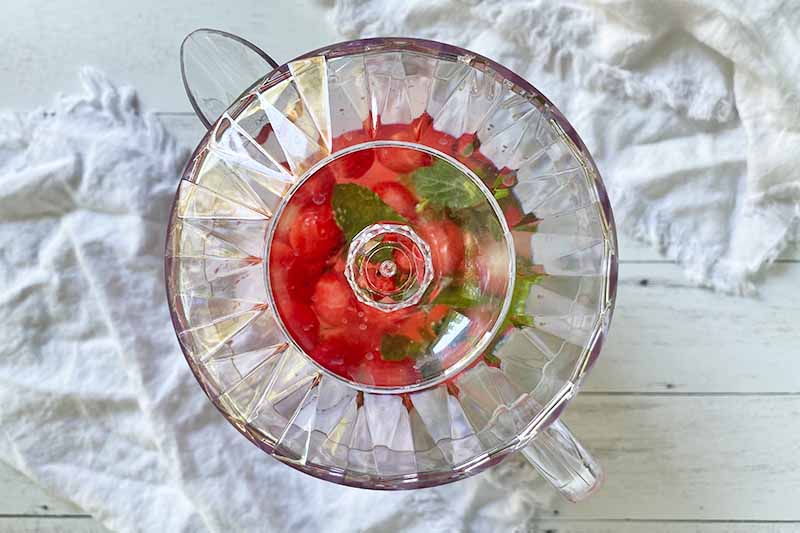
Infuse the liquid for a minimum of four hours, or up to 10 hours.
Unlike our recipe for infused water with strawberries, lemon, and basil, this version does not contain any citrus, which releases its strong flavor quickly. For that recipe, we recommend an infusion time between two and eight hours.
You will need a longer minimum infusion time for this recipe, so the subtle melon and hardier leaves can more effectively release their flavors into the liquid.
Otherwise you run the risk of your drink tasting like… well… just water!
And definitely do not infuse the beverage on your table or countertop at room temperature! It’s easy to get distracted when you have tons of fun summer events planned, but be sure to refrigerate your beverage as soon as you mix it!
According to food safety experts at the CDC and FDA, freshly cut fruits – especially melons! – are considered highly perishable produce. They need to be refrigerated within 2 hours of being prepped at room temperature to prevent foodborne illnesses due to improper storage.
Step 4 – Serve and Store
After your preferred length of infusion time, you may now serve your beverage. Give it a taste to see if the flavor’s to your liking.

Fill individual glasses with ice before pouring the beverage into them. While this is not necessary, it certainly creates a colder, more refreshing drink!
You can strain out everything before serving, or you can place some of the fruit and leaves in each glass.
Drink your beverage while it’s cold! As a reminder, perishable sliced fruits should not sit at room temperature for any longer than 2 hours.
Do you need to store any extras? Planning on making a batch in the morning before a party? Remove all of the fruit pieces and leaves after the initial infusion in Step 3 before pouring the beverage into an airtight container.
The beverage is already flavored to your preferred strength at that point – you don’t want to continue infusing, or else the fruit and herbs will continue breaking down and the infusion will become too concentrated.
What Are Some Cute Garnishing Ideas?
Let’s drink our water in style!
If you want to add a few finishing touches to each glass, garnishing is just as easy to accomplish as making the drink itself.
Other than serving the drink with cubes or spheres of fruit inside each glass with the water, you can also skewer them on cocktail picks to place on top of the glasses.
Depending on how large the shapes are, you can use one to four pieces per pick. Take a peek at our sparkling watermelon cocktail for inspiration!
I like to place the skewer flat on top of the rim of each glass, but you can also place the skewer directly in the drink with the garnishes placed at the very top of the pick, the part that is still exposed above the liquid.
Another simple garnish idea is to reserve small sprigs of the best mint leaves to carefully place on top of each drink. But you could go all-out tiki-cocktail-style and place multiple voluminous stems in each glass if you have plenty of herbs to spare!
You can get all the best tips on growing mint from our sister site Gardener’s Path if that’s the type of fresh and lavish garnish you favor.
How will you serve your infused beverage? What is your favorite garnish idea from our suggestions? Leave a comment below!
Apple, Grapefruit, Mojito, Orange… we love all varieties of mint for this drink! Check out a few other homemade refreshments now to continue the sipping celebration with one of our favorite herbs:
- Strawberry Orange Mint Juice
- Mint Lime Ginger Splash
- Sparkling Raspberry Lemonade with Honey and Mint
Photos by Nikki Cervone, © Ask the Experts, LLC. ALL RIGHTS RESERVED. See our TOS for more details. Originally published on May 14, 2015 by Jennifer Swartvagher. Last updated on August 6, 2023.
Nutritional information derived from a database of known generic and branded foods and ingredients and was not compiled by a registered dietitian or submitted for lab testing. It should be viewed as an approximation.
About Nikki Cervone
Nikki Cervone is an ACS Certified Cheese Professional and cheesemonger living in Pittsburgh. Nikki holds an AAS in baking/pastry from Westmoreland County Community College, a BA in Communications from Duquesne University, and an MLA in Gastronomy from Boston University. When she's not nibbling on her favorite cheeses or testing a batch of cupcakes, Nikki enjoys a healthy dose of yoga, wine, hiking, singing in the shower, and chocolate. Lots of chocolate.