
We occasionally link to goods offered by vendors to help the reader find relevant products. Some of these may be affiliate based, meaning we earn small commissions (at no additional cost to you) if items are purchased. Here is more about what we do.
Knives, and fires, and spills – oh my!

Think about the entire cooking process in your home kitchen, with all of the sharp blades, intense heat, and potential spills.
And what about the sleek, shiny surfaces like granite countertops and slippery floors? Have you ever dropped a glass and watched, horrified, as it shattered into a zillion little shards?
It’s no wonder accidents happen while we’re preparing food for our families! And it’s even worse when you’re not the most graceful cook in the kitchen.
I most certainly am not!
Carefully study our 11 top tips for kitchen safety. All of the following pieces of advice will help you to minimize all the mishaps, so you can enjoy safely cooking in your home with no impending risks.
11 Top Tips for Kitchen Safety
Before You Start Cooking
Let’s put a pause on cooking – for just a little!
Safety starts well before you begin cooking. Review these key pieces of advice – you may not have even considered some of these in your own home!
1. Use Common Sense
Remember how your grade school teacher used to yell at the kid sitting next to you to stop tipping his chair back?

Or was that you…?
We’re not pointing any fingers here – everyone should be reminded to use common sense in the kitchen!
When you use tools as they were intended to be used, you can avoid some common injuries.
Don’t use knives – or your teeth, for that matter – to pry lids open. Some knives don’t go the full length of their handles, and may snap under excessive pressure.
And how many times have you stretched, or climbed, to get something seldom used out of that silly cabinet over the fridge?
I know I’ve done it more than once, and felt my lower back seize with the strain. Don’t do it! Keep frequently used items within reach.
If you need an item from a high cabinet, consider keeping a step stool nearby to retrieve it.
You can easily find a place to store this lightweight plastic one-step folding step stool. It’s available to purchase now on Wayfair.
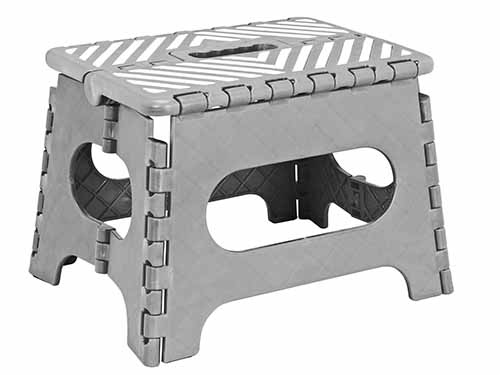
Wayfair Basics one-step plastic folding step stool, gray, available on Wayfair
And after reaching into that cabinet, remember to close it! Potential head injuries, and even concussions, may result from banging your head on the bottom or corner of a cabinet door.
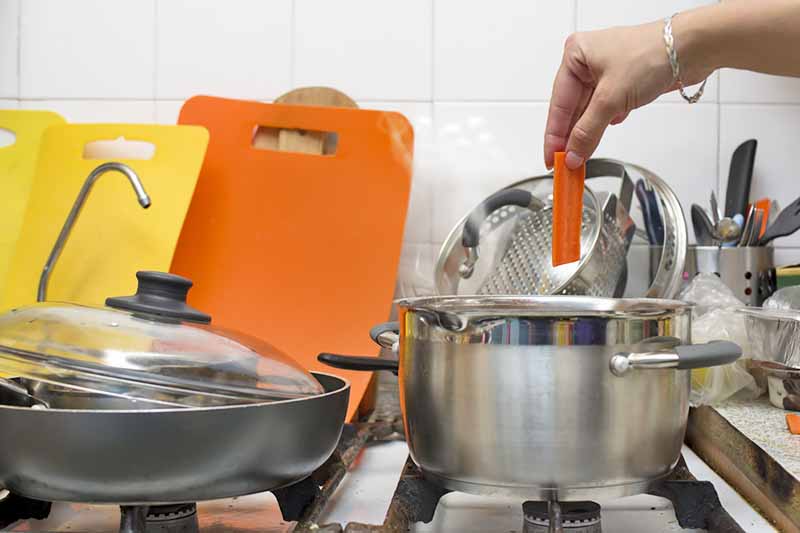
Once you have the equipment or utensil you need, be sure to use it per the manufacturer’s instructions. If it’s a new gadget, or one you use rarely, practice first and be sure to use it properly.
Those mandolines can be scary!
2. Make a First Aid Kit
Every home should have a first aid kit for minor emergencies.
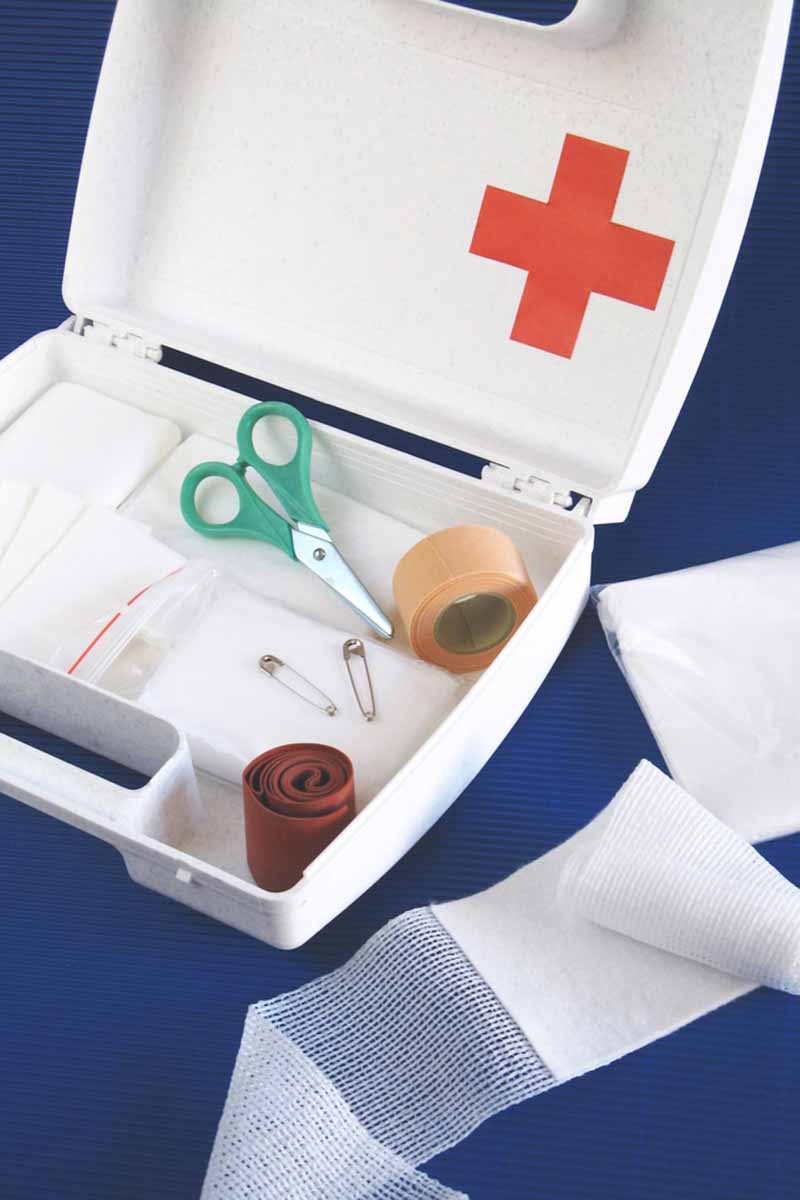
It should contain alcohol pads, antibacterial ointment, a bandage roll, self-sticking bandages, cloth tape, disposable gloves, gauze pads, scissors, a sling, tweezers, a white washcloth, and a book on the basics.
Sometimes you need to help yourself or a loved one until you can get to a doctor. So, don’t just stockpile the supplies. Read the first aid book and be prepared.
In the event of an emergency, try to remain calm.
If you have cut yourself, rinse the area under a gentle stream of cool tap water. Sanitize tweezers with an alcohol pad, and gently remove any remaining debris, such as glass shards.
If the cut is deep, or you are feeling unwell, seek professional help immediately.
If you deem the cut to be minor, elevate the area, place a clean white cloth over the wound, and apply firm pressure until the bleeding stops. Bandage per the directions in your first aid book.
If the wound continues to bleed, and repeated attempts to stop the bleeding fail, seek professional help.
Some injuries may appear small, but may require stitches to promote healing and prevent scarring. Ask your physician for a professional opinion.
For burns and eye injuries, always consult a medical professional.
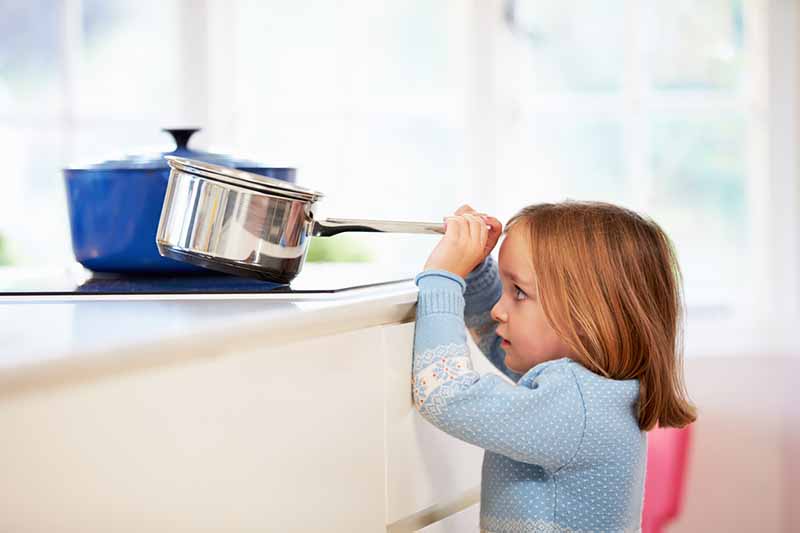
3. Take Child-Proofing Measures
There are special considerations when you have small children in the house.
First, never leave them unattended in the kitchen, especially in areas where food is being prepared. You can secure safety gates to all of the entrances into your kitchen.
If you do want to involve them with the cooking process, make sure you are guiding them carefully. Start off with making simpler and safer recipes, like a batch of cookies, easy snacks, or fun layered sandwiches.
Another method for child-proofing your prep area is to see the world of the kitchen through their perspective:
Sit on your kitchen floor one day when you are making dinner, and look around you. Do you see oven knobs within reach? Are pot handles pointing out over the stove, just waiting to be tipped downward?
Child-proof your home with latches on the cabinets and the refrigerator, cover any sharp corners, and keep breakables out of reach.
4. Have a Fire Extinguisher Handy
This is an essential tool to always have within reach in your home!
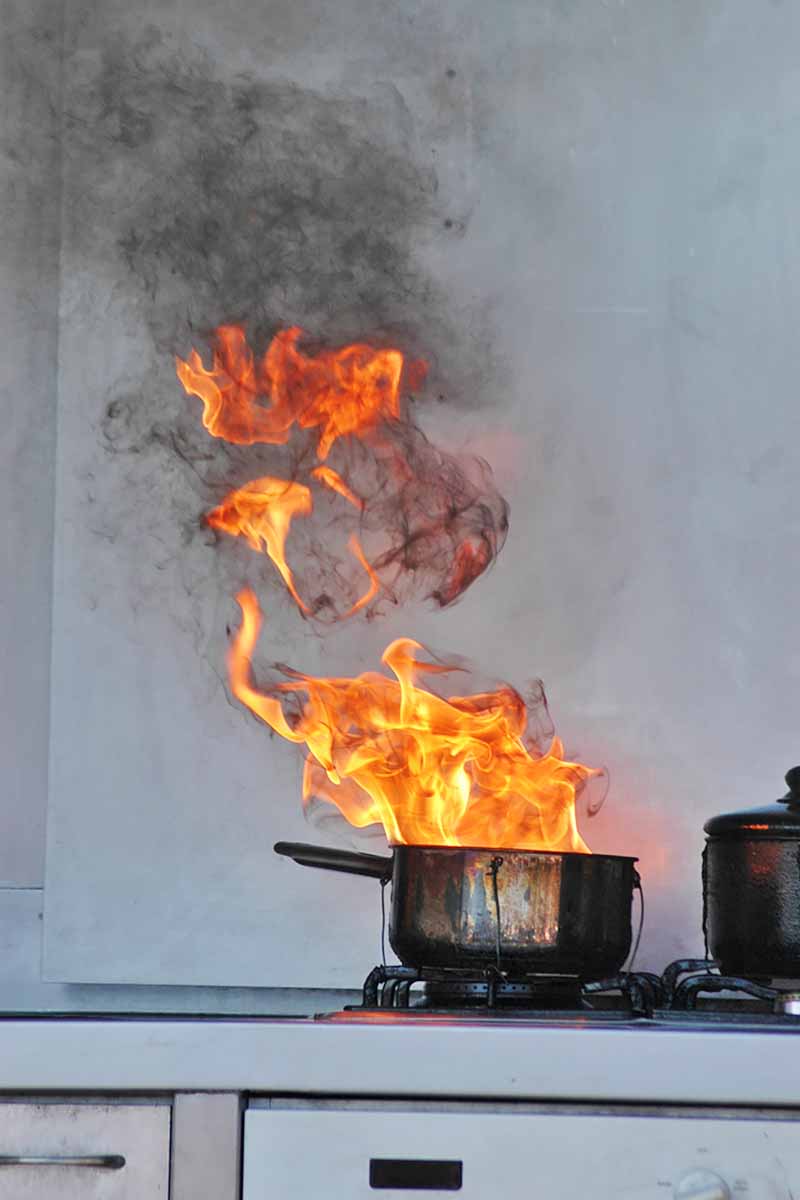
If you see flames that aren’t intentionally coming from your gas burners or when you are flambeing a creme brulee, you must react quickly without panicking.
Within those few heart-racing moments of realizing there is a fire in your kitchen, stay calm and remember these tips:
Immediately call 911 or your local emergency responders.
A fire needs air to burn, so try to find a way to stifle it immediately. You may be able to put out the flames by covering the burning pan with a lid, dousing it with baking soda, or drenching it with a fire extinguisher.
NEVER put water on a grease fire! You will only make the fire worse!
Many folks have tried to put out a cooking fire, only to find that they have made it worse and injured themselves in the process. Precious time may be wasted unless you know exactly what you’re doing.
My advice is to buy and keep an extinguisher in an area near the kitchen, and make sure everyone in your household who is old enough to wield it is aware of its location.
While You Are Cooking
It’s showtime! This is when you’ll encounter a lot of potential mishaps and errors – stay alert and focused on every task at hand.
The following tips will give you additional guidance, from appropriate shoe wear to proper food temperatures.
5. Wear Sturdy Shoes
As simple as it sounds, this is a key safety practice.
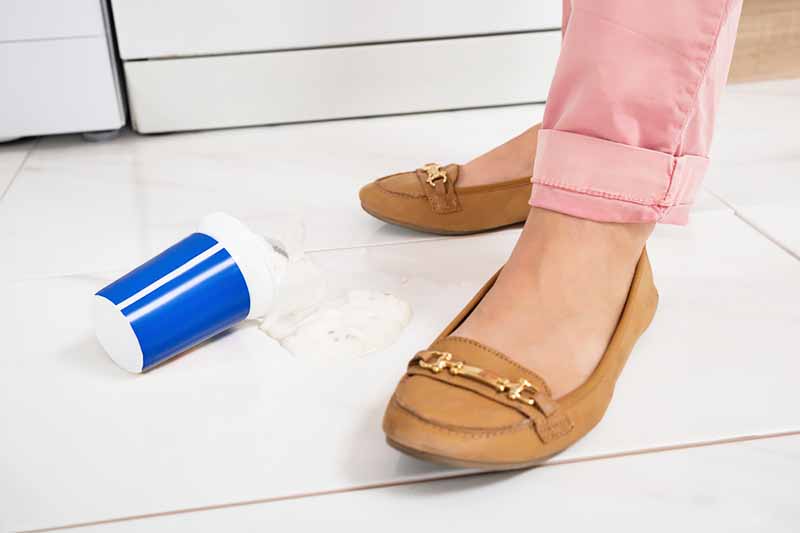
Recently, someone in my house – who shall remain nameless – not only dropped a glass, but proceeded to walk barefoot over the broken slivers, leaving a red trail in his wake.
This is why good First Aid kits contain tweezers, but we’re getting ahead of ourselves.
In addition to protection from broken bits, shoes provide a barrier between your foot and a falling knife, heavy platter, or hot gravy.
The footwear that’s best for cooking and kitchen use has non-skid soles, sturdy toe caps, supportive arches, and comfortable insoles.
In addition to protection from injuries like dropped items and slippery floors, shoes that are comfortable for long periods of standing will help prevent back and leg strain.
Your feet are your foundation, so treat them well!
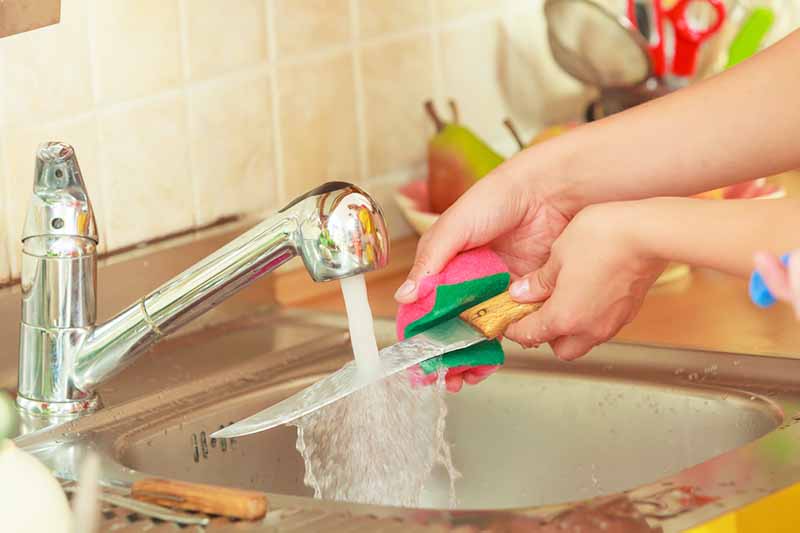
6. Respect Everything with a Blade
Be sure all of your knives and other sharp items are clean, and that they are cleaned immediately after use. Wash each individually, and never leave one submerged in water, where it may become an invisible peril.
Always store knives with blades and tips pointed downward. Wood blocks and drawer dividers help to further reduce the risk of injury. No one wants to reach into a drawer and graze a razor-sharp blade.
And please, never try to catch a falling knife! Try your best to step out of the way.
Use caution when using and cleaning food processor blades, blender blades, and immersion blenders, as well. Carefully wash each individually, pat dry, and put away immediately.
Now that we’ve established these ground rules, careful cleaning isn’t the only item that’s important to point out when it comes to sharp prep tools.
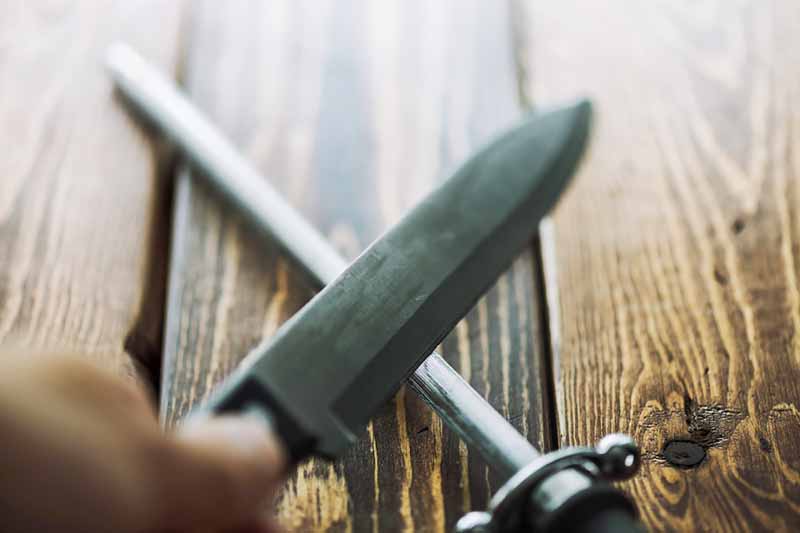
Did you know that a dull knife is more dangerous than a sharp one?
A cutting implement should be sharp enough to work under moderate pressure. If you find yourself having to force it through food, it either needs to be sharpened, or it is not the proper tool for the job.
A heavy knife with a substantial blade, like a Chinese cleaver, is great for chopping, whereas a serrated one is perfect for sawing slices of bread from a crusty loaf.
Using the wrong knife, or a dull one, may result in a cutting injury.
Sturdy tools, stable cutting boards, and proper cutting techniques help to minimize the risk of injury. A good quality chef’s knife and a knife sharpening system will be good investments.
7. Dry Your Hands
Have you noticed how professional chefs and cooks often have an extra dish towel folded around their aprons?
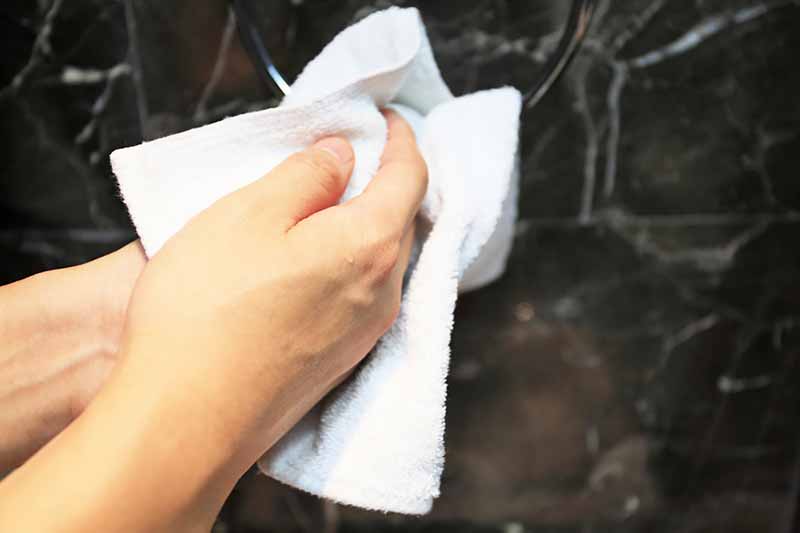
This is so they can constantly wipe their hands. Clean, dry hands have better traction for gripping than wet ones do.
Again, picture a drinking glass slipping through wet fingers…
Also, wet hands conduct heat quickly. If you handle a hot item without first drying your hands, you’re likely to flinch and let go.
Similarly, if you put wet hands into oven mitts and reach for a hot baking sheet, you’re going to conduct the intense heat of the oven right into your damp skin.
Ouch!
As a serious reminder, if you wipe your hand on a towel after handling any form of raw food that can be a potential food safety hazard – such as raw meat or eggs – you should replace the towel immediately with a clean towel.
For all of these reasons, keep a supply of multiple clean towels and rags accessible in or near your kitchen.
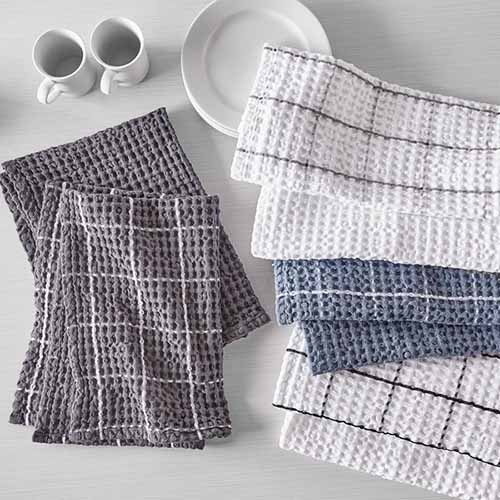
Washed waffle kitchen towels, set of 2, available from Sur La Table
Choose towels with an absorbent material and texture, so you can quickly dry off any wetness from your hands or any sudden countertop spills. These cotton, waffle-textured sets from Sur La Table are both pretty and functional!
8. Keep Floors and Counters Free of Debris
It’s not only a challenge to work in a cluttered space, it’s also incredibly dangerous.
I have a flat, ceramic stovetop, and it’s tempting to use it as an additional counter. However, my son, the firefighter, says this is a big no-no.
Unless you have food cooking in a pot, the top of any stove should be completely clear.
You should also keep the oven clear when not in use. I’m sure you know someone close who likes to store baking sheets, pots, and pans – or even extra couch pillows! – in the oven.
Or maybe you even do it, too!
Please don’t store anything in the oven. You might forget, turn it on, and potentially start a fire, when all you wanted to do was bake some cupcakes.
In addition to the stovetop and oven, you need to keep clear paths between the oven, fridge, sink, and table. Children’s toys are particularly treacherous when strewn across a kitchen floor.
All of those tiny little Legos can be a hazardous nightmare!
Wipe up spills as soon as they happen. Remember those kitchen towels you bought earlier? Put them to use!
Sticky foods like honey may harden and attract ants or other tiny vermin, and dropped raw chicken may leave bacteria behind. Clean countertops and floors are essential to kitchen safety.
A wet floor is a major hazard. Slipping can cause muscle strain, falling can break bones, and falling while carrying sharp or breakable objects multiplies the risk of serious injury.
If you break a glass, come to a grinding halt!
Shards of glass become projectiles with the force of breakage, and ensuring that they have not landed in food is the number one priority. Second is cleaning up the glass with great care.
Use a broom and dustpan to sweep up as much of the glass as possible.
Throw glass away in an appropriate receptacle.
Next, use a wet paper towel or disposable rag to go over the area to pick up glass fragments that were too small for the broom to catch. Wrap fragments in the towel or rag, and then throw away.
Use your vacuum attachment to carefully vacuum the broom straw and the dust pan. Then vacuum the floor. Discard the vacuum bag or empty the canister.
9. Pay Attention to Food Safety and Temps
There’s a major key element to staying out of harm’s way, and that’s food and sanitation safety.
Proper storage, handling, and preparation of food is essential to good health.
Read labels for important information on things like cooking temperatures and expiration dates, to ensure that the food itself is never a source of danger in your home.
One of the easiest ways to prevent sickness is to ensure your food is cooked at the right temperature.
Refer to the USDA’s Safe Minimum Internal Temperature Chart for all the correct minimum internal temperatures to cook various food items.
Here is a quick review of what you should know:
Casseroles, leftovers, and all poultry – ground and pieces – need to be cooked or reheated to an internal temperature of 165°F.
Ham, fish and shellfish, and steaks/chops/roasts of beef, pork, veal, and lamb need to be cooked to an internal temperature of 145°F.
Ground meats other than poultry should be cooked to an internal temperature of 160°F.
The most reliable method of checking temperature is with a meat thermometer – if you cook a lot of meat, make sure you own one!
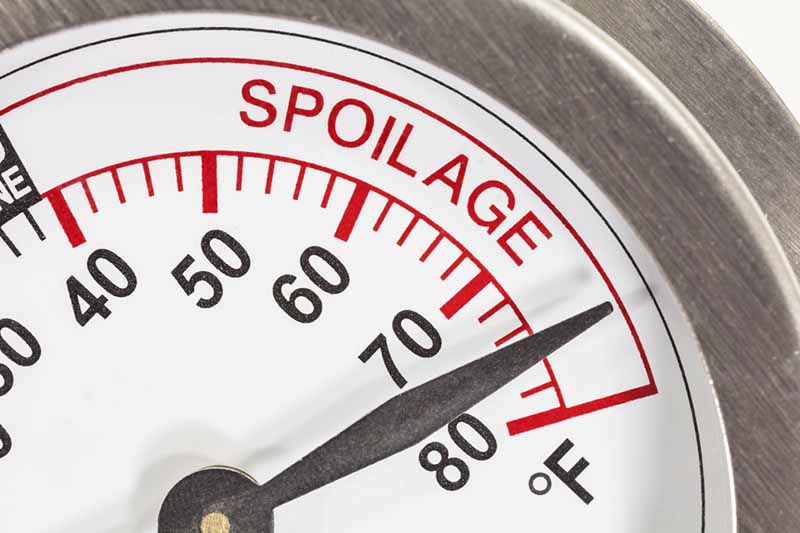
There are also storage temperature requirements.
Referred to as the “Danger Zone,” there is a temperature range in which bacteria can grow to harmful levels in food that can cause potential illnesses. This range is between 40°F and 140°F, according to the USDA.
Ensure you’re keeping cold food cold at or below 40°F, and hot food hot at or above 140°F. The USDA recommends that if your food is within the danger zone for any more than 2 hours, it must be disposed of immediately.
It’s better to be safe than sorry, as the saying goes…
When You Are Not Cooking
Even after you cleaned the last dirty dish from supper, your work is not done! To maintain the longevity of your utensils, equipment, and appliances, treat them well in between uses.
10. Store Gear Properly
Modern cabinetry is designed with safety in mind! There’s never been a better time to store cooking equipment ergonomically, with heavy items stored low, and lighter ones up high.
Also, be sure stored items have plenty of room for manipulation into and out of cabinets. Stacking dissimilar items, like cups within bowls, may result in dropping multiple items, breakage, and injury.
You can purchase various organizers for cabinets and drawers to keep all of your utensils, equipment, and food well-organized.

Joseph Joseph Expandable Tiered Organizer, available from Sur La Table
If your pantry is looking messy, consider buying a couple tiered shelves, like this Joseph Joseph expandable tiered organizer from Sur La Table.
The same organization standards also apply to the refrigerator. I like to use labeled plastic containers with lids so I can securely stack and retrieve food.
Glass is a better choice when it comes to the environment, and its nonporous material is easier to clean. But use glass containers with caution!
I can’t tell you how many times someone has used my little Pyrex dishes to store leftover food – only to fumble, drop everything, and send shattered glass everywhere, including waaaaay under the fridge!
11. Maintain Equipment
As with a dull knife, poorly maintained kitchen equipment is an accident waiting to happen.
Make it a practice to regularly examine all of your cooking gear. Make sure all screwed-in parts and sections are tight. Lids should fit snugly and handle grips shouldn’t wobble.
Discard and replace any items that may pose a hazard – and make sure you are aware of any warranties provided by the manufacturer!
Do you have a pot or maybe a frying or saute pan that no longer sits squarely on your stove? Did you know that it’s probably because you used it over high heat?
Many of today’s modern cooking equipment heats up very quickly and efficiently, and doesn’t require settings greater than medium-high for optimal performance. In fact, high heat may even cause certain materials to warp. Be sure to follow the manufacturer’s directions for the care and use of all of your cookware and equipment.
You should also evaluate all of your drinkware and plateware. Is the glaze intact, or do chips and cracks mar the surface or rims? In addition to harboring bacteria, these pieces are liable to break under the slightest amount of heat or pressure. Dispose of anything that’s damaged, and seek replacements.
Leave Stress Outside the Kitchen!
An organized kitchen, careful work habits, and well-maintained equipment are key ingredients in the recipe for cooking success.

However, sometimes even with the best intentions, things don’t turn out well.
Stress in the kitchen is one sure-fire way to ruin your most well-structured plans.
Maybe you’re running late for work and you’re trying to get the kids fed before school. Distractions and rushing are two common causes of cooking catastrophes.
Do your best to save some time in the kitchen and minimize morning stress with make-ahead meals for busy days. Keep your cool, and stay out of harm’s way in the kitchen!
What are your own tried-and-true safety methods in the kitchen? How do you minimize stress before cooking? We love to hear from our readers! Connect with us in the comments section below.
Don’t stop there! We have so much more kitchen advice to share with you if you want to give your cooking and baking habits a makeover. You’ll find more amazing tricks and tips in these articles:
- How to Exercise in the Kitchen and Burn Calories
- 7 Benefits of Cooking from Scratch at Home
- How to Get a Picky Child to Eat Healthy
© Ask the Experts, LLC. ALL RIGHTS RESERVED. See our TOS for more details. Originally published August 29, 2014. Last updated on February 28, 2023. With additional writing and editing by Nikki Cervone. Product photos via Wayfair and Sur La Table. Uncredited photos via Shutterstock.
About Nan Schiller
Nan Schiller is a writer from southeastern Pennsylvania. When she’s not in the garden, she’s in the kitchen preparing imaginative gluten- and dairy-free meals. With a background in business, writing, editing, and photography, Nan writes humorous and informative articles on gardening, food, parenting, and real estate topics. Having celiac disease has only served to inspire her to continue to explore creative ways to provide her family with nutritious locally-sourced food.


Thanks for the safety tips in the kitchen! Knives that are either sharp or dull are dangerous. Sometimes, licking food off could cut your tongue so avoid doing that so. Also, bee sure to keep those knives out of reach of children, too!
”A dull kitchen knife is more dangerous than a sharp kitchen knife.” I have never heard a truer word spoken. I injured my index finger using a stupid, blunt knife last year. Completely my own fault, I should have sharpened or replaced it, but I was used to it. I had to force it to cut some cheese and lent over on it and cut myself. I recommend everyone keeps their knives sharp!
I had no clue in regard to a blunt knife because most of my accidents in the kitchen have been via a sharp knife but will take that advice to book, very detailed tip on how to use a knife when cutting something to avoid cutting oneself…as for staying calm once cut…for me, i’ d have to talk myself into it…i just hate the sight of blood, it somehow puts me into shock mode…next time it happens {fingers crossed..hoping not} i ‘ll try keep calm and won’t panic. 🙂
Diane,
Freeze, Fight, or Flight. Just try to switch yourself into a fight mode every time you sense yourself beginning to panic (with any situation).
Thank you for the advice there Lynne…true heroic words 🙂 …military style 🙂 …now i have a new mantra when faced with overwhelming scenarios {am all grins and thankful}
My biggest problem is dull knives. I don’t think I’ve ever owned a truly good knife. and you are completely right! It has caused me many cuts, due to having to exert so much force that the food just rolls over and I get cut in the process. I really need to invest in a good knife.
You should do a knife recommendation thread! I’ve heard Victorinox knives are an excellent value priced knife, but I’ve never seen them in stores.
Oatey,
Both Victorinox and Russell-Dexter offer awesome values. Many prep-type chef’s use these as they often use “house” knives or a shared set purchased by the restaurant. They are so cheap (in price) that they are nearly disposable if one gets loss, stolen, or damaged. If you’re good with a steel, you can keep them sharp for quite sometime – many butchers use them as well.
Where they are particularly beneficial for the average home cook is their boning and fillet lines. These have similar shapes – the boning is rigid where the fillet is flexible.
Dexter-Russell – 6″ Boning Knife – Sani-Safe Series
That being said, I think I’d choose a Wusthof (German made) or a Sabitier (French made) as my primary chef’s knife if I wanted something that would last many years. Both are equally as good with determent factor being if you like yours with more of a curved profile for rocking (get the Wusthof) or flatter shape for up and down chopping/slicing (get the Sabitier).
Wusthof Classic 8-Inch Cook’s Knife
Sabatier Chef Knife, 8-Inch, Olivewood
I forgot to add — expect a series of in depth articles on kitchen knives in the very near future. I’m hoping I’ll get to them this weekend.
It’s a wonder I haven’t got any serious injuries, considering how much of a klutz I am. I do admit watching an infinity of video tutorials on how to use a Chef’s knife before I actually bought one, but I also admit not doing what I’m supposed to be doing.
First and foremost thank you for the relevant links to the knife sharpeners and such, I’ve been meaning to get one myself and this is the perfect reminder for me. I cut myself way too often in the kitchen which forces me to always make sure that I cut slowly and carefully. I wish that I could cut like some of those top chefs. They are insanely good at that. I guess practice makes perfect.
Great tips as usual. My main source for kitchen accidents are knives too. I don’t have that many good ones so I resort to using old dull ones too often. In general I am often in a hurry too. There’s no excuse for it, I know. I really like the look of that wooden knife rack. I will look into getting one.
This is the kind of article that I need to print out and put on my fridge! I am accident prone with kitchen knives and I can’t even count the amount of times that I have cut myself using one, having to go for stitches for 2 of those cuts! I need to pay more attention but I just try to go so fast to get it done that no matter how hard I try not to slip, It always ends up happening!
Huh. So today I learned that I never followed safe procedure to get rid of glass shards. Well, it’s good to know now, I’ll be sure to shake that broom!
And for the knife, I think even if it did not cut this much, letting it in water is a bad idea, it can dull the edge, right? My mother-in-law (urgh I talk about her so much!) keeps soaking all the utensils together and when I attempt to wash it it’s always an unpleasant surprise to find knives there. Who does this! She even owns a restaurant! *grumpy*
I’m always worried about cutting myself when washing my knives! It’s definitely a good tip to wash them as soon as you’re done and place them back in whichever storage tray you are using.
The tip about shaking out the broom is very useful, it didn’t occur to me that there might be some extra pieces stuck in there. It totally makes sense thank you!
yeah kitchen safety is VERY important. My mum’s had her fair share of injuries while cooking, including a really bad incident where she almost chopped her finger off. If you don’t want to buy anything fancy, just keep your fingers about half a centimeter away from the knife when you’re cutting, that’s the advice chefs on cooking shows give. Also, always remember that a falling knife has NO HANDLE!
Good article, and timely, for me. I cut myself on the edge of a mirror the other day. I’d removed it from an old jewelry box, and apparently it had a sharp edge. It bled as much as a knife wound, but I happened to be in the kitchen, over the sink, so at least it wasn’t messy. I do have a knife set in a block, but also have random other knives that I use, so I’ll have to check out the drawer insert (knife storage tray), that could definitely prove handy. I try to keep brown paper sacks on hand for when I break glass, because I feel it gives an extra level of protection to anyone handling the trash. I sweep the glass pieces/shards into it, then seal, and place in the plastic trash bag.
These are great tips! I had always heard that a dull knife will cut you faster than a sharp one, now I know why people say that. The broken glass clean up is one area that really needs to be addressed. It’s always so hard to get every last shard off the floor, so I think throwing your rags away is a good idea . I always go over the spot with a piece of bread, after I’ve cleaned up everything I can see. That usually gets the last of it.
Wow icecat, I never met anyone else who does this! It’s such a great way of making sure every last trace of glass is picked up.
For anyone who is thinking “What?”, take a slice of bread and firmly press it over the area where the broken glass has fallen. You’ll find that any traces of glass will embed themselves into the bread, leaving the surface safe.
I remember clumsily cutting myself in the kitchen when I was young and dumb and trying to help out in the kitchen, it hurt a lot and I, being the dumb teenager that I was, didn’t know any first aid at all and was haplessly trying to bandage the cut.
If only I knew the safety advice listed in the article then though, the tips given are great and would definitely help anyone in the kitchen, seriously cannot emphasize the points on what to do after you get cut, its important to clean the wound or chances of infection would be high and you wouldn’t want that.
This post is so important. I had no idea that sharp knives are less dangerous than dull ones. I guess I’ve been wrong about being afraid of them more! They look like trouble, but are actually safer. I would never figure it out by myself!
I never tried to catch a falling knife, but I can imagine how much damage it can do to your hand. I shiver just thinking about how many stitches you might need! Scary.
I find that full knives are the main way people cut themselves. (Other then not paying attention while they cut). I had a really bad set and I would find the knife slipping when I was cutting round fruits and veggies. I cut or came very close to cutting myself so many times. Finally I upgraded to a good quality set and found I don’t have nearly as many mishaps as I used to. I don’t think I’ll ever be able to go back to a bad set.
These were some very helpful ways to help avoid cutting yourself in the kitchen. I always seem to nick myself when either trying to wash a knife or having my other hand accidentally hit it somehow. Both issues were completely my fault and, luckily, weren’t serious.
I can’t remember how many times I have cut myself in the kitchen, I have many scars on my fingers 🙂 It usually happens when slicing a hard and big vegetable like a pumpkin, I put all my weight on the knife and bang, I find the knife in my finger. I also get burned regularly, usually the oven is the problem. Thanks for the tips, and I will ask my husband today to sharpen the knives 🙂
Awesome writing!
I think it’s best to utilize discrete, clean cutting sheets for each sort of food. Make certain to utilize plastic cutting sheets that you can clean in the dishwasher and that are in acceptable condition. Clean other food surfaces subsequent to cutting up meat or fish. Utilize a powerless fade arrangement on ledges. Wash your hands after cutting meat. Stay away from placing prepared food on the same surface you utilized for preparing raw food.