
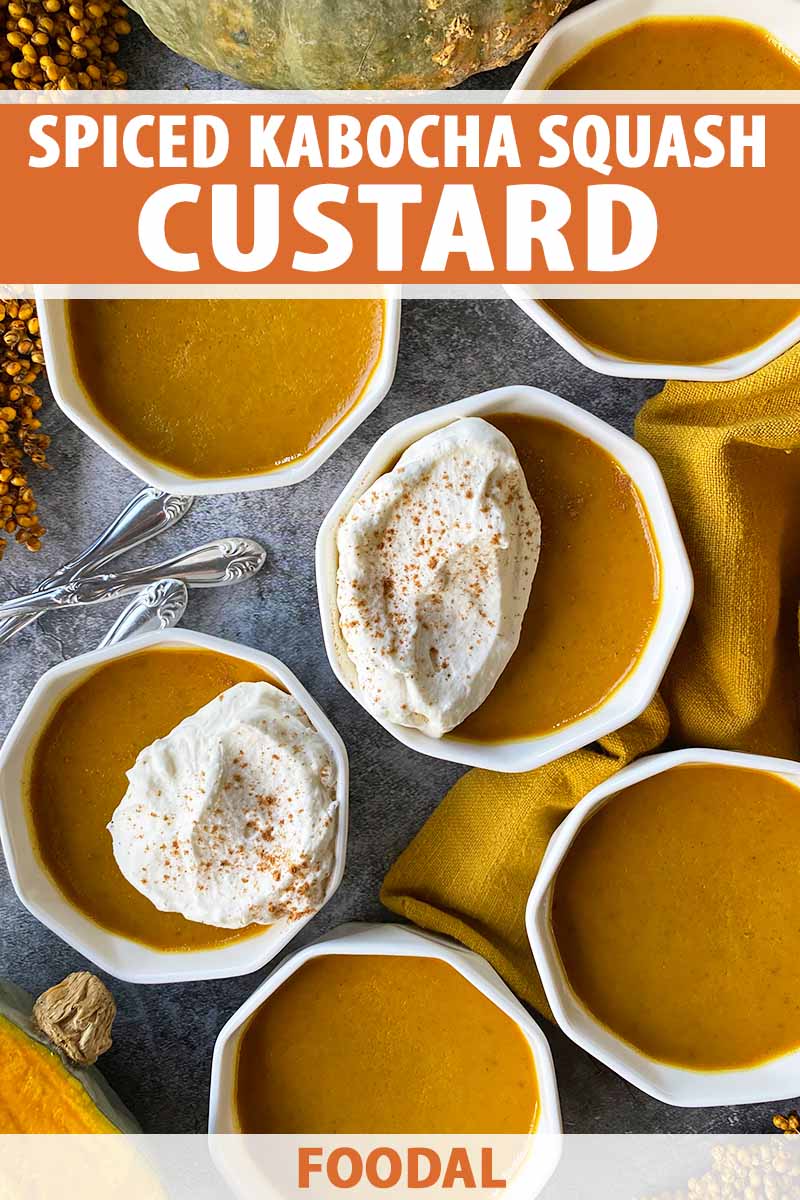
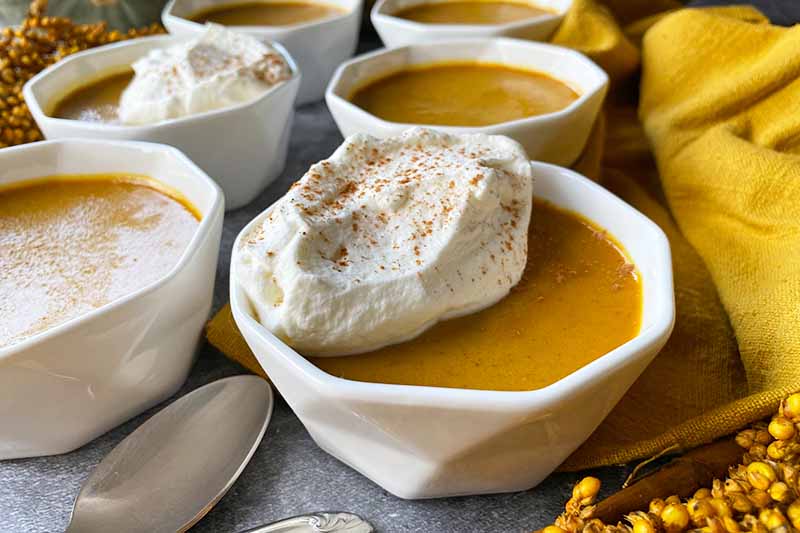
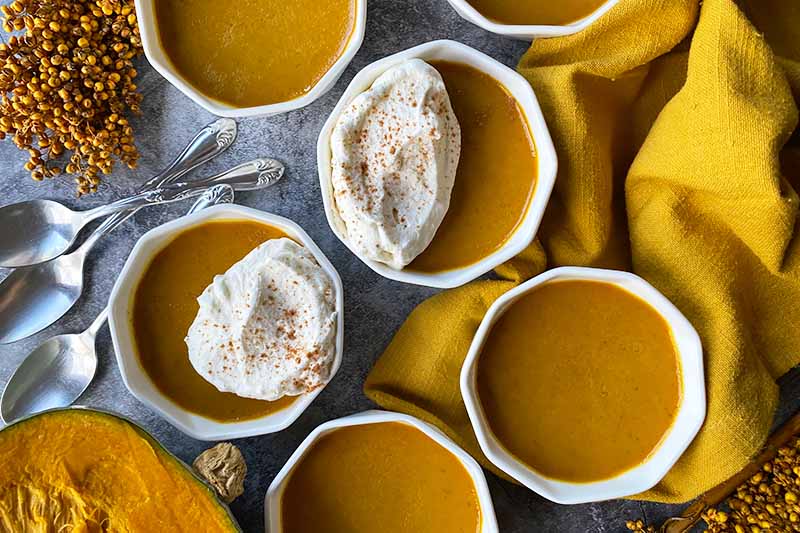
Spiced kabocha squash custard is a dreamy dessert that is yours to cherish when you are in need of a gluten-free dessert for Thanksgiving.
This fall holiday often triggers a common situation when all-American traditions can severely crash against one’s gluten limitations and dietary needs.
It can be quite a bleak time, watching others sit at the table with belts unlatched as they happily feed their bellies with rolls, stuffing, and pies.
All of which – more often than not – contain a sensitive digestive system’s mortal, backstabbing enemy:
Et tu, Gluten?
If you’re living with gluten restrictions, mild or severe, you understand the necessity of strategizing at times to avoid a digestive uprising:
“We need to make sure all of the gluten-free options are on a separate table. And labeled!”
“Oh no, Jane and John want to have us over next week for a holiday party? Should I make my own dinner and bring it over?”
“…maybe I should just eat before I leave?”
And these concerns are often multiplied exponentially during the holidays, when you’re invited to or hosting multiple gatherings.
While managing certain menus may be out of your control, this fall-themed custard is one tasty solution to a potentially problematic dining situation that would have originally denied you a sweet ending.
Start a new tradition this Thanksgiving with a dessert that’s homemade, delicious, seasonally appropriate, and entirely devoid of wheat!
This homemade custard with its creamy pureed kabocha squash base is a gluten-free dessert you can make throughout the fall months.
Also referred to as Japanese pumpkin, kabocha squash is a winter variety with a hard shell. You can read more winter squash and find tips for growing your own on our sister site Gardener’s Path.

Much like pumpkin, butternut, or acorn squash, kabocha can be roasted and pureed to yield a thick, whipped mixture that is sweet and velvety – the best base for this custard.
Reminiscent of traditional pumpkin pie, vanilla extract, maple syrup, and a pumpkin spice blend flavor the filling with a happy autumnal aura.
And there is no crust in sight!
This is also the ideal dessert for anyone who doesn’t like the crust part of pie, or for the adventurous Thanksgiving host who wants to make a fun, individually portioned version of pumpkin pie that anyone who wishes to partake is sure to enjoy.
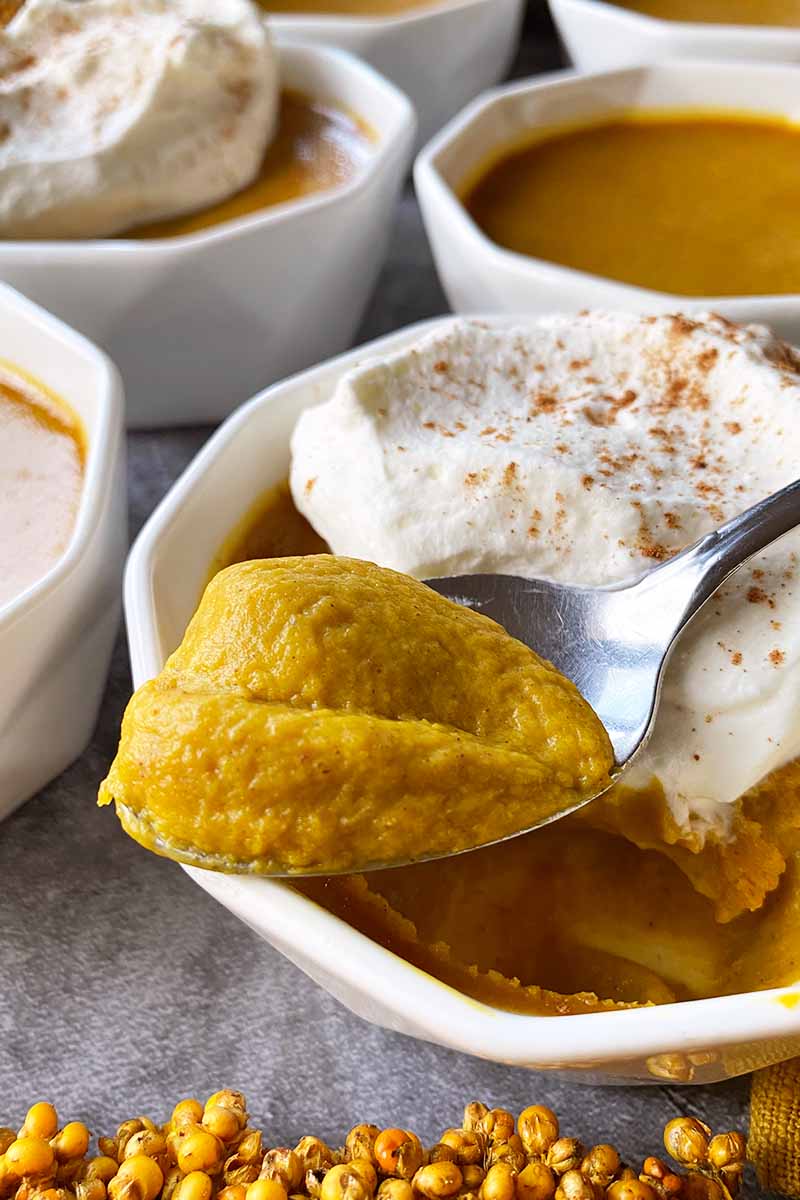
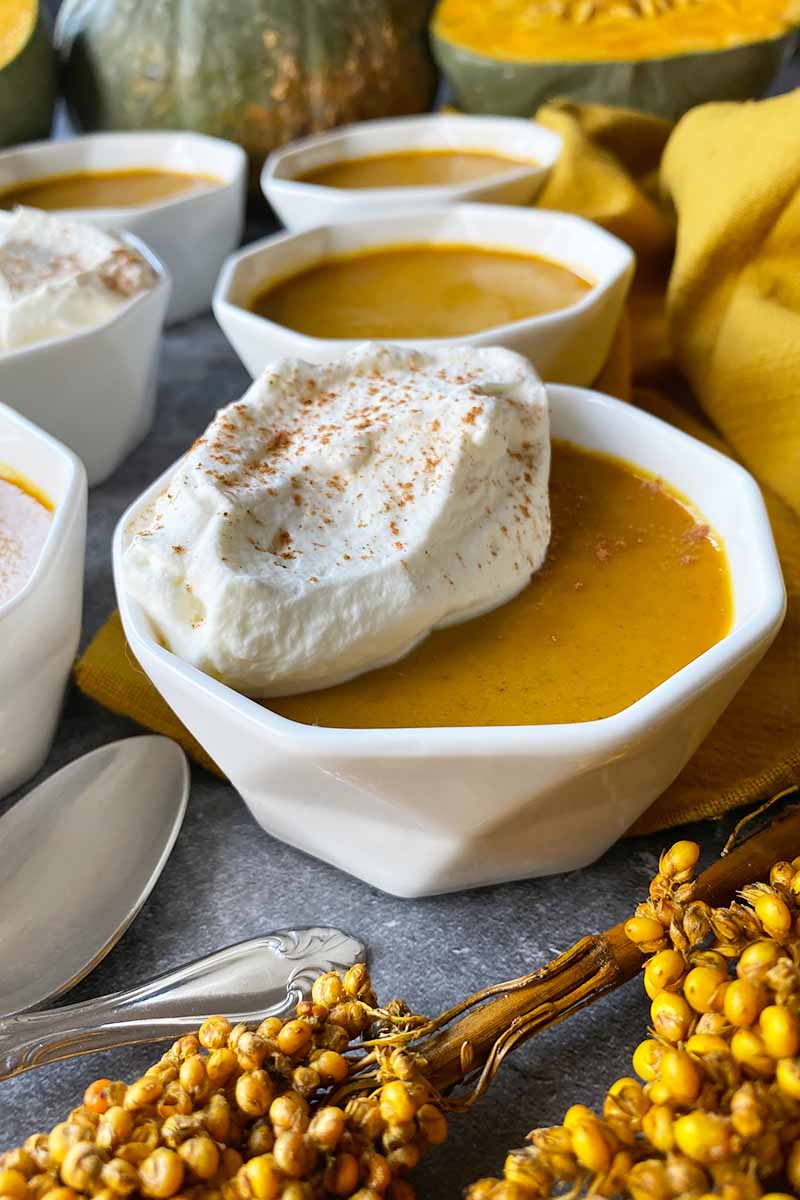
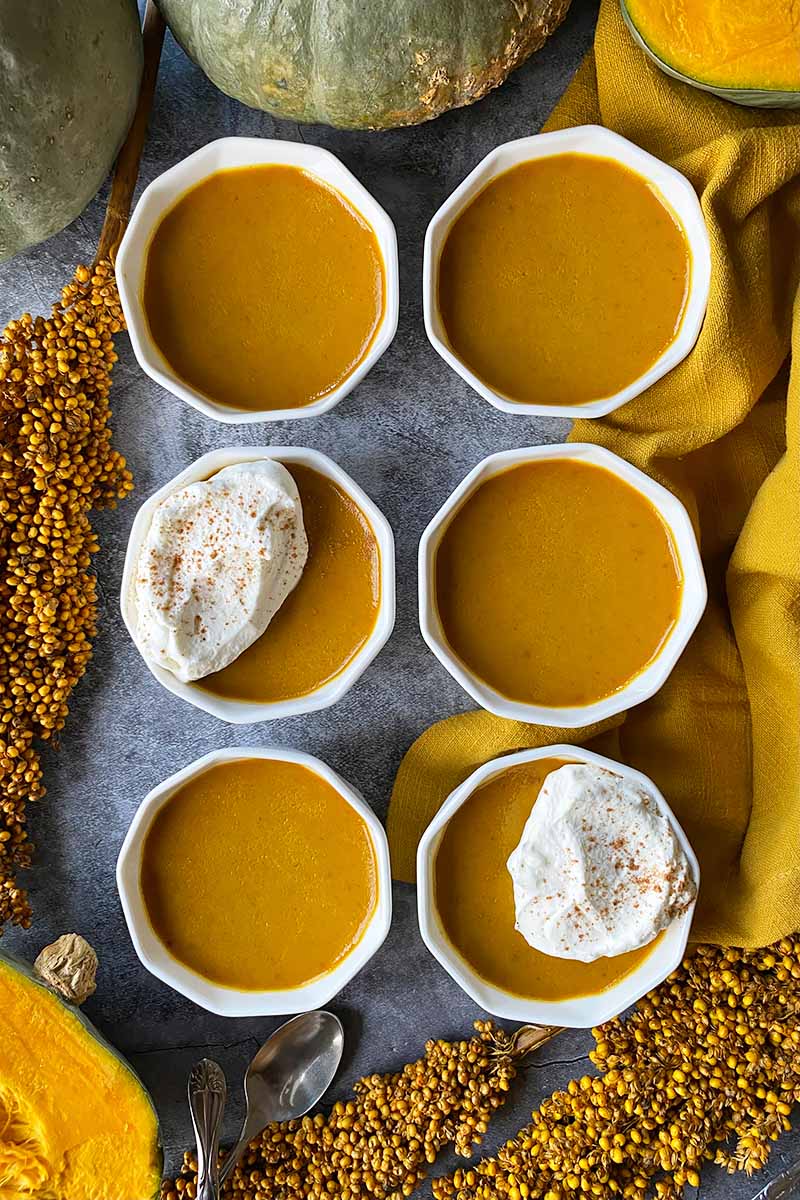
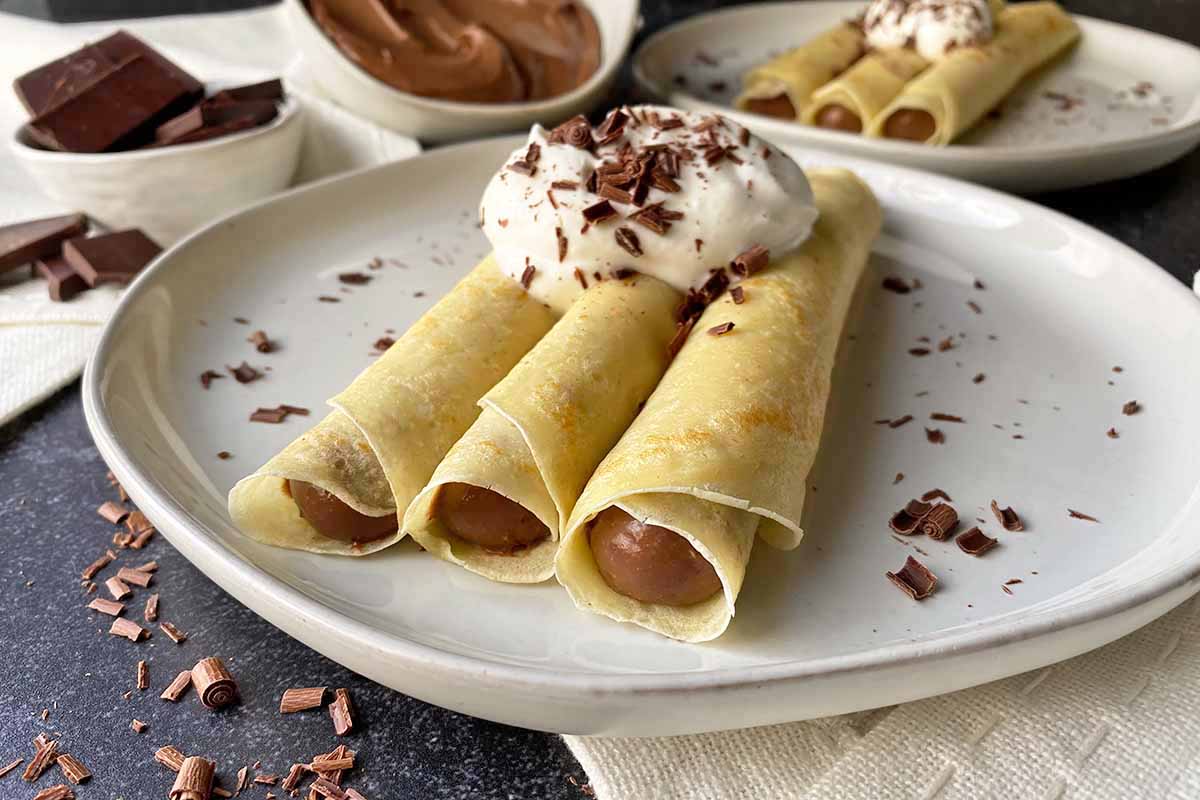
We’re not going too far astray from the beaten path – I highly encourage you to still serve this custard as you would a pie: with a big dollop of whipped cream.
There is no need to cut the celebration short with gluten shortcomings. A creamy kabocha custard will satisfy everyone at the table!
Print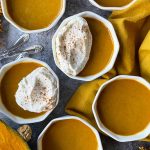
Spiced Kabocha Squash Custard
- Total Time: 6 hours
- Yield: 6 6-ounce cups 1x
Description
Individual kabocha squash custards taste just like pumpkin pie filling with no crunchy crust in sight.
Ingredients
- 1 cup kabocha squash puree
- 1 cup heavy cream
- 1/2 cup whole milk
- 1/4 cup pure maple syrup
- 4 large egg yolks
- 1/4 cup packed light brown sugar
- 1 teaspoon pumpkin spice blend
- 1 teaspoon gluten-free vanilla extract
- 1/4 teaspoon kosher salt
- Whipped cream, for serving (optional)
Instructions
- Position a rack in the middle of the oven and preheat to 300°F. Arrange six 6-ounce ramekins in a 9-by-13-inch baking dish. Boil water in a kettle and set aside.
- In a medium saucepan, whisk together the squash puree, heavy cream, milk, and maple syrup. Warm over low heat on the stovetop, stirring occasionally until the mixture begins to steam without boiling, about 5-8 minutes.
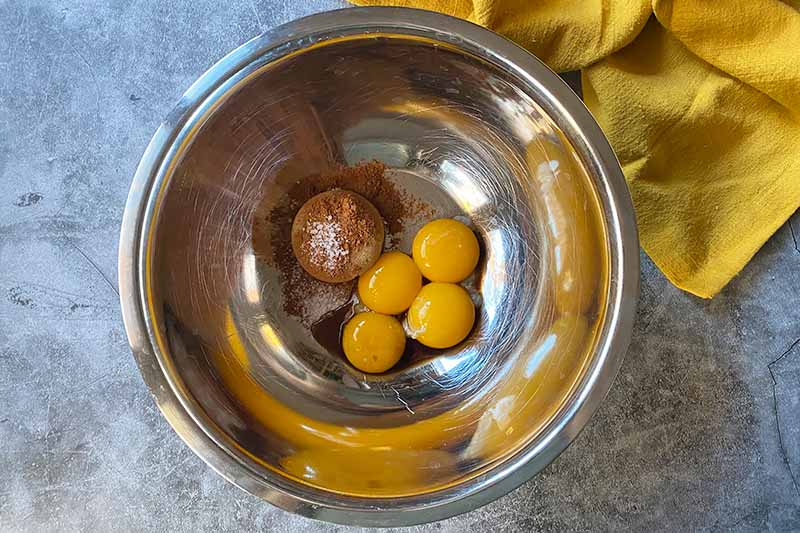
- As the cream mixture is heating, whisk together the egg yolks, brown sugar, pumpkin spice blend, vanilla, and salt in a large heatproof mixing bowl.
- Whisking constantly, slowly pour about a quarter of the hot cream mixture in a steady stream into the egg yolk mixture, to temper the eggs. After combining thoroughly, gradually add the rest of the hot cream mixture in a slow, steady stream while whisking constantly. Using a fine mesh strainer, strain the liquid into a large heatproof pitcher.
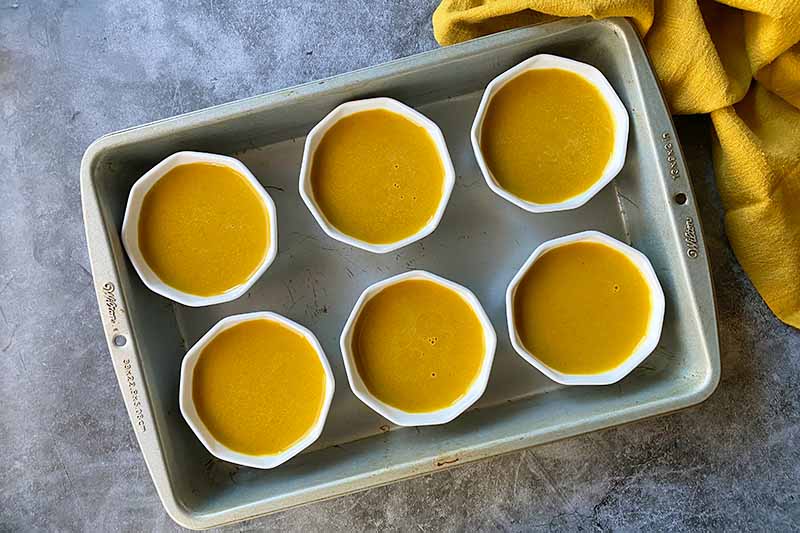
- Pour the custard into the ramekins, leaving about 1/4 inch of space at the top of each ramekin.
- Pour hot water into the bottom of the baking dish until it reaches about halfway up the ramekins. Carefully transfer the casserole dish to the oven, positioning it in the center of the rack.
- Bake uncovered until the edges of the custard are set but the centers jiggle just slightly, about 40-45 minutes.
- Carefully remove the baking dish from the oven. One at a time, remove the ramekins from the baking dish with heatproof tongs and place on a cooling rack. Let them cool to room temperature, about 1 hour.
- Transfer to the refrigerator. Chill for about 4 hours, until completely cold and set, and serve topped with a dollop of whipped cream. Cover the tops of each ramekin with plastic wrap or aluminum foil if you won’t be enjoying them immediately. Refrigerate for up to 1 week.
- Prep Time: 10 minutes
- Cook Time: 50 minutes
- Category: Custard
- Method: Baking
- Cuisine: Dessert
Cooking by the Numbers…
Step 1 – Prep
Make the kabocha squash puree. Follow the easy method in our tutorial for preparing roasted squash puree. As opposed to boiling, this cooking technique adds a dynamic caramelization, and provides a boost of flavor to recipes.
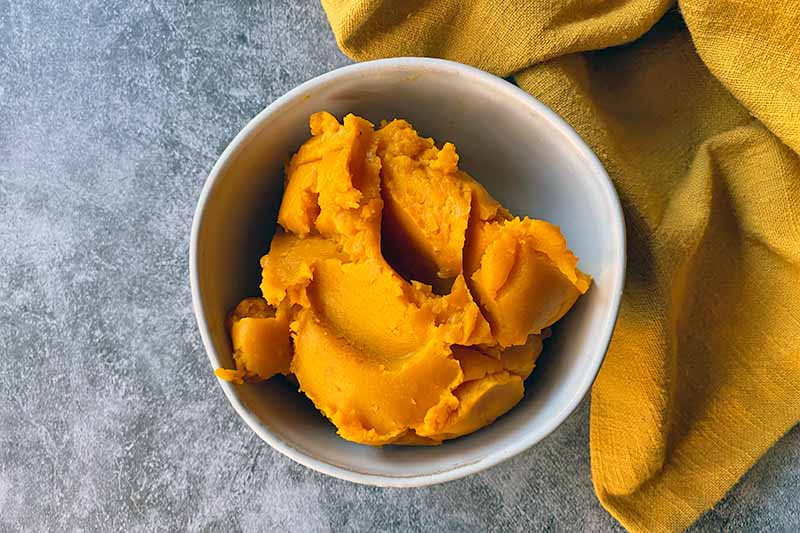
One small kabocha squash, weighing about 1 1/2 pounds, will provide roughly 1 to 1 1/2 cups of pureed roasted squash.
Position a rack in the middle of the oven. Preheat the oven to 300°F.
Evenly space six 6-ounce ramekins in a 9-by-13-inch baking dish with tall walls – a rimmed baking sheet won’t do. You’ll need a dish with tall walls to hold the water bath.
Speaking of which, fill a kettle with water.
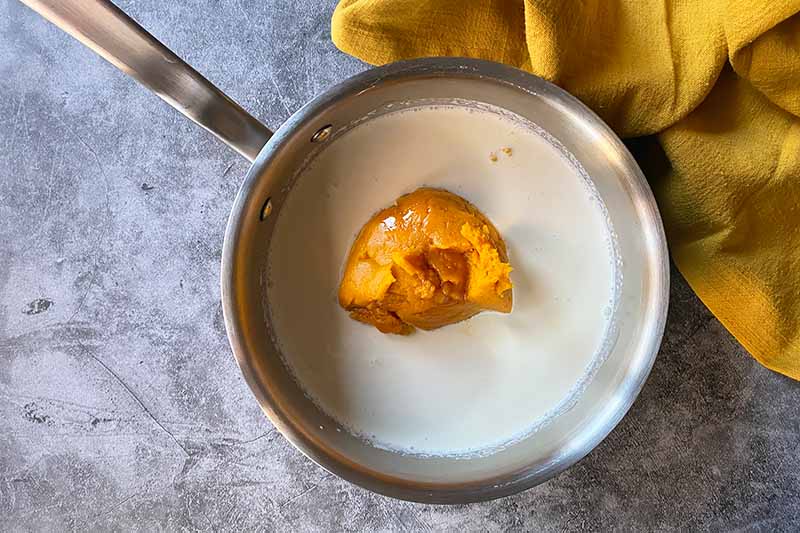
Place 1 cup of pureed squash in a medium saucepan along with the heavy cream, whole milk, and pure maple syrup.
Measure out the packed light brown sugar, pumpkin spice blend, vanilla extract, and kosher salt in a large heatproof mixing bowl. Separate the yolks from the whites of four eggs and add the yolks to the mixing bowl.
Reserve the whites for another use – have you tried baking homemade coconut macaroons? Our recipe uses 4 egg whites, the exact quantity you will have left over when making this recipe!
Do you keep a variety of spices in your cabinet? You may have everything you need already to make your own pumpkin spice blend.
Step 2 – Boil Water and Heat Squash Puree Mixture
This is the best time to heat the water in your kettle for the water bath. Boil the water in the kettle and set aside. Baking the custard in a warm water bath maintains a consistent temperature, helping the base bake evenly. It is the same technique that you might apply when making a smooth and creamy cheesecake.
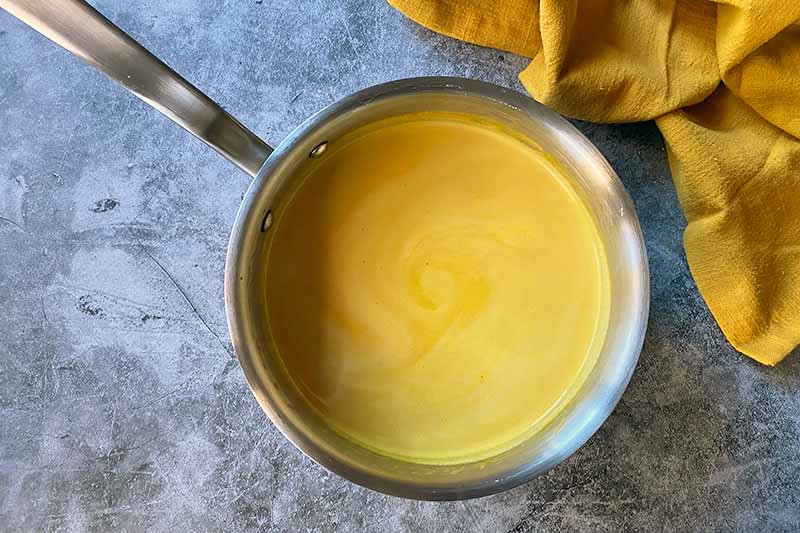
As the water is boiling, whisk together the wet ingredients in the saucepan until they are combined well. The thick puree will easily blend with the milk, cream, and maple syrup.
Place the saucepan on the stovetop over low heat – you don’t want to go any higher with the heat in order to prevent boiling or burning. Whisk occasionally until the mixture begins to steam, for about 5 to 8 minutes.
You do not want to whisk this mixture in excess, as this will develop foam that will form a thin, bubbly top layer as the custard bakes.
While definitely not a devastating mistake that will compromise the integrity of the final product, it’s simply an aesthetic annoyance that can easily be covered with a dollop of whipped cream upon serving!
Step 3 – Whisk Together Egg Yolk Mixture
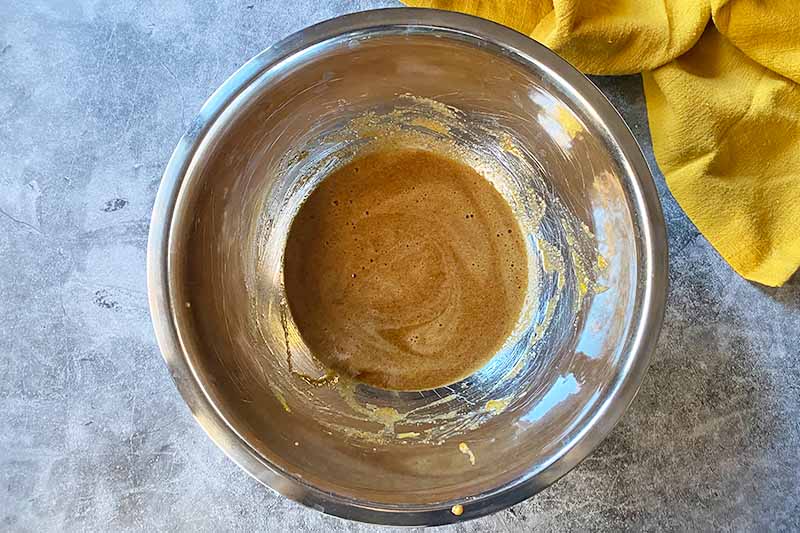
As the squash puree is heating, whisk together all of the ingredients in the mixing bowl until completely combined, to form a smooth and homogenous mixture. There should be no streaks of egg yolk remaining.
Step 4 – Temper the Egg Yolk Mixture
Once the cream mixture is steaming, remove it from the heat.
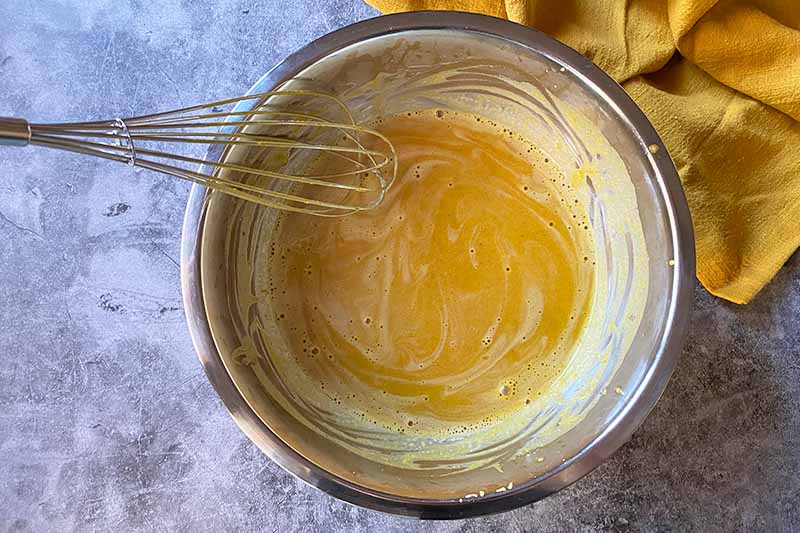
Starting with about a quarter of the warm cream mixture, slowly pour it in a steady stream into the egg yolk mixture, whisking constantly.
Once you have thoroughly whisked this in, slowly pour in the remaining warm cream mixture. Again, this should be added in a steady stream as you whisk continuously.
The continuous and steady pouring and whisking motions help to gently heat the delicate yolks while simultaneously blending the mixtures together. This careful process is also referred to as tempering.
Step 5 – Strain and Divide into Ramekins
To yield a smooth base, strain the liquid through a fine mesh strainer to remove any small lumps of coagulated egg yolks or chunks of squash puree.
You can strain the liquid directly into a clean pitcher, large liquid measuring cup, or a large bowl with a spout. Any of these options will help you to pour the liquid cleanly into the ramekins.
Evenly pour the liquid into the six ramekins in the baking dish so it’s divided equally among them. Leave about 1/4 inch of space at the top of each ramekin. Make sure the ramekins have a little space in between each one to promote even baking around the entire cup.
Step 6 – Make Water Bath and Bake
Carefully pour the hot water from the kettle into the dish. The water should reach about halfway up the sides of the ramekins.

After pouring in the water, carefully transfer the dish to the oven, positioning it in the center of the rack.
Be very slow and careful with this step! You do not want to risk spilling hot water into the custards and on yourself as you try to maneuver the pan!
Bake the custards uncovered until they are mostly set. The very center of each one should still jiggle just slightly if you gently shake the pan. This will take about 40 to 45 minutes.
Step 7 – Cool, Set, and Serve
Carefully remove the baking dish from the oven – don’t forget you still have hot water in there!
Using heatproof tongs, remove the ramekins one at a time from the baking dish and transfer them to a cooling rack. Let them cool to room temperature for one hour before transferring to the refrigerator to chill and set completely, for about 4 hours.
If you are planning to serve the custards directly after chilling, you do not need to cover them while they are in the refrigerator. However, if you are waiting to serve them on another day, cover the tops of the ramekins with aluminum foil or plastic wrap to prevent a skin from forming during storage.
Store covered for up to one week in the refrigerator.
Still Craving Some Crunch? Bring out the Sugar and Torch!
If you’re looking for an excuse to use your kitchen torch more often, and want to bring fire, flare, and crunch to the dessert course, don’t let this opportunity pass you by.
A fall-themed crème brulee sounds pretty nice doesn’t it? And it will still be gluten free!
Right before serving, sprinkle the tops of each chilled custard with a thin, even layer of granulated sugar – roughly 2 teaspoons for each 6-ounce ramekin.
Now… activate the kitchen torch! Heat the sugar until a deeply caramelized and hardened crust develops. Master this technique by studying the step-by-step instructions in our recipe for classic crème brulee.
Crack the top with a spoon, and dive into dessert!
What are your favorite gluten-free dishes you like to make for Thanksgiving? Is there another wheatless dessert you love to serve? I’m always searching for ways to expand my recipe repertoire for the holidays – leave a comment for me below.
There are zero insurrections, mutinies, uprisings, revolts, riots, rebellions, or coup d’etats in your kitchen when pumpkin spice is around – this spice mix is beloved by so many! Maintain peace and prosperity with more pumpkin spice recipes, starting with these fall favorites that are also gluten free:
Photos by Nikki Cervone, © Ask the Experts, LLC. ALL RIGHTS RESERVED. See our TOS for more details. Originally published by Shanna Mallon on November 16, 2012. Last updated on November 4, 2022.
Nutritional information derived from a database of known generic and branded foods and ingredients and was not compiled by a registered dietitian or submitted for lab testing. It should be viewed as an approximation.
About Nikki Cervone
Nikki Cervone is an ACS Certified Cheese Professional and cheesemonger living in Pittsburgh. Nikki holds an AAS in baking/pastry from Westmoreland County Community College, a BA in Communications from Duquesne University, and an MLA in Gastronomy from Boston University. When she's not nibbling on her favorite cheeses or testing a batch of cupcakes, Nikki enjoys a healthy dose of yoga, wine, hiking, singing in the shower, and chocolate. Lots of chocolate.
These look nothing less than divine. I’ve yet to taste a kabocha squash, so I believe I’ll be looking for one this weekend at the market! Thanks for sharing this beautiful recipe.
These sound, and look, great. We can’t always find the range of squashes that you get in the US but I’ll be keeping an eye out for kabocha now.
These look great! New Thanksgiving recipe! Thanks
I just bought a kobocha squash this morning and it’s my first time making it. Mine is dark green, do you know if it’s different from the orange variety? These custards look heavenly!!
I actually wondered the same thing, Nicole, because mine were green before, too. I’m glad you brought this up! This is what I found online yesterday: http://www.happyboyfarms.com/our-produce-varieties.php?id=20&keywords=Orange_Kabocha
Thanks so much for the link! I think Whole Foods only had the green this morning, but I’ll give this guy a whirl and look for an orange one to try next time 🙂
Okay, I have never heard of this kobocha squash stuff, but I am going to head to my New Seasons– the best grocery ever!– and I know they will have them. And I will buy one and make ^this and tell you how I wish you were here to eat it with us.
Beautiful post! You liked LOST? Oh no! I thought we were friends! :
Sarah! Does this mean you *didn’t* like LOST!!!! I thought we were friends! Ha!
This looks fantastic and a simple way to serve a simply divine thanksgiving dessert without gluten. I cook for a couple that is dieting and I think they will love this sweet treat. Thank you.
what a fun and unique recipe! love this idea! everything tastes better out of cute little ramekins 🙂
Your excitement is contagious! I want to wave my hands in the kitchen in excitement for this squash too!! And I am a huge sucker for custards so… I am sold indeed. 🙂
Love these! We just picked up a kabocha squash – what a great use for it! 🙂
Over the summer I signed up for Door-to-Door Organics (I think I heard about it from your blog). Part of the reason was to be more adventerous trying “new to us” produce. So far we’ve tried kale and bok choy. It’s nice we get to sub items, like squash. I’ll keep this recipe in mind next time squash comes up in the rotation. 🙂
So cool to hear that, Vicki! Door-to-Door offers a great selection. : )
I felt that I most certainly should comment on our post today, mostly because, indeed, I did say: “This is what my dreams are made of.”
When the custards get a little bit caramelized… yeah, uh huh. yep. That is all I have to say about that. I have been known to eat one after the other, no topping needed.
These look gorgeous. I’m a big fan of pumpkin pie and pumpkin custards, and I imagine the satiny texture of kabocha would be perfect here. I live in a part of the world that is surprisingly (and frustratingly) void of winter squash. I can find butternut and some pumpkins, and carnival squash is sold by florists as a decoration, but I’ve never seen even an acorn squash let alone kabocha. I’ll have to make this with pumpkin for now, and hang on for kabocha when I’m back in Canada for the holidays in December. Thanks for the recipe!
Katie, Pumpkin will still be quite good, I promise! : )
I had an orange kobacha and kept thinking I had the wrong thing but that’s what the label said. I made a yummy soup, but now I wish I would have just eaten it by itself. Love your pictures and enthusiasm over this dessert. I’m sure it’s as good as it looks.
Thank you for such a nice post and recipe. Will be making this for our gathering.
I fell in love with kabocha squash last fall and have yet to enjoy some this fall. Love this custard idea!
This sounds amazing. And, while I’ve never tried this miracle squash, you’ve convinced me to hunt one down. Also, I totally love the photo of your shoes. It’s just perfect.
Thanks so much, Sarah! I bought them on Etsy and think they’re the cutest…. wish they were the comfortablest, too, but… : )
I really like the idea of these – we’ve got a new fruit & vegetable shop that’s just opened up round the corner so I’m going to test them on their winter squashes this week to see if I can find a kabocha squash and recreate this!
PS I’m with Sarah on your shoes, so adorable!
I’m so intrigued. Love the enthusiasm 🙂
Hooray for kabocha squash … I usually do savory things with them, but I’m into this sweeter idea very much. Hope you guys had a nice weekend. It rained here (shocker). xx , m
I have a confession: I can’t stand pumpkin pie! But I love kabocha squash so. And I keep admiring your photos, and imagining baked kabocha squash with sugar and spices and topped with ice cream and I’m beginning to think my world just may change…
What! In that case, I would especially love to hear your thoughts on this if you try it. Let me know if it’s different enough to win you over! : )
These look great. Two of my favorite things, ramekins and squash!
OK, you have me convinced. These look marvelous! We’ve never cooked with kabocha squash, but now we’ve got me intruiged! It’s on our list.
Oh my! I have to try these little custards. They look splendid. I like the color scheme in the photos too.
I did not use arrowroot nor wheat flour, added an extra egg, and it came out just like I had hoped: a custard! Delicioso!
oh, I’m so glad, Cassini! Thanks for coming back to tell me!
I have been salivating over this recipe for three weeks. Finally made them today. I totally agree with your husband, Tim. They are the stuff of dreams!! Anyone who loves dessert will absolutely love these.
Yay! Thanks for coming back to tell us, Tracey!
Thanks for the recipe! Question — we’re on a low-sugar diet. If we have a very very sweet Kabocha (tastes as sweet as pie by itself), can the sugar be omitted?
Hi Irina, We haven’t tested this, and a whole cup of any ingredient would be a lot to omit from a recipe without making other adjustments. But I have heard of custard recipes that are made with sugar substitutes like stevia before, as well as recipes similar to this one that use less granulated sugar or an alternative like maple syrup. Since this is a baked dessert, the lack of sugar may effect its ability to caramelize on top, but it contains eggs and other thickeners so the texture should still hold up. If you experiment with this yourself, please let us know how it turns out!
Does the recipe make 6 4oz ramekins, or 6 6oz ramekins? The yield says one thing and the recipe says another.
Selina, thank you for catching that error! We have updated our recipe to fix this mistake.
The recipe yields 6, 6-ounce ramekins.