Spatchcocking is a method of poultry preparation that includes completely removing the backbone from the carcass and cracking the ribs and breastbone. This is also known as “butterflying.”
This process flattens out the bird and makes cooking much faster. And since the breast is now fully tucked inside, it is shielded from the higher temperatures that reach the legs – meaning that the dark meat of the thighs and legs hit that 180°F mark that is best for dark meat, while the breast can be dialed in for that 150-165°F range* that is best for white meat.
Temperature control of the meat is handled without tenting (a process using aluminum foil to keep heat away from specific areas) or other pain-in-the-butt methods of controlling temperature, such as applying ice to the breast area prior to roasting, smoking, or other preparation methods.
You’ll need a good quality pair of poultry shears or kitchen scissors to accomplish this task.
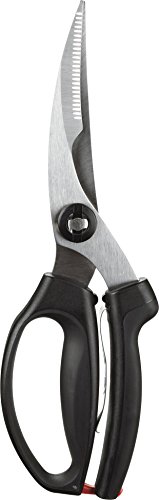
OXO Good Grips Spring-Loaded Poultry Shears available on Amazon
I highly recommend the OXO Good Grips set shown above. I’d almost believe that these things could serve as wire cutters in a pinch. You’ll thank me later.
The next few simple steps will show you how to spatchcock a poultry carcass. This technique is not only limited to chicken or turkey. Any other commonly consumed fowl can benefit from this process including: geese, ducks, quail, pheasants, grouse, and squab.
How to Spatchcock a Chicken Carcass
Step 1 – Prep
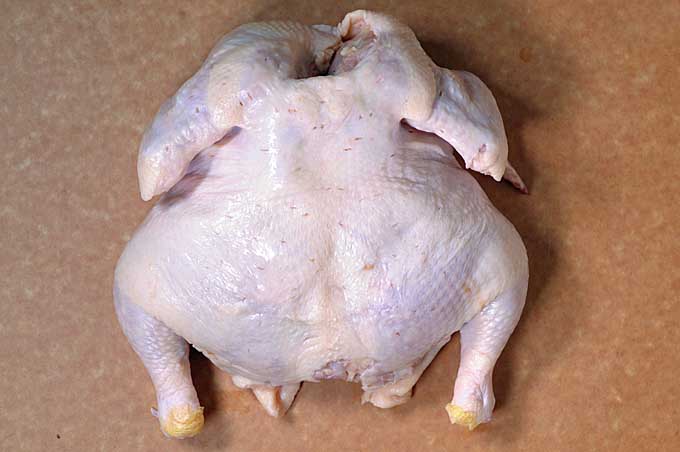
The chicken, turkey, or other fowl needs a bit of preparation before beginning the spatchcocking process. Remove the neck, gizzards, heart, and other bits and pieces that have been included.
You can freeze these for homemade stock, soup, gravy, or other purposes, or just throw them away.
I like to thoroughly wash the bird inside and out and pat it dry with lint-free paper towels. This is not required, and if you plan to do it, make sure you aren’t spreading raw bird juices around and contaminating your kitchen.
Make sure to remove any remaining pin feathers.
Although it is not necessarily a part of spatchcocking procedure, I highly recommend removing the wishbone before starting. This frees up the breast area for perfect carving after the bird is prepared. Get detailed instructions for this process now.
Place the carcass with the breast side down on a composite, plastic, or rubber cutting board. As much as I love wooden boards, I don’t like the idea of poultry juices soaking into the cracks and crevices.
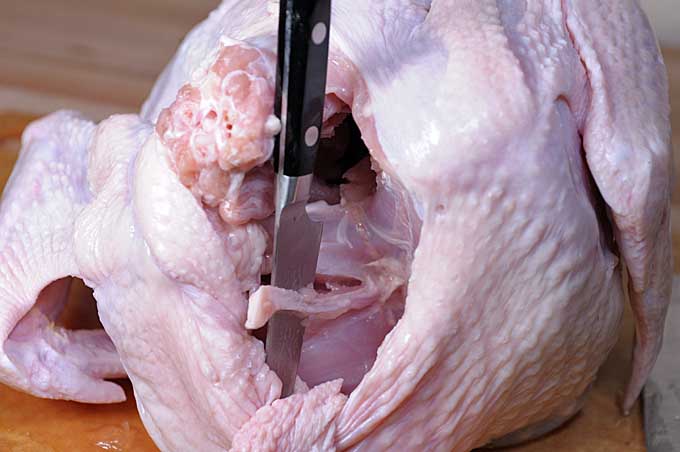
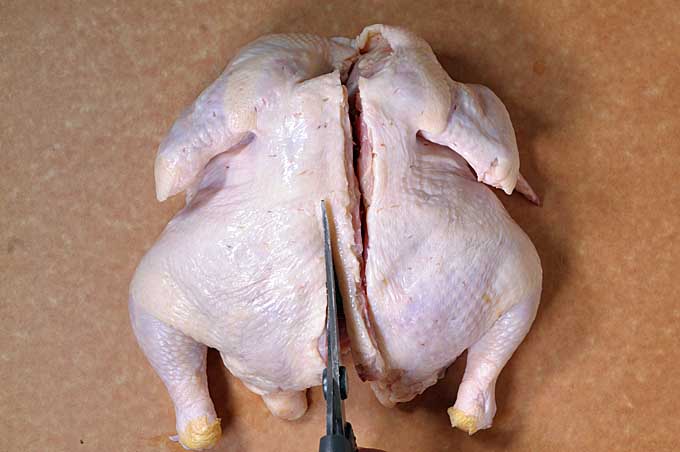
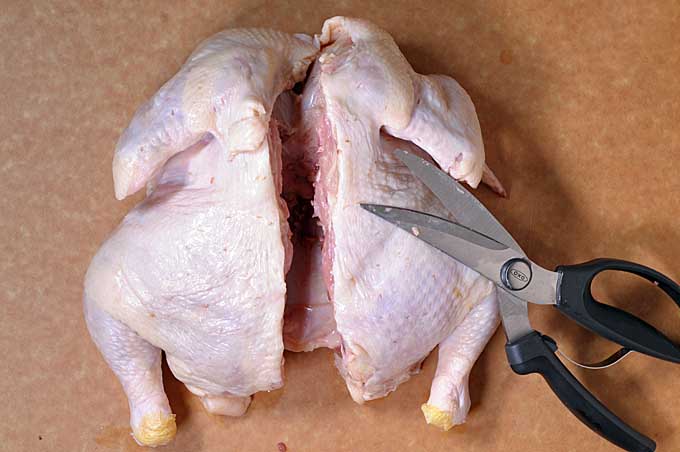
Step 2 – Remove the Backbone
The first thing you need to do to butterfly your chicken or turkey is to remove the backbone. Start by cutting along one side of it with your poultry shears, starting at the tail end and moving to the neck.

Repeat the process on the other side of the carcass.
Voilà, the backbone is removed. You can also save this bit for stock if you desire.
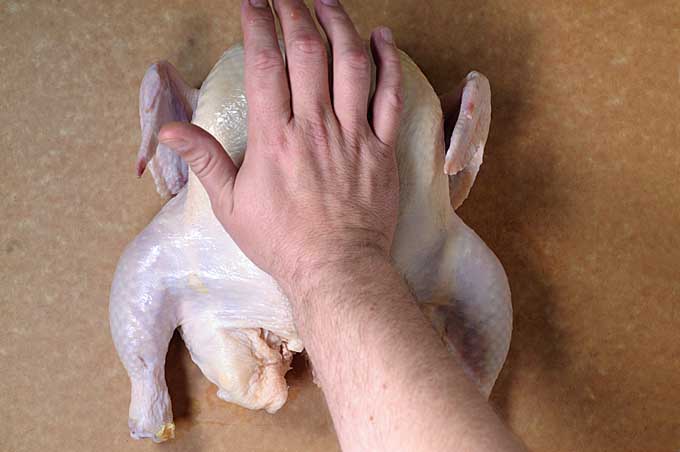
Step 3 – Break the Breastbone and Crack the Ribs
On a chicken or smaller fowl, you merely need to flip the bird over and press firmly on the lower breast area. This will (or at least it should) crack the breastbone and shatter the connections with the ribs.
A turkey may require a little more effort. You’ll likely need to dig out a meat cleaver and give it a few good whacks againts the breastbone to fully crack it.

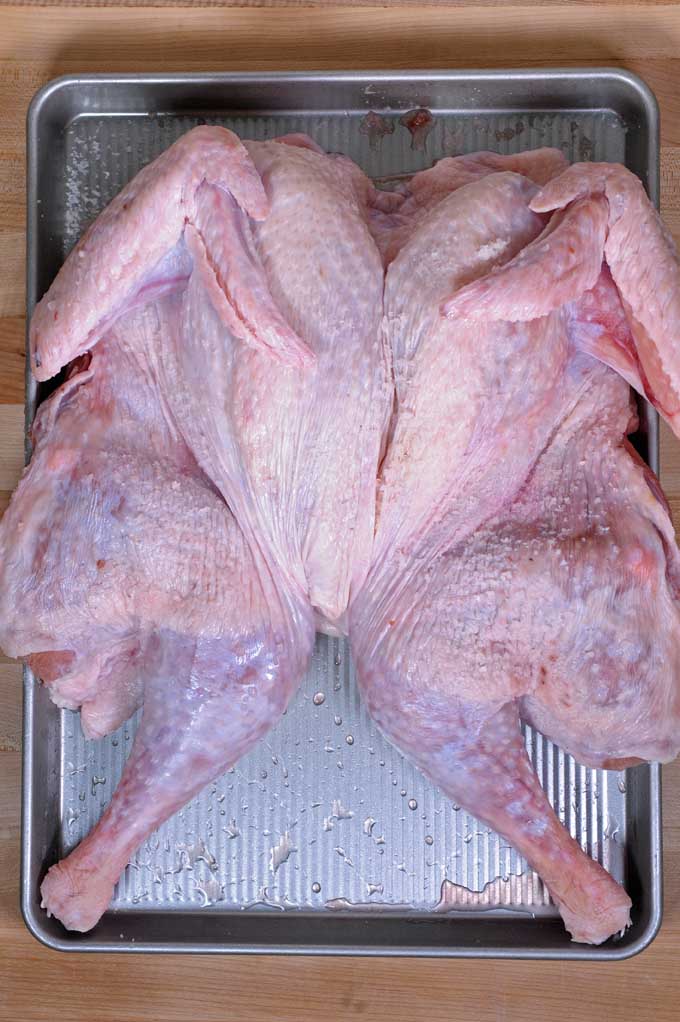
Once you get your bird fully processed, the breast should sink down so that it is completely straddled by both legs, and the carcass is roughly the same thickness throughout.
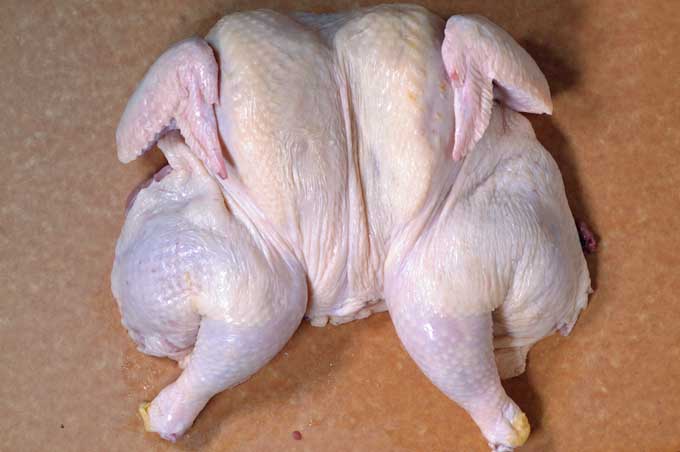
Step 4 – Clip the Wingtips (Optional)
Although not required, I highly recommend removing the wingtips. They usually burn no matter the preparation method and you might as well be rid of them.
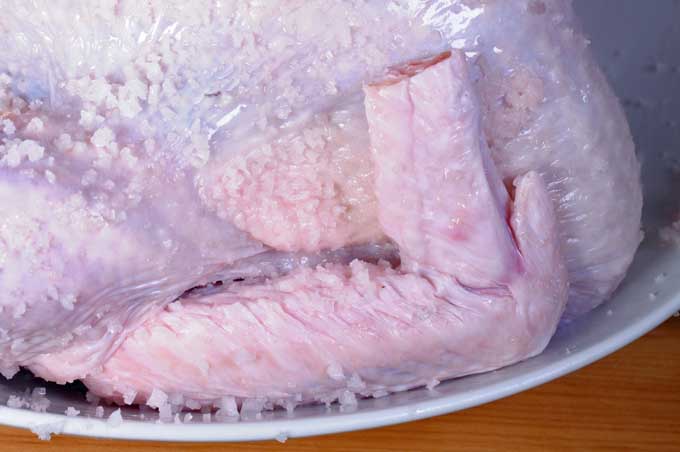
Please note that the turkey carcass pictured above is covered in coarse sea salt as part of the dry brining process, but this image also beautifully illustrates clipped wings.
Your bird is now ready to be fully cooked by whatever whole poultry method or recipe you choose.
Make sure to thoroughly wash all pots, pans, cutting boards, utensils, and work surfaces that have come in contact with raw poultry. I like to use copious amounts of soap and water with a capful or two of unscented bleach.
*Although the US FDA recommends 165°F as the minimum cooking temperature for poultry, many professional chefs and advanced amateurs try to shoot for 150°F on the breast. I tend to be somewhere in the middle and want the bulk of the breast area to be in the 155-160°F range as measured with an accurate meat thermometer when removed from the heat source. The temperature will increase a bit while the bird is allowed to rest before carving, reabsorbing juices and continuing to cook.
Regardless, we are not responsible if you should veer away from the 165°F minimum. You rolls your dice and takes your chances.
Recipe Suggestions
Below are some of our favorite spatchcocked bird recipes.
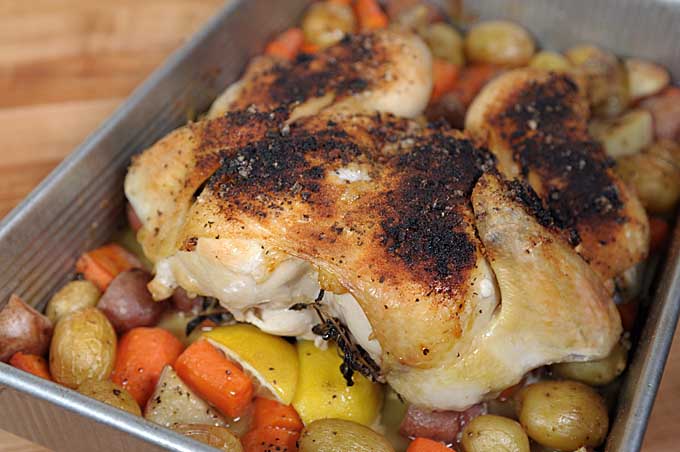
Lemon Roasted Chicken
This easy to make meal can feed your family with minimal fuss. Lemons and herbs stuff the underside while flaky sea salt and other spices lead to a crusty skin on the outside. The who thing is roasted on a bed of savory carrots and new potatoes.
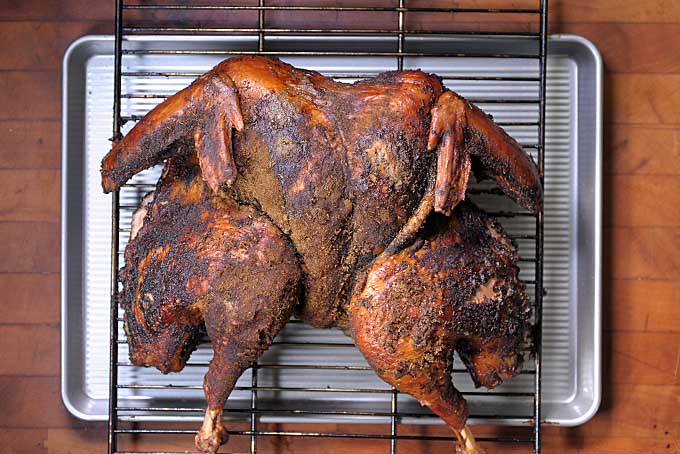
Sage Rubbed Smoked Turkey
The vibrance of sage mellowed with the smoke of hickory combine to produce an outstanding bird for any day of the year. You’ll love the rub that’s applied; the skin could be a meal in of itself.
Don’t forget to Pin It!
Photos by Mike Quinn, © Foodal / Ask the Experts, LLC. ALL RIGHTS RESERVED. See our TOS for more details.
About Mike Quinn
Mike Quinn spent 20 years in the US Army and traveled extensively all over the world. As part of his military service, Mike sampled coffee and tea from all virtually every geographic region, from the beans from the plantation of an El Salvadorian Army Colonel to "Chi" in Iraq to Turkish Coffee in the Turkish Embassy in Kabul, Afghanistan. He spent nearly a decade in the Republic of Korea where he was exposed to all forms of traditional teas. Mike formerly owned and operated Cup And Brew, an online espresso and coffee equipment retail operation.

Once I spatchcock the turkey can I proceed to cut down the middle between the breast to create 2 halves? I have a smaller smoker and would like place a half on 2 different racks in the smoker.