There’s a photo my mom took of me during my fifth (or was it sixth?) birthday party, licking off all the vanilla frosting from a chocolate cupcake. And completely avoiding the cake.
I never liked chocolate cake when I was a kid. And 5-year-old (or 6-year-old) me thought she told Mom that she hated that icky flavor and never ever ever wanted to eat chocolate cake, and wanted vanilla cake (NOT CHOCOLATE) cupcakes for her birthday, but…
Mom still made chocolate cupcakes.
I kept my cool, though. I was a year older, after all, and far too mature to have a silly little temper tantrum.
Thankfully, my mom didn’t go 100% fully loaded with crazy cocoa flavor – she used vanilla frosting for decorating, which I gladly consumed.
So, I still managed to have some fun at my own birthday party.
And I guess the clown and magician (they hired both that year?!) also helped to distract me from succumbing to disappointment and disgust.
These cupcakes are in remembrance of that near-tragic birthday party.
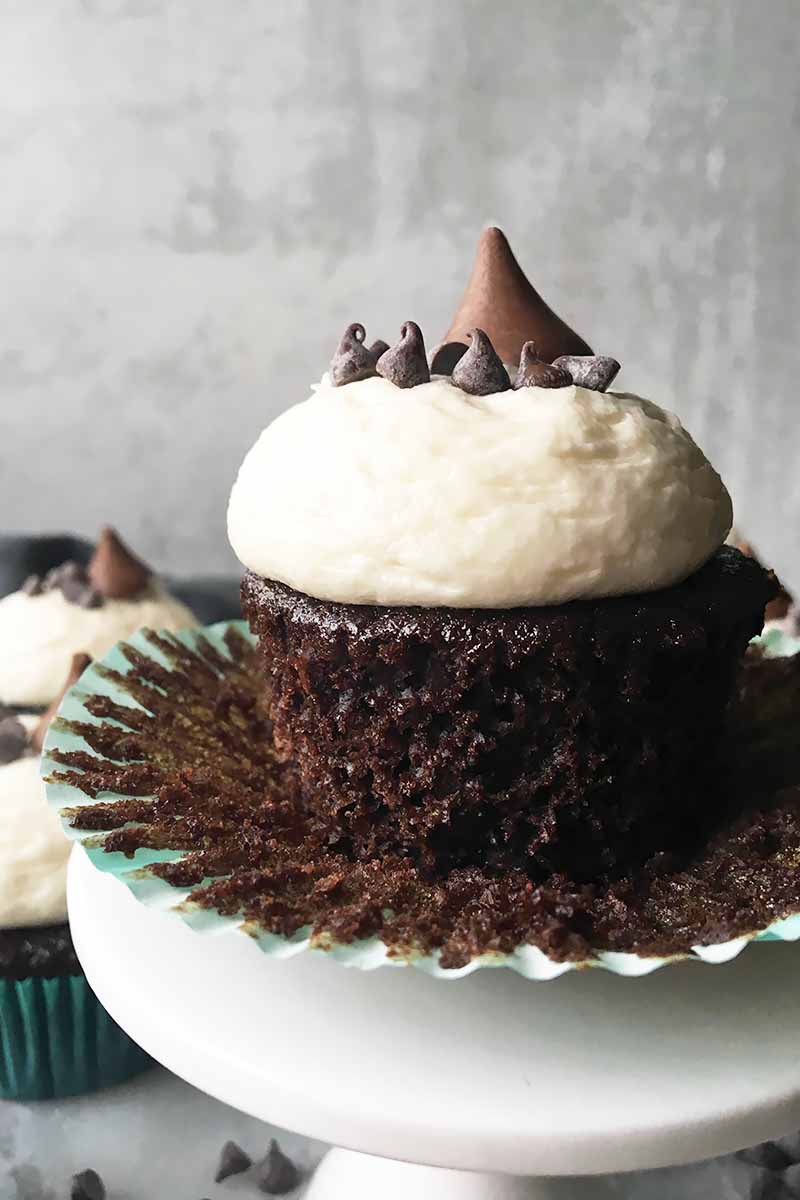
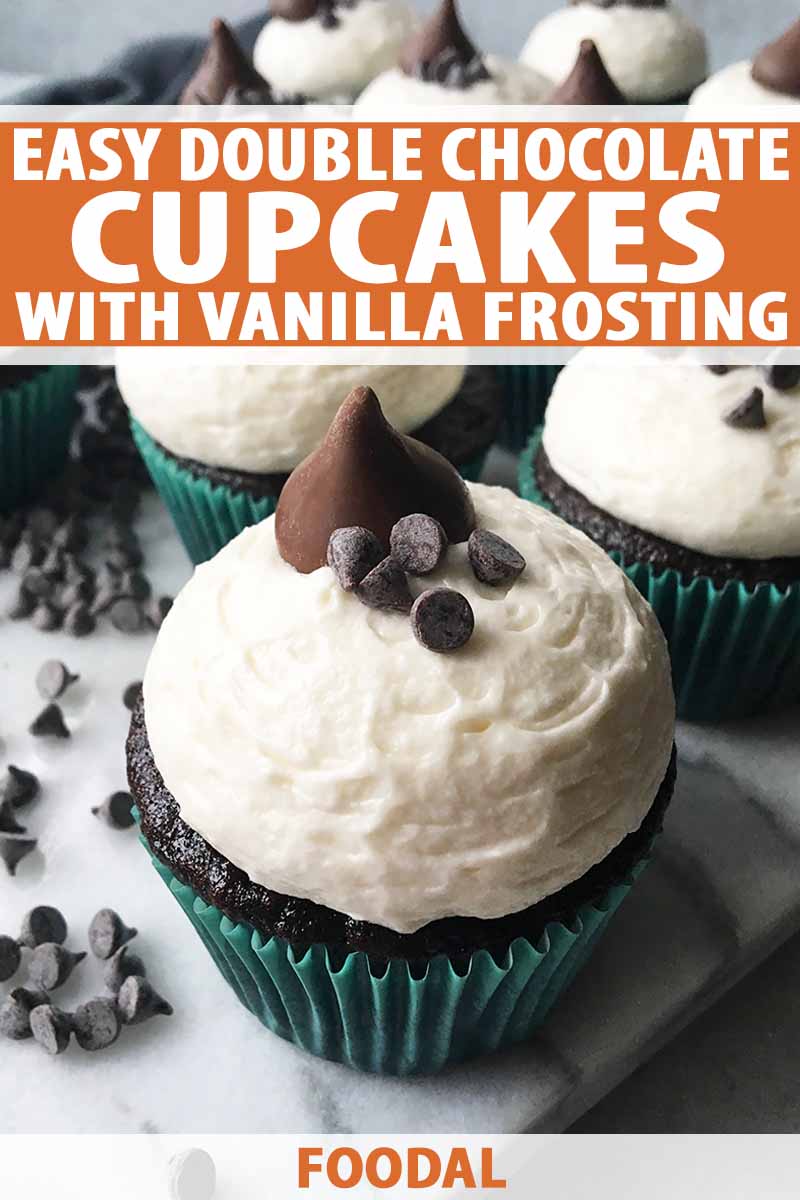
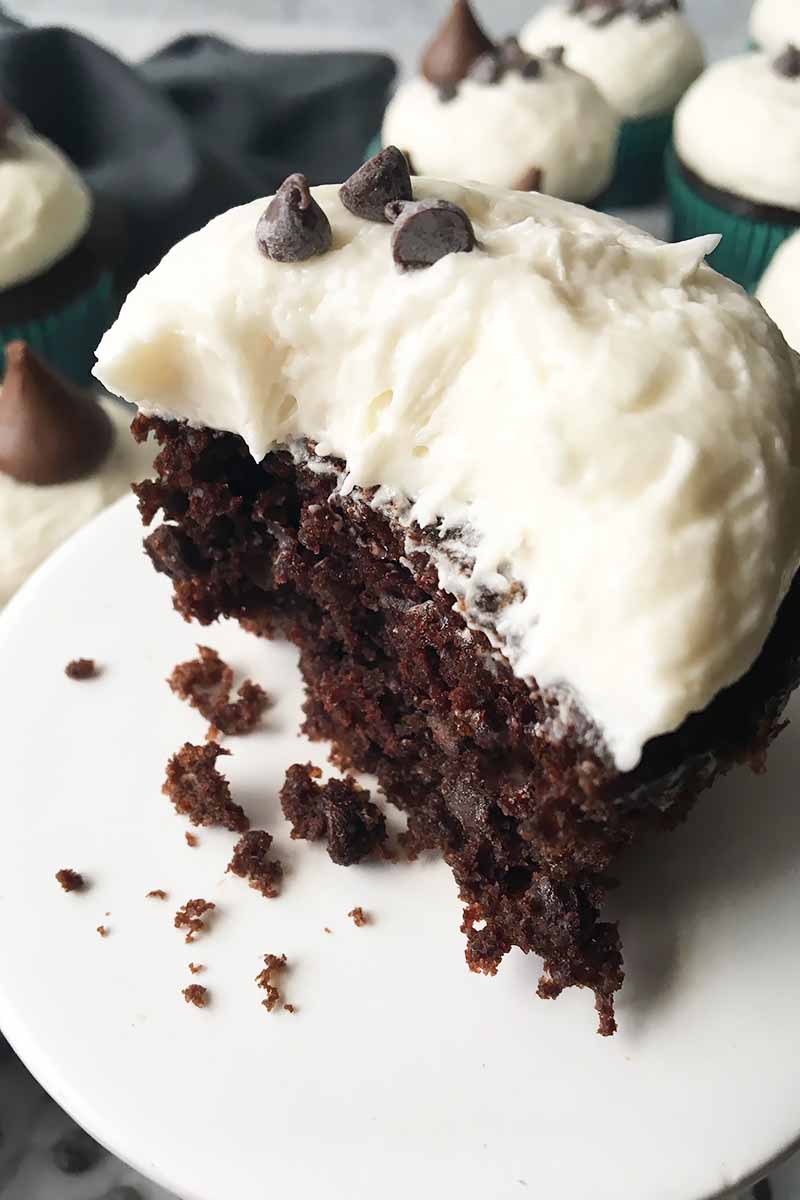
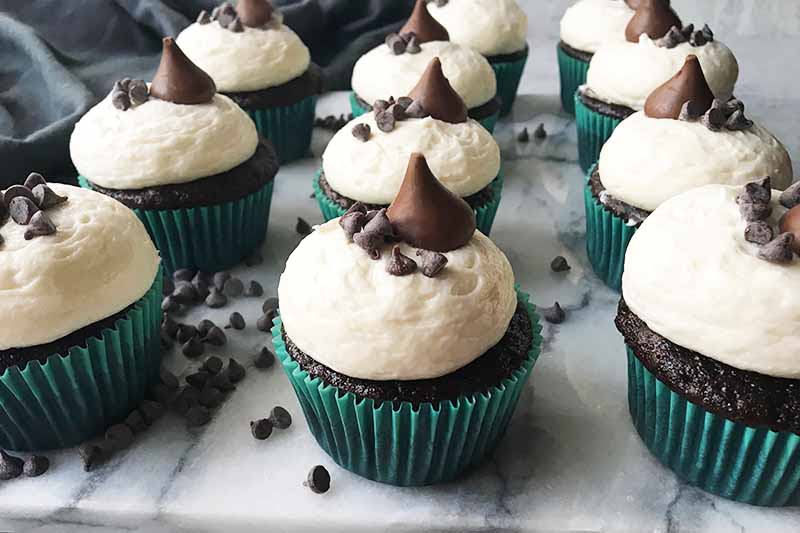
My tastes have changed significantly, now that I’m older and am willing to eat anything considered edible, especially if it’s oozing with chocolate. I can presently enjoy this dessert, a moist and spongy chocolate cake speckled with mini chips and topped with a thick and fluffy vanilla buttercream.
Tastes may change throughout the years, but memories will last forever. Mom, if you’re reading this, you should know that I have not forgotten your betrayal, even 20+ years later.
I’ll never forget.
No matter how many clowns or magicians you try to use to bribe me.
Print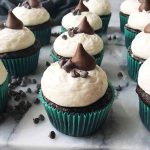
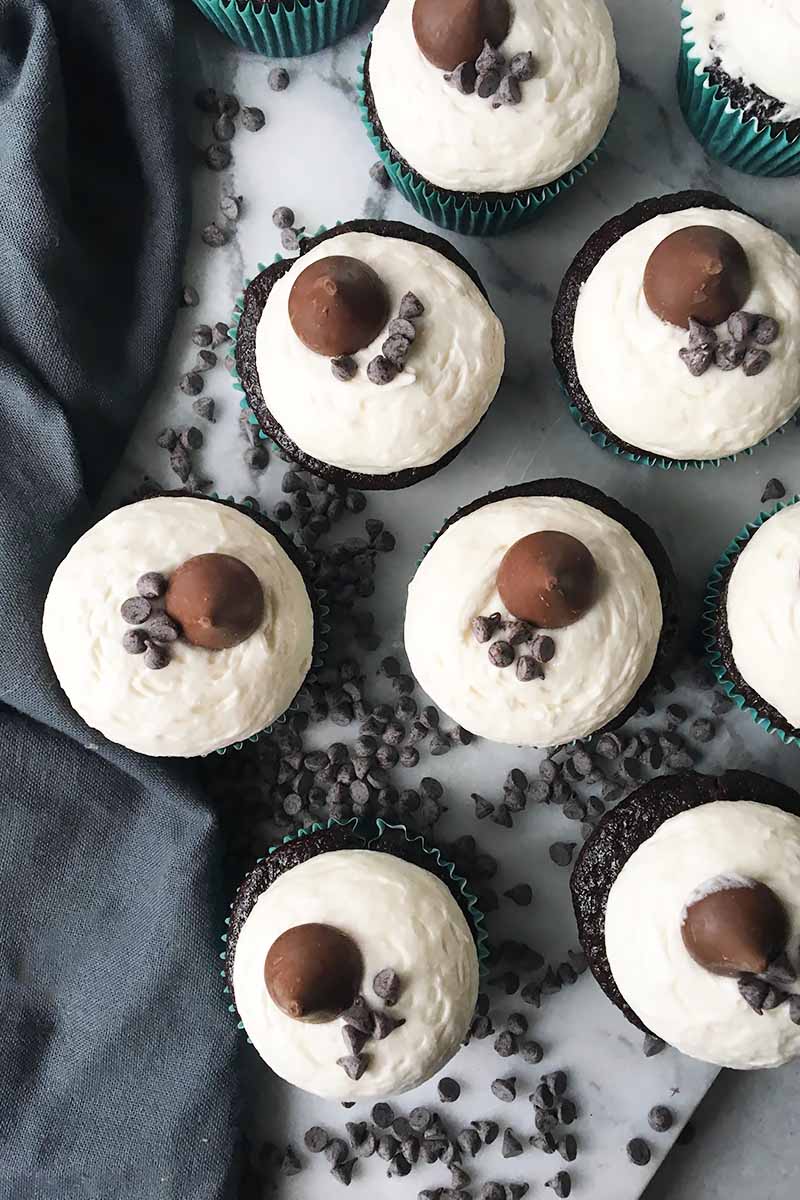
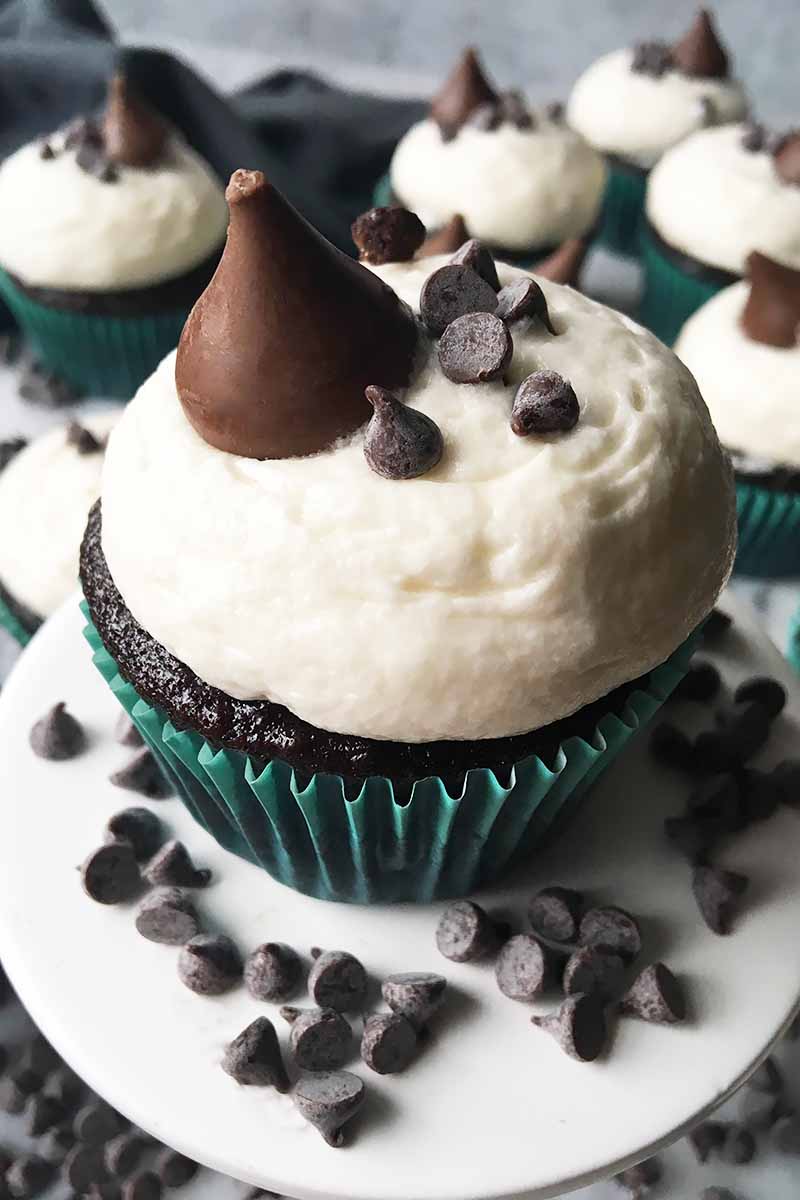
Double Chocolate Cupcakes with Vanilla Frosting
- Total Time: 1 hour, 20 minutes
- Yield: 24 cupcakes 1x
Description
Enjoy classic flavors with our chocolate cupcakes mixed with mini chocolate chips and decorated with a fluffy vanilla buttercream.
Ingredients
For the Cake:
- 1 1/2 cups all-purpose flour
- 1 1/2 cups granulated sugar
- 3/4 cup unsweetened cocoa powder
- 1 1/2 teaspoons baking soda
- 3/4 teaspoon baking powder
- 3/4 teaspoon salt
- 2 large eggs
- 3/4 cup water
- 3/4 cup buttermilk
- 3 tablespoons vegetable oil
- 1 teaspoon vanilla extract
- 1 cup mini chocolate chips
For the Vanilla Frosting:
- 1 cup (2 sticks) unsalted butter, softened
- 4 cups confectioners’ sugar
- 1/8 teaspoon salt
- 2 teaspoons vanilla extract
- 1 tablespoon heavy cream, plus more as needed
- Mini chocolate chips and chocolate candy, for garnish (optional)
Instructions
For the Cupcakes:
- Preheat oven to 350°F. Line two 12-cup muffin pans with paper liners and set aside.
- Sift together the flour, sugar, cocoa powder, baking soda, baking powder, and salt in a large bowl.
- In a separate medium bowl, whisk together the eggs, water, buttermilk, oil, and vanilla extract.
- With a spatula, mix the wet ingredients into the dry ingredients. Mix until just incorporated, scraping down the sides and bottom as necessary. You will still see some small lumps of dry ingredients. Fold in the chocolate chips.
- Divide batter evenly among muffin cups, filling each about 2/3 full. Bake for about 20 minutes, or until the tops are fully set and spring back when touched.
- Remove from the oven, and let the cupcakes cool in the pan for 5 minutes before removing and placing them on a wire rack to cool completely.
For the Vanilla Frosting:
- In the bowl of a stand mixer fitted with the paddle attachment, mix the softened butter on medium speed until it is smooth, with no lumps.
- Sift the confectioners’ sugar into a separate bowl. Add one cup at a time to the butter, beating very well after each addition.
- Add the salt, vanilla, and heavy cream. Mix on medium-high speed until very light and fluffy, approximately 5 minutes.
- Decorate as you wish immediately on the completely cooled cupcakes, using mini chocolate cupcakes as garnish. Serve and enjoy, or store in the refrigerator until ready to eat.
- Prep Time: 30 minutes
- Cook Time: 20 minutes
- Category: Cupcakes
- Method: Baking
- Cuisine: Dessert
Cooking by the Numbers…
Step 1 – Prep and Sift Together Dry Ingredients
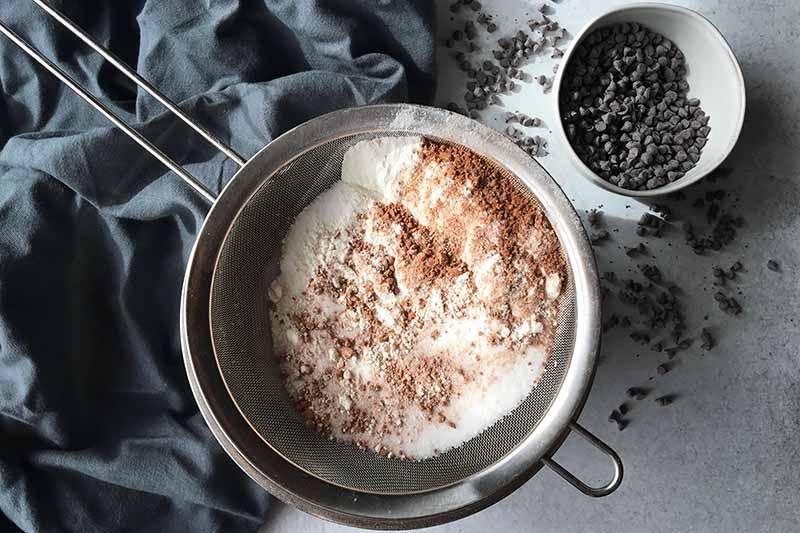
Preheat oven to 350°F. Line two 12-cup muffin pans with paper liners and set aside.
Sift together the all-purpose flour, granulated sugar, cocoa powder, baking soda, baking powder, and salt in a large bowl.
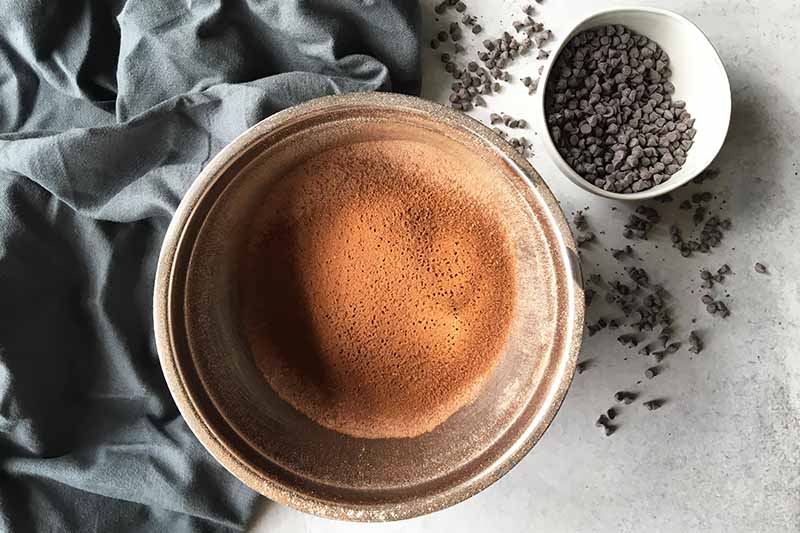
Sifting will not only serve to combine the ingredients, but will also remove any lumps.
If you’re in need of a healthier alternative, use our recipe for whole grain chocolate cake.
Step 2 – Whisk Together Wet Ingredients
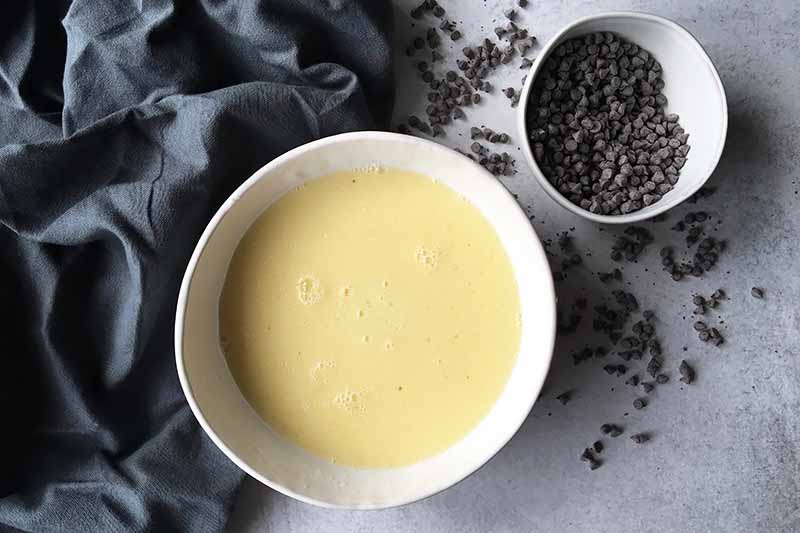
In a separate medium bowl, whisk together the eggs, water, buttermilk, vegetable oil, and vanilla extract. Whisk until the eggs are completely incorporated with the other ingredients. You should have a uniform liquid mixture.
Step 3 – Combine Mixtures
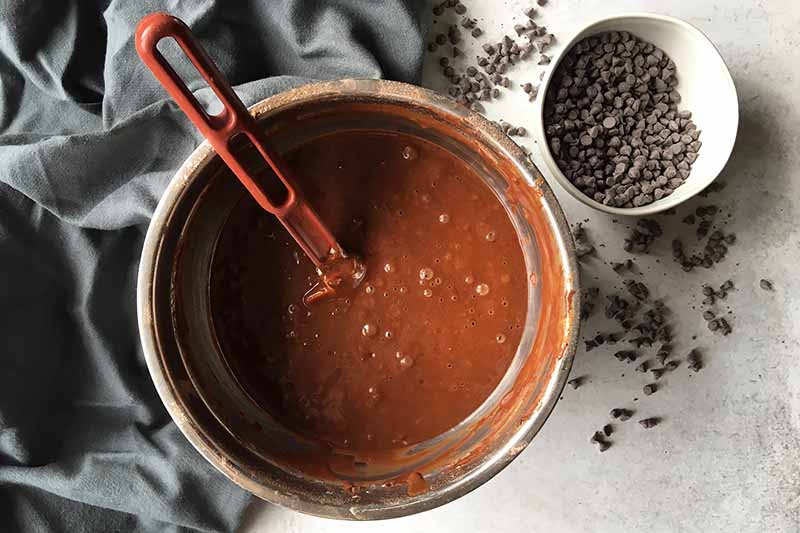
With a spatula, mix the wet ingredients into the dry ingredients. Stir until just incorporated, scraping down the sides and bottom of the bowl as necessary. Be careful to not overmix – there should be some small lumps remaining in the batter.
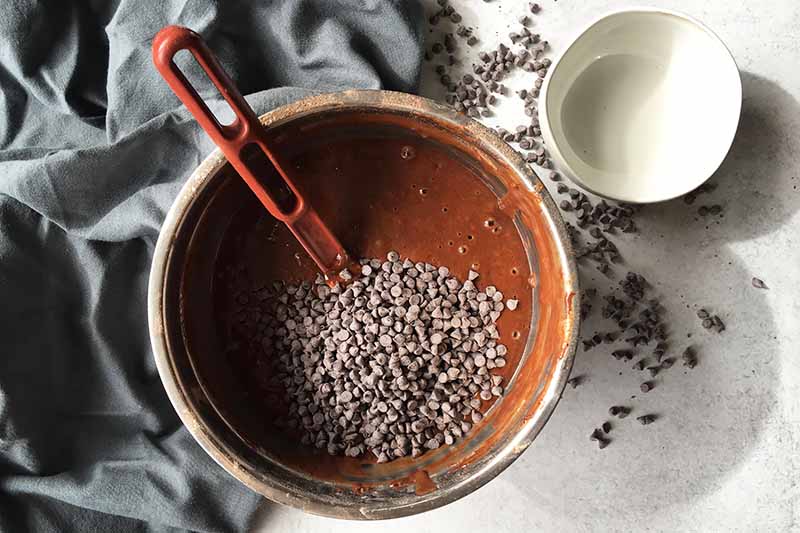
Gently fold in the mini chocolate chips.
Step 4 – Portion Batter in Muffin Pan
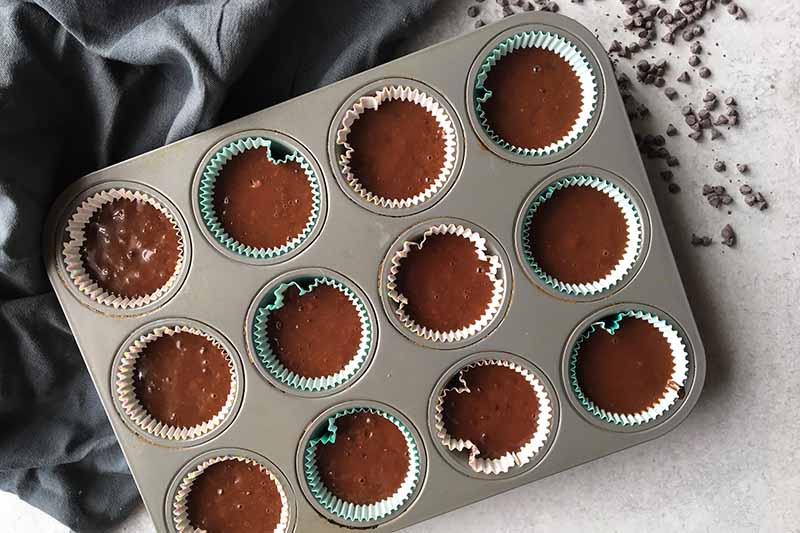
Divide batter evenly among the lined muffin cups, filling each about 2/3 full. I prefer to use an ice cream or cookie dough scooper to distribute even amounts into each cup.
Step 5 – Bake and Cool
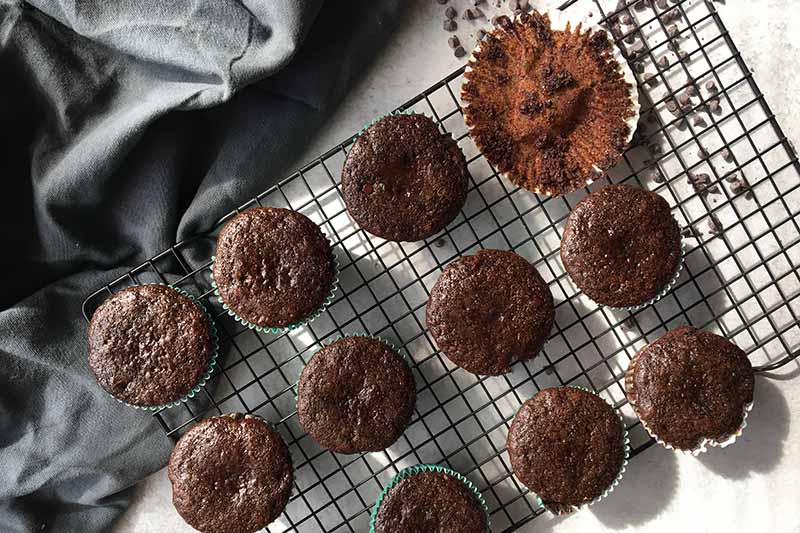
Bake for about 20 minutes, or until the tops are fully set and spring back when touched. When a toothpick is inserted in the center, it should come out clean.
(And don’t feel guilty if you can’t help yourself and absolutely need to steal one while they’re still warm. Clearly, I couldn’t resist).
Step 6 – Make Frosting
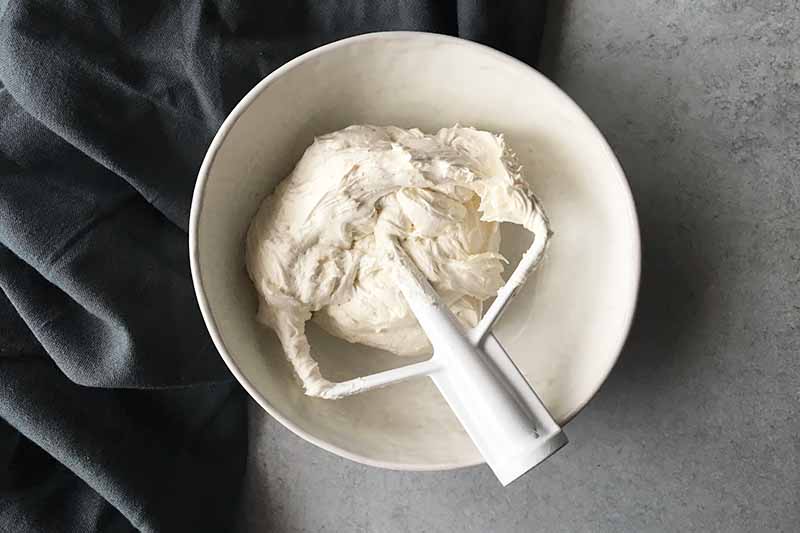
In the bowl of a stand mixer fitted with a paddle attachment, mix the softened unsalted butter on medium speed until it is smooth, with no lumps. The butter should be softened, but not completely melted!
Sift the confectioners’ sugar in a separate bowl. Add one cup at a time to the butter, beating very well after each addition.
Once the butter and sugar are completely whipped together, add the salt, vanilla, and heavy cream. Mix on medium-high speed until very light and fluffy, approximately 5 minutes.
If the mixture still is too thick, add more heavy cream if needed.
I love my American-style buttercream, which is what I use in this recipe, but you can use your favorite recipe. You might consider trying my Swiss meringue buttercream, or even a fudge frosting to triple the cocoa flavor!
Step 7 – Decorate
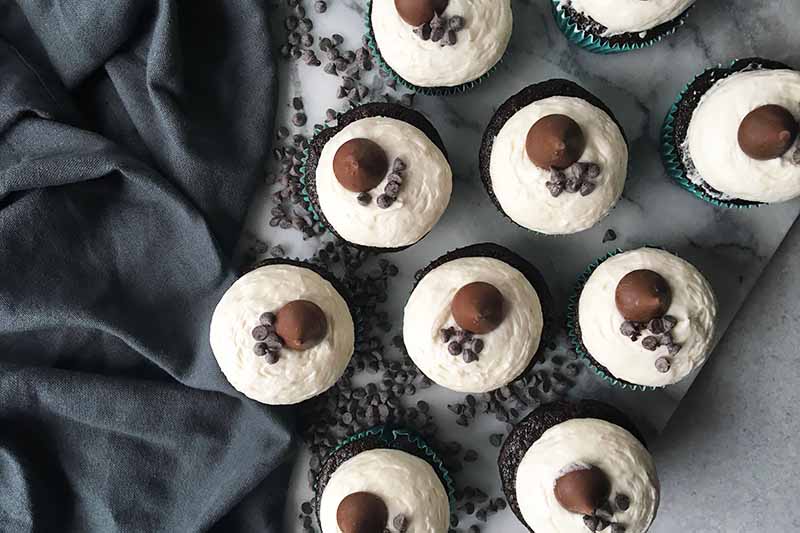
With a piping bag and a tip of your choice, pipe a mound of frosting onto each completely cooled cupcake. Don’t decorate when they are still warm, or else you’ll have a pool of melted buttercream!
If you won’t be decorating until later, you can store the frosting in the refrigerator until ready to use. Because the icing hardens as it cools, you’ll need to mix it with a stand mixer fitted with the handle attachment to get it light and fluffy again.
Garnish with extra chocolate chips or candy, if desired. Serve immediately, or store in the refrigerator until ready to eat.
Two Flavors, One Tasty Treat
Simple combinations of flavors can yield the tastiest results!
You can’t go wrong with the classic combo of simple vanilla and rich chocolate, like you’ll enjoy when you make these delicious cupcakes.
Kind of makes me wish I could go back in time and convince 5-year-old me to eat the whole cupcake, and not just the icing on top!
But if you are the complete opposite of me, and would rather eat the cake than the frosting, you’ll love our frosting-free technique to decorating!
How do you like to use the classic flavors of vanilla and chocolate in your desserts? What are your favorites? Let me know in the comment section below.
If you want something with a more unique flavor, consider making cupcakes with our sourdough chocolate cake base!
More cupcakes? You got it:
Photos by Nikki Cervone, © Ask the Experts, LLC. ALL RIGHTS RESERVED. See our TOS for more details. Originally published on Februrary 18, 2011. Last updated: August 22, 2021 at 9:23 am.
Nutritional information derived from a database of known generic and branded foods and ingredients and was not compiled by a registered dietitian or submitted for lab testing. It should be viewed as an approximation.
About Nikki Cervone
Nikki Cervone is an ACS Certified Cheese Professional and cheesemonger living in Pittsburgh. Nikki holds an AAS in baking/pastry from Westmoreland County Community College, a BA in Communications from Duquesne University, and an MLA in Gastronomy from Boston University. When she's not nibbling on her favorite cheeses or testing a batch of cupcakes, Nikki enjoys a healthy dose of yoga, wine, hiking, singing in the shower, and chocolate. Lots of chocolate.