
We occasionally link to goods offered by vendors to help the reader find relevant products. Some of these may be affiliate based, meaning we earn small commissions (at no additional cost to you) if items are purchased. Here is more about what we do.
If you’ve ever baked anything in your lifetime, you know that not every oven is the same, nor is any given model perfect.
As much as we wish our ovens would produce picture-perfect results every time, it’s not something we can guarantee, even if you have one of those super-extra-fancy appliances.
Don’t worry, this isn’t the end of the world. Instead of lamenting over our ovens, wishing we could make them perfect, it’s better to simply accept our home appliances for what they are and get to know their imperfections.
If you haven’t noticed, I have a bit of an emotional attachment to my oven. I use it so frequently, and when it comes to baking season, you can bet you will see mine doing overtime if you walk into my home on any given day.
Here’s what to come in this article:
Getting the Most Out of Your Oven for Home Bakers
No matter how often you use yours, it’s so important to know the ins and outs of its unique quirks. The two best ways to master your oven are understanding how to identify hot spots, and getting a handle on the best rack placement.
Gas, Electric, or Convection?
Let’s start with the basics, shall we? First, you need to know the specifics of the type of appliance that you have at home. There are some differences between using gas, electric, and convection that you need to know about.
Electric ovens use metal heating elements to bring the appliance to temperature, glowing red-hot as they work. These elements are usually on the floor of the appliance with another broiling element found at the top.
When you are working with electric, you will find that it will heat up faster than gas and the variance in temperature won’t be as broad.
With a gas oven, there’s a tube burner that is ignited by a spark to burn the gas. The heating elements are generally under the floor, with the broil burner positioned at the top like you see in electric.
There are some that come with broilers in a drawer at the bottom instead, versus those that have drawers for storage only.
Gas ovens have more fluctuation in the temperature than other types because the burner switches on and off as the appliance heats and maintains temperature. This is mechanically similar to electric, but the heat elements take longer to heat up in comparison to electric.
This is why it’s important not only to identify hot spots, but also to have an oven thermometer so you can track those variances for yourself. But more on that later.
The good news is, gas is generally cheaper to run than electric, and the heat provided is more natural since it’s more consistent and adds moisture into the air in the oven via the combustion process. Therefore, it typically yields great results for baking. But the higher internal humidity levels can also lead to some browning issues for certain recipes as well as hot spots, especially with older models.
If it’s a convection oven, you’ll find a third element which is circular, around the fan at the back. You’ll commonly find this type of oven in restaurant kitchens, and if you have a double set of ovens, chances are that one will provide convection.
For convection, note that these usually produce more heat, and that heat is rotated by the fan for more even cooking overall. However, this doesn’t mean they won’t have hot spots as well. Be sure to test with convection models, because they can still provide heat that is not completely even throughout the baking space.
Get to Know Your Oven
The sides, bottom (if a heating element is found there), and top are the typical hot zones. The closer to those areas you get, the hotter the air is going to be.
That’s why baking in the very top or bottom of yours will result in baked goods that will brown more quickly than they will at the center.
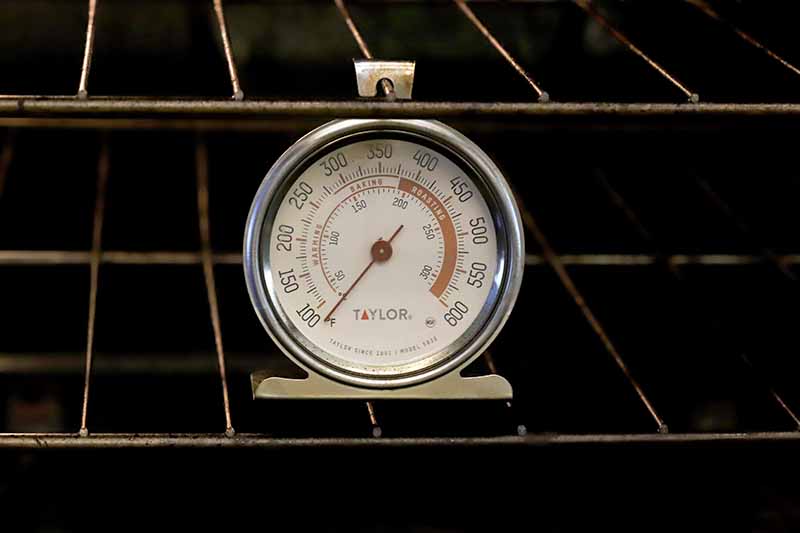
If you want to get to know your oven and how it heats up, I recommend purchasing an oven thermometer. Mine is super simple and it helps me to see see how the temperature changes.
Taylor Classic Large Dial Oven Thermometer, available on Amazon
The nice part is it helps you to see how accurate your oven’s thermostat is, and how that can change over time and with use. You may find that you have to set your appliance to a higher temperature like I do, to ensure you are hitting the right temperature when baking.
Next, it’s time to learn where your hot spots are.
How to Identify Hot Spots
Hot spots are those frustrating little areas that make your cakes and cookies bake unevenly, and generally make you want to scream… Unless you know them well.
Don’t go for trial and error here. Instead, take a quick moment to figure out where your hot spots are for future baking success, and more predictable results.
When you’re on a mission to figure out your oven’s hot spots, you need to start with a clean oven. The cleanliness can affect its operation, so make sure you know how to clean your large appliance.

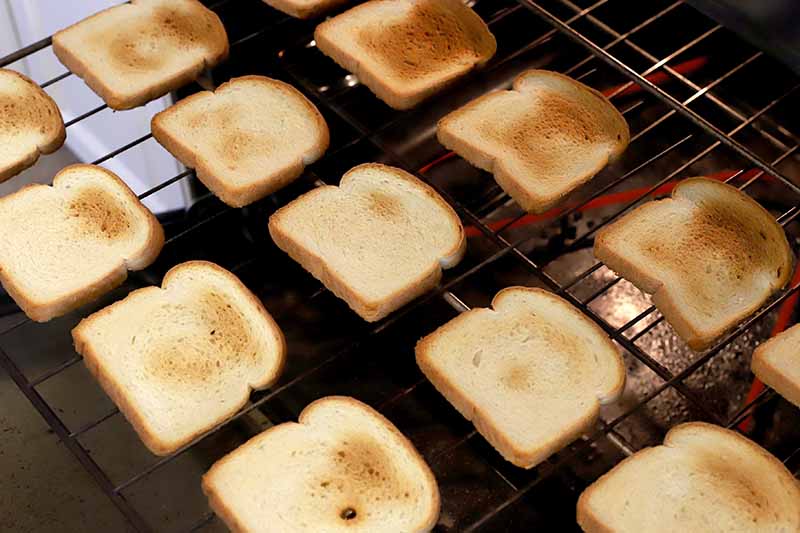
Once it’s sparkling clean, it’s time to set about learning where those trouble spots are. The most well-known method is the white bread test.
All you need is a loaf of sliced white bread from the grocery store. Preheat your oven to 350˚F. Add the slices of bread directly on the racks, covering them completely in an even layer of bread.
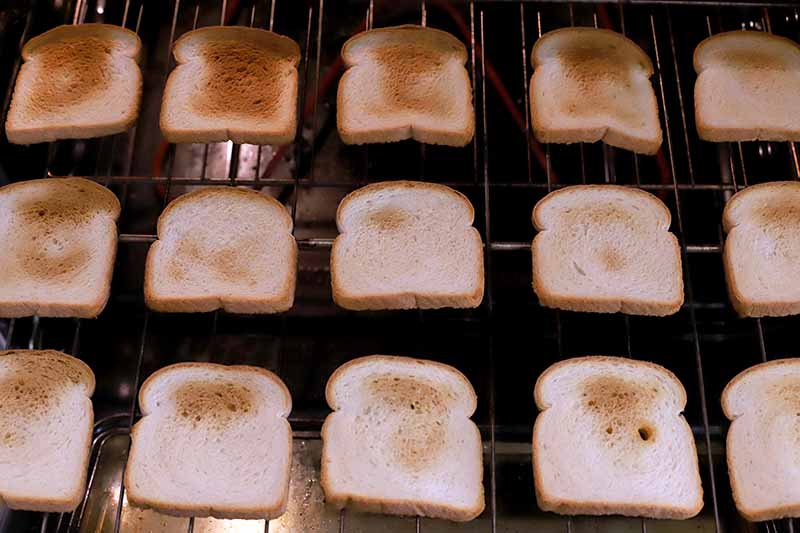
Wait a few minutes until they start to toast. For me, it took about 10 minutes before I started to see some color. As they toast, you can make a note of which start to brown first, which stay pale, and for how long.
Keep in mind that this is much easier to observe if you have an appliance with a light and a window, and opening the oven door will result in heat loss.
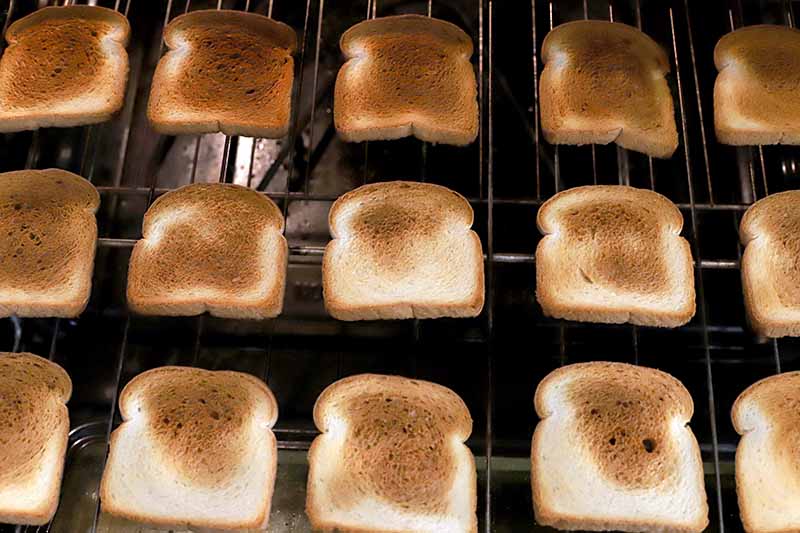
I noticed that my major hot spots are at the very back of my oven, particularly on the left side. This is exactly why turning dishes halfway through is so important for me. Otherwise, one side of the pan cooks too quickly or browns too much.
Another option to test for hot spots is to spread shredded coconut on sheet trays to run the same test.
I find that bread is easier to use and a better indicator because you can cover the racks directly with the bread slices. Plus, this way you don’t have to dirty a pan.
Oven Rack Placement Matters
Not only is it important to know your appliance, it’s also important to know about rack placement and how it impacts your baking.
Real talk: rack placement can actually ruin a recipe if you aren’t aware of what you are doing.
Even browning comes from the top portion of the appliance for most, but browning the bottom of a pizza crust comes from the lower section. When you have your rack in the correct place, your recipe will come out just like you want it to.
Most ovens are hotter at the top than at the bottom (heat rises, after all), so it makes a difference if you rotate your pans not only from front to back, but also from top to bottom halfway through baking if you are using multiple racks at a time.
When it comes to understanding recipes, most refer to where the rack should be placed for optimal baking results. If a recipe doesn’t offer this information, here’s a quick guide to what typically works best:
Top Portion
When you want browning on the top, be sure to bake in the top portion of your oven.
It’s hotter up there, so it’s great for browning the top of bread pudding, getting a golden bubbling cheese topping for your potato gratin, or browning the breadcrumbs on the top of your macaroni and cheese for the final few minutes of baking.
Middle Portion
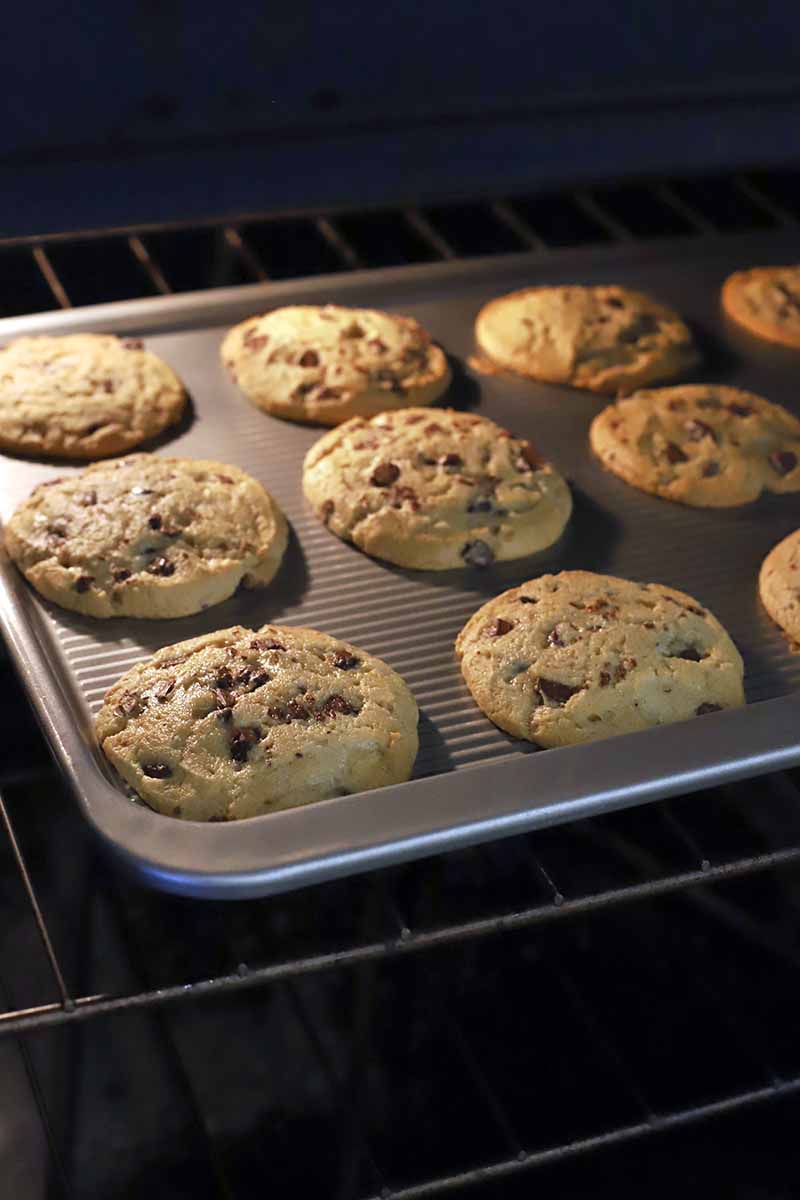
The middle of the oven is the safest place when you aren’t sure where to bake. This is where you want to bake a single sheet of cookies, rotating front to back halfway through cooking. It’s best for when you are only baking one thing at a time.
Upper and Lower Thirds
When it comes to baking more than one item at once, this is where you need to employ the rule of thirds. This means that when you are baking two sheets at once, you arrange the oven racks in the top and bottom thirds of the oven, rotating halfway through from front to back. This applies for cookies, cakes, and so much more.
The most important thing to keep in mind while you bake is to rotate from top to bottom, as well as front to back.
Lower Portion
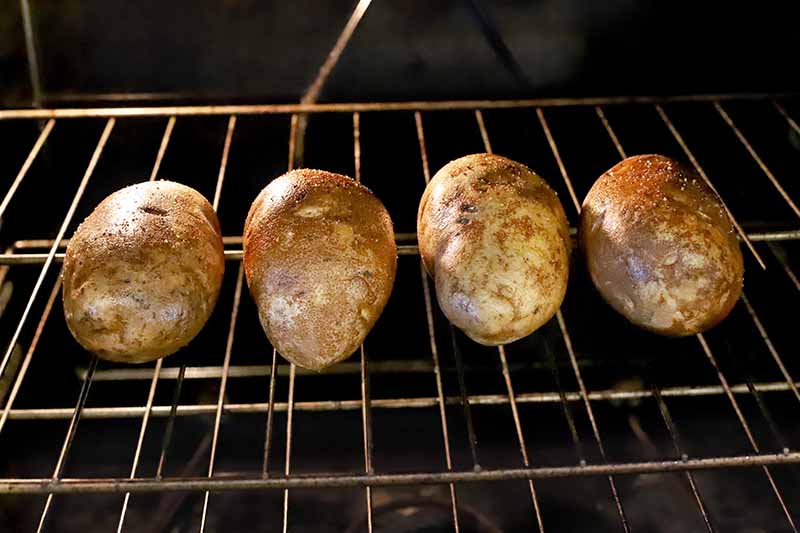
To get that golden brown crust on the bottom of your pizza or bread, this is the time to employ the lower portion of your oven (the lower third, ideally). It’s closest to the heating source in gas and electric appliances.
Broiling
For broiling, knowing where your broiler is located is the most important factor, obviously. Mine has the broiler heating element at the top, which is fairly typical, but every appliance is different.
Sometimes the broiler is located in a completely separate compartment from the oven, appearing underneath the main baking space.
Be sure to take a moment to see what your heating element looks like for your broiler. It could be a single rod with flames coming out either side if you have gas, or a twisted rod like mine that spreads from front to back if you have electric.
You could also have a broiler drawer underneath, instead of what is simply a storage drawer in some models. If this is the case, do not use this portion of your oven for storage! Accidentally turning it on could pose a fire hazard.
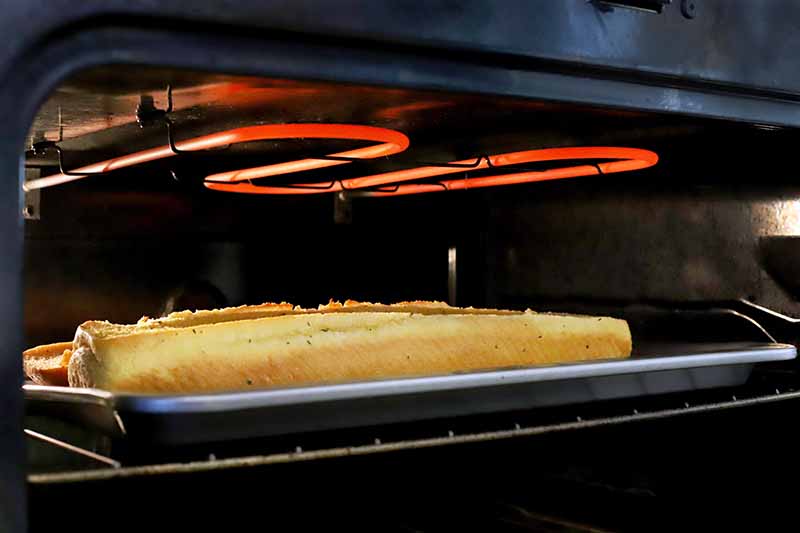
To use the broiler that is at the top of your oven, make sure you are placing the rack at the highest possible position. It should be about 3 to 4 inches away from the heating element.
Foods with more height may need more space, and you don’t ever want whatever you’re baking to touch the heating element.
Keep an eye on whatever you are broiling, because those elements get hot fast. If you have electric, I highly recommend doing a white bread test to identify its hot spots.
There are some who leave the door cracked while broiling, and others that don’t. So who is correct?
The general rule is to leave the door ajar when using an electric broiler, and closed with a gas broiler or convection. However, it depends on the broiler and the age of your appliance, so check your manual to be sure.
What If I Only Have One Rack?
If you only have one rack, employ the tips for middle of the oven baking described above for most baked goods, since you are only going to be baking on one level at a time.
You can always invest in a new rack to bake multiple items if you have the space, but if you are sticking with one, the middle of the oven rule is your best bet when you are in doubt about where to place it.
Don’t Overcrowd It
Ever wonder why your food is soggy, never browning, and basically coming out as a major disappointment? It’s likely because you are overcrowding the food and your oven.
When you bake multiple items at the same time, you are creating an uneven cooking pattern. This is why cookie recipes require rotating pans throughout the baking process. Make sure to pay attention to rack placement and move things around about halfway through baking for items like cookies.
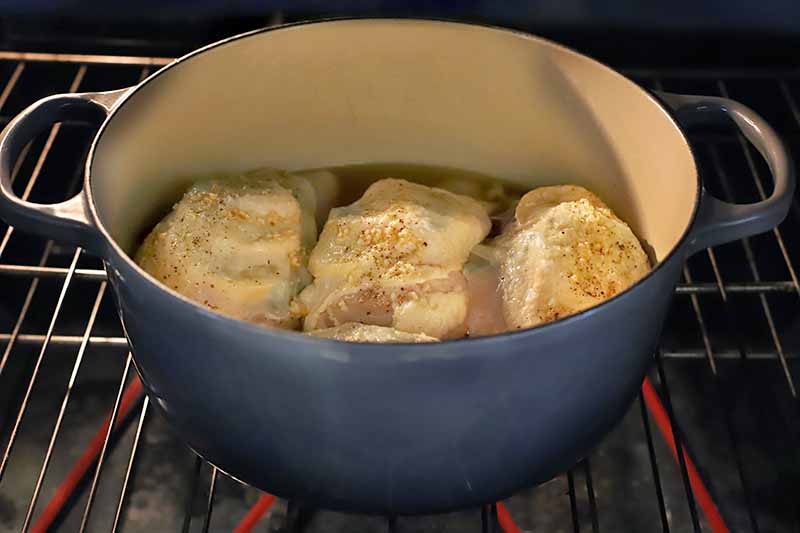
However, note that other items like casseroles and braised dishes that contain a lot of liquid won’t be impacted as much from baking a couple at the same time.
As we mentioned above, rack placement and understanding how to bake two pans at once are both important. It’s equally important to avoid overcrowding the food in the pan as well.
With the exception of casseroles, make sure your food has some room to breathe so that there is space for the moisture from the food to escape. It’s the best way to avoid soggy food. This is applicable for sheet pan dishes and other similar items, but not the wet, compact dishes.
Time to Bake Up a Storm
Now you have everything you need to get to baking your favorite cookies, cakes, casseroles, and so much more! Whatever type of oven you have, these tips should be helpful in your quest to prepare the best baked goods ever.
If you need some inspiration for baking, check out some of our favorite recipes:
- Slow-Cooked Black Beans & Poblano Pepper Baked Taquitos
- Baked Apple Chips
- Crispy Oven-Baked Green Beans
- Sweet and Salty Glazed Maple Cookies
- Chocolate-Dipped Peanut Butter Cookies
And if you want to give your baking knowledge even more of a boost, check out more of our articles on the subject here.
What are some oven quirks that you have discovered in your own kitchen? Can you think of something that we forgot? Share your stories and tips with us in the comments below!
Photos by Meghan Yager, © Ask the Experts, LLC. ALL RIGHTS RESERVED. See our TOS for more details. Product photo via X.
About Meghan Yager
Meghan Yager is a food addict turned food and travel writer with a love for creating uncomplicated, gourmet recipes and devouring anything the world serves up. As the author of the food and travel blog Cake 'n Knife, Meghan focuses on unique foodie experiences from around the world to right at home in your own kitchen.


My range is a Whirlpool, it is less than two years old. My issue is..when I bake a pie in a foil plate, the very center bottom does not completely bake. However, if I use a glass pie plate, it does bake properly. I use the bottom rack of my electric oven set on convection heat. Any suggestions?
I put my foil pan on a dark cookie sheet. This also keeps the oven clean from spillover.