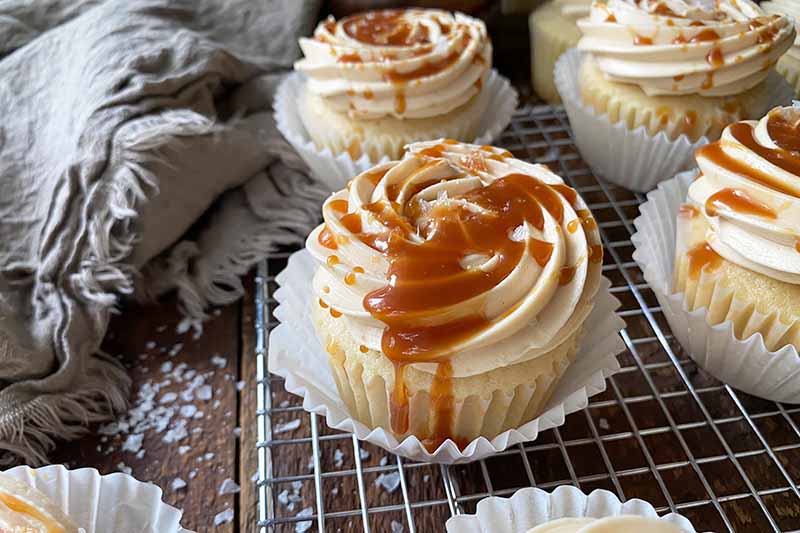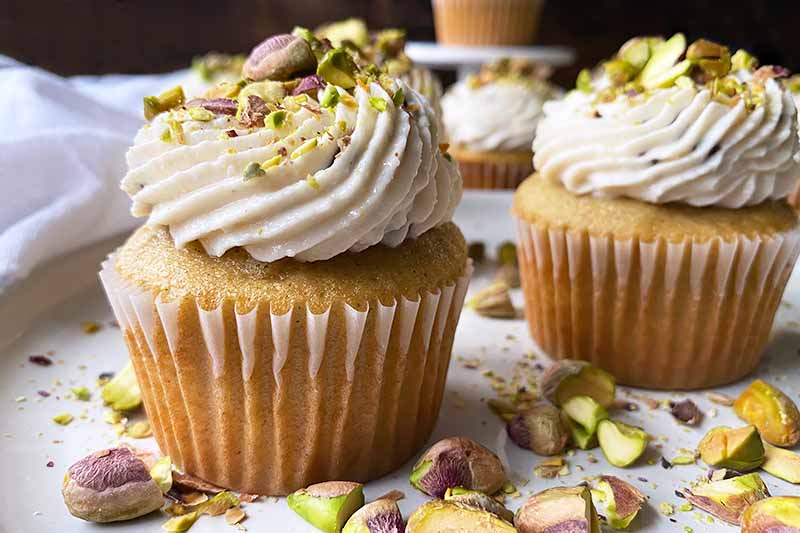
It’s time to face the facts. Not everyone likes frosting.
I won’t panic. I won’t gasp in shock. I won’t faint in sudden terror upon this discovery.
I won’t ask you, in utter disbelief, why you don’t like the dreamy, cloudlike concoction of whipped sugar and butter gently placed atop a cupcake. I won’t ask you why you don’t like the textural balance between the cakey base and the fluffy frosting.
I don’t need to know. It’s fine, I’m fine, we’re fine.
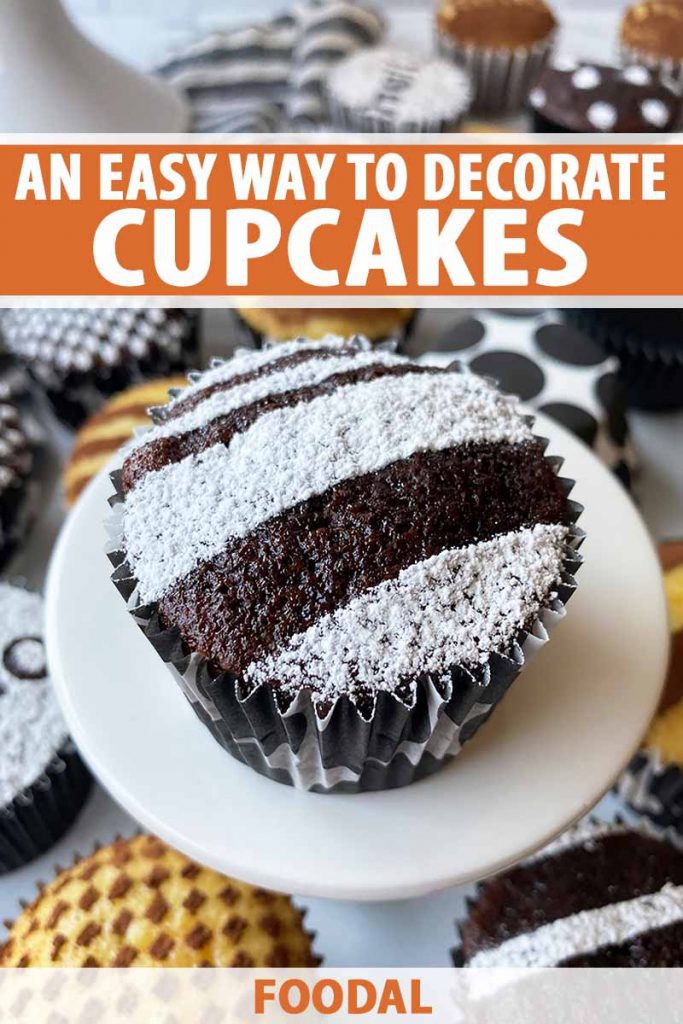
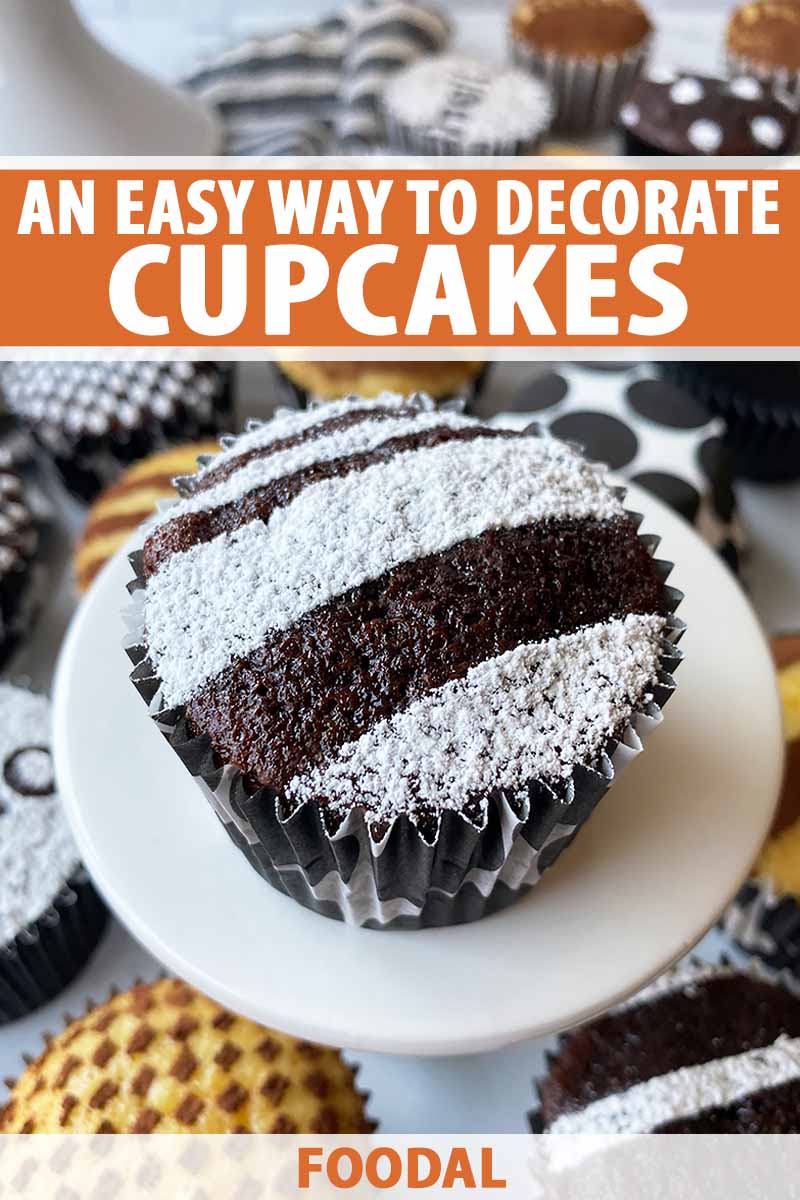
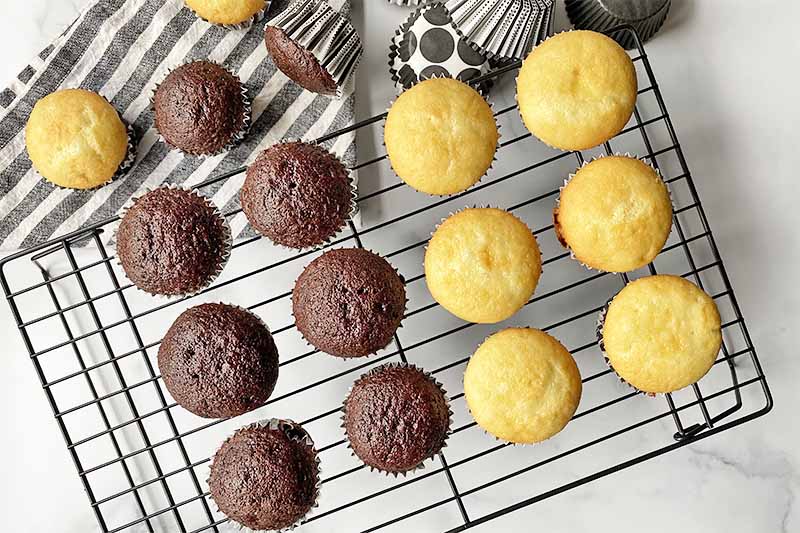
But while I’m blissfully licking the spatula from a bowlful of thick and luscious vanilla buttercream I just made, you can feast your eyes on this easy, 100% frosting-free way to decorate a cupcake!
This is a fast approach to add delicate and festive finishing touches to your favorite cupcakes, without having to whip up a big batch of frosting, or wait forever for royal icing to dry on a batch of cookies. In just a few minutes, you’ll have beautifully decorated desserts with intricate designs.
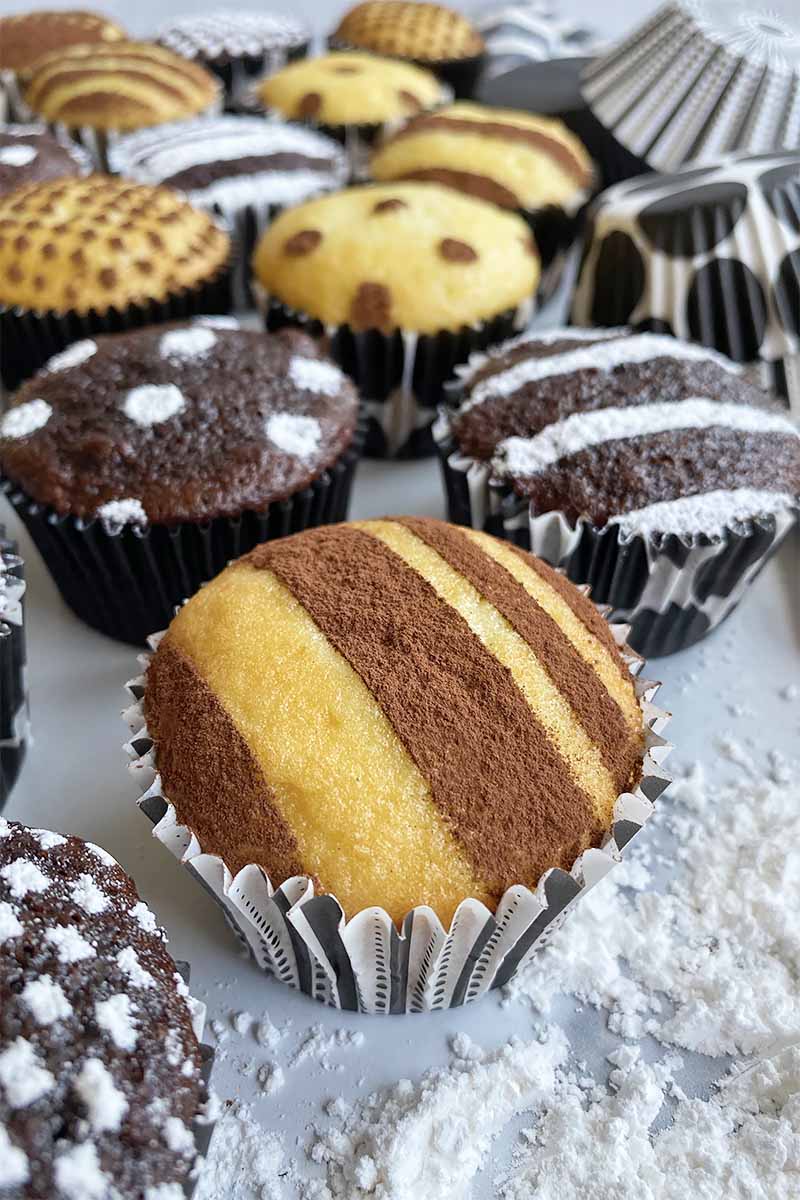
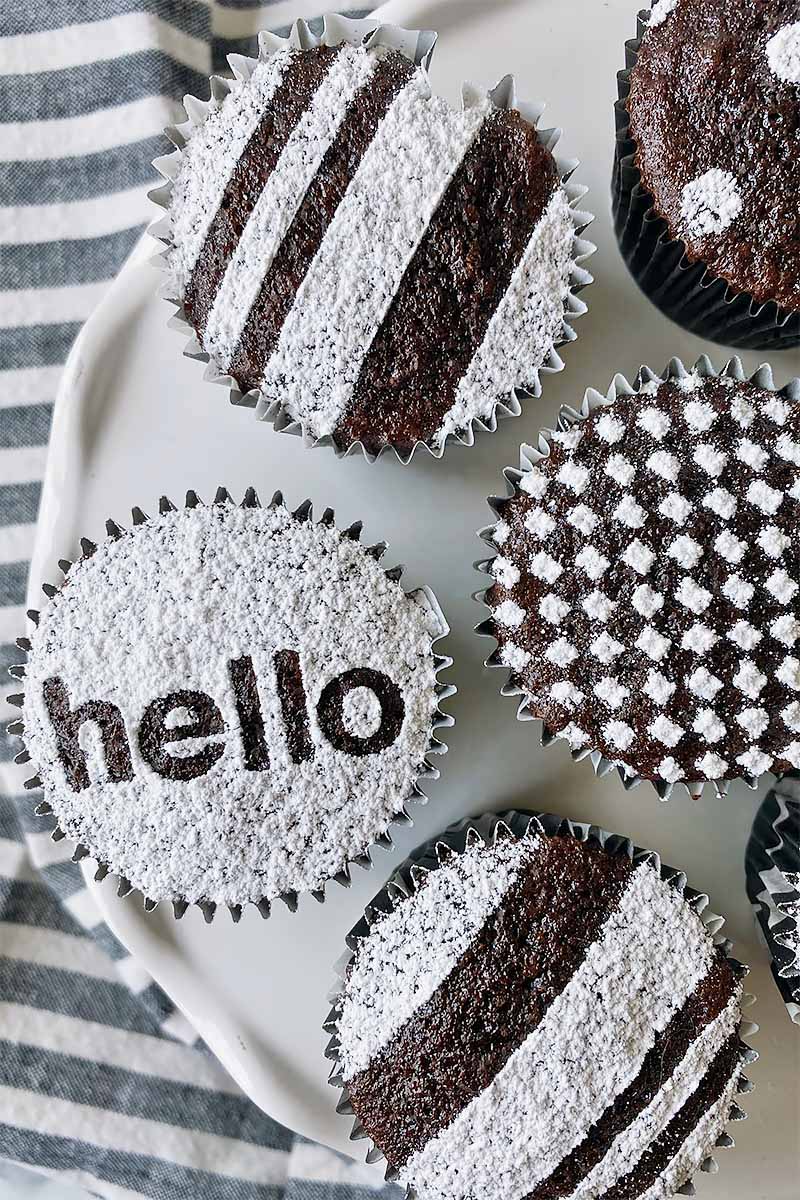
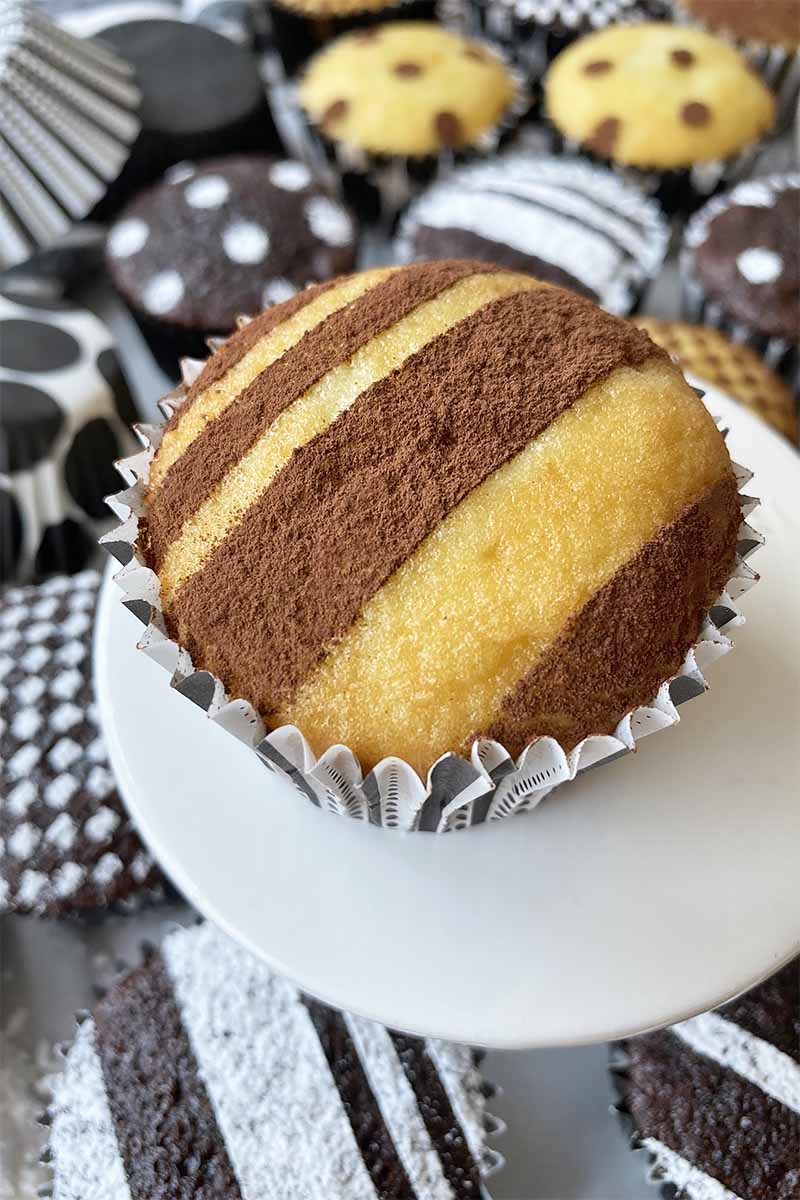
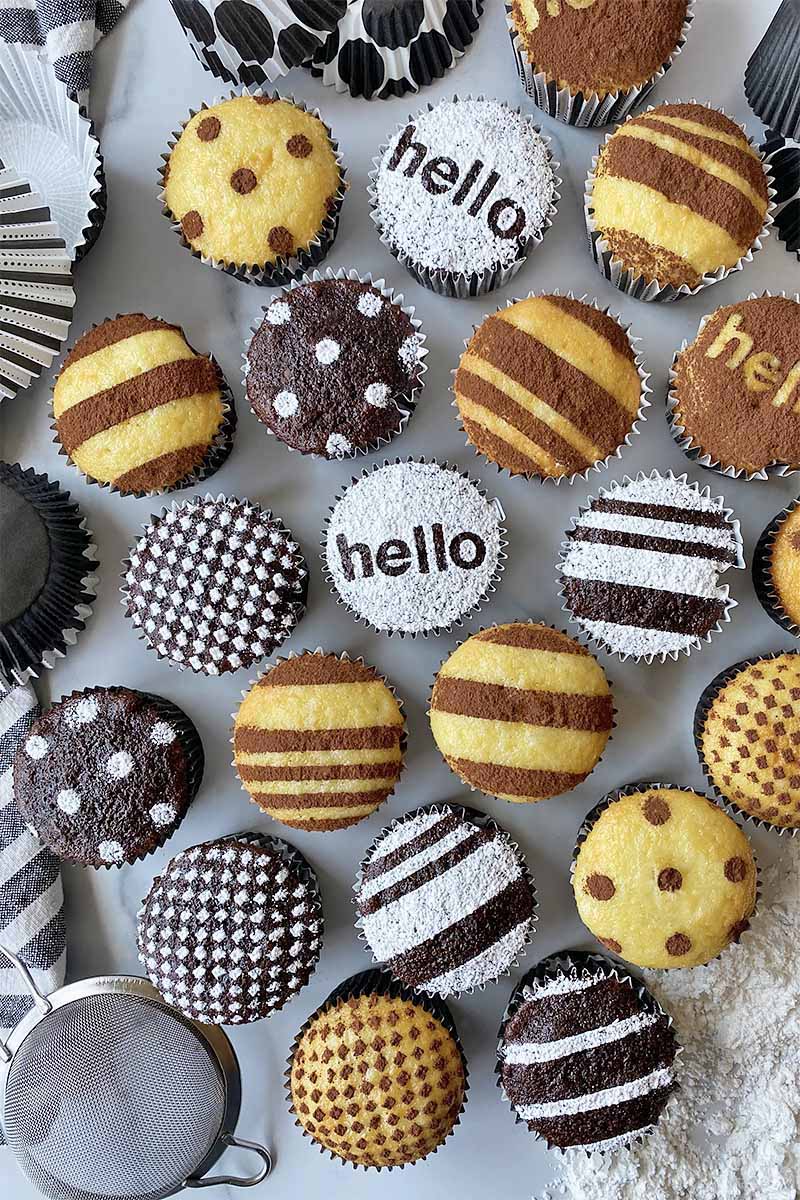
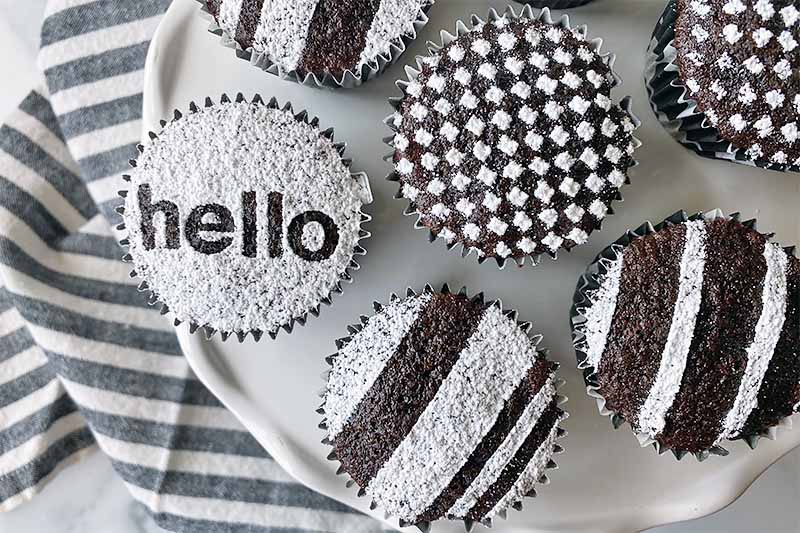
The technique is simple: dust confectioners’ sugar or cocoa powder with a fine mesh strainer over cupcakes, using a stencil in a shape of your choosing. After you remove the stencil, the pretty design is revealed on top of the cupcake.
That’s it! You’re done! Proudly gaze upon those effortlessly perfect results!
Even for the most hardcore of frosting lovers such as myself, you’ll become a big fan of this quick little cheat.
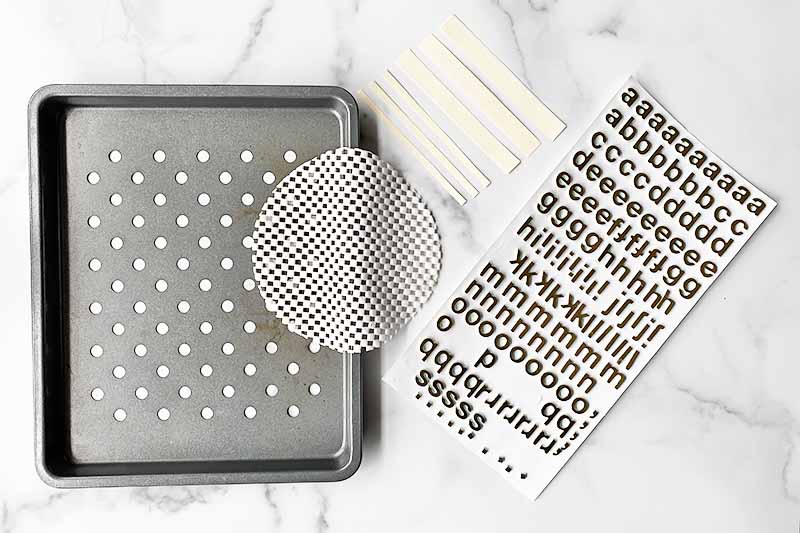
For the designs, you can buy pre-made stencils, lace, and thick stickers from your craft store. But if you can’t make it there (how’s it hanging, quarantine?), you have plenty of options available to you without any need for leaving your home.
You can easily find everyday items around your house that can also be used as makeshift stencils. With one little power-walk around my apartment, I found all of the objects I needed for decorating.
Here are some ideas for decorations using a few household kitchen items:
- Jar gripper pads – small checkerboard print
- Cooling rack – large checkerboard print
- Broiler pan with holes – polka dot print
And if you want to make custom designs, it’s as easy as cutting out small, fun shapes on thick construction paper. It’s super simple to make stripes in varying sizes like I did for a big, bold design.
Nope, you don’t need a butter-laden icing or any crazy cake decorating skills. And you certainly don’t need to worry about gathering a bunch of tiny cake decorating tools.
Grab a stencil, a strainer, some powdered sugar, and you’ll have a gorgeous dessert in minutes! Follow our step-by-step guide below to learn what you need to do.
Cooking by the Numbers…
Step 1 – Bake and Cool the Cupcakes
Bake a batch of your favorite cupcakes. Let them cool completely.
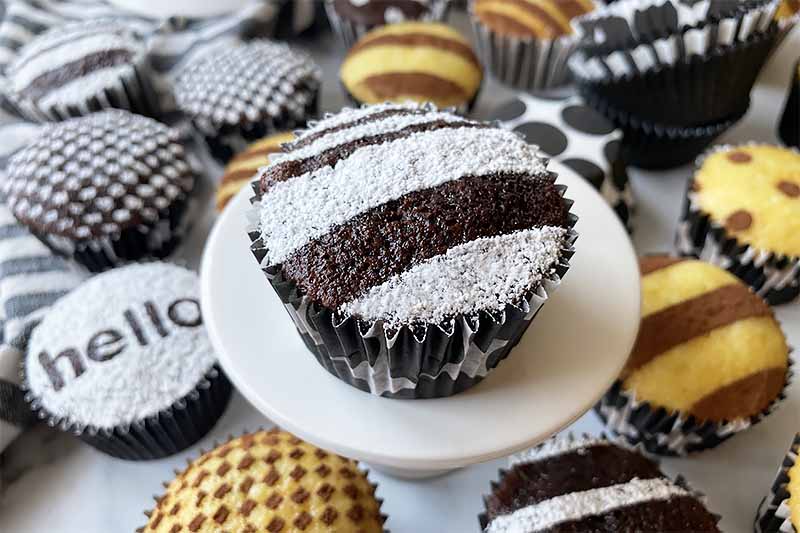
For the best visual contrast, you’ll need to decide what type of powdered ingredient you want to pair with what type of cake.
Use white and bright powdered sugar on darker-hued cakes:
Use dark cocoa powder on lighter-hued cakes:
Step 2 – Prep Tools and Ingredients
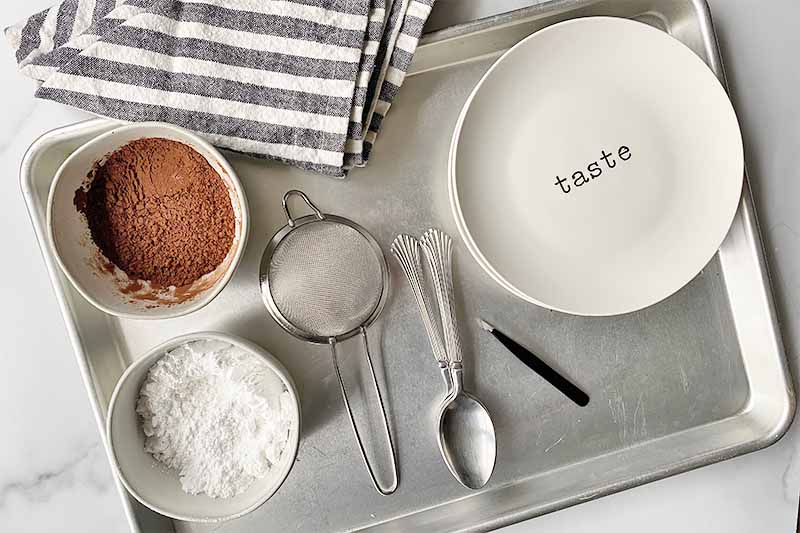
Gather the stencils you are going to use.
Set out a small, fine mesh strainer, a few metal spoons, a couple large plates, tweezers, a baking sheet, and a damp towel – because you’ll know you’ll make a mess.
Cue sad flashback of Nikki cleaning up powdered sugar that spilled (exploded, rather) all over the kitchen floor…
Measure about 1/2 cup each of powdered sugar and/or cocoa powder in separate bowls. About 1/2 cup of the dry ingredient will be enough to artfully adorn 12 cupcakes.
Step 3 – Place Stencil on Cupcake

Set a cupcake down on the baking sheet. I prefer to use use a baking sheet to dust the powdered sugar and cocoa powder. You’ll need plenty of extra room to catch any stray dust!
Gently place the stencil on top of the cupcake.
Step 4 – Dust with Powdered Sugar
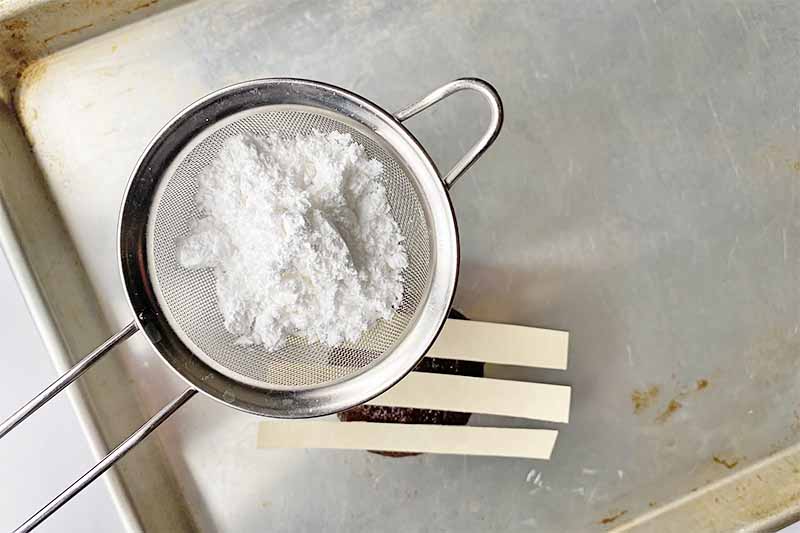
Gently spoon the confectioners’ sugar into the strainer, over a plate.

Tap the side of the strainer with the metal spoon over the stencil, until you get enough sugar on top of the cupcake to make your design visible.
Step 5 – Remove Stencil
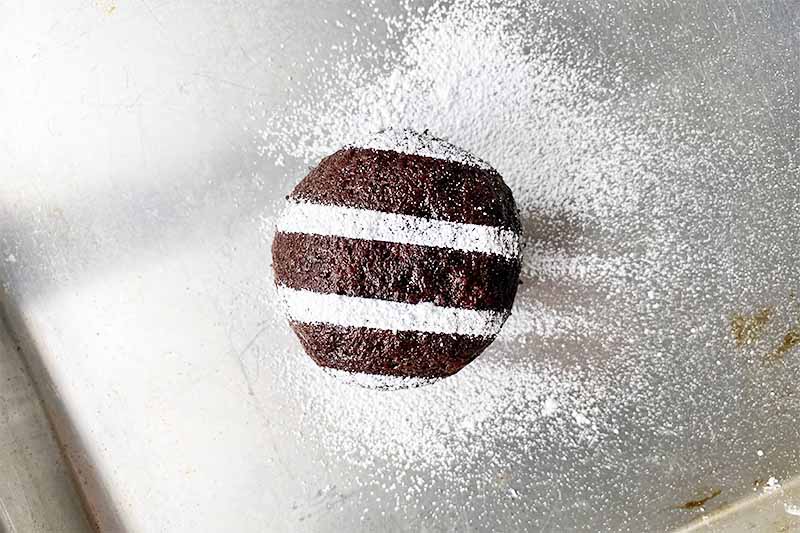
Carefully remove the stencil, without agitating the powdered sugar or cocoa powder on top. This is where the tweezers come in, if you need a little extra help with this step!
Set the finished cupcake to the side, out of the way of any powdered sugar clouds.
Repeat with the remaining cupcakes.
Step 6 – Serve
Serve the cupcakes immediately. If you are planning to serve them later, store them at room temperature in an airtight container. Don’t refrigerate them. The moisture in the refrigerator may cause the powdered sugar to dissolve.
Not Just for Cupcakes!
When you’ve dusted your last cupcake, you don’t have to stop there – you have a HUGE selection of desserts and baked goods that you can decorate using this technique.
Can you imagine stars of various sizes spread across a tray of chocolate brownies? Or how friends and family would gasp (in a good way, this time!) at the sight of a beautiful floral design on top of a whole cheesecake? Or how about a pretty lace pattern on top of honey lemon muffins?
I’m sure you’ll come up with your own cool ideas! And I’d love to know what they are – don’t forget to message me in the comment section below. I’m ready to exchange decorating ideas, tips, and tricks anytime you are!
Let’s start with some of these beautiful and brilliant ideas for decorating homemade desserts, if you’re looking for more ideas to try next:
Photos by Nikki Cervone, © Ask the Experts, LLC. ALL RIGHTS RESERVED. See our TOS for more details. Originally published on August 14, 2012. Last updated May 16, 2020.
Nutritional information derived from a database of known generic and branded foods and ingredients and was not compiled by a registered dietitian or submitted for lab testing. It should be viewed as an approximation.
About Nikki Cervone
Nikki Cervone is an ACS Certified Cheese Professional and cheesemonger living in Pittsburgh. Nikki holds an AAS in baking/pastry from Westmoreland County Community College, a BA in Communications from Duquesne University, and an MLA in Gastronomy from Boston University. When she's not nibbling on her favorite cheeses or testing a batch of cupcakes, Nikki enjoys a healthy dose of yoga, wine, hiking, singing in the shower, and chocolate. Lots of chocolate.