Take it from someone who touched her very first fresh artichoke just a few weeks ago: prepping one is not as terrifying as it seems.
It may look like a scary monster on the outside (are we even allowed to eat something that looks like this?!), but deep down inside, it has a soft – and very delicious – heart.
You’ll see what I mean.
Up until recently, I was content using the jarred or canned versions. It wasn’t until I finally summoned the courage to write this article that I cooked a fresh one for the first time.
Luckily, I had a team of experts by my side to help me remove those training wheels: chef friends who spent hours prepping hundreds of artichokes for banquet events, and an aunt who continues the tradition to this day of how my grandmother would often cook them for Dad’s side of the family.
With their advice and support, I gained enough confidence to walk into the grocery store with my head held high to buy them for the first time ever and make a tasty meal.
And I now get to inspire that fearlessness in you!
This tutorial explains how to prep a whole artichoke, one small step at a time. You’ll learn how to choose, store, prepare, and break it down. With detailed instructions and photos, you’ll be able to tackle these leafy fellas with zero fear.
Now is the time to show that artichoke who’s the boss of the kitchen!
Learn the Basic Anatomy
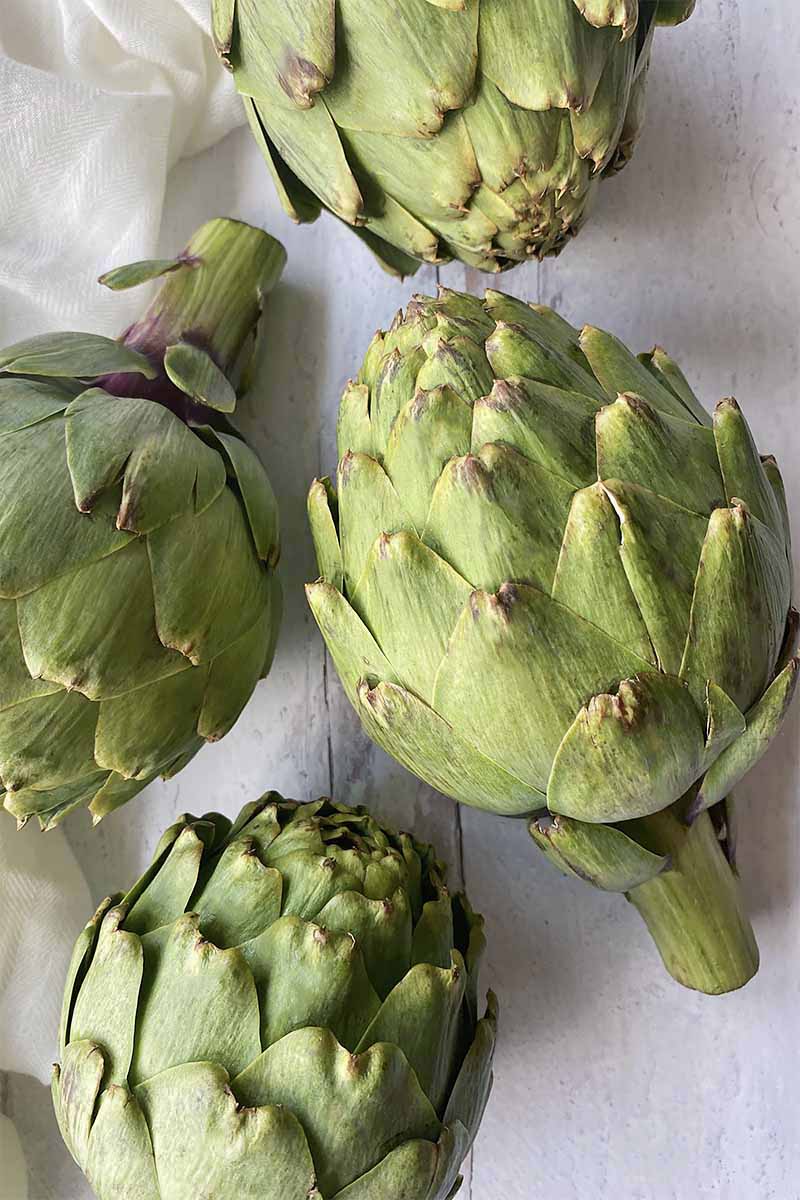
An artichoke is the large, bulbous flower bud of Cynara scolymus, a type of thistle plant native to the Mediterranean.
Starting from the outside, the plant has multiple layers of protective leaves, or bracts. The darker, harder outer leaves surround lighter, tender inner leaves. Though the majority of each leaf is inedible, there is a thin layer on the underside of each leaf base that can be scraped off with the teeth once cooked.
The center of the plant houses the choke, a cluster of inedible, hair-like strands. These are the flowerets. When they bloom, they form directly on top of the choke as thin, purple leaves.
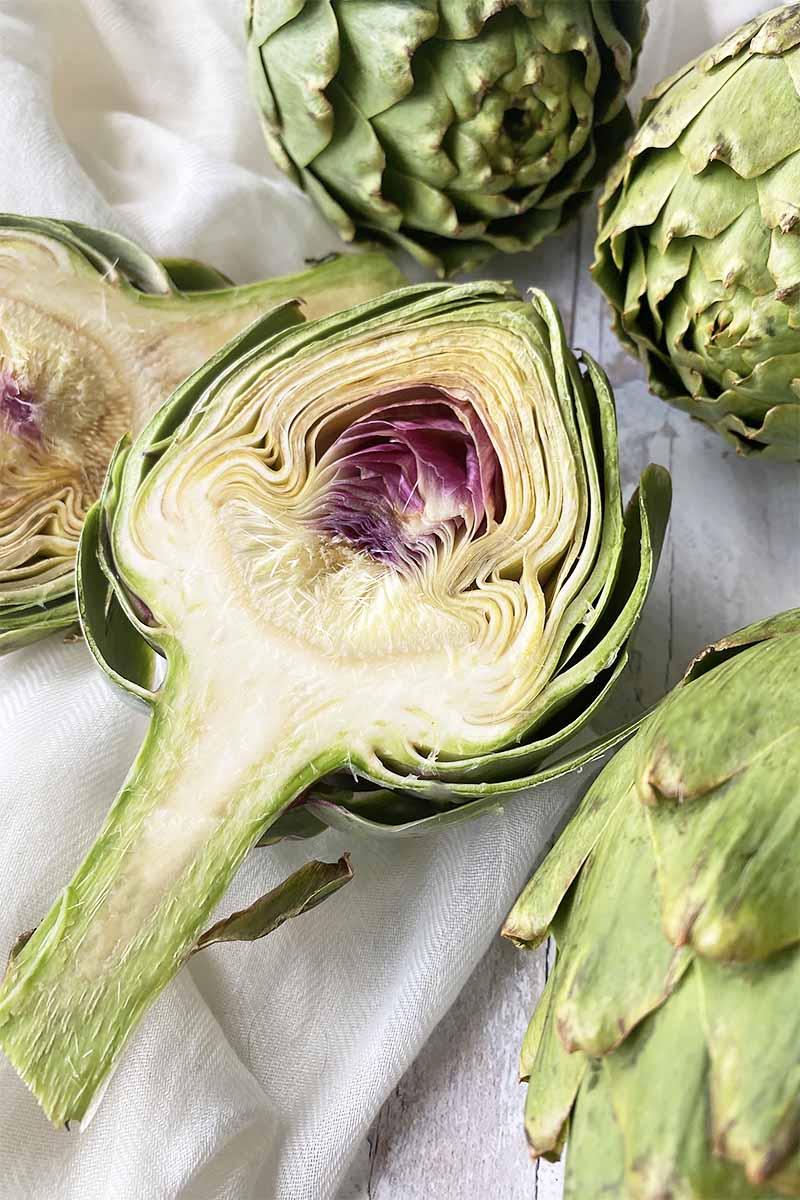
The choke acts as a prickly “hat” that sits on top of the heart, also referred to as the flower base. The heart connects to the stem. Both the heart and stem are edible.
But the heart… oh, my heart! The heart is the most tender, and the most prized, part to enjoy – so much so that family members would often fight over who gets to eat the heart once all the leaves were eaten.
Seriously, I’ve heard stories.
While You’re Shopping
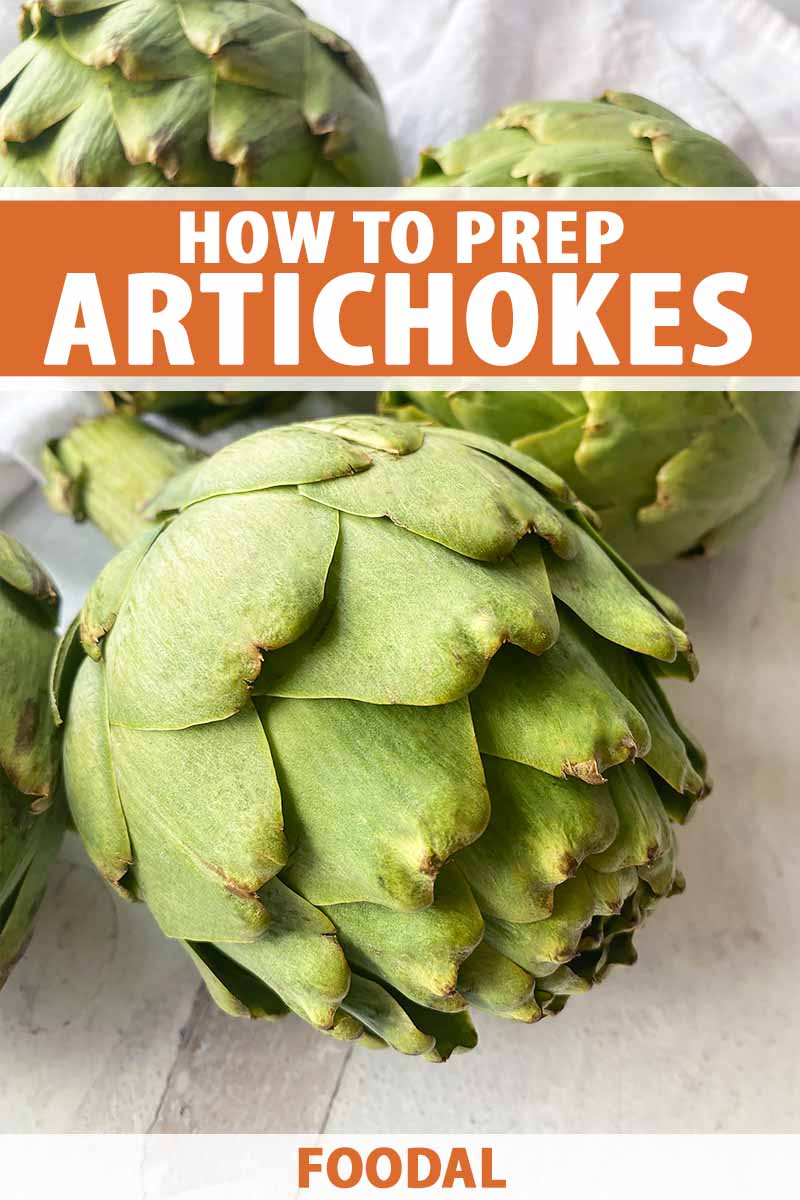
When you’re at the grocery store or market, choose one with leaves that have a healthy green color. It’s completely fine if the exterior layer of leaves and tips have some brown discoloration, and you can ignore any superficial cuts or scrapes.
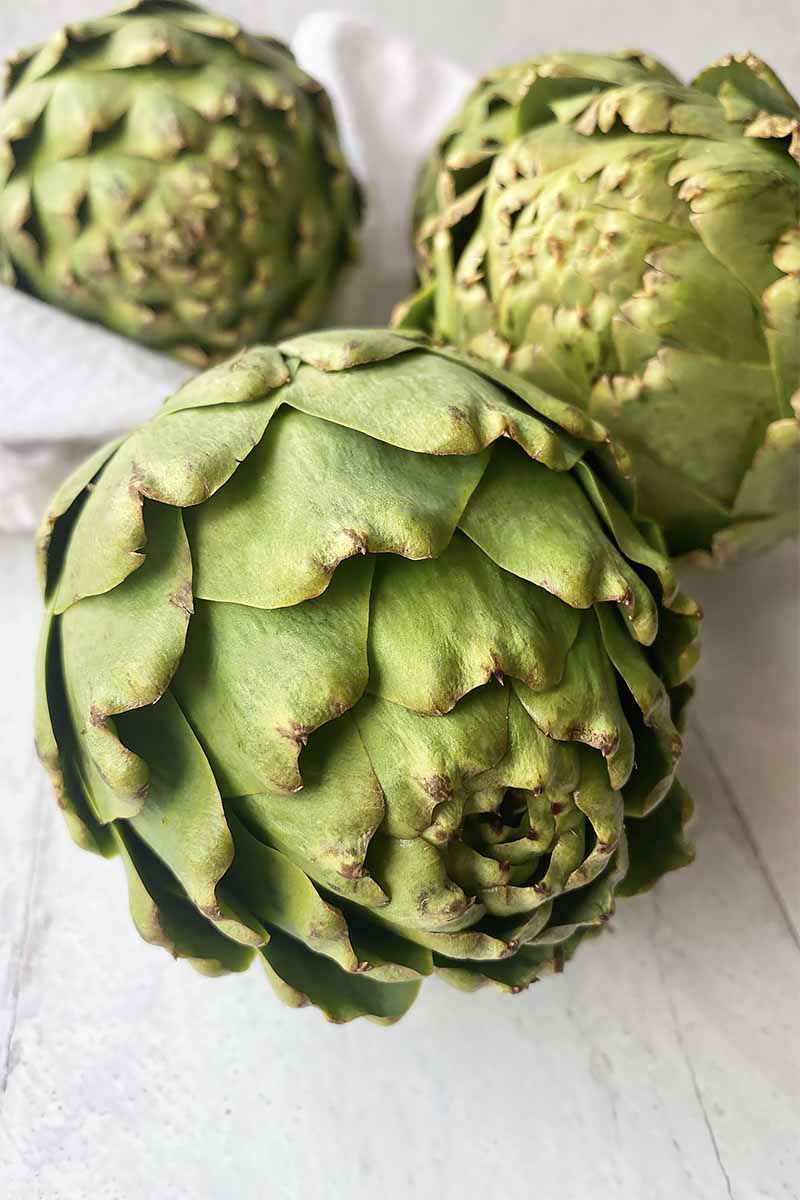
The outer leaves should not look too withered or dried out – that is a sign that the plant has been devoid of moisture and improperly stored for a questionably long period of time.
When you touch one, it should be very firm, with no soft, mushy, or moldy sections. The outer leaves should feel hard and plump.
Storing at Home
Refrigeration is best as soon as you arrive back at home. Store them in the vegetable drawer of your refrigerator.
Because the plant will continue to lose moisture and will continue to brown and wither the longer it remains in your refrigerator, it is best to cook within 3-5 day after purchasing.
How to Prep
Take a deep breath in and out – you’re ready to start cutting! We’ll help you every step of the way. And, look! We have pictures!

See? This won’t be bad at all.
Step 1 – Clean and Gather Tools
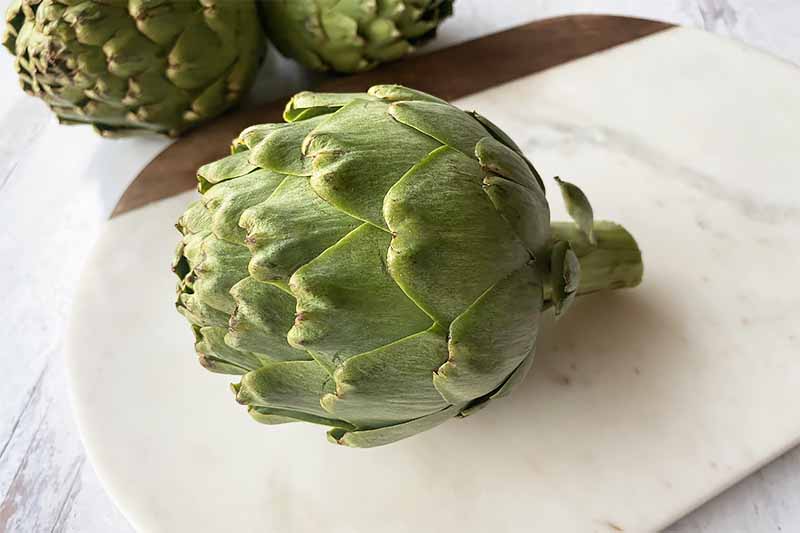
Wash the artichokes with cold, clean water. Shake off any excess water, and dry completely with a towel.
Gather a sharp chef’s knife, a sturdy cutting board, kitchen shears, a vegetable peeler, a large bowl (for any discards), and a halved fresh lemon.
Step 2 – Cut Tips Off Each Leaf
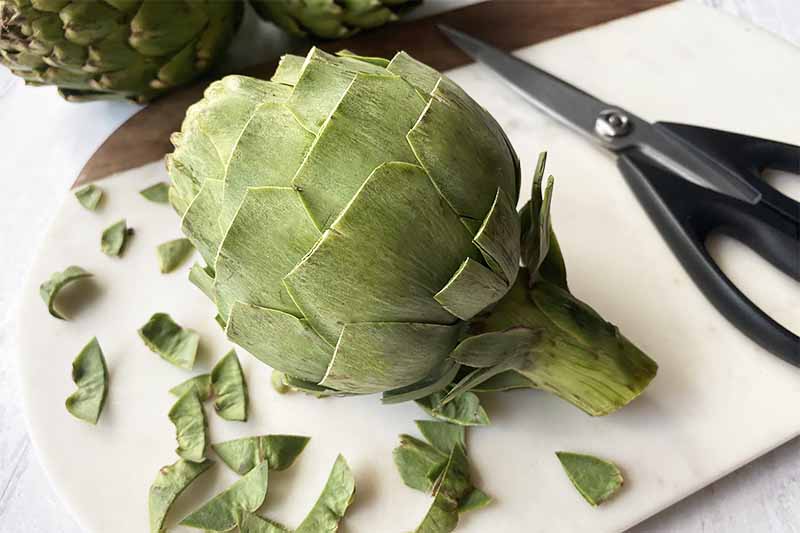
Using kitchen shears, cut the tips off all the outer leaves. You don’t need to cut the leaves on the top two inches of the whole artichoke, where all the leaves begin to taper together. You’ll be cutting those portions off in a later step.
Step 3 – Cut and Peel Stem
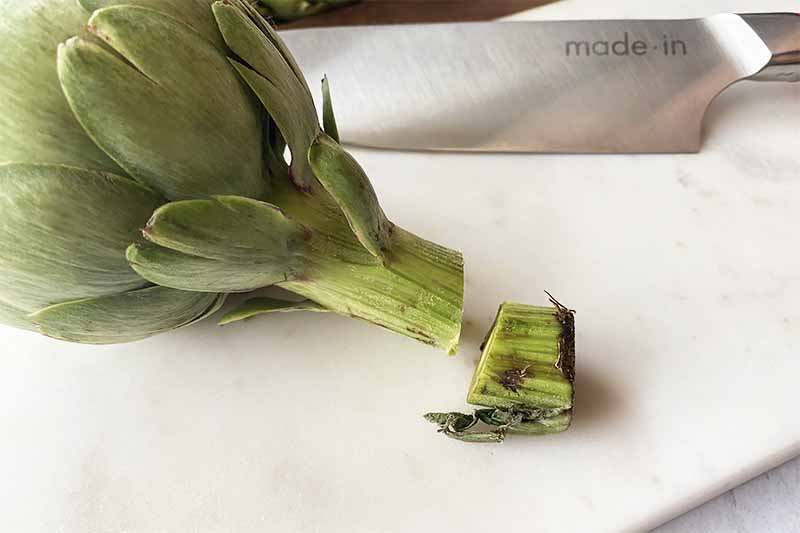
If you are keeping the stem intact, cut off about 1/2 inch at the bottom of the stem to remove the dried end. Remove any small leaves on the base and any leaves on the stem.
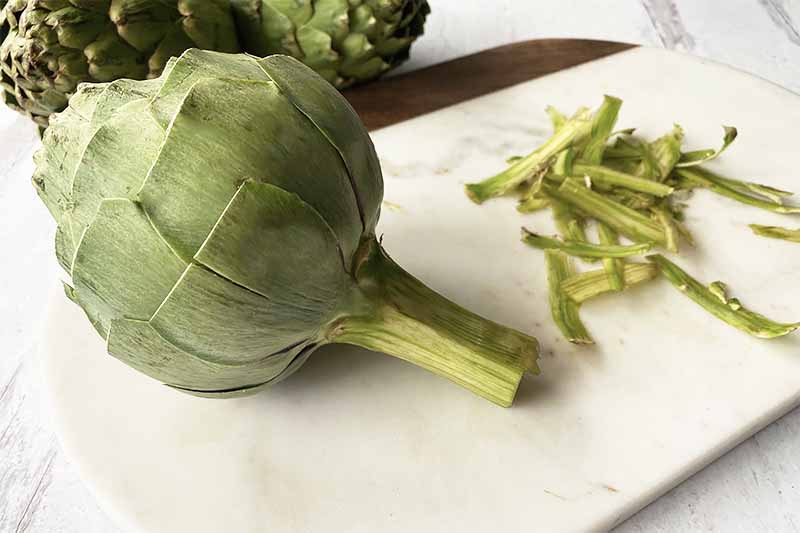
Peel off the outer fibrous layer of the stem with a vegetable peeler.
If removing the entire stem, cut off the whole thing in line with the base of the artichoke to create a flat surface. It should be able to stand up on its own without toppling over.
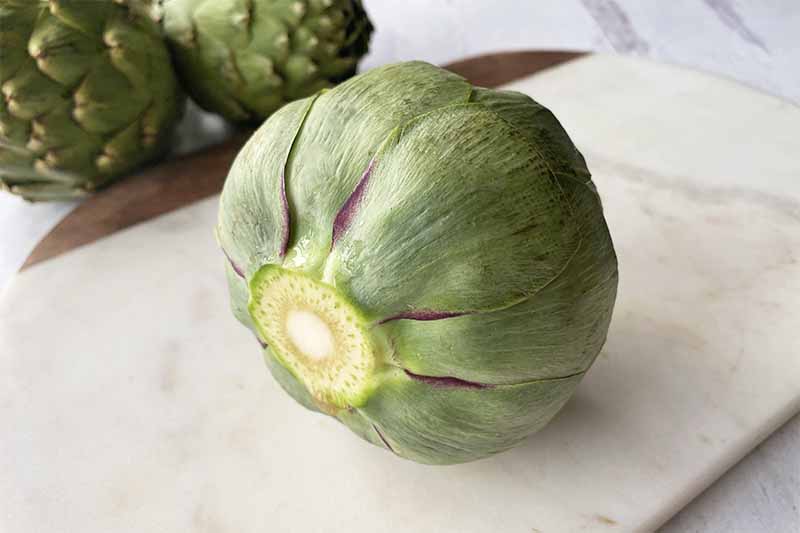
Rub the cut lemon on the exposed stem to prevent browning.
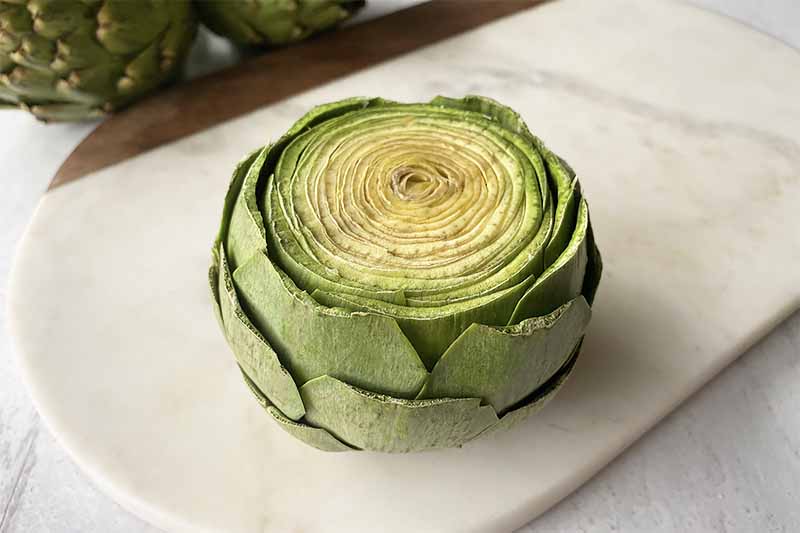
Step 4 – Cut Entire Tip
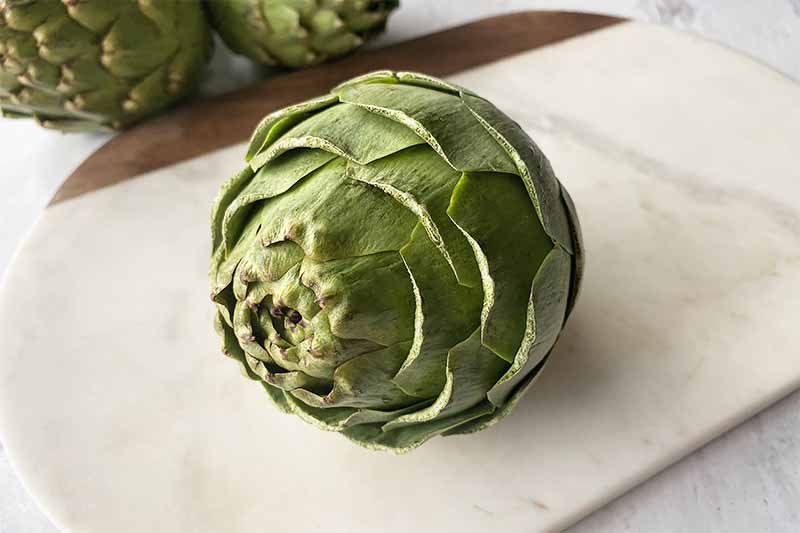
With your chef’s knife, cut the tip off of the entire artichoke. You’ll want to cut about 1 1/2 to 2 inches down from the tip.
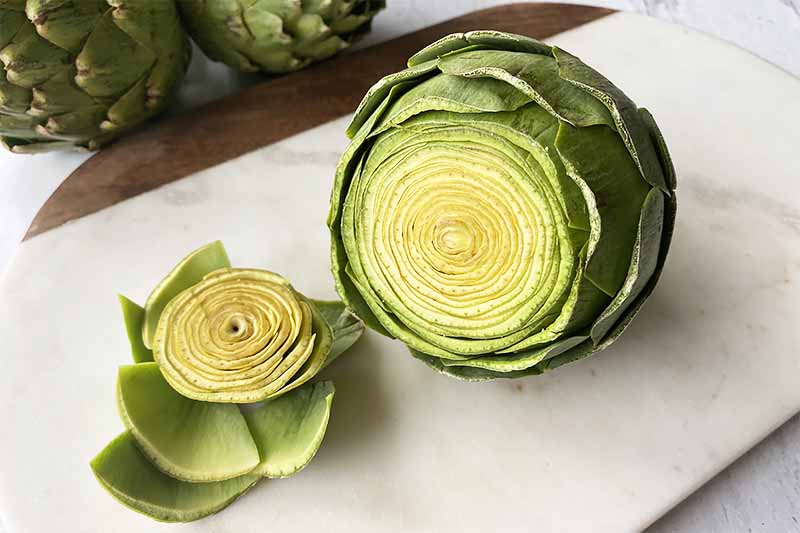
Rub the cut lemon on the exposed top to prevent browning.
That’s it! These four steps outline the basic prep of a whole artichoke. For basic cooking ideas, and our best techniques for removing the inedible flowerets, keep reading!
How to Remove the Choke
After the basic prep is complete, you now need to consider the way in which you’ll remove the inedible flowerets. This decision is dependent on how you’re planning to cook it.
We’ll review two basic cooking techniques, and how to remove the choke based on those two methods.
Cooking Style #1 – Steamed or Boiled Whole Artichokes
Boiling or steaming whole prepped artichokes is an easy and popular cooking method.
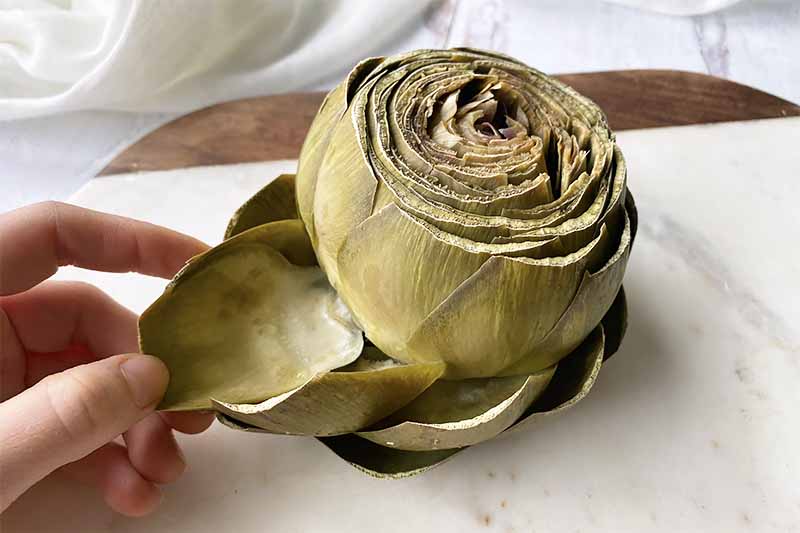
After boiling or steaming until tender (a fork should easily pierce through the first few layers of leaves), serve whole with a flavorful dipping sauce like aioli, melted butter, or an herby pesto.
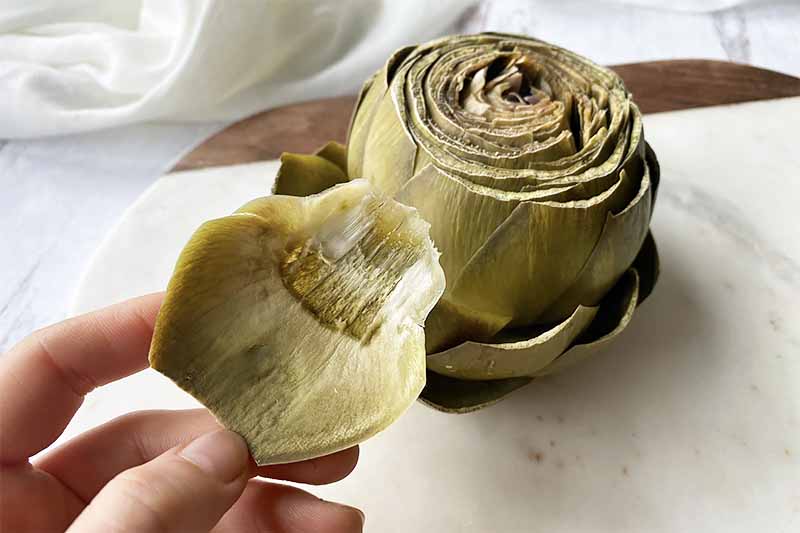
To eat, tear off each individual leaf, and scrape off the tender edible base on the interior of the leaf with your teeth. Discard the leaf when you’re done.
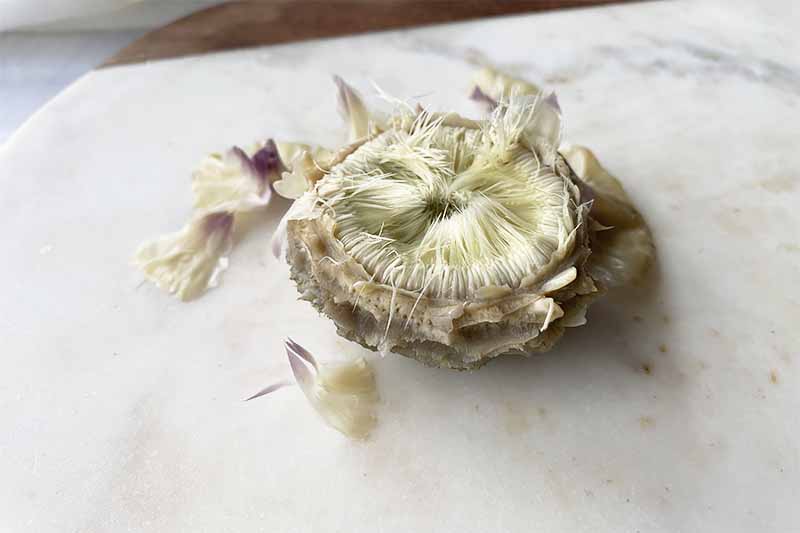
Once you peel off all the layers of leaves, the choke and heart remain.
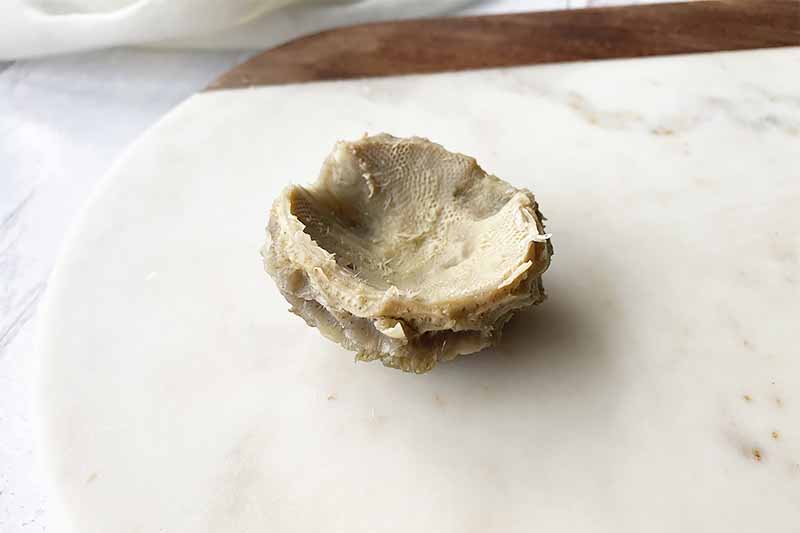
With your fingers or a spoon, tear off and discard any purple leaves and the hair-like strands, leaving the tender heart underneath.
Fight with a family member over who gets to eat it, win, and savor your work. You’ve earned it!
Cooking Style #2 – Stuffed Artichokes
Stuffing the hollow interior of an artichoke with a tasty filling like seasoned breadcrumbs, cheese, rice, or sausage is a heartier alternative to a simple steamed recipe.
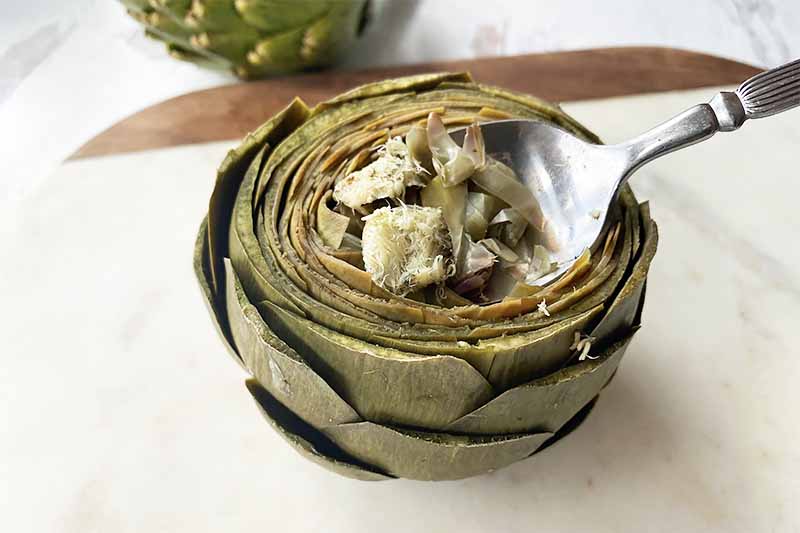
To prepare, steam or boil the artichoke until it’s tender. It is much easier to remove the interior after steaming, rather than trying to remove it when the artichoke is raw. Steaming or boiling helps to soften and open the leaves, which allows for easier accessibility to reach the center.
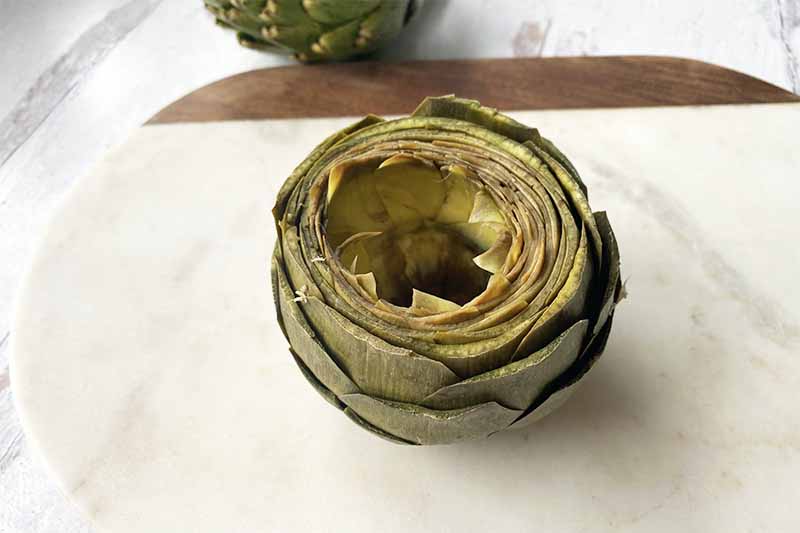
Once cooked and cooled slightly, use your hands to gently pull the leaves open. With a spoon, remove the center leaves. Gently dig the spoon towards the center to scoop out the individual flowerets, being sure not to scrape out any of the heart’s meat inside.
Stuff to the top with your filling, and roast or bake according to your recipe.
Is All the Work Worth It?
To be honest with you, prepping artichokes is a lot of work for such little gain. You need a small army of tools, extra time on your hands, and acceptance that the majority of this huge plant will be discarded.
In the end, though, I’d say it’s worth it.

A whole artichoke is the quintessential fun finger food, the perfect shared appetizer for a casual gathering or at a fun holiday party. Serve it to enjoy with friends and family – with a creamy aioli on the side, a bottle of wine, and plenty of energetic conversation.
Pretty soon, you’ll have new memories of your own guests getting a little messy, and laughing and bickering over who gets to eat the heart!
Have you ever prepared a whole artichoke? What other tips can you provide? Chat with me in the comment section below.
Now that you’ve learned how to prep them, it’s time to get cooking. Take a look at some of our favorite recipes that feature your favorite new edible thistle:
- Artichokes Stuffed with Italian Sausage
- Balsamic Grilled Baby Artichokes
- Slow-Cooked Artichokes with Wine and Garlic
- Cheesy Quiche with Leeks, Artichokes, and Red Pepper
Photos by Nikki Cervone, © Ask the Experts, LLC. ALL RIGHTS RESERVED. See our TOS for more details.
About Nikki Cervone
Nikki Cervone is an ACS Certified Cheese Professional and cheesemonger living in Pittsburgh. Nikki holds an AAS in baking/pastry from Westmoreland County Community College, a BA in Communications from Duquesne University, and an MLA in Gastronomy from Boston University. When she's not nibbling on her favorite cheeses or testing a batch of cupcakes, Nikki enjoys a healthy dose of yoga, wine, hiking, singing in the shower, and chocolate. Lots of chocolate.