As a kid, I thought I was well-versed in most breakfast food items an all-American, freckle-faced tyke could ever dream of scarfing down.
I thought I knew and conquered it all!
I was quite the proud aficionado of the typical morning specials: pancakes, waffles, muffins, cereal, oatmeal, bagels, English muffins, doughnuts, French toast…
Until a sleepover in 4th grade made me realize I only grazed the surface of culinary possibilities. It was the first time I ever had homemade crepes.

I stayed the night at a friend’s house, gabbing all night long while singing along to Veggie Tales and playing ping pong in the basement.
Though I’m sure we kept her parents awake all night long with our loud ribaldry – we assumed we did our best to be as quiet as possible – my friend’s father was still energetically enthused to make us a homemade breakfast the next morning.
He made what looked like pancakes… but they were so thin! Delicate and soft, but just elastic and strong enough that they could still be rolled, folded, and picked up by hand.

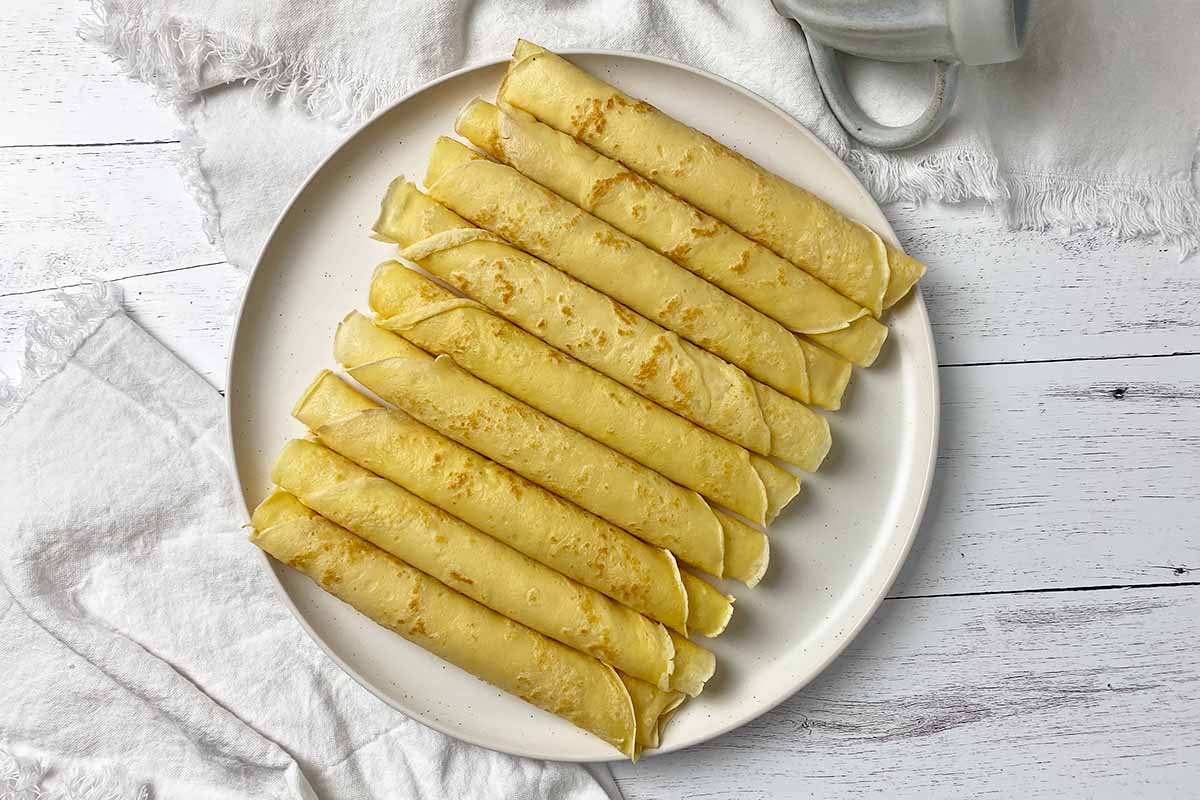
He rolled each one with a strawberry jam filling, and lightly drizzled the tops with maple syrup before handing us the plates.
And in that moment, a brand-new breakfast – at least to me – was unlocked!
As my friend’s dad knew so well, crepes are an easy treat to make completely from scratch, and can be made to feed a hungry family, and friends sleeping over!

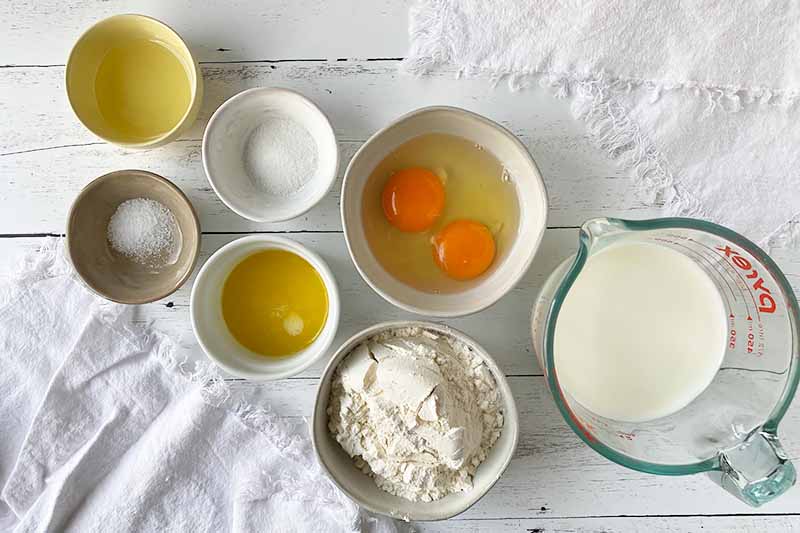
In its most simple format, the loose batter is a mix of flour, eggs, milk, salt, and granulated sugar.
With no leavening agents, they won’t rise big and fluffy like pancakes. Instead, they quickly cook for just a minute or two per side in a lightly greased skillet, yielding a thin and pliable base.
Because it’s soft, flexible, and mild, there are – no exaggeration here – infinite ways to enjoy them for breakfast, lunch, dinner, or dessert.

Rolled or folded, filled or topped, sweet or savory, you can try anything here!
Stay sweet and simple with jams, jellies, preserves, and other spreads like chocolate pudding, or pursue bigger and bolder flavors with savory ingredients like meats, veggies, and cheeses.
We share our favorite variations you can play with and customize to liven up your dish, like filling each one with savory spinach and cheese, or pouring over a bright and fruity strawberry sauce.
But before deciding on all the fun fillings, you need to first learn how to make the crepe itself, an easy recipe to perfect. We’ll teach you all the basics, from the best way to mix the ingredients to storage tips.

And we’ll break down each step in our Cooking by the Numbers section, so don’t miss out on our helpful tricks.
Expand your breakfast repertoire, and spoil your family, friends, and friends of friends with a new recipe!
Print
Basic Crepes
- Total Time: 1 hour
- Yield: About 12 10-inch crepes 1x
Description
Thin, soft, and pliable, learn how to make our recipe for basic crepes. Rolled or folded, filled or topped, easily customize them.
Ingredients
- 1 cup all-purpose flour
- 1 teaspoon granulated sugar
- 1/2 teaspoon salt
- 2 tablespoons unsalted butter, melted and cooled
- 2 large eggs
- 1 1/2 cups whole milk, plus more as needed
- 1 tablespoon vegetable oil, for greasing
Instructions
- Whisk together the flour, sugar, and salt in a medium-size bowl. Set aside.
- In a separate medium-size bowl, whisk together the melted butter, eggs, and milk.
- Gradually add the dry ingredients to the wet ingredients while whisking constantly, until a smooth and thin batter forms. There should be no lumps.
- Cover the bowl with plastic wrap and let sit in the refrigerator for 30 minutes to 1 hour.
- When ready to cook, dip a paper towel in the vegetable oil and thinly coat the bottom and sides of a 10-inch nonstick skillet. Heat the skillet over low heat.
- Briefly re-whisk the batter and pour a little less than 1/4 cup into the middle of the pan. Immediately tilt the pan and quickly swirl the batter to evenly coat the entire bottom of the pan with a thin layer.
- Cook without moving the pan, until the edges are dry and starting to turn golden brown, 1-2 minutes.
- Loosen the edges of the crepe from the sides of the pan with a rubber spatula. Gently slide the spatula underneath the edge of the crepe, grasp the edge with your fingertips, and flip. Cook for an additional 1 minute.
- Remove the crepe from the skillet and place on a half-size baking sheet lined with parchment paper. Determine if you would like to add more milk for a thinner crepe, and whisk in more milk one tablespoon at a time to achieve your desired consistency.
- If necessary, very lightly re-grease the skillet with more oil using a paper towel. Repeat the process to make the remaining crepes, shingling each crepe slightly on top of the other on the baking sheet.
- Fill the crepes with your preferred spreads and ingredients. Roll or fold in quarters and serve while warm.
- Prep Time: 10 minutes
- Cook Time: 30 minutes
- Category: Crepe
- Method: Stovetop
- Cuisine: Breakfast
Cooking by the Numbers…
Step 1 – Prep
Place two tablespoons butter in a small, heatproof bowl. Microwave the butter until just melted. Allow to cool as you prepare the remaining ingredients.
If you mix hot butter into the cold milk and eggs, the fat will solidify into tiny chunks and won’t incorporate thoroughly into the batter.
Measure out the flour, sugar, salt, whole milk, and vegetable oil. Crack the eggs in a small bowl, finding and disposing of any shell fragments.
Set out a 10-inch nonstick skillet, two mixing bowls, a half-size baking sheet, a whisk, a rubber spatula, and paper towels.
Step 2 – Make the Batter
In one mixing bowl, whisk together the melted – and cooled! – butter, milk, and eggs. Make sure you’ve fully blended the ingredients together. It will turn a creamy light yellow.
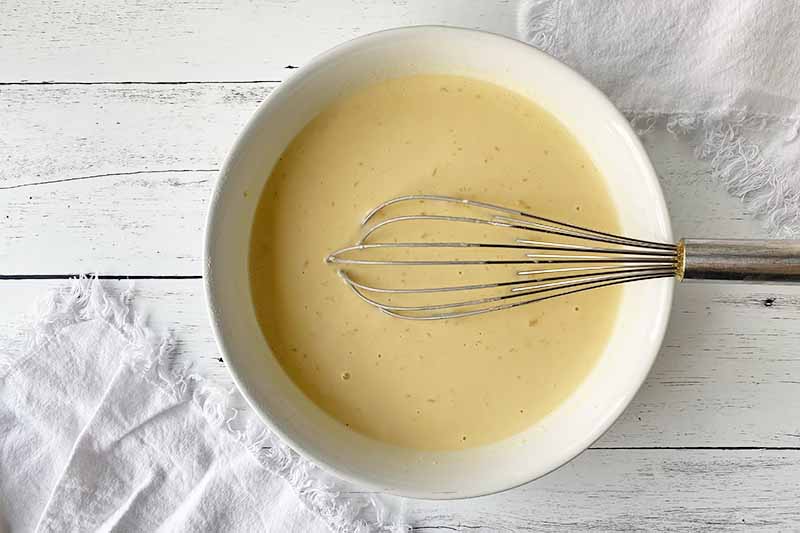
Whisk the flour, granulated sugar, and salt together in the other mixing bowl.
Gradually add the dry ingredients into the wet ingredients while whisking constantly until a smooth and thin batter forms, without any lumps. It will be fairly thin.
If your mix looks a little too lumpy, there is the option to blend your batter in a blender for 10 to 15 seconds to yield a smoother result. You can also do this initially as you’re mixing together the ingredients, if you’d rather not burn the energy of whisking power.
Cover the bowl with plastic wrap and let it rest in the refrigerator for 30 minutes to 1 hour.
This step is essential to allow the flour to absorb the liquid in order to strengthen the gluten structure. It helps create pliability, while still maintaining a soft and luscious texture.
Step 3 – Prepare the Skillet
When you’re ready to cook, dip a piece of paper towel in the vegetable oil. Thinly coat the bottom and sides of a 10-inch nonstick skillet. You don’t want a pool of oil, just a very thin coating. Heat the skillet over low heat.

You can test the heat of the skillet by placing a teaspoon of the batter in the center, and allowing it to cook for 60 seconds. If the batter is a light golden brown on the bottom, the skillet is ready to use.
Step 4 – Cook
Pour a little less than 1/4 cup batter into the middle of the pan. Working quickly, immediately tilt the pan and quickly swirl the batter to evenly coat the entire bottom of the pan with a thin layer.
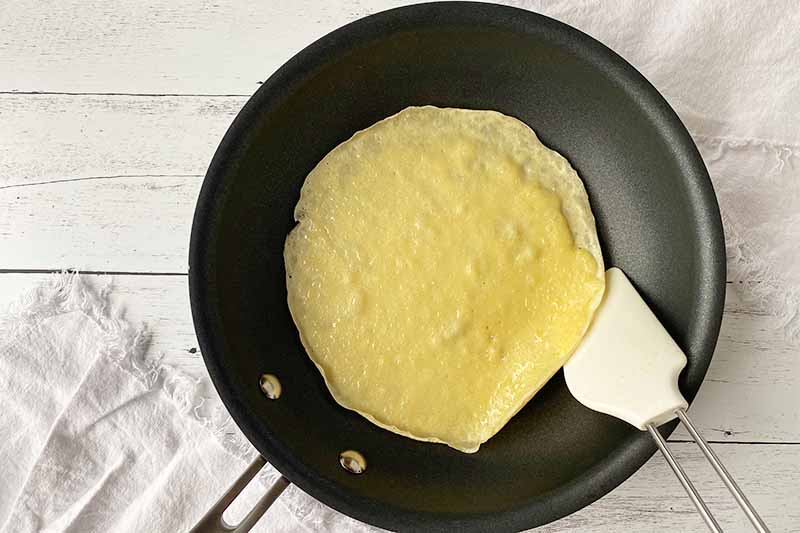
If there are any holes after you have swirled the pan, quickly drip some batter from a spoon to fill in any holes.
Cook without moving the pan or disturbing the batter, until the edges of the batter are dry and just starting to turn golden brown, about 1 to 2 minutes.
Loosen the edges of the crepe from the sides of the pan with a rubber spatula. Gently slide the spatula underneath one edge of the crepe, grasp the edge with your fingertips, and flip.
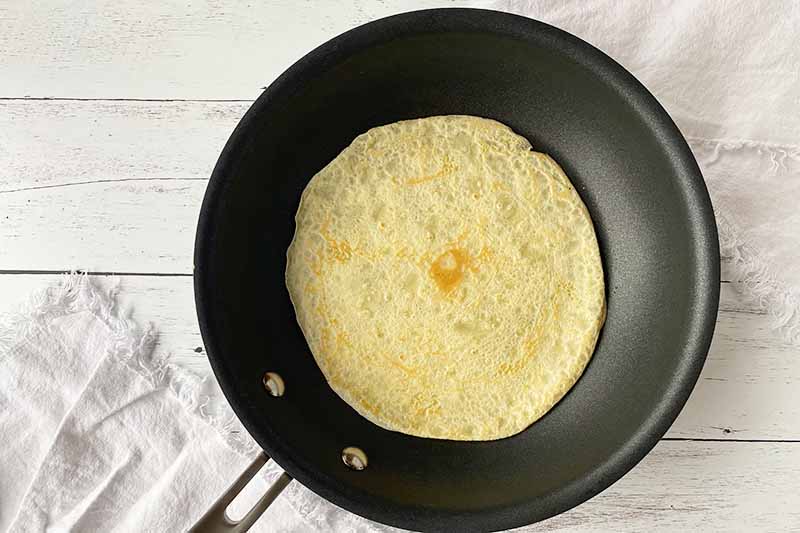
Let the other side cook for an additional minute – the edges will continue to dry, but shouldn’t develop too much additional color.
Much like making pancakes, your first crepe is usually the tester. Determine whether or not you need to adjust the heat setting, or if you should thicken or thin out the batter.
Remove from the pan and transfer onto the baking sheet.
There still may be enough residual vegetable oil in the skillet, so check before you re-grease. If there is not enough oil, lightly coat the skillet again with a paper towel. Repeat the cooking process for the remaining batter. The recipe will yield around 12 crepes.
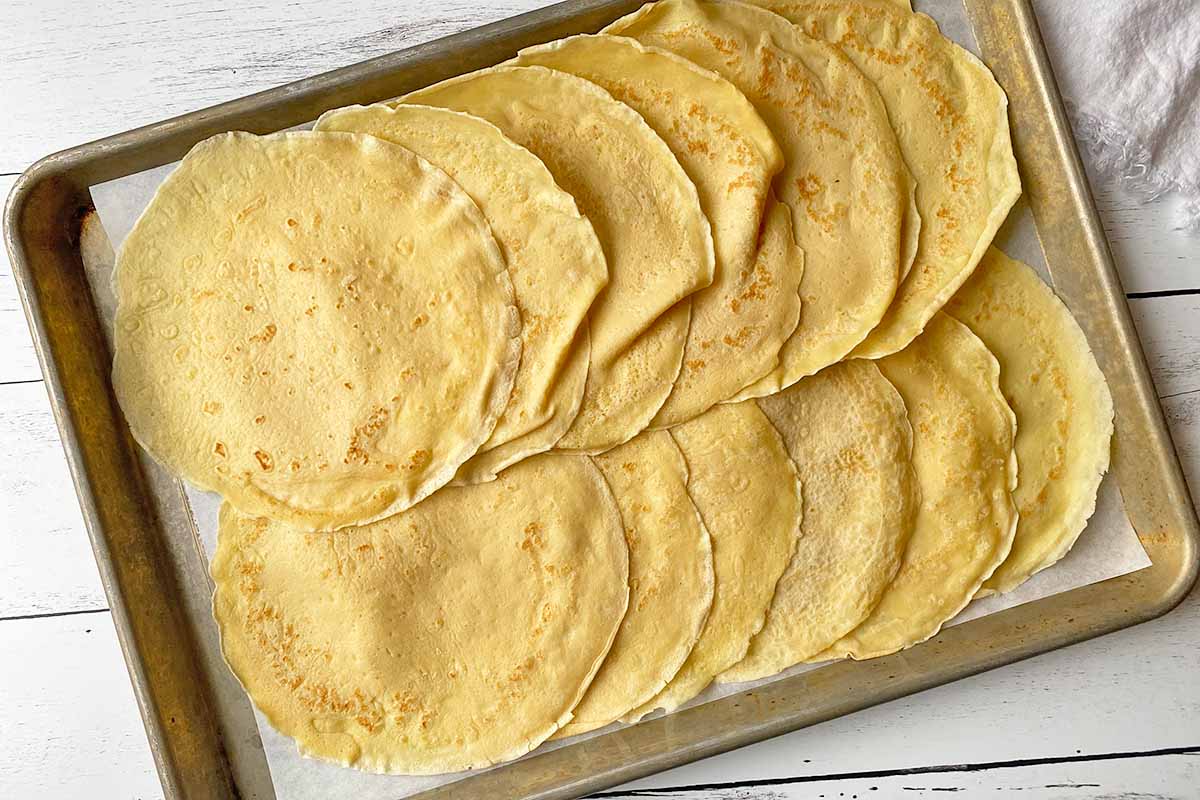
Slightly shingle each crepe on top of one another on the baking sheet. They will not stick to each other.
Step 5 – Fill, Serve, and store
At this point, you may fill the crepes with your desired spreads or other ingredients. You can then fold each individual unit in quarters, or roll it.
For an extra crispy exterior, you can also choose to build your layers while the crepe continues to cook on its second side in the skillet – this is the technique we use in our recipe for ham and cheese crepes.
But a filling is totally optional! You can fold or roll them without any filling, and top them with your desired garnishes.
Once cooled completely, any unused and unfilled crepes can be stored flat and shingled in an airtight container.
They will not stick together, but if you are nervous, you can layer sheets of wax paper between each crepe. Refrigerate them for up to two days.
When ready to serve, reheat them in a nonstick skillet over low heat, gently warming them for one to two minutes on each side.
Thick or Thin, Soft or Crisp, Know How to Customize
It’s easy to adjust the recipe to yield your personalized version of the perfect crepe.
If you prefer a thinner foundation, whisk in one additional tablespoon of milk to the batter at a time until you reach your preferred consistency.
And for crispy, browned edges, cook the crepes for an additional minute or two per side.
If you love something thicker and chewier, you can either reduce the amount of milk in the recipe, or simply add more batter to the pan.

And for a softer end result, be sure to reduce the amount of time it cooks in the pan, flipping and removing them before they get too browned around the edges.
How do you prefer your crepes? Thick or thin? Soft or crisp? Filled or topped with garnishes? There are so many ways to customize, and we’d love to know your own spin – leave a comment below!
Make your dreams come true by waking up every morning to a bountiful breakfast. Here are even more tasty recipes to enjoy when as the sun is rising:
Photos by Nikki Cervone, © Ask the Experts, LLC. ALL RIGHTS RESERVED. See our TOS for more details. Originally published September 1, 2015 by Jennifer Swartvagher. Last updated January 9, 2024.
About Nikki Cervone
Nikki Cervone is an ACS Certified Cheese Professional and cheesemonger living in Pittsburgh. Nikki holds an AAS in baking/pastry from Westmoreland County Community College, a BA in Communications from Duquesne University, and an MLA in Gastronomy from Boston University. When she's not nibbling on her favorite cheeses or testing a batch of cupcakes, Nikki enjoys a healthy dose of yoga, wine, hiking, singing in the shower, and chocolate. Lots of chocolate.