
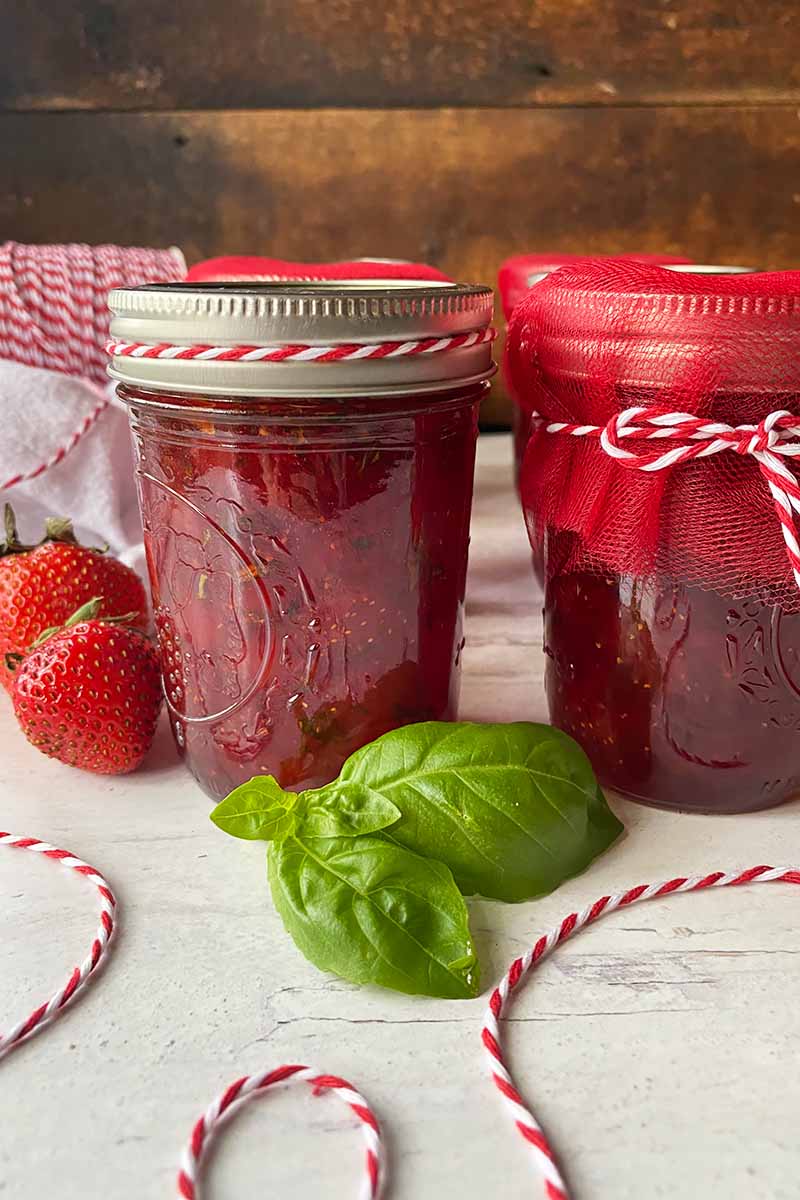
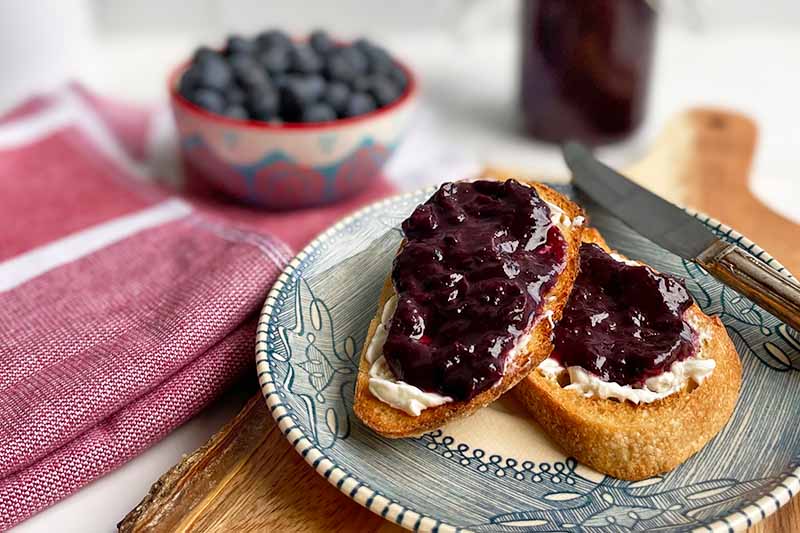
Strawberry jam is a simple delight. And by making it from scratch when the season is right, and adding some fresh basil, your favorite spread becomes a summer sensation you don’t want to miss!

Beautifully floral basil has kept a strong position in popular savory dishes: whizzed into pestos, layered in caprese salads, and topped on pizzas.
I consider myself lucky, as I have a pretty legit connection for my year-round pesto supply.
As one of the proud recipients of the Cervone parents’ fresh stash of homegrown herbs, fruits, and veggies from their enviably thriving garden, I get so excited every year when I receive my allotted amounts of frozen Tupperware containers filled with fresh basil pesto.
Speaking of which, if you want to grow your own basil, visit our sister site, Gardener’s Path, for detailed instructions. You can learn how to grow your own strawberries there too!
While I love this savory spread, my unfettered pastry cook spirit likes to explore how this herb can play in the same arena as sweet condiments. And I have found that basil can be besties on the playground with both salt and sugar!
What’s stopping any of us from combining strawberries and basil, two quintessential summer foods, into one sweet and fruity condiment?
NOTHING! Strawberry basil jam for EVERYONE!
So, what will you experience with each taste?
Pure happiness.
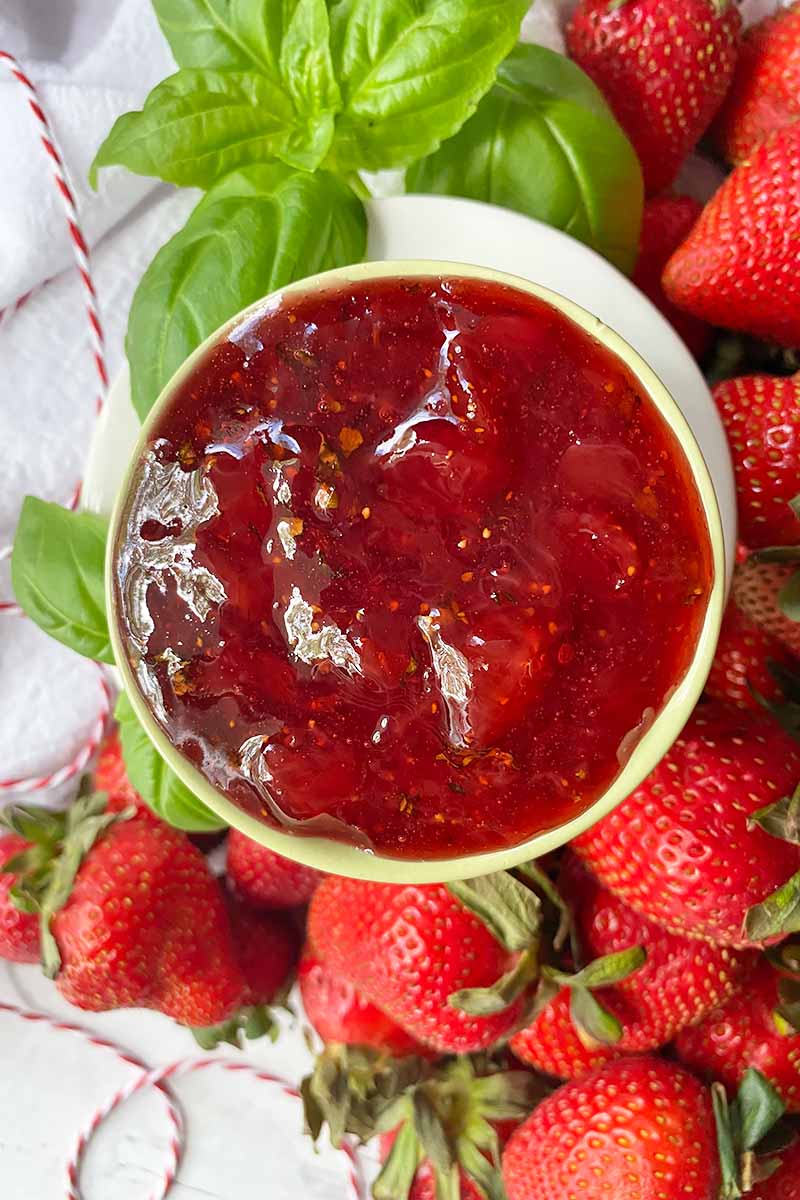
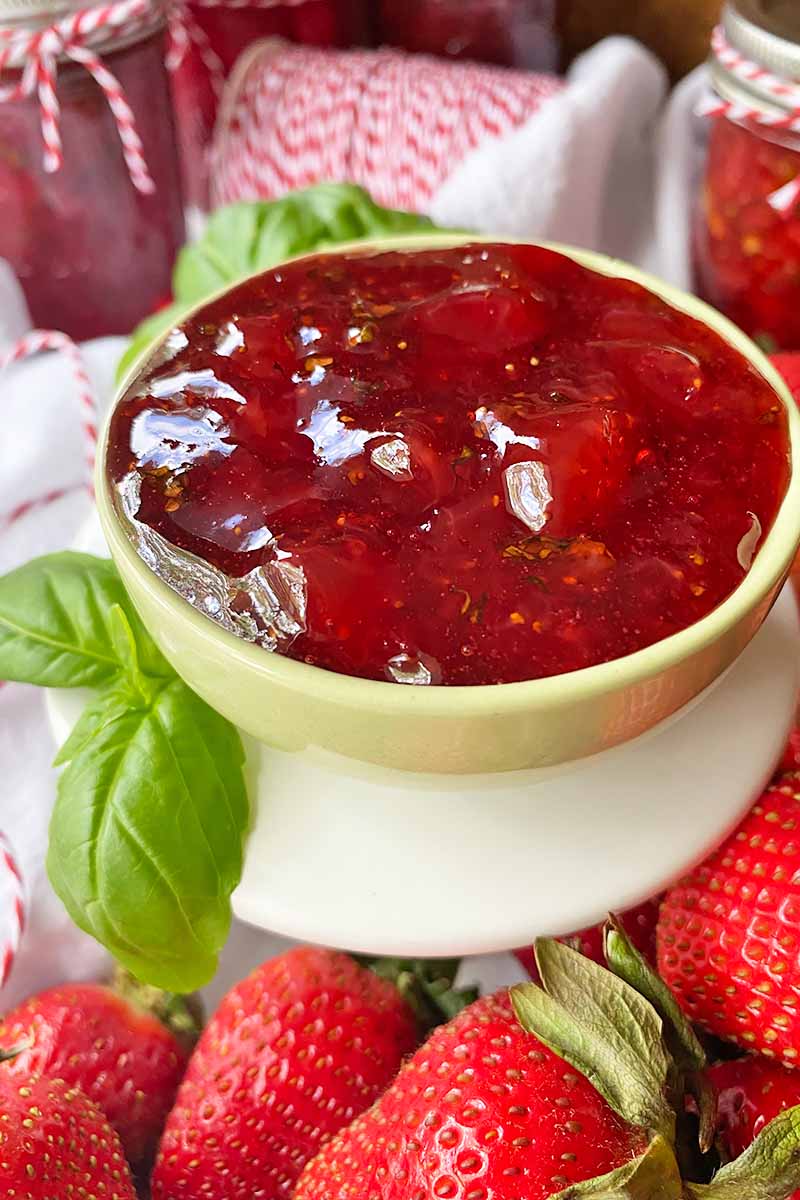
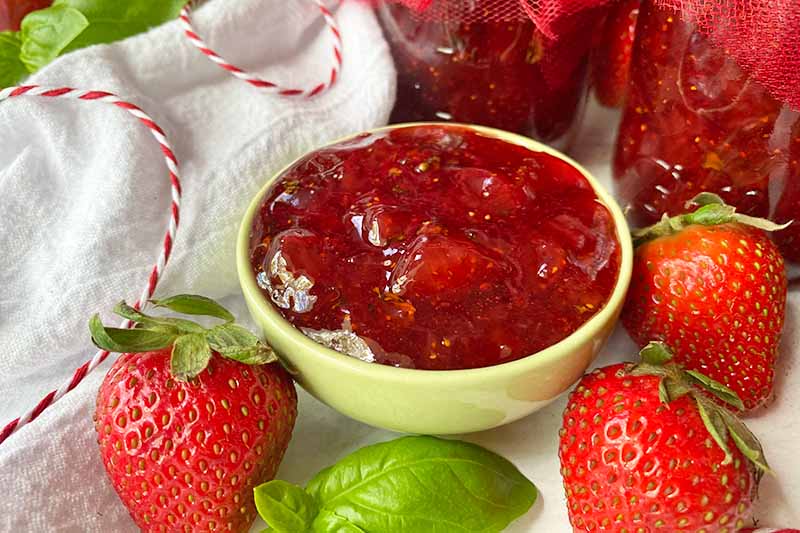
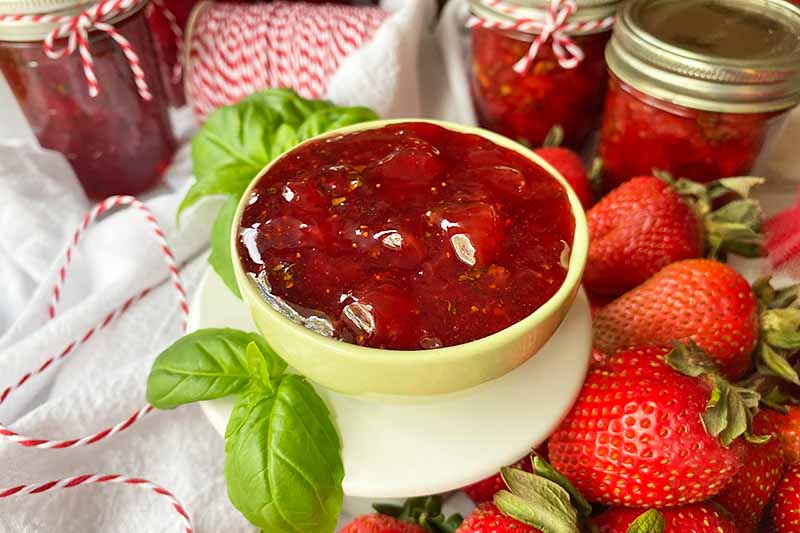
With soft and plump chunks of crushed strawberries (the best parts of any jam!) and floral flecks of fresh basil, you’ll want to dollop and spread it over everything your sweet cravings desire.
Are you worried that the flavor of the basil may be overwhelming? This won’t be a problem.
The herb provides a subtle floral aroma and taste, and is a fantastic contrast to the tart strawberries and sweet, syrupy sugar.
I have a feeling that my parents will soon be asking me to be their new supplier!
Make my recipe, and soon you might find you have a few friends and family members making a beeline towards your front door too.
Print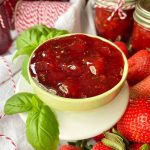
Strawberry Basil Jam
- Total Time: 1 hour
- Yield: 6 half-pint jars or 3 pint jars (about 6 cups total) 1x
Description
Want to enjoy your summer’s bounty of basil in a fun new way? Make something sweet and fruity and try our homemade strawberry basil jam recipe.
Ingredients
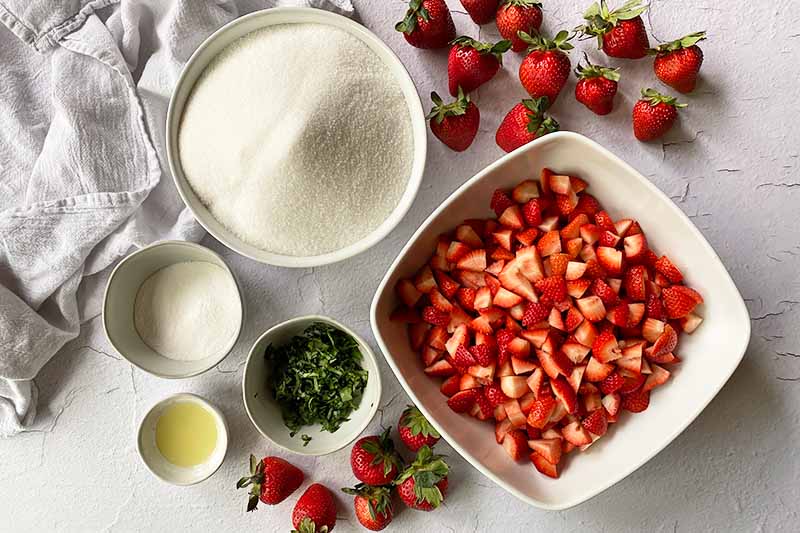
- 3 pounds strawberries, hulled and roughly chopped
- 1 tablespoon fresh lemon juice
- 1 package (1 3/4 ounces) powdered fruit pectin
- 6 cups granulated sugar
- 1/2 cup gently packed minced fresh basil
Instructions
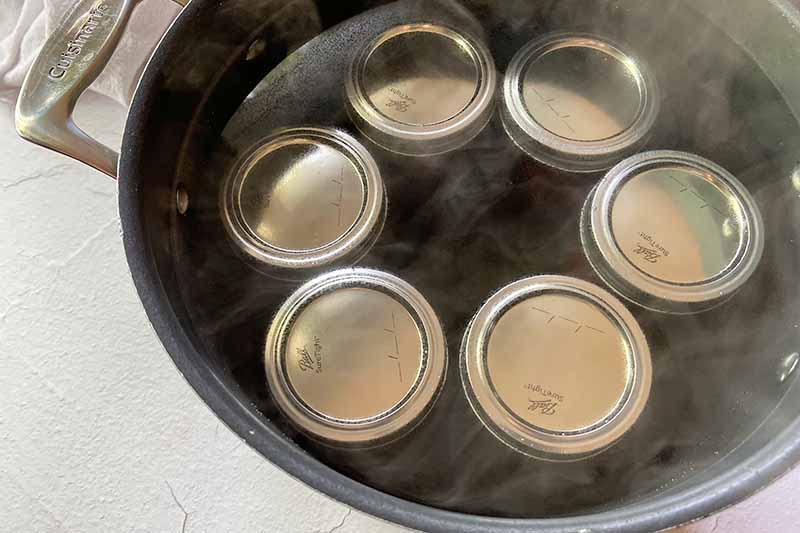
- Fill a large pot or stockpot with water. Submerge the empty jars (without the lids and rings) right side up, making sure the water is at least 1 inch above the tops of the jars. Bring the water to a boil to sanitize the jars for at least 10 minutes.
- Meanwhile, place the strawberries in a separate large pot or Dutch oven. Using a potato masher or sturdy spoon, lightly crush some of the strawberries to release their juices. Stir in the lemon juice and pectin.
- Cook on high heat, stirring constantly and continuing to crush some of the strawberries, until the fruit releases more liquid and comes to a rapid boil, about 5 to 10 minutes.
- Stir in the sugar to dissolve completely. Return the mixture to a boil, stirring constantly. Continue boiling and stirring until the mixture thickens slightly and is no longer thin and runny, about another 5 to 10 minutes.
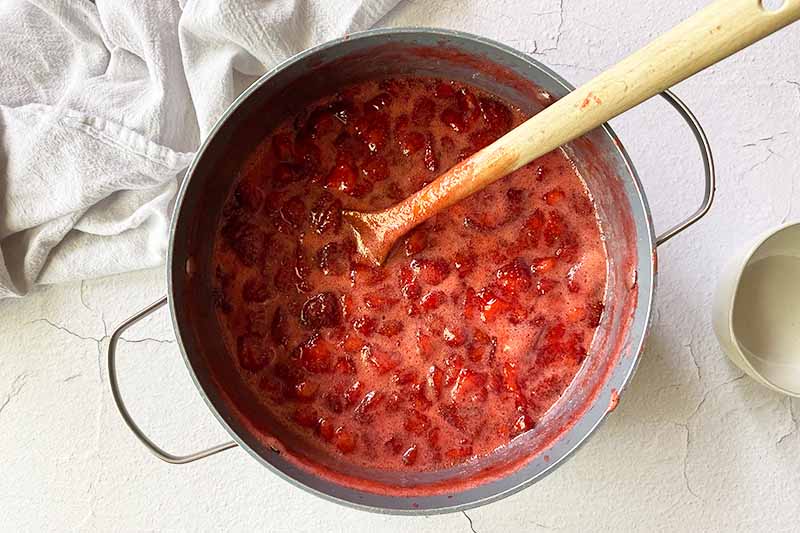
- Remove the pot from the heat, and skim off any foam at the surface with a spoon.
- Stir in the basil.
- Remove the jars from the pot of boiling water, and keep the water at a steady boil. You’ll use the same water to process the filled jam jars.
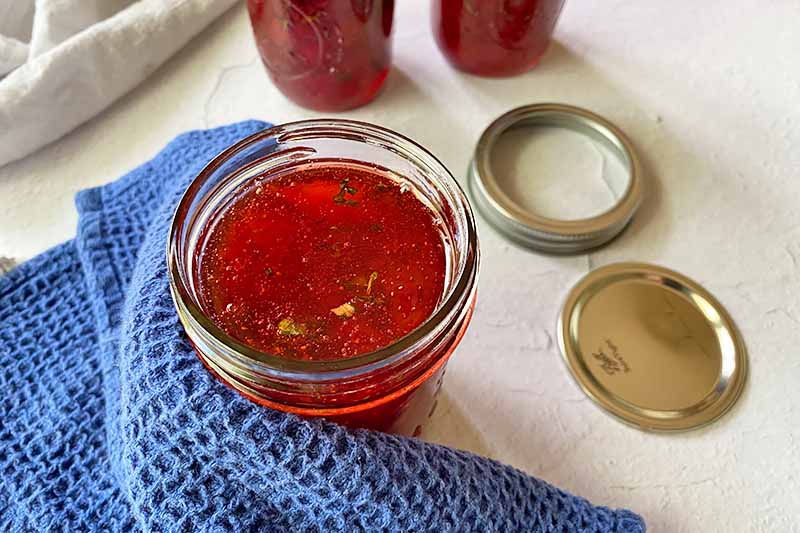
- Working quickly, ladle the hot jam into the hot jars, leaving about 1/4 inch of headspace. Remove any air bubbles by briefly stirring the jam with a small spoon. Wipe the rims clean, center the lids on top, and tightly screw on the bands.
- Place the filled jars back into the pot of boiling water right side up, ensuring that the water is at least 1 inch above the tops of the lids. Bring to a boil and process for 10 minutes.
- Remove the jars from the pot and set them aside to cool completely, at least 8 hours. If the lids have created a seal, label and store the jars in a cool, dry place for up to 2 years. Any jars that have not sealed must be refrigerated immediately and used promptly.
- Prep Time: 30 minutes
- Cook Time: 20 minutes
- Category: Jam
- Method: Stovetop
- Cuisine: Condiments
Cooking by the Numbers…
Step 1 – Prep
Set out two large pots, one that’s large enough for processing the jars (like a stockpot) and one for making the jam. Gather any of your preferred tools for jarring, including clean towels, ladles, potato masher, sturdy spoons/spatulas, and tongs or a jar lifter.
You’ll also need to check your supply of jars, lids, and rings. Make sure they are in good condition before moving forward! If the jars are cracked, or if the lids and rings are rusty, you will need to buy new canning jars and accessories.
Want to study up on making homemade jams and jellies? Learn four simple steps to making sweet spreads.
And you should also review what’s required for safe water bath canning, too! It’s better to be over-prepared!
Clean and dry the glass jars, as well as the lids and rings. Set them aside on a clean surface.
Wash the strawberries, remove the hulls, and coarsely chop them using a sharp knife and sturdy cutting board. Discard any pieces that are soft or moldy.
You will be crushing some of the pieces of fruit as you cook the mixture, so your knife work does not have to be impeccable.
Squeeze the juice from a lemon and discard any seeds. Measure out the lemon juice, powdered fruit pectin, and granulated sugar.
Mince the fresh basil leaves.
Step 2 – Sanitize Jars
Fill the stockpot with water.
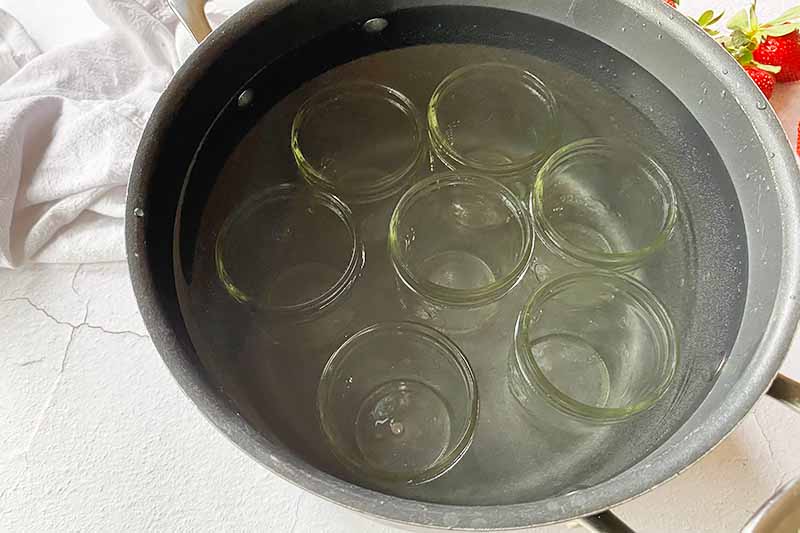
Submerge the empty jars (without the lids and rings) right side up into the stockpot, making sure the water is at least 1 inch above the tops of the jars. Bring the water to a boil to sanitize the jars as you continue with the following steps to make the jam. Keep the jars boiling for at least 10 minutes.
Going a little slow? You can keep the jars in the boiling water as you work through the recipe. They can remain in the hot water for over an hour. And because they need to be hot and sanitized directly before filling with the jam, you don’t want to remove them prematurely.
I prefer to sanitize the empty jars while I’m making the recipe – you’ll be creating the most efficient and the most sanitary process, as your jars will be prepped and hot as soon as you finish the recipe, and you can fill the jars immediately.
Step 3 – Combine and Cook Strawberries, Lemon Juice, and Pectin
Place the strawberries in the second large pot. Using a potato masher or a sturdy spoon or spatula, lightly crush some of the strawberries to release their juices.
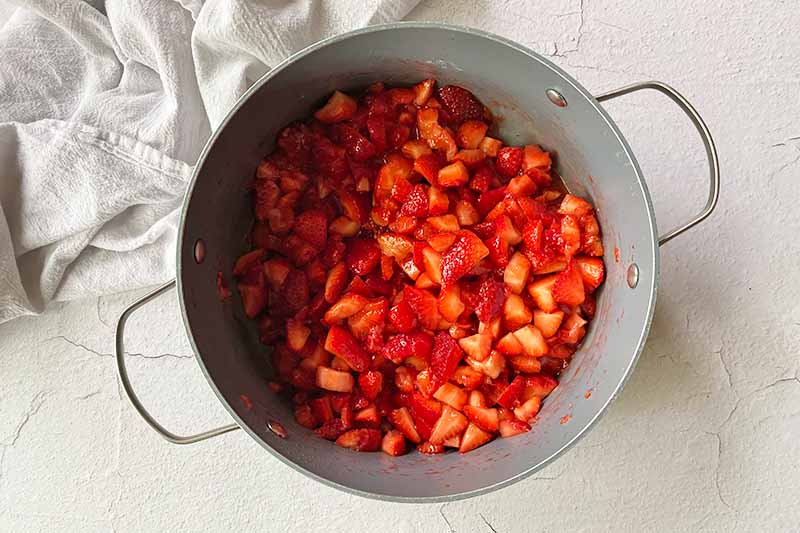
Stir in the lemon juice and pectin.
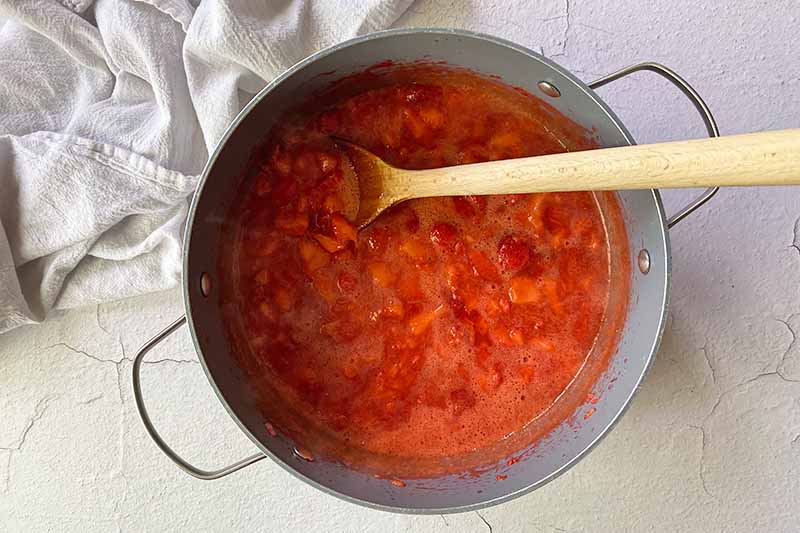
Heat the strawberries on high, stirring constantly, until the fruit releases more liquid and comes to a rapid boil. This will take about 5 minutes.
Step 4 – Add the Sugar and Boil
Once the mixture comes to a boil, stir in the sugar and continue mixing to completely dissolve.
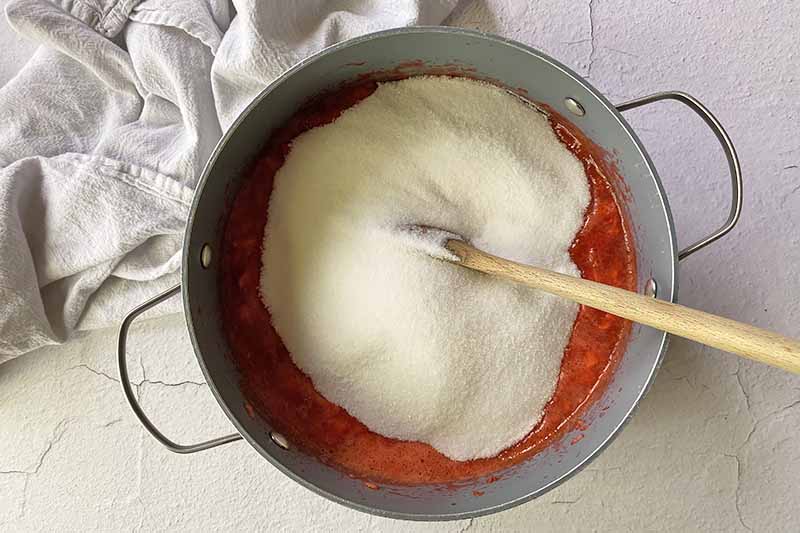
Return the mixture to a boil, continuing to stir constantly.
Once at a boil, continue boiling and stirring until the mixture thickens slightly and is no longer super thin and runny. This may take up to 10 minutes.
This step can be tricky, since you need to determine when the jam has reached the ideal consistency.
One main sign that the jam is ready is that the mixture no longer runs quickly off your spoon, and is thick enough to slowly drip off.
For another test, utilize your freezer for help. Before you begin making the jam, place a small plate in the freezer for at least 10 to 15 minutes.
Once you have made the recipe, place a small dollop of the jam on the frozen plate and place it back in the freezer for a few minutes.
Gently push the jam by pressing the tip of your finger on top of the dollop – if a noticeable skin has formed and it has mostly gelled, the jam is ready. If it is still liquidy when pressed with your finger, continue to cook the jam for a few more minutes.
Step 5 – Remove the Foam
Remove the pot from the heat, and skim off any foam at the surface with a spoon.

This step is not completely necessary, but it helps with the aesthetic to create a clearer jam! Excess foam may cause cloudiness.
Step 6 – Add Basil
Once you remove the foam, stir in the minced basil until it’s completely incorporated.
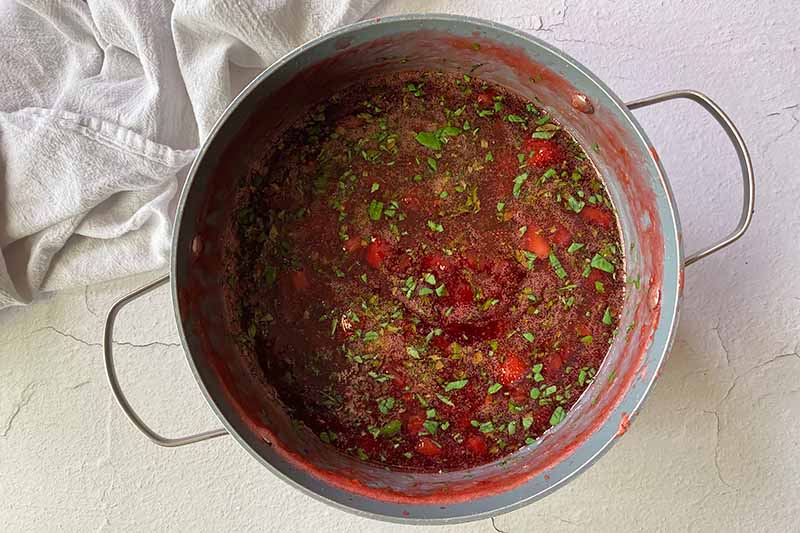
To maintain as much aroma and flavor as possible from a delicate fresh herb like basil, this is the best time to add it. You don’t want to lose any of those flavorful aromatics with an excessive amount of time spent cooking!
Step 7 – Fill Jars
Carefully remove the empty jars from the pot of boiling water, and keep the water at a steady boil. You’ll use the same water to process the filled jam jars.
At this point, you may need to add more water, as some will have evaporated throughout the past few steps.
Working quickly, ladle the hot jam into the hot jars, leaving about 1/4 inch of headspace.
Remove any air bubbles by briefly stirring the jam with a small spoon. Wipe the rims clean, center the lids on the jars, and tightly screw on the bands.
Work quickly and work cleanly – the heat from both the jam and the jars will help to create a better seal. If there is any debris around the rim, that may prevent a seal from forming, so be sure to keep everything clean.
Step 8 – Process
Place the filled jars back into the pot of boiling water right side up, ensuring that the water is at least 1 inch above the tops of the lids, and leave a little space between each jar.
Process for 10 minutes.
Step 9 – Store and Use
Carefully remove the jars from the pot and set them aside to cool completely, for at least 8 hours. If the lids have created a seal during this time, they are good to go for long-term storage!
Label and store the jars in a cool, dry place for up to 2 years.
If the lids are not sealed, you can choose to sanitize clean jars and go through the jarring process again. Or, you can choose to refrigerate the unsealed jam and enjoy it within a week.
Share It, Use It, Love It!
A jar of strawberry basil jam, wrapped in decorative string or tied with a bow with a handwritten label, is the perfect gift for any breakfast or sweets enthusiast.
And if said enthusiast asks for your creative suggestions on how to use it, you’ll know what to recommend – with a little help from us, of course! Give these options a try:
- Mix the jam into homemade coconut milk ice cream, and serve it with a lovely dollop or two of extra jam on top.
- Make a summery strawberry peach tart by combining the jam with fresh peaches on a shortbread crust.
- Layer the jam with tangy yogurt and crunchy lemon cookies for the best parfait you’ll ever eat.
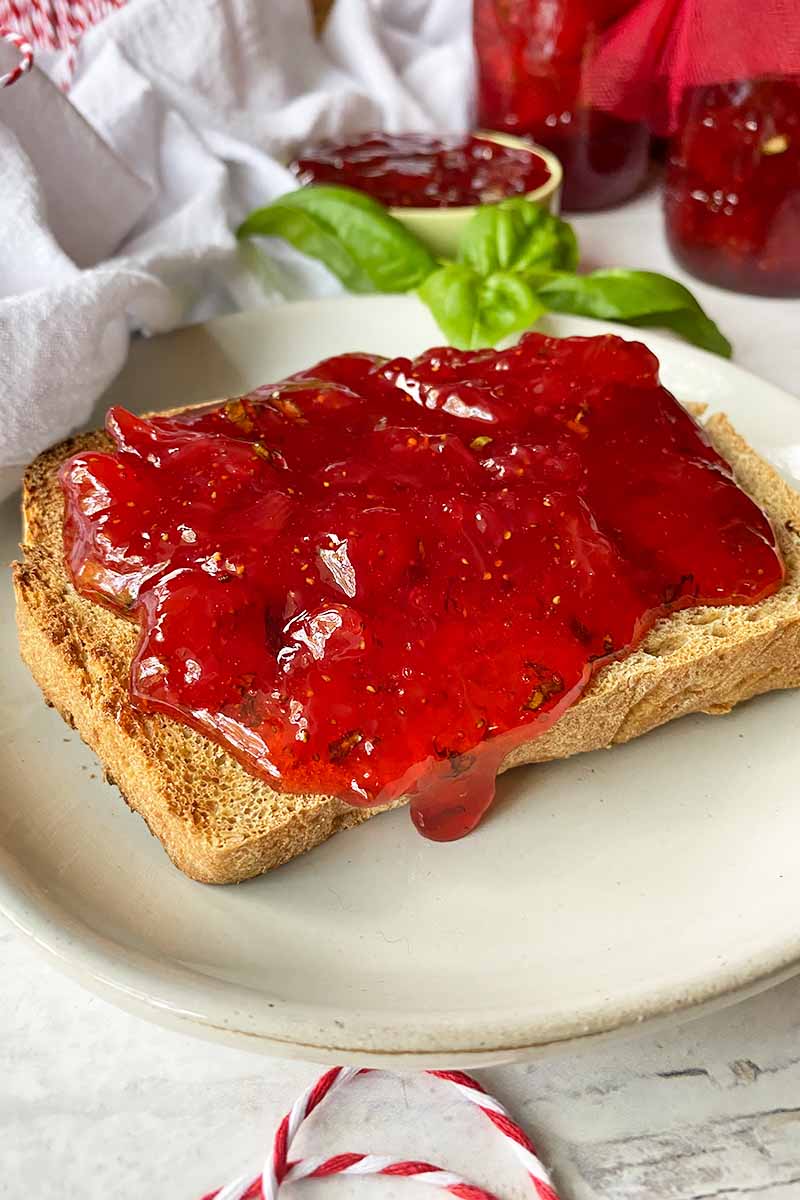
We love these recipes, but in the defense of uncomplicated ease, simply spreading the jam on your morning toast would also be ideal!
Do you have any other thoughts on how you’ll use this aromatic fruit spread? We’ll never say no to more delicious ideas! The comment section is open, so let’s have a little chat.
Going berry picking soon? You’ll need even more recipes featuring sweet and tart strawberries! Have a look at these recipes next:
- Fresh Strawberry Syrup
- Dried Mango-Strawberry Fruit Rolls
- Grilled Chicken Salad with Strawberry Vinaigrette
Photos by Nikki Cervone, © Ask the Experts, LLC. ALL RIGHTS RESERVED. See our TOS for more details. Originally published by Shanna Mallon on May 28, 2013. Last updated on May 16, 2022.
Nutritional information derived from a database of known generic and branded foods and ingredients and was not compiled by a registered dietitian or submitted for lab testing. It should be viewed as an approximation.
About Nikki Cervone
Nikki Cervone is an ACS Certified Cheese Professional and cheesemonger living in Pittsburgh. Nikki holds an AAS in baking/pastry from Westmoreland County Community College, a BA in Communications from Duquesne University, and an MLA in Gastronomy from Boston University. When she's not nibbling on her favorite cheeses or testing a batch of cupcakes, Nikki enjoys a healthy dose of yoga, wine, hiking, singing in the shower, and chocolate. Lots of chocolate.
Question, not comment. Using no/low sugar pectin could this be made using Splenda? I am diabetic.
Phil, you should be able to substitute the regular pectin for an equal amount of no-sugar pectin, and the granulated sugar for an equal amount of Splenda with similar results. We have not tested this, so be sure to closely follow the same jam-making and jarring procedures!