We occasionally link to goods offered by vendors to help the reader find relevant products. Some of these may be affiliate based, meaning we earn small commissions (at no additional cost to you) if items are purchased. Here is more about what we do.
Looking for a pickled veggie that will bite you back after you chomp down on it?
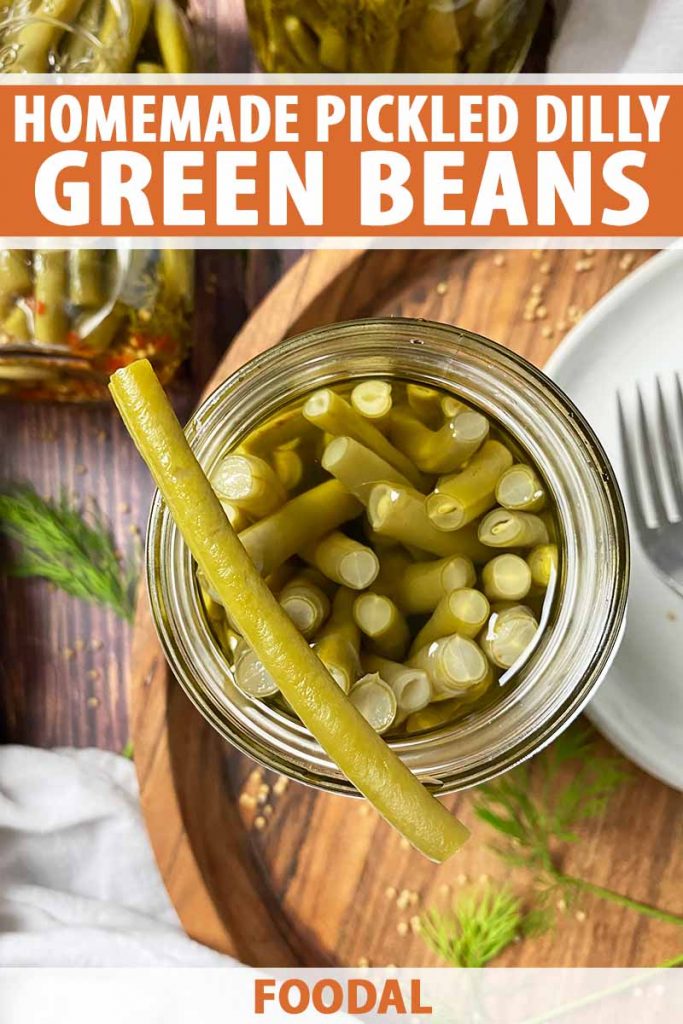
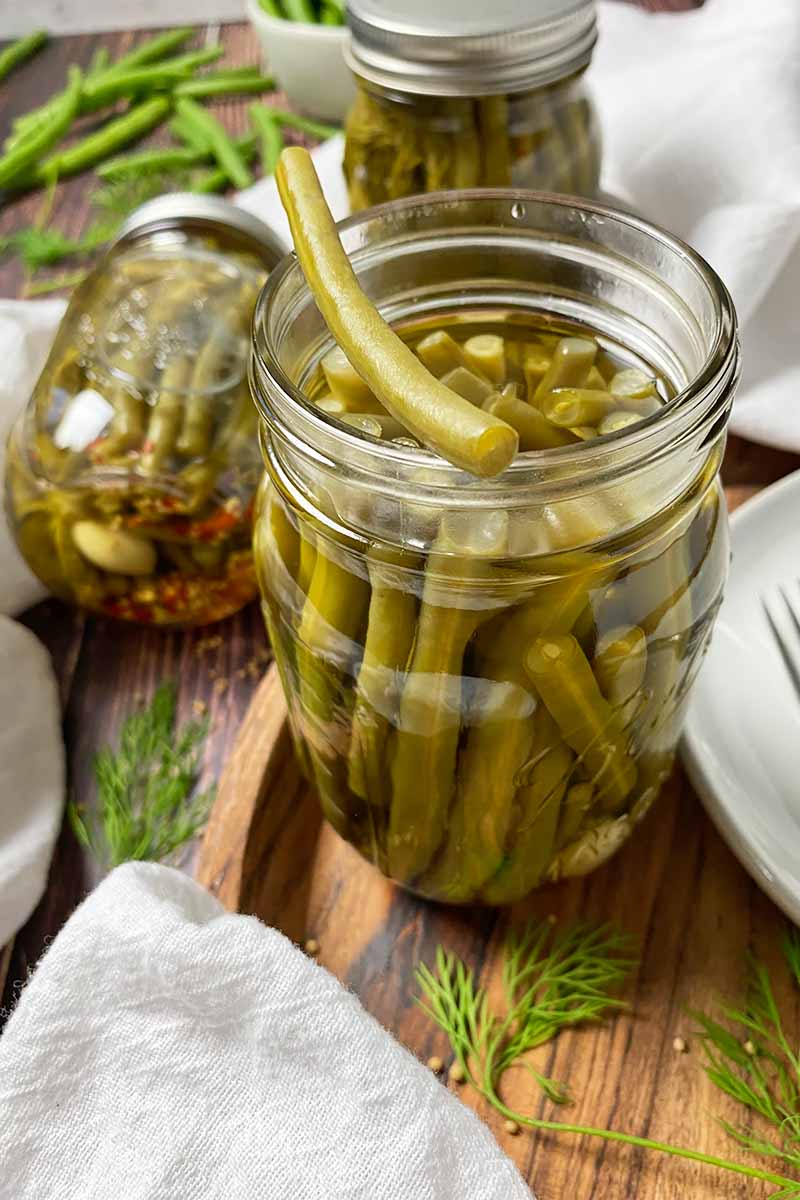
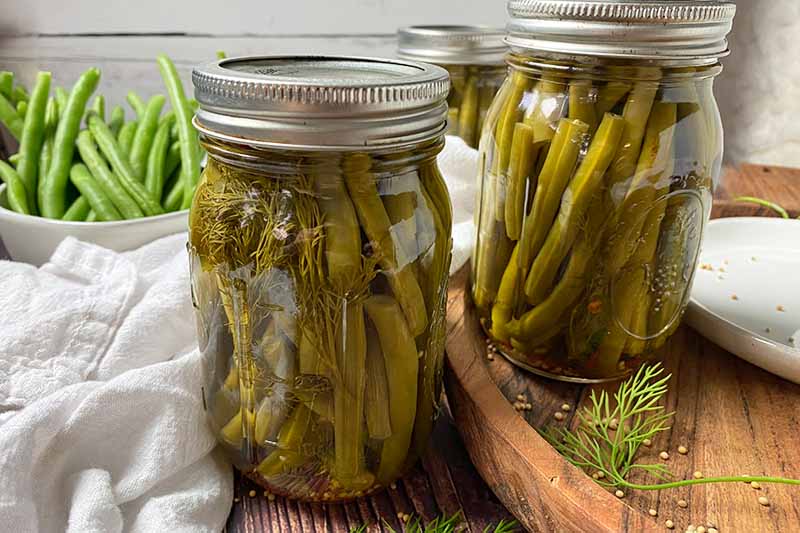
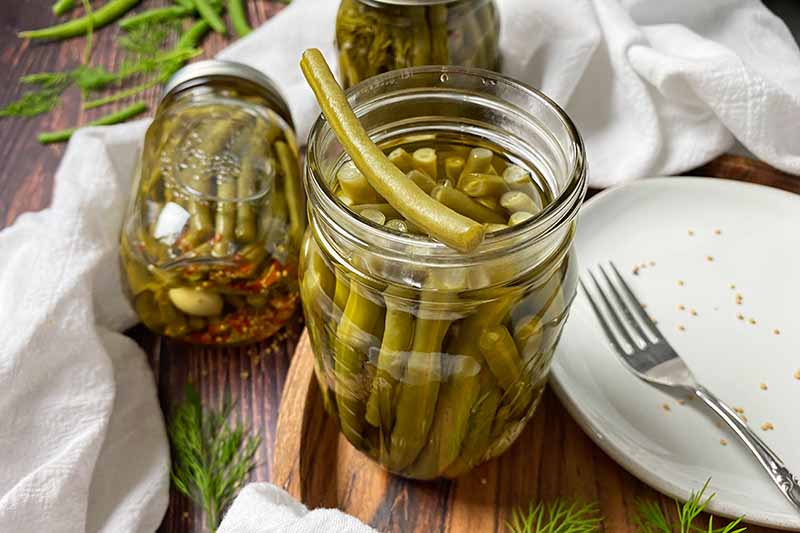
My recipe for dilly green beans has a vinegary and spicy kick that is so lip-puckeringly good.

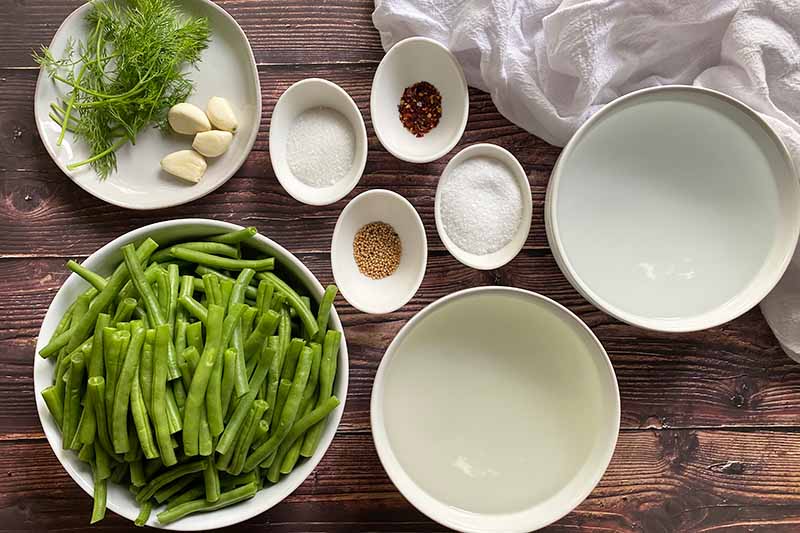
In addition to a simple liquid mix of white vinegar, water, and granulated sugar, each jar is packed with a handful of fresh green beans, a few sprigs of fresh dill, a sprinkle of mustard seeds and red pepper flakes, and a whole clove of garlic.
With uncomplicated ingredients and big flavors, this style of pickle is a simple yet impactful preparation – and an ideal introductory recipe if you are a beginner starting a new pickling project at home.
You’ll have no problem using up your stash, and the recipe’s yield of 4 jars won’t be an overwhelming amount to make per batch.
While you could give away a jar or two to family and friends who love the vinegary punch of brined vegetables, you too will want to eat these all the time!
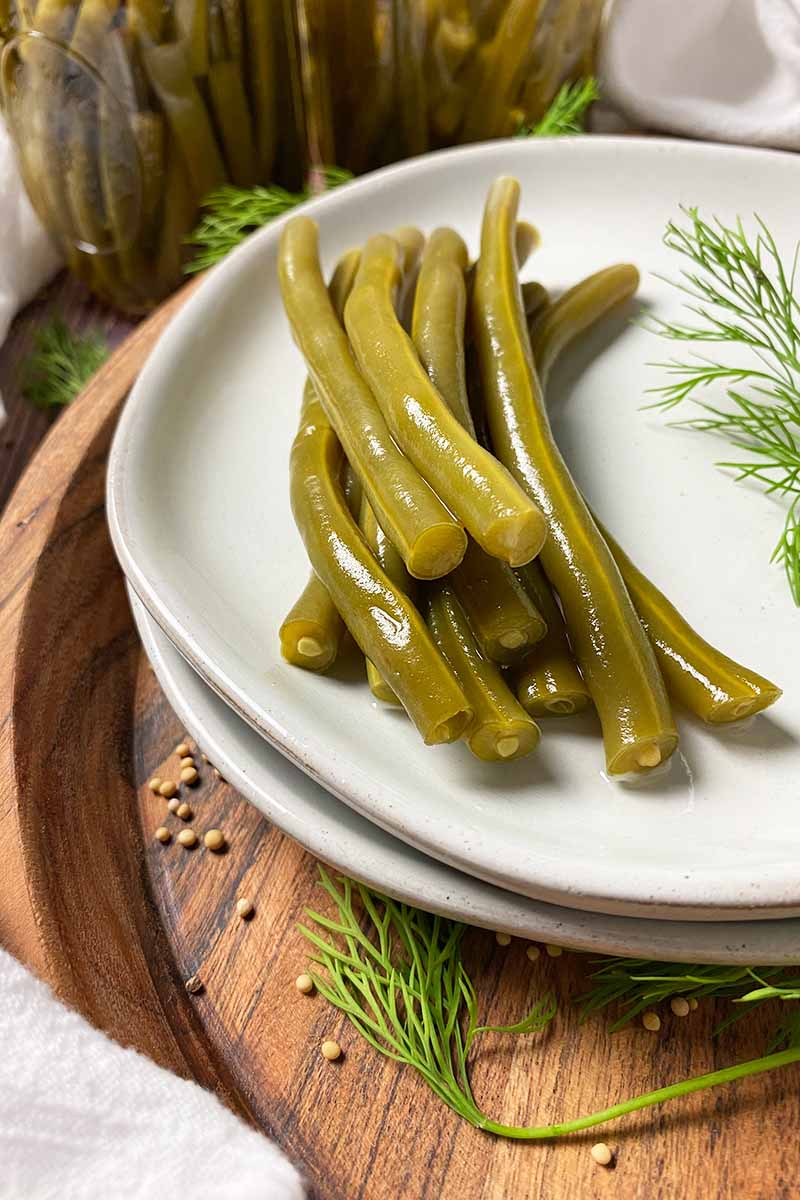
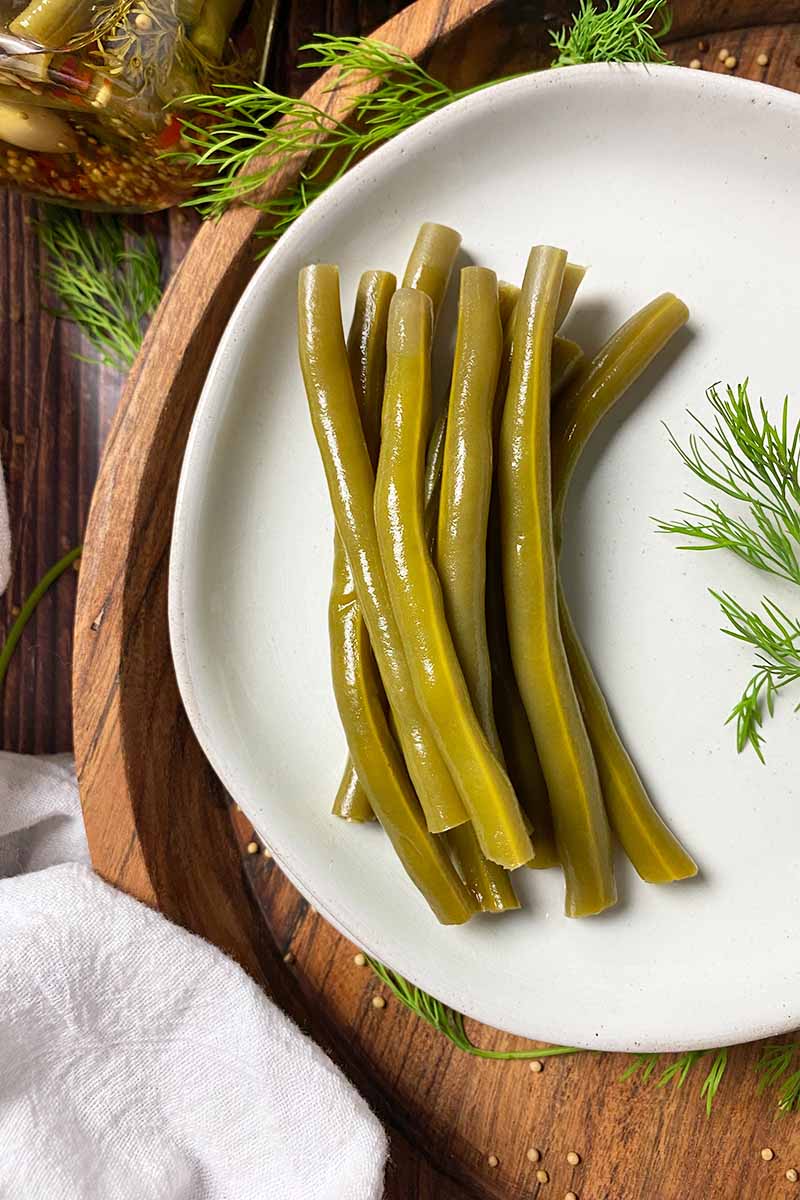
Give me a crispy pickled green bean any day of the week – morning, noon, or night – and I’ll show you a way to chow down on that feisty little one.
Treat it like a few drops of hot sauce. You only need a little of this mighty accompaniment to bring a bold bite to your dishes!
Let’s start with breakfast: One or two chopped dilly green beans is the perfect zesty topping for avocado toast, with or without a fried egg.
And for brunch? Done! Incorporate them as a spicy garnish for a Bloody Mary.
For lunch or dinner, replace your typical jarred pickle with these beans in your favorite sandwich or on top of hamburgers, hot dogs, and pizzas.

You can also mix a little into potato salads or pasta salads, or use it as a final garnish to balance thick and creamy soups like our loaded baked potato soup or cream of chicken soup.
For a late-night nibble board, a small pile of these pickled goodies is a smart accoutrement to a savory meat and cheese plate – the strong flavors and crisp texture can stand up to stronger cheeses and heartier charcuterie.
If you’re already thinking of your own fun serving ideas, you’re more than ready to make some pickles!
Print
Pickled Dilly Green Beans
- Total Time: 9 hours
- Yield: 4 pint-size jars 1x
Description
Pickled dilly green beans are a spicy, crispy, and sour spin on their classic dill pickle cousins, and they can be served in so many ways.
Ingredients
- 2 pounds fresh green string beans, trimmed
- 2 1/2 cups white vinegar
- 2 1/2 cups water
- 1/4 cup canning/pickling salt
- 1/8 cup granulated sugar
- 8 large sprigs fresh dill, divided
- 1 teaspoon red pepper flakes, divided
- 1 teaspoon mustard seeds, divided
- 4 cloves peeled whole garlic, divided
Instructions
- Rinse the beans and dry them well. Trim the beans on both ends, cutting them down as necessary so each bean can fit inside a pint-size jar with 1/2 inch of clearance from the top of the jar.
- Fill a large pot with water. Submerge the clean, empty jars (without the lids and rings) right side up, making sure the water level is at least 1 inch above the tops of the jars. Bring the water to a boil to sanitize the jars, and continue boiling for at least 10 minutes.
- Meanwhile, prepare your pickling liquid. Whisk together the vinegar, water, salt, and sugar in a medium pot. Bring to a boil over high heat, whisking constantly to dissolve the sugar and salt, then immediately reduce the heat to low so the liquid barely simmers. Maintain a gentle heat to keep the liquid warm without reducing.
- Remove one jar at a time from the pot of boiling water with tongs, and keep the water at a steady simmer. You’ll use the same water to process the jars after they’ve been filled.
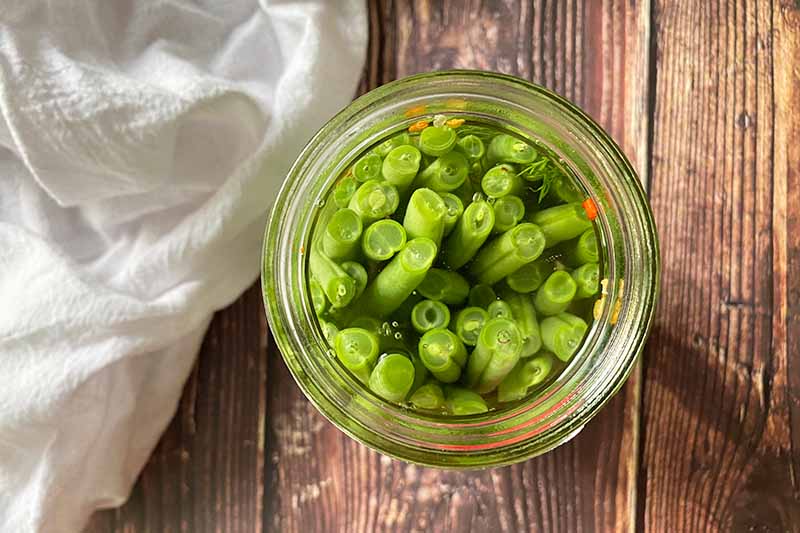
- Working quickly, place 1/4 teaspoon red pepper flakes, 1/4 teaspoon mustard seeds, and one clove of garlic in the bottom of the jar. Place the jar on its side and line two sprigs of dill against the side of the jar closest to your work surface.
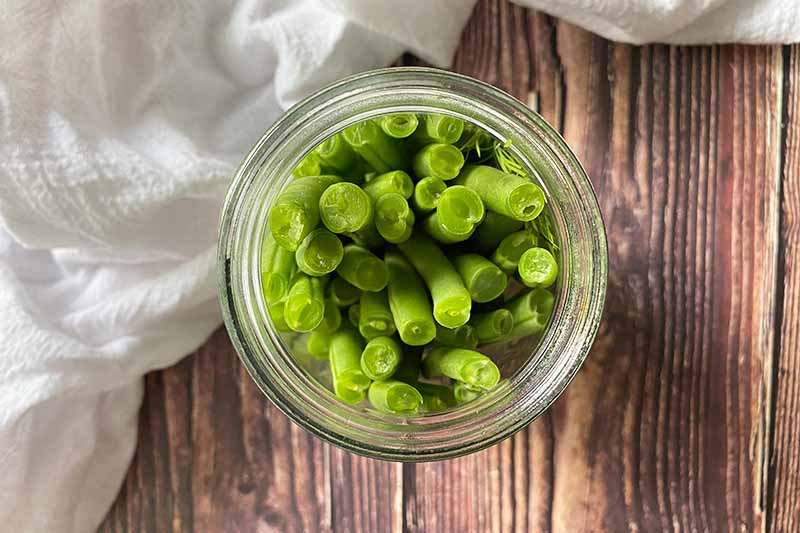
- While keeping the jar on its side, tightly stack a handful of beans horizontally in the jar so that they will stand up straight when the jar is upright. Pack the beans in the jar as tightly as possible, using as many as you can. Stand the jar upright.
- Working quickly and carefully, ladle some of the hot pickling liquid into the jar, leaving about 1/2 inch of headspace.
- Remove any air bubbles by slightly tilting the jar in different directions and gently tapping the bottom on your work surface. You may need to add more liquid to maintain about 1/2 inch of headspace.
- Wipe the rim of the jar clean, center a clean jarring lid on top, and tightly screw on a clean jarring band. Set aside for processing as you fill the remaining jars.
- Repeat Steps 5-10 with the remaining 3 jars.
- As soon as you screw the band on the last jar, immediately and carefully place all of the filled and enclosed jars in the pot of simmering water, using tongs. You may need to refill with more water as needed to maintain at least 1 inch of water above the lids. Bring the water back to a boil and process for 10 minutes.
- Remove the jars from the pot and set them aside to cool completely without disturbing them, for at least 8 hours or up to 24 hours. If the lids have created a seal, label and store the jars in a cool, dry place for up to 2 years. Any jars that have not sealed must be refrigerated immediately and used promptly.
- Prep Time: 45 minutes
- Cook Time: 15 minutes
- Category: Green Beans
- Method: Stovetop
- Cuisine: Pickles
Cooking by the Numbers…
Step 1 – Prep
Before you start cooking, review what’s required for safe water bath canning – now is the time to refresh your memory on every step! This is also a great guide for beginners.

You also want to check your jars, lids, and rings to make sure they are all in good condition. You may need to buy some new canning jars and accessories if you notice the jars are cracked, or if the lids and rings are rusty.
Feeling good? Feeling confident? Feeling ready! Let’s move on!
Set out a large pot that’s big and tall enough for processing the jars, like a tall stockpot. Make sure your pot is big enough to allow space so the jars won’t jostle each other when standing upright. Set out another medium pot for the pickling liquid.
Gather any of your preferred tools for jarring, including clean towels, ladles, sturdy spoons/spatulas, and tongs or a jar lifter.
If I can advise you to buy one essential tool for canning, get a jar lifter – this really has been a major help for me as a way of safely transferring jars to and from the hot water. I love using this Secure-Grip Jar Lifter from Ball, available now on Amazon.
Ensure you have enough space on your countertops, and that you are clean and organized for each step of the jarring process.
Clean and dry the glass jars, as well as the lids and rings, with soap and water. Set them aside on a clean surface.
Step 2 – Clean, Measure, and Prep the Veggies and Seasonings
Rinse the beans in a colander using cold, running water and dry them well.
Other than green, you can also use other colorful varieties of string beans that are available, like yellow or purple. Just keep in mind that purple varieties may lose their color when they are heated.
Using a sturdy cutting board and sharp knife, trim both ends from each bean. If necessary, trim them down even further so that each bean can fit vertically inside a pint-size jar with a 1/2 inch of clearance from the top of the jar. You can use one bean as the guide for all of the others when you are cutting.
You can reserve any usable trimmings for another use, or compost everything that’s left over. Either way, try to reduce your food waste here.
The trimmings could even go in their own jar with any leftover pickling vinegar and be treated like a refrigerator pickle, if you like. The goal here is to can only full-size beans, so they look as uniform and lovely as possible!
For the seasonings, gently rinse and dry the fresh dill sprigs. Peel 4 whole cloves of garlic. Measure out the red pepper flakes and mustard seeds.
For the pickling liquid, measure out the white vinegar, water, canning/pickling salt, and granulated sugar.
For the salt, you can use your favorite brand of kosher salt as long as it does not contain any anti-caking ingredients or additives, which may cause your brine to become cloudy instead of remaining clear.
Step 3 – Sanitize the Jars
Fill the stockpot with water.
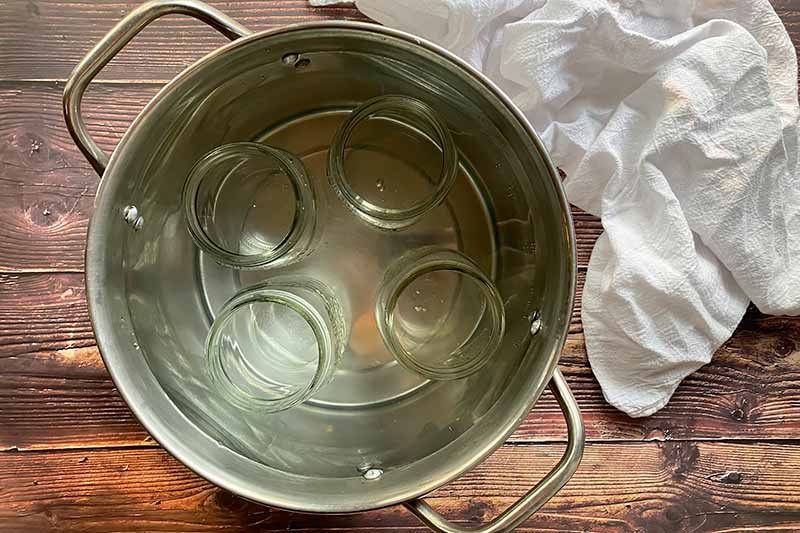
Submerge the empty jars – without the lids and rings – right side up in the stockpot, making sure the water level is at least 1 inch above the tops of the jars.
Bring the water to a boil to sanitize the jars as you continue with the following steps. Keep the jars boiling for at least 10 minutes.
If you’re running behind schedule, keep the jars in the boiling water as you work through prepping the rest of the recipe. The jars can stay in the hot water for over an hour.
Because they should be hot and sanitized directly before filling, you don’t want to remove them prematurely.
I prefer to sanitize the empty jars while I’m heating the pickling liquid and then filling the jars one by one– you’ll be creating the most efficient and the most sanitary process this way, as your jars will be prepped and hot in advance, and you can fill the jars immediately when you’re 100% ready to go!
While opinions vary, you can choose whether or not to heat the lids and rings as well – I like to use a separate small pot to gently heat them in slightly simmering water. Boiling water may destroy the rubber ring inside the lids.
Step 4 – Heat the Pickling Liquid
As you are sanitizing the jars, prepare the pickling liquid. Whisk together the vinegar, water, sugar, and salt in a medium pot.
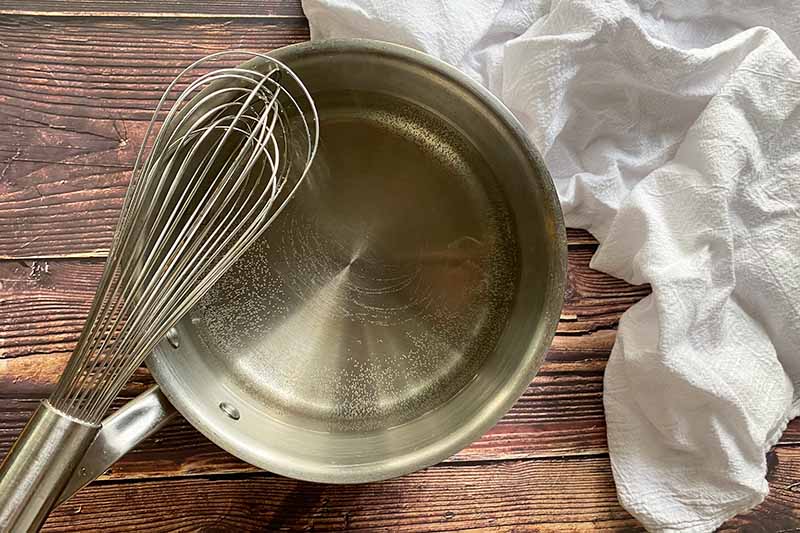
Bring to a boil over high heat on the stovetop, whisking constantly to dissolve the sugar and salt. Once it reaches a boil, immediately reduce the heat to low so the liquid barely simmers.
Maintain a gentle heat to keep the liquid warm – for safe and proper canning procedures, this liquid should be hot, but you don’t want to reduce the liquid so it thickens.
Reducing the liquid would cause an imbalance of ingredients, and you might not have enough to fully submerge the beans when you fill the jars.
Step 5 – Fill with Seasonings and Vegetables
If you’re working by yourself, remove and fill just one jar at a time with seasonings and the prepared vegetables.
Work quickly but carefully during the next few steps – you want the jars and pickling liquid to be as hot as possible to create the best seal.
Remove one jar from the boiling liquid, and set it on a clean surface next to your ingredients. Keep the water at a steady simmer, since you’ll be using the same water that’s in the pot to process the filled jars.
At this point, you may need to add more water, as some will have evaporated throughout the past few steps.
Working quickly using one jar at a time, place 1/4 teaspoon red pepper flakes, 1/4 teaspoon mustard seeds, and one peeled clove of garlic in the bottom of each jar.
Let gravity be your friend here! For both the herbs and the beans, place the jar on its side – it will be much easier to fill the jar this way than straight up, as the ingredients will naturally move downwards to pack in towards one side so you can pack the jar with as many beans as possible.
Line two sprigs of dill against the side of the jar closest to your work surface.
While keeping the jar on its side, tightly stack a handful of beans horizontally in the jar so that they will stand up straight when the jar is upright. Pack the beans in the jar as tightly as possible, using as many as you can.
Place the jar back in its upright position.
If you have helpers in the kitchen, and you’d prefer to fill multiple jars at once, you can go ahead and do so.
Step 6 – Fill with the Pickling Liquid
To make this process easier when transferring the pickling liquid, you can move the jar closer to the stovetop next to the pot, or you can remove the pot from the stovetop and place it next to the jar.
Using a heatproof ladle, carefully pour pickling liquid into the jar, leaving about 1/2 inch of headspace.
Don’t screw the lid on just yet! There may be air bubbles!
Remove any air bubbles by tilting the jar in different directions and gently tapping the bottom of the jar on your work surface.
If you notice the level of the liquid is now lower, you may need to refill with additional liquid to maintain about 1/2 inch of headspace.
Step 7 – Assemble Lid and Band and Repeat
Wipe the rim of the jar clean. Center a lid on top, and tightly screw on a band. Set aside for processing as you fill the remaining jars.
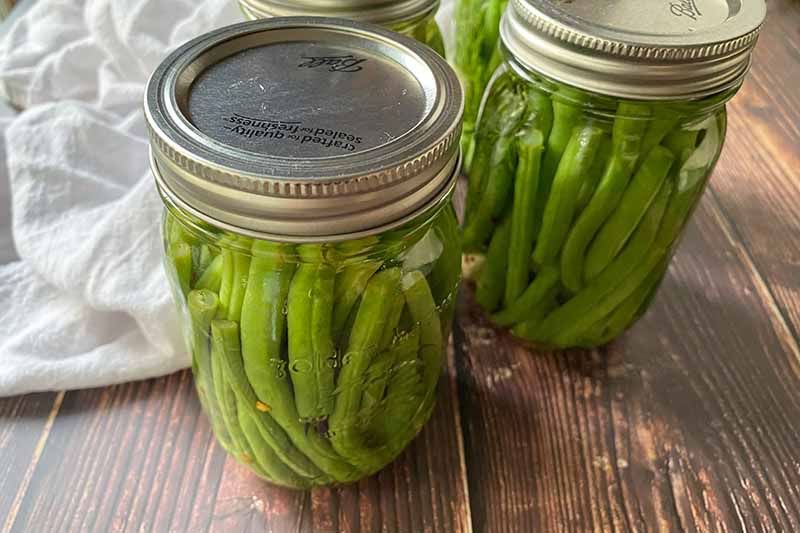
Repeat Steps 5 through 7 with the other three jars.
Step 8 – Process
Immediately and carefully place all of the filled jars in the pot of simmering water – this is another instance when a jar lifter is the supreme tool to use! Ensure that they are not touching.
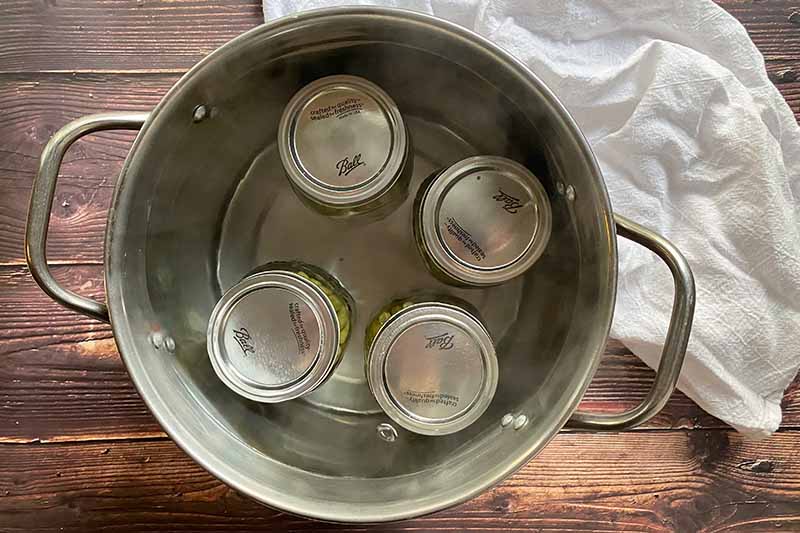
You may need to refill with more water as needed to maintain at least 1 inch of water above the lids.
Bring the water back to a boil, and process the jars in the boiling water for 10 minutes. The raw green beans will gently cook during this time and will lose a little color, but they will still remain crisp in texture.
Step 9 – Cool Completely and Store
After 10 minutes, immediately remove the jars from the pot. Set them aside on a heatproof surface to cool completely without disturbing them, for at least 8 hours or up to 24 hours.
Don’t be hasty during this step! They need this – I repeat, undisturbed – time for the lids to properly seal. Once you have placed them in their dedicated space, don’t touch them.
That means no shaking, rubbing, rolling, tapping, tickling, or titillating! Leave them be!
Once the jars have fully cooled, and if the lids have created a seal, you’re good to go for long-term storage! Label and store the jars in a cool, dry place for up to 2 years.

If the lids are not sealed – don’t fret. You can choose to sanitize clean jars and go through the jarring process again.
Or, you can refrigerate the unsealed containers and enjoy these fresh pickles within a week. Hello, refrigerator pickles!
Choose the Freshest Flavors
I won’t stop you from having a good time when choosing your own flavor combos, especially when said flavors are fresh and seasonal!
When the herbs in the garden are lush and vibrant, getting creative with homemade recipes is right at your gloved fingertips.
Fresh and grassy, dill is a classic choice for pickles, but you can certainly walk another herb-lined path if you so desire.
Herbs such as rosemary, chives, and thyme would work well here as substitutions for the dill, though you’ll only need one sprig instead of two for stronger herbs like rosemary. Or you might choose to play with a mix of assorted herbs.
You can also tinker with the other flavoring components in the recipe – maybe using a small knob of ginger in addition to the garlic, or opting to omit the red pepper flakes if you’d rather have a milder final result.
Do you think you’ll stick to the original recipe, or will you try your own combo of flavors? Leave a comment below, and we can brainstorm some delicious ideas together!
If the green bean harvest is plentiful, we have more recipes featuring this crisp green veggie! When you run out of mason jars, here are some other savory ways to use them when they’re fresh – and feel free to throw in all the usable trimmings you collected from making these pickles:
- Green Beans and Soba Noodles with Crispy Shallots
- Homemade Three Bean Salad
- Grilled Corn and Green Bean Tacos with Cilantro Goat Cheese Crema
Photos by Nikki Cervone, © Ask the Experts, LLC. ALL RIGHTS RESERVED. See our TOS for more details. Originally published by Lorna Kring on September 23, 2015. Last updated on May 18, 2023.
Nutritional information derived from a database of known generic and branded foods and ingredients and was not compiled by a registered dietitian or submitted for lab testing. It should be viewed as an approximation.
About Nikki Cervone
Nikki Cervone is an ACS Certified Cheese Professional and cheesemonger living in Pittsburgh. Nikki holds an AAS in baking/pastry from Westmoreland County Community College, a BA in Communications from Duquesne University, and an MLA in Gastronomy from Boston University. When she's not nibbling on her favorite cheeses or testing a batch of cupcakes, Nikki enjoys a healthy dose of yoga, wine, hiking, singing in the shower, and chocolate. Lots of chocolate.