We occasionally link to goods offered by vendors to help the reader find relevant products. Some of these may be affiliate based, meaning we earn small commissions (at no additional cost to you) if items are purchased. Here is more about what we do.
I’m not one to shy away from the ooey-gooey parts of a dessert I love most. That’s why making a chocolate tart with a filling consisting only of ganache is something I stand by wholeheartedly.

Let’s put this particular line of thought into perspective:
Do you have a habit of eating the edges of a chocolate chip cookie first, and saving the soft and chewy center for last?
Or maybe you’re more familiar with formulating an intricately designed plan to eat around the molten core of a lava cake, reserving that outrageous melted filling to enjoy in the final few bites?
Or do you tend to favor the moist and tender center cut from a full chocolate sheet cake at a birthday party, and become quietly disappointed when someone carelessly hands you a slightly overbaked corner piece while passing out plates?
If you answered in the affirmative to one or more of these questions, we share a bond built upon a passionate love affair with the richest chocolatey indulgences.
When the opportunity presented itself to make a chocolate tart completely from scratch, I could have created a few different styles of recipes… But you can certainly understand why I chose to prepare what I selfishly desired the most:
A filling that, with every single bite, offers sinful, wicked, melt-in-your-mouth bliss.
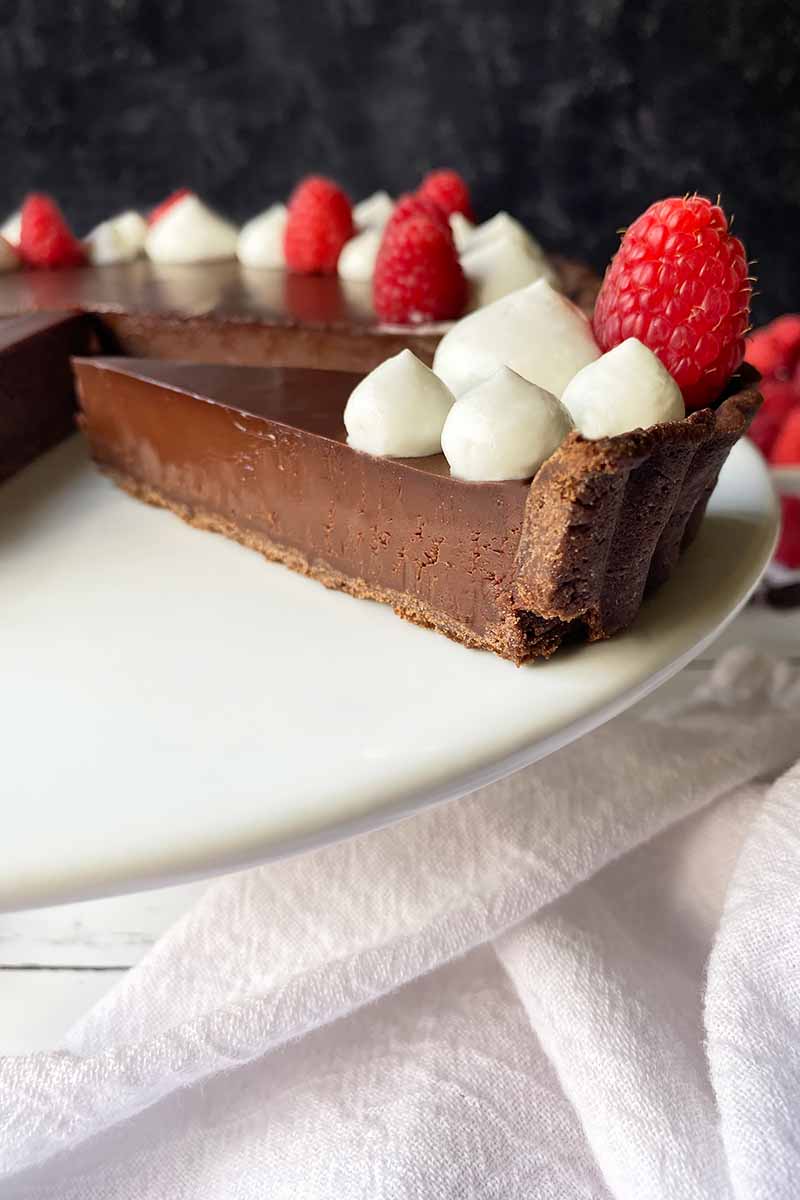
Uninterrupted by other ingredients, the filling of this dessert is pure dark chocolate ganache – just a smooth and seductive blend of dark chocolate, heavy cream, and a little butter.
A flaky pate brisee pie crust won’t do here. It doesn’t stand a chance.
Our independent, powerful ganache needs an equally supportive partner, one that is strong and sturdy without stealing too much of the limelight from our leading lady.
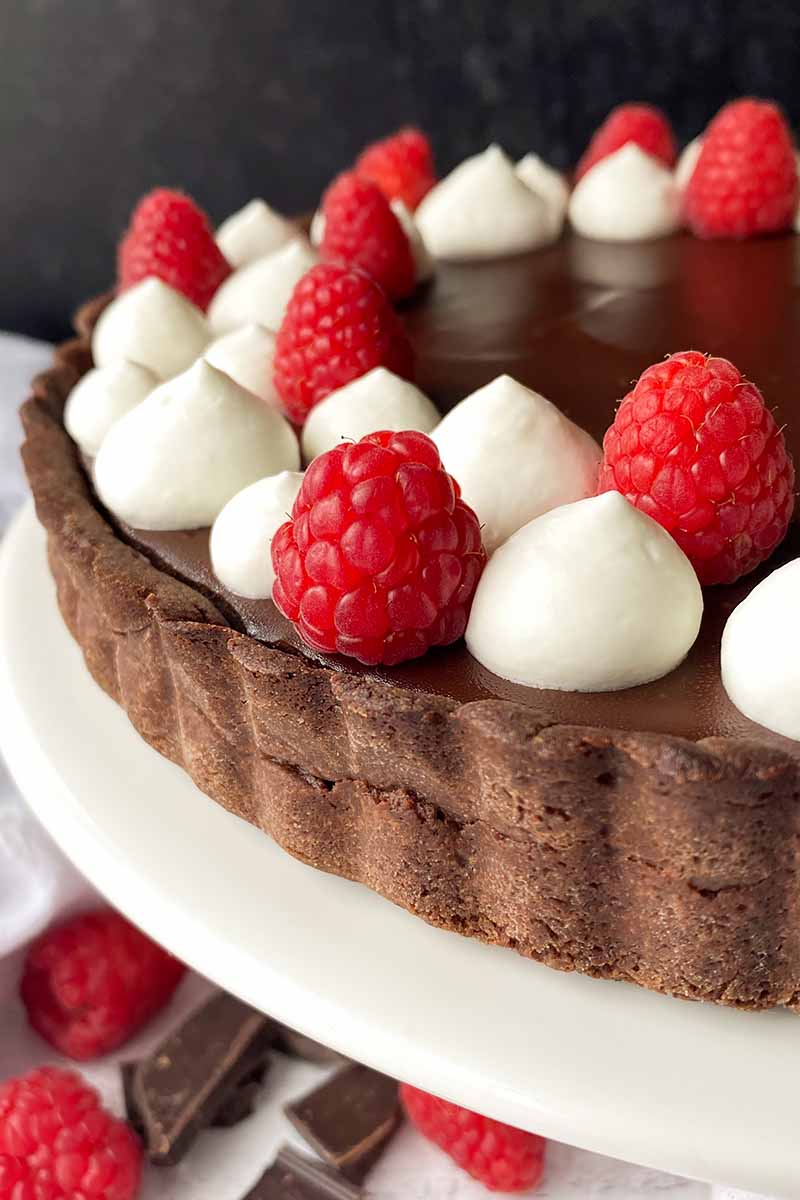
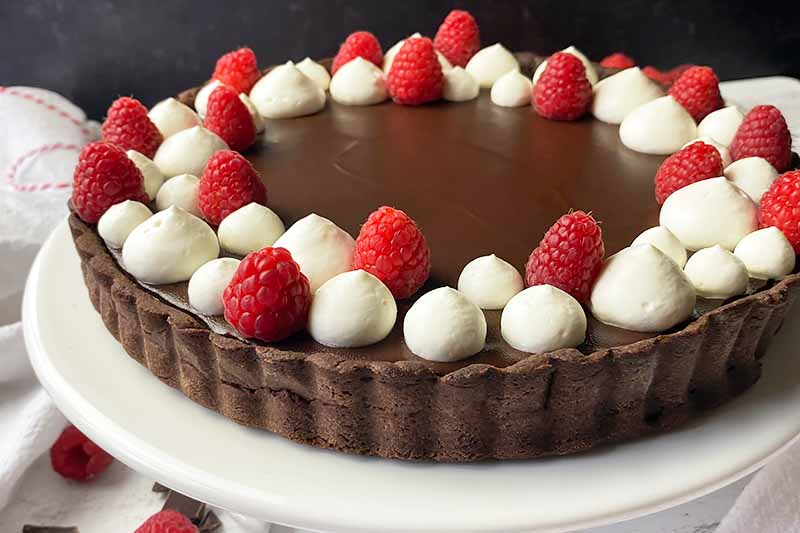
Housed in a crisp, cookie-like sable crust (also known as pate sablee) flavored with cocoa powder, the rich and creamy ganache makes a harmonious duet with this thin and crunchy shell, providing a doubly decadent chocolate flavor that is ideal for celebrating special occasions.
There’s no waiting around to be served the good part of the cake, or nibbling away at the edges of a soft-centered cookie, or painstakingly operating on a molten lava cake in eager anticipation of the payoff at the core.
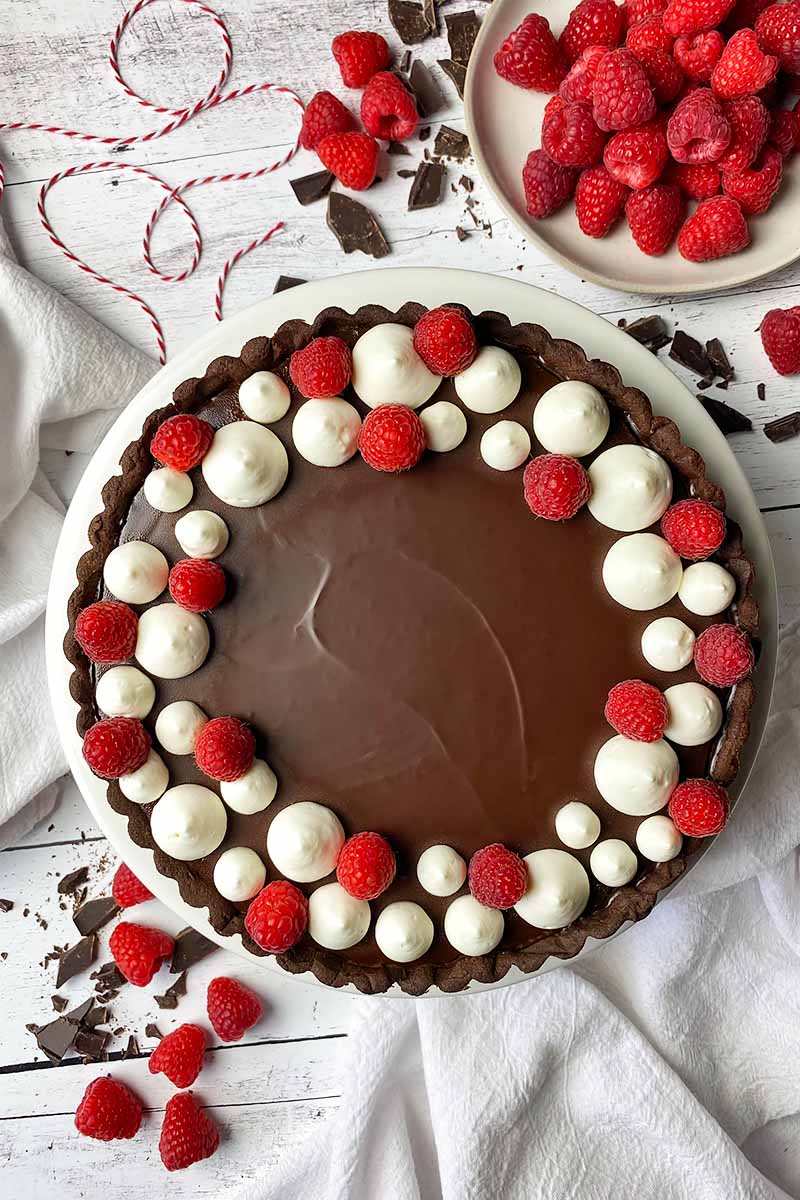
When you have a slice of this intense dark chocolate ganache tart on your plate, you can enjoy the very best of the best with every single bite!
Print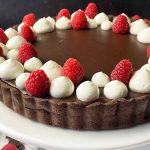
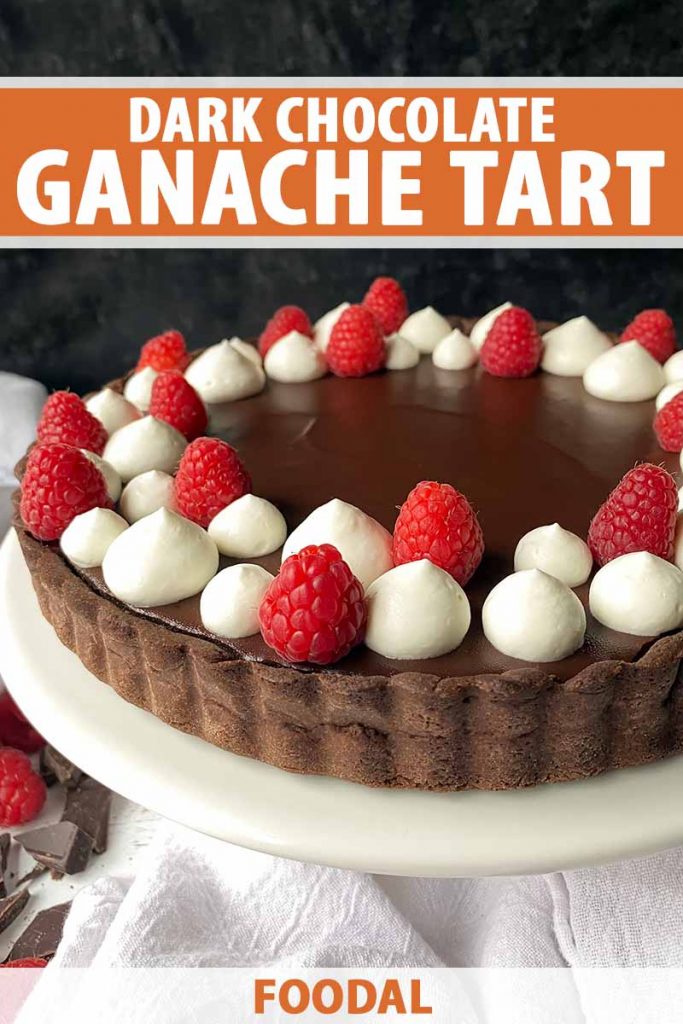
Dark Chocolate Ganache Tart
- Total Time: 3 hours, 30 minutes
- Yield: 10-12 servings 1x
Description
A simple yet elegant dark chocolate tart is the ideal dessert for special occasions, with a smooth ganache filling and a crisp chocolate crust.
Ingredients
For the Chocolate Crust:
- 1 cup all-purpose flour
- 3/4 cup confectioners’ sugar
- 1/4 cup unsweetened cocoa powder
- 1/4 teaspoon coarse kosher salt
- 8 tablespoons (1 stick) cold unsalted butter, cut into cubes
- 1 large egg, lightly beaten
- Water, as needed
For the Ganache Filling:
- 12 ounces bittersweet chocolate (60-75% cacao), finely chopped
- 1 1/2 cups heavy cream
- 1 tablespoon room temperature unsalted butter, cut into cubes
Instructions
For the Crust:
- Sift the flour, sugar, cocoa powder, and salt into a large bowl.
- Using a pastry cutter, cut the cold butter cubes into the dry ingredients until a uniform mixture forms with small, coarse crumbs.
- Using your hands, knead in the egg just until a crumbly dough forms, adding a teaspoon of water at a time if the dough seems too dry.
- Turn the dough onto a clean counter dusted with flour and press lightly to form a smooth, flat disc. Tightly wrap the disc in plastic wrap and refrigerate for at least 1 hour.
- Set out a 9-inch tart pan with a removable bottom. Remove the chilled dough from the refrigerator and let sit at room temperature for 5-10 minutes, until it has softened slightly and is pliable. Remove the plastic wrap and place the disc on a clean counter dusted with flour.
- With a rolling pin, roll and flatten the dough until it is about 1/8 inch thick, and large enough to cover the width of the base with about an inch of excess on all sides.
- Carefully transfer the dough to the tart pan. Press into the bottom of the pan, then press into the sides. Trim any excess dough around the edges so it’s flush with the top of the pan.
- Place the pan in the freezer and chill for 1 hour until very cold and firm.
- Preheat the oven to 400°F. Cover the bottom and sides of the tart pan with a sheet of parchment paper and fold the excess over the sides for easy lifting later. Gently press the paper against the bottom and sides of the pan. Add pie weights so they nearly reach the top of the pan, and spread them out evenly.
- Transfer the pan to the oven and bake for 15-20 minutes, or until the edges of the crust are just starting to dry out. Carefully remove the pan from the oven, and avoid pressing the bottom of the pan so the crust doesn’t separate from the sides. Lift the parchment paper to remove the hot pie weights and set the weights aside to cool.
- Lightly pierce the dough covering the bottom of the pan several times all over with the tines of a fork. Place the pan back in the oven and bake for another 10-15 minutes, until the dough is completely baked and the surface looks dry. Remove the pan from the oven and let cool completely on a wire rack, about 1 hour. Carefully remove the shell from the pan and place on a flat plate, stand, or serving platter.
For the Ganache:
- Place the chopped chocolate in a medium-size heatproof bowl and set aside.
- Heat the heavy cream in a medium-size saucepan over medium heat. As soon as it begins to simmer, in about 5-8 minutes, immediately remove from the heat and pour over the chocolate. Allow to stand for 3-5 minutes, then gently stir with a whisk until the chocolate has melted completely and the mixture is smooth.
- Add the cubed butter and gently stir until completely melted and fully combined.
- Immediately pour the ganache into the cooled tart shell. Transfer the tart uncovered to the refrigerator and chill until completely cooled and set, about 2 hours.
- Remove the tart from the refrigerator, slice, and serve.
- Prep Time: 40 minutes
- Cook Time: 45 minutes
Cooking by the Numbers…
Step 1 – Prep the Dough
Set out a rolling pin and a 9-inch metal tart pan with a removable bottom. We recommend this fluted tinned steel option from King Arthur Baking Company!
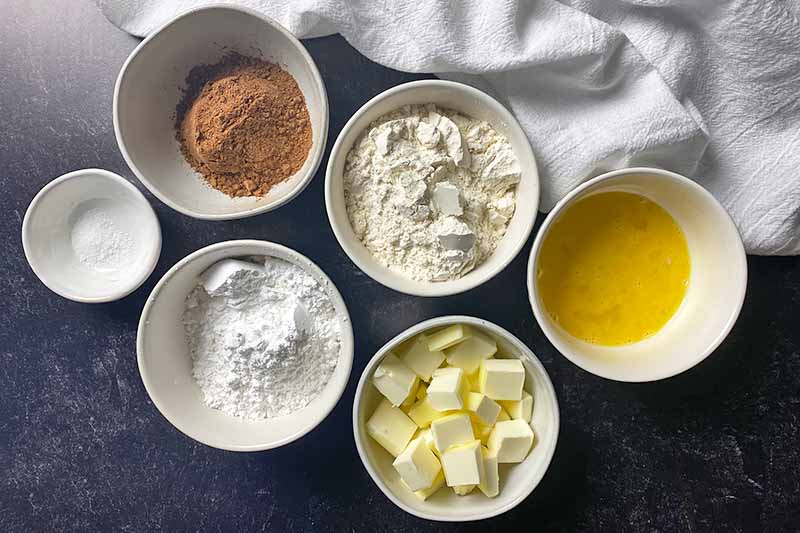
Measure out the all-purpose flour, confectioners’ sugar, cocoa powder, and salt. Feel free to use either Dutch process or natural cocoa powder for this tart dough recipe!
Cube the stick of unsalted butter using a sturdy cutting board and sharp knife. Lightly beat a large egg with a whisk in a small bowl.
Keep your cold ingredients as cold as possible! Your butter should be chilled and it should stay in the refrigerator until you’re ready to prep and use it in the recipe.
A cold temperature will ensure that your tart dough bakes into a sturdy, well-formed crust.
Step 2 – Make and Chill the Dough
Sift the flour, confectioners’ sugar, cocoa powder, and salt into a large bowl. This will help to break up any chunks in the dry ingredients – cocoa powder tends to clump! – and will help to incorporate the other ingredients more easily.
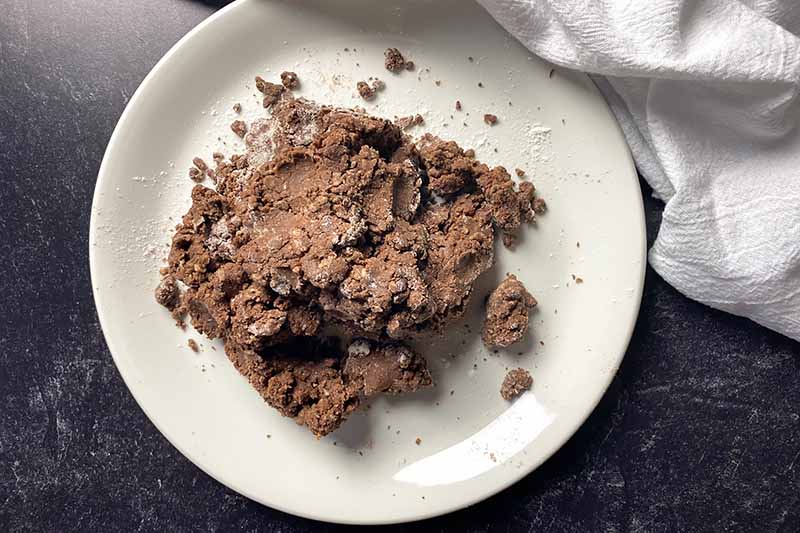
Use a pastry cutter to cut the cubes of butter into the dry ingredients. For this sturdier, more cookie-like shell, the butter can be broken down a little further compared to what you might typically do when making pie dough. Continue to cut the butter into the flour until a uniform/well-blended mixture with small crumbs forms.
Using your hands or sturdy spoon, mix the beaten egg into the mixture until a crumbly dough starts to form. You don’t want to overmix the dough! It may toughen and shrink while baking if you work it too much at this point.
If the dough seems too dry, you can add a teaspoon of water at a time to reach the right consistency. The dough should be able to clump into a solid mass when squeezed by your hand.
You can also make the dough entirely in the food processor, pulsing the ingredients together at every step.
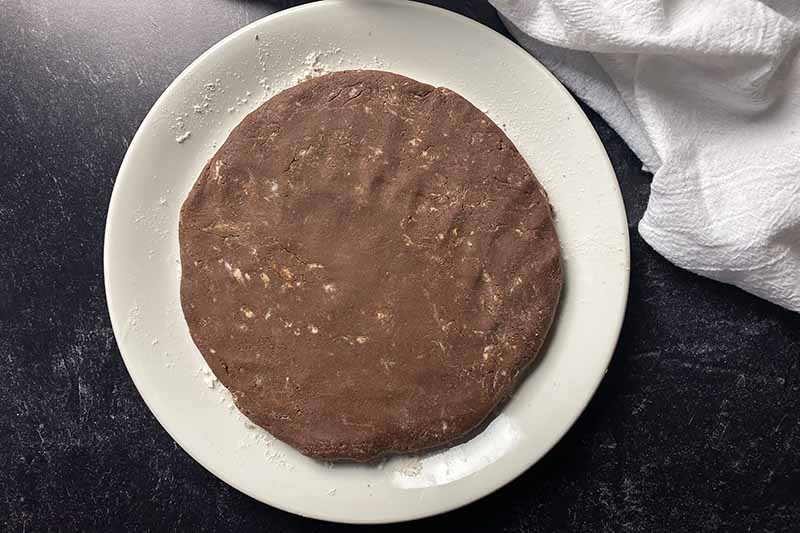
Dust a clean work counter lightly with flour and place the dough on top. Press lightly to form a smooth, flat disc.
Forming the dough into a disc is an essential step that will help you later. A flat disc is the best shape to start with before rolling it out into a large, flat circle to fill the tart pan in the following steps.
Tightly wrap the disc in plastic wrap and place it in your refrigerator. Chill for at least 1 hour. If you are preparing the dough in advance, you can store it for up to 2 days in the refrigerator, or up to two weeks in the freezer.
Step 3 – Roll the Dough
Remove the chilled dough from the refrigerator and let it sit at room temperature for 5 to 10 minutes.

You don’t want to attempt to roll it out immediately as it will be too cold and stiff, and will rip easily. Letting it sit for a few minutes will soften the dough to an ideal temperature so it’s pliable enough for rolling.
Remove the plastic wrap and place the disc on a clean countertop dusted lightly with flour.
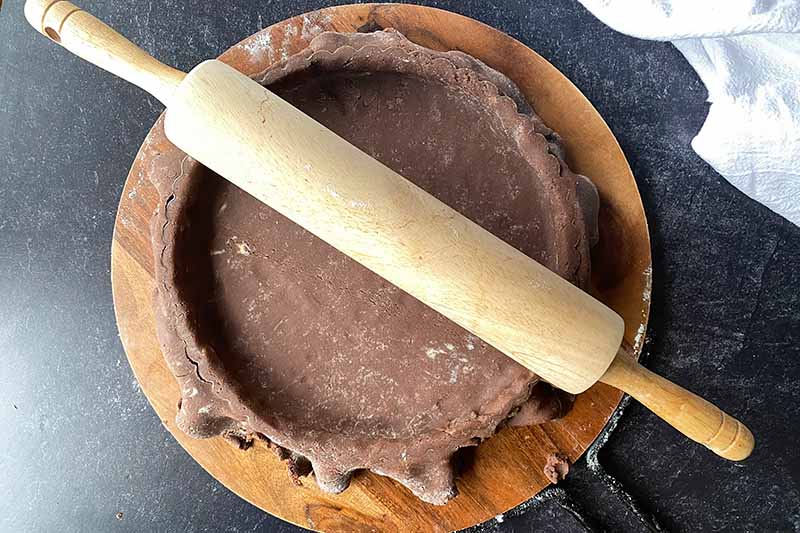
Roll and flatten the dough into an even circle using a rolling pin, until it is about 1/8 inch thick. It should be large enough to cover the base of the tart pan, with about 1 inch of excess dough around the edges.
Hover the tart pan over the dough to determine if you have reached the correct size – you may need to continue rolling!
Step 4 – Form into the Pan and Chill
Carefully transfer the dough to the tart pan. An easy way to do this without ripping the dough is to gently fold it in half, quickly transfer it to one half of the tart pan, and unfold it over the other half.
Using your hands, gently press the dough into the bottom of the pan, then press it onto the sides of the pan going all the way around.
Trim any excess dough around the edges so it is flush with the top of the tart pan. A quick tip for this is to roll a rolling pin over the edges of the tart pan to create the cleanest cut.
Notice a couple rips or tears? You can use the excess dough to fill in any cracks.
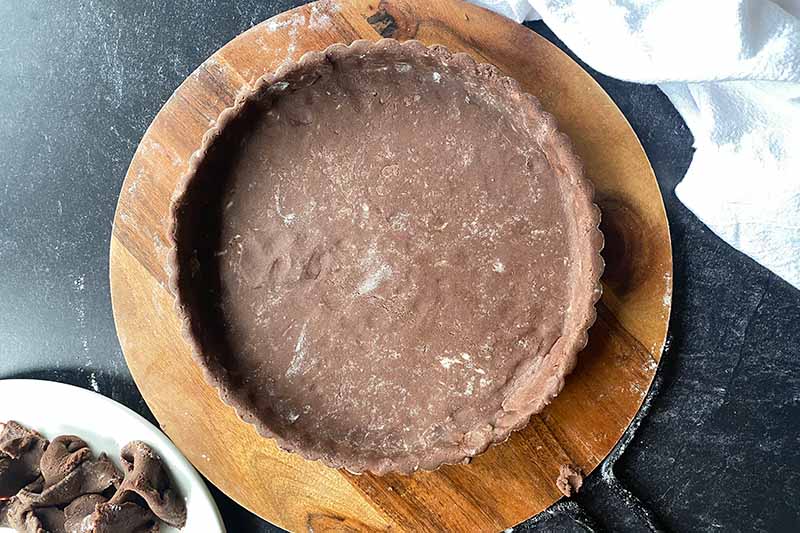
Place the pan uncovered in the freezer and chill for 1 hour until the dough is very cold and firm.
This chill time helps to set the structure of the dough in the pan so the butter won’t melt prematurely and cause it to collapse while baking.
Step 5 – Blind Bake
When the crust is nearly finished chilling, preheat the oven to 400°F.
Take the pan out of the freezer. Use a sheet of parchment paper or aluminum foil to cover the bottom and create a bit of an overhang that goes up and over the sides.
Place pie weights on top of the paper.
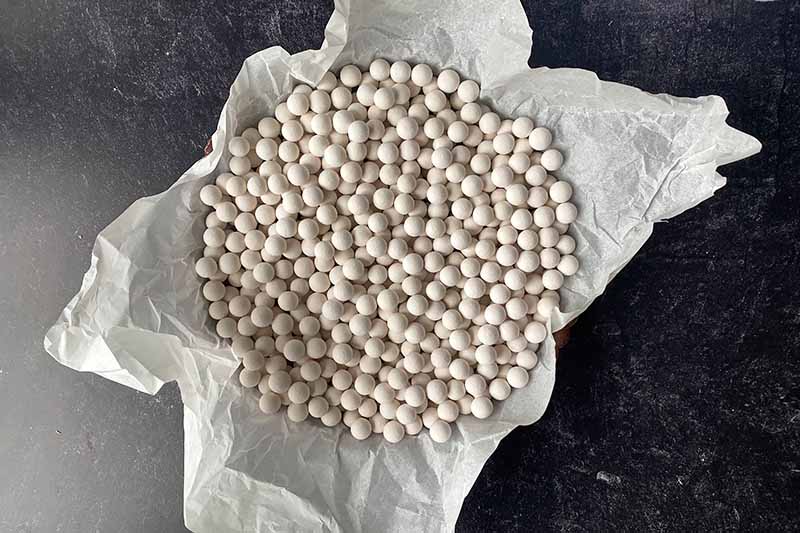
As long as you use enough weights to reach as close to the top of the tart pan as possible without them spilling over, this will ensure the sides of the dough will stay in place and won’t collapse.
We suggest reading our guide to using pie weights to learn everything you should know about this baking process!
Transfer the pan to the oven and bake for 15 to 20 minutes, or until the edges of the crust are beginning to dry.
Take the tart pan out of the oven and transfer it to a wire cooling rack or heatproof surface. Carefully remove the parchment paper, lifting it up around the edges so it holds the weights – be careful, because they will be hot!
Pierce the bottom crust multiple times, using the tines of a fork to dock the dough evenly across the surface. This will help steam escape from the bottom of the pan, allowing the dough to remain flat and bake evenly without forming large air bubbles.
Transfer the pan back to the oven and bake for another 10 to 15 minutes. The crust for this recipe needs to be baked completely, since we will not continue baking it after adding the filling.
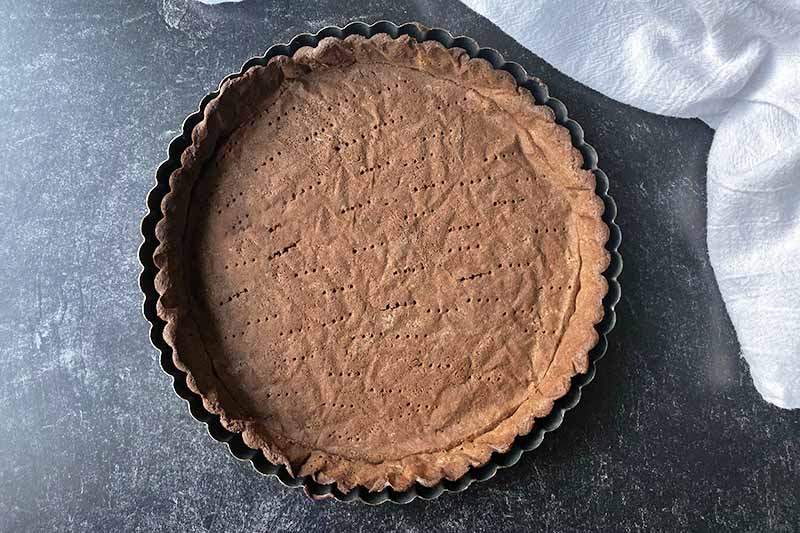
A chocolate crust will bakes faster, and is more difficult to check for doneness compared to other types, due to its darker color.
The most reliable visual aid to see if the shell is done baking is to check whether the dough appears to be evenly dry, with no wet or shiny areas. If it still looks wet or shiny, this is your cue to put it back in the oven. Continue baking and check again in 5-minute increments.
Remove from the oven and let the crust cool completely in the pan, set on a wire rack. Be sure to pick the pan up around the sides rather than from the bottom, to avoid dislodging it! Do not prepare the ganache filling until the crust is totally cold. This will take about one hour.
Step 6 – Prep the Ganache Ingredients
As the crust is cooling, you can prep the ingredients to make the ganache filling.
Cut the butter into small cubes, and leave it out at room temperature.
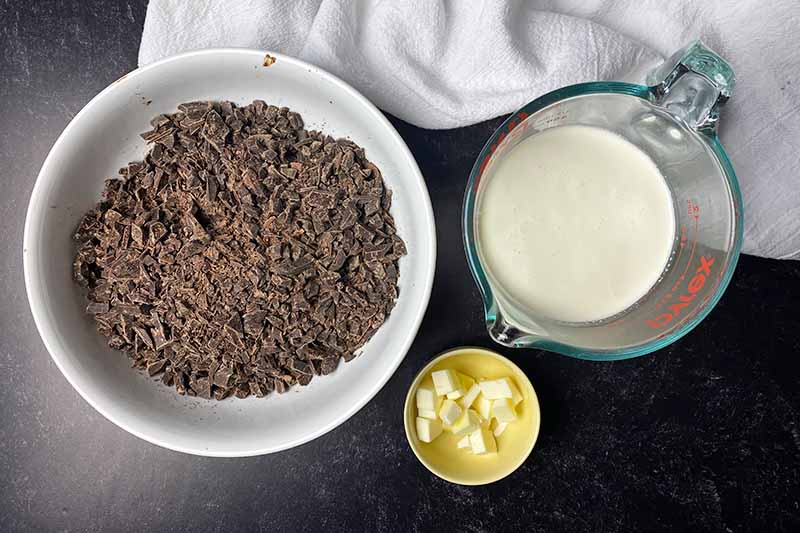
The temperature of the butter is incredibly important here – make sure it’s had enough time to warm up to room temperature – it should absolutely not be cold when you incorporate it into the filling! This may cause the mixture to seize, and it will not form a smooth ganache.
Measure and finely chop the bittersweet chocolate, using a sturdy cutting board and sharp knife. Finely chopped chocolate pieces will melt more evenly and quickly when combined with the hot heavy cream. Place the chocolate in a medium-sized heatproof bowl.
Measure the heavy cream into a small saucepan.
Step 7 – Warm the Heavy Cream and Combine with Chocolate
Heat the heavy cream on the stovetop over medium heat just until it begins to simmer.
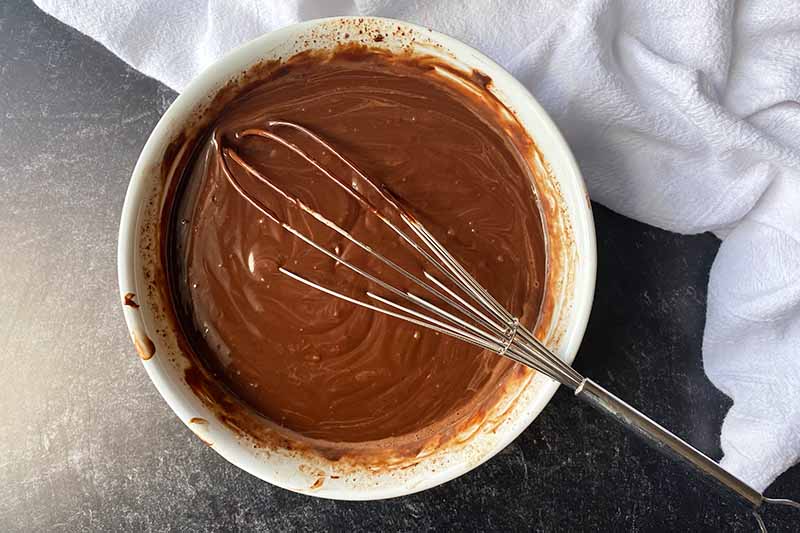
Immediately pour the heavy cream over the chopped chocolate. Let stand for 3 to 5 minutes without whisking in order to give the chocolate a chance to melt.
Gently stir with a whisk just until the chocolate has melted and is mixed completely with the heavy cream. Whisk the mixture as little as possible to prevent excessive aeration.
Step 8 – Add the Butter
Add the room temperature butter cubes immediately to the chocolate and cream mixture.
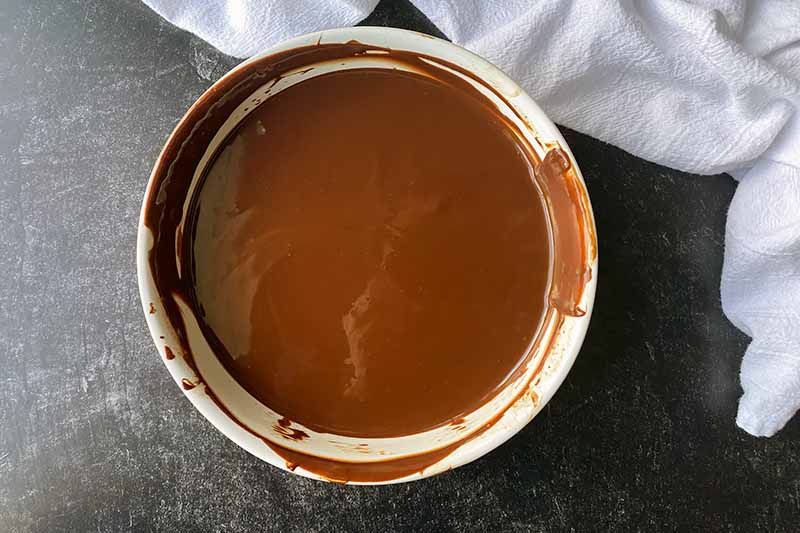
Gently whisk until the butter is completely melted and incorporated into the ganache.
Step 9 – Pour in to Tart Shell and Chill
Immediately pour the ganache into the prepared tart shell, scraping the bowl with a flexible spatula and spreading it with an offset spatula to reach the edges of the pan.
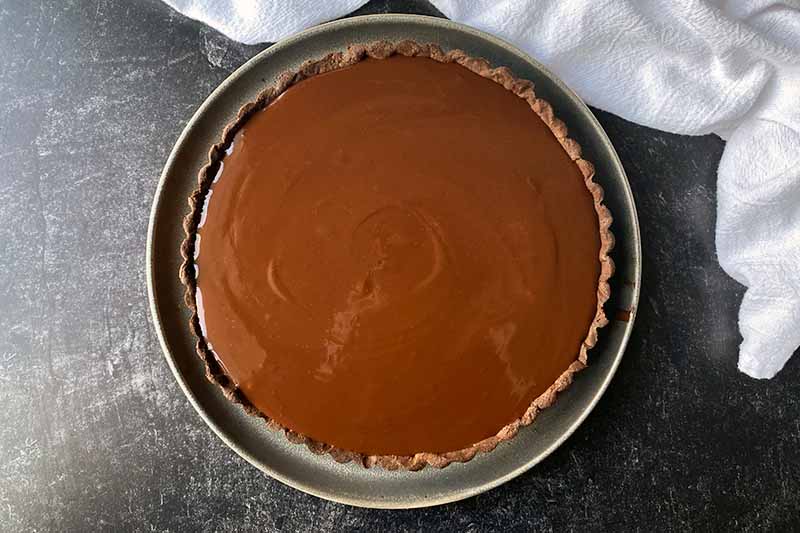
Transfer the pan to the refrigerator, but don’t cover it! The warm ganache will create condensation if you cover it with plastic, and any water droplets that form could potentially fall onto the ganache. Nobody wants that!
Chill until completely set, for about 2 hours. The ganache will be firm and it won’t jiggle in the pan if gently shaken.
Step 10 – Serve
After the filling has chilled and set, remove the pan from the refrigerator.
Wish to decorate the top of the tart? Go for it – let your creativity go wild! You can use anything you’d like that’s delicious paired with chocolate, from fresh fruit to freshly whipped cream, or shaved chocolate to crushed candied nuts.
Cut the tart into wedges with a sharp chef’s knife, serve, and enjoy!
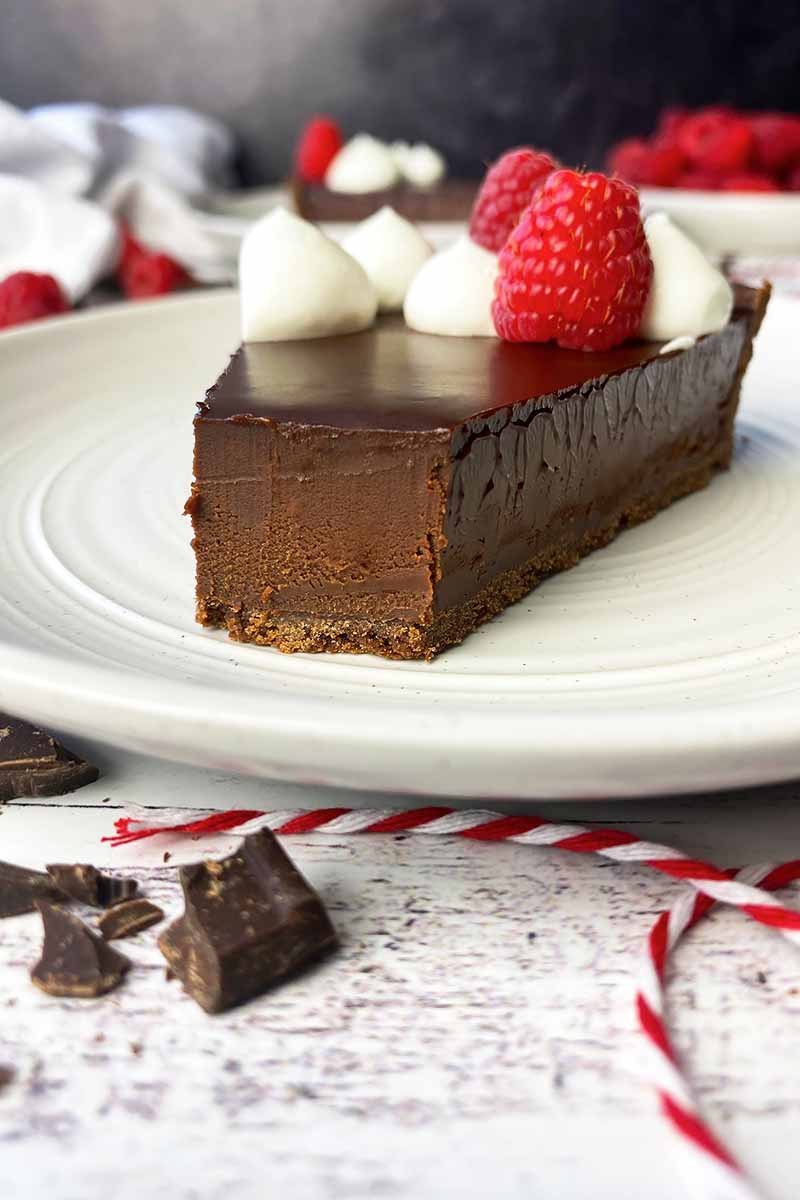
The ganache will be cold and stiff if you decide to serve directly from the refrigerator. If you prefer a softer, more melt-in-your-mouth ganache, allow the dessert to sit out at room temperature for about 10 minutes before serving.
For the cleanest cuts, rinse the knife under hot water after each slice and wipe it clean before slicing again.
Beauty, and Risk, in Simplicity
Ganache in a chocolate crust – that’s it?!
Yes, that’s it. And it’s beautiful.
Two carefully crafted components of an elegant dessert combine to create a gorgeous end result that has more than enough visual and flavorful impact, despite its disciplined simplicity.
You are in fact doing a lot of work to create a beautiful tart, though it involves “just two” components, and the minimal ingredient list here certainly leaves room for error.
Don’t get too ahead of yourself.

What could be viewed as a simple recipe carries some deception, with its reliance on somewhat advanced baking and pastry techniques.
Make sure you do the necessary homework before you start your prep. Study our guide to using pie weights and blind baking a homemade crust, as well as our article on making the best ganache.
As long as you take the time to read, review, and then complete the necessary preparations, your hard work will pay off with the creation of a delicious masterpiece!
Do you have any troubleshooting tips to share, when it comes to homemade ganache or pastry crusts? Leave a comment below, please!
And what could be better than rising to the challenge of preparing a new chocolate recipe that’s sure to become a favorite? Discovering more chocolate recipes! While we could easily tempt you with so many options, here are just three to start:
Photos by Nikki Cervone, © Ask the Experts, LLC. ALL RIGHTS RESERVED. See our TOS for more details.
Nutritional information derived from a database of known generic and branded foods and ingredients and was not compiled by a registered dietitian or submitted for lab testing. It should be viewed as an approximation.
About Nikki Cervone
Nikki Cervone is an ACS Certified Cheese Professional and cheesemonger living in Pittsburgh. Nikki holds an AAS in baking/pastry from Westmoreland County Community College, a BA in Communications from Duquesne University, and an MLA in Gastronomy from Boston University. When she's not nibbling on her favorite cheeses or testing a batch of cupcakes, Nikki enjoys a healthy dose of yoga, wine, hiking, singing in the shower, and chocolate. Lots of chocolate.