We occasionally link to goods offered by vendors to help the reader find relevant products. Some of these may be affiliate based, meaning we earn small commissions (at no additional cost to you) if items are purchased. Here is more about what we do.
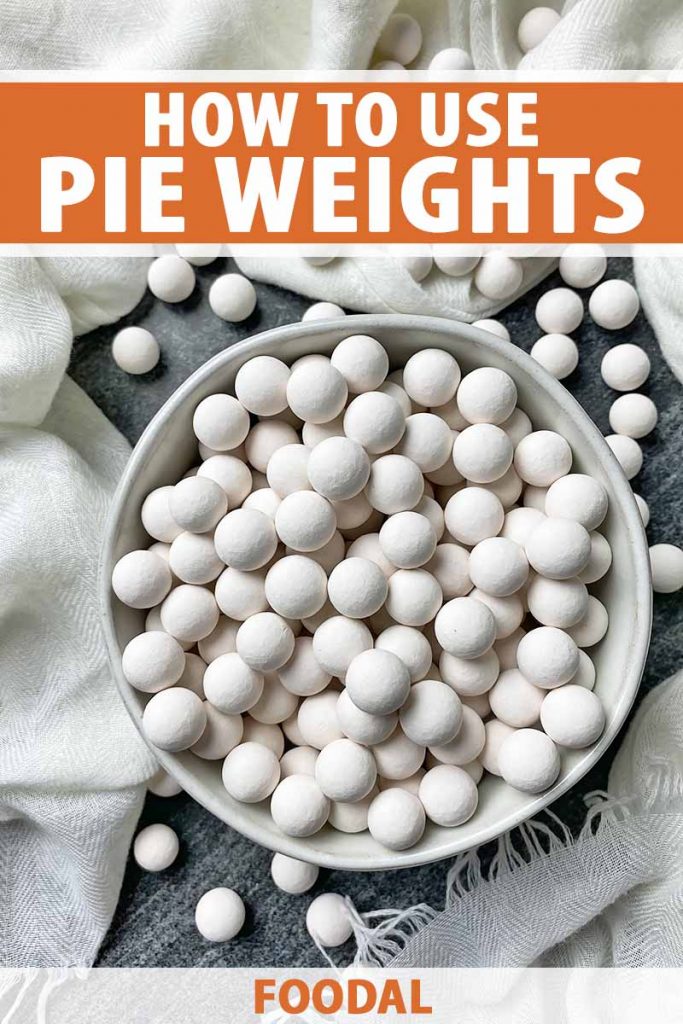
Pie weights: love ‘em or leave ‘em?

When it comes to baking tips and tricks, I don’t like to leave any stone unturned – if I know there is a method I can easily apply to ensure a better outcome and produce a perfect pastry, I’m going to use it!
And that is definitely the case with using pie weights.
If you are often disappointed to discover a limp, soggy bottom when you cut into a homemade crust, you’ll benefit from incorporating pie weights into your baking process.
I know, I know – maybe you’re not happy that there will be more steps to complete, with more time and more work involved. There’s already so much to do…
But trust me when I tell you that this technique is a cinch to pull off, and the results are well worth it.
Will you try it?
Pie weights are your little helpers – the star assistants that will help you over and over again to make beautiful pies and tarts, whether you need to blind bake an empty crust or if you want a crisp base that will stay that way when you’re baking a wet filling.
Let’s weigh in right now on pie weights! You’ll learn what they are and why you need them, as well as a little bit about the different types available.
After a quick review of our suggestions, move on to our step-by-step tutorial to learn how to use them.
Start rolling out that dough now…
What You’ll Learn
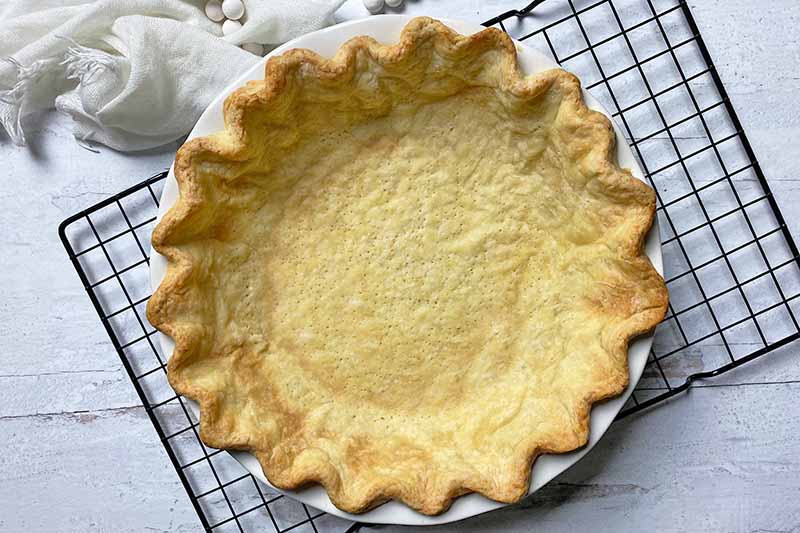
What Are Pie Weights?
Pie weights are materials used to weigh down raw dough as it bakes, either partially or fully, after it’s been shaped and placed in the pan.
But why would you do such a thing?
This prevents a nightmare situation that’s the bane of all bakers:
A soggy bottom!
With the help of gravity, the weights force the dough to remain flat and in place during an incredibly delicate part of the baking process.
Because pie dough has a high ratio of fat compared to the dry ingredients like flour, there is a long list of potential atrocities that can happen when the crust bakes:
The dough’s weak structure can easily melt, bubble, shrink, sag, and warp if it’s not handled and baked properly – all are sad scenarios, needlessly prompting a range of emotions in the baker as you’re helplessly watching your failing pastry through the oven window!
The weighted materials help the bottom of the crust to stay flat so it bakes evenly, and act as a structural support for the sides of the crust to keep them upright. Both are key here.
What Is Blind Baking?
Blind baking is the process of fully or partially baking – also known as parbaking – an empty crust.
A fully cooked pie crust is used with filling that you do not have to bake before serving, like the custard in a cream pie that is cooked separately on the stove.
A partially cooked crust is used when you still need to cook the filling in the oven. This is an extra step to ensure the crust stays crisp and dry as it continues baking along with the filling. Many fruit or nut pies begin with a parbaked crust, as well as savory quiches.
Different Types
You have many options to choose from!
Store-bought products are available in a range of materials and designs. But you can also use many basic household pantry ingredients as a substitute for pie weights.
Let’s go over some of the more popular styles now.
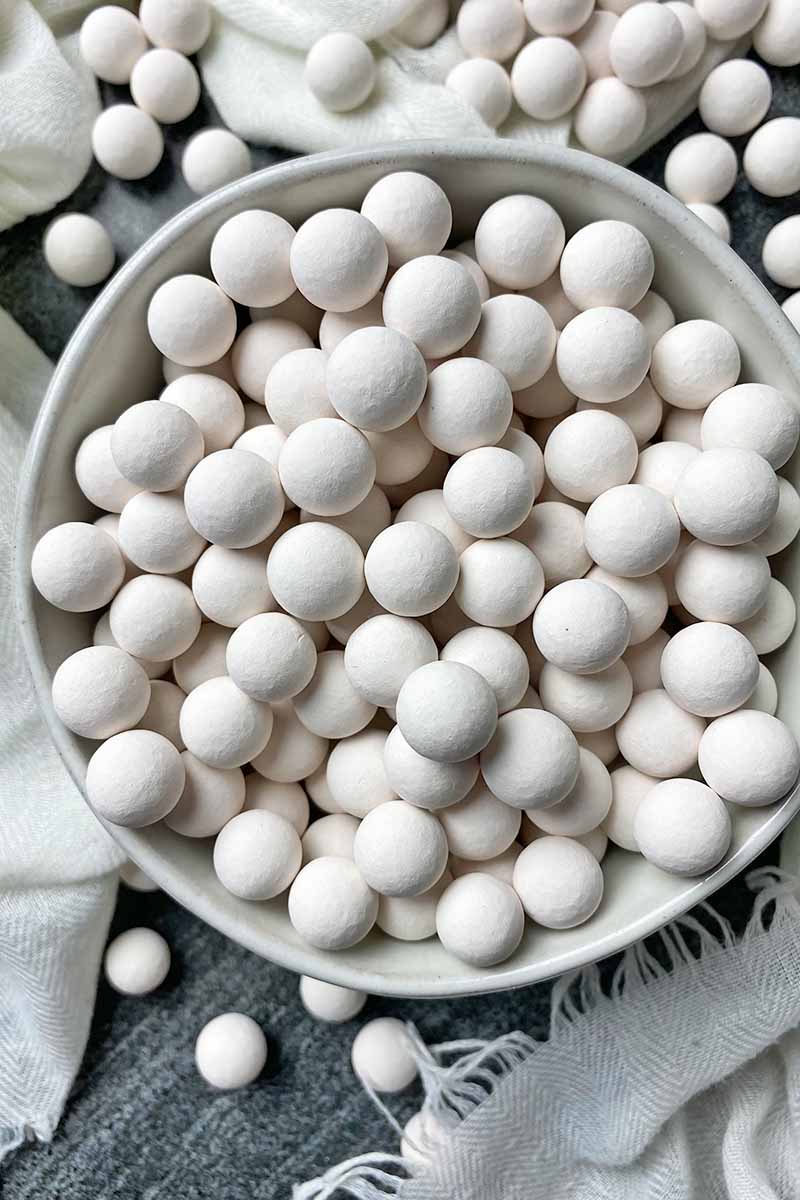
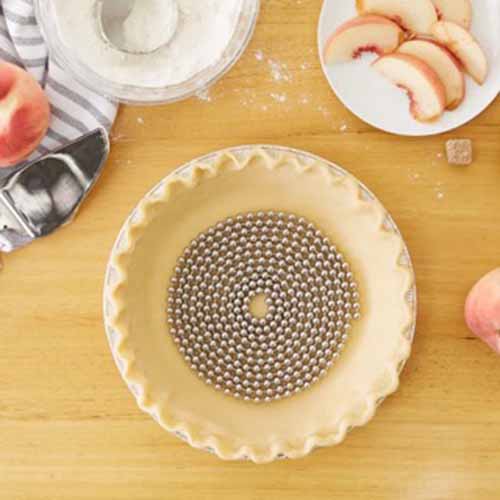
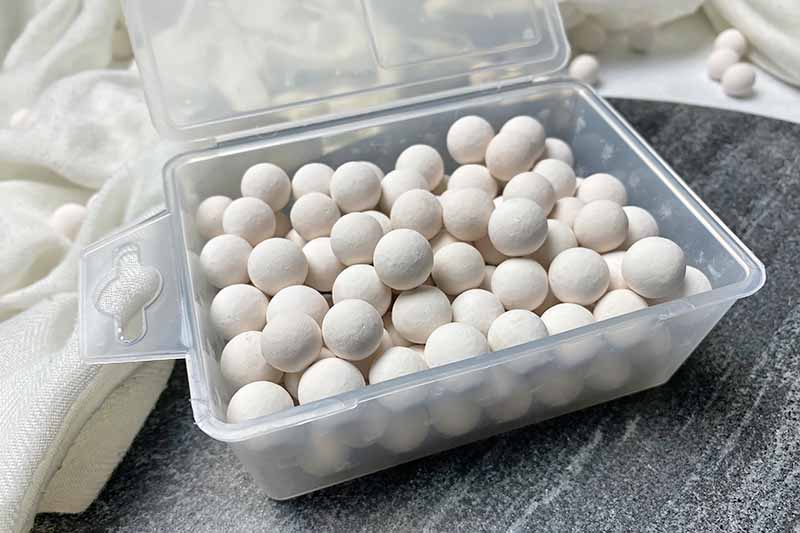
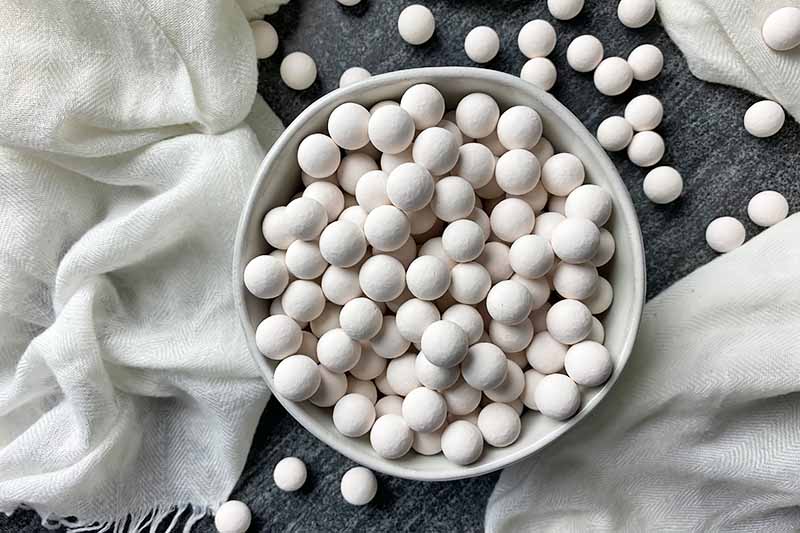
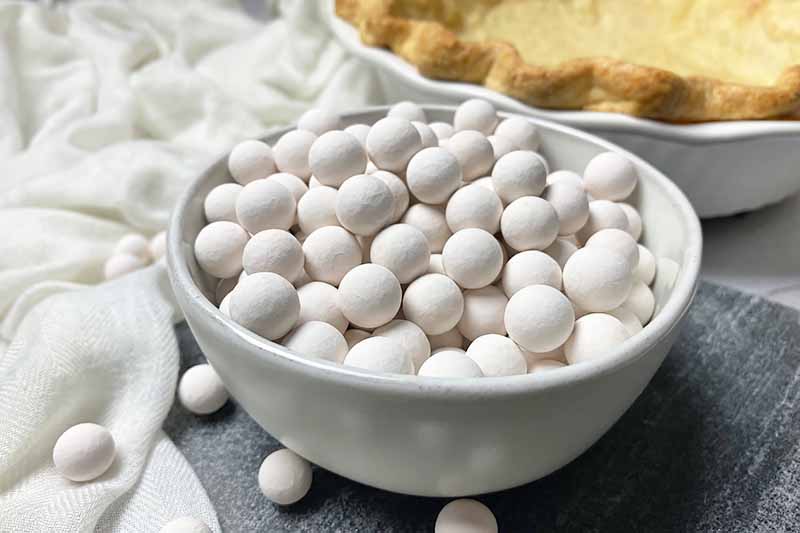
Beads
A well-liked choice comes in the form of small beads made with heatproof and nontoxic materials. You might sometimes see these referred to as “baking beans.”
This is my favorite option since I can easily select whatever amount I need to fill the pan I’m using, regardless of style or size.
Beads are generally made from unglazed clay that has been fired in a kiln to create ceramic spheres. You may also see metal beads, or beads made from borosilicate glass. These may all be uniform or they may vary slightly in size, with uniform or irregular shapes.
Mrs. Anderson’s Baking Ceramic Pie Crust Weights, available on Amazon
If you like this option, Mrs. Anderson’s Baking Ceramic Pie Crust Weights are a great choice that’s available on Amazon in 12-ounce packages.
Note that residual dust or debris may come off the surface of the beads after the first use and with continued reuse. With all pie weights of this type it’s important to use a liner to create a barrier that keeps them from touching the dough directly, and they can be cleaned after allowing them to cool with a clean, dry cloth or in warm soapy water.
Borosilicate glass beads bring a modern touch with no dust or debris to worry about. This is the same type of glass that’s used to manufacture oven-safe glass pans.
Gretel Baking Glass Pie Weights, available on Amazon
If you like the look of these, 2.5-pound packages are available from Gretel Baking via Amazon.
Aluminum pie weights, or even stainless steel ball bearings used for blind baking, are better conductors of heat than ceramic or glass. If you use these materials you may find that you need to adjust your recipe timing by a few minutes to avoid overdoing it.
Since glass and metal aren’t porous like clay they won’t retain any oils or odors, and they’re easy to clean with warm, soapy water.
Depending on the weight and size of the beads and the quantity included in your purchase, multiple sets may be required to make sure you have enough available to fill your pan. The step-by-step tutorial below explains how to estimate what amount you’ll need.
Chains
Don’t want to deal with cleaning, gathering, and storing individual beads? Consider a pie weight chain instead.
Rather than cautiously trying your hardest to avoid dropping a bunch of beads all over the counter and onto the kitchen floor, a chain is much more efficient to maneuver and remove after use.
Design Imports 10-Foot Beaded Stainless Steel Chain, available on Wayfair
These may be made from metal or silicone, and they’re often dishwasher-safe for easy cleaning. But they tend to be very light, and you may need multiple chains for this option to work effectively in terms of weight and to get full coverage across the dough in the bottom of your pan.
Consider this 10-foot beaded chain from Design Imports, available on Wayfair. The small 18/8 stainless steel weights are connected, so they’re easy to coil around the base of your crust and remove again after parbaking.
A silicone chain option from Empava is also available from Wayfair. This 46-inch chain of silicone beads even doubles as a coiled trivet.

Empava Silicone Chain, available on Wayfair
One of the main pitfalls of this style is that you won’t get any height using a chain that rests flat on the bottom of the pie. There is a potential risk that the sides of the crust may still sag or bubble as the crust is baking.
Because of this design detail, I advise saving this option for pastries with shorter sides, such as tarts.
Some sources also say you can use these without a liner, but that may result in a crust with a pattern of pit-shaped indentations in the bottom.
Covers
If you don’t want to use individual beads but you like the idea of a single piece that can help hold the structure of a crust on the sides, you’ll love this next option.
A cover is a convenient option to choose for parbaking crusts with tall sides. Made of metal or metal and silicone, it nestles up against the crust in the bottom and up the sides of the pan to hold the dough securely in place.
Chicago Metallic Pie Weight, available on Amazon
Pie crust shields that are placed in a ring around the pan while it’s baking to prevent burning sometimes have a similar construction, with flaps of silicone that are cut to accommodate the round edges of the pan.
But these are rare, with a unique design, and we haven’t seen many of them available on the market today.
This cover-style pie weight from Chicago Metallic has a stainless steel perforated base and flexible silicone sides. It’s available on Amazon.
The perforated base allows steam to vent, while the pliable silicone sides easily move and bend to fit the curves and sides of the pan. A knob in the center allows for easy removal, and it can be cleaned on the top rack of the dishwasher.
This cover can accommodate pies ranging from 9 to 11 inches in diameter. But note that this is a very lightweight option, with silicone flaps that will only go partway up the sides of a deep-dish baking pan. Mixed materials also mean the base and the sides won’t heat evenly.
You could weigh it down, but that will block airflow. So you may just want to stick with traditional bead-shaped weights! Or bean-shaped ones, which brings us to our next option.
Substitute with Household Ingredients
If you’re running out of time or you’re not quite ready to purchase a new product, you can use ingredients you more than likely already have in your kitchen as substitutes for store-bought weights.
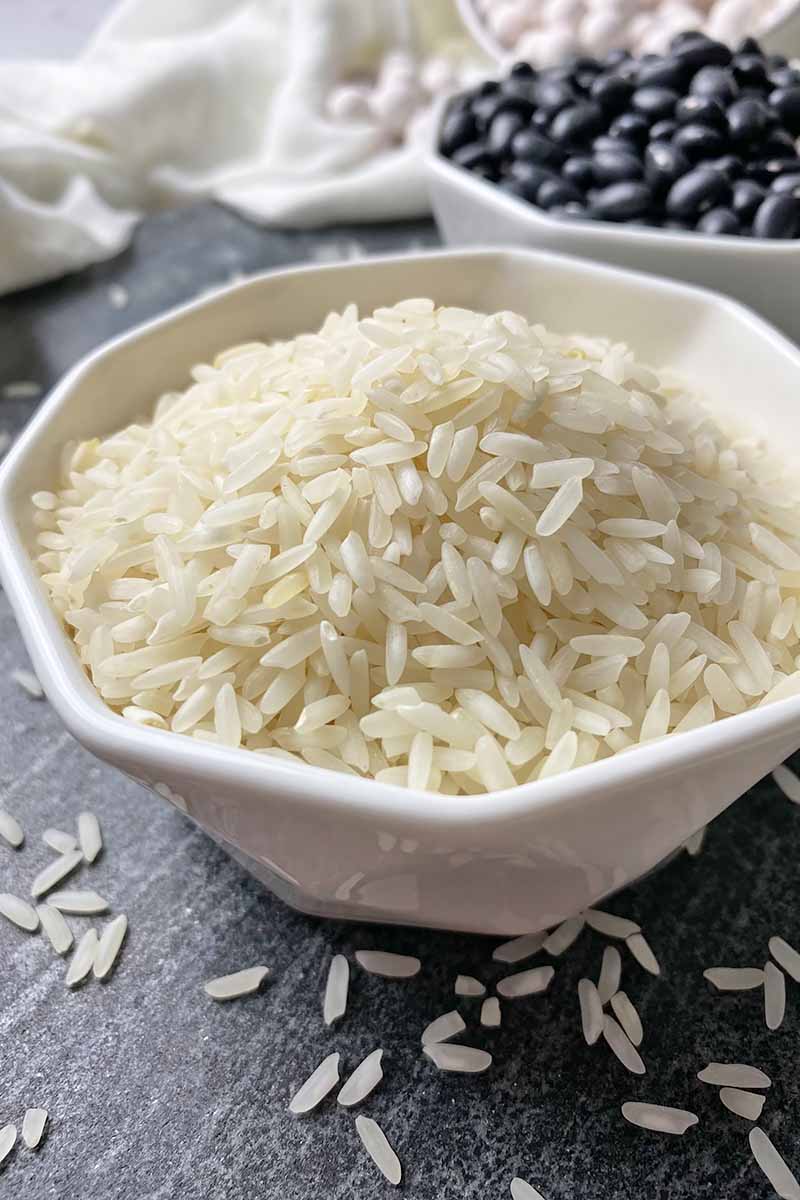
Common pantry ingredients such as dried beans, uncooked rice, and even granulated sugar are all cheap and easy options to employ instead of purchasing a new kitchen gizmo.
Smaller varieties of beans and rice will work better than larger legumes or grains, since the smaller pieces will more evenly distribute their weight throughout the pan.
Opinions vary as to whether these foodstuffs are still fit for eating after use – or repeat use – as baking implements. Dried beans will simply become more dry, losing a bit more moisture each time they’re heated. There are probably tastier options in the pantry, but you could eat these in a pinch as long as they’ve been cooled and stored properly.
Rice will not cook as well after repeated heat treatments and handling, so refrain from cooking or baking foods that will be consumed with it, and save it just for use as a baking tool instead.
Consuming toasted sugar won’t hurt either, if you like the flavor. But this option can be particularly messy to work with as it’s difficult to maneuver a sheet of parchment paper or foil filled with a pound or so of sugar as you remove it from the hot pan.
How to Use Pie Weights to Blind Bake a Crust
What type of pie are you planning to make: fruit, custard, no-bake, savory, cream, meringue, chiffon? Or maybe you’re making a thin and delicate onion and bacon tart?
Whatever you decide to prepare, you’ll be glad that you read over these step-by-step instructions!
Step 1 – Prep
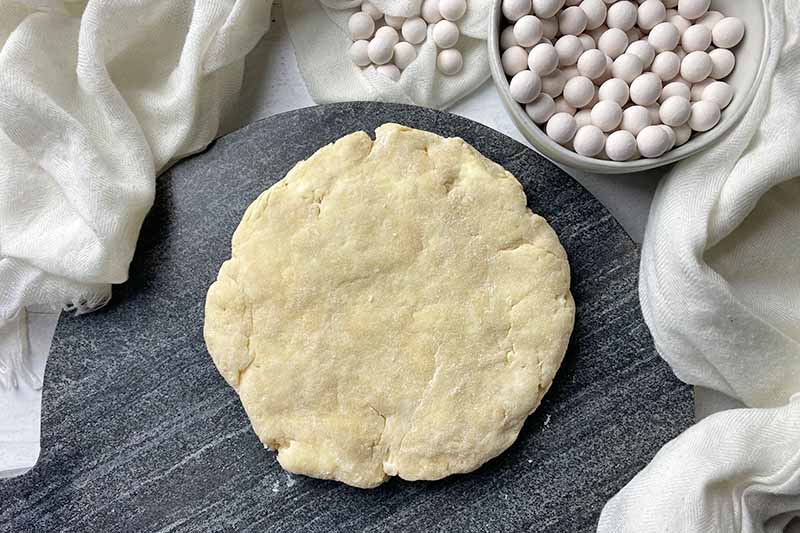
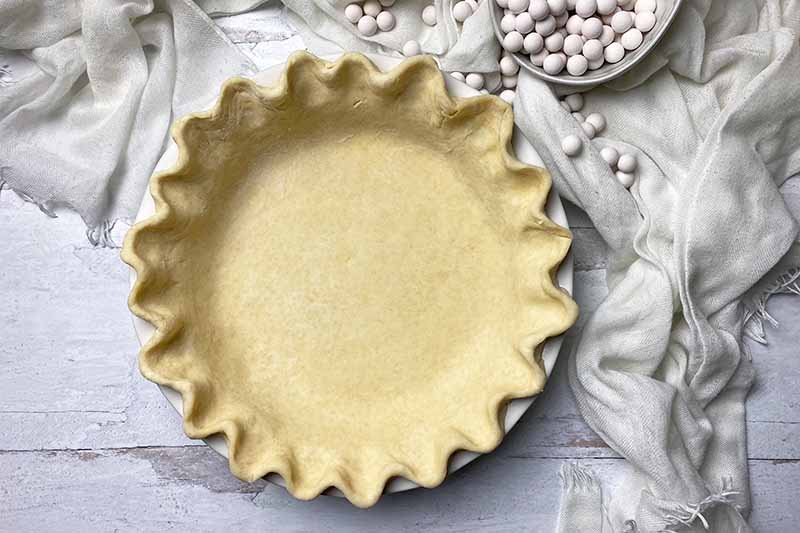
If you are making the dough from scratch, prepare it according to the recipe directions, forming it to fit a pie or tart pan of the correct size, and placing it inside.
Foodal’s recipe for an all-butter pate brisee crust will yield deliciously crisp and flaky results. This article also includes essential info on prepping the perfect crust – read and review it vigilantly before getting started!
You can also use premade pie dough, or a pie crust mix.
If you are using a preformed pie crust from the store, follow the baking instructions on the packaging for the best results. If blind baking is not recommended, skip it or choose a different recipe.
Step 2 – Chill the Formed Dough
After forming the crust inside the pan, place it in the refrigerator to chill uncovered for at least one hour before moving forward with the baking process. As a quick shortcut, you can place it in the freezer instead for about 30 to 40 minutes.
Whichever method you choose, make sure the dough is completely chilled and very firm before baking.
Cold, firm dough will maintain its shape better in the oven, since the butter or shortening is given this opportunity to chill again after softening while it was being manipulated to form and shape the dough.
Whether you opt to use weights or not, an inadequately chilled crust won’t be able to maintain its shape as it bakes, and it will melt and sag quickly.
When the crust is nearly finished chilling, preheat the oven to 400°F and move a rack to the center for the most even heating in the best location in your oven.
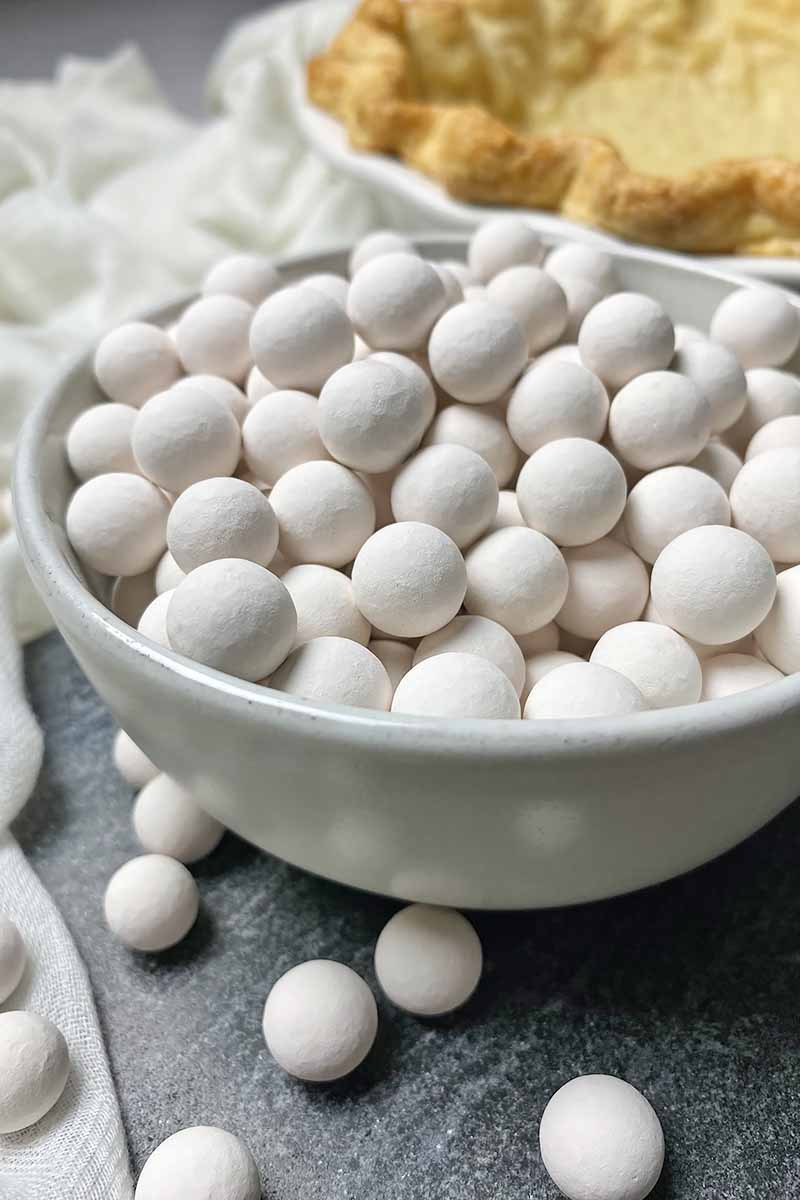
Step 3 – Cover Dough with a Liner
Once the dough is completely chilled and firm, remove the pan from the refrigerator.
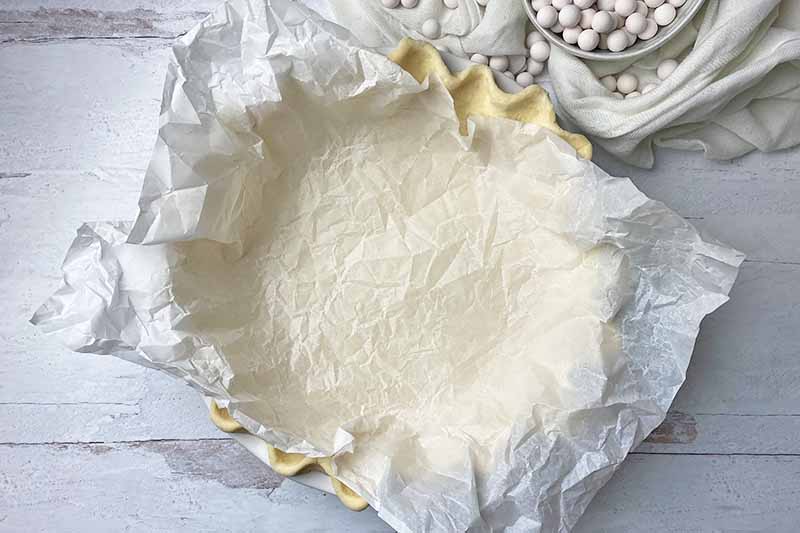
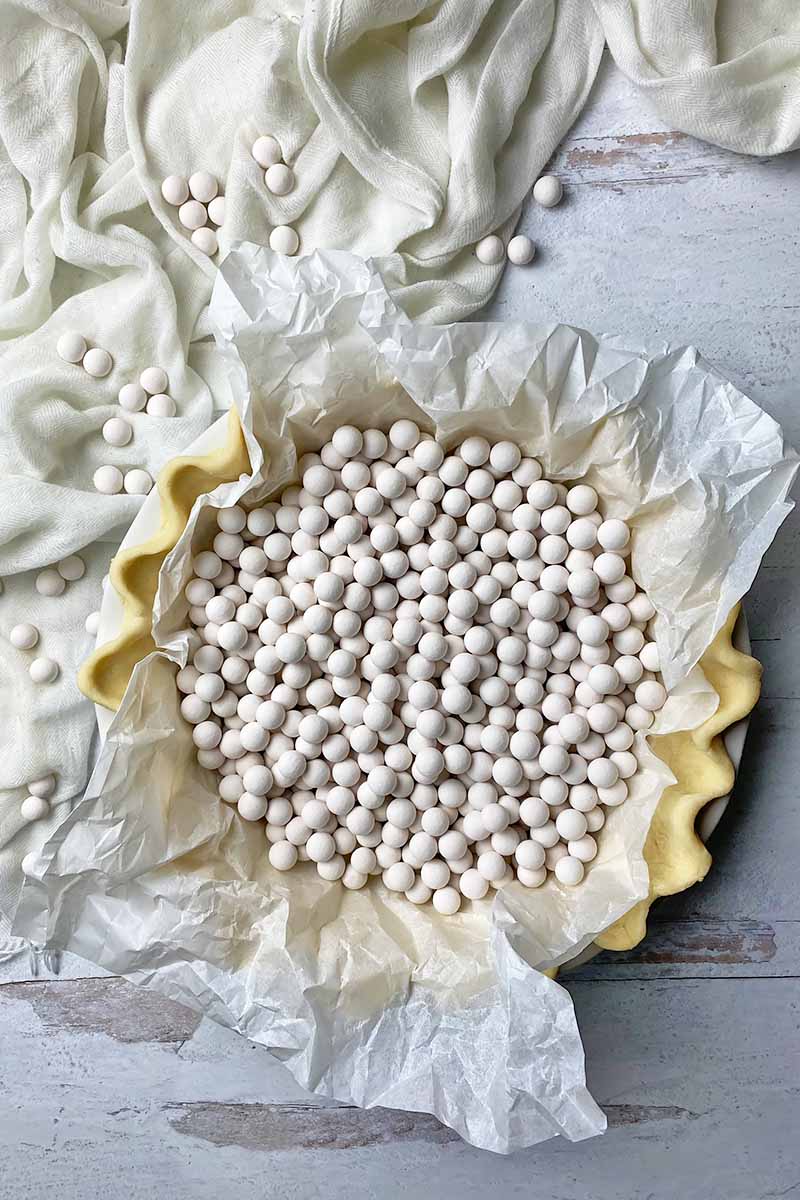
Working quickly to keep the crust as cold as possible, cover the bottom and sides of the unbaked crust with a large sheet of parchment paper or aluminum foil that is big enough to allow for a bit of an overhang.
Gently press the liner against the bottom and sides of the pan. Fold any excess over the sides for easy lifting later.
Direct contact between the dough with any type of pie weight is not recommended. This thin liner will prevent the dough from becoming damaged by the pie weights, protecting it from dents and divots, and will help to more easily remove them while keeping them clean.
Trust me, bakers – you do not want to be picking out individual grains of rice from a parbaked crust with tweezers!
Tip: parchment paper is easier to manipulate if you crumple it into a tight ball first, then flatten it out again before lining your pan. This helps to soften the rigid paper, making it pliable enough for you to move and manipulate as needed in a pan with a round shape.
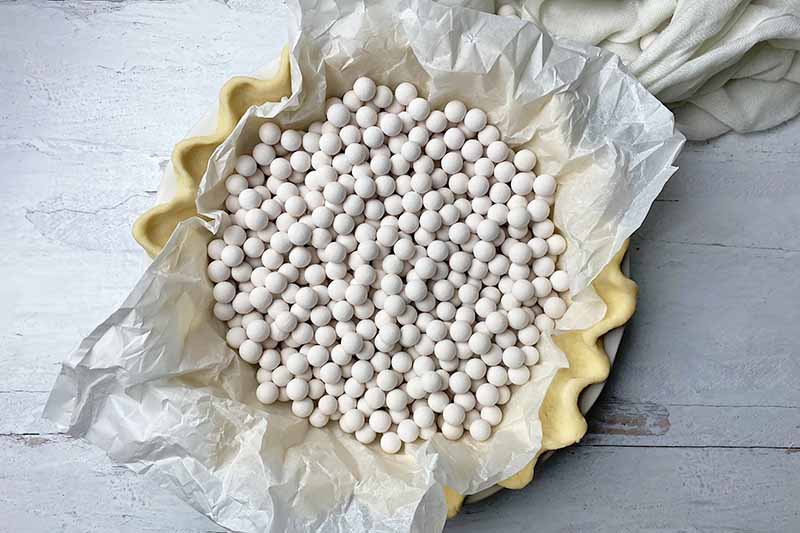
Step 4 – Fill with Weights
Using your chosen style of pie weights, place them on top of the liner.
If you’re using a pie chain or other type of single-piece gadget, assemble it appropriately. A chain should lie flat in a single layer on the bottom of the crust from the edges to the center.
If using individual beads – our preferred option – or if you’ve opted to use beans or rice, spread them out evenly to cover the bottom and go up the sides.
A common mistake is not using enough pie weights!
Make sure you have enough to reach as close to the top of the pan as possible without the weights spilling over. This will keep the sides of the dough in place, ensuring that they don’t bubble or collapse while the crust bakes.
Not sure how much you’ll need? Here are some general estimates to give you the lay of the land if you are using individual beads, rice, or beans:
To fill a 9-inch tart pan:
- Use about 1 1/4 pounds of dried rice or beans, roughly 3 cups
- Use about 2 pounds ceramic beads, roughly 3 cups
To fill a 9-inch pie pan:
- Use about 1 3/4 pounds dried rice or beans, roughly 4 1/2 cups
- Use about 3 pounds ceramic beads, roughly 4 1/2 cups
If you’re using metal or glass beads, these may weigh more or less than ceramic, depending on the material. Use the available volume as your guide, and feel free to test things out first – it’s easy to fill an empty pie pan to see if you have enough before you start baking!
Step 5 – First Bake and Remove Weights
Immediately transfer the pan to the oven and bake for 20 to 25 minutes, or until you can see the edges of the crust just starting to dry out, and beginning to develop a little color.

Take the pan out of the oven and carefully remove the liner, lifting it up by the edges on opposite sides so it holds the weights – and be careful, because they will be hot!
Tip: set a large heatproof bowl next to the oven so you have a safe place nearby to deposit the hot pie weights and allow them to cool.
Step 6 – Dock
Before transferring the crust back to the oven to finish parbaking as needed, according to the instructions in your recipe, you have the option to repeatedly pierce the bottom and sides of the crust with the tines of a fork. This is what’s known as docking the pastry.
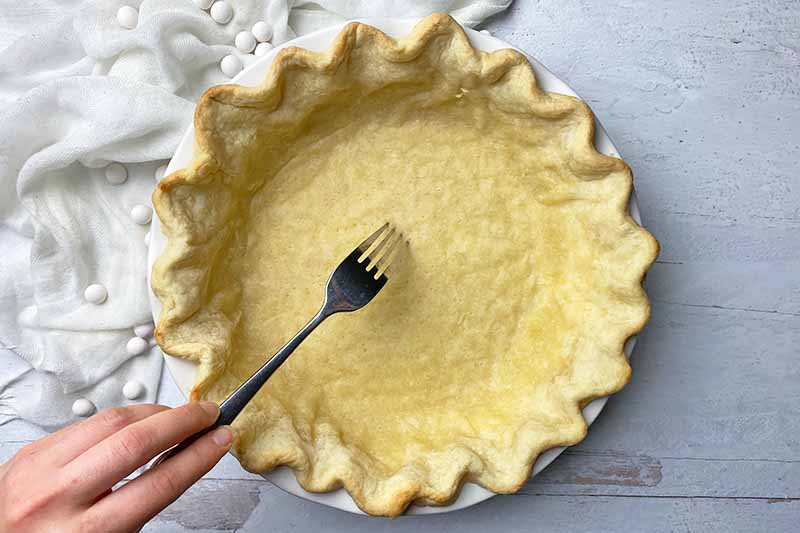
The dough will still be at risk of bubbling after the pie weights are removed, so docking is a quick and easy technique that’s used to prevent these bubbles from forming.
Docking is not a requirement, but it is a smart extra step that will pick up right where the pie weights left off to help the crust bake evenly.
Step 7 – Second Bake
Place the pan back in the oven.
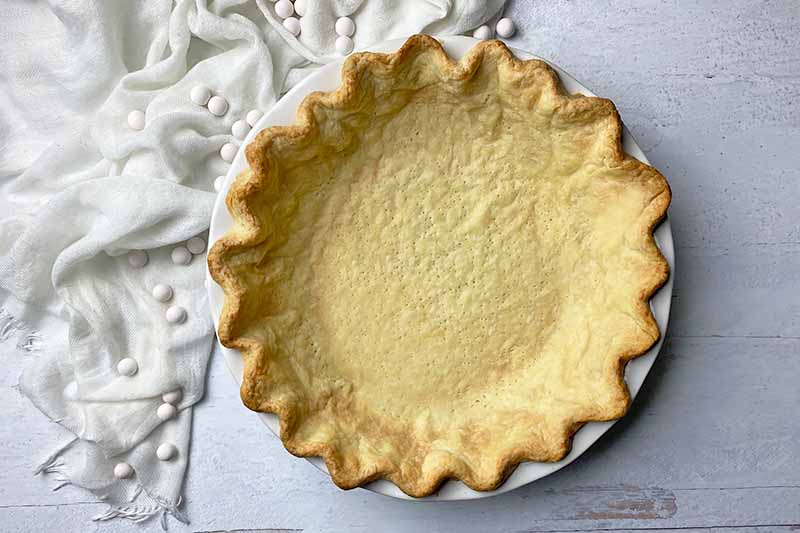
If you are only partially baking the crust, which you will then continue baking after adding the filling, bake for another 10 to 15 minutes. The edges and bottom of the crust will take on a light golden brown color.
While you do want the crust to be partially baked, you don’t want to develop too much color at this stage, since the crust will continue to cook after filling and overbaked dough may burn.
If you are fully baking the crust at this point, to fill with a pudding or custard, for example, bake for another 15 to 20 minutes instead. The edges and bottom of the crust should be a deep golden brown.
The required time in the oven may vary slightly depending on the thickness of the dough, what style of pan you’re using, the material the pan is made of, and the temperature of your oven.
Occasionally, recipes will call for a quick egg wash and a few more minutes of baking before filling, to plug the docking holes and prevent any liquids from seeping through the crust and into the pan. But this usually isn’t necessary.
Step 8 – Cool
Remove the pan from the oven and let the crust cool completely in the pan on a wire rack.
The structure of the delicate crust is still setting as it cools, so be careful to not disturb or jostle the pan during this step.
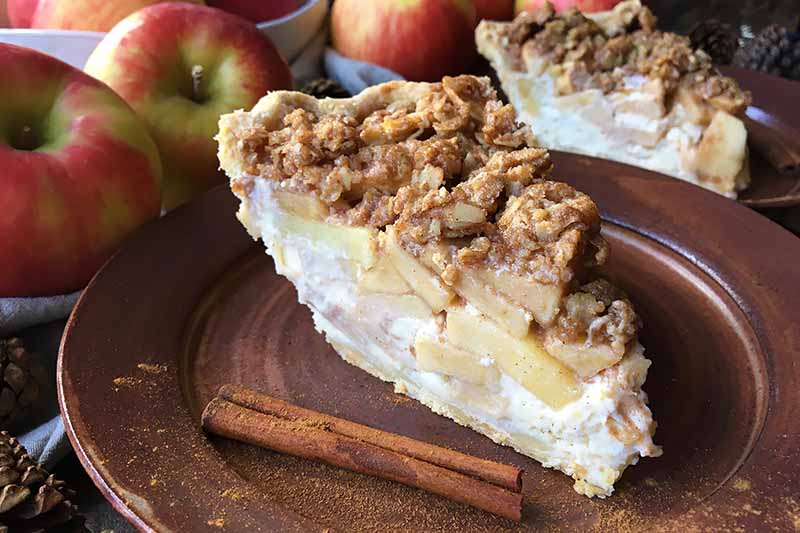
Step 9 – Fill, Bake, and Serve
Continue with your recipe, following the instructions to prepare the filling. You might place it back in the oven at this point, or place it in the fridge to chill.
Step 10 – Clean and Store Weights
Not so fast – unless you’re using a substitute from the pantry that you’re prepared to toss out, you’ll need to pack and store those weights away properly.
Be sure to let them cool completely before handling, and allow them to dry completely before storing in the cabinet.
Ceramic weights that have been kept clean might only require a quick wipe with a dry cloth before placing them back in their box or jar.
Beads must be hand washed – be sure to place a colander in the sink so you don’t lose track of them. Other single-piece styles made from metal or silicone may be cleaned in the dishwasher, but be sure to check the label first to confirm this.
Are Pie Weights Always Necessary?
The short answer: not always.
The long answer: while you don’t necessarily have to use them for every pie, they will reliably provide the results you want.
With pie weights, you’re setting yourself up for success. An evenly baked, golden-brown pie crust with a crisp bottom is within reach every time you use these.
They are especially useful for baking an empty crust fully when you aren’t cooking the filling in the oven – a perfectly formed and baked shell with a beautifully flat base, structured sides, and a gorgeous deep golden-brown color is your reliable base for this style of pie!
But there are many recipes out there, including some of our own at Foodal, that allow you to bake a raw crust with the filling inside – with delicious results.
Our recipes for blueberry and chicken curry pot pie are among the many examples that don’t require going through the process of using pie weights and parbaking.
And maybe your great-grandmother’s recipe for pumpkin or pecan pie doesn’t call for parbaking, and it turns out perfectly every time!
Like I said – you don’t have to use them.
But if you have been saddened repeatedly by those soggy bottoms, sagging sides, and lifeless color, this is your solution. Sometimes a classic recipe is in need of a little improvement, and you’ll be eager to give it another try with pie weights. Use these the next time you’re hoping for success – not another disappointment!
What kinds of pies will you be baking this year? Do you think you’ll try using weights, or go without them? Maybe you’re well-versed in using these, but you learned something new? Tell me what you think about this baking accessory by leaving a message in the comment section below.
You’ll be an unstoppable force in the kitchen when you’re equipped with the tools and the know-how! Be sure to read more of our helpful articles to increase your baking knowledge and improve your technique, starting with these:
- Tips for Baking at High Elevations
- Mastering the Art of Artisan Sourdough Bread
- The Best Rolling Pins for Home and Pro Kitchens
Photos by Nikki Cervone, © Ask the Experts, LLC. ALL RIGHTS RESERVED. See our TOS for more details. Credited photos via Amazon and Wayfair.
About Nikki Cervone
Nikki Cervone is an ACS Certified Cheese Professional and cheesemonger living in Pittsburgh. Nikki holds an AAS in baking/pastry from Westmoreland County Community College, a BA in Communications from Duquesne University, and an MLA in Gastronomy from Boston University. When she's not nibbling on her favorite cheeses or testing a batch of cupcakes, Nikki enjoys a healthy dose of yoga, wine, hiking, singing in the shower, and chocolate. Lots of chocolate.


