Jump to the Recipe
Foodal loves dumplings.
From German bread dumplings to schupfnudel to malfatti, we have eaten and enjoyed quite a variety of them.
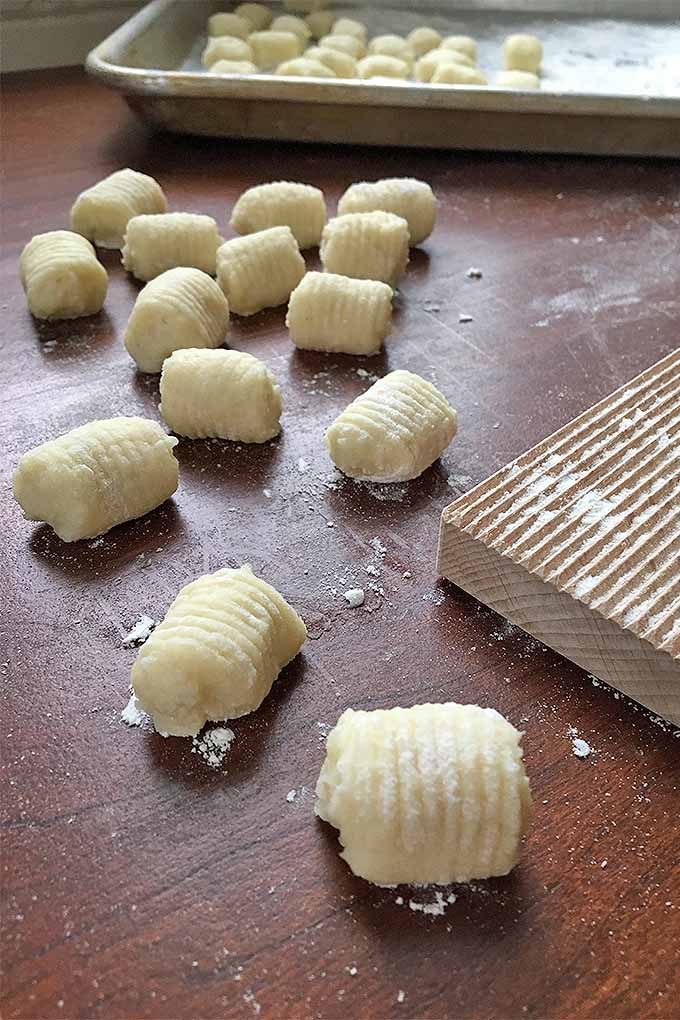
Let’s add one more to the collection, shall we?
Gnocchi are small, soft Italian dumplings, with an open interpretation of textures, flavors, and ingredients.
They date back as far as Ancient Rome, when they were originally made with just a firm paste of flour and water.
Potato gnocchi are a very popular version, and the inspiration for our recipe. With just a few ingredients (potato, flour, egg, and salt), you might be making this a new starchy staple for your daily dinner feasting!
Put your apron on and crank up the Frank Sinatra – we’re eating Italian tonight!
Tips to Follow
In their cookbook Collards and Carbonara, available on Amazon, professional culinary chefs Andrew Ticer and Michael Hudman describe making gnocchi as “a form of meditation; everything else falls away.”
Collards & Carbonara: Southern Cooking, Italian Roots
To a couple of pros like Ticer and Hudman, sure – it’s easy. But it isn’t always a walk in the park for many others.
I’ve personally dealt with my fair share of doughy disasters.
Follow the tips below carefully, and you’ll soon reap the edible benefits of properly made dumplings – whether or not you find any meditative value while making them!
Choose a Superior Spud
The best potatoes to use are starchy, non-waxy varieties.
Russets or baking potatoes are ideal.
Your goal while making these yummy delights is simple: avoid moisture as much as possible. So you need a potato that contains the least possible amount of liquid.
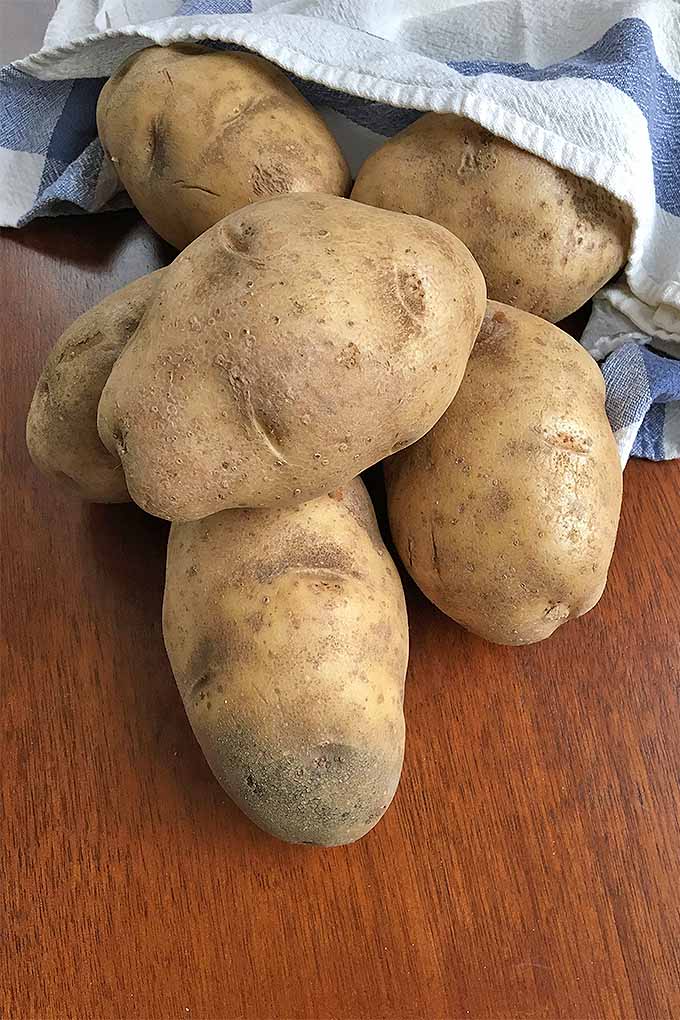
Other varieties of potatoes, like red or new, have a higher amount of water within their skins than the russet or baking varieties.
This is true with our recipe for sweet potato gnocchi. It’s a colorful and very tasty recipe, but the texture will be chewier and firmer than using a white potato.
The cooking method for these starchy spuds also needs to be noted. Since they need to be as dry as possible, any extra water will change the final dough’s texture.
To make up for any extra moisture introduced in cooking, you will need to incorporate more flour to balance it out, resulting in a more leaden, gummier dough thanks to the excess flour and additional kneading time that’s required.
How to avoid this altogether? The best cooking method to keep your potatoes out of the deep end in terms of excessive moisture is by baking them at a high temperature.
Don’t boil, don’t microwave, don’t steam, and don’t fry!
Careful with the Flour
It’s a bit of a slippery slope when it comes to how much flour you will need.
If you add too little flour, the gnocchi won’t hold their shape and will deteriorate into the boiling water, or the final result will be gummy. If you add too much flour, they will end up too chewy and tough.
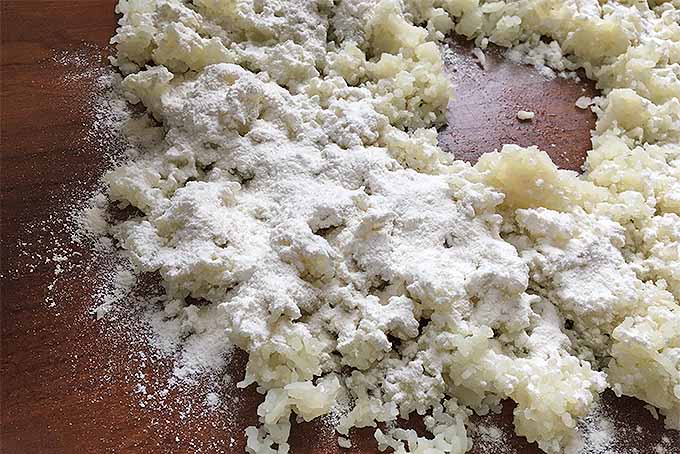
Let me be honest. The amount of flour you need will vary each time you make the recipe. It really is dependent upon so many different factors that are always changing.
Even when you buy starchy spuds, their moisture levels can vary. Humidity is also a tough monster to beat. With extra moisture in the air, your gnocchi will require even more flour to ward it off.
An obvious sign to indicate that you need a little more love from a touch of extra flour is if the dough is too wet and sticky. Flour will help to absorb some of the wetness.
But be sure not to add too much at once. Start by adding just a couple of tablespoons at a time.
Watch Out for Temperature
You need to let the riced potatoes cool before adding the flour. If you sprinkle your flour over steaming hot potatoes, this will definitely result in a very gummy gnocchi.
When the potatoes have reached a lukewarm temperature (room temperature is ideal), you may then add the flour.
It helps to spread out the potatoes when you are cooling them, to optimize the surface area. To help with this, instead of mixing in a bowl, I recommend bringing your dumpling mixture together on a clean countertop.
It helps to bring your egg yolk to room temperature as well, before mixing it with the other ingredients. As it will be close to the same temperature as the potato mixture and the flour, it will mix more homogeneously than if it came straight out of the fridge.
Excessive Kneading is Unnecessary
Gnocchi are not like typical forms of pasta that you may be more familiar with, such as a basic semolina dough.
Whereas pasta dough needs to be kneaded and manipulated thoroughly to develop a great al dente structure in the final cooked product, gnocchi should be minimally kneaded. Some kneading is required, but just until a uniform dough is developed.
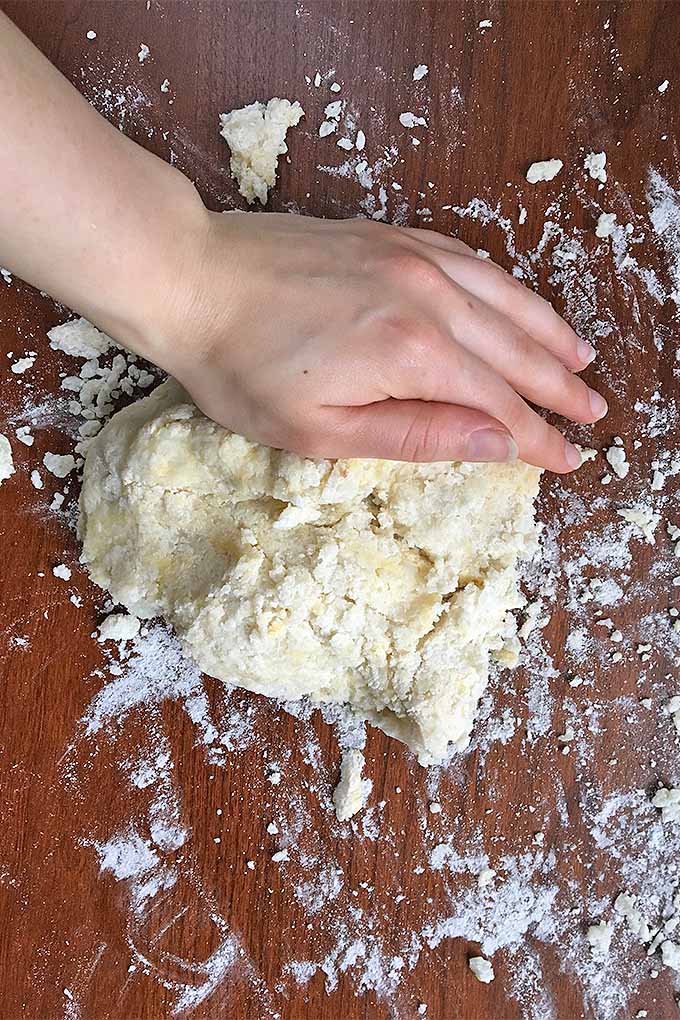
As you continue to knead, you are strengthening the gluten structure, which results in a tougher, tighter final product.
Admittedly, there is an upside to stronger, more elastic gnocchi dough – it’s easier to roll, cut, and shape. But the final texture will not be at its peak in terms of deliciousness.
We want to create heavenly clouds of soft, delicate gnocchi. While softer dough is more difficult to work with as you shape it, you will appreciate the final outcome so much more.
This is why I think it is absolutely necessary to mix this with your bare hands. Feel your dough every step of the way, and learn by touch what it needs from you to thrive. Become the dough whisperer.
Ready to get your hands dirty? Let’s make some gnocchi!
The Recipe
| Servings | Prep Time |
| 2 large servings | 2 hours |
| Cook Time |
| 10 minutes |
|
|

|
Curious about how to make potato gnocchi? We have the perfect recipe! Read our article on Foodal get the best advice for making these doughy delights!
|
- 3 russet or baking potatoes, washed and dried
- 1 1/2 cups all purpose flour
- 1 1/2 teaspoons kosher salt
- 1 large egg yolk room temperature
- Preheat the oven to 375°F. Place the potatoes on a sheet pan and bake until very tender when pierced with a knife, about 1 to 1 1/2 hours. After they are cooked, cut the potatoes open lengthwise across the top and let the steam escape. Use a spoon to scoop all of the potato flesh from the skins. Discard the skins.
- Put the flesh in a ricer set over a large bowl and squeeze until all of the potato is in the bowl. Using a kitchen scale, weigh out 1 pound of the flesh. Save any extra for another use. On a clean counter, spread the riced potato out in a small, even layer. Allow it to cool to room temperature, for about 10 to 15 minutes.
- Starting with 1 cup of the flour, sprinkle the flour and salt evenly on top of the potatoes. Make a small well in the center. Add the egg yolk in the center of the well and begin to slowly incorporate it into the potato mixture. Continue to gently knead the dough until it comes together, being careful to not overmix it. If it is still very wet and sticky, add additional flour as needed.
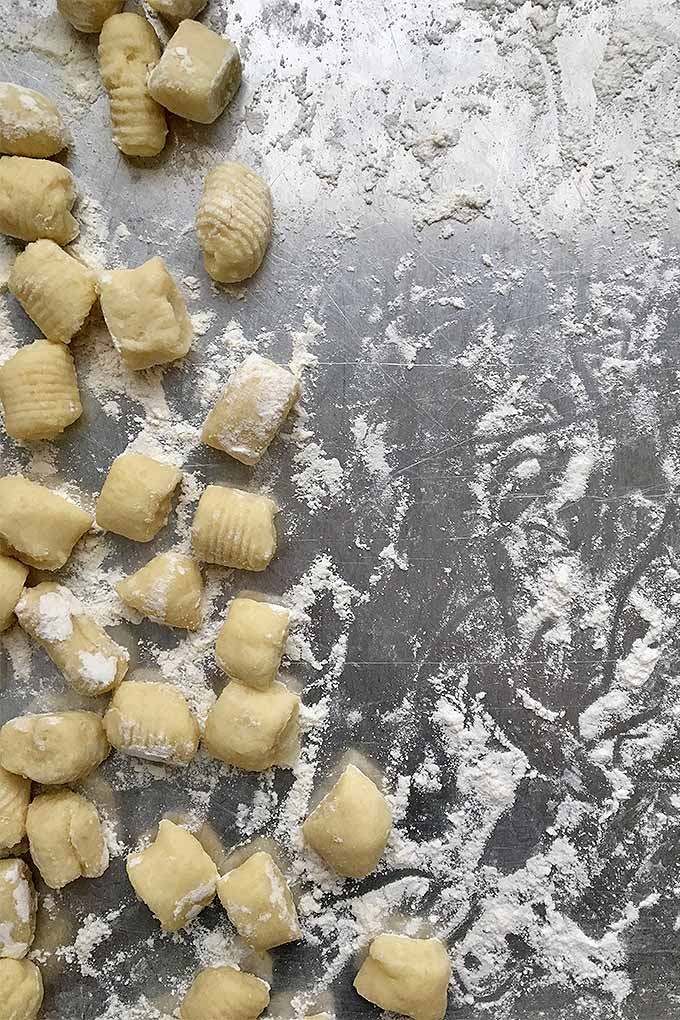
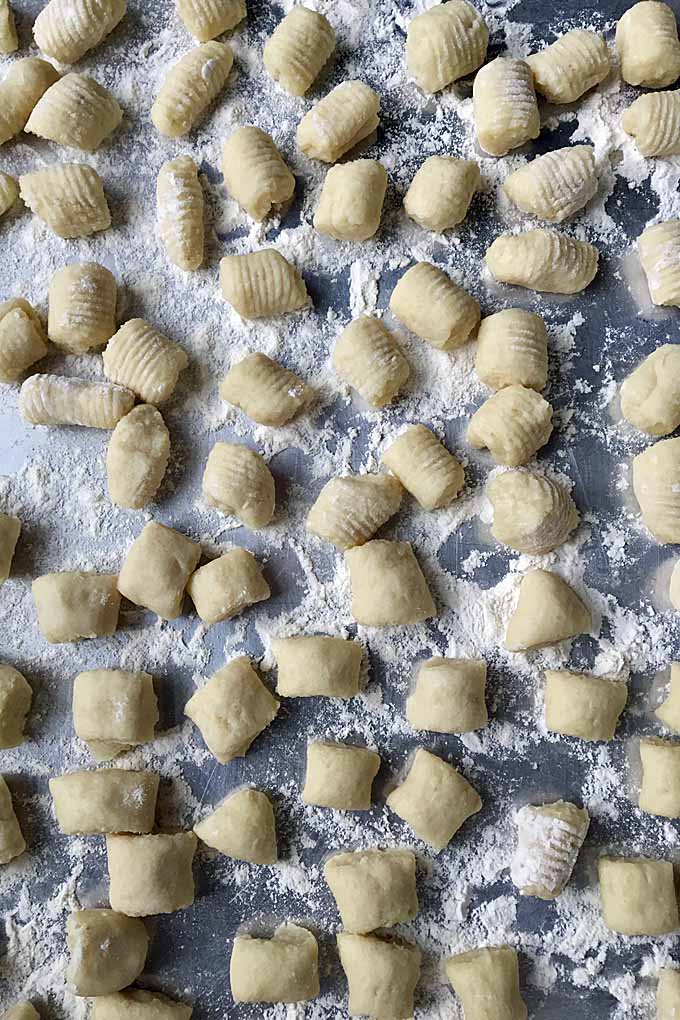
- On a clean work surface, divide the dough in half. Working with one half at a time, gently roll it back and forth until you form a long log that is about 3/4 of an inch thick. You may need to sprinkle it with some flour to prevent excessive sticking. Using a bench scraper, cut each log into 3/4-inch square pieces. Place each piece on a lightly floured sheet pan. Optional: If you want to create grooves, you may roll each piece across a gnocchi board.
- Bring a large pot of salted water to a low boil. Working in two batches, drop the gnocchi in and cook until they float to the top. As soon as they are all floating, drain them immediately. Bring water back up to temperature, and repeat with the remaining pasta. Serve warm, with your favorite sauce.
Nutritional Information*
Cooking By the Numbers…
Step 1 – Prep the Spuds
Place the cleaned potatoes, skin and all, on a sheet pan and bake them at 375°F until completely tender when you insert a knife into the flesh, about 1 to 1 1/2 hours.
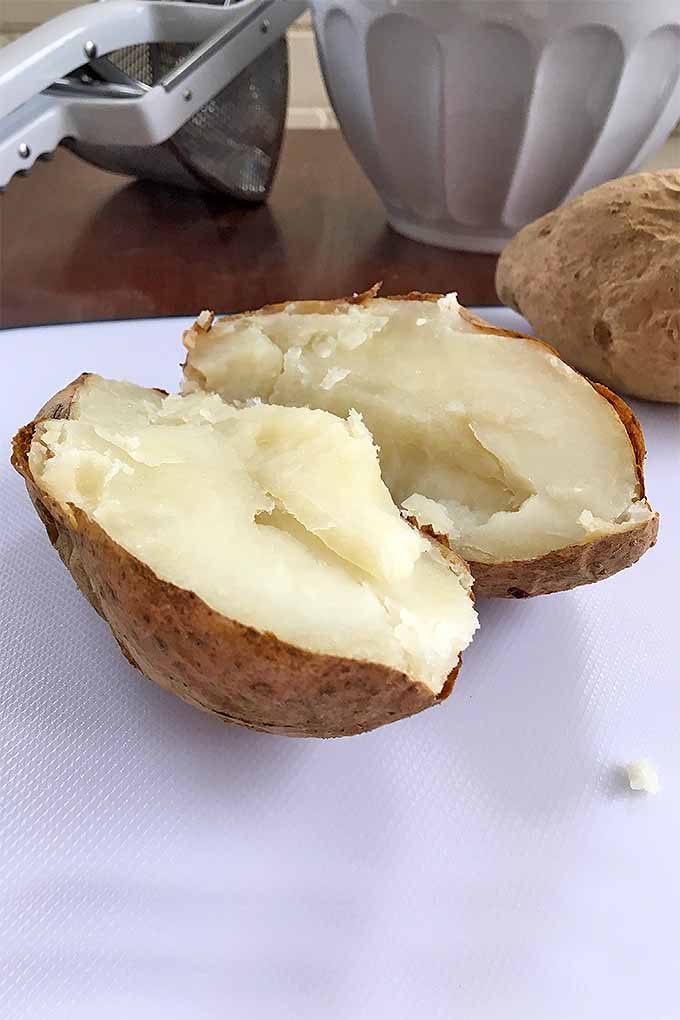
Once they are cooked completely, cut the potatoes in half lengthwise across the top and allow the steam to escape. Halving them creates more surface area for the steam (and all of that unnecessary moisture!) to escape more quickly.
Potato skins actually lift and separate from the flesh during cooking, but they reattach quickly when the spuds begin to cool down. For this reason, scoop out all of the flesh soon after you remove them from the oven.
Step 2 – Rice the Spuds
Working in two batches, place the potato flesh in a ricer or food mill with fine holes, and press firmly to extrude the flesh into a bowl, scraping off any bits that linger on the metal holes.
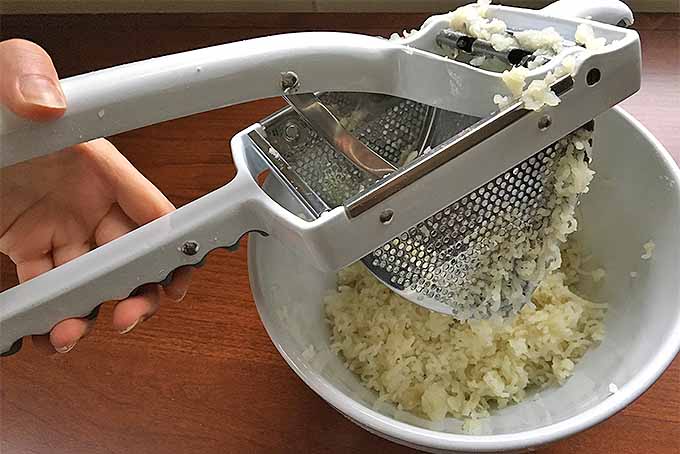
Once all of the potatoes are riced, weigh out 1 pound and spread it evenly on a clean work surface, to continue cooling them until they reach room temperature.
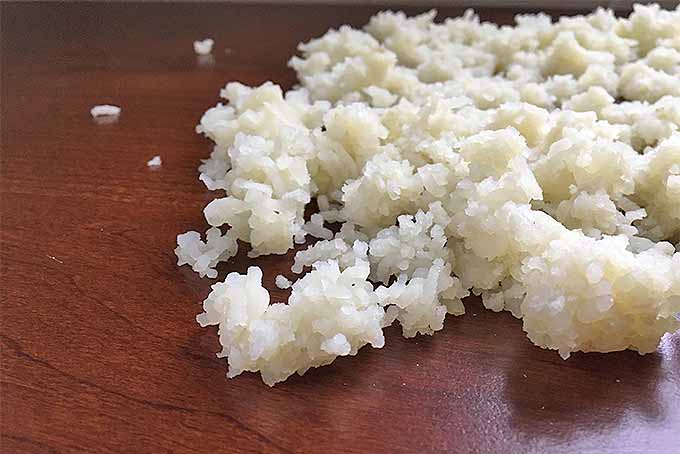
The ricer is a practical kitchen tool for distributing the softened potatoes into small pieces with no large lumps, making them easy to incorporate into a uniform dough that does not fall apart.
Need some help choosing the best ricer? Get our guide now.
Step 3 – Form the Dough
Lightly sprinkle 1 cup of the flour evenly on top of the riced flesh. Form a well in the center of the prepared potatoes for the egg yolks.
Gently mix in the dry ingredients into the egg yolks, a little at a time, to form the most consistent dough.
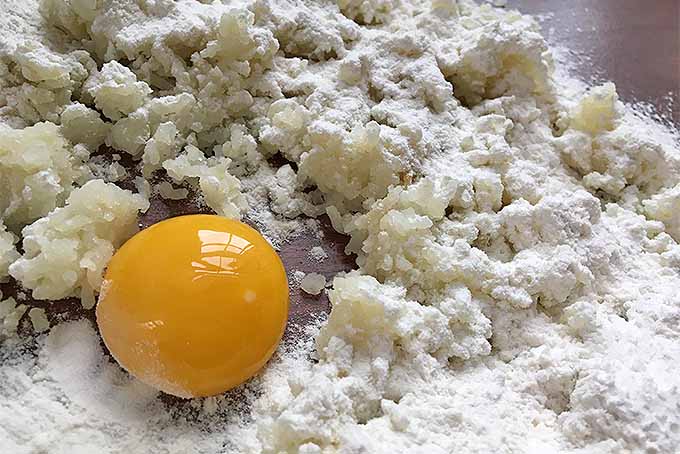
Start to gently knead the dough with your bare hands, rather than using a spoon or a mixer. You will have a better understanding and feel for the dough, and be able to determine if you need to add any extra flour.
If the dough is too sticky and unmanageable, add just one tablespoon of flour at a time, lightly kneading it into the dough.
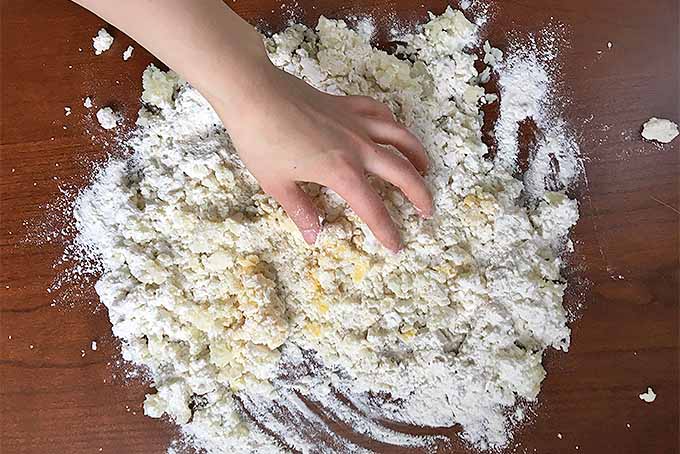
Remember: one of the biggest problems that may arise during this step is over kneading the dough. To avoid developing unwanted elasticity, which leads to a dense and tough final gnocchi, do your best to handle the dough gently. Mix in just enough flour to form the right dough consistency, and stick to the bare minimum.
Step 4 – Rolling, Cutting, and Shaping
Work on a clean and dry surface. Make sure you have a large area available to roll out the dough.
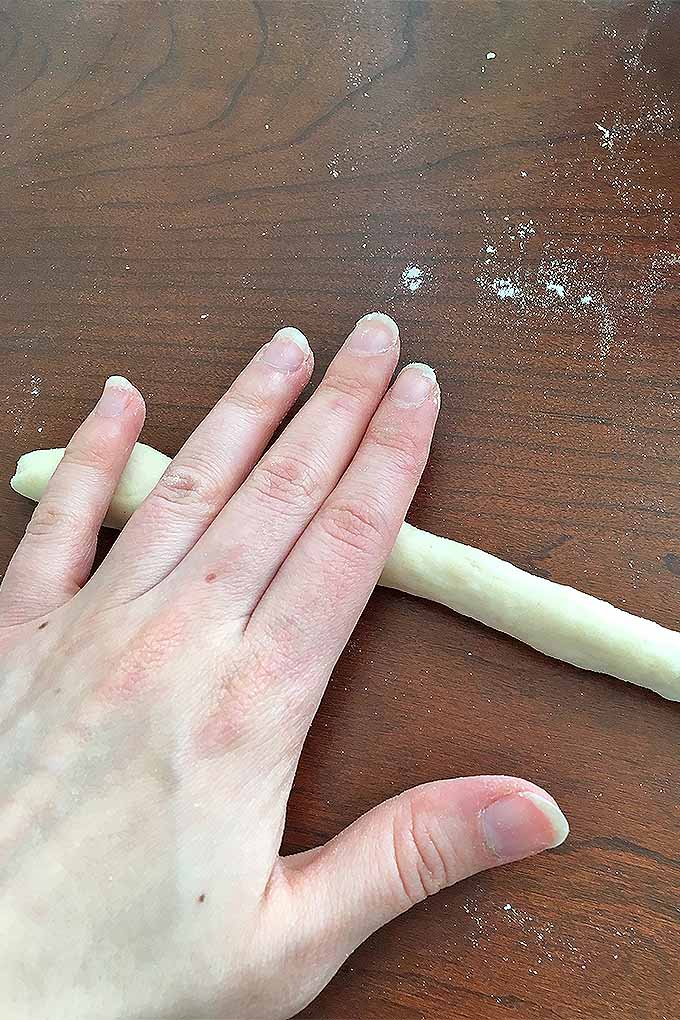
A little flour may be necessary to prevent sticking, but keep in mind that an excessive amount will make it more difficult to roll the dough into logs.
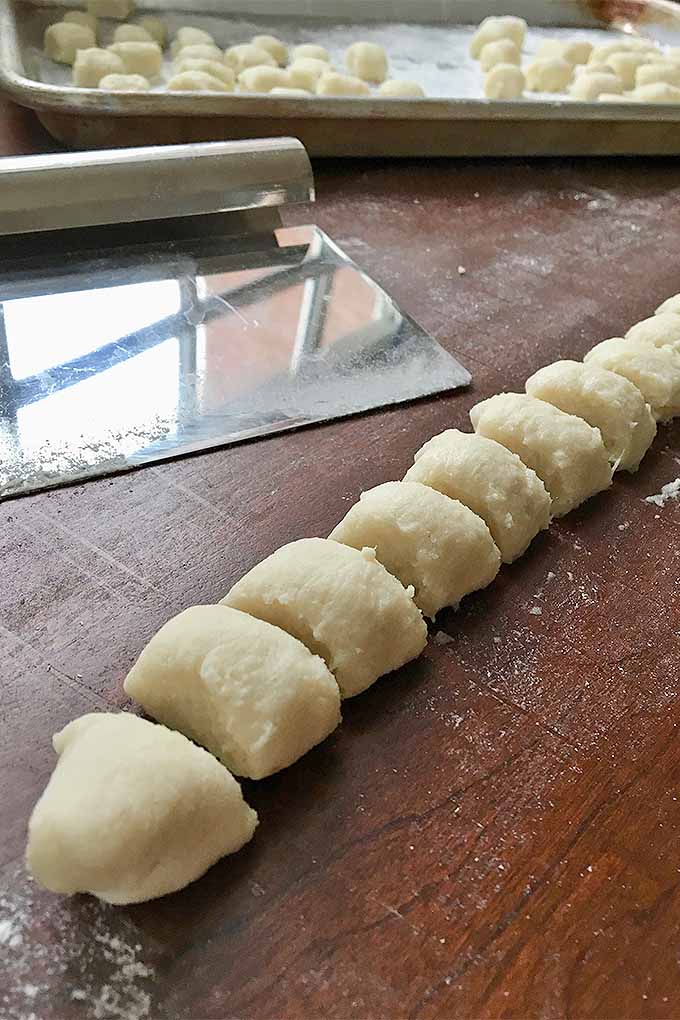
Using a metal bench scraper, cut the log into small pieces.
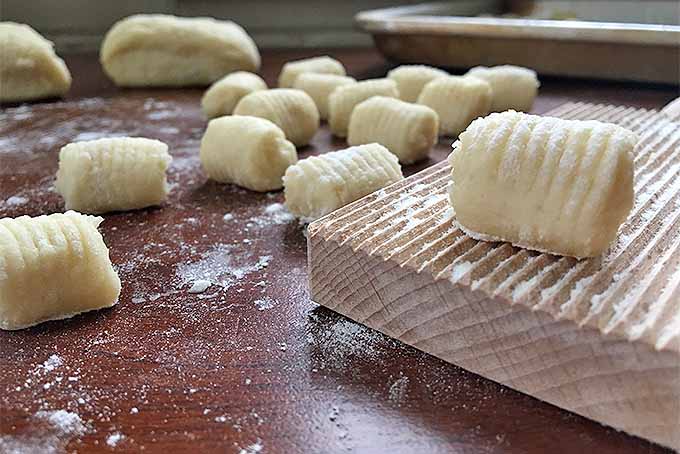
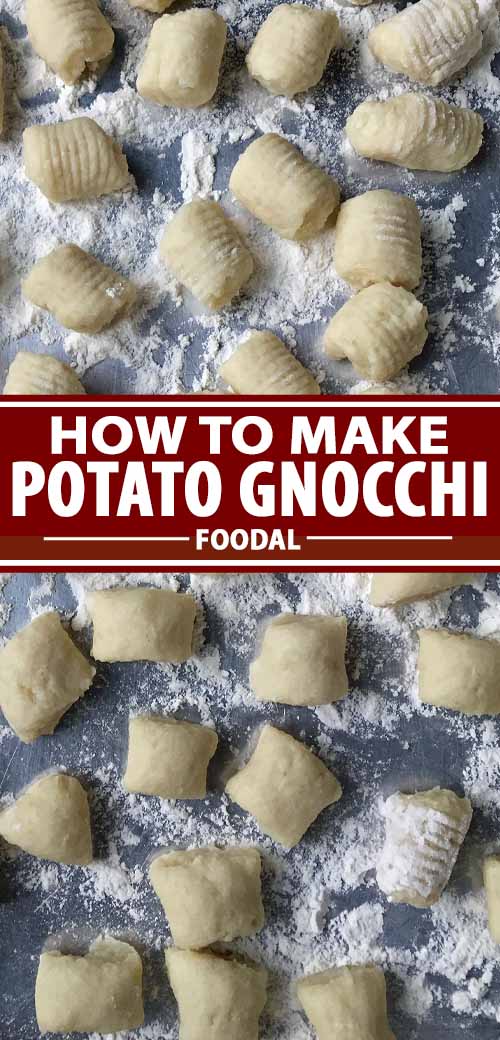
Leave these as is, or use a gnocchi board to create grooves. This is a light wooden tool with grooves that’s used specifically for making this popular variety of Italian dumplings.
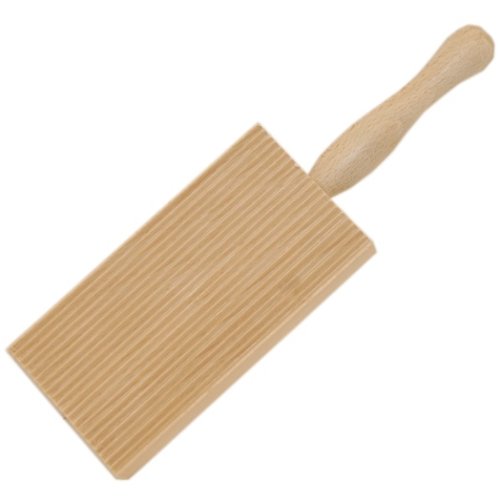
Happy Sales Gnocchi Paddle available on Amazon
The grooves are traditionally formed to help the sauce better adhere to the gnocchi. The pieces are also indented in the middle to promote more even cooking in the center.
You can also use a wooden dowel called a paddle to curl your dumplings if you want – this is purely optional.
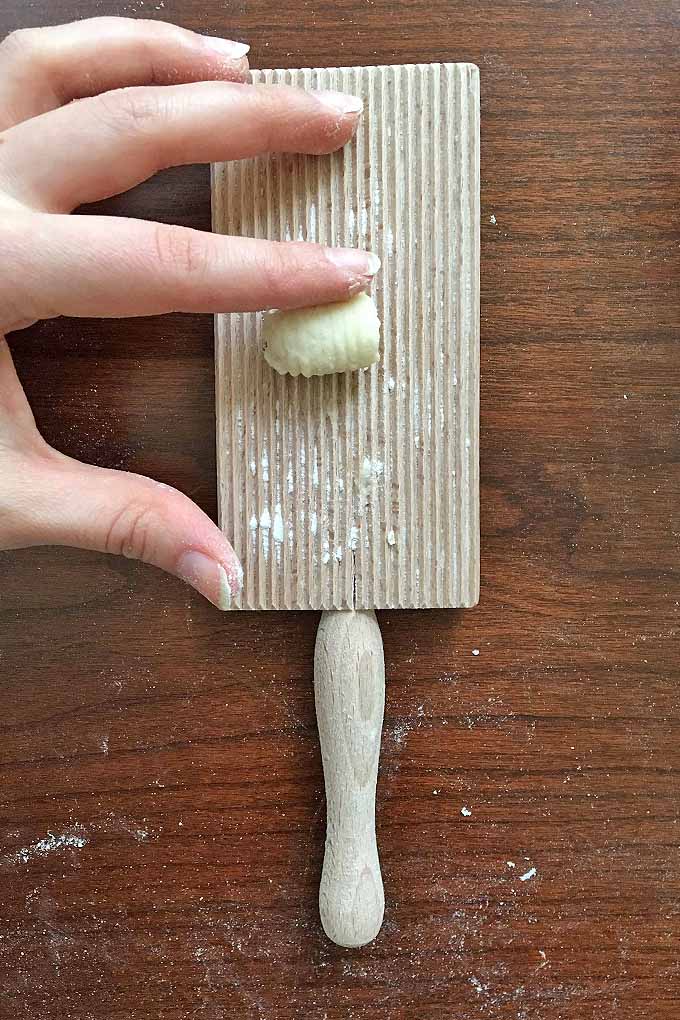
Creating Grooves:
1. Place one piece on the top section of the board.
2. With a floured thumb, gently indent the middle of the gnocchi.
3. Press down very lightly as you roll the piece down the board
4. Each finished piece will have grooves on the top, with a small indent on the bottom
Step 5 – Boil
Bring a pot of salted water to a low boil. Working in two batches, drop half of the total gnocchi into the water. Be careful not to splatter yourself – that boiling water is hot!
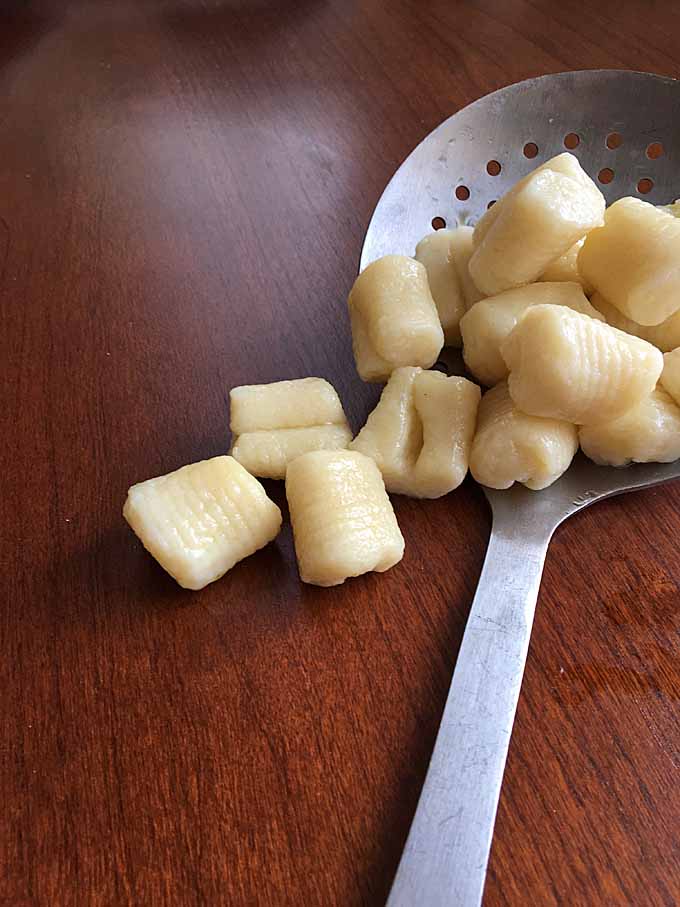
These will cook quickly, in about 2 to 4 minutes. The moment that they have all floated to the surface, drain them immediately by scooping them into a colander with a ladle, and place them on a serving platter. To prevent sticking, mix them with a small amount olive oil.
You could dump all of the water, but then you will have to wait to bring fresh water back to a boil again to cook the remaining pasta. If you’re able to work quickly, you can use a slotted spoon rather than a colander for draining.
Be careful not to overcook your dumplings! Overboiling the gnocchi will lead to excessive water absorption. Since this is a delicate type of pasta, rather than remaining firm, they will start to soften and deteriorate quickly.
Step 6 – Serve
Before you serve them, let them sit for a minute or two. This helps to cool the gnocchi and sets the final texture.
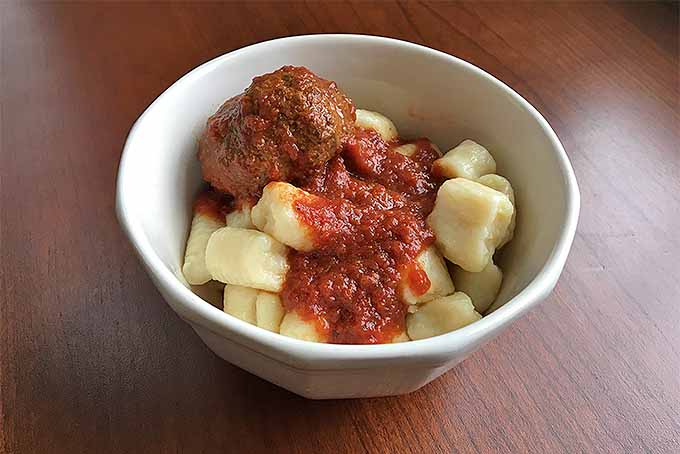
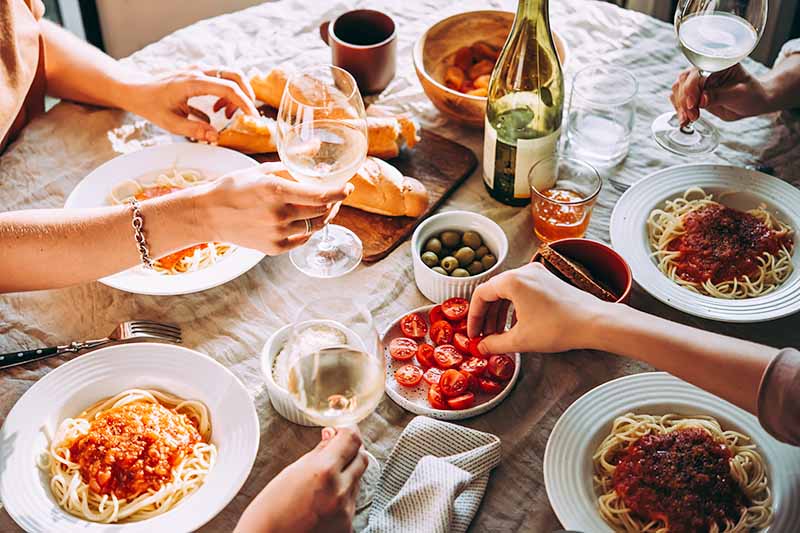
Serve and enjoy these little doughy nuggets of joy with your favorite pasta sauce, like pesto, tomato cream sauce, or meat sauce!
You can choose to serve the classic spaghetti and meatball dish, but instead of spaghetti, fill up your bowls with these potato-y pillows instead!
They are even fantastic in soup, like our thick and creamy chicken gnocchi soup!
And you can even incorporate your favorite garden ingredients such as spinach. Check out Wanderspice’s Spinach Gnocchi with Ricotta and Brown Butter Sage recipe for more inspiration.
We Love Thee, Gnocchi
While they may be a little temperamental, potato gnocchi are a delicious Italian classic, and a welcome addition to your dinner menu!
Have you made these doughy delights before? Do you have any troubleshooting tips and tricks to share? Questions? Let us know in the comments below!
Don’t forget to Pin It!
Photos by Nikki Cervone, © Ask the Experts, LLC. ALL RIGHTS RESERVED. See our TOS for more details.
*Nutritional information derived from a database of known generic and branded foods and ingredients and was not compiled by a registered dietitian or submitted for lab testing. It should be viewed as an approximation.
About Nikki Cervone
Nikki Cervone is an ACS Certified Cheese Professional and cheesemonger living in Pittsburgh. Nikki holds an AAS in baking/pastry from Westmoreland County Community College, a BA in Communications from Duquesne University, and an MLA in Gastronomy from Boston University. When she's not nibbling on her favorite cheeses or testing a batch of cupcakes, Nikki enjoys a healthy dose of yoga, wine, hiking, singing in the shower, and chocolate. Lots of chocolate.

I bought the OXO potato ricer from Amazon that was recommended on a recipe. It feels so good in my hands. Thank you!
Nice, Ellie! So glad you used one of our recommended tools – you’ll be making this recipe over and over again with the help of your new ricer!
I add a teaspoon of baking powder to the mix. Makes them very light. Also a small pinch of cayenne pepper adds some flavour
Robert – These are great ideas! And I LOVE a little heat in my pasta dishes!
Hi,
Can these be made ahead of time and frozen until ready to use?
Thanks, Angie
Absolutely, Angie! One of the many fantastic things about fresh pasta. Let them dry for a bit at room temperature and coat with a little additional flour before freezing, to keep them from sticking to each other too much. Enjoy!
Could you tell me how to pronounce “gnocchi”? I have heard it different ways. I even have a box of gnocchi which explains how to pronounce it. They say it is “nyaw-kee”. But here at our Olive Garden I am always corrected and told to say NO-KEE. Thanks.
Ah, a question that has stumped many! The pronunciation of “gnocchi” can vary slightly regionally depending on dialect.
Merriam-Webster provides two common pronunciations, which are similar to the two ways that you have listed in your comment: The “g” sound is silent in the word “gnocchi,” and when combined with the first few letter “gno,” two acceptable ways of pronouncing it can be either “naw-kee,” or nyaw-kee,” with the stress on the first syllable.
Thank you for your reply. I grew up in southwestern PA, not far from Pittsburgh. Many people in our area were Italian and pronounced it “nyaw-kee” as well.
Thanks again. Hope you had a nice Christmas.
Sincerely,
D Brooks