Attention, friends: If you are looking for the one cookie recipe that you should be making all season long, you’ve come to the right place.

Why, you ask?
Well, this particular recipe is not only delicious on its own, it can be molded into whatever sweet treat you want it to be, with the right ingredients and a little creativity.
When I say that these slice-and-bake cookies are versatile, I mean they can be adapted to fit any flavor profile you are craving at this particular moment in time. No matter what you are craving.
Seriously, this recipe is pure magic.
You can even make the dough ahead of time, and refrigerate or freeze it until you are ready to bake up a batch.
It’s one of the recipes that I love to keep on hand during the holiday season, because I can whip them up in November, and pull out some pre-made dough whenever I need it, for everything from cookie exchanges to last minute get-togethers.
They stay in my freezer, prepped with my favorite holiday flavor profiles, and I whip them out whenever I am craving the classic cookies and milk combination (or spiked homemade eggnog), alongside my favorite holiday movie.
(It’s Love Actually, for those who are wondering!)
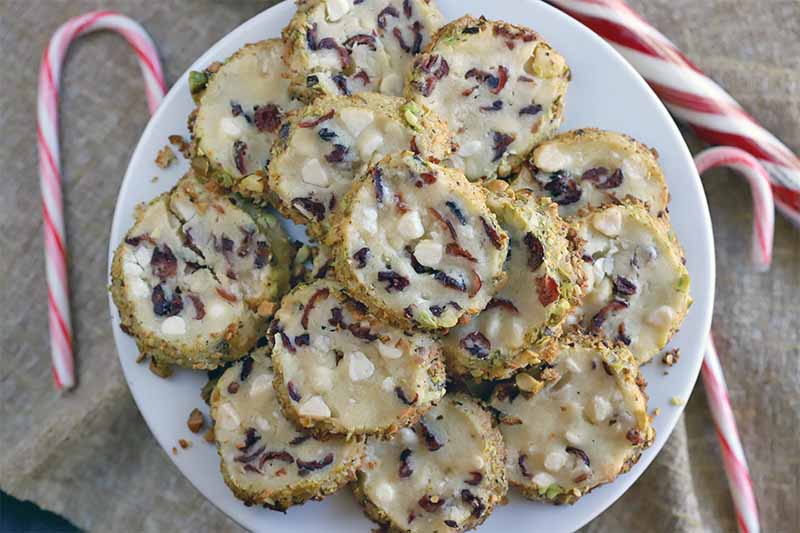
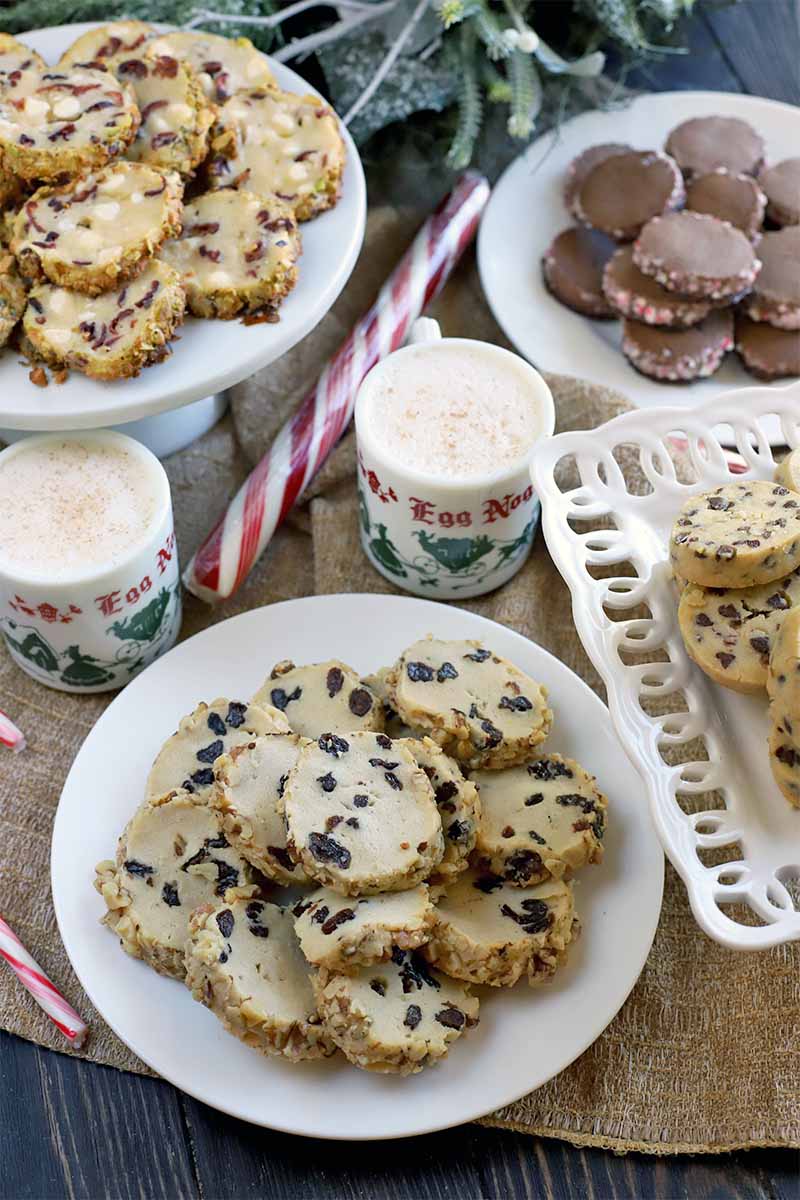
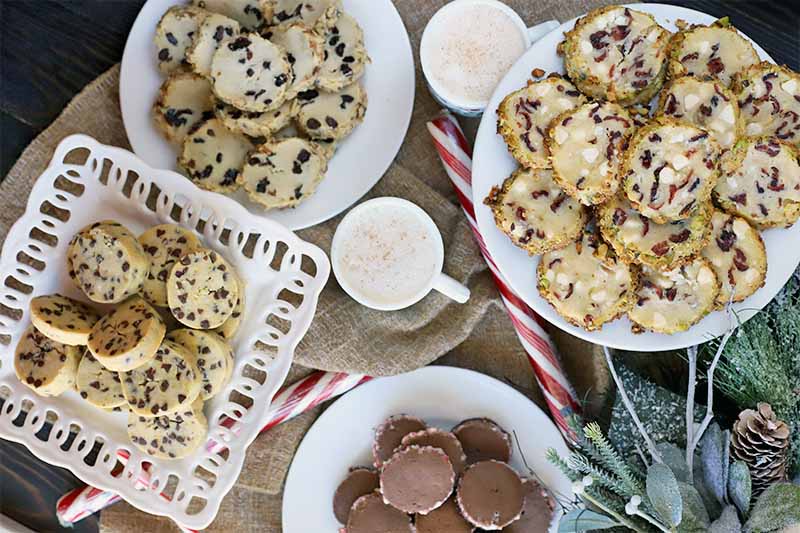
As you can see in the photos, there are a ton of different variations to be made. If you haven’t played around with different mix-ins or experimented with flavor combinations before, I recommend starting with any of the following to dip your toes in the water.
Hopefully, this will spark some creativity to help you down the path towards coming up with your own favorites!
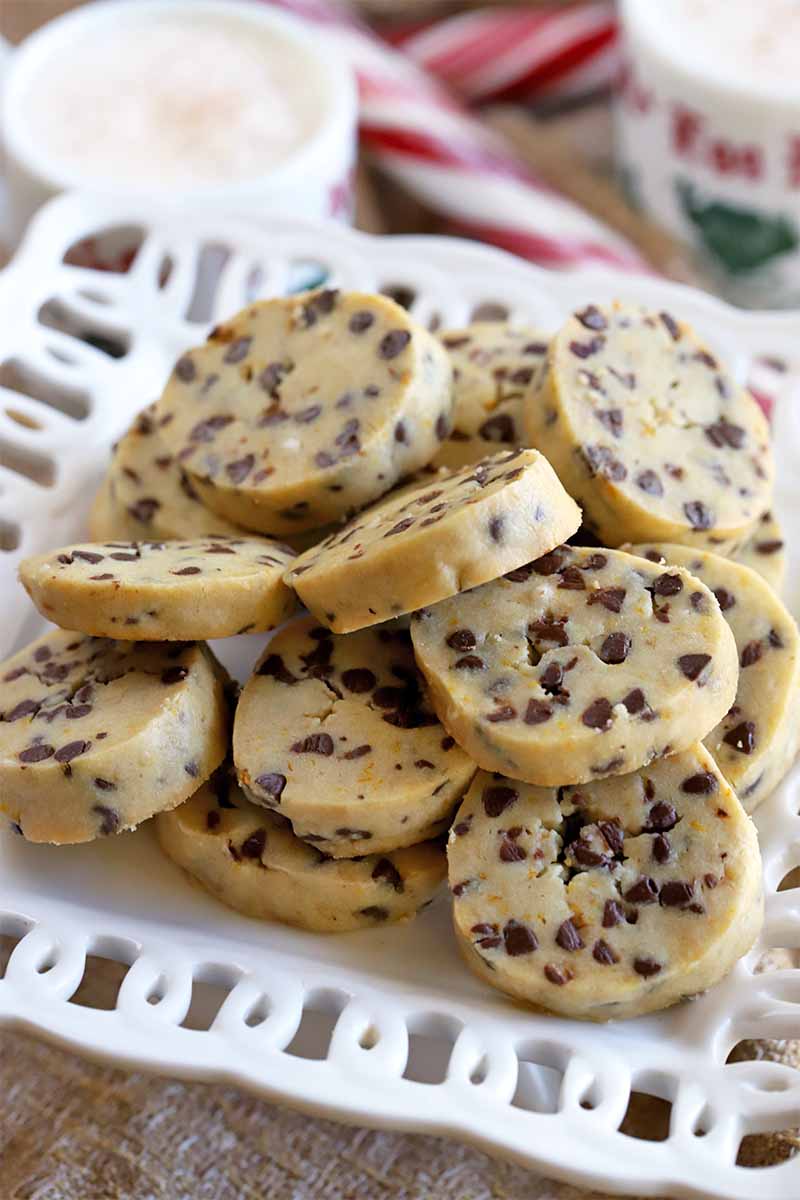
Here are the variations you see in the photos:
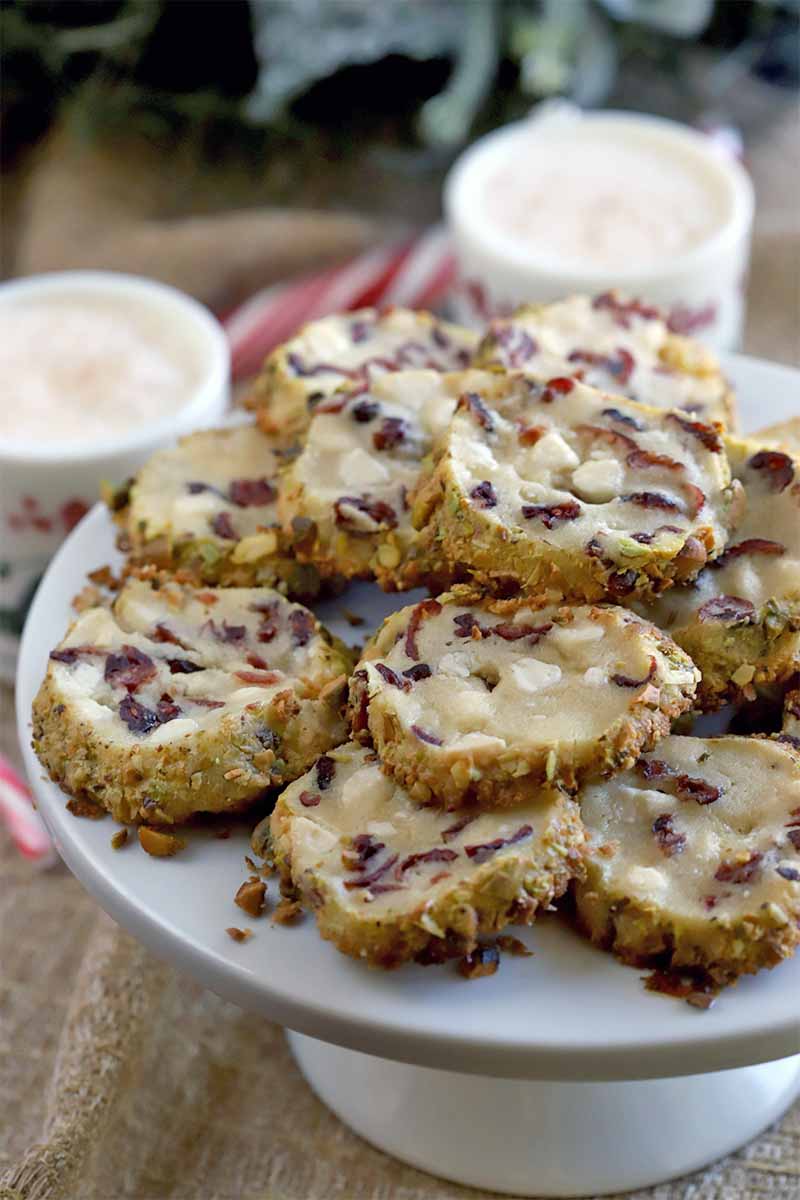
- Dried Cranberry and White Chocolate Chip – A fun holiday spin on the recipe, and after being rolled in chopped pistachios, you get the classic Christmas colors in every bite. They are so festive.
- Orange Chocolate Chip – These taste like someone took a chocolate orange and smashed it into a cookie, but with fresh orange zest and whatever type of chocolate chip you prefer. It can be dark, milk, or semi-sweet – let the spirit of the season guide you!
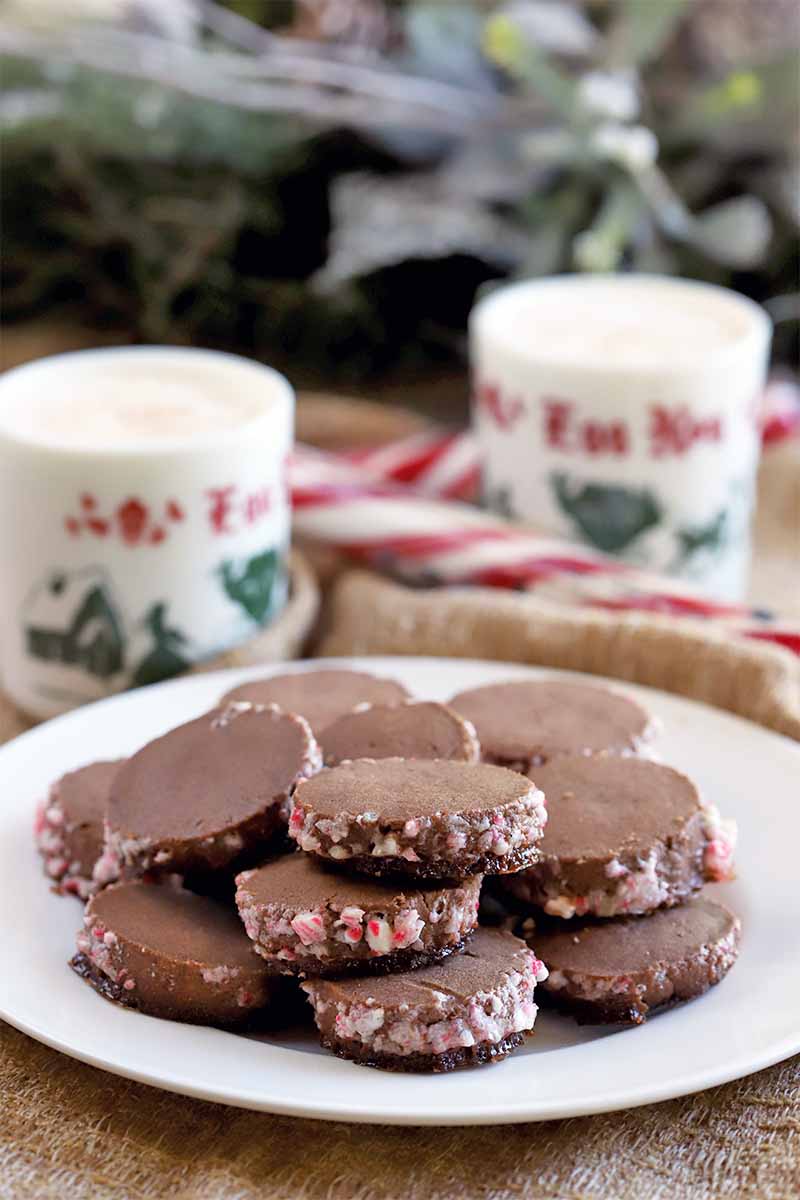
- Chocolate Peppermint – Ideal for eating on Christmas Eve and leaving out for Santa. The rich chocolate cookie is rolled in crushed candy canes (always a classic at this time of year) so you get a little bit of crunch in each bite.
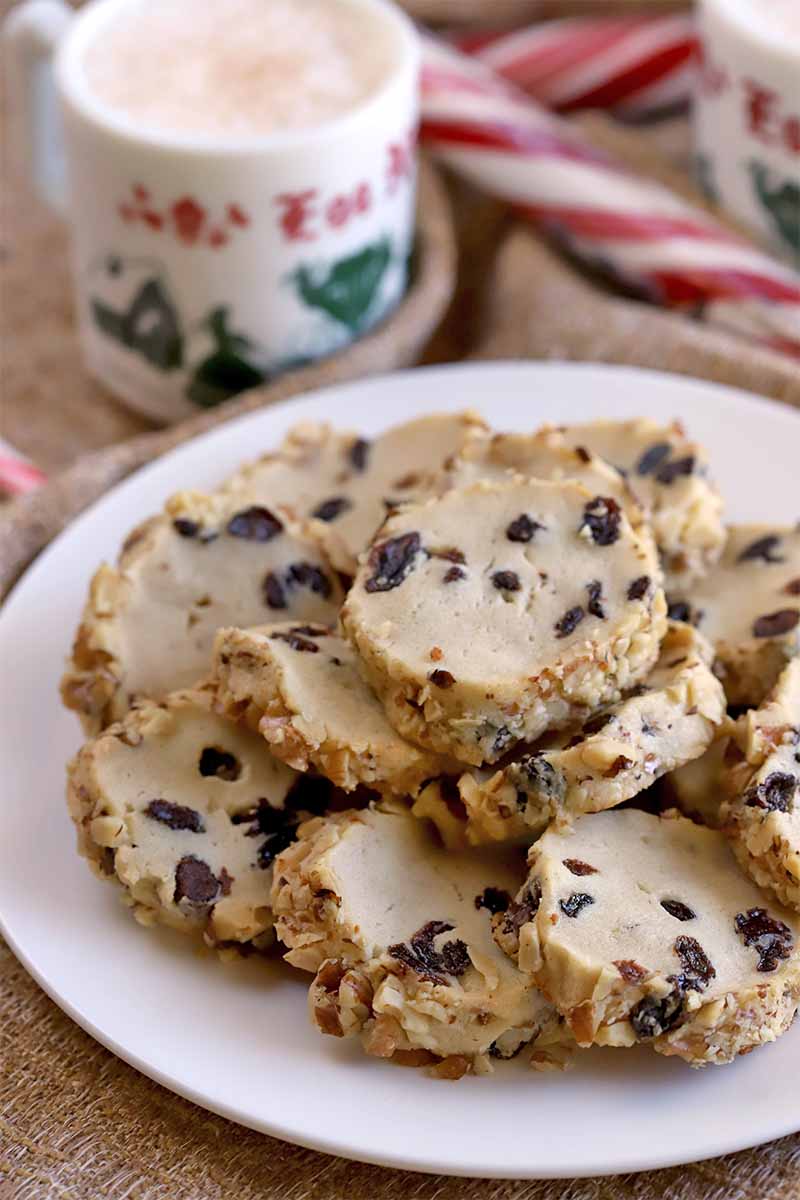
- Rum Raisin – This one is for all you boozy people out there, with a nice little spiced rum bite dotted with raisins, and rolled in chopped walnuts for added crunch.
This is just the beginning when it comes to all the flavor possibilities you can make with this oh-so-simple recipe. There is so much fun to be had, and you can even turn them into homemade gifts for friends and family.
You can tailor them to everyone’s tastes, so if your sister loves milk chocolate, add some in. If your sweetie loves cinnamon, consider adding ground cinnamon and other warming spices to the dough. If you love all things peppermint, consider using peppermint extract and roll the cookies in mini mint chocolate chips.
Not only is this recipe excellent for when holiday cookie baking season is in full swing, you can pull it out throughout the year, experimenting with your favorite flavors as they rotate with the seasons.
Print
Versatile Slice-and-Bake Cookies
- Total Time: 3 hours, 0 minutes
- Yield: 2 dozen cookies 1x
Description
The only treat you need for your seasonal baking, try our versatile slice-and-bake cookies. You can customize them however you like!
Ingredients
For the Base Dough:
- 1 cup unsalted butter, room temperature (2 sticks)
- 2/3 cup confectioners’ sugar, sifted
- 2 large egg yolks, room temperature
- 1 teaspoon vanilla or almond extract
- Pinch of salt
- Add-ins as desired (see below for suggestions)
- 2 cups all purpose flour
Suggested Variations:
Dried Cranberry & White Chocolate Chip:
- 2/3 cup dried cranberries
- 2/3 cup white chocolate chips
- 1/2 cup chopped pistachios
Orange Chocolate Chip:
- 2/3 cup mini chocolate chips
- 1 Tbsp orange zest
Chocolate Peppermint:
- 1/4 cup cocoa powder
- 1/2 cup crushed candy canes (about 5)
Rum Raisin:
- 1/2 Tbsp spiced rum (or 1 tsp imitation rum extract)
- 2/3 cup raisins
- 1/2 cup chopped walnuts
Instructions
- Add butter to the bowl of a stand mixer fitted with the paddle attachment and beat on medium speed until smooth. Add sifted confectioners’ sugar and beat again until the mixture is smooth and silky, starting on low speed, increasing to medium speed.
- Beat in the egg yolks and vanilla or almond extract on medium speed, followed by the salt and any dried fruits, citrus zest, chopped nuts, or seeds that you will be adding.
- Place the flour in a bowl, and add the cocoa powder if you are using it. Stir to combine.
- Reduce the mixer speed to low and add the flour mixture gradually, beating just until it disappears. Make sure you do not overmix.
- Turn the dough out onto a clean, floured surface, gather it into a ball, and divide it in half. Wrap each piece of dough tightly in plastic wrap and refrigerate for about 30 minutes.
- Working on a clean, floured surface, form each piece of dough into a log that is about 1 to 1 1/4 inches in diameter. The logs should be about 11-12 inches long.
- Wrap the logs in plastic and chill for 2 hours.
- Position the racks to divide the oven into thirds, and preheat the oven to 350°F. Line two baking sheets with parchment paper or Silpat nonstick liners.
- While the oven is preheating, roll cookie logs in any coatings of your choice, such as chopped nuts. Using a sharp slender knife, slice each log into discs about 1/3 inch thick. You can make the cookies thicker if you’d like; just bake them longer.
- Place on the lined baking sheets, leaving about 1/2 inch of space between each.
- Bake for 12-14 minutes, or until set but not browned. Transfer to cooling racks to cool to room temperature.
Notes
Packed airtight, these cookies will keep for about 5 days at room temperature, or in the freezer for 1 month.
Nutrition facts below include ingredients for the base recipe only, without optional add-ins.
- Prep Time: 16 minutes
- Cook Time: 14 minutes
- Category: Cookies
- Method: Baking
- Cuisine: Dessert
Keywords: cookie, Christmas, holiday baking, slice and bake
Cooking By the Numbers…
Step 1 – Soften Butter, Sift Confectioners’ Sugar, Prepare Add-Ins, and Measure All Remaining Ingredients
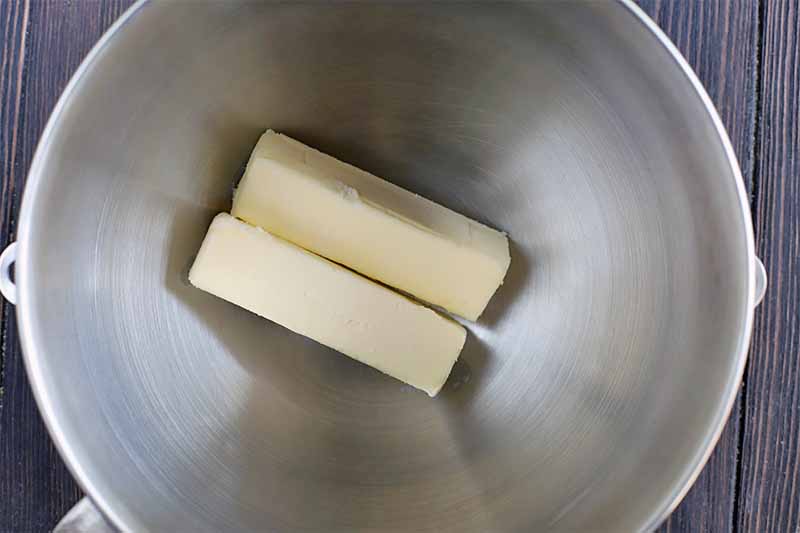
To soften refrigerated butter, leave it at room temperature for 30-60 minutes. If you want to bring your butter to temp faster, you can microwave it for 15 seconds at 30% power.
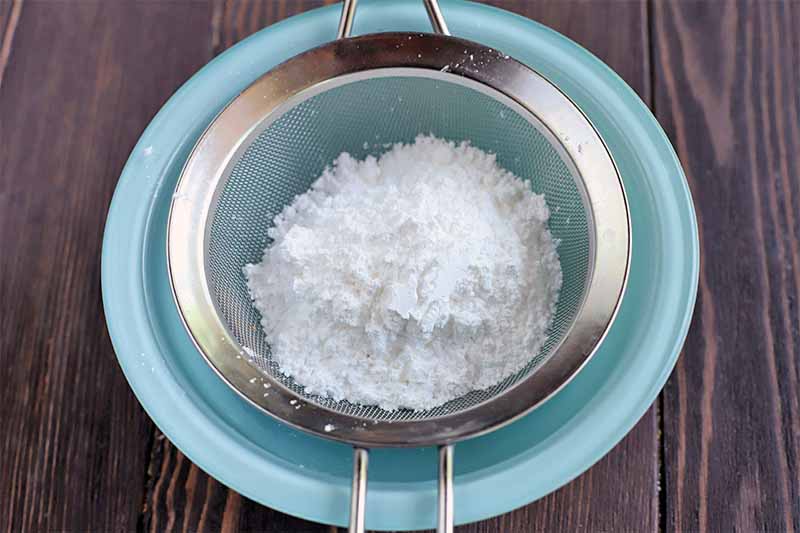
Measure out 2/3 cup confectioners’ sugar, then sift into a small bowl.
Prepare any add-in ingredients as you like, whether that means zesting citrus fruit, chopping nuts, crushing candy canes, and so on. Variations included in the ingredients list above provide quantities as a reference point, but you can customize and tinker with these amounts.
Pro Tip: I always sample a small amount of the cookie dough before I chill it, and if you aren’t averse to eating a little raw egg, I suggest that you do the same. The flavors and mix-ins that you add should be prominent, but not overwhelming. Remember that some of the flavors will fade a bit after baking, so the flavor should be there in the raw dough, without question.
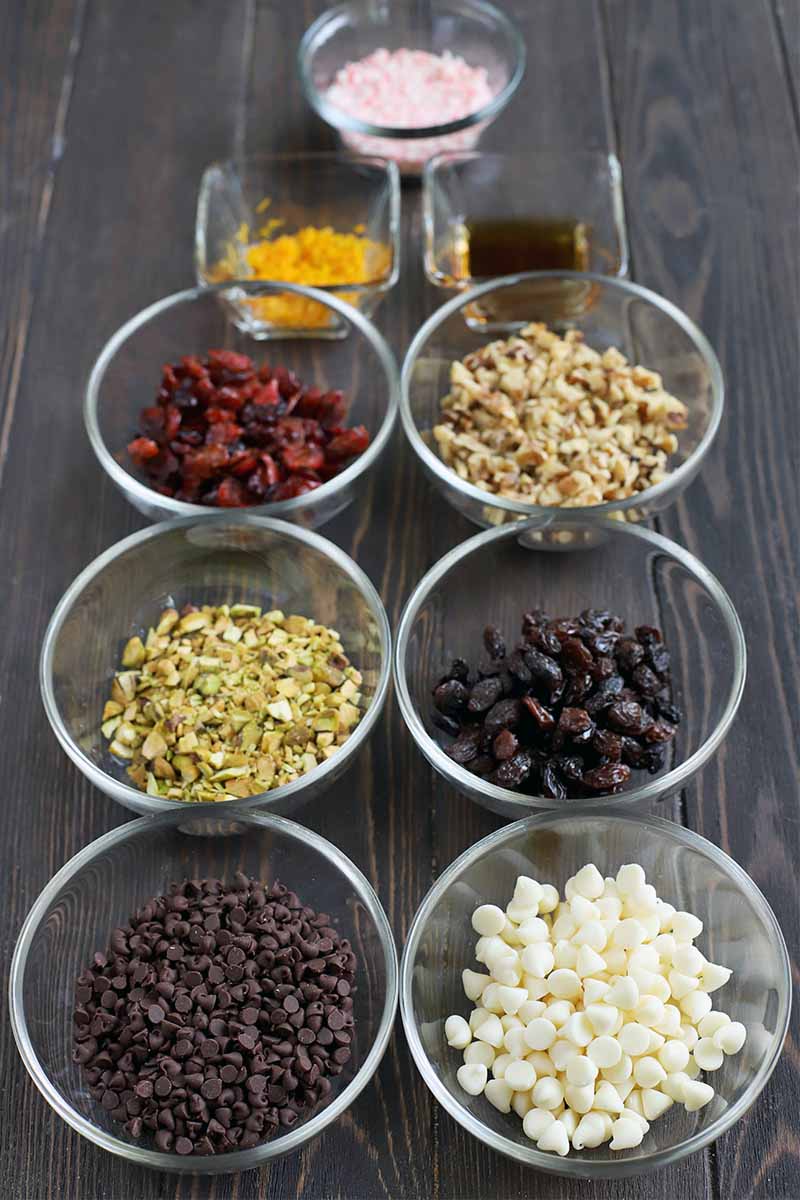
Measure out all remaining ingredients for the basic dough, and any additional add-ins.
Step 2 – Mix Together Wet Ingredients
In the bowl of a stand mixer fitted with a paddle attachment, beat the butter on medium speed until smooth.
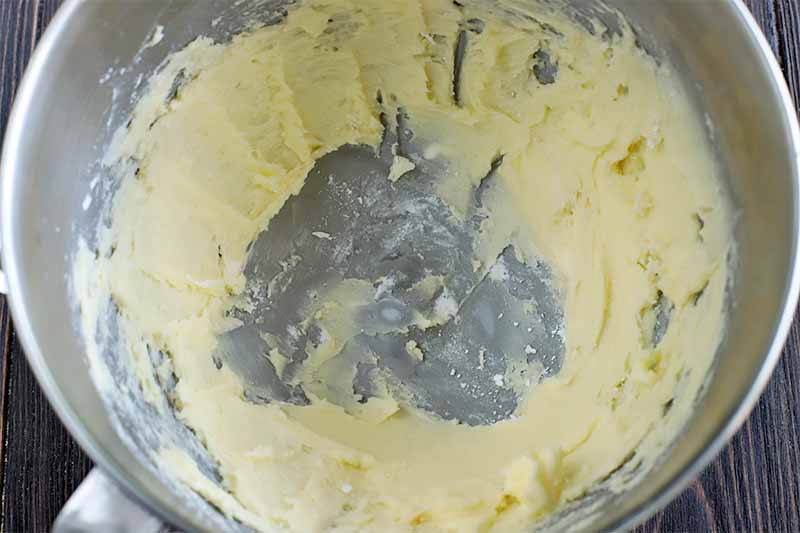
Beat in the sugar, scrape the bowl with a rubber spatula, and beat again, until the mixture is silky. Start mixing on low speed, and increase to medium as the sugar starts to become incorporated.
Add the egg yolks and vanilla or almond extract, beating until incorporated. Other types of flavoring extracts can be subbed in for these if you like, just remember that the overall liquid to dry ratio of the recipe should remain consistent with what’s described above.
Step 3 – Incorporate Add-Ins and Finish Dough
Stir in any dried fruits, nuts, seeds, or chocolate chips that you want to add.
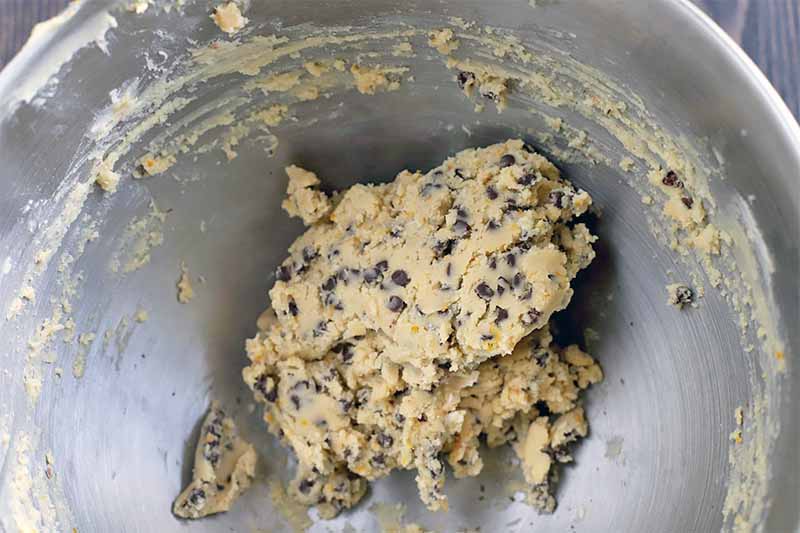
Place the flour in a small bowl, and stir in the salt. If you want to use cocoa powder, sift out any lumps, and stir it into the flour as well, until combined.
Add the flour mixture gradually to the wet ingredients, and beat on low speed until just combined. Be sure not to overmix at this point.
Step 4 – Chill Dough
Turn the dough out onto a clean, floured surface. Divide it evenly in half. Wrap each piece of dough tightly in plastic wrap, and chill in the refrigerator for about 30 minutes.
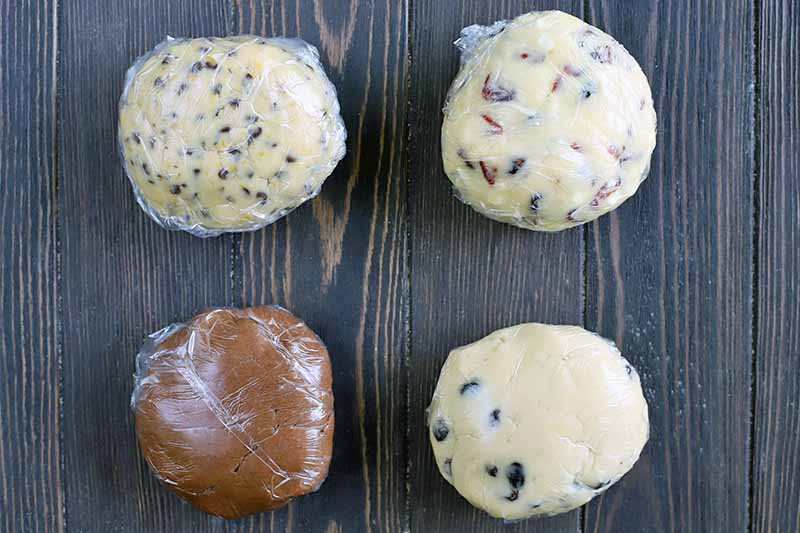
Unwrap and turn the dough pieces out onto a floured surface again. Form each piece of dough into a log that is about 11-12 inches long, and 1-1 1/4-inches in diameter.
Wrap the logs in tightly in plastic wrap, and chill for 2 hours.
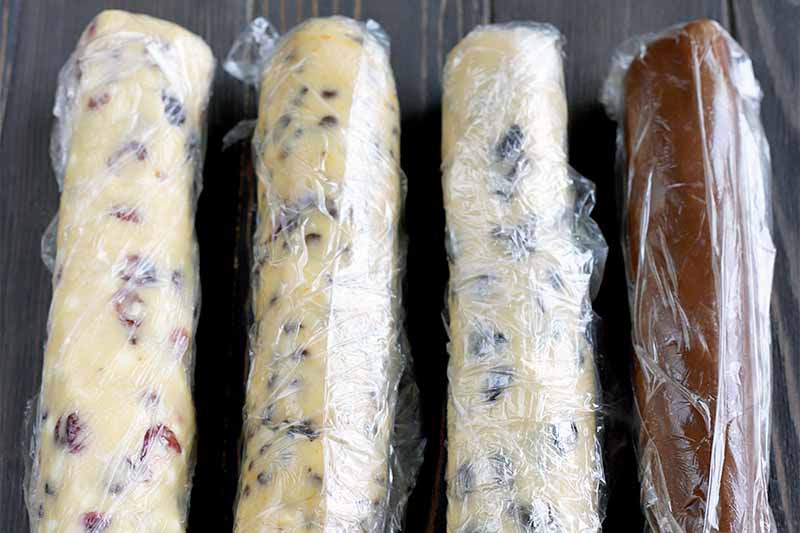
At this point, the dough can be wrapped airtight and kept in the refrigerator for up to 3 days, or stored in the freezer for up to 1 month. Make sure to store it in the refrigerator or freezer in a place where it can remain undisturbed, so the dough doesn’t get flattened or lose its shape.
Step 5 – Coat (If Desired) and Bake
Positing the racks so they divide your oven into thirds. Preheat oven to 350˚F and line two large baking sheets with parchment paper or silicone mats.
Measure out and chop any ingredients that you want to roll the logs of dough in, if you haven’t already.
Remove dough logs from the plastic wrap and roll them in the coating of your choice.
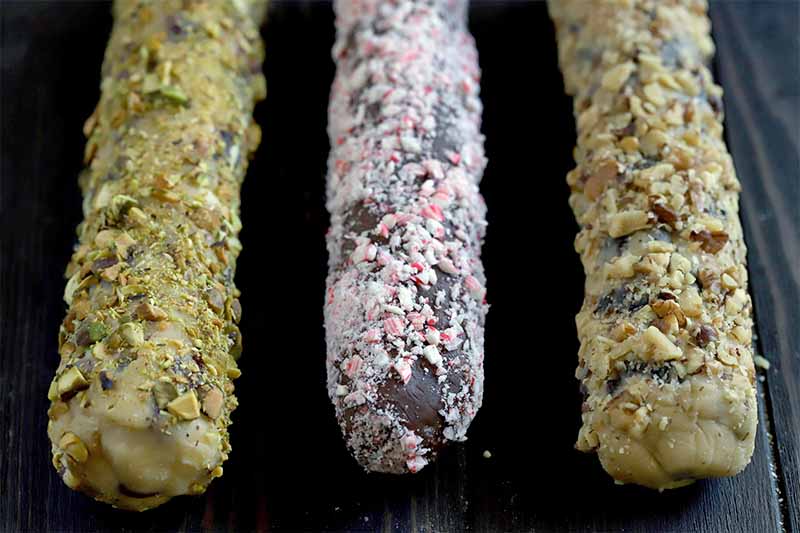
Use a sharp knife to slice each log into uniform discs that are about 1/3 inch thick.
You can make the cookies thicker if you like, but you will need to add a couple minutes to the baking time. Just be sure to be as consistent as you can throughout a given batch, so cookies that are arranged on the same tray will be done at the same time.
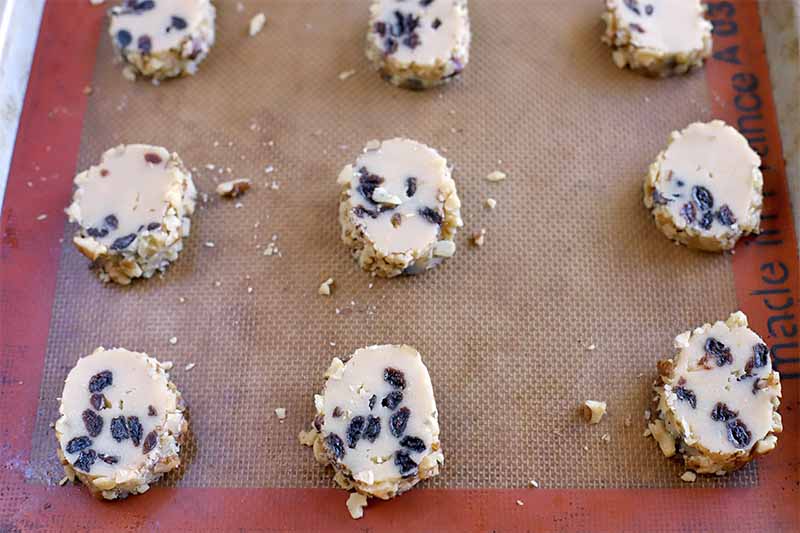
Place on the baking sheets, spaced evenly apart. You’ll want to leave about 1/2 inch of space between them.
Bake for 12-14 minutes, until the cookies are set. They should not be allowed to brown. Keep an eye on the oven through the last few minutes of baking, in case you need to take them out early!
Transfer to wire racks to cool completely.
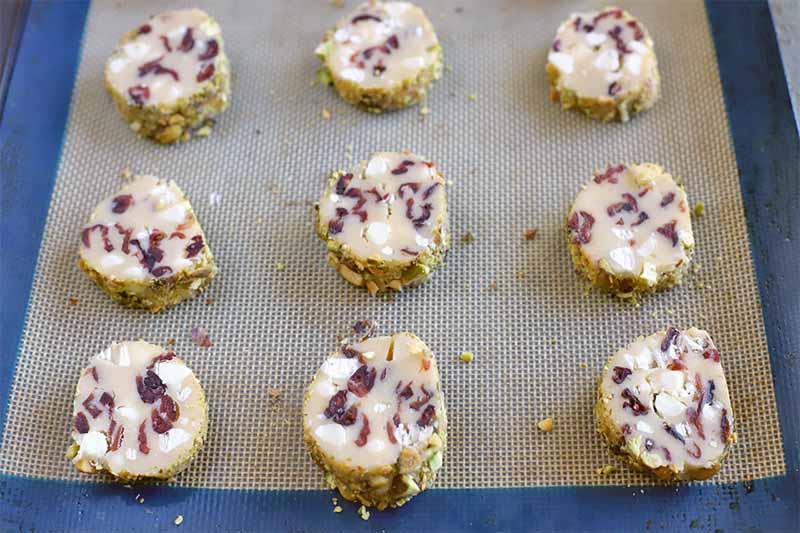
To store the cookies, pack them in airtight containers, or plastic zip-top bags with the air pressed out, to keep for 5 days at room temperature. Or, they can be stored this way in the freezer for 1 month.
Variety Is the Spice of Life
As I mentioned before, there is a ton of flexibility when it comes to making these cookies. You can essentially take the base recipe and make them whatever you could possibly want.
If you don’t love the variations that you saw listed in the recipe above, you can really do anything you want.
Come up with creative ideas that spark your cookie craving, like using lime zest and gin for a twist on the gin and tonic.
Want to go more seasonal with your flavors? Consider lemon zest and chopped rosemary for an herbaceous option that you can dip in your tea.
And speaking of tea, consider adding ground tea leaves to the mix. Earl Grey and orange zest would make a delicious combo.
Endless variety, and endless experimentation, is what it’s all about.
Which flavors will you make? Tell us in the comments below, and be sure to come back to rate the recipe after you bake it up.
If you loved these, be sure to check out some more of our favorite seasonal cookie recipes such as:
Photos by Meghan Yager, © Ask the Experts, LLC. ALL RIGHTS RESERVED. See our TOS for more details. Originally published by Shanna Mallon on January 9, 2009. Last updated: December 13, 2022 at 13:16 pm.
Nutritional information derived from a database of known generic and branded foods and ingredients and was not compiled by a registered dietitian or submitted for lab testing. It should be viewed as an approximation.
About Meghan Yager
Meghan Yager is a food addict turned food and travel writer with a love for creating uncomplicated, gourmet recipes and devouring anything the world serves up. As the author of the food and travel blog Cake 'n Knife, Meghan focuses on unique foodie experiences from around the world to right at home in your own kitchen.


These types of cookies are the best… prepared in advanced, shoved in the freezer for use when you really need it!
I never think to freeze cookie dough. I’m a more make it and eat it now kind of a person. Which is why I make a batch of 24 cookies and eat, like, 12 of them in the first 3 days. Must.consume.before.it.goes.stale!
I better start freezing my cookies too. I’m definitely going to try this recipe…probably this weekend!
OOooO so handy. I will have to make. yum.
Oh my goodness! Those cookies look and sound SO good. (I’m a sucker for anything sweet.)
Yeah. I’m going to have to make these sometime soon.
MC: See, now, I totally get that—the not wanting to wait. This whole plan-ahead thing is a slow journey for me, and this is one small step. It’s better when I can eat some as I go, like make a bunch of logs to freeze but bake a few right there. Also helps with portion control, and, gosh, I need that.
Rae: You’ll love them!
E.P.: Oh, boy, I’m a sucker for anything sweet, too. Like, that’s a gigantic understatement.
I love thick cookies. If I slice them thicker will they stay thick when baking or do they spread the same way as a cookie scoop?
You’ll have to experiment with this to see what you get. I’d try making the log of dough a bit thicker as well as cutting thicker slices, chill before baking, provide plenty of space between each on the baking sheet, and keep an eye on them while they bake as you will also need to make corresponding adjustments to the bake time.
I’m looking for an old slice n bake recipe off a large bag gold medal flour circa 1986-1990 or more. Base cookie dough then add mini choc chips for 1, coconut bars, chocolate nut, oatmeal cranberry, brown sugar for 5 different types. Freeze into logs, slice then bake. Very sturdy, packing cookie.
Please help me find a copy.
Unfortunately I was not able to track this down for you via their website, but I suggest you contact the Gold Medal Flour Company at General Mills directly with your question. You can access their contact form here.
Otherwise, maybe one of our readers has a copy they can share. Good luck with the search!