What’s so special about flatbread?
Present in some form in almost all cuisines, flatbreads are the perfect introduction to yeasted bread for the novice baker.
While the simplicity might fool you into believing it is nothing of note, there is great room for variation with this practical dish.

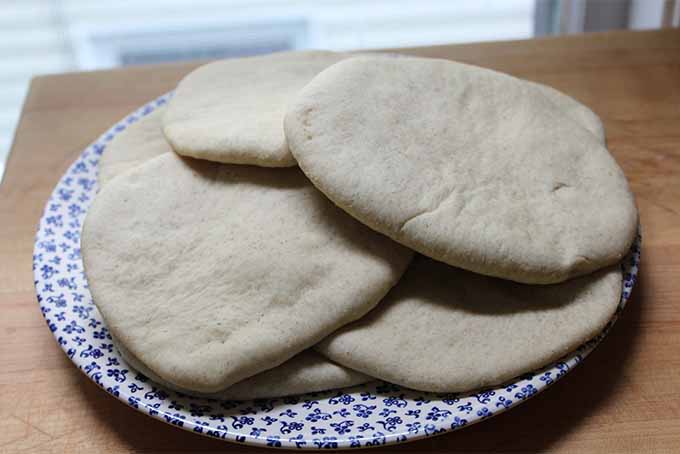
Pita has been the staple of Mediterranean, Moroccan, and Middle Eastern cuisine for 4,000 years. When baked at high temperatures, steam inflates the dough to create the traditional pocket.
While it is difficult to get an even pocket with the lower temperatures of a home oven, the bread is still delicious when used as a wrap or torn into pieces to eat with traditional dips, called mezze. In fact, this is the manner in which pita is most commonly consumed.
In this recipe, a simple pita is made significantly more interesting by fermenting barley flour prior to making the dough.
This is accomplished through a sponge method, where a portion of flour is mixed with yeast, honey, and water to develop a tangy flavor that adds great complexity and tenderness to the final product.
This pita recipe does not include any eggs, so it’s perfect for those who need to avoid eggs in their baked goods.
Although the use of a sponge is unusual for pita, the end result will have you questioning if it’s really worth making it any other way!
I love using this recipe in many different ways, beyond those traditional to pita.
It makes a great crust for a personal pizza, or you can serve it slathered with butter and jam for breakfast. Or brush it with olive oil and grill for 30 seconds on each side for a nice addition to your next barbecue.
The Recipe

- 1 cup barley flour
- 2 tablespoons honey
- 1 tablespoon instant yeast
- 1 cup water
- 2 cups all purpose flour
- 1 teaspoon salt
- 1/4 cup olive oil
- Combine the barley flour, honey, instant yeast, and water in a mixing bowl. Let this sponge sit for twenty minutes until small bubbles begin to appear on the surface.
- Add the all-purpose flour, salt, and olive oil. Stir together just until a shaggy dough begins to form. Let rest for ten minutes.
- After resting, turn dough onto the counter and knead for ten minutes. Using the heel of your hand, push firmly down and forward, rotate 90°, fold in half, and repeat. Continue this motion for ten minutes until the dough becomes smooth.
- Once your dough has come together in a smooth ball, place in a well-oiled bowl, cover loosely with a dishcloth or plastic wrap, and let rest for an hour.
- Divide your dough into ten even pieces. Shape each piece into a ball by cupping your hands and rotating between your palms. Once shaped, let the rounds rest another hour while preheating the oven to 400°F.
- Place an empty baking sheet in the oven. Using a rolling pin, roll the dough one piece at a time into 6-inch circles, rotating 90° after each roll. Let rest for 5 minutes.
- Quickly place rounds onto the hot baking sheet and return to the oven. Bake for 4 minutes. Be careful when you remove your pita from the oven – while baking, the bread will puff with steam, which can severely burn you if deflated while still hot.
- Serve pita with traditional Greek mezze, such as hummus or tzatziki, as a wrap for a sandwich, or the crust of a pizza. Or eat it on its own, savoring the complex balance of flavors.
Nutritional Information*
Cooking By the Numbers…
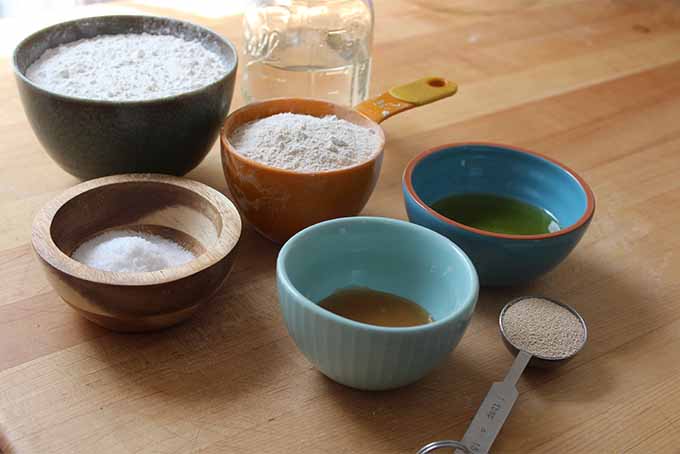
Step One – Mix the Sponge
This recipe is made using the sponge method, a process where part of the flour is mixed with yeast, sugar, and water. This gives the yeast time to develop a deeper flavor. This is particularly helpful in this recipe because it uses barley flour, which can oftentimes lead to a dense, dry end product.
By giving it time to ferment early in the process, the yeast not only develops a sour flavor, it also breaks down the barley flour to create a more tender pita in the end.

Mix the barley flour, honey, yeast, and water in a bowl. Make sure your water is lukewarm to the touch, about 100°F. If it is any hotter, it will make the dough very sticky and difficult to knead.
Let the mixture sit undisturbed on the counter for twenty minutes.
If you are substituting active dry or fresh yeast, whisk together the honey, yeast, and water first. In the case of active dry, allow time for it to activate, then stir in the barley flour.
After twenty minutes, small bubbles will begin to form on the surface of the sponge and it will have a slightly sour flavor.
Step Two – Add the Other Ingredients
Stir in the all-purpose flour, salt, and olive oil. Once the mixture has come together to form a shaggy dough, let it rest on the counter for ten minutes.
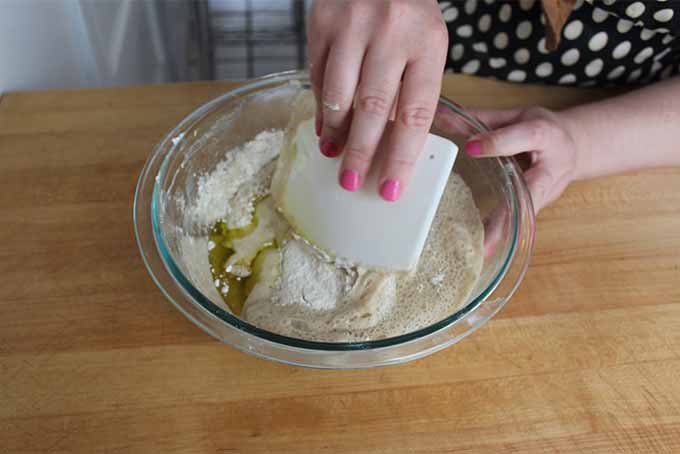
The gluten in this recipe tends to get exhausted pretty quickly. This early rest gives the flour time to become hydrated, which will make for an easier knead.
Step Three – Knead
Turn your dough out onto your countertop and knead for ten minutes. Unless it feels very sticky, it is best to avoid adding any additional flour. Work on a clean countertop, and if it sticks, use a bowl scraper to help with the early phases of kneading.
Fold the dough in half. Using the heel of your hand, press it forward. Rotate 90° and repeat. This is your basic kneading motion.

If it begins to feel tough and resists stretching, let the dough rest for 3-5 minutes before continuing. For a more detailed explanation of how to knead, check out our in-depth article!
Knead for about ten minutes, until the it forms a smooth ball. Perform a windowpane test to check the gluten formation.
Here’s how:
Cut off a small portion of the dough and stretch it slowly in every direction. If you have developed the gluten sufficiently, your dough should be able to stretch thinly enough in the center that light shines through without it breaking.
Step Four – Rest
Place in a well-oiled bowl, cover loosely with a dishcloth or plastic wrap, and let it rest at room temperature for an hour or until doubled in size.
During this rest, the yeast is slowly working its magic, munching on the sugars and starches in the dough. If the weather is very warm, the yeast eats more quickly, and thus a sufficient rest might be accomplished in less than an hour. If it is very cool, the process might take a bit longer.
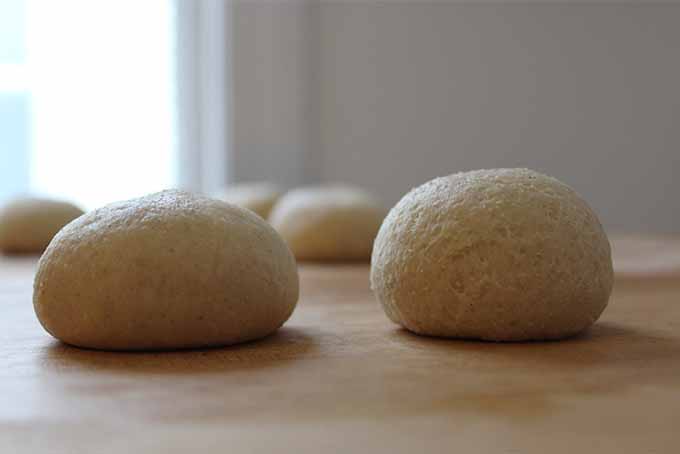
Step Five – Shape
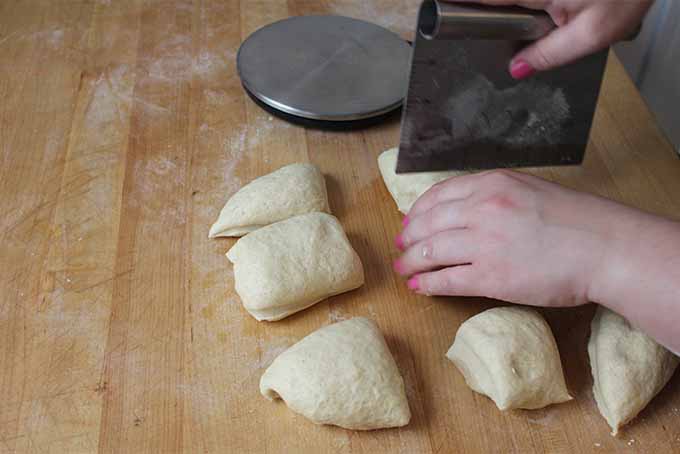
When the dough has doubled in size, cut it into ten even pieces. Roll each piece between cupped hands to shape it into a smooth ball.
Once you have finished shaping all of the pieces, let them rest for another hour. You can let them rest on the counter, or on a baking sheet if you don’t have enough space, covered with plastic wrap or a clean dish towel.

During this second rest, called a proof, the yeast is working through one final push to soften the gluten strands and prove that it is still alive.
While your dough is resting, preheat the oven to 400°F.
Step Six – Roll
Place an empty baking sheet in the oven.
Roll each piece of dough out into 6-inch rounds.
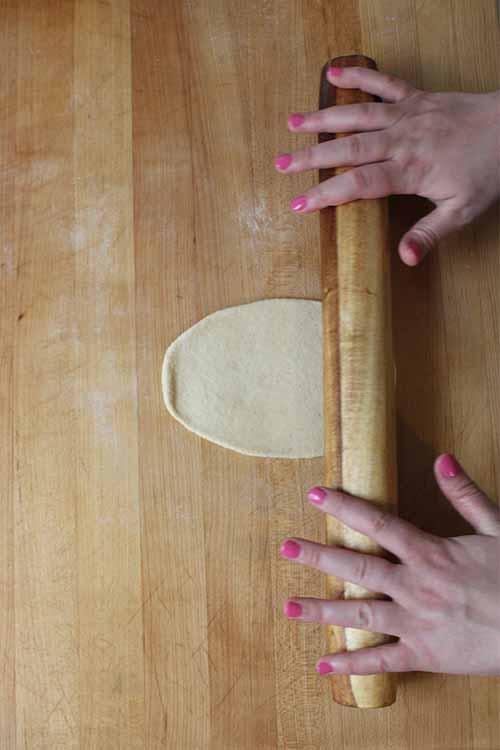
As you roll, you are stretching the gluten into a large, flat net. In order to avoid gluten’s resistance, you want to make sure you roll in every direction. An easy way to make sure that you are rolling without exhausting the gluten is to rotate the dough 90° each time.
Let the rolled rounds rest for five more minutes, to make sure the gluten is ready for its final step.
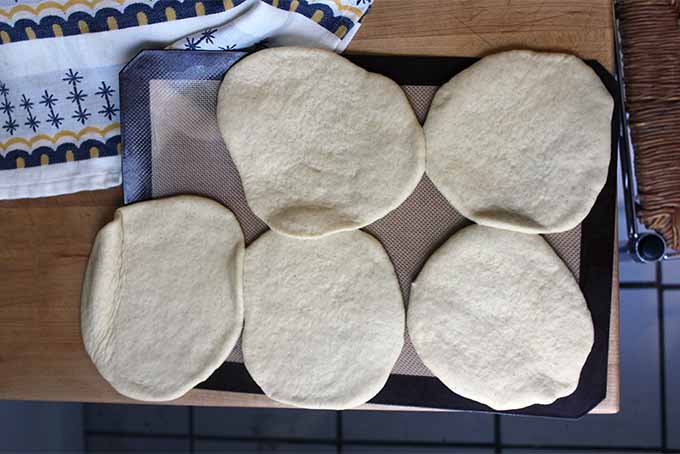
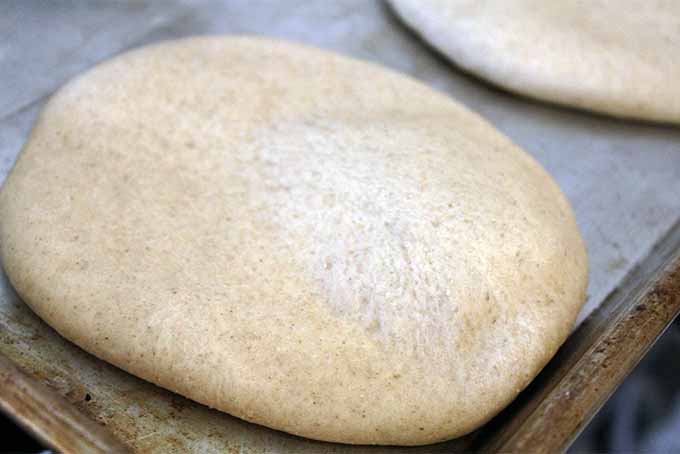
Step Seven – Bake
Take your hot baking sheet out of the oven. Carefully place three rounds on the sheet and return to the oven for four minutes.
By baking on a hot sheet pan, you are providing heat evenly to both sides. This causes steam to create a pocket inside, and each side cooks quickly.

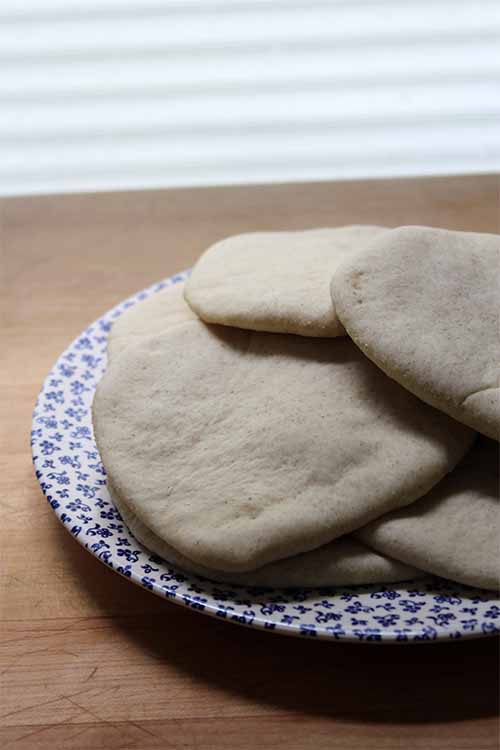
Be careful when you take the pitas out of the oven – the steam inside is very hot!
Slide your baked pita off of the tray immediately to stop the cooking process.
Put three more rounds on the sheet and repeat until all of the pita are done.
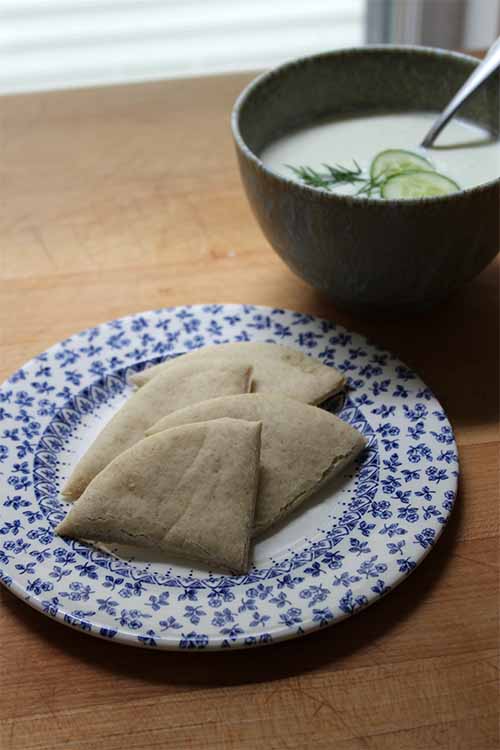
Step Eight – Enjoy!
Serve this pita fresh from the oven with traditional Greek mezze, like hummus, cool and creamy tzatziki, or baba ghanoush. Alternatively, try using it as a wrap for a sandwich, or the crust of a pizza. Or spread it with butter and jam for a tasty breakfast.
Another great option is to brush each side with olive oil, and place on a hot grill for 30 seconds on each side. This will make a delicious addition to your next barbecue.
Thinking about purchasing a grill to expand your cooking repertoire during the summer months? Check out our reviews of the best gas and charcoal grills on the market.
This pita is very soft and flavorful, I would dare say that it just might be the best pita you’ve ever had! It is simple to make, even for the novice baker, and is a great way to practice your kneading and shaping technique.
In just a few short hours, you can have the scent of this pita filling your home. Let us know in the comments how you plan to serve this tasty treat, whether next to a Mediterranean sheet pan chicken dinner or dipped in a spread.
We have more perfect pita recipes for you to try. Make some of these tasty ideas:
Photos by Kendall Vanderslice, © Ask the Experts, LLC. ALL RIGHTS RESERVED. See our TOS for more details.
*Nutritional information derived from a database of known generic and branded foods and ingredients and was not compiled by a registered dietitian or submitted for lab testing. It should be viewed as an approximation.
About Kendall Vanderslice
Kendall’s love of food has taken her around the world. From baking muffins on a ship in West Africa and milking cows with Tanzanian Maasai, to hunting down the finest apfelstrudel in Austria, she continually seeks to understand the global impact of food. Kendall holds a BA in Anthropology from Wheaton College and an MLA in Gastronomy from Boston University, and has worked in the pastry departments of many of Boston’s top kitchens. Based in Somerville, Massachusetts, Kendall helps to run a small community supported bread bakery and writes about the intersection of food, faith, and culture on her personal blog, A Vanderslice of the Sweet Life.


Well I have to say that this really sounds like something that I would love to make in the kitchen. I am a big fan of pita bread and I use it a lot. Especially in the summer time when the weather is pretty terrible the pita bread is light enough to really hit the spot. I have some olive oil and basil pesto mixture to dip it in, and voila, you have yourself a perfect appetizer. Thanks for sharing and I am going to bookmark this one.
When making any type of recipe it is also good to experiment with spices and herbs. Many of my guests are vegan and/or vegetarian and when I prepare a vegetarian meal the flavor comes from spices. Actually the flavor comes from spices more than actual ingredients. I would definitely not eat an unseasoned steak. yuck lol! 😀 I like adding paprika, Italian spice, and rubbed sage for this recipe.
This recipe looks pretty tasty, and the multiple rest periods would give me a chance to get other things done while I’m in the process of baking it. I can see me eating it as a sandwich with just about any ingredients, including peanut butter and jelly. It could also make a really great mini-pizza that could be customized for every member of the family. I like that idea the best, I think. Particularly since my husband and I have different tastes in pizza and we have to buy two different types.
Bread making truly does give you the opportunity to do other things around the house during the rest and rising periods. I also love the tremendous smell of fresh bread in the house, which can also be used as a reminder to check on your dough.
This bread has a great tangy fragrance to it. I love when the scent of it fills my home!
I love it when the scent of any bread baking fills my home. Mmmm. Is there anything better than warm bread right out of the oven? I’d be hard pressed to think of anything.
We can’t get this kind of food around here very often, so this is a great recipe for me stash for later use. I wonder how these would work with gyros? I’ve all but perfected my recipe for making those, but finding the pocket bread is a chore. If I could make my own, that would be great.
These make fabulous gyros! I actually developed the recipe while working for a Greek restaurant and that is precisely what we used them for!
My son absolutely loves bread of all kinds, but pita is our go to for just about anything! Hummus, peanut butter, tomato soup, just about anything he can dunk it in or spread on it is fair play. I love when i can make something versus buying it in the store, but never considered trying to make my own pita until i read this post! thank you for such a detailed instruction, will definitely be putting this on my to do list!
I also hadn’t heard of this one before reading this post, they look intriguing. I could see them as an accompaniment when you’re eating a somewhat salty food – adorable! Have you tried this bread with empanadas? That was the fist thing that came through my mind while I was reading this. It seems to be a great recipe for them, fast and versatile.
Now this really does sound interesting and thank you for the in-depth information about how the process works. I regularly make my own pizza bases and use the same recipe for a kind of pastie – calzones I think they are called in Italy. They are oven baked with almost any sort of filling and provide an excellent portable lunch. I think this will provide a splendid and very interesting variation.
I think this would be delicious for a pastie! I’d suggest brushing it with an egg-wash (whisk together one egg and a tablespoon of water) right before putting it in the oven so that it will get a shiny crust!
I’m always looking for healthier ways to eat bread and I adore wholemeal pasties, but making the pastry takes quite a while.
The idea of having these pittas double up for pasties is great, plus I like to use them as pizza bases too and use different toppings according to what people prefer.
Thanks for this post!
I am insulin resistant and ideas like this one always help making tasty things healthier
I think this is also a great idea to put in a party with a couple of cheeses and stuff like that!
This is great with cheeses, olives, and charcuterie. Honestly, I use this as my go-to bread for everything!
I will definitely give this a go! Do you have any suggestions for alternative flours that you could use? I’d like to try it with a wholewheat flour to add a bit of extra fiber but would that affect the texture too much do you think? I suppose I could try half barley flour and half wholewheat?
Thanks for this recipe, it’s definitely inspired me to get back into baking!
You could substitute part of the barley flour for whole wheat flour, although the barley is a whole grain flour so you are still getting the fiber benefits! You would not want to substitute any more of the all-purpose flour or else you will lose out on the necessary gluten formation. I’m glad it has inspired you!
My kids and I really enjoy pita bread. Our newest idea has been using pita bread, pizza sauce, thick shredded mozzarella cheese, and pepperoni slices. We make our own “Lunchable Style Pizza” for lunch sometimes!We will have to check out this recipe. Sometimes I think the pita bread we are using is too bland.
Hi Ashley,
I agree that most store bought pita is quite bland — and has an unpleasing texture about it as well. I love using this recipe for personal pizzas. It has both great texture as well as wonderful flavor.
I found this link from a previous article I was reading here, and I thought I could take a peek and see if I can make this. My latest run to buy tortilla at the grocery wasn’t successful. I guess, I won’t be eating that fajita anytime soon. While the procedures on how to make this are very clear, I highly doubt I have the patience to do all these kneading. But who knows I just might give this a try as I truly want to eat some delicious wraps.
I promise it is well worth the kneading for the end result! It truly is delicious. Also, I find kneading to be a very relaxing and soothing task 😉
Is it also a possibility to allow the barley flour and water to ferment on its own without the use of sugar/honey? Obviously it will take days to develop, as any starter would, right?
But if I were to try, would the absence of the sweetener negatively affect the finished product? I’m looking for a natural sourdough pita dough. Please advise.
Thank you!
Hi, Sharon! We’re thrilled that you’re interested in developing your own sourdough starter for this recipe! Often, honey is used as the sugar to “feed” the yeast, but it is possible to replace the sponge with a sourdough starter in this recipe as another means of fermentation.
As long as you understand the complexities of making a sourdough starter from scratch, and if you have the time to dedicate to making the starter, as well as to experiment/tinker with the pita recipe, why not give it a try?
For reference, here’s our guide to homemade sourdough. I wouldn’t necessarily want to use ALL barley flour for the starter, since the fermentation may not develop consistently and effectively. I would recommend using at least 50% all-purpose flour with the barley flour.
We love using sourdough in recipes like our Sourdough Chocolate Cake and Sourdough Biscuits, but because this is a flatbread recipe that requires extra steps for rising, you’ll want to carefully follow our notes for sourdough bread to fully understand all of the intricacies of sourdough fermentation.
When you have the sourdough starter prepped, here’s the next step to making the pita recipe: Eliminate all of the ingredients to make the sponge (barley flour, honey, yeast, water). I’d say use about 3/4 of the sourdough starter, and add that to the all-purpose flour, salt, and olive oil. You are trying to achieve a shaggy dough, so you may need to add water a few tablespoons at a time if the dough seems dry. Continue to follow the recipe as instructed.
Please let us know how it turns out, and if you have any additional notes when you’re making the recipe! We’re looking forward to the tasty results!