
Lemme tell you… I consider myself to be quite the seasoned expert when it comes to pita bread. I’ve eaten my weight in pita bread, I kid you not.
It’s a natural outcome when you make it your mission every summer for over a decade to attend all the Greek festivals in the area.
Or when you drunkenly stumble into your favorite late-night gyro shop at two in the morning after one of many typical weekend nights bar hopping in college, in order to sober up with a hefty sandwich before the long trek back to campus.
Or when you know some of the cooks who work at a restaurant that specializes in the most amazing gyros with the creamiest of tzatziki sauces. And you get free food whenever you visit.
See, I know this bread.
So it’s only natural that I should know how to make it at home. I owe it to the tired manager of that little late-night gyro shop.
No one should have to repeatedly endure a 4’11″ drunk chick, along with her equally sloshed gal pals, dancing and screaming nineties Disney songs at the top of their lungs while waiting in line for a gyro.
Good thing pita is easy, and actually really fun, to make from scratch.
With just a few ingredients, the soft einkorn flour dough comes together easily. Once you divide the dough into little balls, flatten them into discs, and proof, you bake them on a very hot baking sheet in a very hot oven.
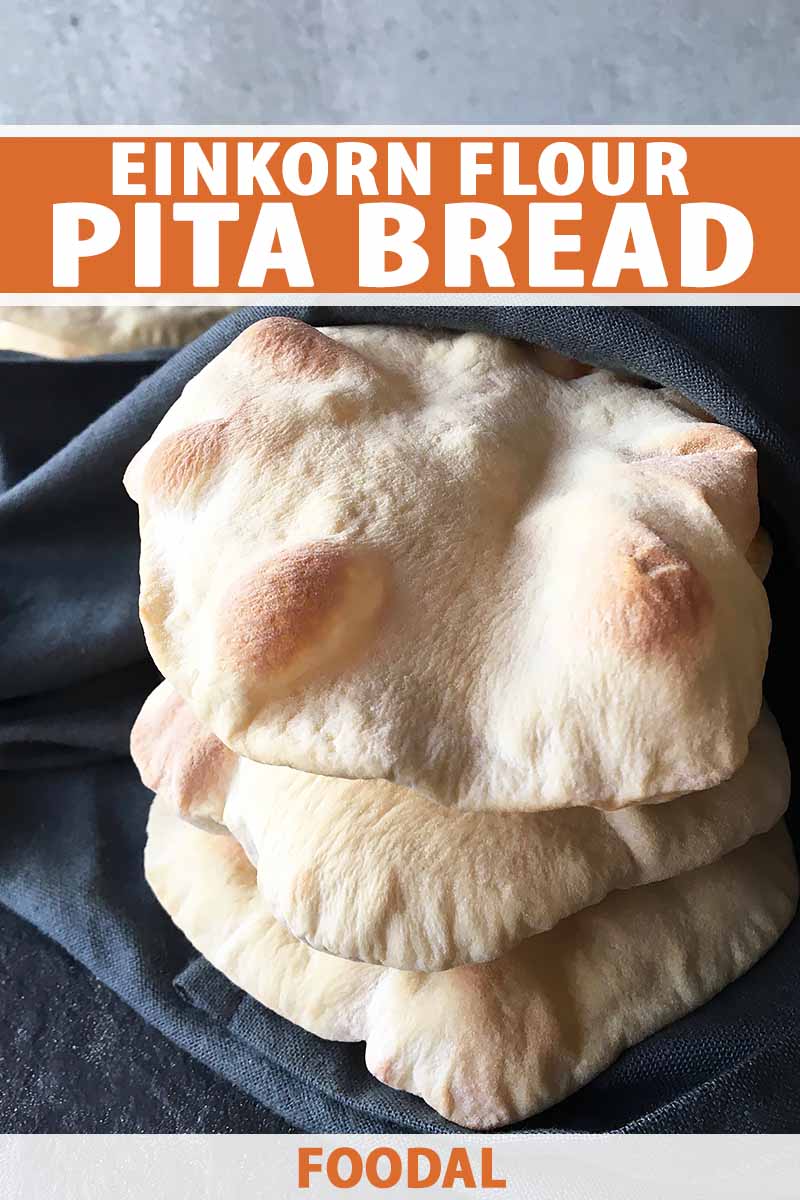
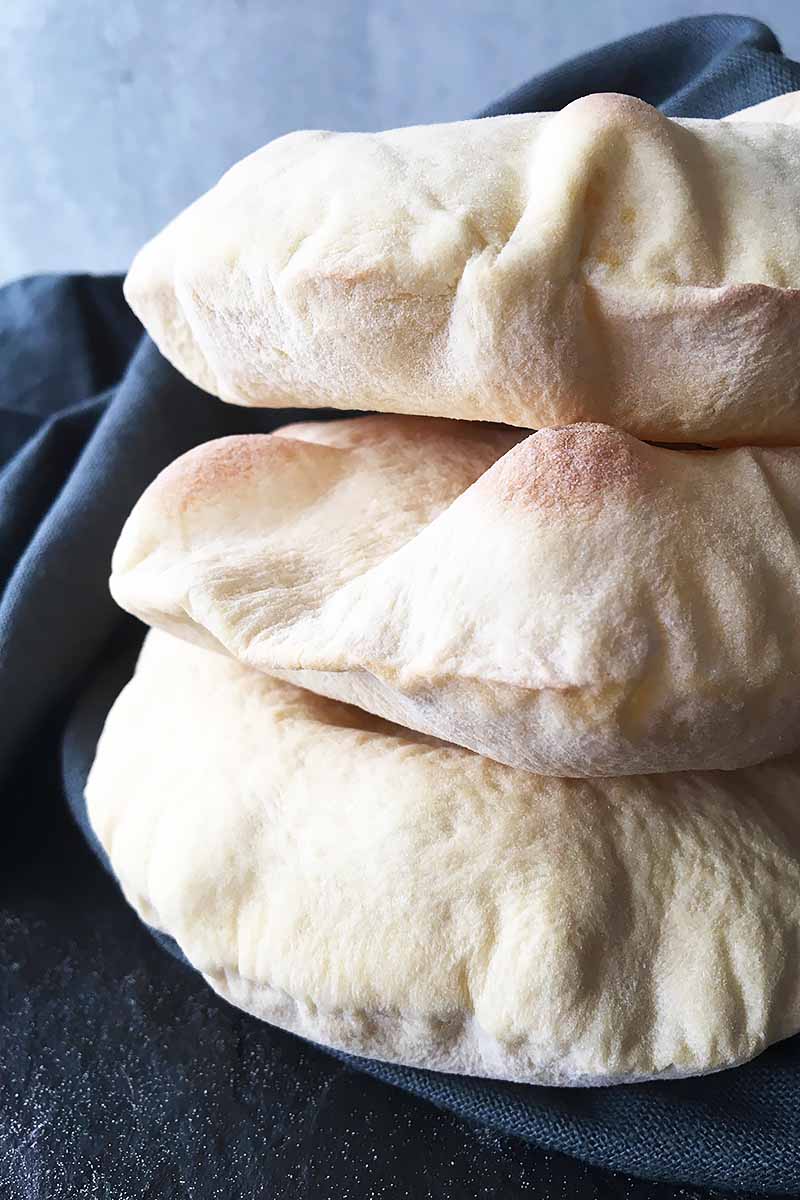
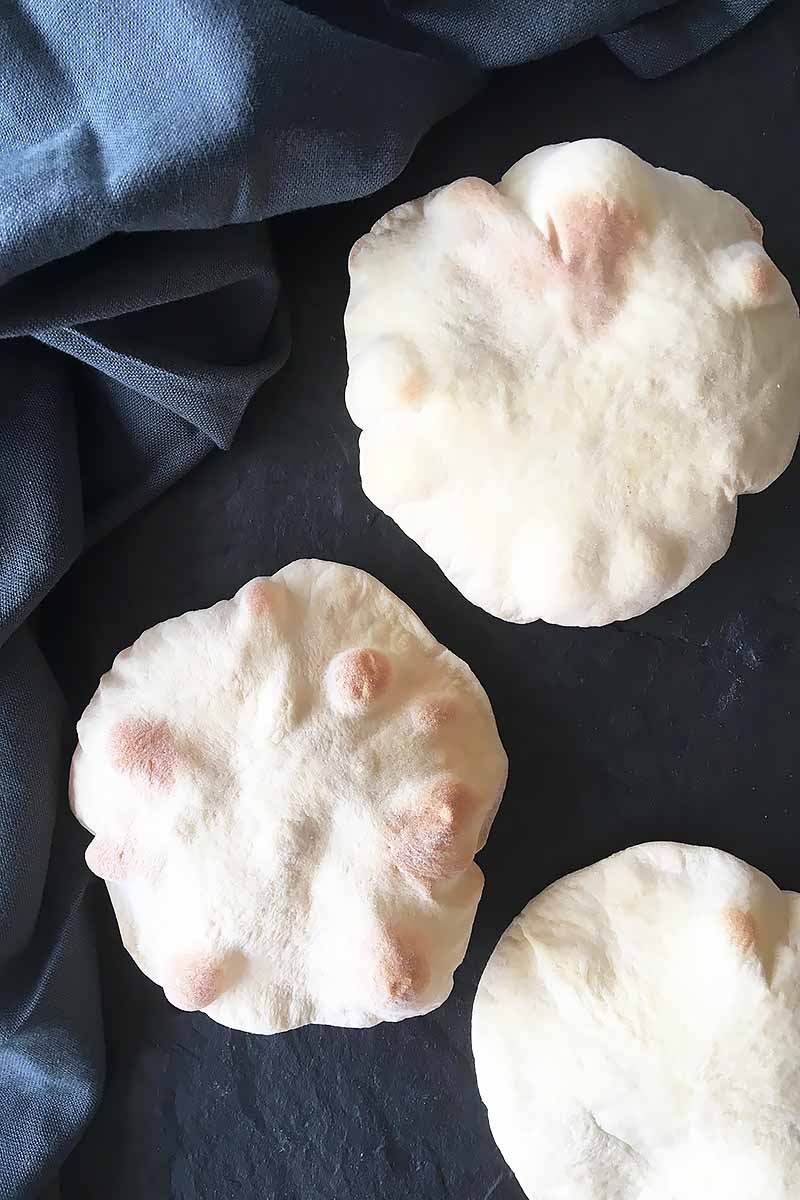
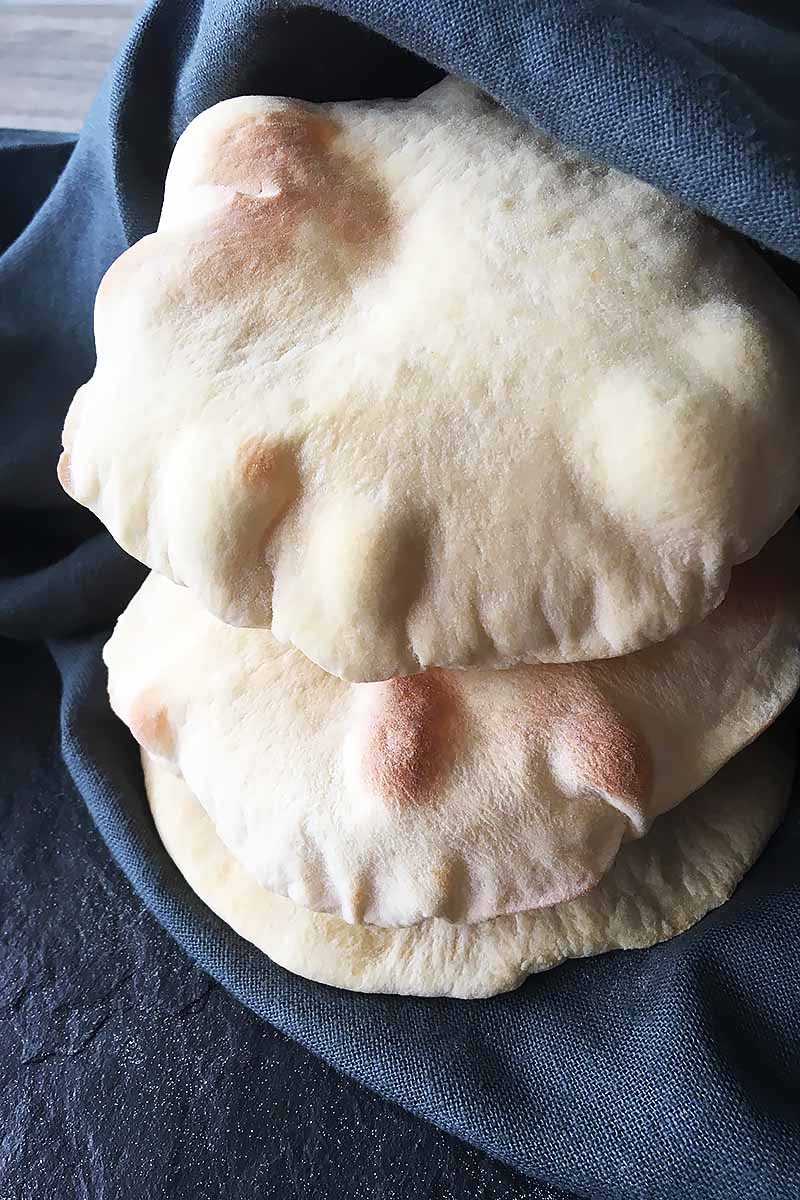
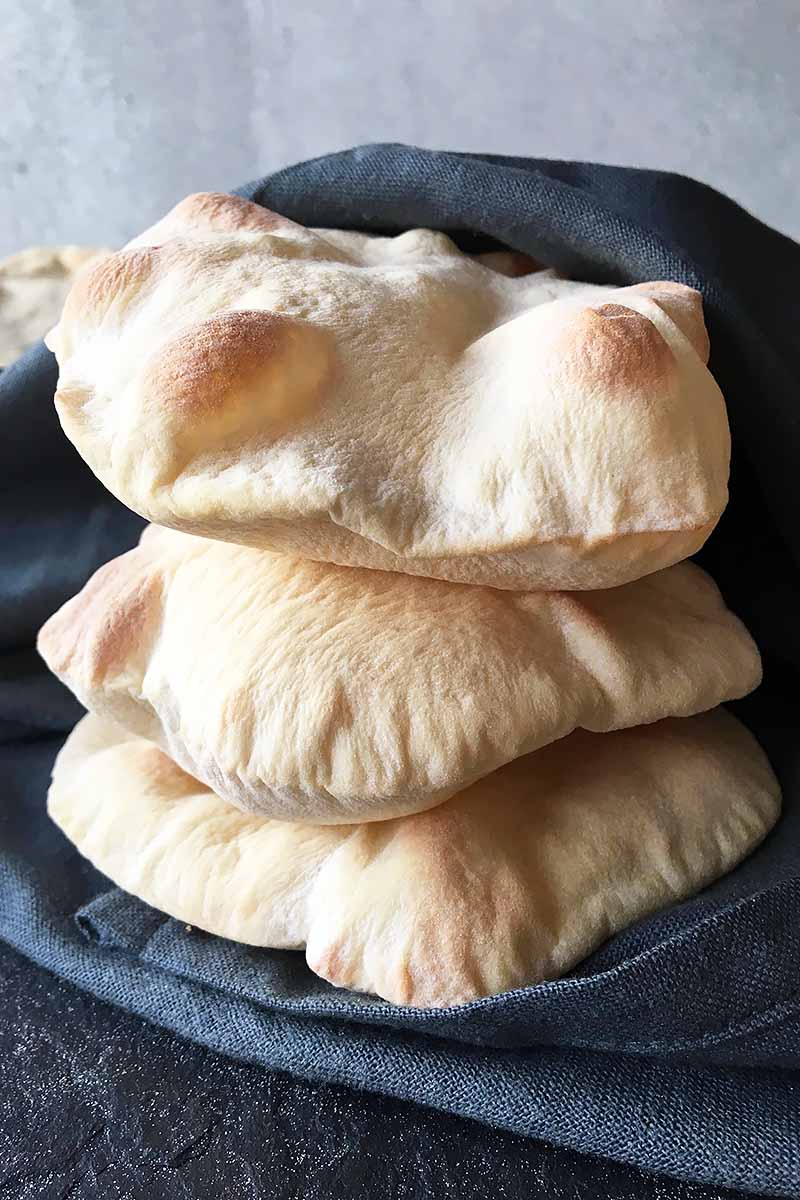
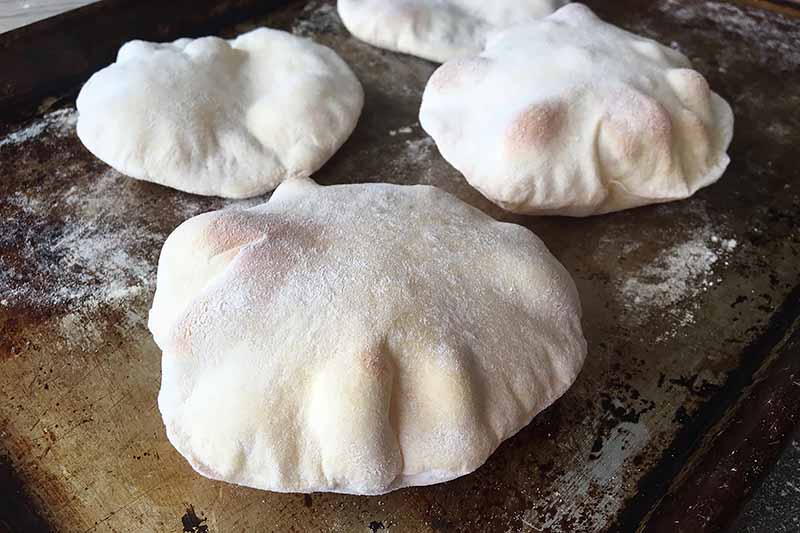
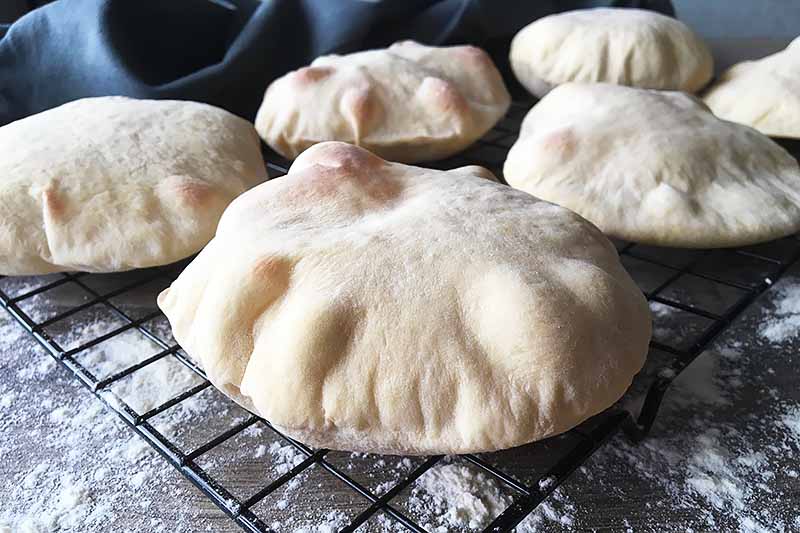
They puff! They fluff! Like little clouds of carbs!
After you let them cool down for a little (a caution for all of you: the steam inside each freshly baked disc is HOT!), cut them open along the seam and fill with whatever tasty food you like.
Have your gyro and eat it, too. Disney songs optional.
Print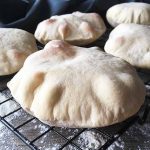
Einkorn Flour Pita Bread
- Total Time: 2 hours, 5 minutes
- Yield: 12 pita 1x
Description
Our 6-ingredient einkorn flour pita bread is a fun recipe to learn how to master for all kinds of sandwich fillings, from savory to sweet.
Ingredients
- 2 to 2 3/4 cups einkorn flour, plus more for dusting
- 1 1/2 teaspoons salt
- 1 1/2 teaspoons instant yeast
- 1 tablespoon honey
- 3/4 cup warm water (roughly 90°F)
- 2 tablespoons olive oil, divided
Instructions
- In the bowl of a stand mixer, whisk together 2 cups of einkorn flour, salt, and yeast. Pour in the honey and water. Using the dough hook, mix for 8-10 minutes until a soft, slightly elastic dough forms. If the dough is very sticky, gradually add more flour and continue to mix.
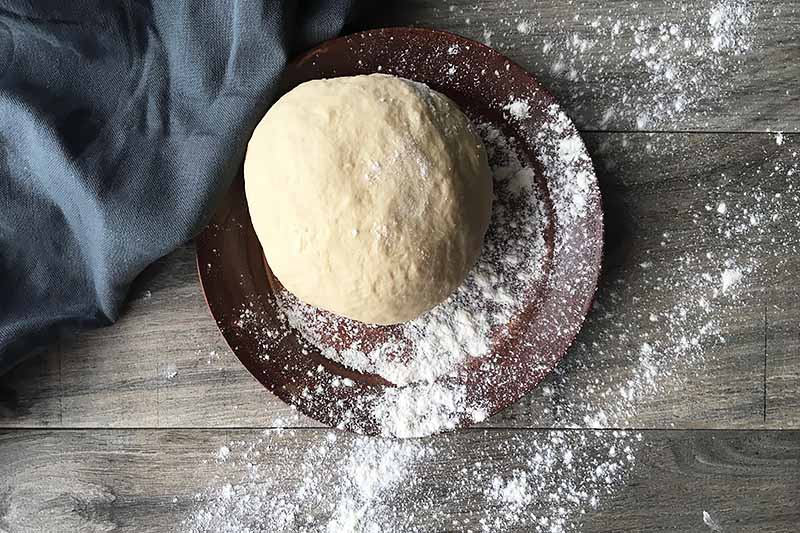
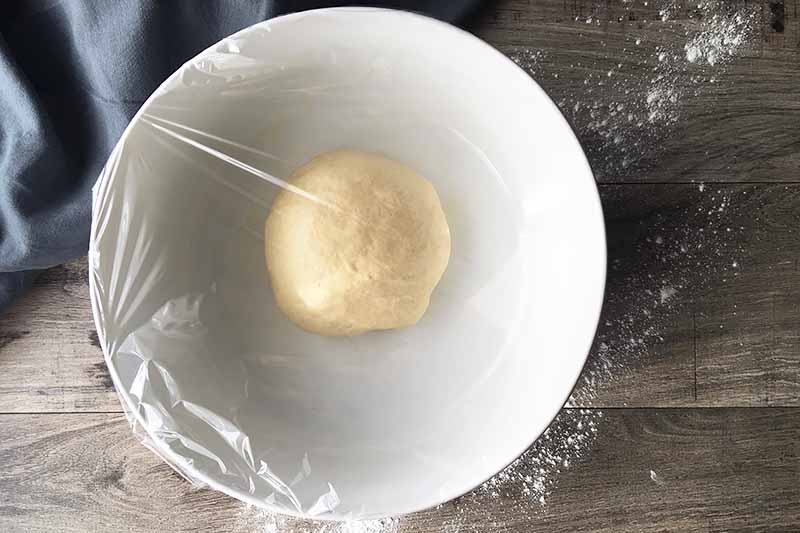
- Spread 1 tablespoon olive oil on the bottom and sides of a large bowl. With lightly floured hands, form the dough into a large ball and transfer to the oiled bowl, rolling the entire surface of the dough in the oil. Tightly cover the top of the bowl with plastic wrap. Let ferment until doubled in size, about 45 minutes to 1 hour.
- Place the dough on a lightly floured work surface and gently punch it down to flatten. Divide into 12 equally sized pieces. With your hands, shape each piece into an even ball. Very lightly brush the tops of each ball in a very thin layer of olive oil. Cover the dough balls with a large towel and let proof for 20-30 minutes, until slightly expanded.
- Preheat the oven to 450°F. Place an empty baking stone or a baking sheet in the oven to heat as you prepare the dough. With a rolling pin, roll each ball into a flat, 1/4-inch-thick circle about 4-5 inches in diameter. Dust the dough with flour if it’s too sticky when rolling.
- Working carefully, place 4 rounds on the hot pan and quickly return to the oven. Bake for about 4-5 minutes, until the pita has puffed and is showing some color, but still mostly pale. Repeat two more times with the remaining dough.
- Let the pitas cool for 10 minutes. Cut them one of two ways: leave whole by using a small knife to gently make a slit along part of the seam on the side, or divide in two by cutting completely in half along the top of the pita. Fill with your favorite sandwich items, and enjoy!
- Prep Time: 30 minutes
- Cook Time: 5 minutes
- Category: Flatbread
- Method: Baking
- Cuisine: Bread
Cooking by the Numbers…
Step 1 – Make the Dough
In the bowl of a stand mixer, whisk together 2 cups of einkorn flour, salt, and yeast until completely combined. Pour in the warm water and honey.
Using the dough hook, mix for 8-10 minutes until a soft, slightly elastic dough forms.
Sticky dough? Gradually add in more flour. You don’t want the dough to become firm and dry by adding too much – it should still be soft without being too sticky.
If you need a little assistance with this step, read our thorough article on the process of making bread, as well as how to knead it properly. You can choose to knead entirely by hand, if you can’t keep your floured hands off this beautiful dough!
Step 2 – Ferment
Coat the bottom and sides of a large bowl with one tablespoon of olive oil.
Form the dough into a large ball and transfer to the oiled bowl, rolling the entire surface of the dough in the oil. This will prevent the surface from drying out as it rises.
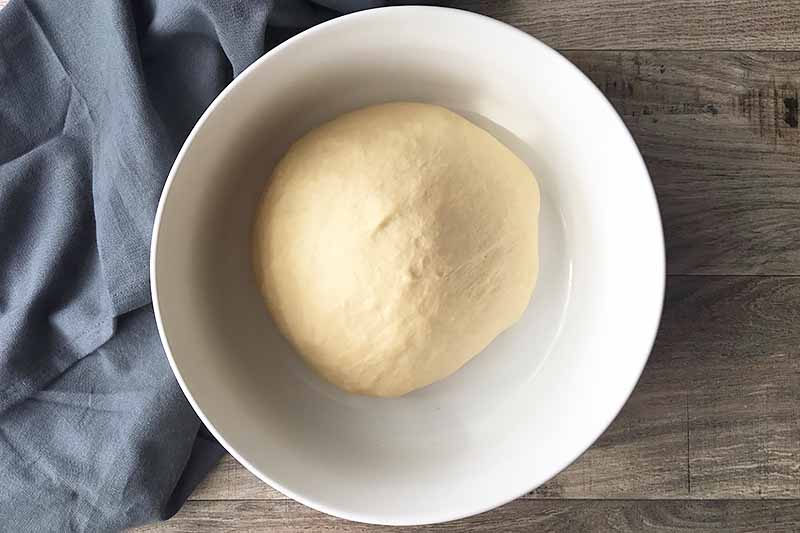
Tightly cover the top of the bowl with plastic wrap. Let the yeast do its amazing work – ferment until doubled in size, about 45 minutes to 1 hour.
Step 3 – Shape
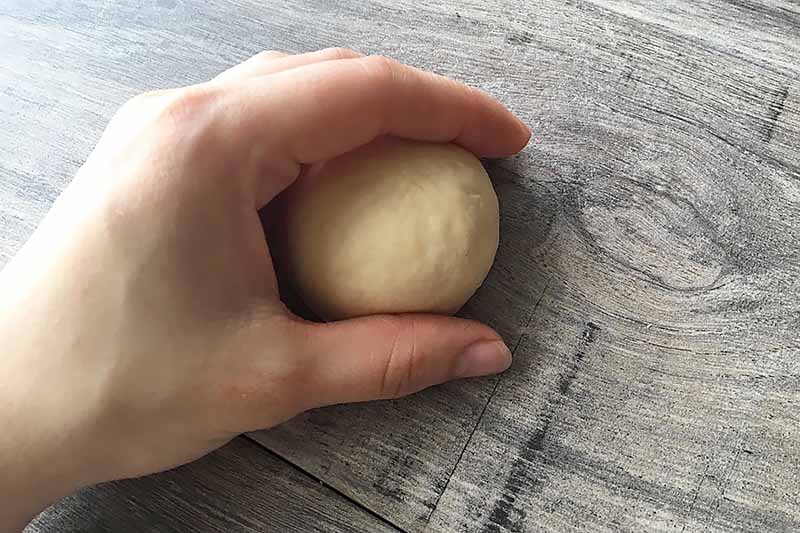
Place the dough on a lightly floured work surface and gently punch it down to flatten. Divide into 12 equally sized pieces with a sharp chef’s knife or a metal bench scraper.
With your hands, shape each piece into an even ball. Learn the importance of properly shaping bread dough.
Step 4 – Proof
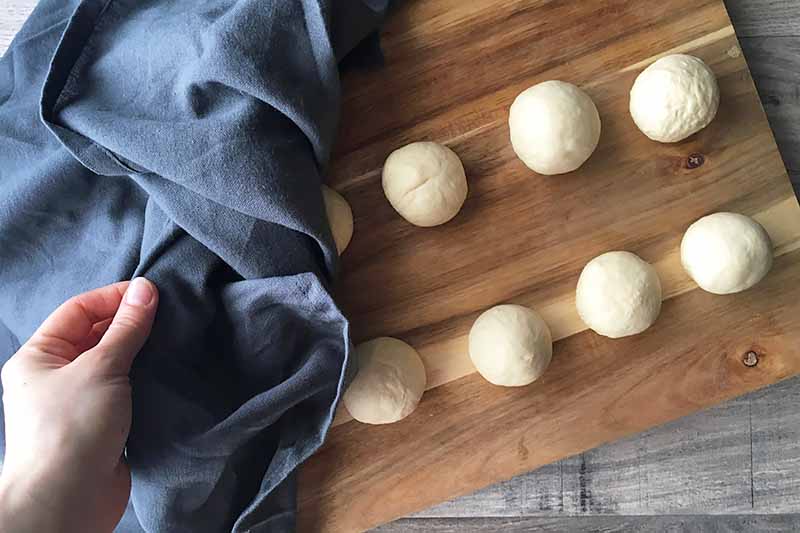
With the remaining tablespoon of olive oil, very lightly brush the tops of each ball with a thin layer of oil. This will prevent the tops from drying out. Cover the dough balls with a large towel and let proof for 20-30 minutes on your work surface, until slightly expanded.
Step 5 – Flatten
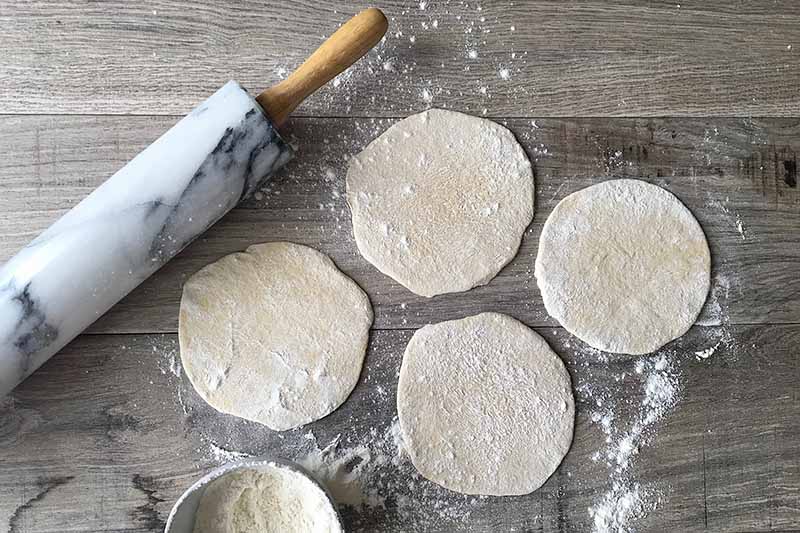
At this point, preheat the oven to 450°F. Place an empty baking stone or a baking sheet in the oven to heat as you prepare the dough.
Transferring the dough to a hot baking sheet, rather than a cold one, kick-starts the rising process of the dough rounds. It helps them puff up during the few minutes they are in the oven.
With a rolling pin, roll the balls one at a time into a flat, 1/4-inch-thick circles that are about 4-5 inches in diameter.
Step 6 – Bake
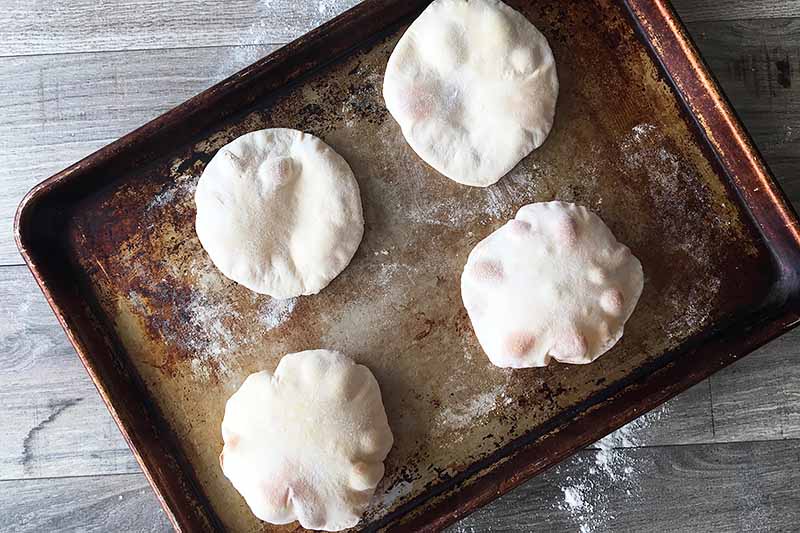
Carefully remove the hot pan from the oven, and close the door. Quickly place 3-4 discs on the pan with a little space between each. Immediately return to the oven.
Bake for about 4 minutes, until the dough rounds become very puffy. Repeat with the remaining discs.
Some of the discs may not puff up, and may remain flat – this is totally fine! You will still get a delicious flatbread to enjoy, it just might be a little harder to fill.
Don’t overbake! The bread can easily become hard and brittle if overbaked – it only needs just a few minutes in the hot oven.
Step 7 – Cool and Serve
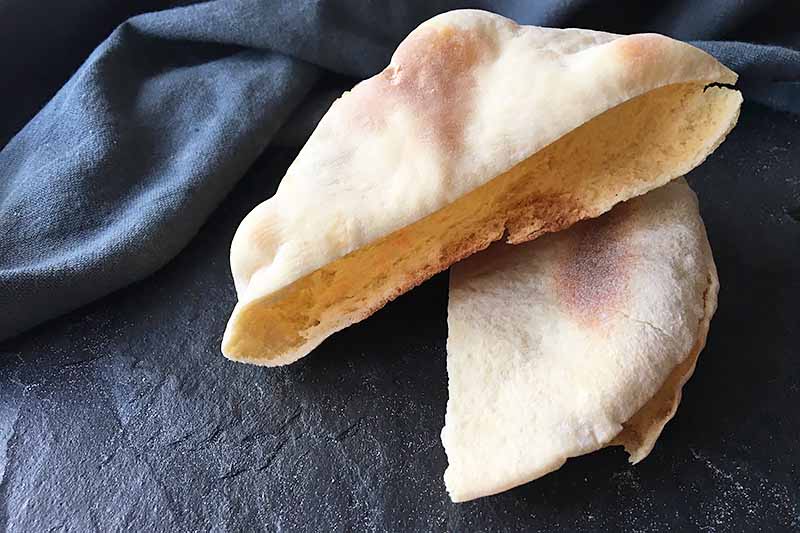
Promptly remove from the oven, and let cool for 10 minutes on a wire rack.
Do NOT try to open the bread right after removing it from the oven! The steam will rapidly escape from the inside, potentially burning your skin.
Once you’ve let them cool for the appropriate amount of time, slice them open, fill with your favorite sandwich ingredients, and eat!
Cut them one of two ways: leave whole by using a small knife to gently make an incision along part of the seam on the side, or divide in two by cutting completely in half across the diameter.
How Will You Fill It?
No matter if you’re stuffing it with vegetarian falafel or a Turkish kebob, Greek chicken, grilled chicken, or a roasted veggie medley, pita bread is a tasty foundation for many sandwich choices.
You could even take a ride down the sweet route – no one is stopping your sugar-fanatic ways! Fill them with sliced bananas and homemade Nutella, or choose your favorite fruit pie filling (we love our apple and pear option!) for a makeshift hand pie, topped with whipped cream.
The little pockets help all of the food stay put, making these the perfect handheld meal for picnicking, summer parties, or any on-the-go busy day.
And even if some of your pitas didn’t puff up, it’s no failure at all. Pile your chosen fillings high right on top of the bread, and dig in!
Feeling fine with flatbreads? Try more of our favorite homemade bread recipes:
Photos by Nikki Cervone, © Ask the Experts, LLC. ALL RIGHTS RESERVED. See our TOS for more details. Originally published by Shanna Mallon on August 14, 2012. Last updated: November 29, 2022 at 9:05 am.
Nutritional information derived from a database of known generic and branded foods and ingredients and was not compiled by a registered dietitian or submitted for lab testing. It should be viewed as an approximation.
About Nikki Cervone
Nikki Cervone is an ACS Certified Cheese Professional and cheesemonger living in Pittsburgh. Nikki holds an AAS in baking/pastry from Westmoreland County Community College, a BA in Communications from Duquesne University, and an MLA in Gastronomy from Boston University. When she's not nibbling on her favorite cheeses or testing a batch of cupcakes, Nikki enjoys a healthy dose of yoga, wine, hiking, singing in the shower, and chocolate. Lots of chocolate.


Hello, thank you for the recipe! My bread tastes good but it didn’t raise like urs did in the picture ???? what do u think I did wrong?
Like I mentioned in the article, pita bread sometimes won’t fill with air bubbles. Finicky dough! Even if you followed the recipe exactly, a flat pita could be due to a variety of factors.
Make sure you roll out the dough as evenly as possible to promote even air flow as the bread is rising during the baking process.
Make sure you brush off any excess flour on the top and bottom of the dough before baking. The flour may hinder a good rise.
Make sure your oven is heated to the correct temperature. Your oven may have uneven heat spots that could be preventing a good rise. Check out our article on understanding your oven.
If you’re still having trouble, no worries! This pita bread makes for a perfect flatbread!
Can i skip the honey? Coz i dont like sweet
The honey in this recipe helps with browning, and it does contribute a light sweetness to the finished product. Most recipes for this type of flatbread call for a small amount of sweetener, but you could try reducing the total amount of honey and adding an extra teaspoon or so of water to the dough. Please let us know how the pita turns out if you try this!
Without the honey, the yeast won’t have anything to ‘feed off’ of, so your dough won’t rise. The honey is only there to leaven the bread with the yeast. You won’t taste it at all.