It wasn’t until I was in college that I had actually heard of rhubarb.
Rhubarb was just one of those ingredients we didn’t use in our home. We were much more of a cherry and apple pie kind of family.
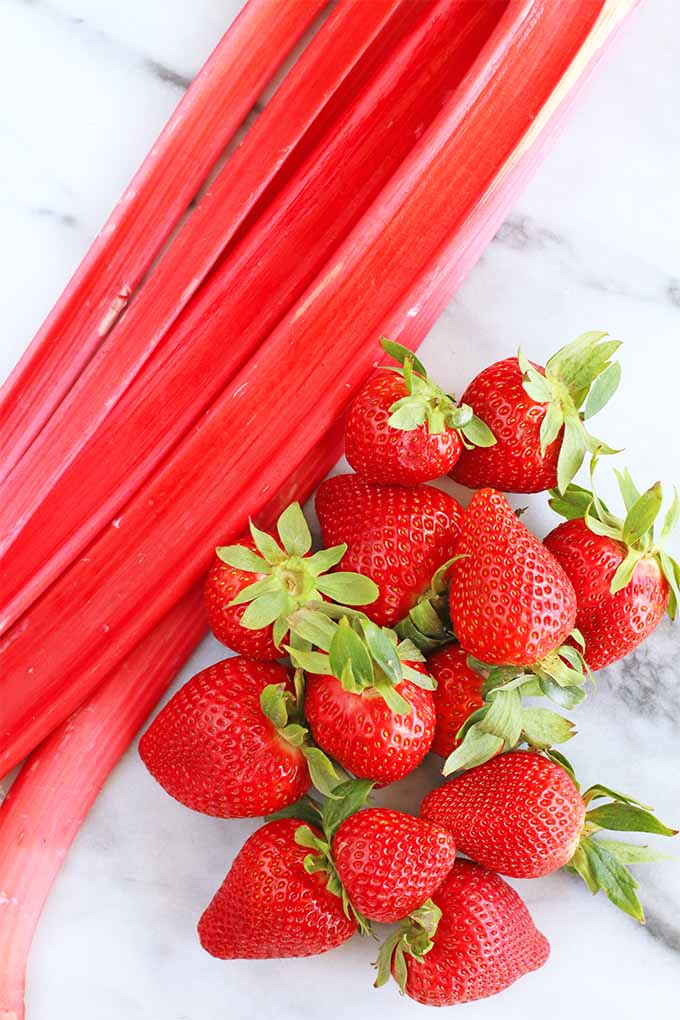
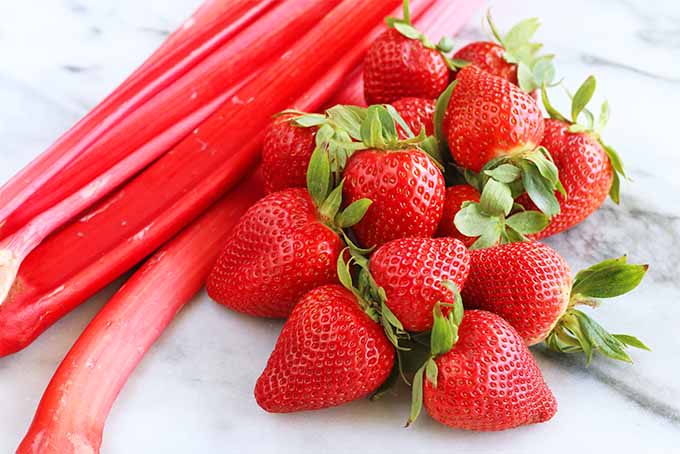
So, when my friend took me to her grandmother’s house, I was intrigued by the bright pink and reddish stalks sitting out on the kitchen counter.
The first time I indulged in a rhubarb recipe was my friend’s grandmother’s rhubarb crumble. And upon the first taste, I was completely taken aback. It was tart. It was tangy. It was delicious!
This was a completely unique taste sensation, and when enhanced with a bit of sugar and a crunchy crumble topping, the flavor of it really shone through.
Right then and there, I was addicted.
Ever since then, when spring rolls around, I feel like a giddy schoolgirl who has just finished the last day of classes before summer break. To me, not only does rhubarb offer incredible flavor to incorporate in a plethora of recipes, it’s also the mark of warmer weather to come.
Of course, there’s nothing more classic than pie, and that’s exactly how you should use this stalky vegetable when it comes into season.
But… Is It a Fruit or a Vegetable?
Yes, it is technically vegetable. This is one of those weird realities, like the fact that tomatoes are technically a fruit.
However, we tend to think of rhubarb as a fruit as it’s used in cooking and baking. We traditionally pair it with other fruits, such as the fresh strawberries used in this delicious recipe. Sweeter components help to balance its slightly sour taste.
A lot like celery in appearance with a vibrant pink hue, it’s not very tasty raw. Well, I don’t think so, at least. It’s really sour, but apparently some people like to just peel off some of the outer strings and go for it, on its own or dipped in sugar.
If you’re new to the wonders of rhubarb (or you’re not a fan of extreme tartness), keep in mind that you probably want to roast, bake, or cook it over the stove in a saucepan before you enjoy it.
Please remember that the leaves should not be eaten. They contain oxalic acid, which is toxic. Fortunately, the leaves do serve an ornamental purpose in the garden (they look lovely!) and they can be added to compost or mulch. To learn more about growing your own rhubarb, visit our sister site, Gardener’s Path.
The Perfect Fruit Pie
To be honest, crafting this delicious dessert is about two things – the balance of flavors in the filling, and the perfect crust.
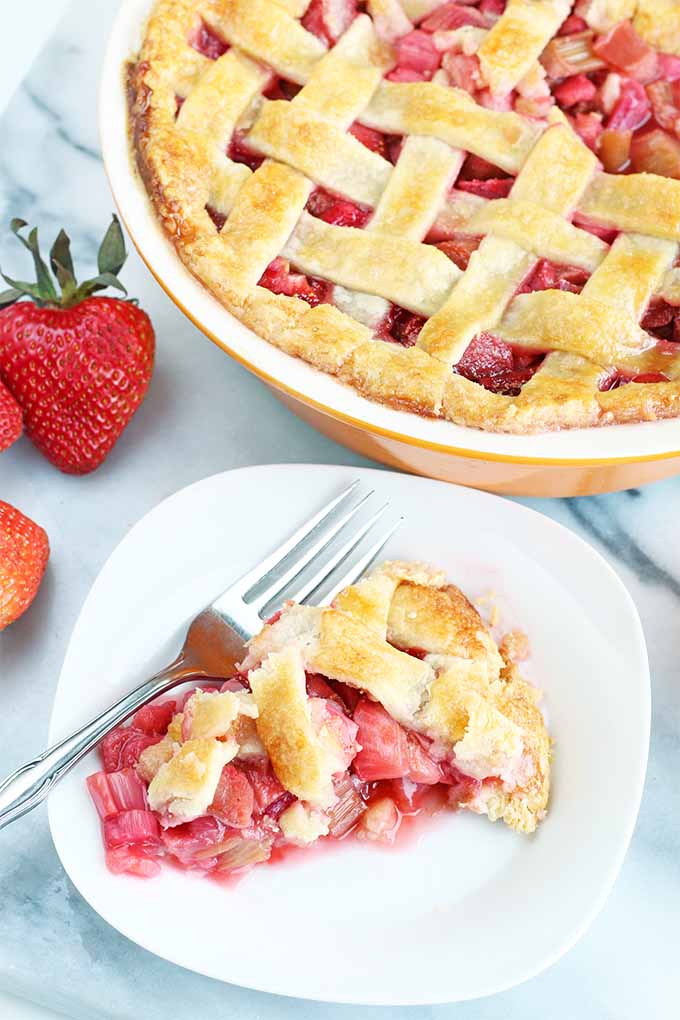
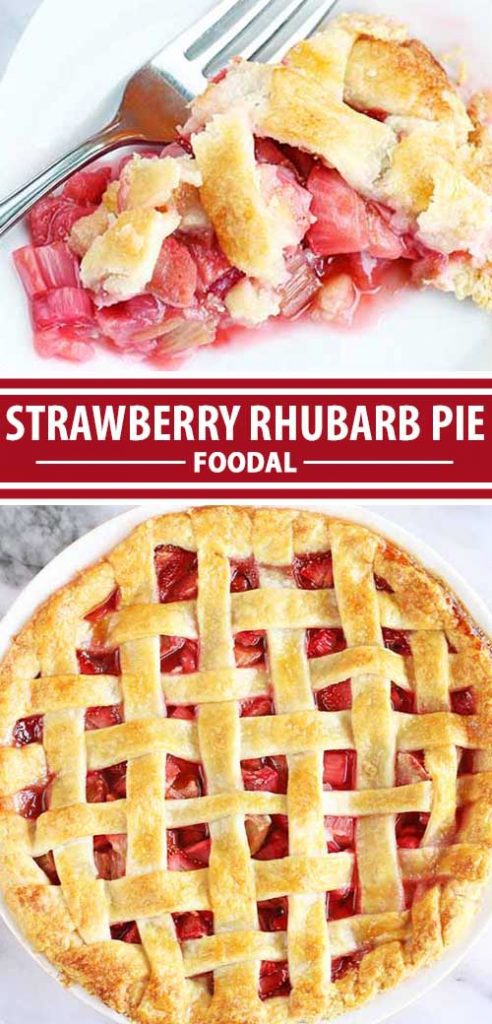
The combination of rhubarb and strawberry in the filling of this pie makes for a sweet, tangy flavor explosion that just screams spring (or summer)! You won’t believe how juicy and melt-in-your-mouth fantastic the filling is.
Be sure to serve slices warm, to really maximize the flavor experience.
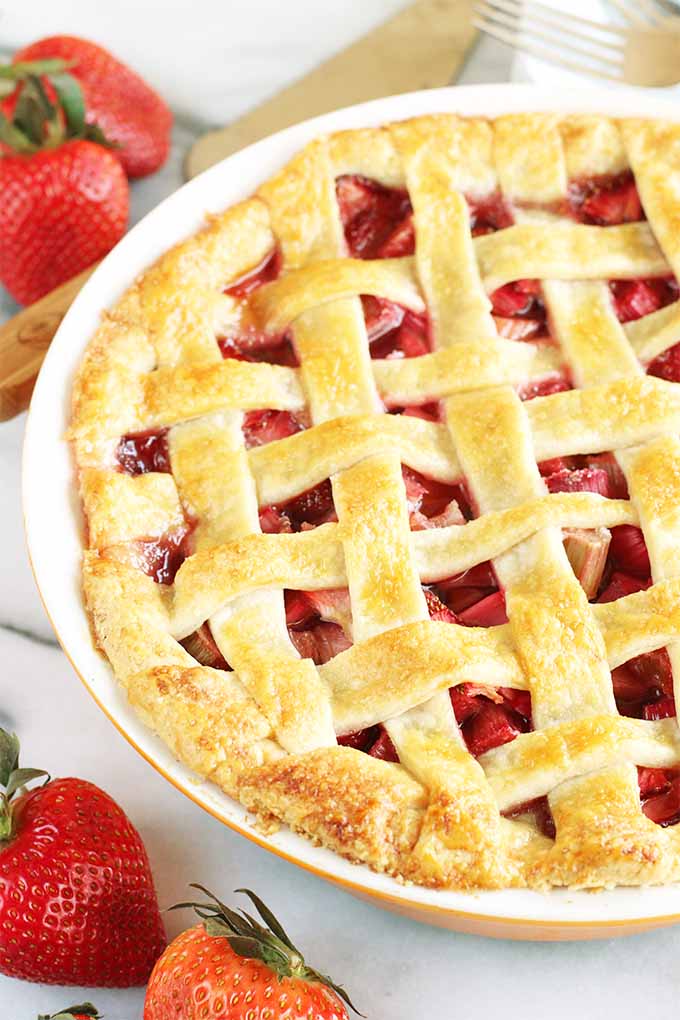
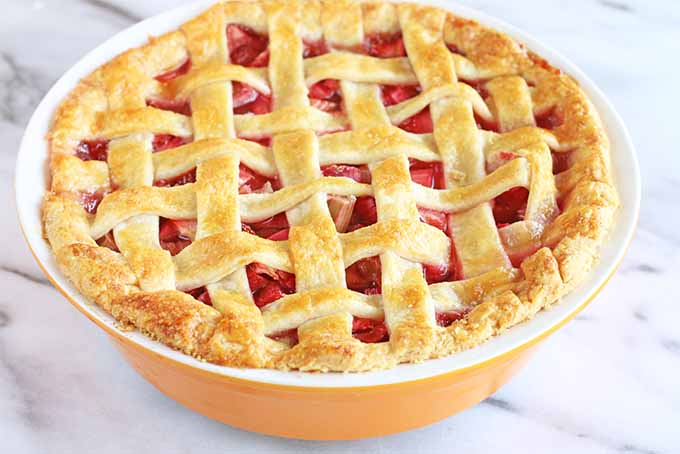
Paying close attention to the pastry is also important, because you need a crust that will hold the filling together without becoming a sopping mess. The easy crust that’s used in this recipe is a perfect baking standby to keep in your back pocket not only for this particular dessert, but for any pie you make this year.
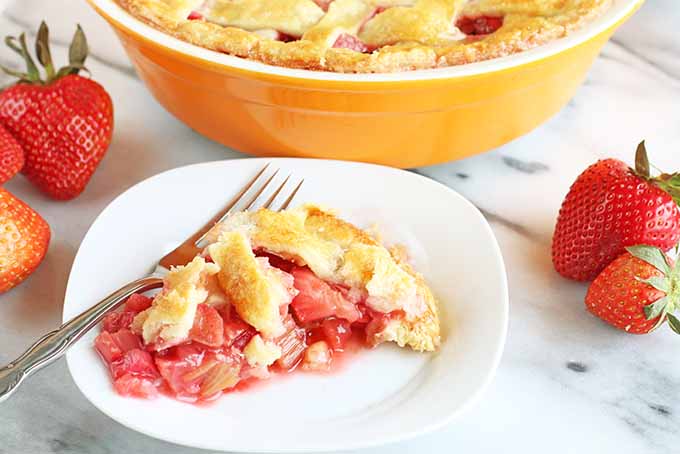
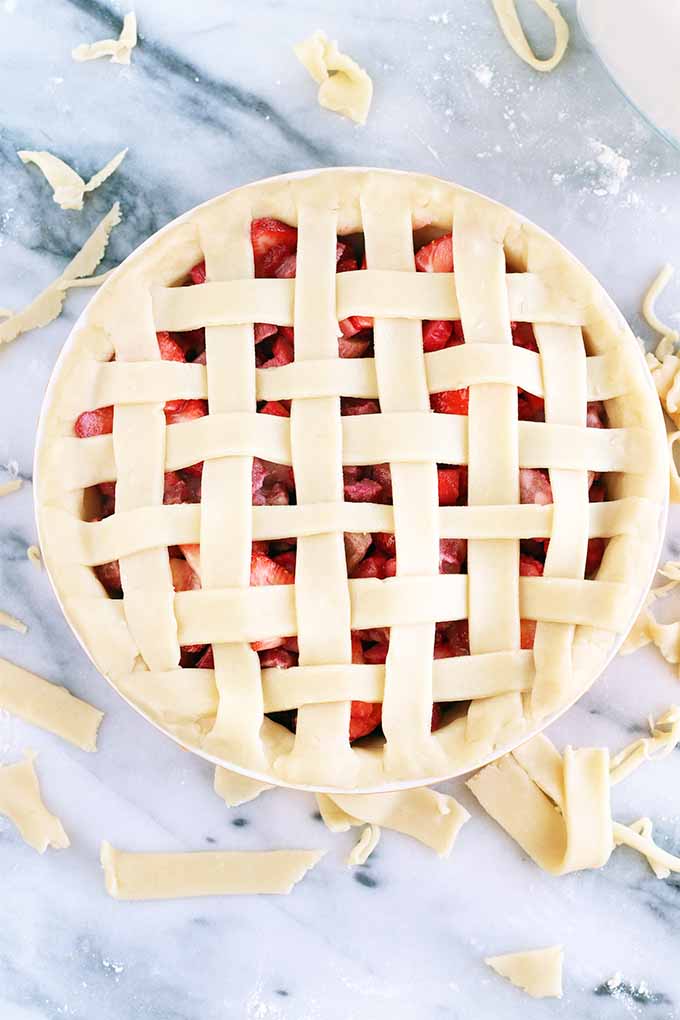
The crust holds the juicy, fruity filling without cracking or getting too soggy on the bottom. Plus, the dough holds together well as you work with it, making it ideal for creating that gorgeous lattice top that you see pictured here.
Instead of heading to the bakery section at your neighborhood supermarket, take the time to put together a dessert that will really make an impact… even if you’re just going to hoard the entire thing for yourself. It’ll be our little secret if you do!
Are you looking for more tasty rhubarb recipes? Then check out these tasty options:
Print
The Best Strawberry Rhubarb Pie
- Total Time: 1 hour 30 minutes
- Yield: 8 servings 1x
Description
There’s nothing more classic than a homemade pie for dessert, and the combination of strawberry and rhubarb is always a winner.
Ingredients
For the Crust:
- 2 cups all purpose flour
- 1 teaspoon salt
- 2 sticks (1 cup) unsalted butter, chilled and cut into cubes
- 6 tablespoons cold water
- 1 egg
- Sugar, for sprinkling (optional)
For the Filling:
- 4 cups chopped rhubarb
- 2 cups sliced strawberries
- 1 1/2 cups sugar
- 4 tablespoons cornstarch
- 1 tablespoon lemon juice
- 1/4 teaspoon cinnamon
Instructions
To Make the Crust:
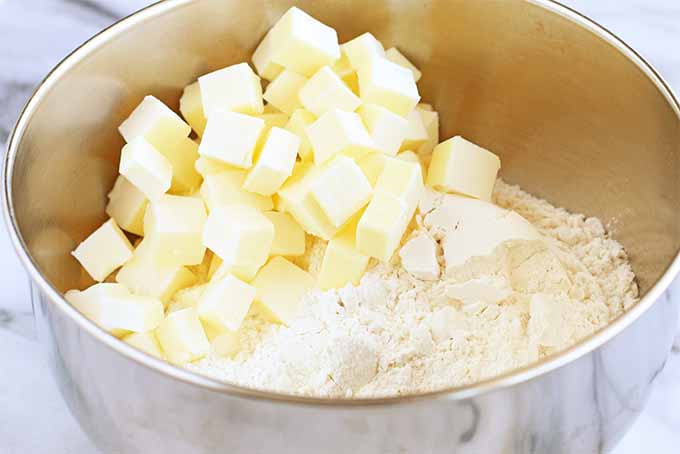
- Combine flour, salt, and butter in a large mixing bowl.
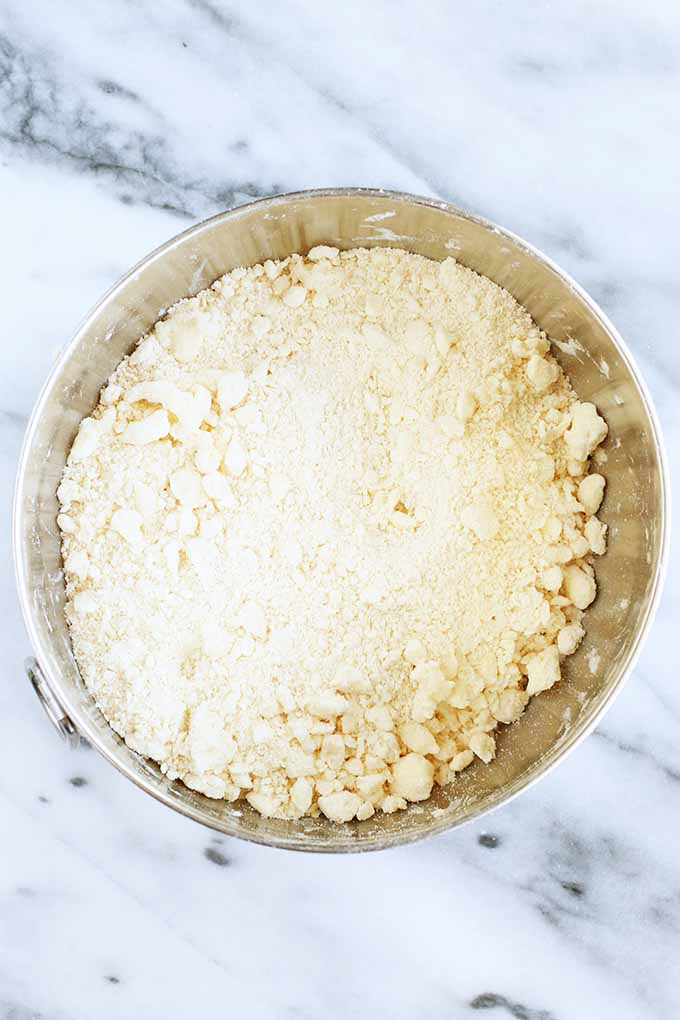
- Cut together with a pastry cutter until mixture takes on a crumbly appearance.
- Stir in water 1 tablespoon at a time with a fork using a tossing motion, until the dough forms into a ball. You might not need to use all of the water. Divide in half, and form into two flattened discs. Set aside, or wrap in plastic and refrigerate until ready to use.
To Make the Pie:
- Preheat oven to 400°F and move rack to the middle of the oven.
- In a large bowl, combine rhubarb, strawberries, sugar, cornstarch, lemon juice, and cinnamon. Set aside.
- On a lightly floured surface, roll out one of the discs of dough to fit a 9-inch deep dish pie pan.
- Line the pan with the bottom crust, then fill with the strawberry rhubarb mixture.
- Roll out the remaining dough and cut into 1-inch-wide strips. Place on top of the filling, alternating to form a lattice top. Crimp edges with your fingers.
- Beat an egg in a small bowl, and brush onto the latticework crust with a pastry brush. Sprinkle crust with sugar if desired.
- Bake for 15 minutes.
- Reduce heat to 350°F, and continue to bake for another 45 minutes. The pie is done when the filling has thickened and the crust is golden brown.
- Remove from the oven and place on a cooling rack to cool and set for at least 20 minutes before serving.
- Prep Time: 30 minutes
- Cook Time: 1 hour
Cooking By the Numbers…
Step 1 – Chop, Slice, and Measure
Rinse the rhubarb stalks and pat dry with paper towels. Using a sturdy cutting board and a sharp knife, chop into small pieces.
Rinse the strawberries clean in a colander, pat dry, and remove the tops.
Juice a fresh lemon to get the tablespoon of lemon juice needed for the recipe.
Measure out the remaining ingredients so they will be ready when you need them.
Step 2 – Prepare the Crust
Combine the flour, salt, and butter for the pie dough in a large bowl. It’s important to use chilled butter here, because you don’t want it to melt while you’re working with the pastry.
Use a pastry cutter to cut the butter into the mixture until it is crumbly in appearance. You can also use two knives to cut in the butter if you do not have a pastry cutter.
Add water 1 tablespoon at a time, and fluff with a fork, forming larger clumps in the flour and butter mixture. I like to use ice water here, as an extra safeguard against accidentally heating up the butter.
Continue adding and gently mixing, then pressing together with your hands, until the dough forms into a ball. Divide evenly in two, and shape gently into balls, or flatten to shape into two discs. Don’t overwork the dough.
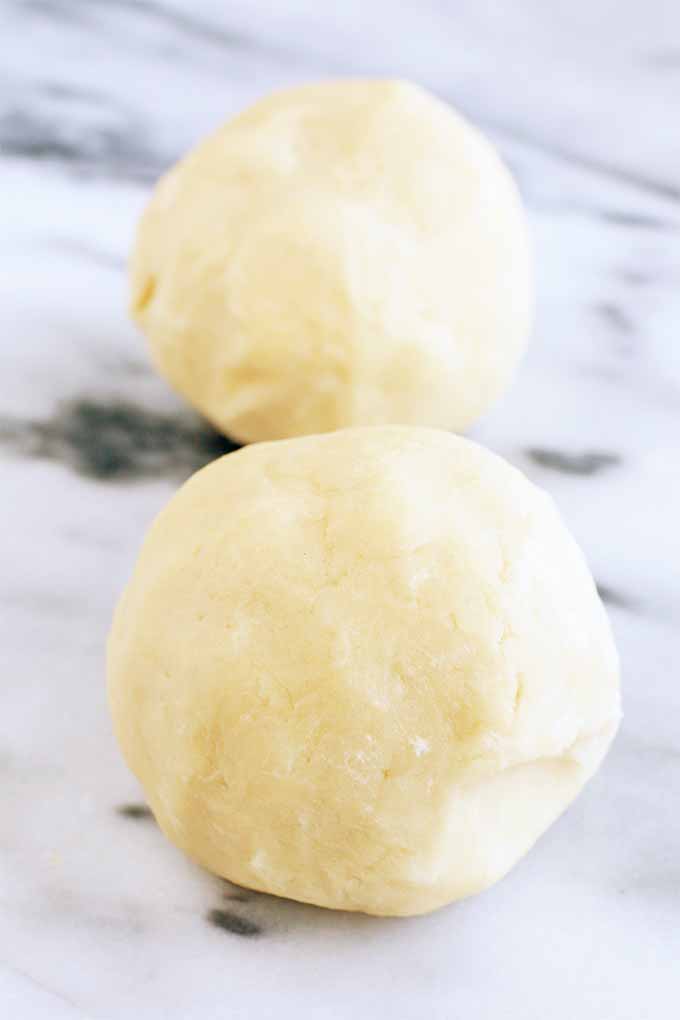
If you’ll be using the dough right away, you can just set it aside until you’re ready for it. If you’re planning to prepare the rest of the recipe later, or if your kitchen is particularly warm, wrap in plastic and put in the refrigerator.
Step 3 – Prepare the Filling
At this point, it’s a good idea to preheat your oven to 400°F, so it will be up to temp when you need it. You’ll be baking in the middle of the oven, so shift your baking racks around now if you need to, before they’re hot.
Combine all of the ingredients for the filling in a large bowl. Stir to combine, making sure the cornstarch coats the fruit well.
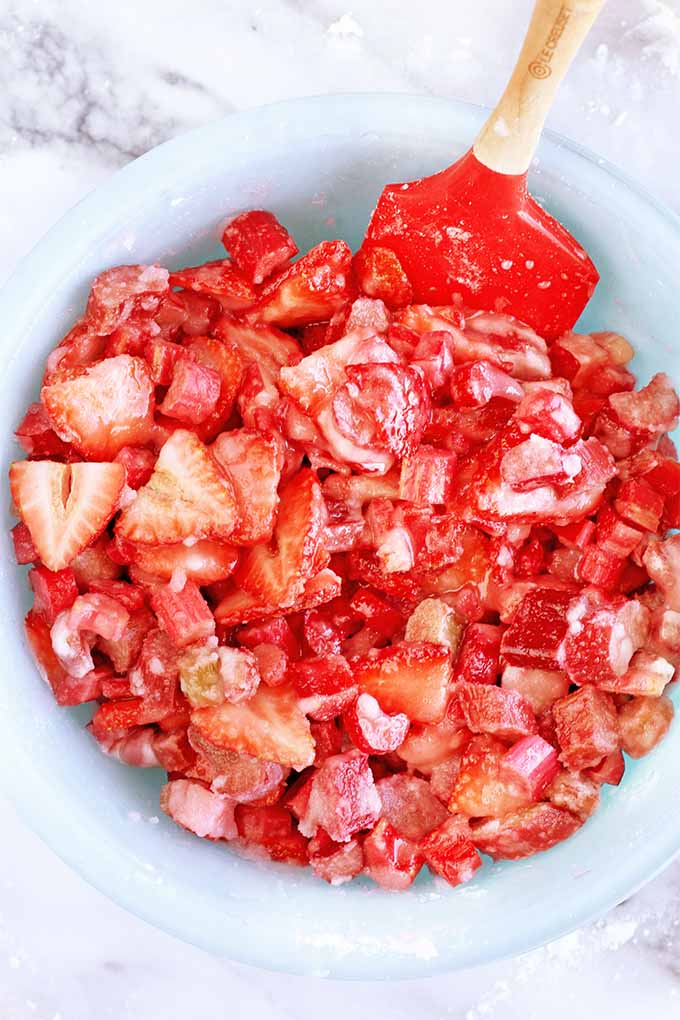
Even coverage with the cornstarch helps to ensure that the filling thickens nicely, and there will be no lumps of cornstarch found hidden in your pie.
Step 4 – Roll Out the Dough
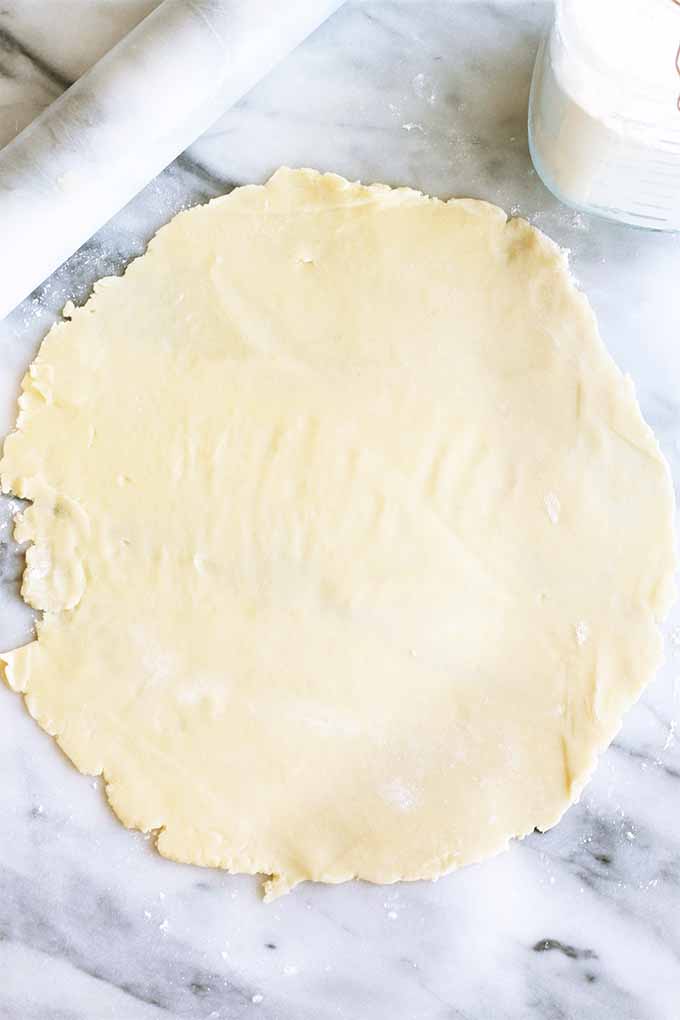
Roll out one of the dough discs on a lightly floured surface. Make sure the dough is big enough to line the bottom and sides of your pie pan. I used a 9-inch ceramic deep dish pan to make this pie.
Dust your rolling pin and work surface lightly with flour so the crust doesn’t stick, and add more only as needed so the dough doesn’t dry out.
Some pastry chefs like to use a marble rolling pin or a marble slab when they’re making buttery pastries, providing a cool surface to prepare your crust. But working on a clean countertop and using the wooden rolling pin that was passed down from your grandmother, or the newfangled silicone one that you got a few weeks ago, are also fine options!
Don’t have a favorite rolling pin yet? Check out our review of what’s out there that you might like to add to your collection of kitchen gear.
Step 5 – Assemble
Line the pie pan with the rolled out dough, working quickly and carefully to avoid tearing it. One tried-and-true technique is to loosely roll it onto a floured rolling pin, then transfer it over to the pan and unroll.
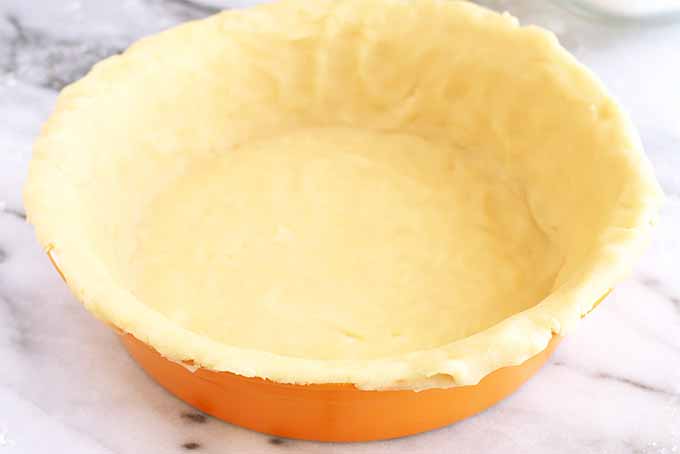
It’s alright to have a little bit of excess hanging over the edge of the pan, since you’ll need something to pinch together with the lattice strips, and you can trim off any excess with a paring knife.
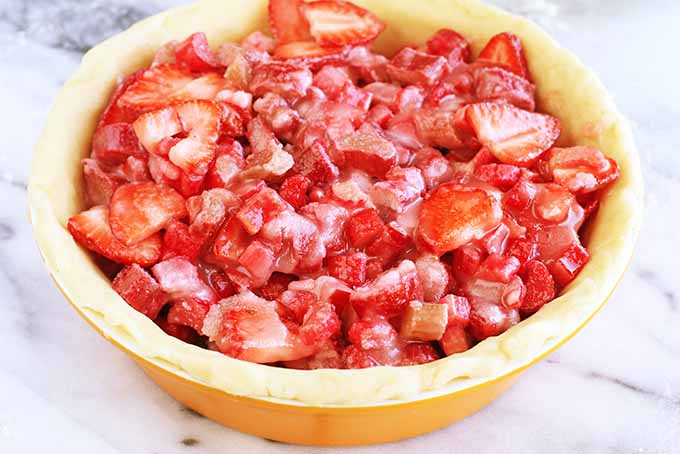
Add the filling, and spread it a bit with a spatula if you need to redistribute any of the fruit or even it out. It’s not important to worry about this too much – the filling will settle as it bakes.
Step 6 – Decorate
Roll out the remaining dough on a lightly floured surface. Again, make sure the dough is wide enough to fully cover the top of the pie.
Using a sharp knife or a pizza roller, cut the dough into 1-inch-wide strips.
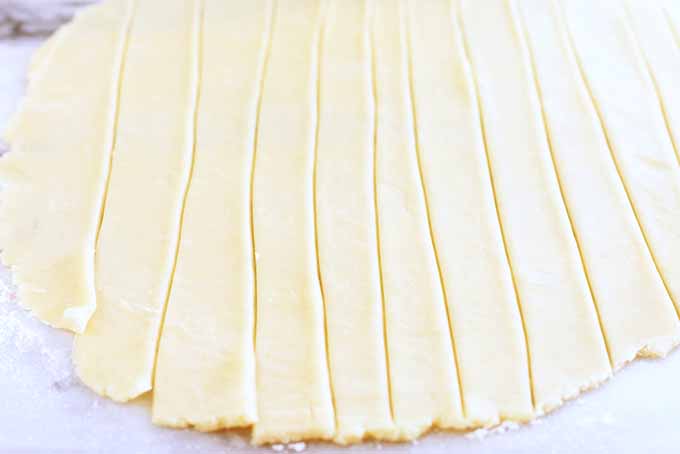
Next, craft a lattice top by weaving together the strips, creating your top crust.
Not sure how to get it to look just right, or you’re in need of a bit of a refresher? Check out our article on perfecting your pie game to get that gorgeous lattice look, plus more tips to demystify the daunting crust.
When all of your top strips are in place, crimp the edges by pinching with your fingers to make sure the crust stays together. Dunking your fingers in a little bit of water first can help to make the dough stick.
Beat an egg, and use a pastry brush to coat your crust with a light egg wash. Sprinkle the pastry with sugar if you like, for a bit of added crunch.
I prefer to use regular granulated sugar, but you could use chunkier demerara if you like, for even more of a textural boost and added sweetness.
Step 7 – Bake
Place your creation in the oven and bake for 15 minutes.
Fresh fruit pies tend to bubble while they bake, and these bubbles can turn into drips that won’t hesitate to burn on the bottom of your oven.
If you’re not in the mood to clean your oven today, here’s an easy trick:
I like to put my pie plate on top of a baking sheet lined with foil before I put it in the oven. If your oven has two racks, you can put foil or a pan below the middle rack instead.
Some bakers say this can affect the heat distribution in your oven (and the total required bake time). But I say it’s worth it to keep your eye on your pie for a few extra minutes if necessary, rather than making a mess!
Reduce the oven temperature to 350°F, and bake for 45 more minutes.
Step 8 – Rest Before Serving
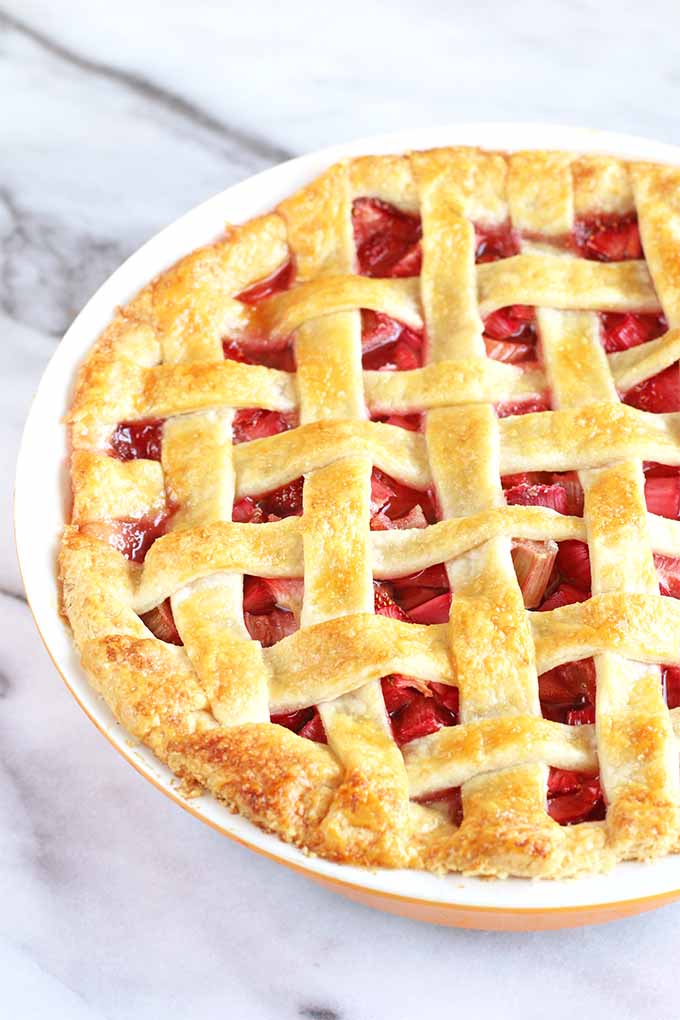
The pie is done baking when the filling has thickened and the crust is golden brown. Looks amazing, doesn’t it?
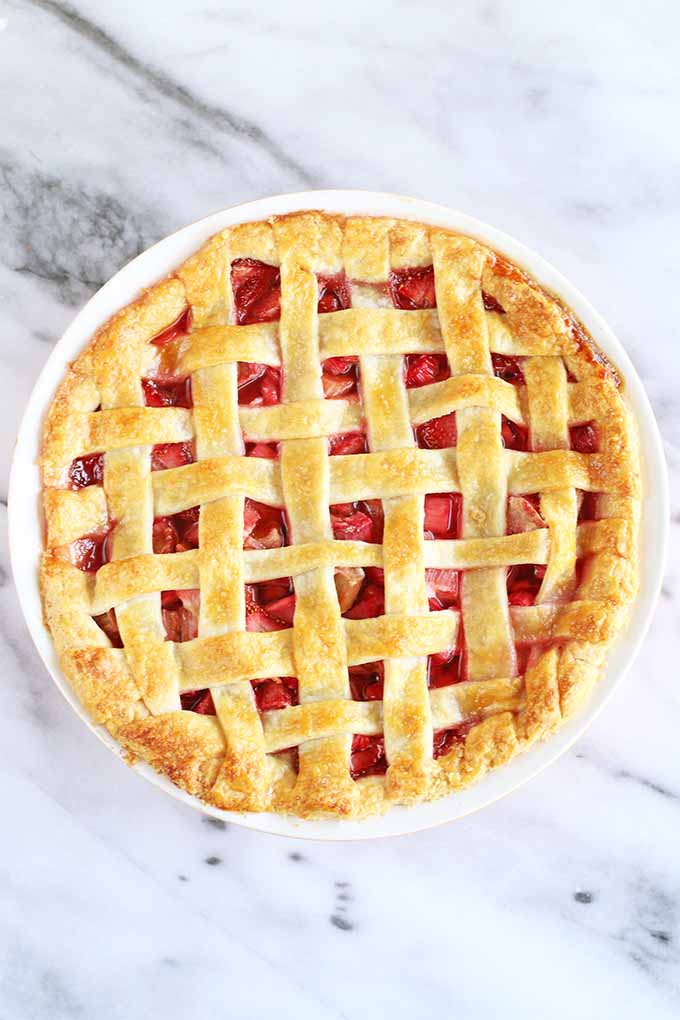
After you take it out of the oven, let the pie rest on a wire cooling rack for 20 minutes before serving. Serve warm with a scoop of vanilla ice cream or freshly whipped cream. Or maybe with a scoop of tart and creamy rhubarb buttermilk sherbet!
Homemade Truly Makes a Difference
We all know that you can buy a pie crust in the freezer section of your favorite grocery store, or simply head to the bakery section to buy a ready-made pie. But it’s the homemade ones that really stand out from the crowd when you eat them, and in your memories as well.
Making a pie from scratch can be a bit of work, but honestly, the effort you put into it is always worth it.
Thankfully, just like our easy blueberry version or chocolate blueberry option, this pie recipe isn’t particularly labor intensive. You’ll spend more time waiting for it to bake than actively putting it together, which means more time for relaxing and doing other things while it bakes in the oven.
Everyone notices the difference of a homemade pie the moment they take their first bite. From the perfect firm pastry crust to a well-balanced filling, a gorgeous lattice top to the love that you bake into it, you will always get rave reviews when you make a pie from scratch.
So, what are you waiting for? Celebrate the season with this incredible strawberry rhubarb combination before rhubarb is no longer available at the farmers market or in the produce section.
Tell us what you think of this tart and tangy combination below, and don’t forget to rate the recipe as well!
Don’t forget to Pin It!
Photos by Meghan Bassett, © Ask the Experts, LLC. ALL RIGHTS RESERVED. See our TOS for more details. Originally published by Jennifer Swartvagher on May 25th, 2015. Last updated: December 29, 2019 at 9:32 am. With additional writing and editing by Allison Sidhu.
Nutritional information derived from a database of known generic and branded foods and ingredients and was not compiled by a registered dietitian or submitted for lab testing. It should be viewed as an approximation.
About Meghan Yager
Meghan Yager is a food addict turned food and travel writer with a love for creating uncomplicated, gourmet recipes and devouring anything the world serves up. As the author of the food and travel blog Cake 'n Knife, Meghan focuses on unique foodie experiences from around the world to right at home in your own kitchen.
As usual…salivating as always 🙂 . Thank you for the fore-warning about the leaves of the rhubarb plant, will be sure to keep that in mind when trying out this awesome delicious recipe 🙂 Am thinking of adding a few more ingredients to the recipe if that’s alright 🙂 {whip cream, ice cream, blueberries, raspberries…just a little twist to the original recipe…a slight shoulder shrug}
A hot cup of chocolate with this pie equals pure awesomeness 🙂
It is always fun to tweak recipes to make them your own. Enjoy!
I’m going to have to look for an article on how to select rhubarb, because I’ve only had it once or twice, and have never cooked with it. I like the idea of trying this recipe, though, and all I’m lacking is the fruit, so hopefully I will be trying this out soon. Your pie looks delicious. I’ve never been able to achieve a perfect lattice crust, but thankfully, a full top crust usually suffices.
I haven’t used rhubarb in a dish either. It’s a pretty uncommon ingredient here. I love tart stuff though, so I’ll definitely have to see if I can try this out at some point. Especially since strawberries are among my favorite fruits.
You know what I think? Some people have just had little experience with rhubarb or just plain bad experiences. People seem really afraid of using it. I’ve noticed using it in combination with other flavours is an important key to making it palatable for everyone. Me? I’ll munch on a raw stick. Any tips on how to utilize the leaves?
I have never tried rhubarb but I keep seeing recipes for it. I did not know that it was poisonous but I still will like to try. Anything with strawberries I would probably try because it usually turns out good. I didn’t think strawberries and salad would be good but this is the same concept.
Made strawberry-rhubarb cobbler, had a lot leftover and didn’t want to make 2 cobblers so I made this! Lucky for us we keep a few pie crusts in the freezer for just such an occasion. The cinnamon really added a nice touch and the pie had a beautiful balance of flavours.
I never knew that rhubarb leaves were poisonous. You learn something new everyday. The pie looks delicious too.
It’s crazy how different it looks in the before and after. I also wouldn’t have expected lemon to be in there. Very cool recipe. I’ve never made pie from home before, so I’ll be trying here when I do!
Oh my God! I just melted when I saw this recipe and thought “I have to have this”! When I saw the Rhubarb leaves were poisonous I thought “oooh a little risky! I got to have this even more now” LOL. But seriously, thanks for the recipe it looks simply delicious and so easy to make! I would like to try your original recipe first, and then give it a try with apples. I know both will be sooo good! Yumm! Thanks again.
My mom loves rhubarb pie and I’ve always wanted to make it for her. I haven’t made very many pies but I have confidence in myself. Thanks for the inspiration, love!
Prepare wash and cut pieces to size. Toss and sprinkle liberally with brown sugar and a dash of vanilla and squeeze of lemon juice. Place in oven proof dish, cover with lid or foil and bake in oven till al dente (cooked through but firm – not mushy). Eat as a snack or as a healthier dessert by adding it to sliced stewed apple ( 10 green Granny Smiths) to make a Rhubarb and Apple Crumble. Serve warm with ice cream or Delicious next day as cold leftovers so I always make it big enough to have leftovers. Serves 8