Who else out there loves chocolate as much as I do?
Not a day goes by that I don’t find myself consuming this indulgent ingredient in some form, and I’m usually shoving it in my mouth before the clock strikes noon.
Hey, don’t judge me. Chocolate is a wonderful thing.
But sometimes you just aren’t in the mood for a plain piece of your favorite bar, or a simple cookie or other sweet. That’s where this recipe comes in.
Rocky road is a flavor combination that I have loved since I was a child. It really holds a special place in my heart.
When I was a kid, my dad and I would frequently indulge in a little ice cream. It was our end-of-the-night tradition, whether we had just finished dinner at home or we were coming back from one of my basketball games.
Regardless of what we were doing, the flavor of the day was always rocky road if I had my pick.
I have always loved chocolate, but the addition of marshmallows and nuts was oh-so-scrumptious. Paired with the smooth and creamy cocoa ice cream, it was a surefire win for me, every time.
Especially with a drizzle of chocolate sauce on top.
As time went by, I started experimenting with different ice cream flavors, and rocky road took a backseat.
Now, my love of this old classic has been reinvigorated. But instead of indulging in a carton of ice cream, I’m making brownies instead.
If you ask me, this is one of those mashup recipes that everyone needs to try at least once. But once you do, I can almost guarantee that you will want to make these over and over again.
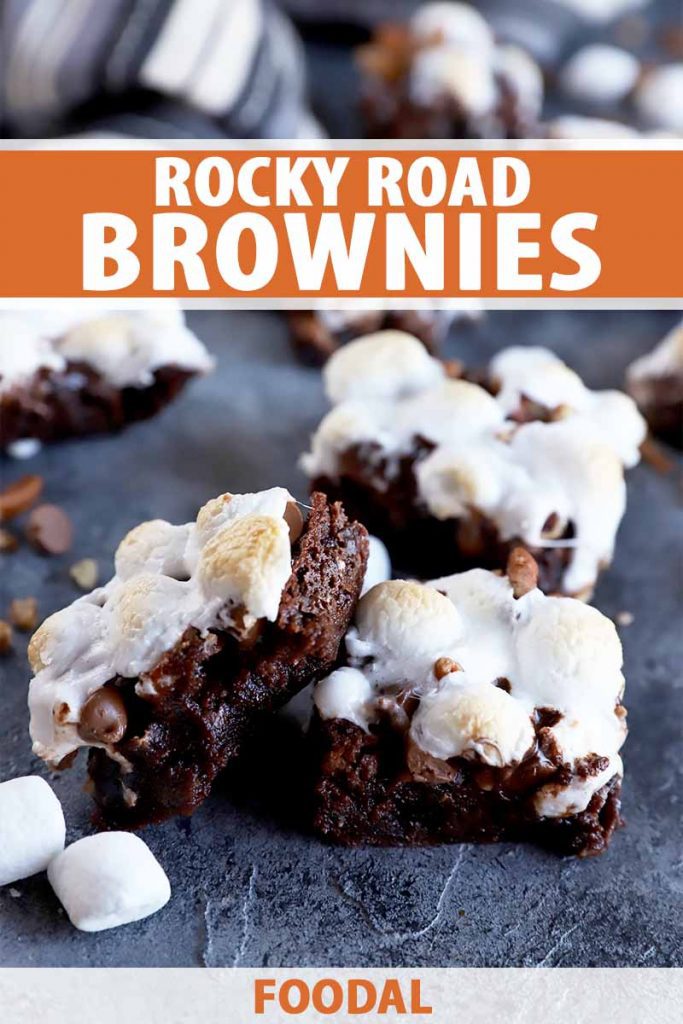
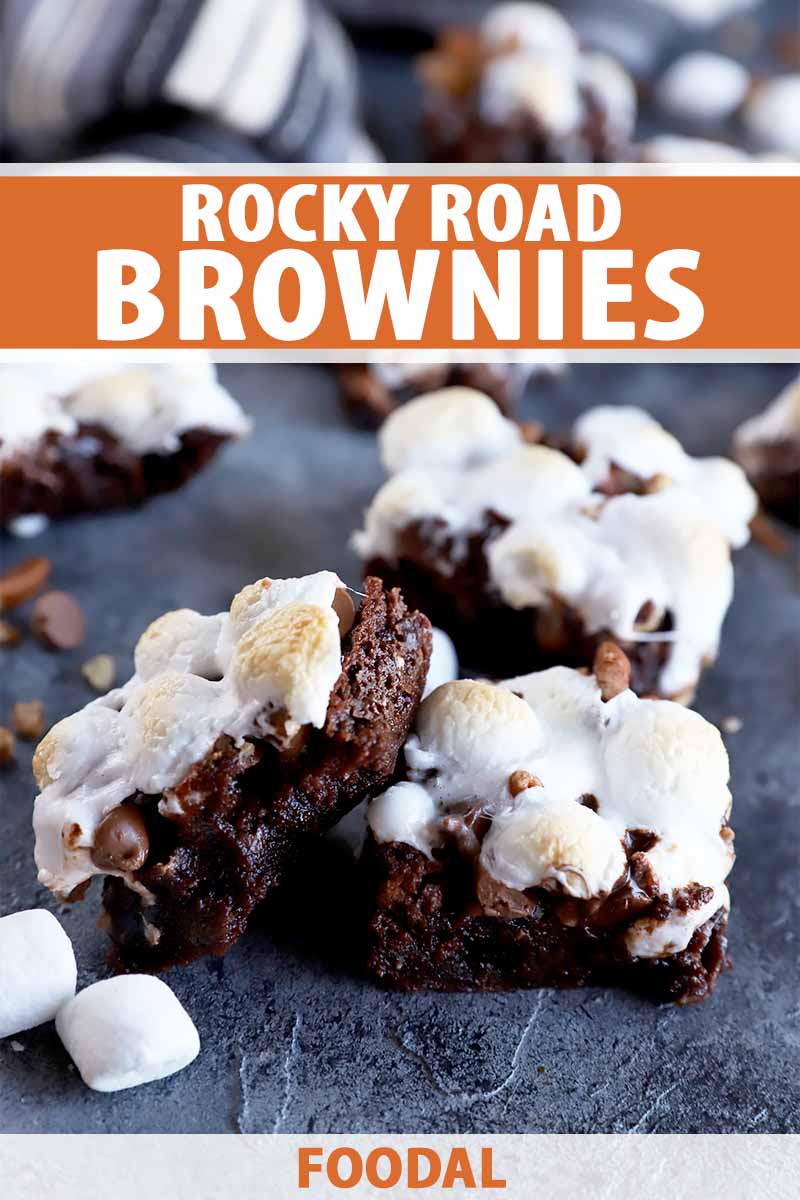
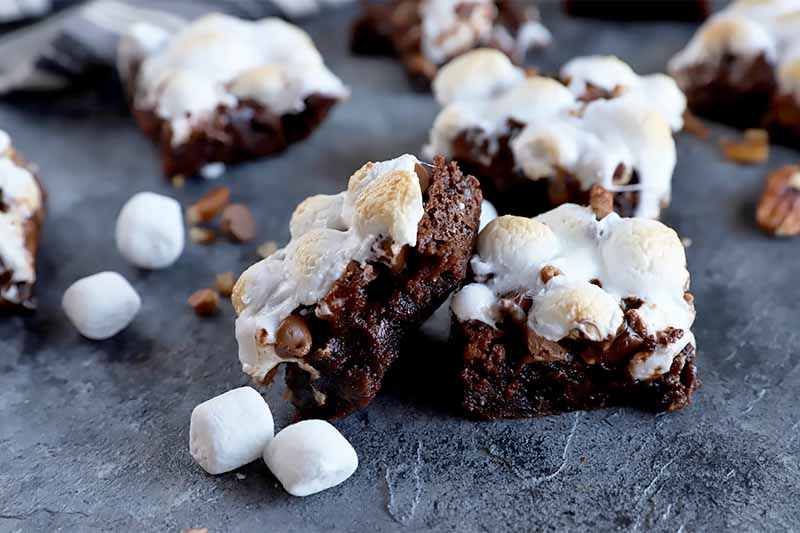
These little bars are decadent, rich, and packed with all the classic ingredients that you find in the frozen treat that goes by the same name.
You also get a bunch of different textures in each bite. There’s the fudgy, chewy brownie base. Then this is topped off with smooth chips, soft and squishy marshmallows, and crunchy pecans (or walnuts, if you prefer).
You won’t be able to stop at just one. Trust me.
And if you are heading to a party, I can’t recommend this recipe enough. Not only are they sure to be a hit among the lovers of sweets, they also have a really impressive look when you set them down on the table.
I mean, look at the photos here. Wouldn’t you agree?
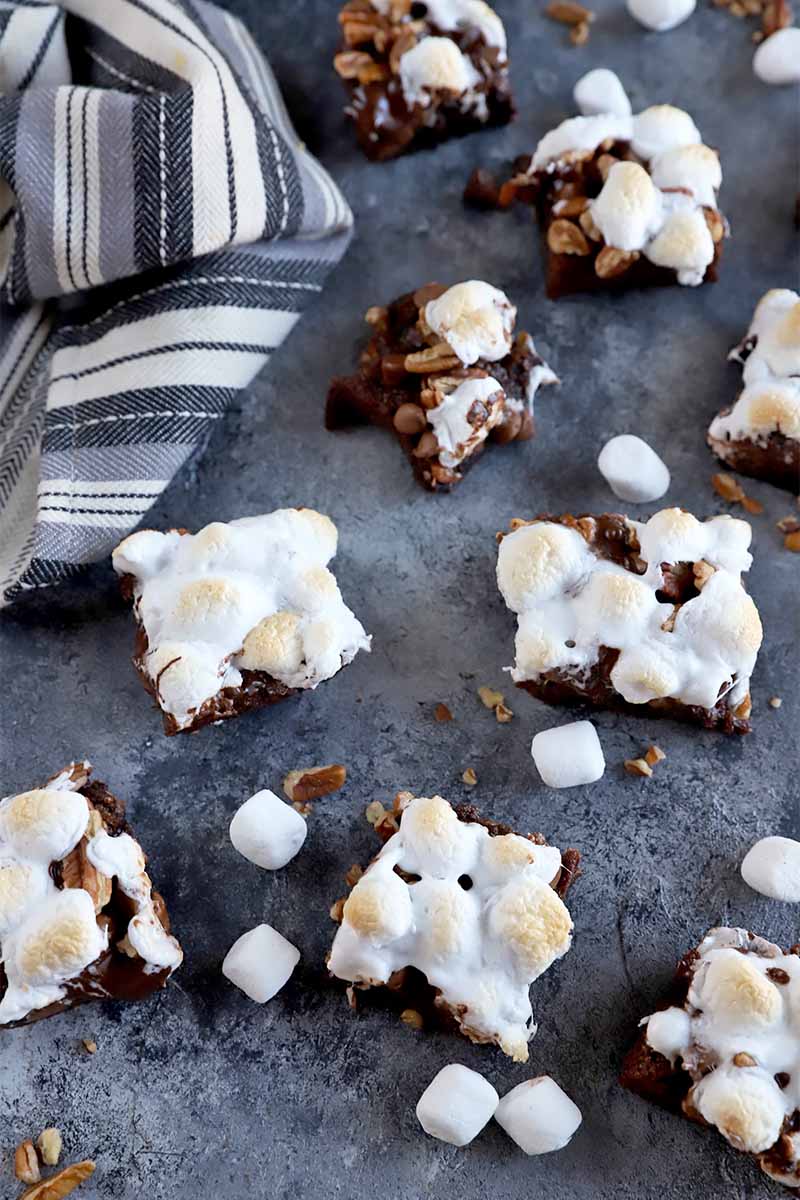
For those of you who like to go the extra mile with your presentation, I highly recommend that you stick the pan under the broiler for about 1 to 2 minutes at the end of baking. This gives the marshmallows a little bit of a toasted flavor and makes them look even more delicious.
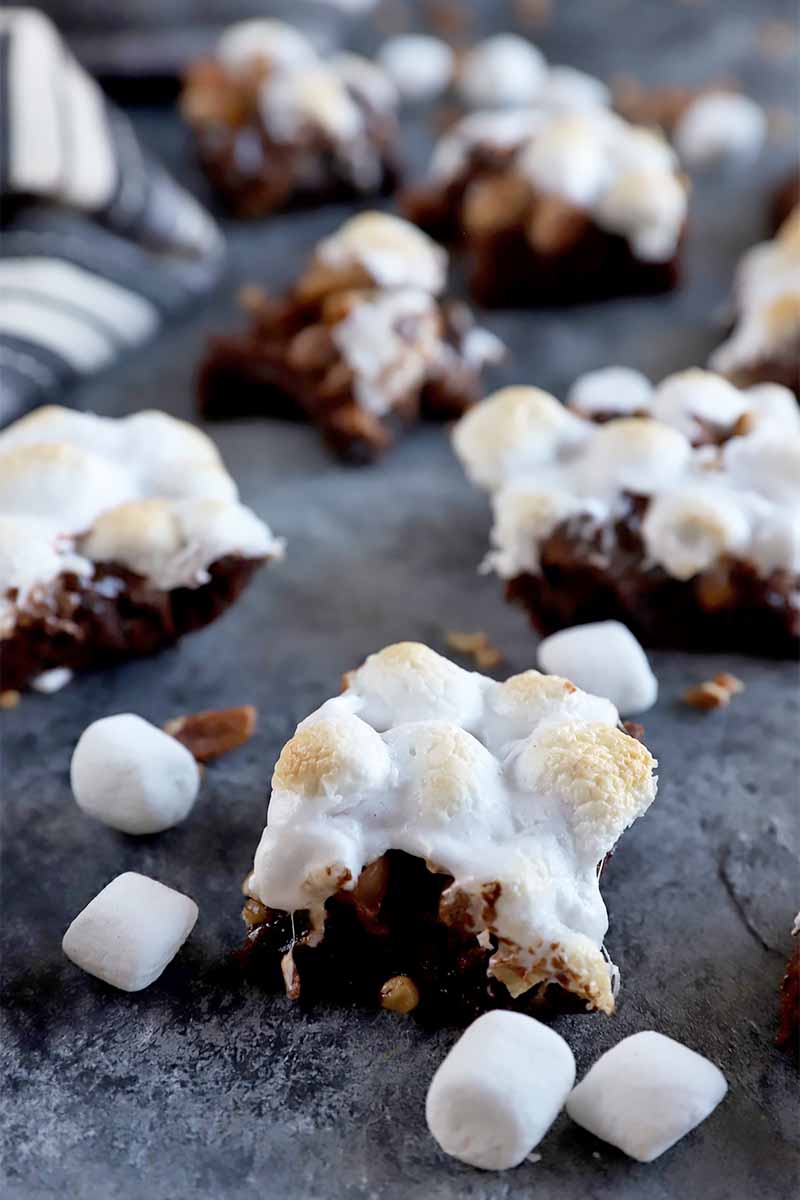
The only caveat that I would warn you about is that the marshmallows can make these a bit tricky to cut into. You definitely want to wait until they have cooled completely before you start cutting them into pieces.
Another option is to run a sharp knife under hot water, and clean off the blade between each slice when you cut. This makes it easier to create clean cuts, and the marshmallows won’t stick to the knife and peel off the top of the dessert this way.
This recipe is best devoured the same day you bake it, but you can also freeze these if you’d like. This is what I usually do when I have some leftovers. You’ll find more instructions for my recommended method at the end of this article, so keep reading for those!
Print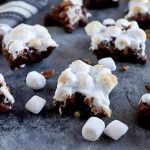
Rocky Road Brownies
- Total Time: 45 minutes
- Yield: 9 servings 1x
Description
Rocky road brownies have a rich chocolate brownie base topped with even more chocolate, chopped nuts, and sweet marshmallows. Get the recipe on Foodal.
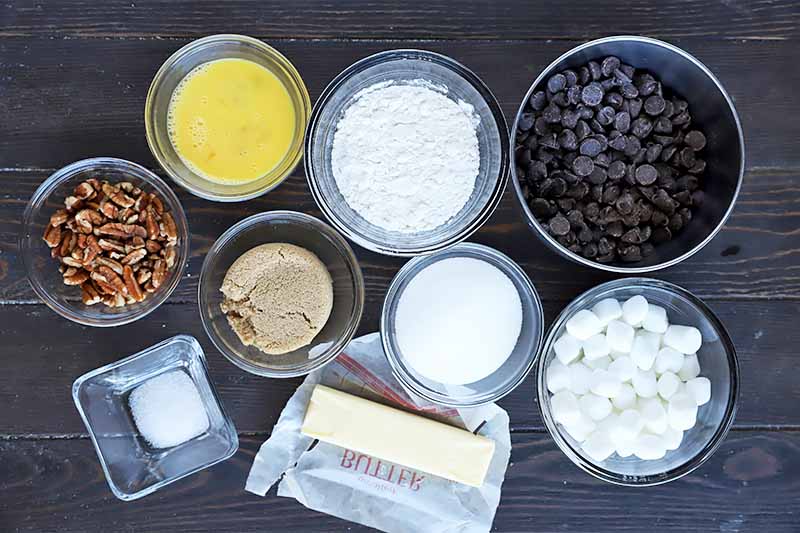
Ingredients
- 1 stick (1/2 cup) unsalted butter, plus more for greasing pan
- 1 12-ounce bag semi-sweet chocolate chips, divided
- 1/2 cup granulated sugar
- 1/2 cup packed light brown sugar
- 1/2 teaspoon salt
- 2 large eggs, beaten
- 3/4 cup all-purpose flour
- 1 cup miniature marshmallows
- 1/2 cup chopped pecans (or walnuts)
Instructions
- Preheat oven to 350˚F. Grease an 8-inch-square metal baking pan with butter. Line the pan with one piece of parchment paper, leaving an overhang on two sides for easy removal, and lightly butter the parchment paper.
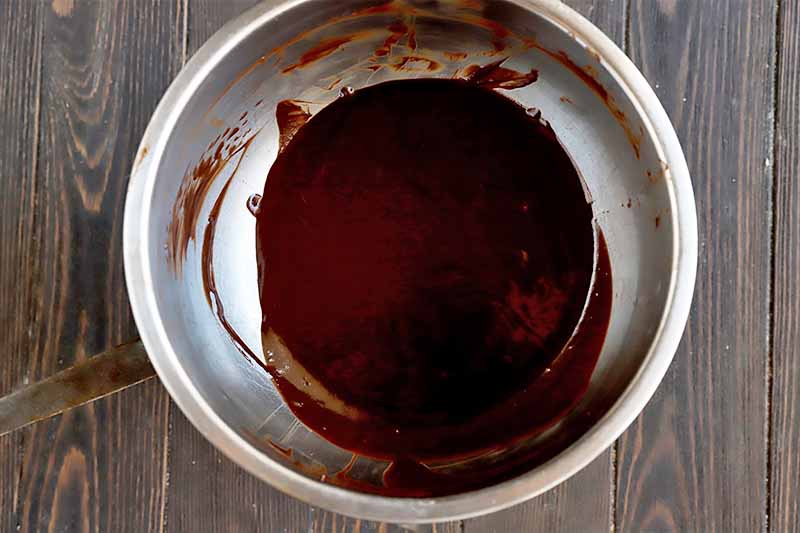
- Heat about 2 cups of water to a simmer in the bottom of a double boiler or medium-sized saucepan. Cut the butter into small pieces and place in the top of the double boiler, or use a heatproof bowl of an appropriate size set over the saucepan, being careful not to let the bowl touch the water. Add 1 cup chocolate chips. Stir frequently until chocolate and butter are melted and combined.
- Pour chocolate mixture into a large mixing bowl. Add granulated sugar, brown sugar, and salt. Mix well to combine. Stir in eggs and flour.
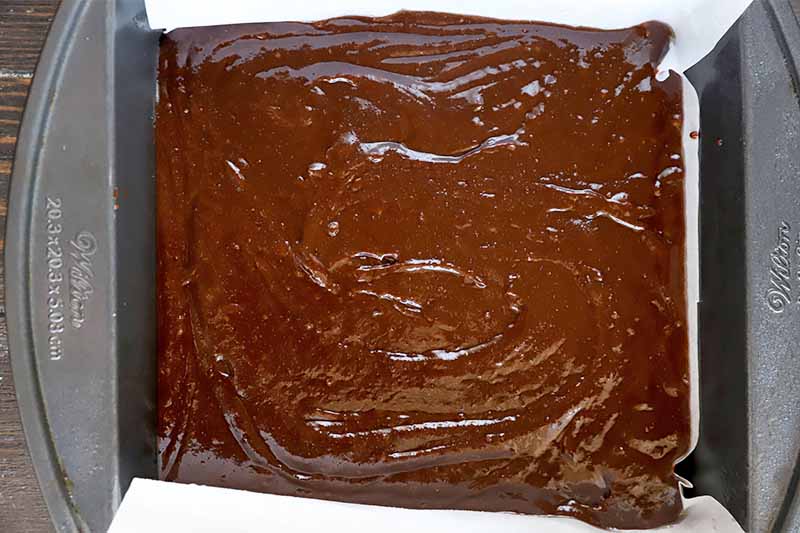
- Pour into prepared pan and bake for 25 minutes.
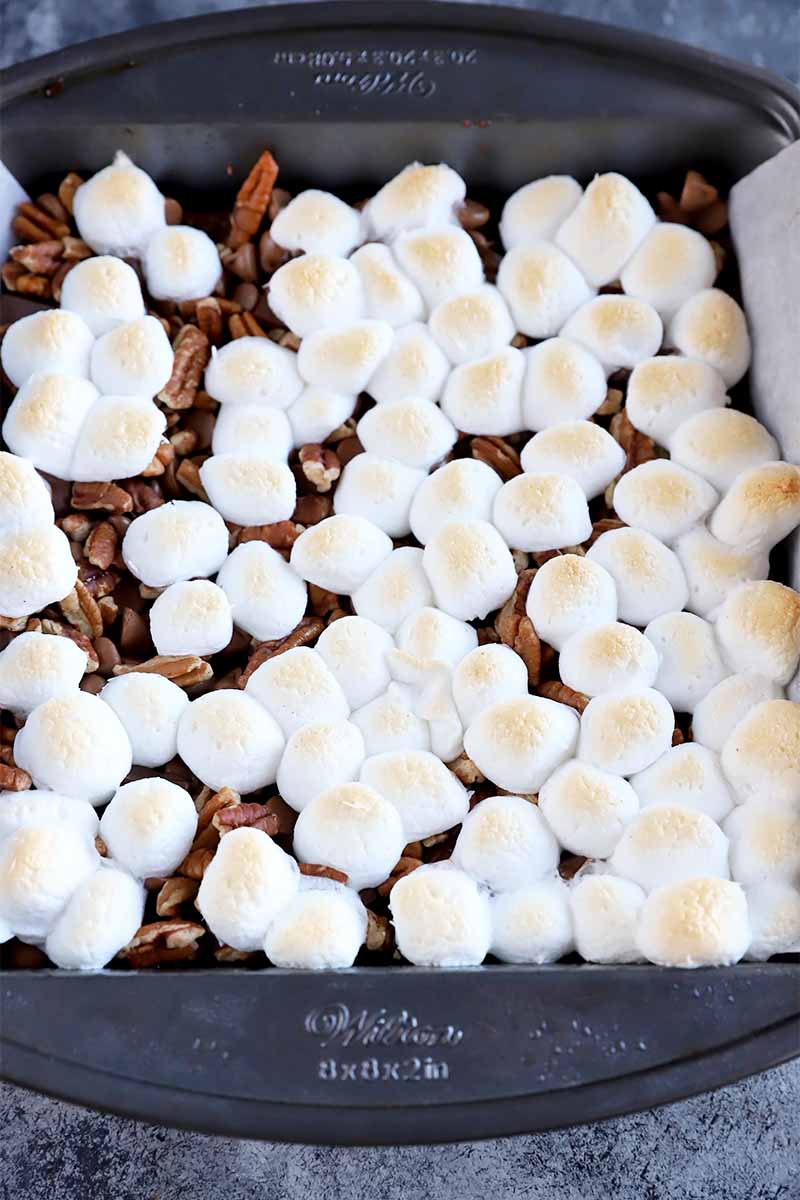
- Remove from oven and sprinkle evenly with marshmallows, chocolate chips, and nuts. Return to the oven and bake for 5 more minutes, or until toppings begin to melt.
- Remove from oven. Let cool completely in the pan, then lift out using edges of parchment paper. Cut into squares and serve.
Notes
Adapted from Martha Stewart.
- Prep Time: 10 minutes
- Cook Time: 35 minutes
- Category: Brownies
- Method: Baking
- Cuisine: Dessert
Cooking By the Numbers…
Step 1 – Beat Eggs, Chop Nuts, and Measure Remaining Ingredients
In a small bowl, beat two large eggs together with a fork or small whisk.
Chop enough pecans or walnuts until you have 1/2 cup total.
Measure out all of the remaining ingredients as listed on the ingredients list.
Preheat your oven to 350˚F. Butter a metal 8-inch-square baking pan lightly.
Cut a piece of parchment paper that is 8 inches wide by 12 inches long. Line the pan with the paper, leaving an overhang on two sides to form a sling. Lightly butter the paper.
Step 2 – Melt Chocolate and Butter
Add 2 cups of water to the bottom of a double boiler or a medium saucepan. Bring the water to a simmer.
Cut butter into small pieces and place in the top of the double boiler, or a heatproof bowl that sits over the saucepan, making sure the bottom of the bowl doesn’t touch the water.
Add 1 cup chips and stir frequently, until the chips and butter are melted.
Step 3 – Make Batter
Add the butter mixture to a large mixing bowl with the granulated sugar, brown sugar, and salt.
Stir well to combine.
Stir in beaten eggs and flour until combined.
Pour batter into the prepared pan.
Step 4 – Bake
Place in the oven and bake for 25 minutes, or until cooked but still gooey in the center.
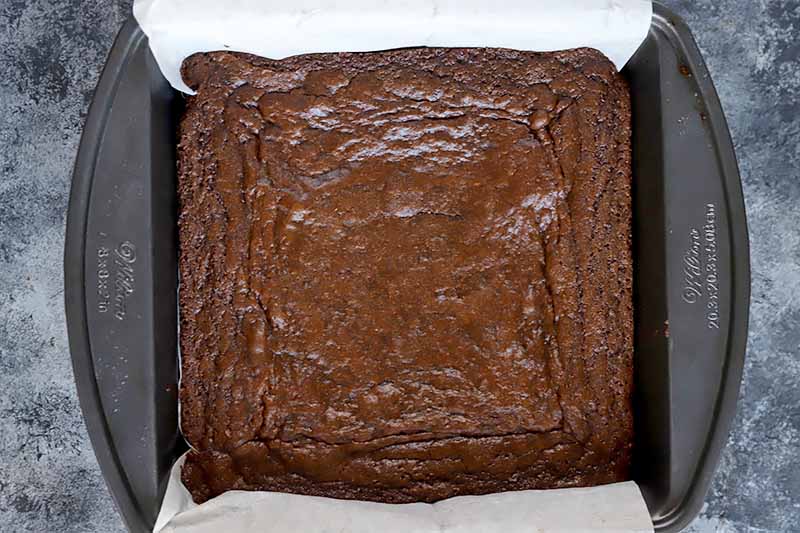
Remove from the oven.
Step 5 – Top and Finish
Sprinkle evenly with the remaining chips, pecans, and marshmallows.
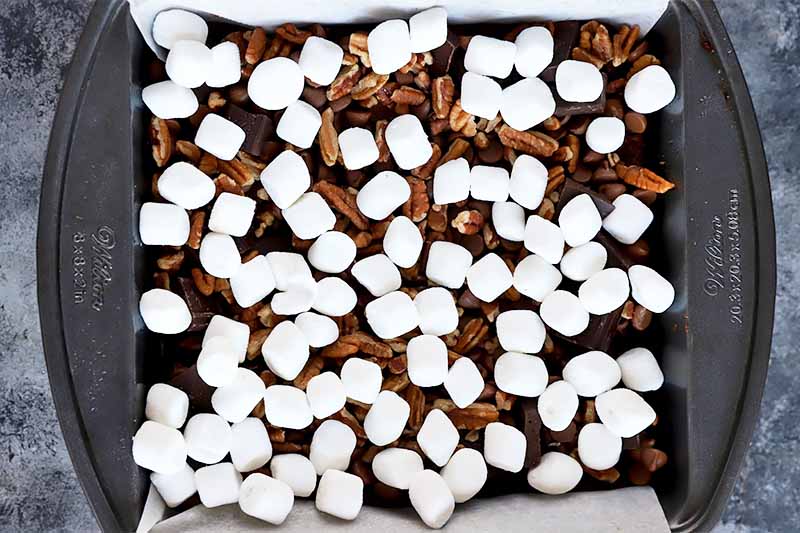
Place back in the oven and bake for 5 more minutes, until the toppings begin to melt.
As an alternative, you could bake for a few more minutes, and then place under the broiler for 1-2 final minutes, to toast the marshmallows. Be sure to keep your eye on the pan if you do this, to avoid burning the toppings!
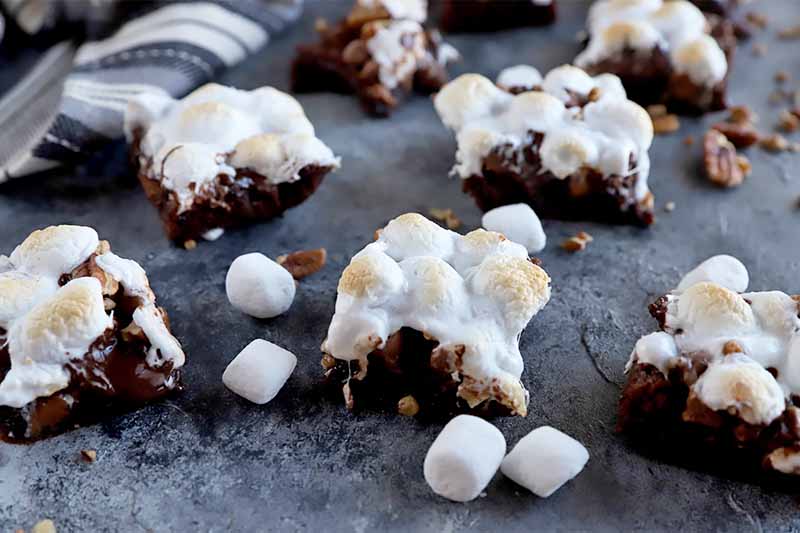
Remove from the oven. Cool them completely in the pan. Lift them out using the edges of the parchment paper. Cut into squares and serve.
Can I Freeze These?
If you want to save the leftovers or you plan to serve these at a later date, they can definitely be frozen.
Allow them to cool completely, then place them in an airtight storage container. Place it in the freezer and they will keep for several weeks. If you wrap them individually in plastic wrap, they’ll keep even longer.
To serve, just remove as many as you need from the freezer and place them on the counter for a few hours to thaw.
Need even more brownies in your life? Try these recipes next:
- Raw Brownies with Fudgy Avocado Frosting
- Ultimate Vegan Brownie Recipe
- Chocolate Chip Cookie Dough Brownies
What’s your favorite part of rocky road – the chocolate, the nuts, or the marshmallows? Tell us in the comments below, and after you try this recipe, be sure to give it a five-star rating if you loved it!
Photos by Meghan Yager, © Ask the Experts, LLC. ALL RIGHTS RESERVED. See our TOS for more details. Originally published on August 14, 2012. Last updated on November 18, 2010. With additional writing and editing by Allison Sidhu.
Nutritional information derived from a database of known generic and branded foods and ingredients and was not compiled by a registered dietitian or submitted for lab testing. It should be viewed as an approximation.
About Meghan Yager
Meghan Yager is a food addict turned food and travel writer with a love for creating uncomplicated, gourmet recipes and devouring anything the world serves up. As the author of the food and travel blog Cake 'n Knife, Meghan focuses on unique foodie experiences from around the world to right at home in your own kitchen.