
Well, summer’s winding down and harvesting the season’s bounty is now well underway.
And what better way to bring the wonderful colors, tastes and fragrances of summer into the darkening months than with homemade jams and jellies?
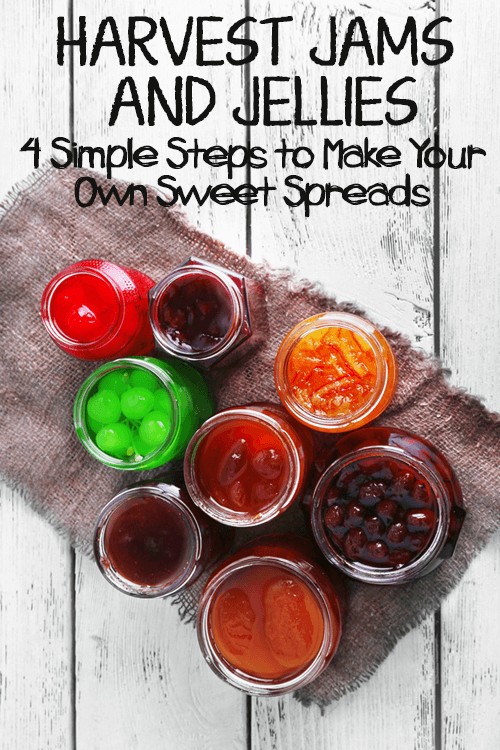
Few things are more effective at lightening up a dreary winter day by opening the pantry to shelves full of colorful preserves.
And, as it’s harvest time now, this is the time to get organized, and get jamming.
To take advantage of the season, and create the delightful taste and aromas of lovingly crafted, homemade jams and jellies, please read on.
We’re going to:
- Cover the basic skills in the art of jam and jelly making.
- Have a look at the ingredients and equipment needed.
- Go over the different methods for making jams.
- Discuss how to select and prepare fruit.
- Go over the 4 steps for fun and successful jam sessions.
And at the end of the post, there’s four recipes for you to try. One is for a clear jelly, another is a no-pectin-added jam, there’s a sugar-free recipe, and one for a no-cook freezer jam.
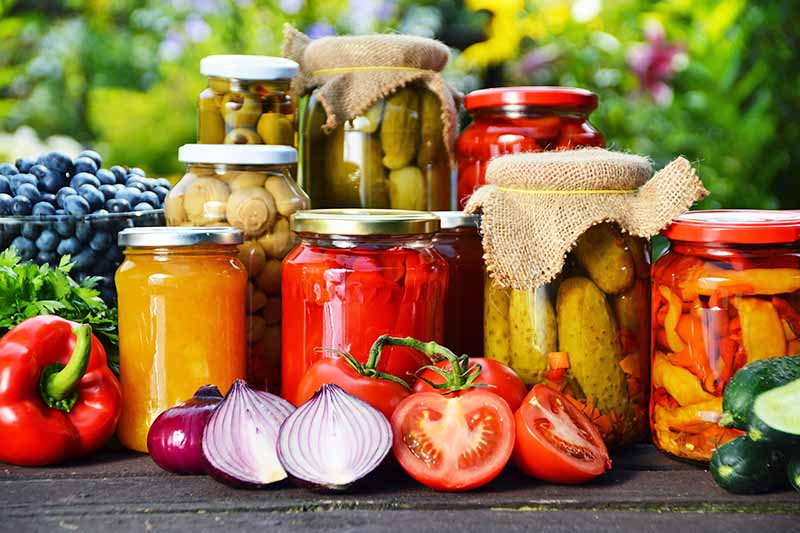
Jams, Jellies or Marmalade?
Sweetened spreads such as jam, jelly and marmalade are in a food class of their own and come in a brilliant array of colors, tangy flavors and jellied textures.
The common denominator is that all consist of fruit that’s been preserved primarily with sugar, and have been thickened or jellied to varying degrees.
Jelly is a semi-solid gelatinous mixture of clear fruit juice and sugar, and is firm enough to hold its own shape.
Jam will also hold its shape, but is less firm than jelly. Jam is typically made from a combination of chopped or crushed fruit and sugar.
Jams that have a mix of fruit or berries are referred to as conserves, and may also include citrus fruits, nuts, cranberries, raisins, or coconut.
Marmalades are fruit jellies that have small bits of fruit or citrus peel suspended throughout the colorful, transparent jelly, and will often have a tart tone to their flavor.
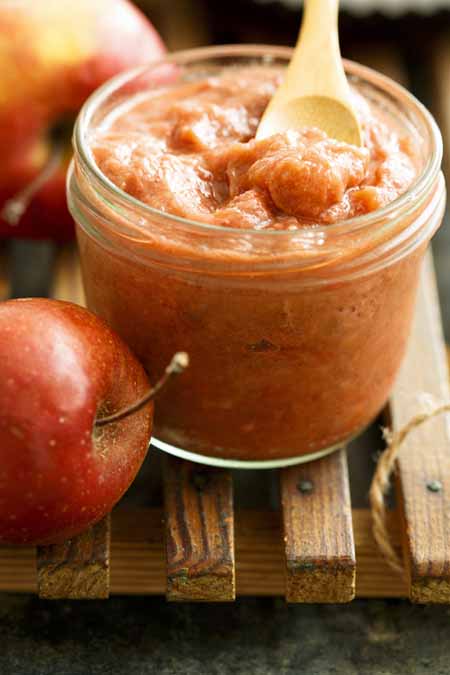
Fruit butters are sweetened fruit puree that is processed and cooked with sugar, until it reaches a creamy consistency that’s thick enough to spread with a knife. However, there is a German variety of apple butter which does have more of a smooth, jelly-like consistency.
Preserves consist of of small, whole fruits (cherries, plums, strawberries), or equally sized pieces of fruit in a thick, clear syrup that has a slight gel to it.
Fruit spreads are made from crushed or chopped fruit and usually contain less sugar – and their form is less jelly-like.
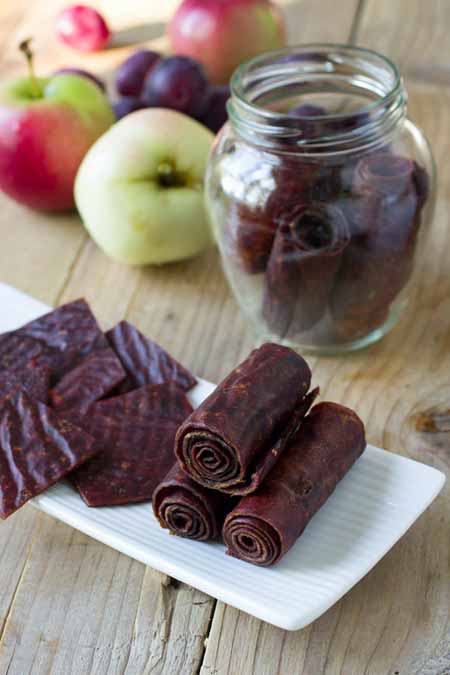
Fruit leather is another option at harvest time, a popular and healthy snack in kids’ lunchboxes. A natural or lightly sweetened puree is dried slowly in a low oven or food dehydrator, producing a thin, flexible sheet that somewhat resembles leather.
Fruit cheese is made by cooking and sieving the softened pulp, then cooking the juice with sugar. It’s then potted up in ramekins and the mold is turned out and sliced to serve – perfect on a cheese plate.
Fruit cheeses are usually made with intensely flavored fruits like quince, currants, damson plums, and rose hips.
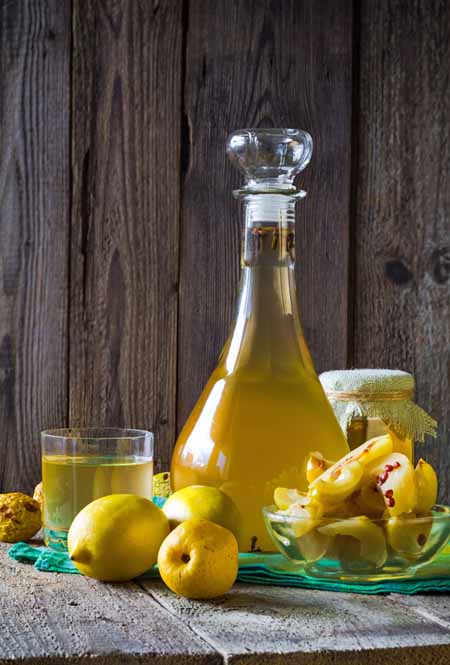
Liqueurs are made by steeping fruit in alcohol for several weeks. The flavored liquor is then stained, transferred to an aging canister and mixed with sugar. It then needs to rest for 3 or more months before transferring to a serving canister and imbibing.
Syrups and cordials are made from fruit that has been cooked with sugar and citric acid, strained and then bottled up. They’re a lovely, old-fashioned way of preserving summer fruit juices and can be served over ice or diluted with sparkling water, soda water or lemonade for a fruit squash.
And, they make great toppings on ice cream!
Essential Ingredients
For jams and jellies to “set” properly, or achieve the desired texture, they require a precise combination of four ingredients: ripe fruit, acid, pectin, and sugar.
Fruit
The fruit chosen will provide each spread with its unique color, flavor and fragrance. It will also furnish most, or all, of the liquid necessary (in the forms of water and juice) to dissolve the rest of the ingredients.
The fruit will also supply some or all of the requisite pectin and acid.
For the best color and flavor, fruits that are just ripe should be used. Irregular sizes or shapes can be used if they’re of good quality, as they’ll be cut up or mashed anyway.
Be sure not to use fruit that is overly ripe or rotting.
Pectin
Pectin is a naturally occurring water soluble fiber found in many fruits and plants, and it will form a gel if mixed with the right combination of acid and sugar.
It’s a natural polymer compound of acids and sugars, and could be considered the glue that holds plant cells together.
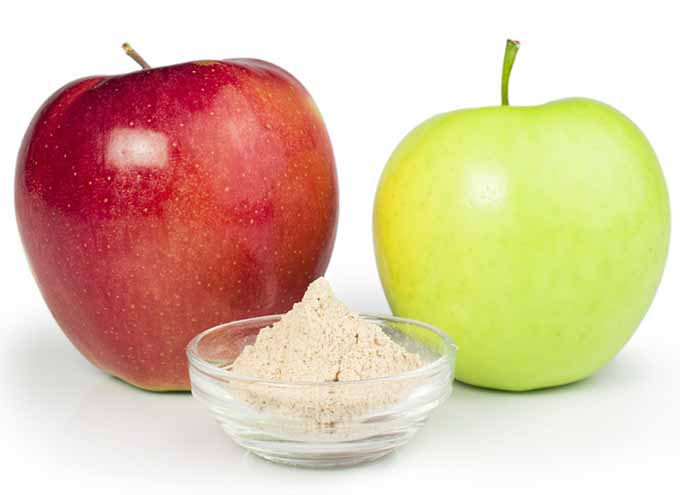
All fruit and berries contain some level of pectin. Citrus peel has the highest levels, followed by tart apples, citrus pulp, carrots, cranberries, guavas, loganberries, currants, quince, elderberries, blackberries, Concord and wild grapes, and gooseberries.
Most varieties of plums also contain enough naturally occurring pectin to set a gel on their own.
Other fruits – such as apricots, peaches, pears, strawberries, cherries, most grapes and blueberries – contain only small amounts of pectin.
So, in order to obtain a gel, these fruits will need to be combined with other high pectin fruits, or a commercially produced pectin.
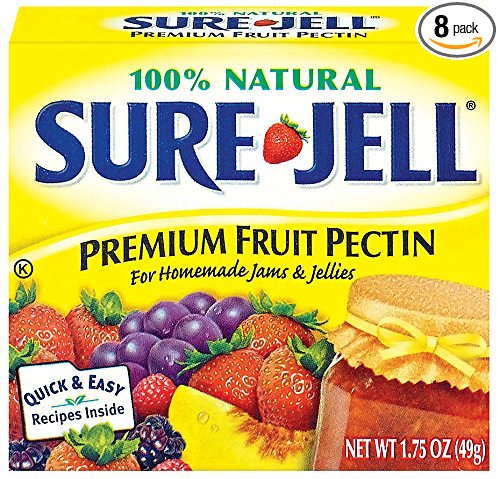
Sure-Jell Premium Fruit Pectin, 1.75-Ounce Boxes (Pack of 8) available on Amazon.
Pectin levels are at their greatest in fruit that is just ripe.
Because fruit that’s fully ripe or overripe will have less pectin, about one quarter of the fruit used for making jams and jellies without any added pectin should be a bit on the green side.
Acid
Acid is also of primary importance to proper setting.
If acid levels are too low, the liquid will never set. And, if there’s too much acid, the jelly will “weep” after it’s set, which is an open invitation for bacteria and mold to set in.
Sugar
The addition of sugar serves a few purposes. It acts as a preserving agent, contributes sweetness to balance tart flavors, and assists in the gelling process.
Replacing sugar with other sweeteners such as honey or corn syrup is one of the leading reasons for gelling failure in home preserving projects.
So, please, for the best chances of success, follow the recipe.
Sugar is essential in the process of gelling. This happens when fruit juices are entangled in an invisible web of fibers, until the target consistency and firmness are achieved.
This only happens when pectin is in contact with sugar and acid – the sugar acts to first attract and then retain the water as gelling happens.
Sugar also provides protection from spoilage of jams, jellies, and preserves after the jar is opened. If processed properly, jams and jellies are free from microorganisms and yeast cells, until the jar’s been opened and exposed to air.
After a jar is opened, the sugar thwarts bacteria through its ability to attract water. It does this via the process of osmosis, pulling water away from the germs and toward the fruit juice.
The bacteria then become dehydrated and compromised, they can’t multiply and spread, and food doesn’t spoil.
Don’t try to replace and adjust the sugar in traditional recipes, as that’s just a problem waiting to happen. You might get lucky and have the batch set, but chances are better that it won’t.
Too little sugar prevents a gel from forming, and contributes to the growth of unfriendlies: yeasts and molds.
So, stick to the recipe or you may find yourself wondering what the heck to do with 14 jars of “kind of thick,” sweet juice…
Low Sugar Jams and Jellies
Low sugar jellies and jams are made with a low calorie sweetener rather than sugar, and will usually require a modified pectin to set.
They’re also commonly made with more fruit pulp and less natural juices, which are often quite sugar dense.
In texture, they’re closer to that of a fruit spread than a jam, and flavors may not have quite the clarity of top notes that sugar brings out.
But, for anyone with dietary restrictions or if you’re just counting calories, low sugar spreads offer a delicious, sweet treat without the guilt.
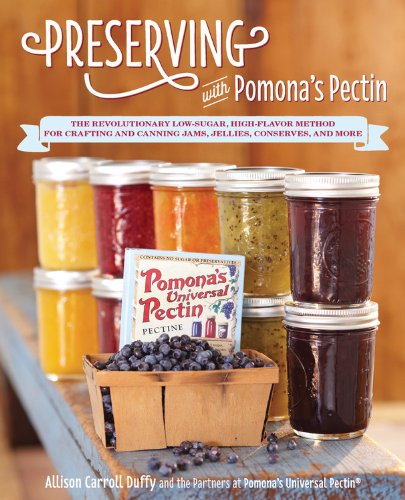
Foodal recommends Preserving with Pomona’s Pectin: The Revolutionary Low-Sugar, High-Flavor Method for Crafting and Canning Jams, Jellies, Conserves, and More
If you plan on trying a batch of low sugar spreads, look for a modified pectin that will gel with one-third less sugar (such as Pomonas Universal Pectin), and follow recipe directions for specific amounts of acid, fruit and processing time to ensure the best results.
You could also make a homemade version with no pectin at all in our recipe for spiced blueberry jam. This recipe uses dates and agave instead of granulated sugar.
Preventing Spoilage
While sugar helps significantly to preserve spreads, it’s still possible for mold and bacteria to grow on the surface of some jars.
Because of the common occurrence of contamination, paraffin or wax seals are no longer recommended for sealing jams and jellies.
Instead, to prevent the growth of molds as well as color and flavor loss, jars need to be processed in a hot water canner or a pressure canner.
To minimize chances of mold growth, hot jam, jelly and marmalade should be ladled into hot, sterile jars, leaving 1/4″ of headroom.
A Note on Canning Jars
Older jars (i.e. 30 years or so) that contained factory foods are okay to can with, but newer jars that were originally sold containing pre-packed food are much too thin. You’ll want canning jars – either new or old – for optimal results.
Rims and threads need to be wiped clean with a damp, sterile cloth. Jars should be sealed with a new, unused, self-sealing lid and band, then processed for 5 minutes in a boiling water bath.
For elevations more than 1,000 feet above sea level, increase processing time by 1 minute for each 1,000 foot increase in elevation.
A Tale of Two Methods
There are two standard methods of making sweetened preserves.
The first, which requires no additional pectin, works only with fruits that have naturally high levels of pectin. This process also requires cooking the fruit and sugar for a longer time in order for it to release the pectin and bring about a proper set.
The other method does require the addition of extra pectin, usually commercially prepared in liquid or powdered form, and is a much quicker process.
The amount of gelling that occurs from various pectin sources will vary considerably. To ensure that your products achieve a uniform gel, be sure to add the precise quantities of pectin, fruit and sugar that each recipe calls for.
For either method, rather than doubling up batches, it’s better to make one batch at a time as per recipe directions.
Sterilizing jars and preparing the fruit can be done for a double batch, but cooking the fruit and processing the jars should be done in single batches.
Why? Because increasing quantities means a longer cooking time, which often results in soft gels – this happens when the pectin breaks down from overcooking, and prevents proper setting.
Another point to remember is that recipes have been developed to hold their set within specific jar sizes. Jams and jellies that are poured into larger jars may result in soft, runny results.
Follow the Recipe
It’s a mantra worth repeating when it comes to preserves, be they sweet or sour:
“Follow the recipe. Follow the recipe. Follow the recipe…”
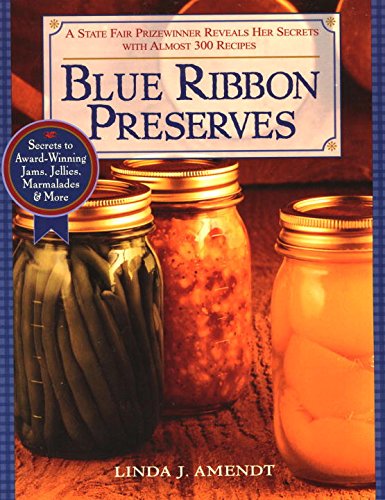
Foodal recommends “Blue Ribbon Preserves: Secrets to Award-Winning Jams, Jellies, Marmalades and More”
You can wing it and add a dash of this or a splash of that in other cooking endeavors, but for jams, jellies, pickles or relish, follow the recipe. This is for food safety as well as ensuring the best flavor, set and texture.
Selecting the Fruit, Preparation, and Extracting Juice
Select the best fruit for the job. Approximately one-quarter of your fruit should be slightly under ripe and the remaining three-quarters should be fruit that’s just ripened.
Measure and prepare the fruit in small batches, portioning out enough for one recipe at a time. Discard any overripe, bruised or damaged pieces.
Wash and drain the fruit, but don’t remove skins or cores, as pectin is more concentrated in these areas. Cut into small pieces.
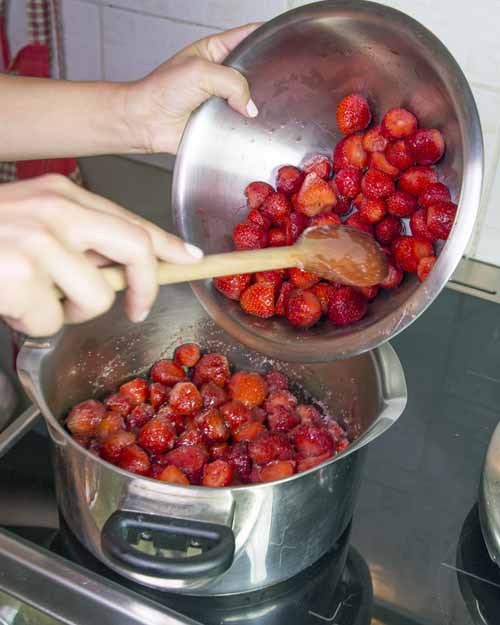
Pick clean and wash berries carefully to prevent juice loss. Drain, then remove any remaining caps or stems.
Add the prepared fruit to a large saucepan with a wide, flat bottom and add cold water.
Foodal recommends “175 Best Jams, Jellies, Marmalades and Other Soft Spreads”
For apples, pears, plums, peaches and other hard fruits, 1 cup of water per pound of fruit is a good rule of thumb. For soft fruit like berries and grapes, use just enough water to prevent scorching.
Mash or crush any soft fruit and bring to a boil on high heat, stirring to prevent scorching. For soft and hard fruit, once boiling, reduce heat but maintain a low boil and stir frequently to prevent sticking.
Soft fruits will need only 10 minutes or less to soften, while hard fruits may need up to 20 or 25 minutes, depending on their texture. Follow the recipe, as overcooking will damage flavor and color as well as the pectin.
Pour the fruit slurry into a damp jelly bag and suspend the bag to drain the juice. For the best clarity, juice should drip freely through the jelly bag without pressing or squeezing.
If using a fruit press or sieve and pestle to extract the juice, it should be restrained through a jelly bag to clarify and prevent cloudiness.
Jam and Jelly Making Tips
• For the best set, use fruit that is fresh and slightly under ripe. The ideal proportions are one-quarter under-ripe fruit to three-quarters ripe fruit.
• Soft berries such as strawberries, raspberries and blackberries will have a fuller flavor if first layered with the amount of sugar called for in the recipe, then left for a couple of hours before cooking.
• Hard berries and hard fruit such as currants, gooseberries, blueberries, cherries, and plums should be lightly poached to release the juice before sugar is added.
• As mentioned above, pectin is crucial to making your jam set. You can help out low-pectin fruits like strawberries by adding pectin-rich fruits like gooseberries, or by using a commercially produced jam sugar that has added pectin and citric acid.
Foodal recommends 250 Home Preserving Favorites: From Jams and Jellies to Marmalades and Chutneys
• To prevent overcooking, watch for your jam to reach the set point. The initial fast, active boil will slow to a more relaxed boil, the surface will take on a glossy appearance, and the mix will feel thicker. It’s better to undercook rather than overcooking, as a runny batch can be cooked up again.
• To remove foam (trapped air) at the end of your processing time, stir rapidly in the same direction until the bubbles break down. A pat of butter added to the fruit will also help to reduce foam.
• To speed up the flow of juice being strained, place a water-filled jar on top of the fruit pulp. But, make sure to restrain the juice through cheesecloth to clarify before processing.
• Always read recipes thoroughly to ensure that you have all the necessary ingredients and equipment on hand before beginning a batch.
4 Steps for Making Jam and Jelly
1. Wash half-pint or pint-sized canning jars in hot, soapy water and rinse well.
If the recipe you’re using calls for jars to be sterilized, do so by submerging them for 10 minutes in boiling water.
To save time and energy, use your hot water canner (read our guide here)– stand the empty jars upright on the rack for your canner and fill with boiling water to one to two inches above the jar tops.
Adjust the heat to maintain a low boil. When finished, empty the jars back into the canner, then invert onto a clean tea towel.
Leave the hot water in the canner for processing the jars later, and keep the heat on low to keep the water hot.
Put the lids and bands in a pot, cover with water and bring just to a boil, keeping the water at just a hint of a simmer until ready to use. Or, prepare two-piece canning lids as per the manufacturer’s instructions.
2. Prepare jam and jelly ingredients according to recipe directions. Cook as per the recipe directions, and skim any foam from the top if needed.
Quickly fill the clean, warm and sterilized jars quickly with the hot fruit or jelly mixture, leaving 1/4” of headspace.
3. Wipe the rims and threads with a damp, clean cloth or a clean, damp paper towel. Set lids and bands in place, working quickly to keep the ingredients as hot as possible until ready for processing.
But please remember, you’re working with a very hot liquid – take all necessary safety precautions so as not to burn yourself.
Load the sealed jars into the canner, keeping them upright and use a jar lifter if needed.
4. When all the jars are loaded, the water level in the canner should be one to two inches above the tops of the jars. Turn the heat to high, cover and bring to a vigorous boil.
Begin the processing time after the water has begun to boil.
As the canning water needs to stay at a boil for the entire processing time, keep the heat on high and the lid tightly on the pot.
When jars have been processed for the recommended time, turn off the heat and remove the lid. Wait five minutes, then remove jars with a jar lifter. Carefully place them on a clean tea towel or cooling rack, and leave an inch of air space between the jars.
Allow jars to cool in an upright position for 12 to 24 hours. As a seal forms, the center of the lid is drawn down and you may (or may not) hear a “popping” sound. Don’t tighten the bands or push the lids down at the center, and allow the jars to rest undisturbed while setting.
If desired, remove and store the rings, then label and date the jars, and store in a cool cupboard out of direct light. Any jars that haven’t sealed can be stored in the fridge to be used first.
Recipes
And that’s the skinny on how to make your own jams and jellies in four simple steps. Simple but a bit time consuming, so make sure you give yourself enough uninterrupted time to finish.
And I know you’ve heard it before, but it’s important, so don’t forget – follow the recipe!
Foodal recommends “Jam On: The Craft of Canning Fruit”
To get you started, here are four recipes to ward off winter and stock the pantry with. And remember, homemade jams and jellies are popular, so make lots – they make a great gift for the holidays, or any time of year.
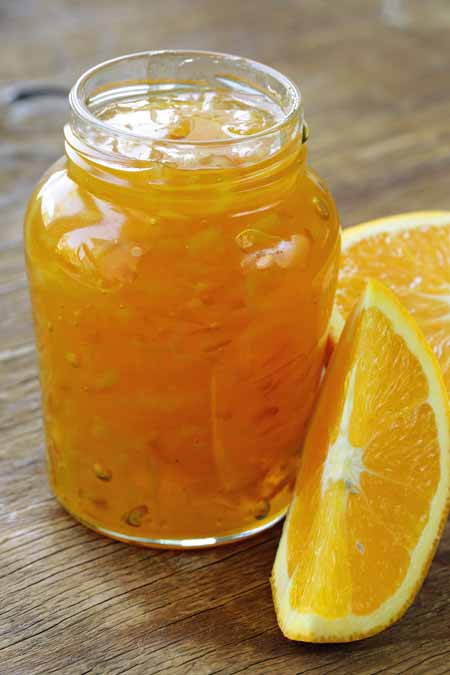
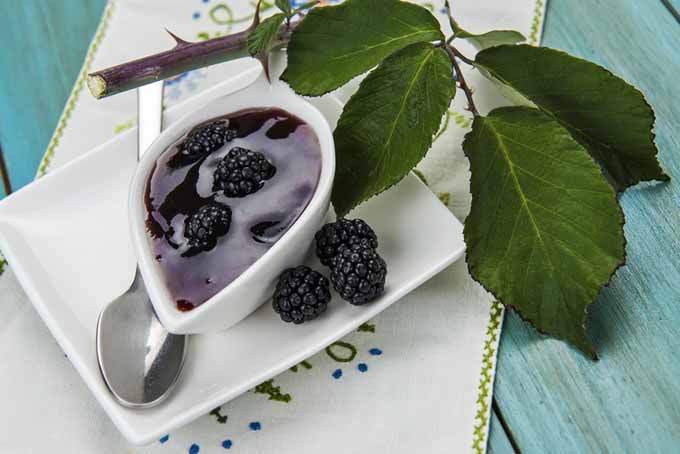
Old Fashioned Blackberry Jelly
Of all the wonderful aromas that came out the family kitchen at harvest time, the fragrance of Mum’s blackberry jelly was my favorite.

Heady, fragrant and with its intense, deep purple color, it seemed to be an elixir of the kitchen gods… and the taste of this simple recipe is equally delicious.

- 4 cups Blackberries
- 4 cups water or just enough to cover berries
- 3 3/4 cups blackberry juice
- 4 1/2 cups sugar
- 1 box powdered pectin 1 3/4 ounce size
- 1/2 teaspoon butter
- In a large saucepan, lightly crush and mash the berries, then add the water and bring just to a boil.
- Reduce heat and cook on medium for 20 minutes.
- Remove from heat. Into a medium mixing bowl, strain the berries through cheesecloth, a large wire mesh strainer or sieve. If needed, add a weight to the pulp to speed up the dripping (a canning jar filled with water will work). But, if the juice is put through a press or sieve with added weight, restrain through cheesecloth to prevent cloudiness.
- In a large saucepan, add the juice, pectin and butter (the butter will reduce any foam from forming). Over high heat, bring to a full rolling boil while stirring constantly.
- Mix in the sugar, return to a rolling boil and boil for exactly one minute, while stirring constantly.
- Remove from heat and skim off any foam.
- While the juice is hot, quickly ladle into hot, sterilized jars, leaving 1/4” headspace. Wipe the rims and threads with a damp, sterile cloth, cover with fresh lids and screw bands on loosely.
- Process in a hot water bath for 5 minutes. Remove from the bath, and when cool enough to handle, label and date then store in a cool cupboard out of direct light.
- Save any leftover juice to spoon over ice cream, or freeze for smoothies.
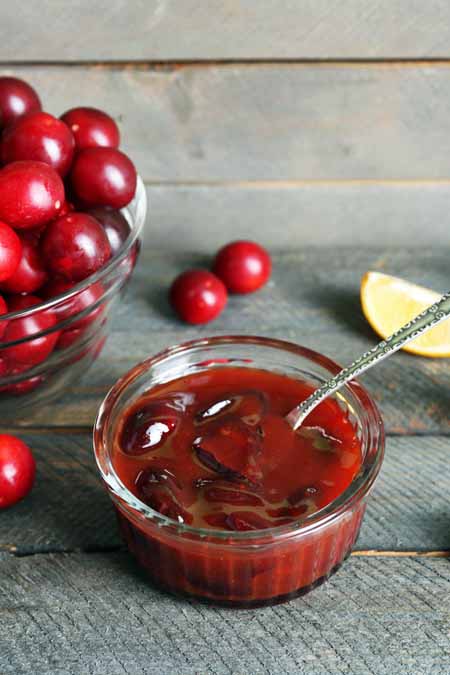
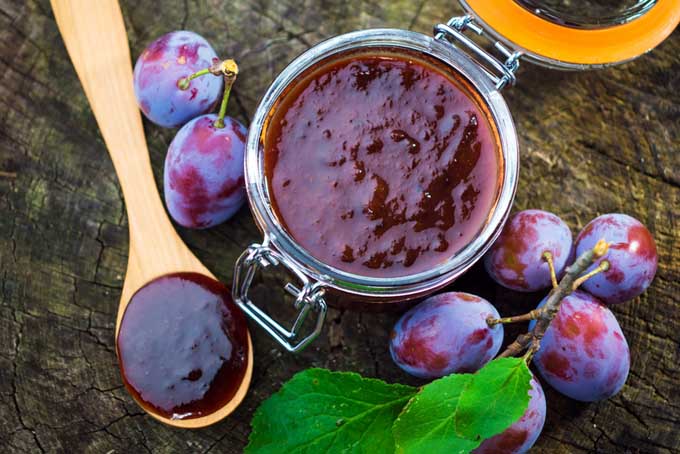
Plum Jam
A good way to use up any type of plums, the pectin found in the skins will set this jam nicely without having to use additional pectin. Jams and jellies that don’t require additional pectin should reach a temperature of 220°F when cooking, in order to ensure a good set.
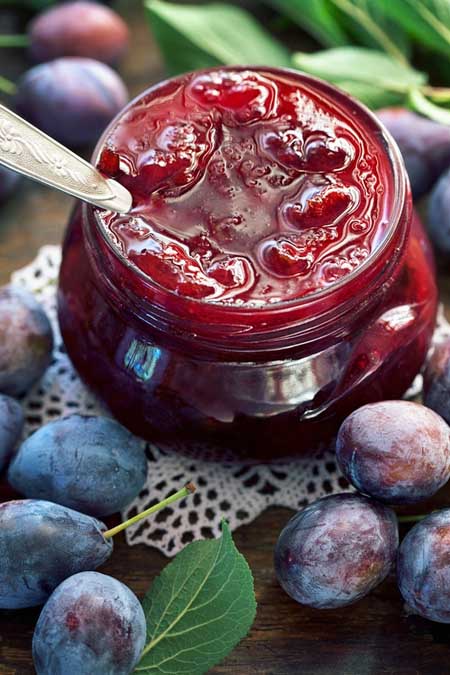
Sweet and tart, this jam is always a favorite on toast, with bagels, or as a condiment for pork and poultry.

- 8 cups sugar
- 6 cups pitted plums coarsely chopped
- 2 cups unsweetened black currant juice
- 1 teaspoon ground cinnamon
- juice of one half lemon
- 8 one pint jars with lids and bands
- In a large saucepan, add the plums, black currant juice, sugar, cinnamon, and lemon juice. Bring just to a boil and stir constantly for 5 minutes.
- Reduce heat and simmer for 30 minutes or until the mixture reaches 220 F, stirring frequently to prevent sticking. Use a candy thermometer to check temperature.
- Ladle into clean and sterile jars leaving 1/4" headroom, then wipe rims and threads with a clean, damp cloth. Seal with lids and bands and process in a hot water bath for 5 minutes.
- Remove from the bath and when cool enough to handle, label and date. Store in a cool spot out of direct light for up to one year.
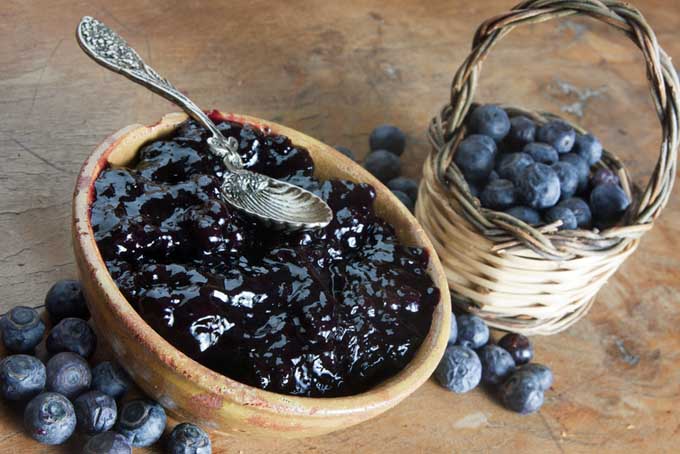
Honey Blueberry Jam
A tasty low-cal alternative to traditional blueberry jam, this one uses raw honey for its sweetness.
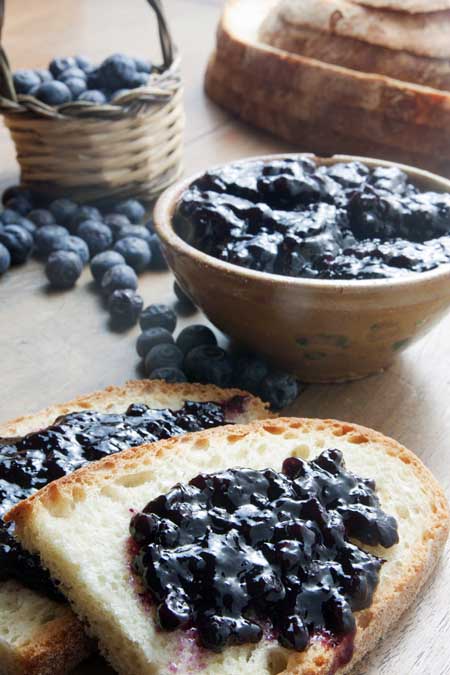
Goes very nicely on crackers with soft goat cheese and a sprinkle of pecans or walnut pieces.

- 5 cups fresh Blueberries
- 1 cup apple juice
- 1 cup raw honey
- 1 box powdered pectin
- 1/4 teaspoon cinnamon
- 1/2 teaspoon nutmeg
- 1 teaspoon pure vanilla extract
- 6 one-half pint jars with lids and bands
- Wash thoroughly and sterilize the jars, lids and bands.
- Place the blueberries in a large pot and mash with a potato masher. Add apple juice and powdered pectin and stir continuously over medium high heat, just until the mixture comes to a boil.
- Add honey, cinnamon, nutmeg, and vanilla and boil for 1 minute, stirring constantly.
- Remove from heat and ladle into hot sterile jars, wipe the rims and threads clean with a damp, sterile cloth, seal with lids and bands then process in a hot water bath for 15 minutes.
- When cool enough to handle, label and date, then store in a cool cupboard out of direct light for up to one year.
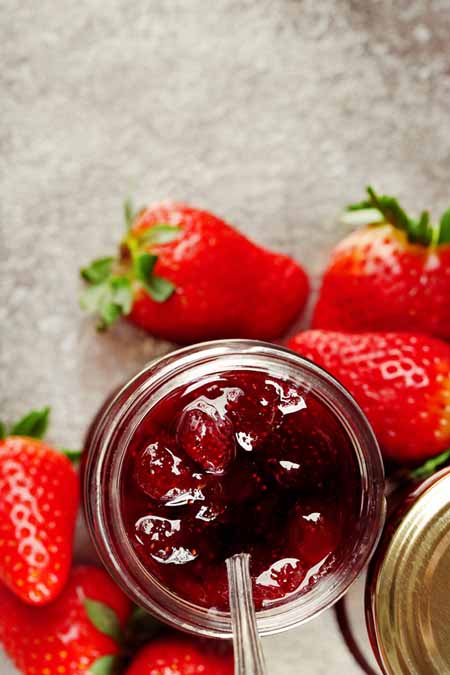
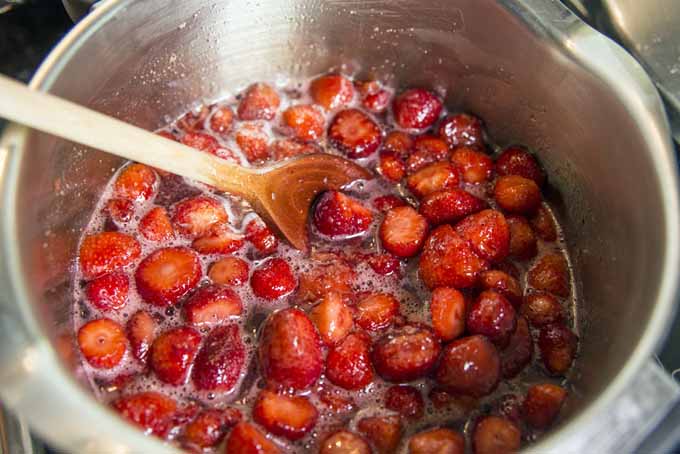
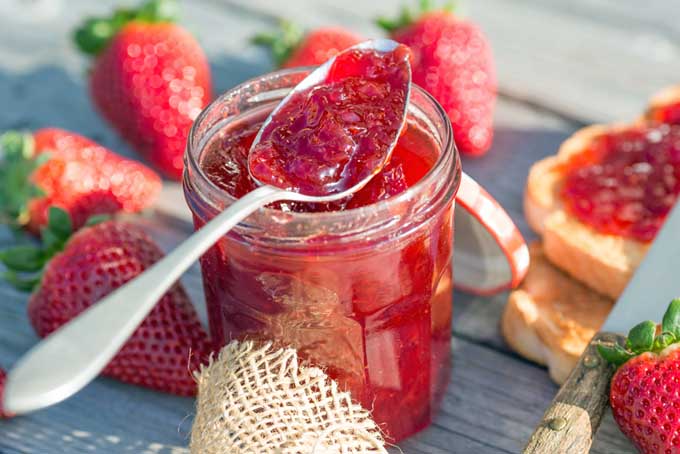
Strawberry Freezer Jam
The ultimate in easy, no-cook jams, this strawberry freezer version is also delicious – you’ll never want to buy commercial strawberry spread again. Wonderful on toast or crackers with cream cheese or soft goat cheese.
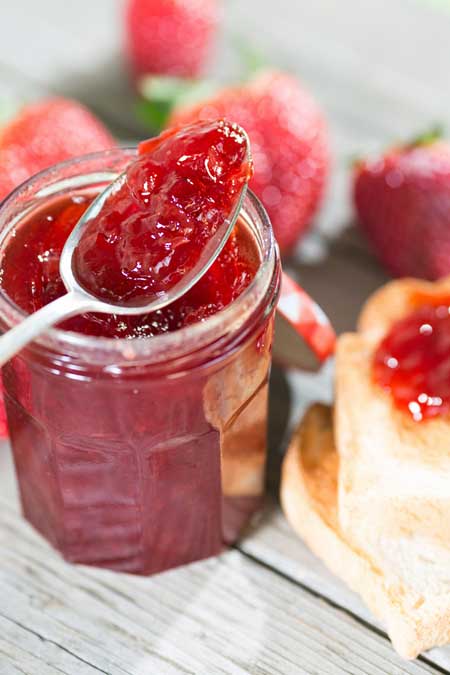
This jam can be kept in the fridge for up to 3 weeks, or in the freezer for one year. Allow jam to thaw in the fridge before using.

- 1 quart fresh ripe strawberries
- 4 cups sugar
- 3/4 cup water
- 1 box fruit pectin 1 3/4 ounce size
- 10 one-half pint jars with lids ensure that they are rated for freezer use
- Wash containers and lids in warm soapy water, then rinse thoroughly with boiling water. Invert on a clean tea towel to air dry.
- Wash, rinse and stem the strawberries. In a large mixing bowl, crush the berries thoroughly with a potato masher, one layer at a time.
- Add the sugar to the crushed berries and stir thoroughly. Let berries stand for 10 minutes, stirring occasionally.
- In a small saucepan combine the water and pectin. Over high heat, bring to a boil while stirring constantly. Continue to boil and stir for 1 minute.
- Remove from heat and add to the berry mixture. Stir non-stop for 3 – 4 minutes, or until sugar granules are completely dissolved.
- Ladle into prepared jars leaving 1/2” headroom. Wipe rims and threads with a damp, clean cloth and cover immediately with lids. Allow to stand at room temperature for 24 hours before using.
About Lorna Kring
Recently retired as a costume specialist in the TV and film industry, Lorna now enjoys blogging on contemporary lifestyle themes. A bit daft about the garden, she’s particularly obsessed with organic tomatoes and herbs, and delights in breaking bread with family and friends.

Wow, this is a very informative article. As an avid lover of all kinds of preserves, I will definitely take advantage of these recipes and guide. I’ve never tried plum or honey blueberry jam, so I think I might start by making those. I also saw that you mentioned jelly can be spread on crackers or toast, but I wonder if there are other things you could put this on. Sometimes I like to put grape jelly on my eggs, so maybe making one of these recipes and trying it on eggs could be tasty. I can’t wait to try making some of these!
Glad you found the post informative mk417. And yes, jelly is very versatile – mint jelly is great with lamb, plum works well with pork, and crab apple or quince is nice with lamb, pork and game. So I’m sure some of them would work with eggs as well… perhaps a herb infused flavor for eggs?
A few months ago I had apple jelly for the first time. It was the best tasting thing I have had so far. There was also a time when my mom brought home apple butter from a farmers market. That was my first time having any type of fruit butter as well. I’m glad there are so many things you can do with fruit.
Both apple jelly and apple butter are a treat! Thanks for your comments Jasmine2015…
I personally enjoy homemade jams and preserves. My favorite breakfast is a homemade biscuit with homemade jam. I have never tried to make freezer jam however. I really like this informative post. I learned quite a bit, and I personally have made my fair share.
I will be referring a couple friends to this post. They are new to canning and jellies and this would be helpful
Homemade biscuits and jam are wonderful! Thanks for your comments and passing on the post misskrystal, we all need to start somewhere.
I wasn’t aware of all the different fruit preserving methods. The fruit cheeses sound interesting. I will have to look into those more as I have never seen nor heard of them before. I do not have canning supplies nor pectin, so all the jams an jellies I have ever made have been stored in the freezer or fridge. I would be nice to try canning, however, since it can be stored for long periods and used for many foods. I’ll look into it more.
Freezer jams are very handy and tasty lebrennan, but canning seems to give more options. It does require the specialized equipment, but none of it’s expensive and return on investment is quick and delicious! Thanks for your comments.
I do enjoy making my own preserves when I have a glut of produce. Many people are under the impression that preserve making is a difficult business. The actual cooking is an easy process, it’s just gathering together all the equipment that you need can be quite a task!
You’re so right missbishi, it is a simple process. But it’s also time consuming, and with all the steampunk equipment it does take on a somewhat mysterious air… too bad, because it’s a lot of fun too!
Lorna, I love your articles. I always know that I’ll not only find a recipe or two that I like, but will see luscious pictures, and get an education on the subject matter. I absolutely adore the idea of making my own preserves. My kitchen is limited right now, but hopefully in the future I will be able to try out the first three recipes. In the meantime, I’ll be happy if I’m able to make the strawberry freezer jam. Once I’m able to master that, I’ll have the confidence to consider attempting the others.
Thanks Diane, so glad you find the posts informative and useful. And the freezer jam is a great place to start, you’re going to love the results!
Wow! This post gave me so many ideas for Christmas presents I can make. I started getting into canning last year, but haven’t really got past the typical strawberry jam. Also still wasn’t sure the difference between all the different types, so it was nice to have just a simple definition of each thing right there. I already own the Ball Preserving recipe book, do these books that you recommended have a lot of different recipes? I wouldn’t mind getting another book to have if it means I get a ton more recipes to follow.
Homemade preservers make great Christmas gifts ccarpenter117, everybody loves them!
The Ball Preserving Recipe book is a great one. But if you want a few different twists, the Jam On book features a lot of low sugar recipes, which is nice. And the 250 Home Preserving Recipes have some nice recipes for fruit butters and chutneys as well as the standards.
Oh yes, Christmas presents indeed. There’s little or no spare cash in our household this year, so Christmas will not be arriving as a delivery from a high end high street store! To be honest, I’d personally rather receive a thoughtfully made gift, however small, than something bought at random just to /be/ a gift, so I’ll hope my nearest and dearest agree.
Finding this post is very well timed for me. I’ve made quite a lot of jam this year and even more chutney and I thought I’d finished but today a friend gave me two big bags of quinces, so I’m off again! I don’t know what variety they are, they’re windfalls from her (inherited) tree but they’re the size of lemons and smell wonderful, so these recipes are the sort of inspiration I need!
Oooh, quince jelly is something I love but haven’t enjoyed in many years… and it makes a great gift that I’m sure your nearest and dearest will enjoy Sue!
My, this just sparked my love for homemade stuffs again! I’ve never tried making jams/jellies/marmalade before since I couldn’t follow my cookbook’s recipe very well. But thanks to this, I think I’ll be able to start making one. 🙂
Then maybe I could give it as a gift to my friends and even turn it into a mini-business. Yay! 😀
I know the stands for homemade jams/jellies etc. at our local craft fairs always do a booming business toradad5598… maybe we’ll see you on the circuit someday!
This is such an excellent article and very informative. I have always wanted to make my own jam and jelly and always thought that I could not do it, but this article helped explain the process. The pictures and recipes all look so delicious! I can’t wait to attempt to make the honey blueberry jam.
Glad you enjoyed the post buggs81 – just follow the recipe and you’ll be enjoying your own home preserves in no time.
Yes I can’t wait till summer so I can make a bunch of jam and jelly. I never knew the difference between the two until now so thanks for filling me in! I also had no idea there were so many types of fruit jams and jellies. I knew there was marmalade but I had no idea conserves, spreads, and preserves even existed! I’m not an expert when it comes to preserving things but this article made me realize I’m a total novice. I had no idea there was a different method depending on what type of fruit you had. I’ve made jam once and it came out runny and slightly jelled and I was confused about it for the longest. I have my answer as to why that happened now! I’ll be picking up some guides to preserving on my way back from work today, and I’ll make sure to follow the recipe. I can’t wait to try making the blackberry and blueberry jam. Those are my two favorite flavors.
A couple of good recipe books will take care of those runny jam blues NN. And enjoy those berry flavors – they’re the best!
Thank you so much for these delightful recipes. This post makes me think of my grandmother and how she use to make homemade jam for us. I use to love them when I was a child,and have been thinking of making them for my children. So excited about the strawberry jam freezer recipe.
It’s certainly one of those wonderful kitchen traditions that make great family memories… have fun with your strawberry freezer version sheeba7!
This is a very interesting read, thank you for sharing all of this with us and for explaining the different ways of preserving fruit. I have a big garden and many fruit trees and every year I always end up giving away lots of fruit so it won’t go to waste. Your article gave me lots of interesting ideas, I’ve already noted almost all of your recipes and I’ll definitely try them out. I’m intrigued by the combination of cheese and fruit spread and I can’t wait to taste it. Your article will make happy even most of my friends and family members as I tend to share with them most of the things I make.
Sharing your bounty always makes it taste better Snarya! Glad you enjoyed the post, and let us know how your efforts turn out this year.
I was recently considering adding some jams and jellies to the canned goods I sell at my local farmers markets. I already can some peppers in oil and vinegar and they sell very well. I hadn’t made jam or jelly though in such a long time that I wasn’t sure if I could really be successful at it. This article was a great refresher. I definitely am going to try making a batch soon for sale. I think varieties that are harder to find in the grocery stores will sell particularly well, like blueberry or plum.
The booths that sell sweet preservers at our local farmers’ market do a booming business Lisa – and I think you’re right on about providing flavors that won’t be found in the grocery stores. Good luck with your venture!
I have three toddlers, and when it comes to lunch time, they ONLY want peanut butter and jelly! I generally dont argue with it, as long as I have somewhat healthy jam to put on it. I have been looking into making my own so its a bit healthier and I have control over whats in it. I was worried about preserving it incorrectly and it somehow becoming moldy. Thanks for this!! Lots of great info!
It’s a great feeling to give your kids what they want, and know it’s been made with healthy ingredients! Glad you enjoyed the post Ashley, and good luck with your preserves.