What’s the best part of an orange Creamsicle?
Seriously, think – it’s hard to decide!
Is it the dreamy vanilla-flavored ice cream center that I love the most? Maybe it’s the thin layer of sweet citrusy sherbet on the outside that I can’t get enough of?
Or is it the tender recollection of summertime fun as a kid, giggling with siblings and friends in the backyard on a hot and sunny Saturday afternoon, as we tried to lick our rapidly melting popsicles before they dribbled too far down our hands and arms?
Perhaps your favorite part is actually the combination of EVERYTHING.
I think it might be impossible to choose a favorite, from the beautiful blend of vanilla and citrus, and the reflection of a cherished sensory childhood experience that is permanently bonded to your memory!
Here’s a way that you can enjoy these delicious flavors, fun colors, wonderful textures, and happy memories at any time of the year:
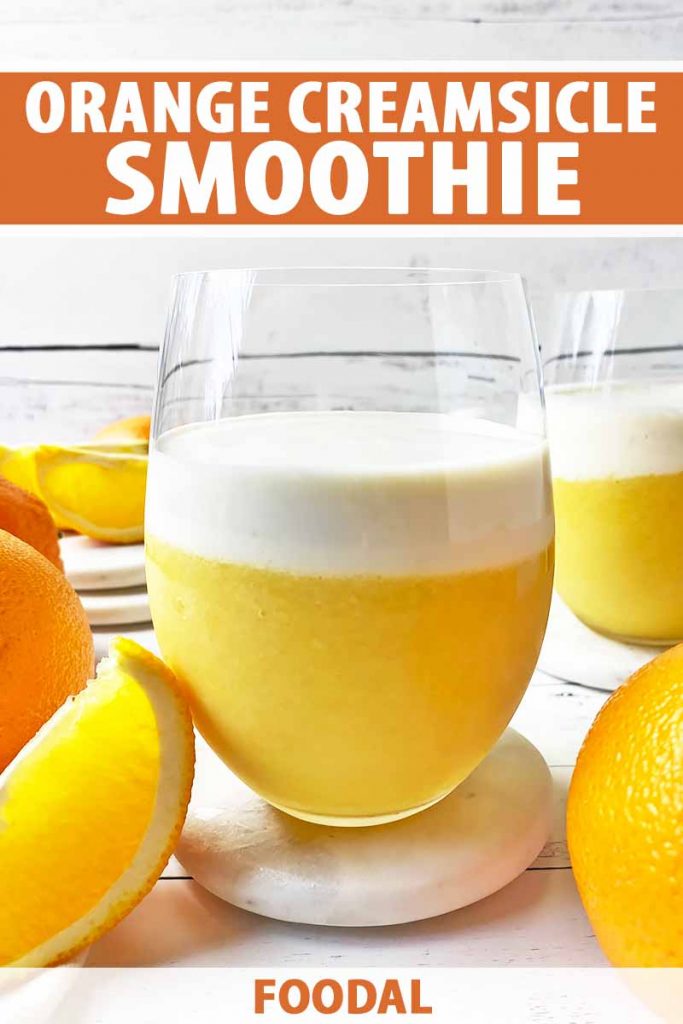
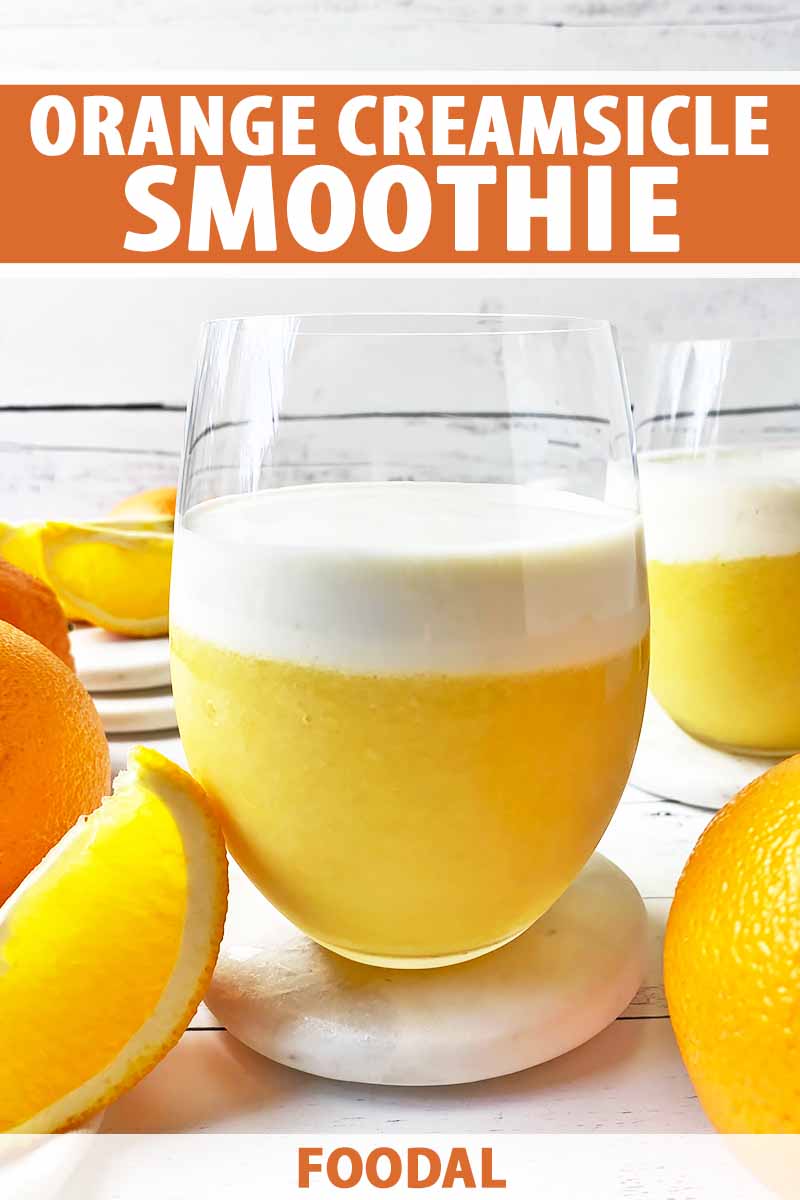
A homemade orange Creamsicle smoothie!
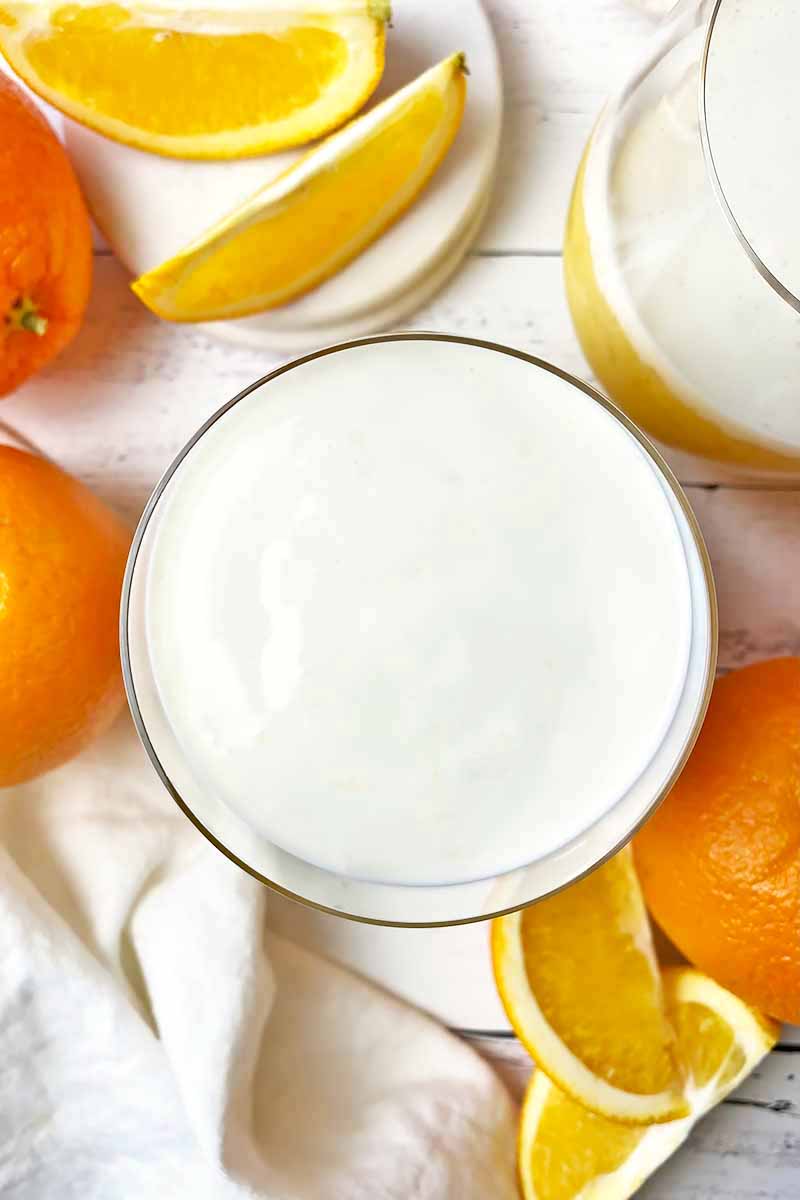
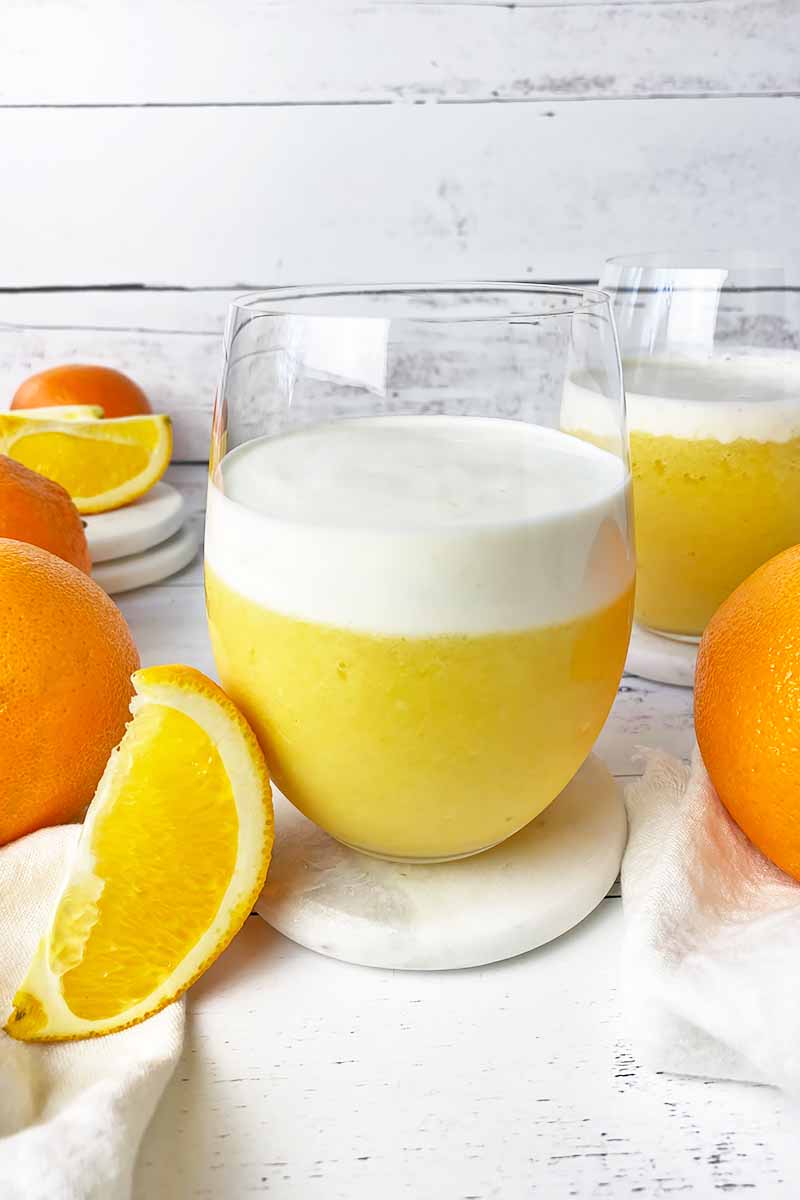
You’ll appreciate the playful nod to the popsicle’s iconic appearance, with a separate vanilla blend layered on top of the orange in the glass.
Made with just a few better-for-you ingredients – unlike the premade frozen treat of your childhood – this smooth and dreamy breakfast beverage provides a healthy start to the day, a bright awakening that will unlock your favorite flavor memories.
But, you know, without the sticky hands and your mom chasing you with a wet rag.
It doesn’t have to be summer to enjoy a Creamsicle-inspired treat – make this smoothie now, and add the recipe to your collection of other healthy blended beverages!
Print
Orange Creamsicle Smoothie
- Total Time: 10 minutes
- Yield: 1 smoothie 1x
Description
Just like a real orange Creamsicle, enjoy fun and refreshing layers of orange and vanilla flavors in our healthy smoothie version.
Ingredients
For the Orange Layer:
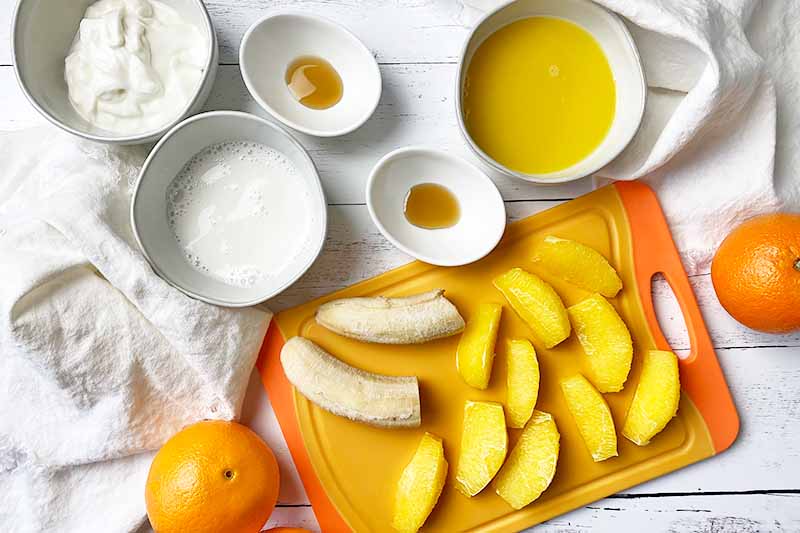
- 1/2 cup freshly squeezed orange juice (about 2 medium oranges), plus more as needed
- 1/2 teaspoon agave nectar or honey
- 1 medium orange, peeled, segmented, and frozen
- 1/2 frozen banana
For the Vanilla Layer:
- 1/4 cup low fat milk or unsweetened non-dairy milk beverage, plus more as needed
- 1/2 cup low-fat vanilla yogurt or non-dairy substitute
- 1/2 teaspoon agave nectar or honey
- 1/2 frozen banana
Instructions
For the Orange Layer:
- Add the orange juice, agave nectar, frozen orange segments, and frozen banana to a high-speed blender. Blend until a smooth and thick mixture forms.
- Pour the orange blend into a tall glass. Place the glass in the freezer while you prepare the next layer.
For the Vanilla Layer:
- Rinse the blender. Add the milk, yogurt, agave nectar, and frozen banana to the clean blender.
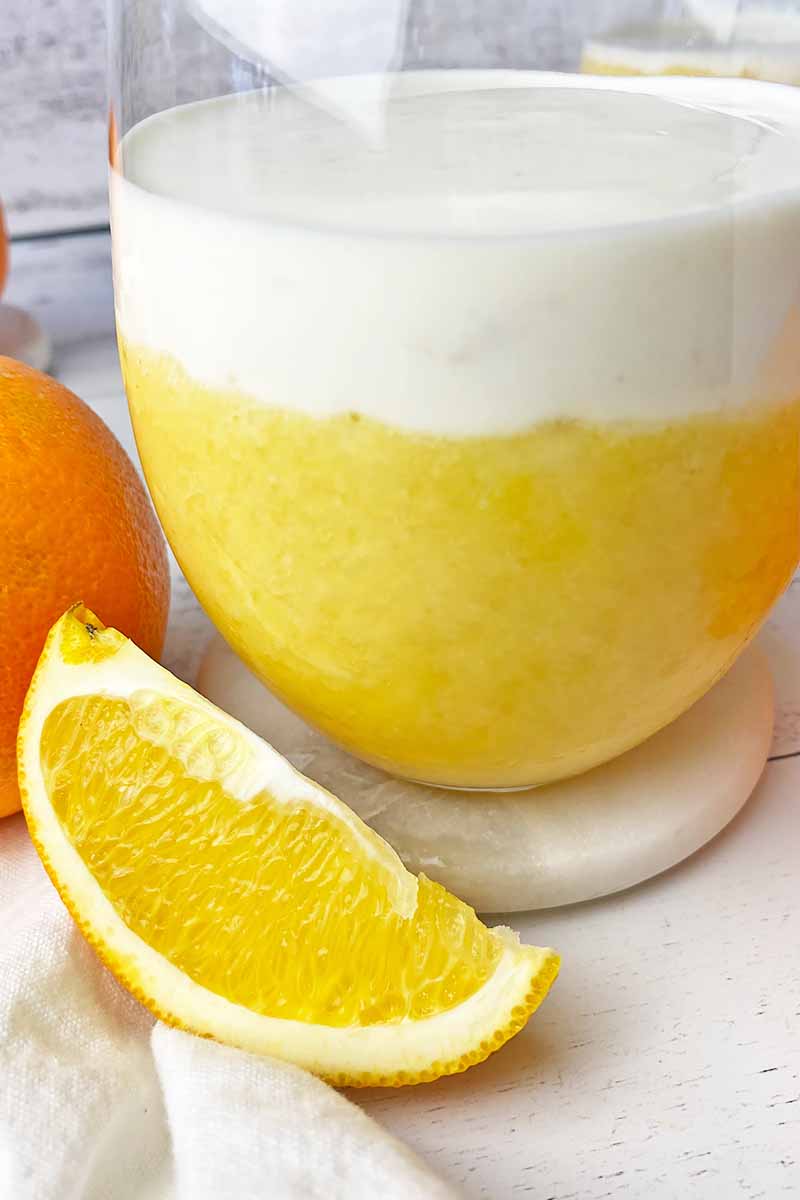
- Blend until a smooth mixture forms. Remove the glass from the freezer and slowly pour the vanilla blend over the top of the orange layer, creating two distinct layers.
- Serve immediately with a straw, swirl gently, and enjoy!
- Prep Time: 5 minutes
- Category: Smoothie
- Cuisine: Beverage
Cooking by the Numbers…
Step 1 – Prep and Measure
If you have not prepared your frozen fruit ahead of time as part of your meal prep routine, do so right now!
Both the banana and the orange segments will take about 2 hours to freeze completely, so you’ll need to dedicate this time to freezing before starting the recipe.
Peel and freeze one whole banana – read our tutorial on freezing bananas for more information. You can halve the banana before freezing so it will be easier to use in this recipe.
Peel and segment one whole orange. Place the segments on a quarter-size baking sheet lined with parchment paper or a silicone mat, leaving some space between the segments. Place in the freezer until completely frozen.
Be sure to make a little space in your freezer to hold the cup between layers as well, to keep the beverage from melting while you prepare the vanilla layer.
When you’re ready to make the smoothie, squeeze the remaining fruit to yield 1/2 cup of juice.
You can also sub in an equal amount of store-bought juice.
Measure the yogurt and milk.
If you are using a non-dairy option for the milk, choose an unsweetened milk beverage substitute like oat, coconut, almond, or soy. Feel free to choose non-dairy yogurt or milk that’s plain or vanilla-flavored!
If you prefer to use canned coconut milk, you may need to add cold water to thin out the smoothie. We’ll cover how to do this in Step 3 below.
Measure and divide the agave nectar or honey, so you have 1/2 teaspoon ready to go for each layer.
Set out the frozen banana halves and orange segments.
Step 2 – Blend and Pour the Orange Mixture
Place all of the ingredients for the orange mixture into a high-powered blender.
For optimal blending, add the liquid ingredients closest to the blade, and the frozen ingredients furthest away from the blade.
Blend until completely smooth – this should only take a few seconds.
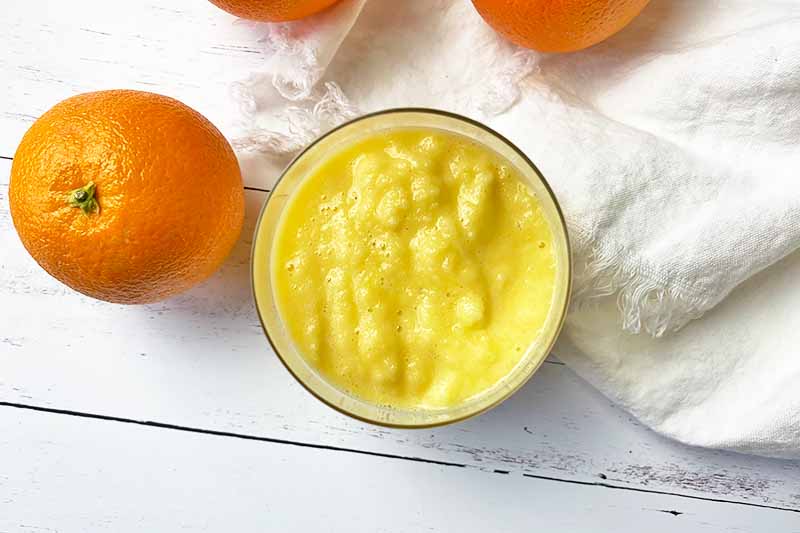
The mixture should be thick, almost like the texture of soft sorbet. This is necessary to suspend the vanilla smoothie on top without the layers immediately blending together.
However, if the mixture is so thick that it will not blend properly, add more juice 1/8 cup at a time, blending between additions until it reaches the desired consistency.
Pour this mixture into a tall glass, and immediately place the glass in the freezer to keep this portion cold and thick as you prepare the vanilla smoothie.
Rinse out the blender and place it back on the base.
Step 3 – Blend the Vanilla Mixture
Place all of the ingredients for the vanilla layer in the blender, and blend until smooth. Again, this will only take a few seconds.
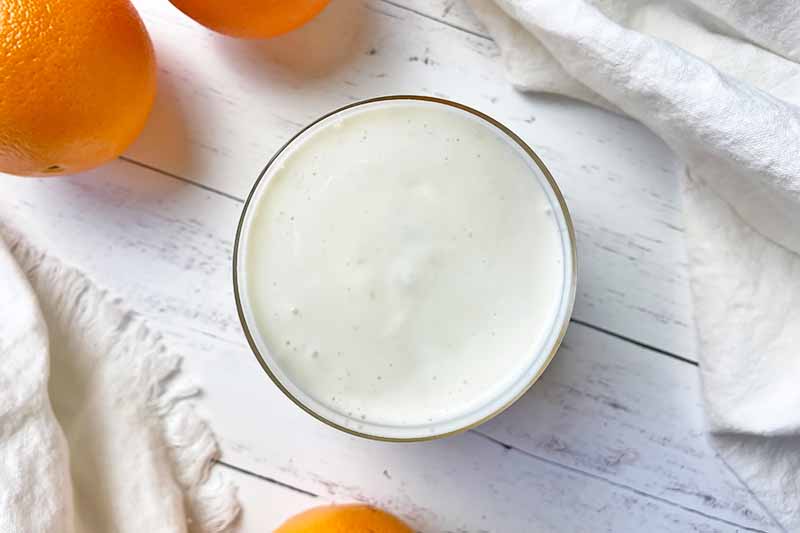
This mixture will be creamier and slightly thinner than the other base layer.
If the smoothie is a bit too thick for your liking, that’s easy to fix. Add milk 1/8 cup at a time, blending between additions until it reaches your desired consistency. If you used canned coconut milk, add cold water 1/8 cup at a time to thin the mixture.
Step 4 – Pour into Glass and Serve
Remove the glass from the freezer.
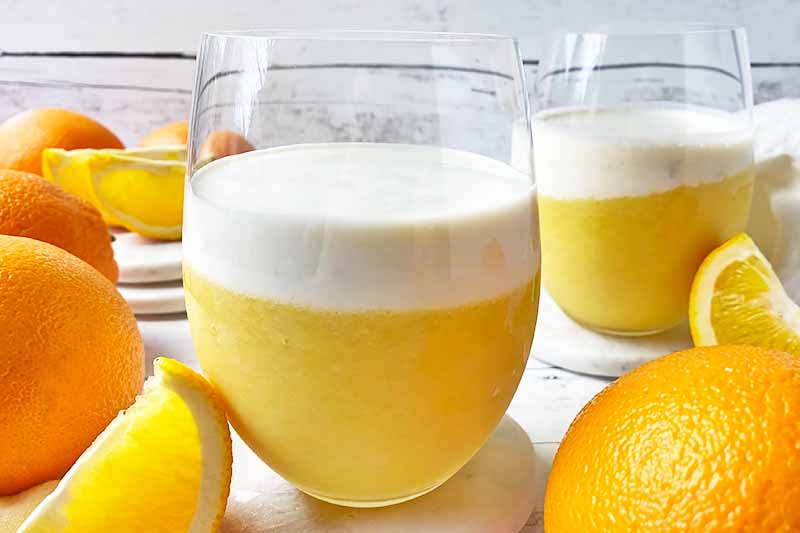
Slowly pour the vanilla smoothie into the glass directly on top of the orange mixture. You can also gently scoop the vanilla smoothie on top with a spoon to prevent this layer from sinking into the other mixture, for a clean presentation.
With your straw, gently swirl the two blends together, and enjoy immediately!
Layering Is Optional
We’re not kids anymore.
For some of us, we’re the ones now chasing our own messy children with wet rags!
So if you’re in a rush to make this smoothie all in one go, shave off a few minutes of time and simply skip the layering.
Done.
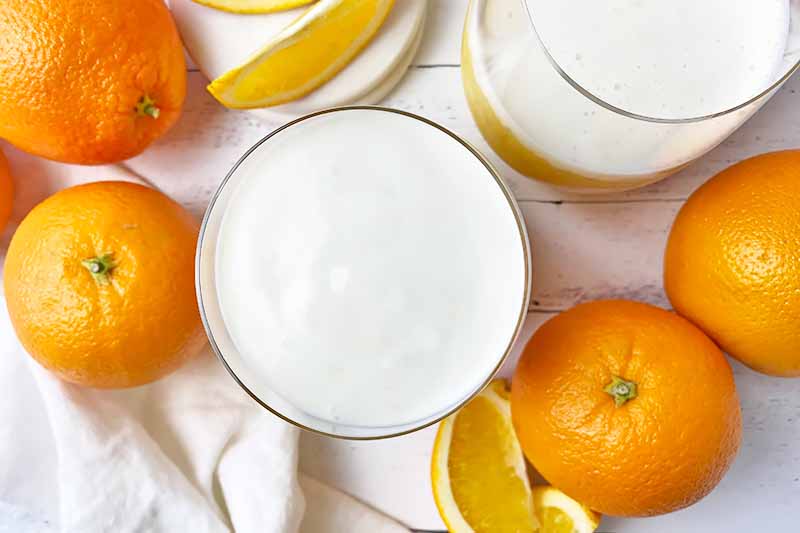
This will not introduce a fatal flaw in terms of taste or texture – nothing will go wrong. While you may need to add more juice or milk to adjust to your desired consistency, you’ll still have an impeccably smooth and creamy beverage, in a solid light color.
You might even want to add in a superfood or two.
And the level of enjoyment will stay the same!
Do you think you’ll try the layers, or go for one simple whiz to incorporate everything in the blender? Do you have any fun memories with this delightful dessert? Let’s chat in the comment section below.
Orange is the name of the game when it comes to bringing bright, fresh, acidic flavor in beverages. The right amount of sweet, citrusy pop in a recipe transforms it into an unforgettable thirst-quencher! You’ll find more chilled recipes featuring this citrus fruit on Foodal, like these tasty options:
Photos by Nikki Cervone, © Ask the Experts, LLC. ALL RIGHTS RESERVED. See our TOS for more details. Originally published by Jennifer Swartvagher on June 11, 2015. Last updated on December 30, 2022.
Nutritional information derived from a database of known generic and branded foods and ingredients and was not compiled by a registered dietitian or submitted for lab testing. It should be viewed as an approximation.
About Nikki Cervone
Nikki Cervone is an ACS Certified Cheese Professional and cheesemonger living in Pittsburgh. Nikki holds an AAS in baking/pastry from Westmoreland County Community College, a BA in Communications from Duquesne University, and an MLA in Gastronomy from Boston University. When she's not nibbling on her favorite cheeses or testing a batch of cupcakes, Nikki enjoys a healthy dose of yoga, wine, hiking, singing in the shower, and chocolate. Lots of chocolate.