Chocolate-dipped, sweet, or even sour, I love candied citrus peel.

Made at home with organic citrus, it’s a labor-intensive recipe but the results are well worth it, tucked into a box of cookies and candy for holiday gift giving.
There are a few tricks that can make the process go more smoothly, which I’ll share with you here. Plus, I’ll share my recipes for coating your preserved citrus three ways.
Ready to turn your kitchen in a candy factory? Let’s begin!
Choosing the Right Fruit
First, survey your local markets for a wide variety of citrus with firm peels that are free of blemishes.
Meyer lemons and mandarin oranges aren’t the best for this recipe, since they tend to be more thin than other types of citrus and they tear more easily. Since you’ll be boiling the peels several times, you need them to hold up to the cooking process and retain their shape for a nice presentation.
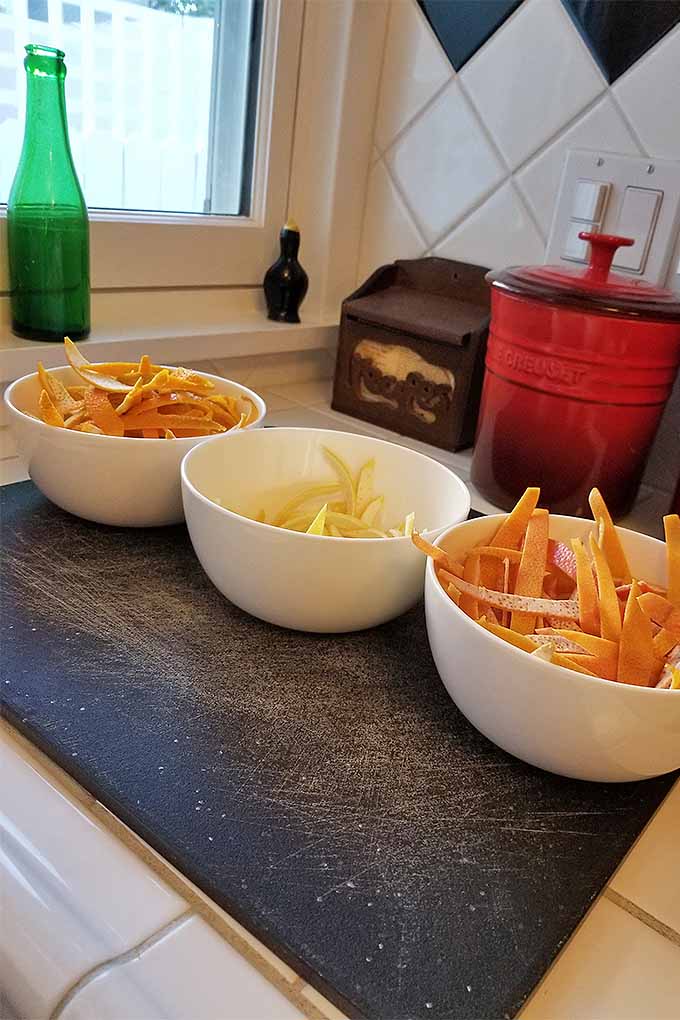
Instead, look for navel or Valencia oranges, ruby red or white grapefruit, lemons, limes, and pomelos.
I recommend organic fruit since you’ll be eating the peels. You will also need plenty of sugar to make this recipe, so be sure to stock up!
If you’re going for a mixed bag and you want to retain the purest flavor of each type of fruit, I recommend processing and boiling them in separate batches, like I’ve done here. But if you’re in a rush (or the idea of spending your evening washing multiple pots, cooling racks, and cookie sheets…) feel free to throw together a few of your favorites.
Prep Tips
Though some recipes say not to worry about it, I’ve found it’s best to remove as much of the pith as possible before starting the cooking process. After peeling and slicing, I go back over the slices slowly and carefully with a sharp knife to remove as much of the pith as I can, especially from the thicker-skinned fruits.
Some like a thicker candied peel, and the triple-boil that you’ll put them through helps to remove any bitterness from that inner white layer. But I like mine to be as pith-free as possible, so you want to carefully slice it away until you can see the pores of the citrus through a thin white layer.
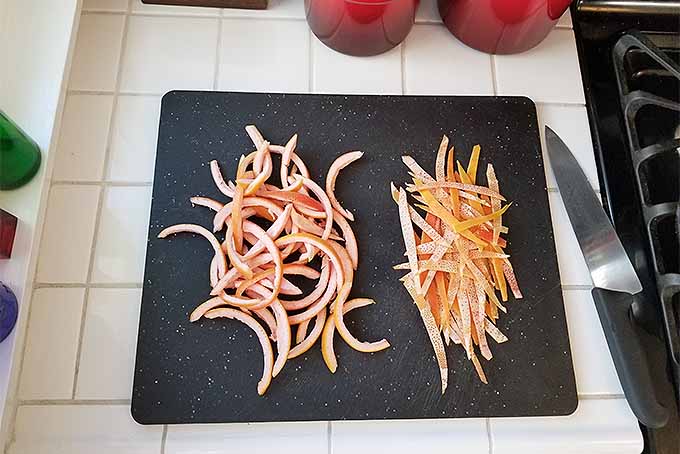
If you do choose to leave them on the thicker side, take the proportions of the fruit into account when you’re boiling them in sugar syrup. Fruits like pomelos and grapefruit tend to have a thicker peel and layer of pith, so they will require a longer simmer before becoming vibrant and translucent.
If you’re doing a mixed bag in one batch, try to cut your larger orange and grapefruit peels to be the same size as pieces cut from limes and lemons.
Through the boiling in sugar syrup phase, each type is made the same way. If you plan to chop up your finished product for use in baking, you’ll want to skip ahead here to the drying phase. These don’t need any additional coating, and they’re wonderful chopped and added to the batter when you’re making seasonal muffins and quick breads.
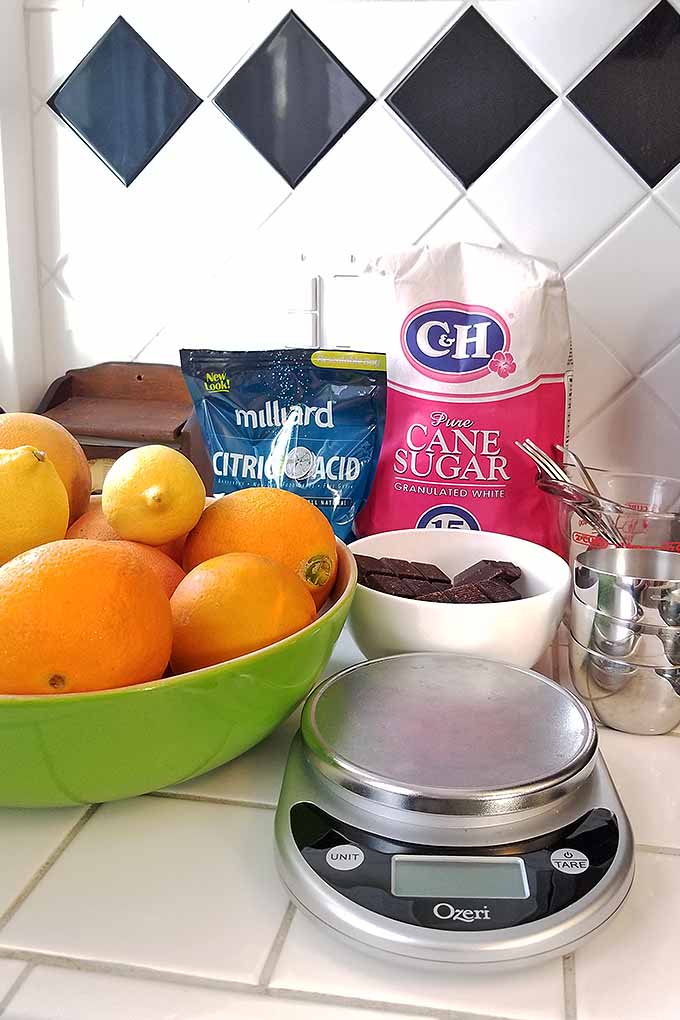
As a 90s kid myself, I’ve always loved the sweet-tart flavor of Sour Patch Kids. And the sour version of these, my friends, is exactly that: like the best homemade Sour Patch citrus-flavored candy that you’ve ever had.
The trick is mixing a few tablespoonsful of citric acid into the sugar for coating. Like magic, the mixture becomes mouth-puckeringly good. I actually had to pile the trays into the sink rather than leaving them on the counter after I was finished, because I kept going back to lick up finger-fulls of the tangy good stuff.
My personal favorite is a tart mixture of orange, grapefruit, and lemon peels, dipped in citric acid sugar. The combination of flavors and pastel sunset colors is just lovely, and the kids in the family (and kids at heart) will be thrilled to find these on the table at your next holiday get together.
These are also an excellent option for those with food allergies, since they’re gluten free, dairy free, nut free, egg free, and vegan!
Before making this recipe, cooking with citric acid (or crafting with it, for that matter) wasn’t something that I had any hands-on experience with. But this has been a Christmas season of firsts in my household. Because I knew that I loved Sour Patch Kids, so it was time to acquire some.
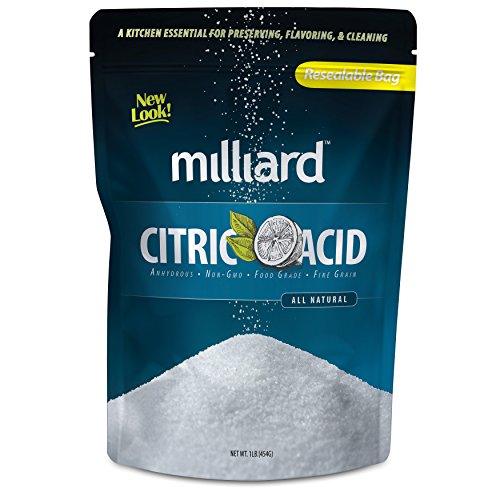
Milliard Citric Acid (1 Pound)
If you’re not familiar with cooking with citric acid, just remember to buy a product that’s marked “food grade.” I purchased a big bag of Milliard brand, conveniently available on Amazon, and perfect for candymaking, crafting, and cleaning.
If you’re stuck with leftovers at the end of holiday baking season, citric acid makes a wonderful addition to homemade bath bombs, or you can use it as a secret-weapon cleaning product around the house.
For something on the sweeter side, candied peels are also lovely dipped in plain sugar, and the process is the same. These are perfect for holiday visitors who might not be a fan of sour treats.
Or, for a bit of fun, you can make separate batches coated in sweet and sour sugar, and mix them up before putting them in your candy dish. Visually, you won’t be able to tell the difference between the two, but your tongue will notice the surprise!
Finally, the all-time classic holiday treatment for citrus peel candy creation involves allowing the peels to dry after their long soak in sugar water, and then dipping them into tempered chocolate. You’ll find my directions below for doing this as well.
The Recipe

| Servings | Prep Time |
| 20 servings | 30 minutes |
| Cook Time | Passive Time |
| 75 minutes | 4 hours |
|
|

|
Candied citrus peel is a holiday classic. We'll teach you how to make it three ways: sweet, sour, and covered in chocolate. Get the recipe now on Foodal.
|
- 1-2 pounds citrus fruit (about 4 large oranges, 3 grapefruit/pomelos, or 6 lemons/limes)
- 2 cups sugar
- 1 cup sugar
- 2 tablespoons citric acid (optional)
- 10 ounces dark or bittersweet chocolate at least 70% cocoa (optional)
- Carefully peel the citrus, remove the pith, and cut into thin, equally sized strips, about ¼” wide. Reserve the flesh/juice for another use.
- Place prepared peels in a large saucepan with 4 cups water and bring to a boil. Reduce heat and continue to cook at a low boil for 5 minutes. Drain in a colander, and return peels to the pan. Repeat this process twice, using fresh water each time.
- Add 2 cups sugar and 2 cups water to the pan, and bring peels to a boil again. Reduce heat and continue to simmer for about 45 minutes, or until the peels are translucent. The cooking time may need to be reduced or increased depending on the size of your peels.
- Drain and transfer to a wire rack set inside a baking sheet. Chill in the refrigerator for about 15 minutes.
- Whisk citric acid (if using) and white sugar together in a large bowl. Toss peels coat, and return to the wire rack, carefully arranged so they don’t stick together. Let them dry at room temperature for 1 hour.
- Toss peels in the sugar mixture again, return to the rack, and allow to dry at room temperature for 4-12 hours.
- Temper the chocolate in a double boiler, starting with about 7 ounces. Melt while stirring occasionally, then remove from heat and stir in the rest of the chocolate.
- Place back over the double boiler and stir. Remove from heat. Chocolate on a knife dipped into the melted mixture will harden quickly when it’s ready to go.
- Working quickly, dip peels halfway into the chocolate using tongs. Place on a baking sheet lined with waxed paper, and chill in the refrigerator to harden for about 15 minutes. Carefully remove from the waxed paper.
- Store in an airtight container in a cool place for up to 1 month.
Nutritional Info*
Cooking By the Numbers…
Step 1 – Prepare Your Mise En Place
First, I always like to make sure I have everything I am going to need to make my recipe at hand.
You wouldn’t believe how many times I have thought “Oh, I know I have X in the cabinet” and it turned out that I was almost completely out of cocoa powder or nutmeg or parsley. Or how many times I’ve tried to make a complicated recipe with a sink full of dishes, only to discover that the garlic press was buried deep beneath a pile of dishes.
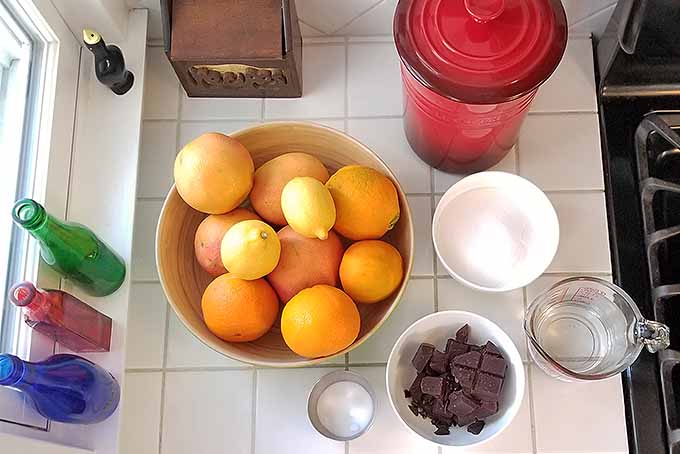
Locate your citrus, sugar, citric acid, and chocolate, and make sure you have enough. Gather a few baking sheets and wire cooling racks, a large saucepan, a colander or mesh strainer, a heat-proof bowl or double boiler and waxed paper if you will be making a chocolate coating, a liquid measuring cup, a cutting board, tongs, and a sharp chef’s knife.
Measure out the sugar, and chocolate and/or citric acid if you are using them. If you’re using a chocolate bar rather than chips, break it into pieces or chop on a cutting board with a sharp knife.
Step 2 – Peel the Citrus
Peeling the fruit doesn’t have to be difficult, but you do want to take your time with this process. Wash the fruit well and remove any stickers.
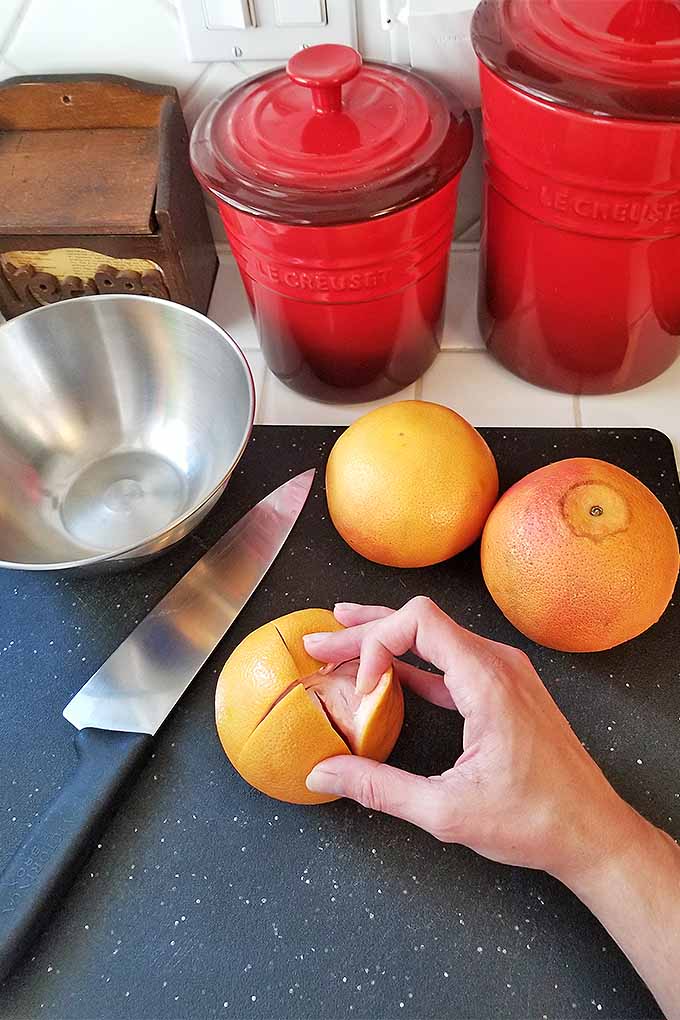
Next, I like to cut a shallow incision in the fruit all the way around, going through the peel but not the flesh, then turn it 90 degrees and cut again. This will create a plus sign at either pole of the fruit, where your incisions meet.
Reach inside at one of the poles and carefully pull the peel away from the fruit, and separate all four sections. Save the juice – it’s excellent for making cocktails while you are doing your holiday candy prep and baking, or you can save it in the fridge for brunch tomorrow morning.
Step 3 – Slice the Citrus and Remove Pith
At this point, you may choose to remove as much pith as possible with a metal spoon. I’ve tried this method, and I find that it can be helpful with pithier fruits, but it’s generally not the best way to go since you risk tearing that precious skin.
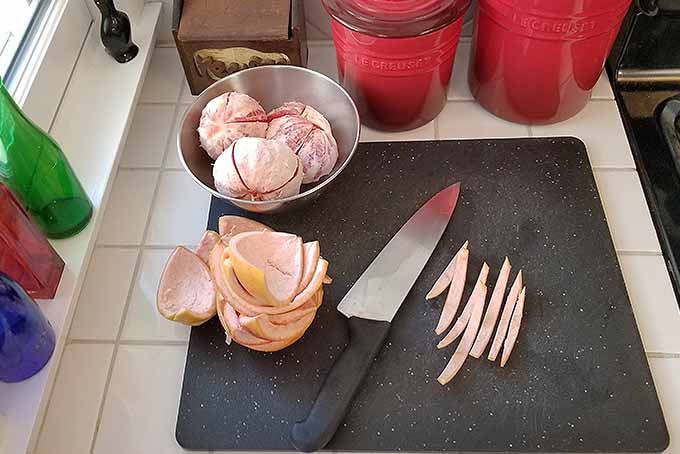
Instead, I prefer to slice my peels first. Using a sharp chef’s knife on a sturdy cutting board, slice lengthwise into ¼-inch strips. These don’t need to be perfectly uniform, but it does help to create strips that are close to equal in size so they will cook and dry evenly.
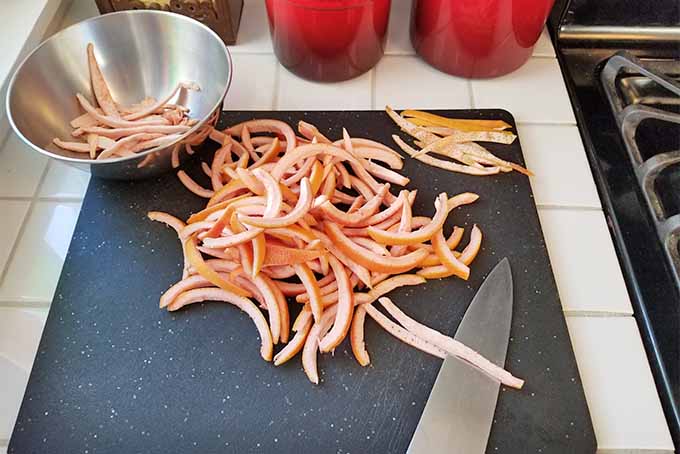
To remove the pith, place a strip skin side down on your cutting board, and hold your knife parallel to the board. Carefully slice away the pith as close to the skin as possible without cutting through it. You should be able to see the pores of the citrus peel through what’s left of the pith.
You’ll be doing this process over and over again, and your careful work may veer in a sloppier direction when you’re eager to hurry it up. Slow your roll! It’s easy to slice through a finger when you’re doing this type of work.
Step 3 – Boil Three Times
Place the prepared peels in a saucepan with 4 cups of water, and bring to a boil. Turn the heat down a bit and continue to cook for 5 minutes. You want to keep the fruit boiling, but not at a rolling boil. If you notice any pieces sticking out above the water, give it a stir to keep them submerged.
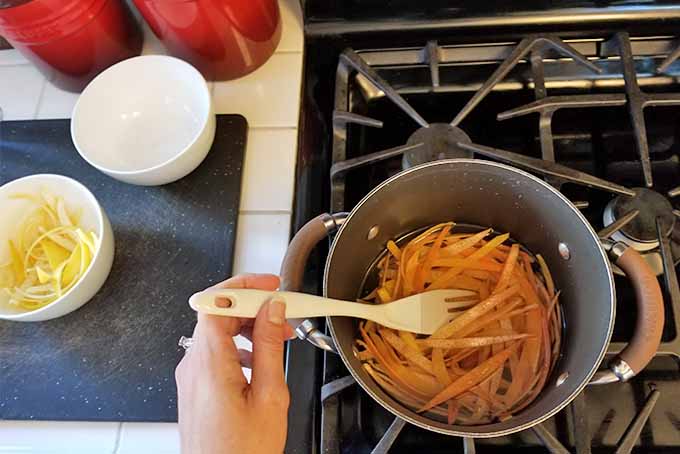
Drain and discard the water. I like to use a metal colander and strain it directly into the sink.
Return the peels to the pan and add another 4 cups of water. Repeat the process of boiling, cooking for 5 minutes, and discarding the water.
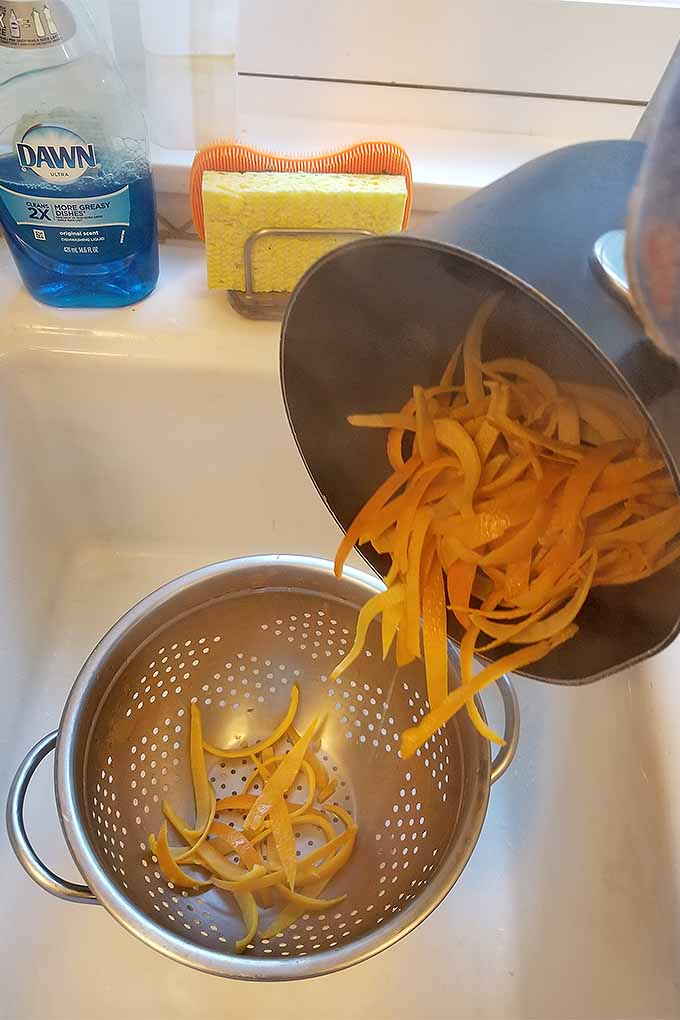
Repeat this process one more time. I do this three times in total since it’s said to remove the bitterness from any pith that is left. I can’t confirm whether skipping this step has any great effect since I haven’t tried it myself, but it definitely starts the cooking process and seems to be worth it.
Step 4 – Boil in Sugar Syrup
Return the peels to the pan, and add 2 cups of water and 2 cups of sugar.
Bring to a boil, and reduce the heat to keep the liquid at a high simmer. The sugar will dissolve and the solution will reduce, forming a sticky syrup, but you do not want to create a caramel here. There should be no browning involved.
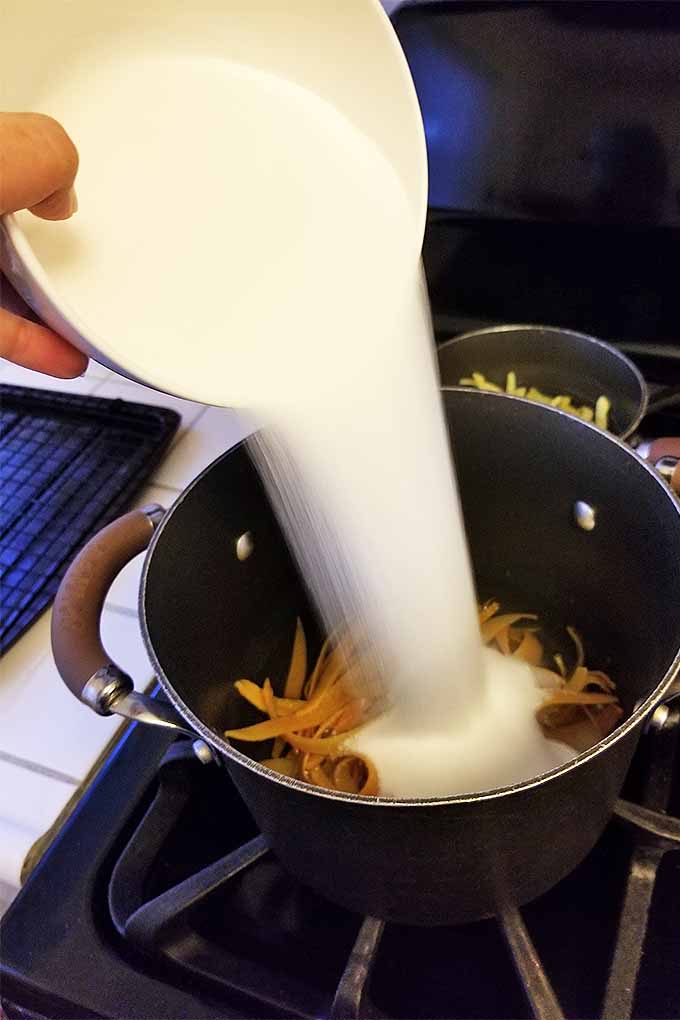
Check on the progress of your future candy every ten minutes or so, and adjust the temperature as needed. Make sure all of the pieces stay submerged beneath the syrup as they cook. If the liquid looks like it’s boiling away too quickly, you can put a lid on your pot.
Continue to cook for about 45 minutes, or until the peels are vibrantly colored and translucent. The cooking time here varies, depending on the size and thickness of the peels that you are using. Along with preventing any crossover of flavors, this is why I prefer to cook different types of citrus separately.
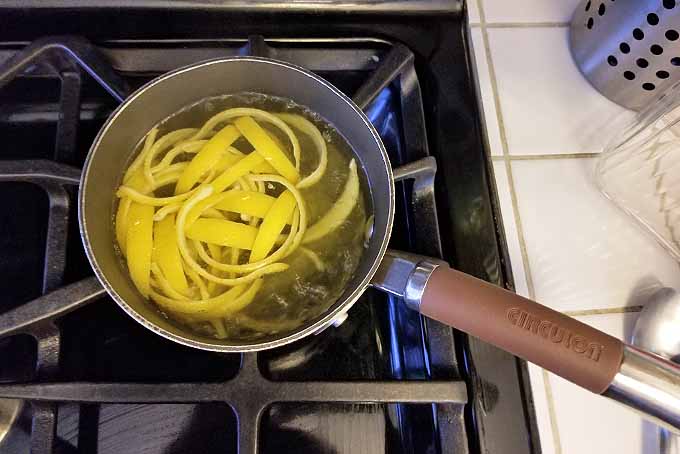
Removing one piece with a pair of tongs and looking through it can help – sometimes it can be difficult to tell if they are really translucent when they are still in the pot. If they aren’t quite translucent, continue to cook in 5-minute increments until you’re there.
They might be a bit curly when they’re done, depending on how thinly you cut your strips.
Carefully drain the peels, discarding the syrup. Again, care is important here because that hot syrup can cause nasty burns. Transfer to a wire rack set into a baking sheet in a single layer, using tongs or a fork. If you need to use two trays, go for it.
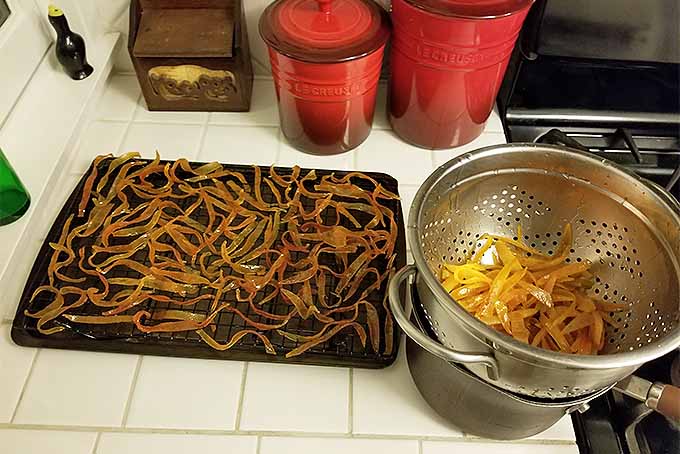
Chill in the refrigerator for 15 minutes.
Some of you might be thinking, “But wait! That citrus-infused simple syrup is probably amazing!” Feel free to save it for another use if you like.
Step 5 – Coat in Sugar, Sour Sugar, or Chocolate
This is my favorite part! And this is where the “3 ways” come in. The directions for each variety vary as follows:
Sweet
For a sweet batch, place 1 cup of sugar in a large bowl. Remove the tray from the refrigerator and toss the candied fruit in the sugar to coat.
Place back on your wire rack in a single layer to dry. I like mine to be relatively flat, and they won’t dry well if they are bent in half or stuck together. This can be a bit of a painstaking process, so I like to use tongs to do this.
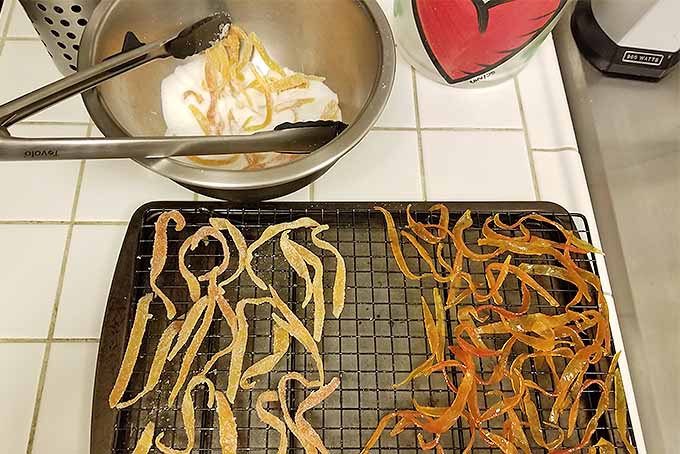
Set aside for 1 hour. Then return the fruit to the bowl and toss in sugar to coat once more. Place back on the wire rack in a single layer, and allow to dry completely in a cool place. This can take anywhere from 4 to 12 hours, depending on the liquid content of the fruit as well as the temperature and humidity of your home.
If you have the space, my advice is to remove your tray from the kitchen. I set it in the dining room away from the heating vent, and loosely cover it with foil overnight. My cooling racks are on legs, so this allows airflow beneath and around the candy while keeping them protected from dust or anything else that might fall onto them.
Sour
To make a sour version, whisk together 1 cup of sugar with 2 tablespoons of citric acid in a large bowl.
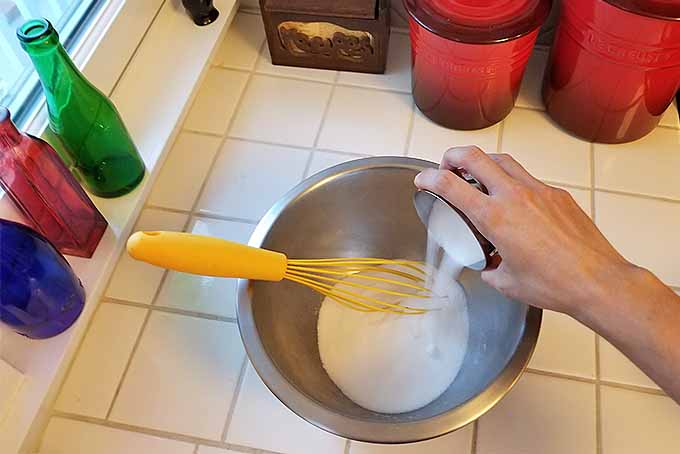
If you’re not particularly daring in the sour department, keep in mind that the peels themselves will be a bit tart to begin with. Reduce the citric acid content to taste, if you like.
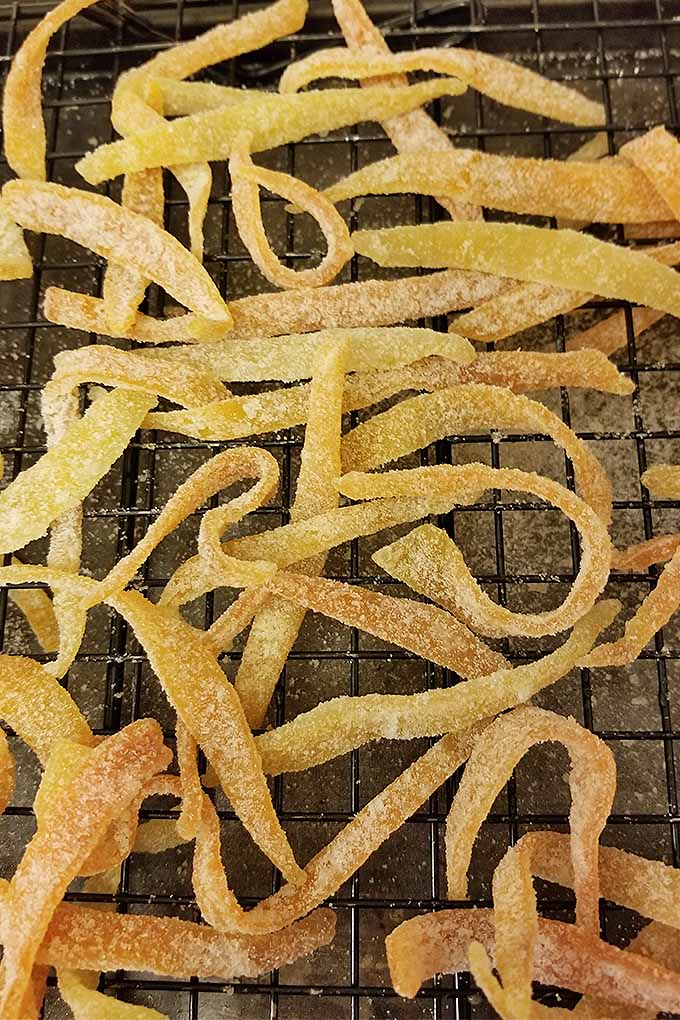
As above, toss the peels in sour sugar coating, remove to a wire rack, and set aside for one hour. Toss again, remove to a wire rack, and allow to dry completely for 4 to 12 hours.
Chocolate
A more traditional version, making your coating for this type will involve tempering chocolate. If you haven’t done this before or if you have any mishaps, please consult our guide to fixing chocolate that has seized.
Fill a saucepan with a few inches of water, and bring to boil. Reduce heat so the water is simmering.
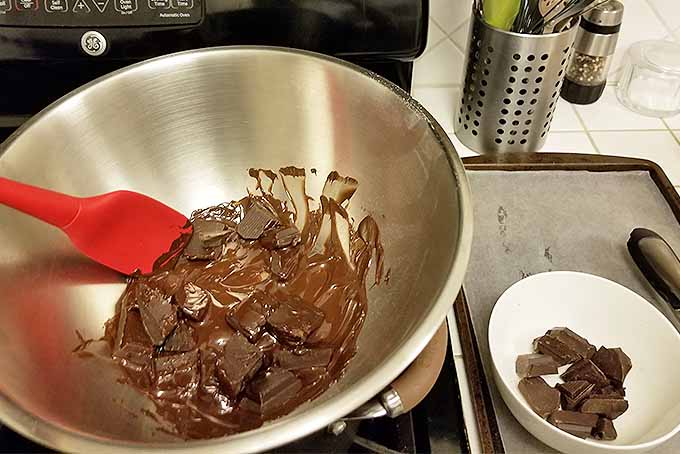
Place about 7 ounces of the chocolate in the top of a double boiler or a heatproof bowl. Stirring occasionally with a heatproof spatula, melt the chocolate. Remove from the heat and stir in the rest. It should be completely melted and glossy. If it’s not quite there, return to the heat briefly and stir.
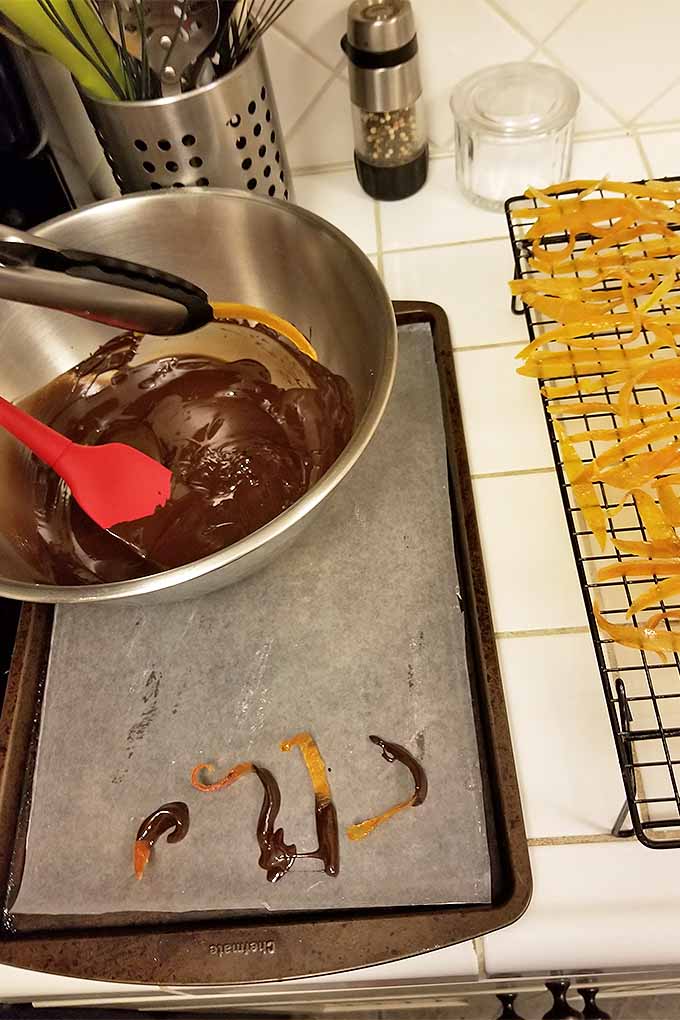
Working as quickly as you can, dip your candied peels about halfway into the chocolate, then place on a waxed paper lined baking sheet to dry. If you like, you can dunk your chocolate completely, but I find it’s difficult to separate the individual pieces using this method, and it doesn’t look as nice.
If the chocolate begins to harden as you work, briefly place it back on the heat and stir before you go back to coating.
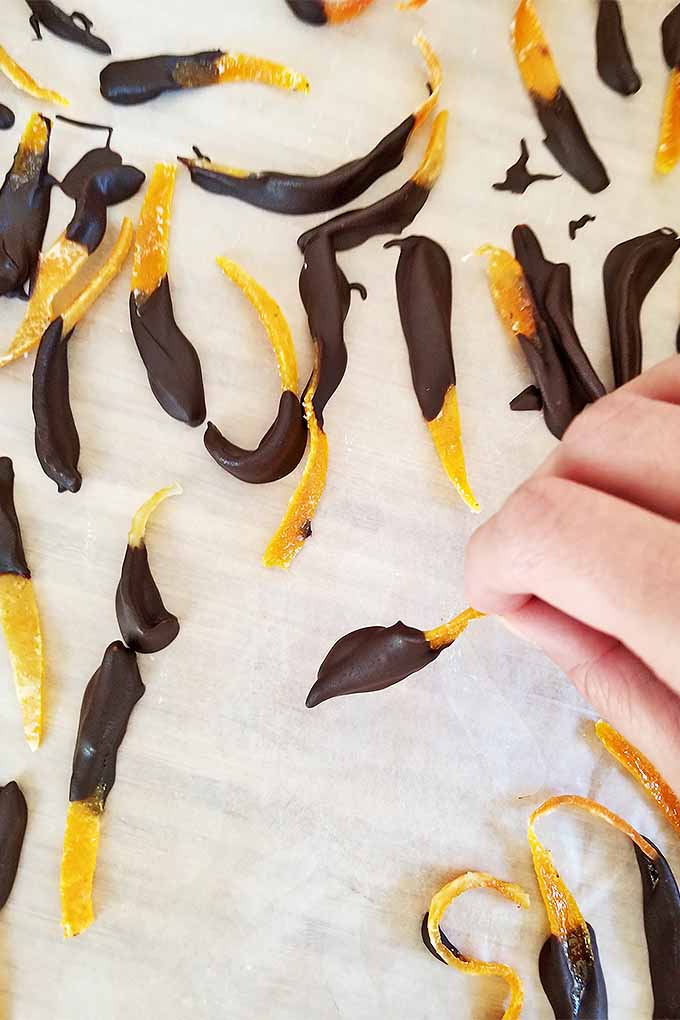
Place the baking sheet of candy in the fridge for 15 minutes to 1 hour. Depending on the temperature of your refrigerator, this should be enough time for the chocolate to harden. Allow to dry overnight for 4 to 12 hours at room temperature, then carefully peel the candies off of the waxed paper.
Time to Pucker Up and Let Your Sweet Tooth Sing!
When your candy is ready, you can serve it right away, or pack it up to distribute to friends and loved ones. If you want to keep the flavors separate, muffin tin liners arranged in the bottom of a cookie tin work well, or you can scatter a few among your other holiday treats on a dessert platter.
They’ll keep for up to 1 month, stored in a cool, dry place in an airtight container. Refrigerator storage isn’t a good idea with this confection, since the moist air will add moisture to your treats.

If you want to try your hand at some more Christmas confectionary, check out our recipes for hazelnut chocolate truffles and peppermint marshmallows.
And if you try this recipe, don’t forget to tell us about your experience in the comments. Happy holidays!
Don’t forget to Pin It!

Photos by Allison Sidhu, © Ask the Experts, LLC. ALL RIGHTS RESERVED. See our TOS for more details. Product photo by Milliard.
*Nutritional information derived from a database of known generic and branded foods and ingredients and was not compiled by a registered dietitian or submitted for lab testing. It should be viewed as an approximation.
About Allison Sidhu
Allison M. Sidhu is a culinary enthusiast from southeastern Pennsylvania who has returned to Philly after a seven-year sojourn to sunny LA. She loves exploring the local restaurant and bar scene with her best buds. She holds a BA in English literature from Swarthmore College and an MA in gastronomy from Boston University. When she’s not in the kitchen whipping up something tasty (or listening to the latest food podcasts while she does the dishes!) you’ll probably find Allison tapping away at her keyboard, chilling in the garden, curled up with a good book (or ready to dominate with controller in hand in front of the latest video game) on the couch, or devouring a dollar dog and crab fries at the Phillies game.



Grandma made these grapefruit peel candies every year. Now I have started to carry on the tradition. I like the options you gave for different flavors. I will try them!
As to the nutritional information, assuming two grapefruits, how many sticks for the calories/serving? I also dipped mine in bittersweet chocolate. To die for!
Thank you for your response
Ruth
I hope you enjoy these, Ruth! The nutritional information that we provide is just an estimate. Total calories will vary depending on the coating used, and the size of the pieces of peel.