
Everyone knows of Marie Antoinette’s famous words ushering in the French revolution. Upon hearing that the people were running out of bread, it’s said she retorted, “Well then, let them eat cake!”
But it turns out this story has been passed down just a little bit incorrectly.
The princess in question was actually Maria Theresa, who ruled a few generations before Antoinette. And the phrase was actually: “Let them eat brioche!”
It turns out her intentions were not cruel at all.
The sweet bread was considered blessed in the Catholic Church, thus Theresa was calling on the Church to feed the poor.
But this misinterpretation and misattribution of the story caused a ruckus early on, feeding national hatred for Marie Antoinette.
What has not been passed down in error, however, is the technique for making this soft, sweet dough. And it’s useful for making a range of pastries: from sandwich loaves to doughnuts, hand pies, and more.
The Science Stuff
Brioche is an enriched bread, meaning the basic bread ingredients – flour, water, salt, and yeast – have been enriched with butter, eggs, and sugar. These ingredients give the dough richness in flavor, tenderness in chew, and a soft, sweet outer crust.

America’s master bread baker Peter Reinhart explains that historically there have been two different types of brioche: poor man’s brioche and rich man’s brioche. The primary difference between the two is the ratio of butter to flour in a given recipe.
The Bread Baker’s Apprentice: Mastering the Art of Extraordinary Bread
For more on this topic, check out Reinhart’s wonderful book The Bread Baker’s Apprentice, available on Amazon.
These terms used to refer to the difference between the sweet pastry-like bread served in the homes of the French elite, versus the leaner loaves savored by the poor.
Today many bakers will make just a single recipe and utilize it for a large variety of purposes in the bakeshop – a medium fat-to-flour ratio works well for both rich pastries and sandwich loaves.
What Can It Do?
Brioche can be used in such a wide variety of applications. The butter gives the chilled dough an almost claylike texture, making it easy to sculpt and shape into your desired treat.
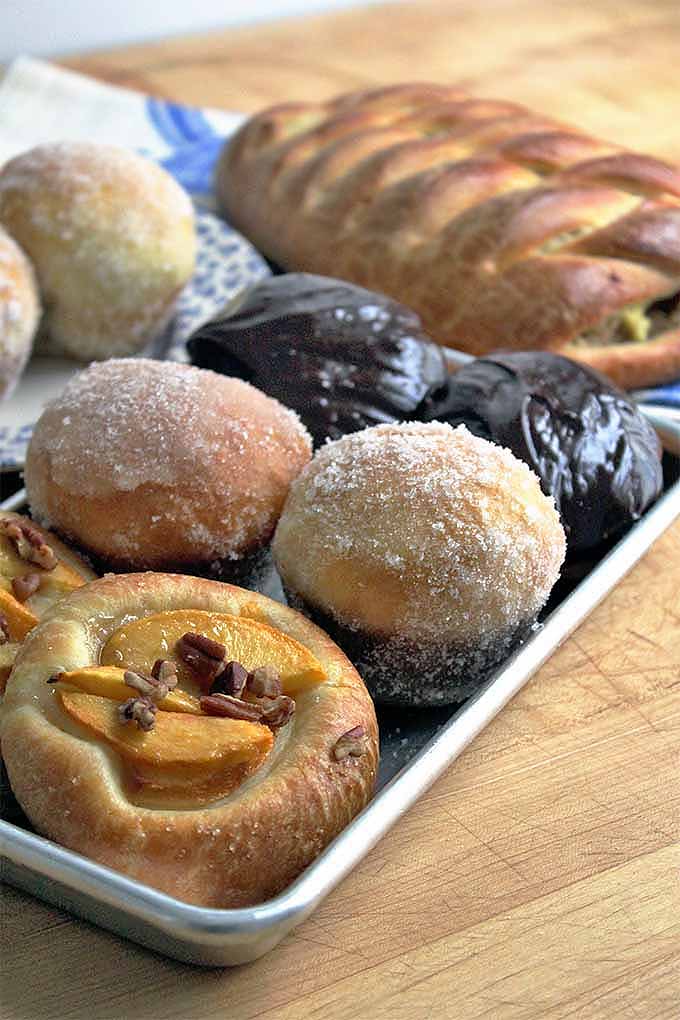
The classic serving is the brioche à tête, a small, round roll baked in a fluted dish with a tiny head (or tête) on top. It is often sprinkled with pearl sugar, lending it a sweet crunch.
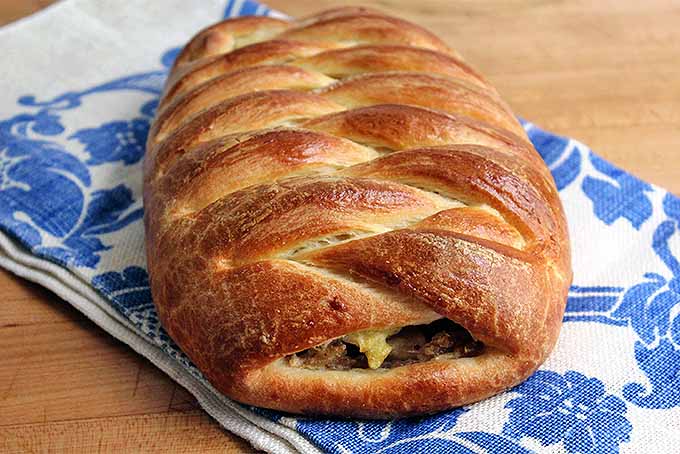
But brioche can be used for myriad purposes – from filled braids and hand pies to doughnuts and cinnamon rolls. Plus dinner rolls as a side dish, sandwich loaves for hearty sandwiches like a Monte Cristo… the list goes on.
Brioche is only limited by your own creativity!
Classic Brioche Dough
- Total Time: 15 hours, 0 minutes
- Yield: 1 brioche loaf 1x
Description
Learn all you need to know to create tender, buttery brioche dough. Turn it into sandwich loaves, doughnuts, hand pies, and more.
Ingredients
For the Sponge:
- 1/3 cup whole milk
- 2 teaspoons instant yeast
- 1 teaspoon granulated sugar
- 1/2 cup all-purpose flour, divided
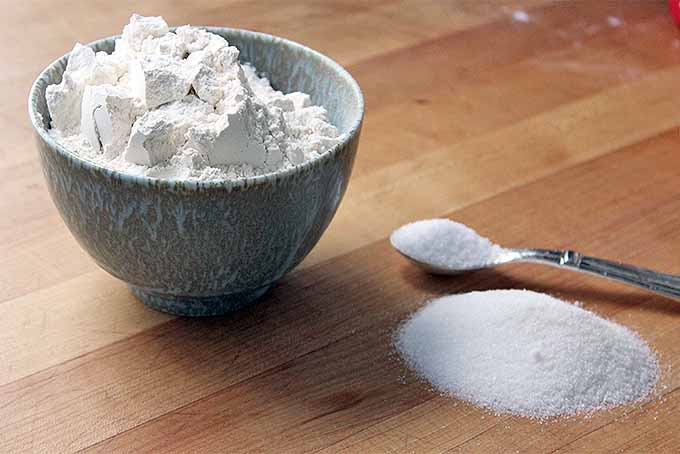
For the Dough:
- 2 1/2 cups all-purpose flour
- 3 tablespoons granulated sugar
- 1 1/2 teaspoons salt
- 5 large eggs
- 1 cup (2 sticks) unsalted butter, room temperature and cut into small pieces
Instructions
To Make the Sponge:
- Microwave milk for 30 seconds, until it is hot. Let cool until to 100°F, or until it is just warm to the touch.
- Pour into the bowl of a stand mixer fitted with the whisk attachment, and add the sugar, instant yeast, and 1/4 cup flour. Mix on medium-low speed until well-combined.
- Sprinkle the remaining flour on top.
- Set aside in a warm place to proof for 30 minutes.
To Make the Dough:
- In a separate bowl, mix together the flour, sugar, and salt for the dough. When the sponge has grown so that flour on top has developed visible cracks, pour the flour mixture over the sponge. Add eggs.
- Mix with a dough hook on medium speed for 15 minutes, or until the mixture is smooth and supple, and can pass a windowpane test.
- Add the butter to the dough in three parts while mixing on medium speed, fully incorporating it between each addition. Scrape down the sides of the bowl if needed.
- Turn the mixer up to medium-high and mix for 3 minutes.
- Transfer the dough to a lightly floured container airtight container with a lid. Allow to proof at room temperature for 30 minutes.
- Keeping the dough inside the container, fold it in half vertically, then horizontally. Reseal the lid, and place in the fridge to chill for 12 hours, or overnight.
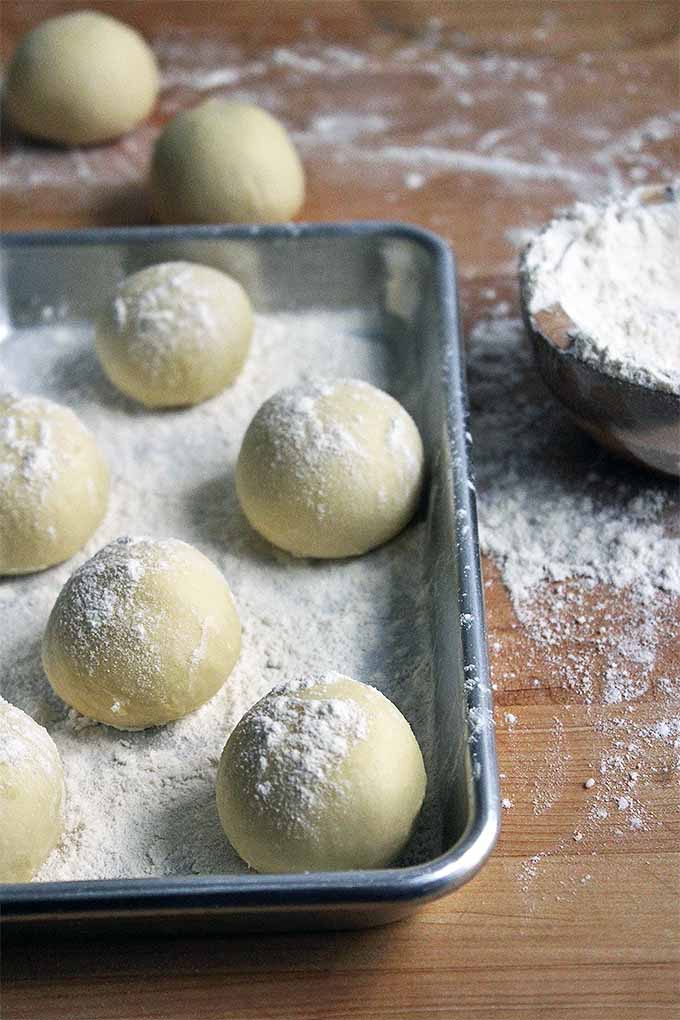
- Remove from the refrigerator and shape the dough as desired, on a well-floured surface.
- Let proof at room temperature until the dough slowly springs back when pressed gently.
- Bake or fry according to the recipe instructions for your desired treat. A general guide that you may follow is to bake at 350°F until the loaf’s internal temperature reaches 180°F.
- Prep Time: 1 hour
- Cook Time: 30 minutes
- Category: Brioche
- Method: Baking
- Cuisine: French
Cooking By the Numbers…
Step 1 – Mix Sponge
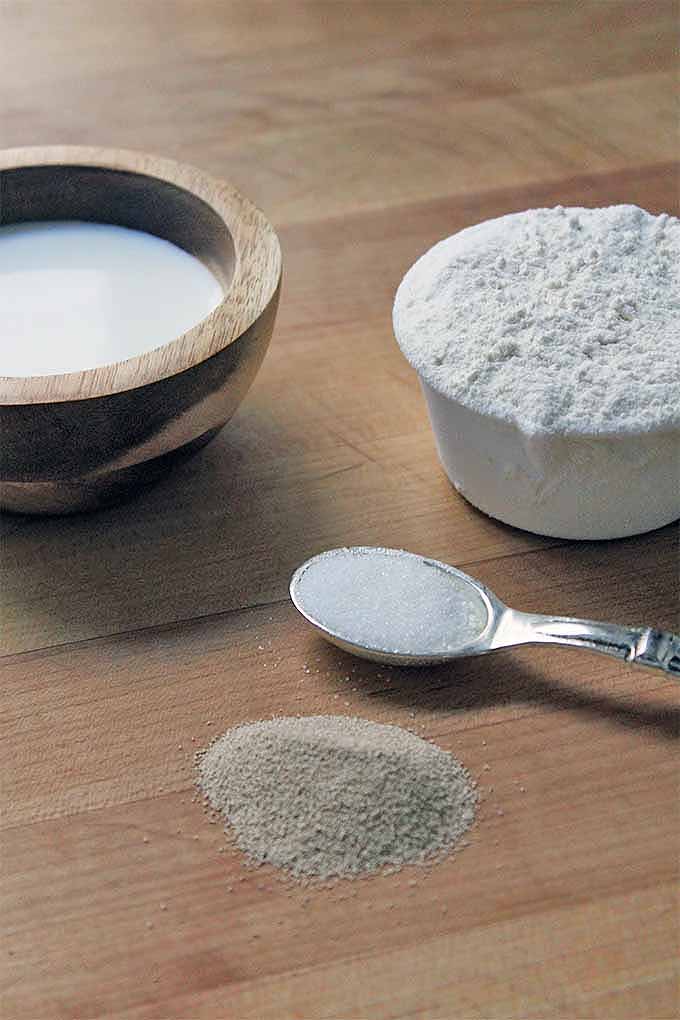
Microwave the milk for 30 seconds, until it is quite hot to the touch. This kills the enzymes in milk that prevent yeast activity. It will need to cool back down to 100°F (just about body temperature) before moving on to the next step.
Once the milk has cooled, add it to the bowl of a stand mixer with the remaining sponge ingredients: granulated sugar, instant yeast, and 1/4 cup of all-purpose flour. Mix to combine with the whisk or paddle attachment. This will form a thick paste.
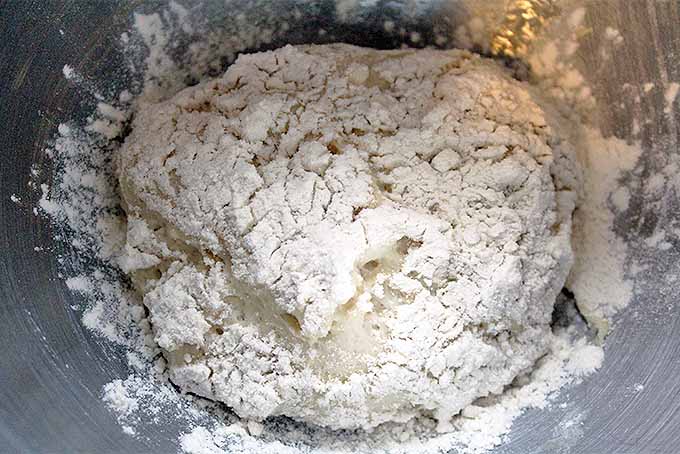
Sprinkle the top of this mixture with the remaining 1/4 cup of flour.
Let this sponge sit in a warm place for about 30 minutes to proof. This process helps to wake up the yeast, and adds flavor to the dough. It is particularly useful in making recipes with a high fat content.
As the sponge proofs, it will begin to rise, forming cracks in the flour coating on top. Once large cracks begin to form, like what you see pictured below, the sponge is ready to go.
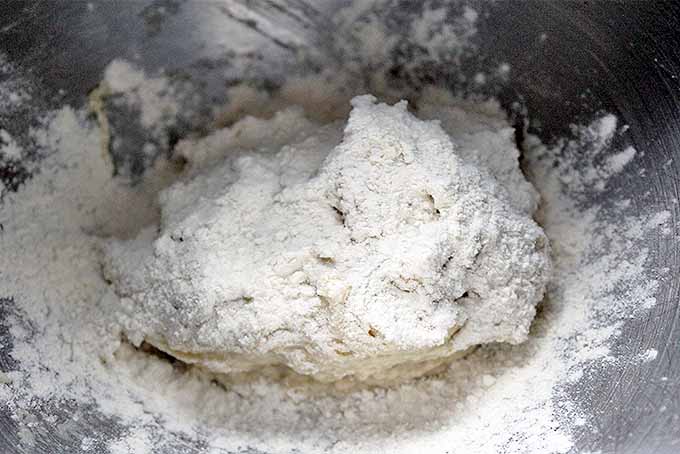
Step 2 – Mix Dough
While the sponge proofs, mix together the remaining flour, sugar, and salt for the dough. Once the sponge is ready, pour these dry ingredients over the sponge, then add the eggs.
I like to remember the order of operations here by reminding myself that it’s a wet/dry sandwich: the wet sponge, then the dry flour, then the wet eggs.
Combining the ingredients in this order helps to incorporate them thoroughly.
Mix with a hook attachment on medium speed for 15 minutes. Brioche can really take a good beating when it comes to kneading, so a higher mixing speed is helpful here.
Start a little slower to avoid covering your countertops with flour!
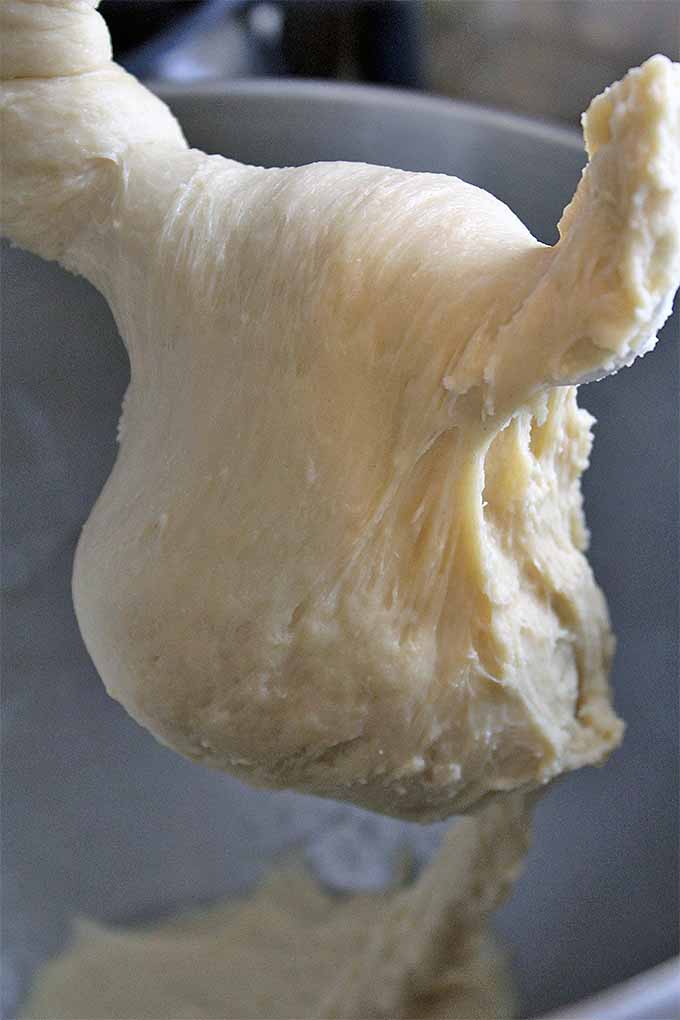
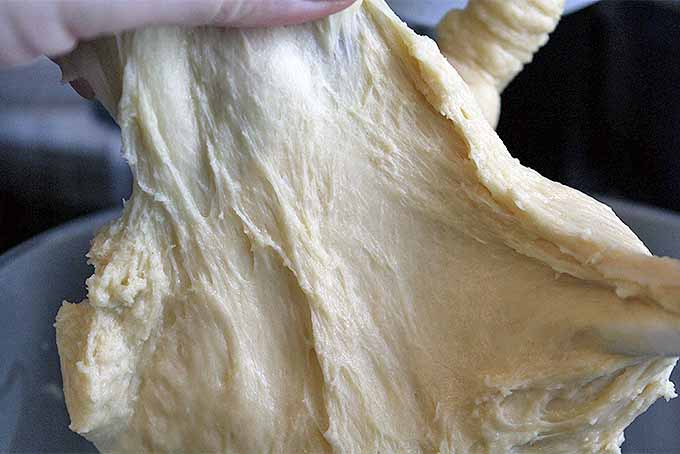
Work the dough until the gluten has fully formed – if you pinch off a piece and slowly stretch it, it should become thin enough to see through. This is what bakers call the “windowpane test.”
The gluten will not develop any further after the butter is added to the dough, so it vital that it be fully formed during this process.
Step 3 – Add Fat
Once the dough passes the windowpane test, begin adding the small pieces of room temperature butter.
Add about 1/3 of the butter at a time, fully incorporating it into the dough after each addition.
It might look like a gloopy mess at first, as the butter smears around the bowl. But as the friction of the mixer warms up the fat, it will begin to emulsify.
If the butter starts to clump up around the top of the mixing bowl, turn your mixer off and use a spatula or a bowl scraper to clear it off the sides, and push the dough back down towards the center of the bowl before you continue mixing.
Step 4 – Mix
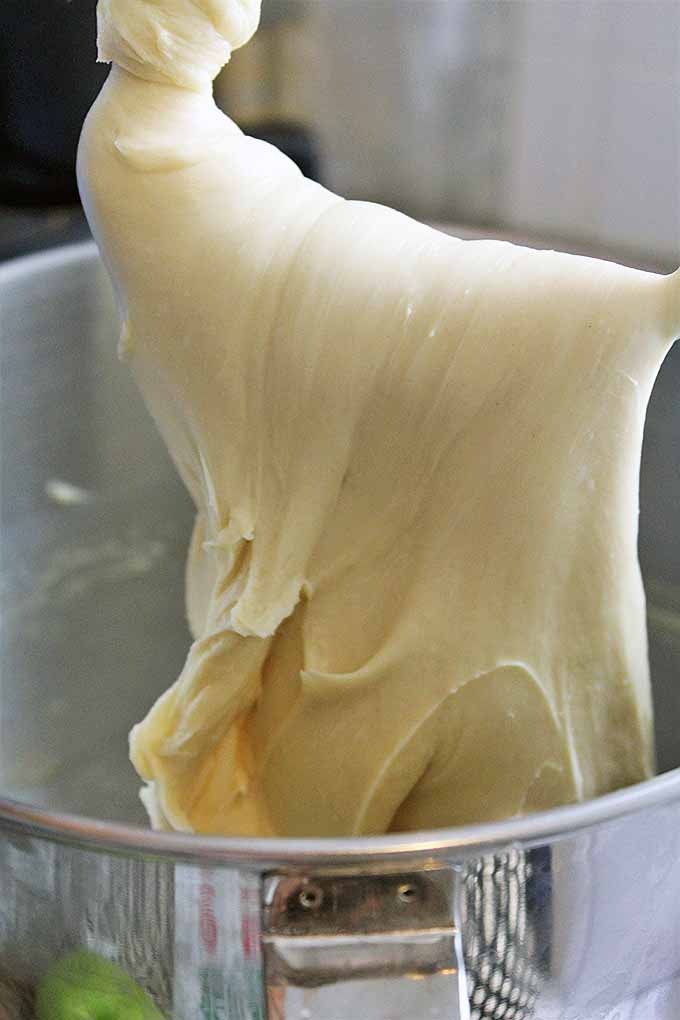
Once the butter appears to be fully incorporated, turn the mixer up to medium-high speed for three minutes. This will ensure that all of the butter is thoroughly worked into the dough.
This step is important because any hidden pockets of fat will create clumps in the dough when it is chilled.
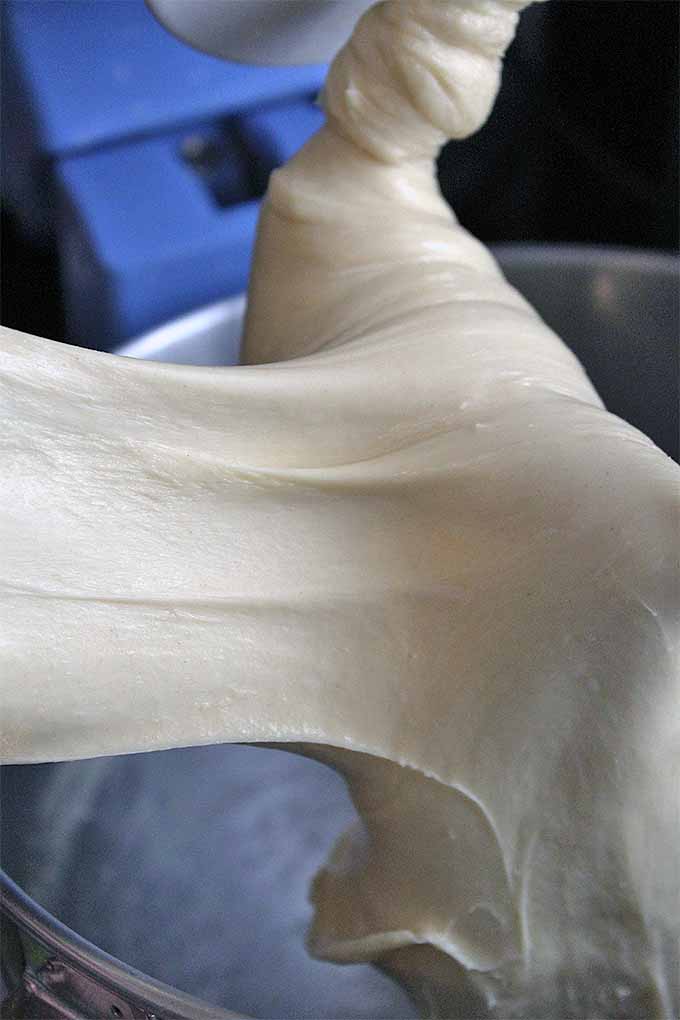
Brioche is very sturdy, so just as in step two, there is no need to fear a strong mix here.
Step 5 – Pour and Proof
Prepare a container for the bulk fermentation of the dough. I like to use a rectangular, resealable, airtight storage container that has been dusted generously with flour.
Use a container that is big enough to contain at least twice the volume of your dough, as it will nearly double in size during this phase.
Pour the dough into the prepared container. It should be very thin at this stage, almost liquid.
Let the sealed container sit at room temperature for half an hour.
Step 6 – Fold and Chill
Now it’s time to give the dough a final fold before placing it in the refrigerator to chill overnight.
Fold it in half first vertically, then horizontally. The flour in the bottom of the container should make it easy to pick up the dough and fold it.
After folding, seal the lid again or wrap the container tightly with plastic wrap. Place it in the fridge for at least 12 hours, or overnight.
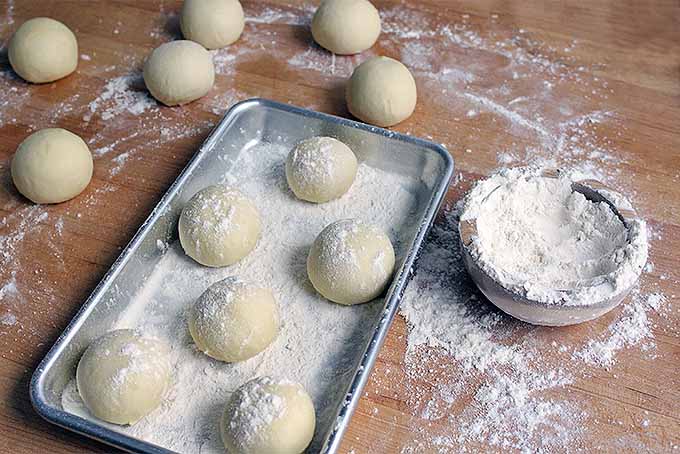
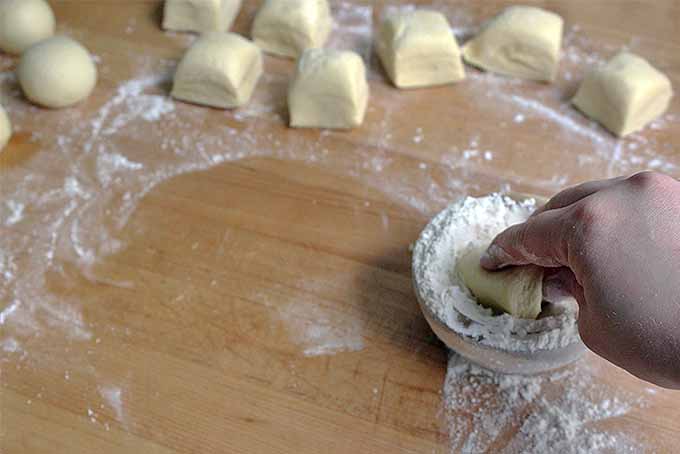
Step 7 – Shape
This is the point when you are able to get creative with your treats.
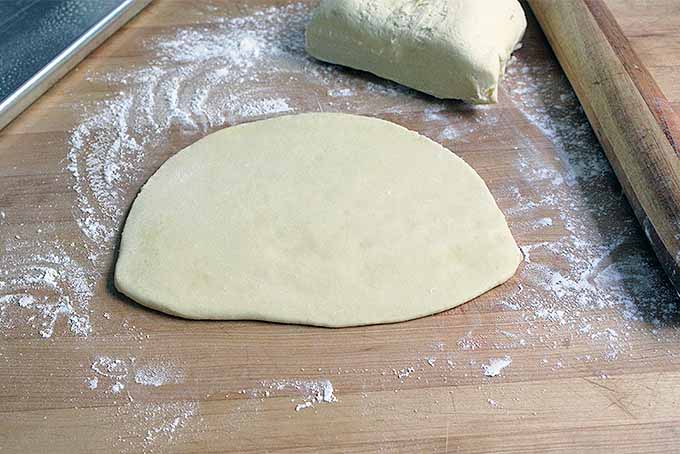
Hoping to make doughnuts? Shape the dough into two-ounce pieces for frying.
Planning on baking a large loaf? Drop the dough onto the counter and shape it into loaf form.
For some more ideas, be sure to check out our guide to shaping, as well as these delicious brioche-based recipes:
- Berliner Jelly-Filled Doughnuts
- Baked Doughnuts
- Brown Butter Dinner Rolls
- Cinnamon Rolls
- Chocolate Cinnamon Babka
Step 8 – Proof
Once you’ve shaped your dough, cover it lightly with plastic wrap and let it sit at room temperature to proof.
It’s better to give brioche a longer proof at a slightly cooler temperature than it is to risk letting it get too warm.
If the temperature in your kitchen is too high, the butter will begin to melt, hurting the beautiful shaping you just completed.
The shaped dough is ready to bake when you can touch the edge lightly with your fingertip and it slowly returns to its original form.
Step 9 – Bake or Fry
After it’s been proofed, your dough is ready to go. If you’re making doughnuts, they can be dropped into the fryer.
If you are making a loaf, hand pies, rolls, or some other kind of baked bread, bake according to the recipe instructions specific to your treat.
A good general guide is to brush the top with a whisked egg wash and bake at 350°F until the internal temperature reads 180°F on a kitchen thermometer.
Bake a Better Brioche
Are you feeling just slightly intimidated? Don’t be!
If you’re ready to bake brioche goods – or just about any kind of bread – don’t forget to arm yourself with the most indispensable baking tools for any baker.
Once you get a feel for things, brioche will become your new best friend. You’ll be mixing up a batch on the regular, whenever you’ve got a hankering for a special breakfast treat or snack.
Do you have a favorite way to enjoy brioche, or a special memory of your favorite buttery French treat? Let us know in the comments below!
And don’t forget to to check out all of our bread recipes and our baking tips now!
Photos by Kendall Vanderslice, © Ask the Experts, LLC. ALL RIGHTS RESERVED. See our TOS for more details. Originally published on November 9, 2016. Last updated: April 5, 2022 at 13:53 pm. With additional writing and editing by Allison Sidhu.
About Kendall Vanderslice
Kendall’s love of food has taken her around the world. From baking muffins on a ship in West Africa and milking cows with Tanzanian Maasai, to hunting down the finest apfelstrudel in Austria, she continually seeks to understand the global impact of food. Kendall holds a BA in Anthropology from Wheaton College and an MLA in Gastronomy from Boston University, and has worked in the pastry departments of many of Boston’s top kitchens. Based in Somerville, Massachusetts, Kendall helps to run a small community supported bread bakery and writes about the intersection of food, faith, and culture on her personal blog, A Vanderslice of the Sweet Life.


I tried this recipe and it was a total fail… Everything was going fine up until I added the eggs, then it became a disaster. I added the eggs and the mixture was very wet and it wasn’t able to be stretched, no matter how long I mixed it which was far longer than 15 minutes. So i kept adding more flour to get it to a more doughy consistency where it could be pinched and stretched, but it never was able to pass the windowpane test.
Does the size of the eggs used matter? I used large eggs because that’s what I had, but maybe I shouldve used regular size since the recipe doesnt specify.
I think I also proofed it too long, and the butter melted in the mixture. I baked half of the dough in a loaf pan at 400 for about 30 mins, and its cooling now so we’ll see how it came out. The other half I tried to fry as donuts but they mostly fell apart in the oil… I know what I did wrong and next time I make this recipe I’ll hopefully get it right.
Just sliced into the “loaf”… its like cornbread. No gluten strands at all. It has the texture of a quickbread… Im not surprised at this. It would not stretch without breaking during the mixing step, before adding the butter and I mixed it on the medium setting of my Kitchenaid for at least 20 minutes, and even tried kneading it by hand in the bowl for a bit. And Im sure I used all purpose wheat flour, although it was not top quality stuff. Im thinking the issue is the use of large eggs. I did everything else according to the recipe. What do you think?
Hello Tom! I see here that you never got a response back to your comment, and it’s been a little over 8 months. I personally apologise for that, although it was not me you left the inquiry for.
I’m a cook and I’m interested in making bread as gourmet items on my menu. I love brioche burger buns and want them to be the flagship product for a restaurant I’m opening in Delaware; hence the reason I’m here.
I’m not sure I have a solution, but I do have a suggestion. Most recipes for breads and most baked goods call for bleached, refined ingredients such as white flour, granulated sugar, table salt, and vegetable oils (which I despise ???? but that’s the way of our world). There’s a reason for that, but that’s a story for another day.
I noticed that you used wheat flour which is lovely, but it’s likely what’s hurting your recipes’ end (or mid) results. I’m sure you’ve noticed the predominant difference between wheat and white flour; the size of the granules. Wheat flour (although it may not be “unrefined”) has granules a bit bigger than bleached flour.
This is likely the reason your sponge isn’t binding well with the rest of your ingredients to start preparing your dough. The more moisture you add to wheat flour the more it will separate depending on your binding agent. Hence, I suggest you try this recipe out again using refined ingredients, the regular (or small to medium) eggs and I’m sure you’ll see a more cohesive product develop.
As far as the quality of ingredients goes, just stick to household or reputable name brands and you should be good. I myself will be trying out this recipe and report my findings, so wish me luck!
Best wishes!
Hey, great recipe there. I was wondering, can i use bread flour as it has more protein, instead of all purpose flour for this recipe?
Thanks
The higher protein content of bread flour will result in a higher rise, so you’ll want to be careful to avoid overproofing your dough. Though your loaves will more easily maintain their shape, using bread flour to make brioche rather than all-purpose tends to result in a tougher consistency, so this isn’t what we recommend. You might want to try experimenting with half AP and half bread flour to start. Please let us know how it turns out!
You can read more about the different types of flour used in baking here.
The instructions do not say to mix the initial flour into the wet mix, even the pic doesn’t help. Is the small amount of flour to be mixed into the liquid or poured over it and left til the rest of the flour is mixed to form the dough? Thanks
I’m sorry for any confusion Judy, but I’m not sure what you mean. Step 1 on the recipe card says to add the warmed milk to the bowl of a stand mixer and combine it with the sugar, instant yeast, and 1/4 cup flour until well-combined. What you’ve created as this point is called the sponge, or what you refer to as the “wet mix.” Sprinkle the remaining 1/4 cup of flour for the sponge on top, then set is aside to proof. Apologies if the wording to describe this was unclear! The recipe has been updated.
Please let us know if you have any more questions!
The reason I give this recipe a full 5 stars is this:
I am not a kitchen person. I rarely cook. I was determined to do brioche cuz I simply love it.
I tried 3 different brioche recipes before this 1.. ALL were FAILS.
The steps are very clear and the pictures help a lot.
It also helped when followed some youtube videos to clear up some brioche-making mysteries.
Now I’m proud to say I’ve made SO MANY I’ve gotten used to it 😉
Thank you Kendall
total fail…..this recipe makes such a wet dough….I looked at other brioche recipes and they use only 3 eggs and much less butter. Don’t waste your ingredients. Use the King Arthur recipe.
We’re so sorry our recipe did not work out for you, Colleen! Yes, we do include a high ratio of eggs and butter to dry ingredients, which is common for a brioche-style bread. And with these higher fat and liquid contents, there is a greater need to pay incredibly close attention to measuring the ingredients, as well as the mixing process. Thank you for your feedback, and we hope you continue trying more of our recipes.