Have you ever stepped into a sandwich shop or a bakery and attempted to decipher the names of the different offerings?
Brioche, challah, sourdough, pain rustica…
What’s the difference?
Perhaps you’ve contrasted the tangy, chewy bite of sourdough with the sweet tenderness of brioche and wondered how bread could vary so much in texture.
Well, wonder no more! Today I am here to answer your questions with a lesson in enriched breads.
Enriched Dough: What Is It?
All yeasted dough fits into one of two categories: enriched or lean.
Lean bread contains little to no fat, and any fat present is oftentimes contributed by oil. Think pita, ciabatta, or a nice crusty loaf.
Enriched bread, on the other hand, contains a high percentage of fat – most often thanks to eggs, milk, and/or butter – and is also sweeter than its lean counterpart.
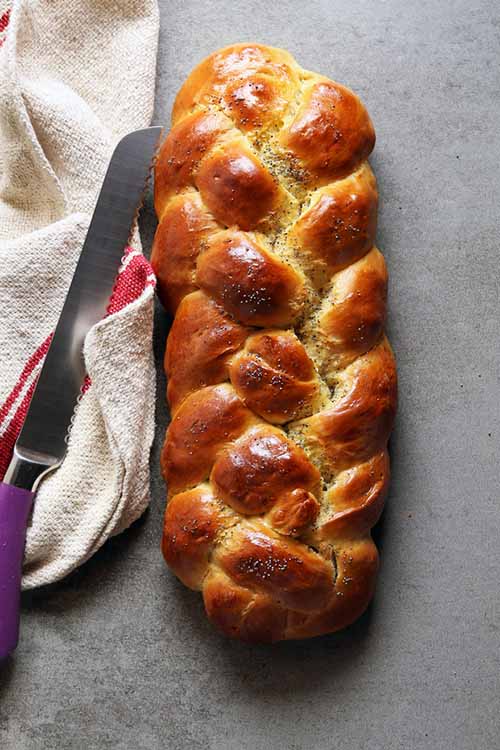
Brioche and challah are the most popular variations, along with pannetone or stollen around the holidays.
The Science-y Stuff
Fat – whether from butter, eggs, or milk – tenderizes dough by coating and shortening the gluten strands. This creates a softer crust and more tender crumb than a lower fat alternative.
Fat also slows down yeast activity, requiring a longer fermentation time that helps to develop lots more flavor.
Surprisingly, the additional sugar also hinders yeast activity. Sugar attracts water, leaving the yeast and sugar to fight over the limited resource in the dough.
The yeast must become fully hydrated before it can start to feast on the sugar, so when the two are at odds, fermentation slows down significantly.
Notes on Ingredients
Milk Enzymes
When working with milk, it is important to first heat it up to 180°F. Milk contains an enzyme that weakens gluten, but this enzyme is denatured and rendered ineffective at high temperatures.
Just pop the milk in the microwave or on the stove until it begins to foam and is about to boil. This process is called “scalding.”
Heavy Dough
Because sugar, butter, and eggs are heavy ingredients, an enriched dough will be much heavier than its lean counterpart.
It is especially helpful to use at least a portion of high-protein flour to provide the strength required to balance this extra weight.
Methods for Mixing
There are three main methods for enriched mixing.
Remember how fat shortens gluten strands and slows down fermentation? And remember how sugar fights with the yeast for water?
Each of these mixing methods help the gluten and the yeast to do their jobs properly. They may vary depending on the type and quantity of enrichment in a given recipe.
1. Straight
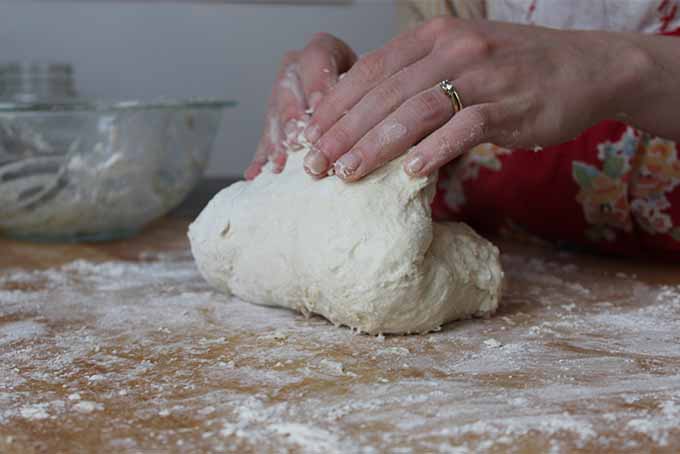
First is the straight method. This is about as simple as it sounds: all of the ingredients are mixed together at the same time.
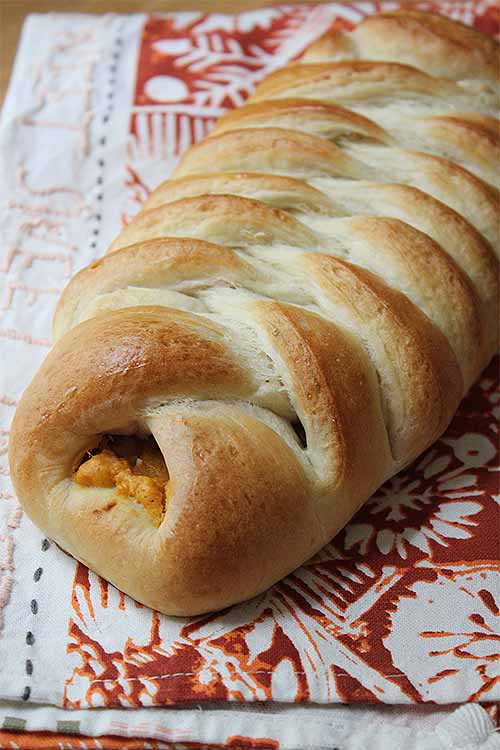
This method can be used when the dough is enriched with a low percentage of fat, which will have a minimal effect on gluten development or yeast activity. This is the method used in our Italian Easter Bread.
In this method, all that is needed to counteract the milk or butter is a long, intense kneading.
2. Sponge
The sponge method begins by mixing all of the yeast with a small amount of sugar, flour, and water or milk, and letting it ferment for a short time before mixing in the rest of the ingredients.
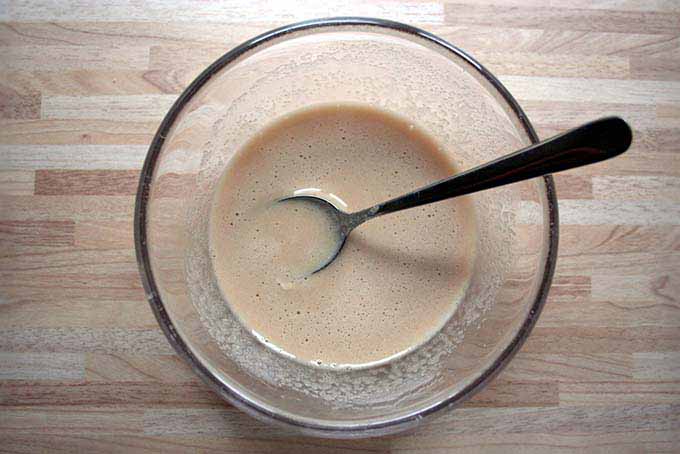
This allows the yeast to hydrate and begin its work without battling the sugar for water.
This method also helps to develop flavor. Giving the yeast time to work on just a small amount of flour adds significant complexity to the final product. The sponge method is what Lorna uses in her Kulich recipe.
3. High Fat
In a very high fat recipe like brioche, the gluten must be fully developed before the butter is added. This method is sometimes combined with the sponge method, or it may be used on its own.
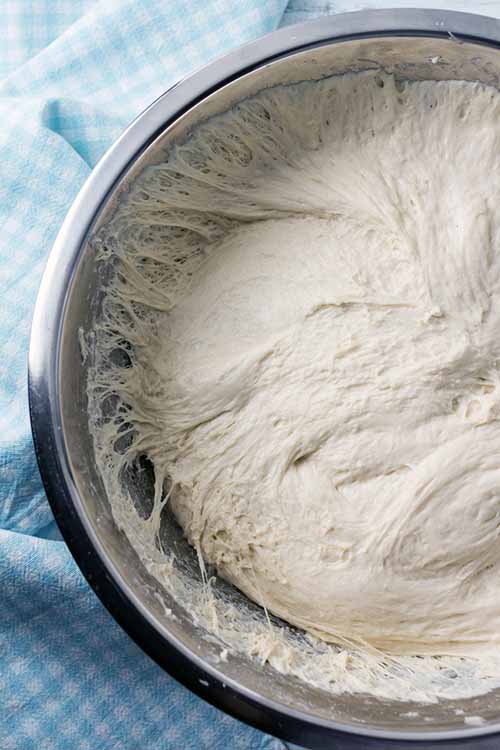
To mix using the high fat method, all of the ingredients except the butter are kneaded until they hit the windowpane stage, signifying that the gluten is fully developed. Room temperature butter is then added a little bit at a time until it is fully incorporated.
Try this method with my recipe for brioche.
Initial Rise
Once the dough is mixed, it must go for its initial rise, or what bakers call the bulk fermentation.
With a lean bread, this is often accomplished at room temperature. An enriched version, however, loves a long, cold fermentation – giving the yeast a comfortable environment in which to take its time.
I usually opt for 12 hours in the refrigerator, but if you are working on a tighter schedule, try 45 minutes at room temperature followed by two hours in the fridge. At the very least, this will help to retard the fermentation – but even more importantly, it cools the dough to help with shaping.
Shaping
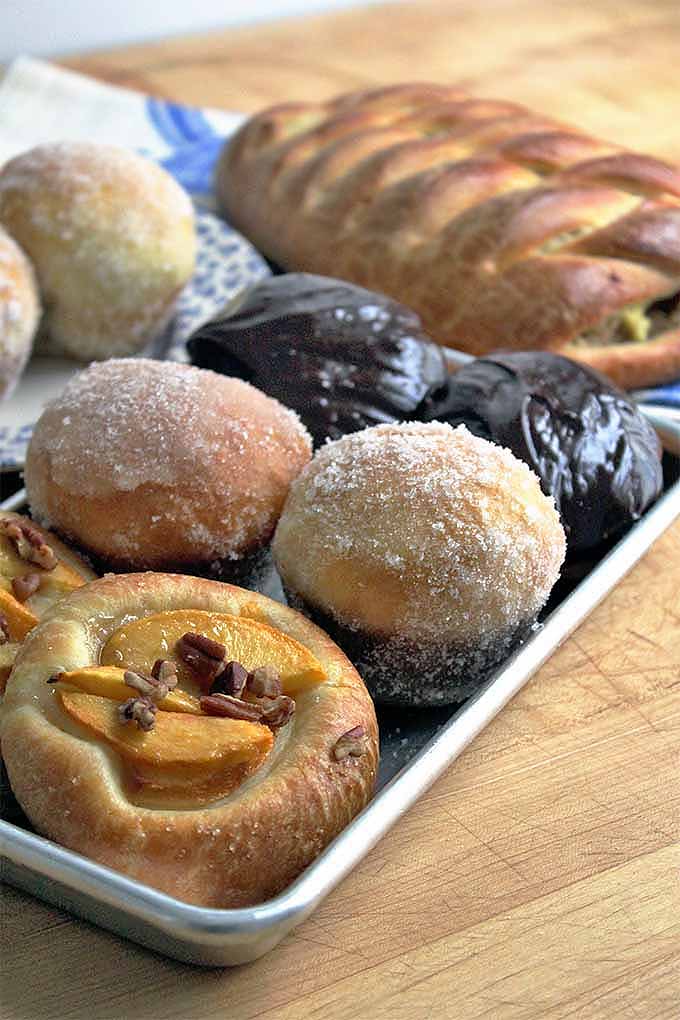
The texture of enriched dough lends itself well to sculpting and molding fun designs.
Different types of enriched breads are often associated with particular shapes. From the classic challah braid to the French brioche a tète, many shapes have long histories and meanings behind them.
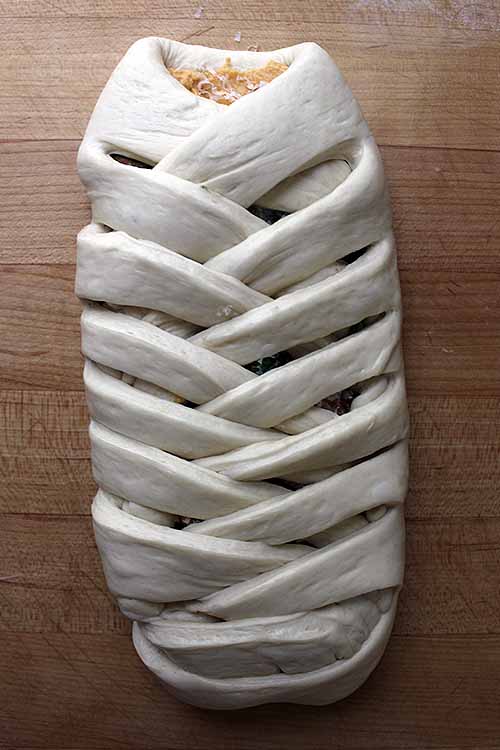
Enriched dough is most fun because of its limitless design options. There is no need to hold yourself to the classic shapes.
If you’d like to get creative with your work of art, check out our guide to shaping for some inspiration to get you started.
Proofing
Because enriched dough is heavier in weight than lean, it will collapse easily if overproofed. For this reason, it is really important to keep an eye on your loaf as it is prepared for baking!
When proofed in too warm an environment (85°F or higher), the butter in the dough will begin to melt. In order to prevent this, and to limit the chances of overproofing, it is best to perform the final rest in a space that is between 65 and 75°F.
Baking
The extra sugar in an enriched dough caramelizes quickly during baking, hence the nice contrast of soft brown crust and tender interior.
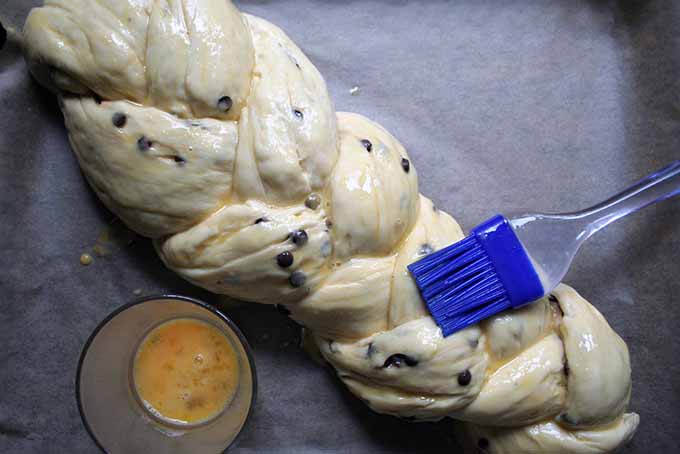
This bread will also benefit from a pre-bake egg wash. Brushing the top evenly with whisked egg helps to seal in moisture, create an evenly browned crust, and leave a nice sheen on the final product.
In order to fully bake the inside of the loaf without burning the crust, enriched dough bakes best at a mid-range temperature between 325 and 375°F.
A good tip to remember is that the larger the loaf, the lower the temperature – it will take longer for the inside to cook, thus you don’t want to bake at a temperature so high that the crust will burn.
After baking and cooling, slice to your desired thickness using a good serrated bread knife. Make sure to equip yourself with indispensable baking tools that every baker needs, whether it’s before or after baking!
Give it a Try!
Is your mouth watering now for a tender, cake-like slice of bread? Go ahead, give one of our recipes a try!
Do you have a fond memory of a sweet, enriched bread? What’s your go-to recipe? Tell us about it in the comments below!
Photo credit: Shutterstock unless otherwise noted. Credited photos © Ask the Experts, LLC. ALL RIGHTS RESERVED. See our TOS for more details.
About Kendall Vanderslice
Kendall’s love of food has taken her around the world. From baking muffins on a ship in West Africa and milking cows with Tanzanian Maasai, to hunting down the finest apfelstrudel in Austria, she continually seeks to understand the global impact of food. Kendall holds a BA in Anthropology from Wheaton College and an MLA in Gastronomy from Boston University, and has worked in the pastry departments of many of Boston’s top kitchens. Based in Somerville, Massachusetts, Kendall helps to run a small community supported bread bakery and writes about the intersection of food, faith, and culture on her personal blog, A Vanderslice of the Sweet Life.


Proofing the enriched sourdough bread (recipes with milk, butter and eggs ) in room temperature for overnight, it is safe ? Because eggs and milk may be contaminated if left overnight. But if left in fridge for safety purposes, than the dough will be very hard because the oil / butter will harden when it in chill/cold condition, thus the chances of rising of the dough in fridge is totally gone. The dough may eventually not rising at all in fridge. What do you suggest if the recipes is enriched sourdough bread ? Out in room temperature overnight or in fridge ? Thank you
Long and slow cold fermentation is often preferred for sourdough, and loaves can be baked straight from the fridge if they are already shaped. Dough that hasn’t already been shaped can rest on the counter for 20 minutes to an hour after refrigeration before shaping. However, leaving any sort of yeasted or fermented dough out overnight at room temperature would almost always guarantee overproofing- food safety is typically not a concern because proofing times at room temperature are typically 1-2 hours.
Excellent summation but please substitute “destroyed” for “killed” when discussing enzymes–they’re not alive!
Good point- thanks for the edit! We’ve updated this section of the article. 🙂
So helpful. Would be really good to find out how to adapt the high fat mixing option to factor in fast action dried yeast.
Making an enriched dough does slow down yeast activity, but you can still use a variety of different yeast types, such as instant or active dry. Read more about the different types of yeast available and how to substitute these in recipes here.
Hi, I have a question about safety. I have an enriched sourdough recipe that uses milk,(whole or reduced fat) egg, butter, honey, bread flour, cinnamon, chocolate chips, and nuts. After the initial hand mix to just incorporate the ingredients and after a couple hours of some stretch and folds, it calls for it to be left at approx 70F room temperature until it at least doubles. It’s a very slow riser and this may take 12 to 16 hours or more at room temperature. Then it goes into a baking pan for up to another 4-5 hours at room temperature before baking. Are there any issues with such a long time of room temperature proofing with these ingredients. It won’t work with refrigerator proofing since it is such a slow riser. Thanks
Thanks for your question, Phil. I’ve also seen recipes that call for this. Overall, yeast is a better option for enriched dough in terms of food safety, because it acts more quickly. For anything over 2-4 hours at room temperature, most food safety experts would recommend proofing in the refrigerator. Unsafe bacterial growth can occur in eggs and milk left in the “danger zone” of 40-140°F, growing rapidly and doubling in as little as 20 minutes. Dough rises twice as slowly for every 15-degree decrease in temperature, so you could experiment with cold fermentation followed by a short rise at room temp after shaping and before baking.
Hi, Can you help me figure out why I get a giant hole in this enriched dough “Kulich” (Russian Easter Bread) that is baked in a tall cylinder shape? It comes out dense on the bottom but airy and hollow on the top.
The recipe has these ingredients:
11 grams Active dry yeast (1 ½ packets), 5 ¾ cups AP flour, 1 cup milk, 8 ounces melted butter (2 sticks), 1 tsp salt, 1 ½ cups sugar, 6 egg yolks, 3 egg whites (beaten separately), ½ cup raisins, vanilla bean, saffron, orange zest, and cardamom. I make a yeast sponge, initial rise – 3 hours, then separate dough in half, put each half into a cylinder (I use two 2 quart stainless steel Bain Marie pots.) Second rise – 3 hours. 350° then reduce to 300° for about 40 minutes. Any help or ideas would be great.
Tunneling, or big, unwanted holes in the crown at the top of your kulich can happen for various reasons. It may just be that the three-hour rises are too long. Rather than only relying on a timer, keep an eye on the dough itself – it should usually expand to about double its size after the first rise, while overproofing can lead to unwanted results. Our kulich recipe calls for a much shorter rise.
Using too much yeast, not kneading long enough, dough or ingredients that are too warm, or an oven that’s not hot enough at the start of baking can all lead to hollow spaces and air bubbles as well.
Hope this helps!