Being told a story as you are eating is a treat on its own, but when what you are eating is the story, that makes for an even more meaningful dining experience!
![]()
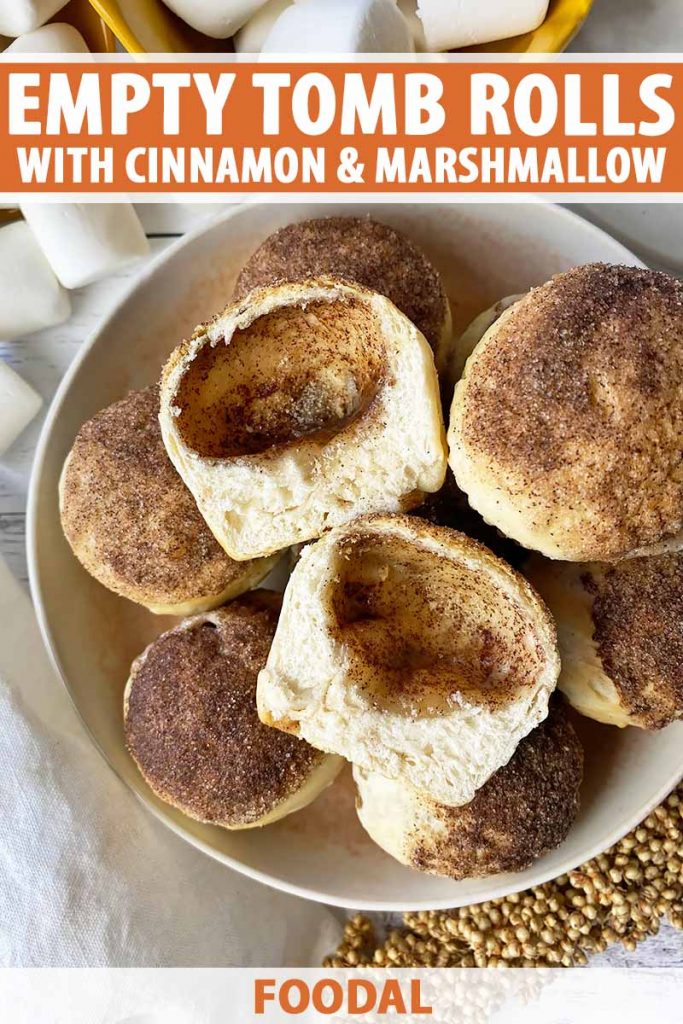
Empty tomb rolls, also known as resurrection rolls, are individual baked desserts with a surprise inside and a story to tell, one centered around the Easter festivities of the Christian religion.
The Easter holiday is a celebratory occasion in Christianity, honoring the resurrection of Jesus Christ three days after his death by crucifixion.
As written in the Bible, Jesus prophesized that he would rise on the third day after his death, a foreboding statement that was discussed among the chief priests and Pontius Pilate, the governor of Judaea who permitted the crucifixion of Jesus.
They agreed to find a way to prevent anyone, particularly the disciples of Jesus, from stealing his body as a deceptive act of his fake resurrection.
After Jesus was buried, his tomb was then sealed by a stone barrier, with guards placed at its entrance, eliminating any chance of anyone physically gaining access in – or out – of the tomb.
But on the third day, the barrier was miraculously destroyed. When the cracked stone was removed from the entrance, there was no body inside.
Despite these efforts to keep the body in the tomb, Jesus still had risen, fulfilling his prophecy and restoring the faith of his followers in eternal life after death.
Every ingredient of an empty tomb roll tells the story of this burial and resurrection:
- Marshmallow: the body of Jesus
- Butter and cinnamon sugar mix: the materials for wrapping his body
- Biscuit: the tomb
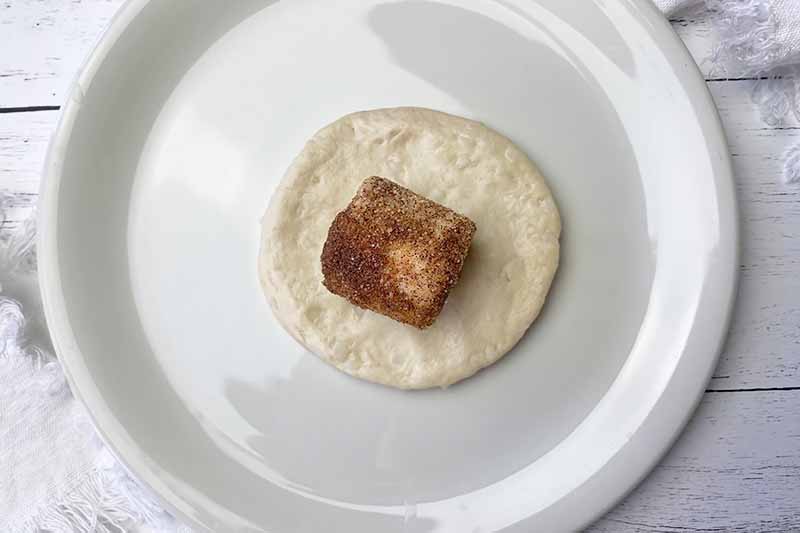
To assemble a tomb roll, you wrap biscuit dough around one single marshmallow that’s coated in butter and a mix of cinnamon and sugar.
Before baking, the candy remains as a solid, physical component inside the dough – symbolizing the entombed body of Jesus.

While the roll bakes, the marshmallow inside melts and disappears, leaving behind a sticky-sweet hollow space – symbolizing the empty tomb.
If you celebrate Easter as a religious holiday, you can make this fun and simple recipe with your children as you tell the story and explain the significance of each ingredient.
But you can also enjoy baking these rolls throughout the year!
This is an easy and delicious baked good to make with the whole family to get your kids more involved in the kitchen and motivated to learn how to read a recipe.
The kids will love the hands-on experience of coating each piece of candy and wrapping it in the biscuit dough – what a perfect opportunity to make a totally acceptable mess on your countertop!
Whether it’s a beautiful Easter Sunday in the spring, a hot and muggy Wednesday in the summer, a perfectly chill Saturday in the fall, or a frosty Friday in the winter, everyone will love tearing apart tender, buttery biscuits with a beautifully spiced, sweet filling.
Print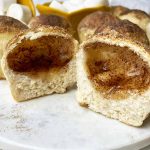
Empty Tomb Rolls
- Total Time: 1 hour
- Yield: 10 rolls 1x
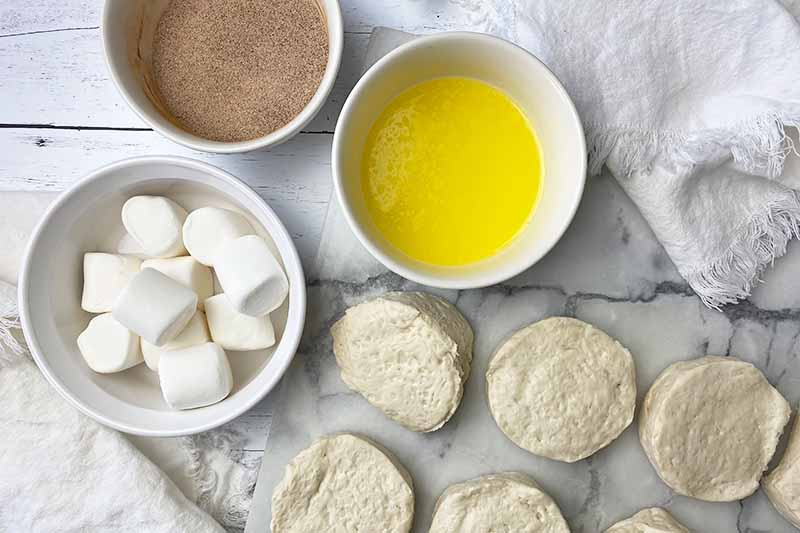
Ingredients
- 1 10-count can refrigerated buttermilk round biscuit dough
- 1/4 cup granulated sugar
- 1 tablespoon ground cinnamon
- 1/4 cup (2 ounces) unsalted butter, melted
- 10 large marshmallows
Instructions
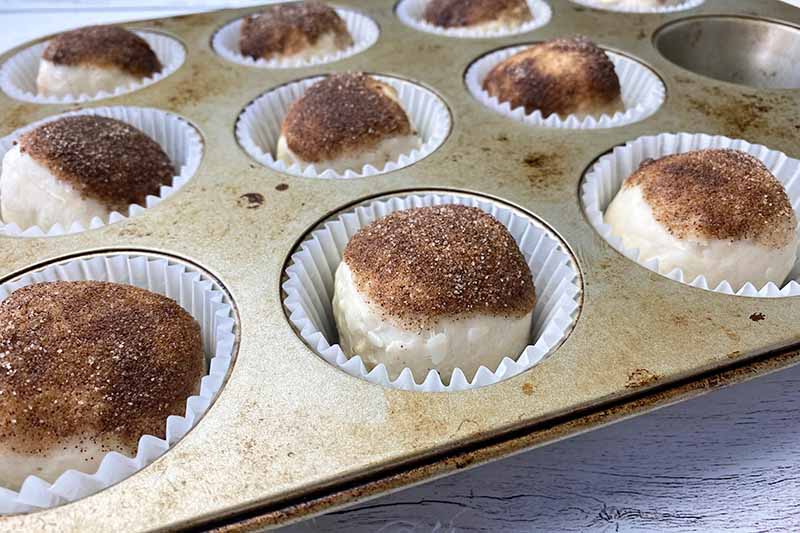
- Preheat the oven to 375°F and place one rack in the center of the oven. Line 10 cups in a muffin tin with cupcake liners and place on a rimmed baking sheet lined with a silicone mat, parchment paper, or aluminum foil.
- Open the can, separate the pieces of biscuit dough and place them on a large cutting board. Flatten each portion of dough into an evenly shaped disc with a rolling pin until it is about 1/4 inch thick. Set aside.
- Whisk together the sugar and cinnamon in a small bowl.
- Roll and lightly coat one marshmallow in the melted butter, then roll and lightly coat the marshmallow in the cinnamon sugar mixture.
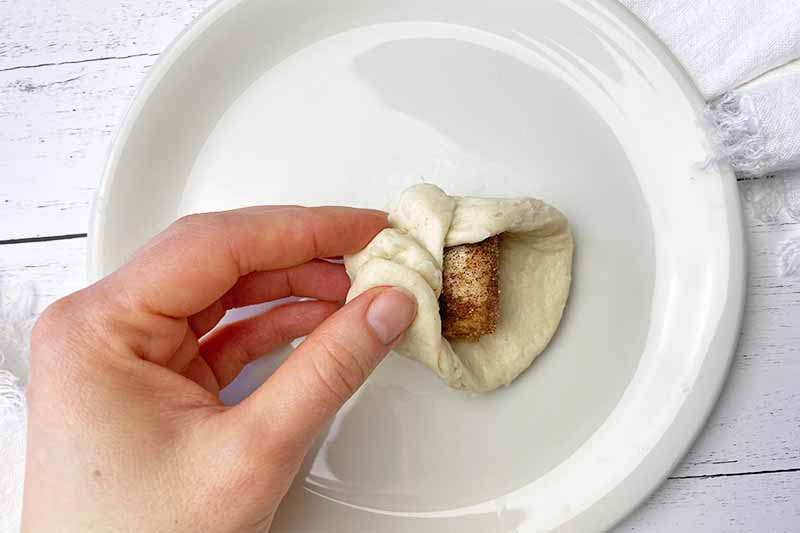
- Place the coated marshmallow in the middle of one of the dough discs. Using your hands, stretch and wrap the biscuit dough around the marshmallow, tightly pinching the dough together at the top to fully cover the marshmallow. None of the marshmallow should be left exposed.
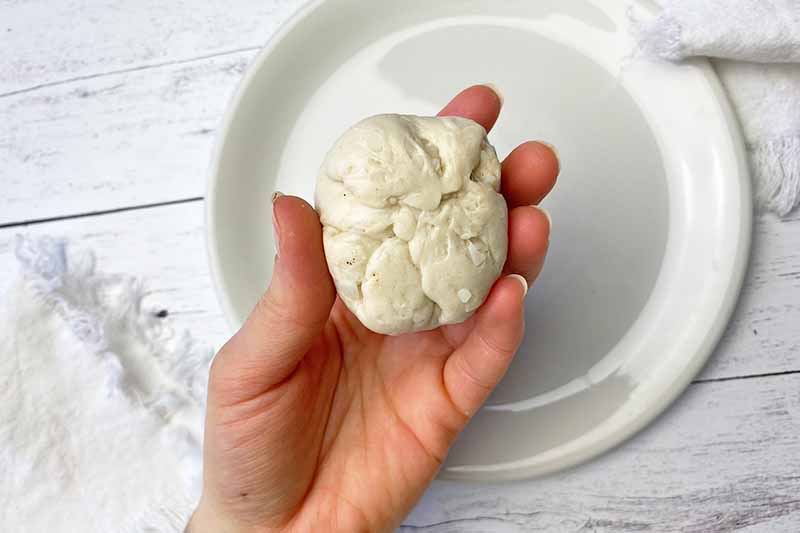
- Gently roll on the cutting board to seal the dough.
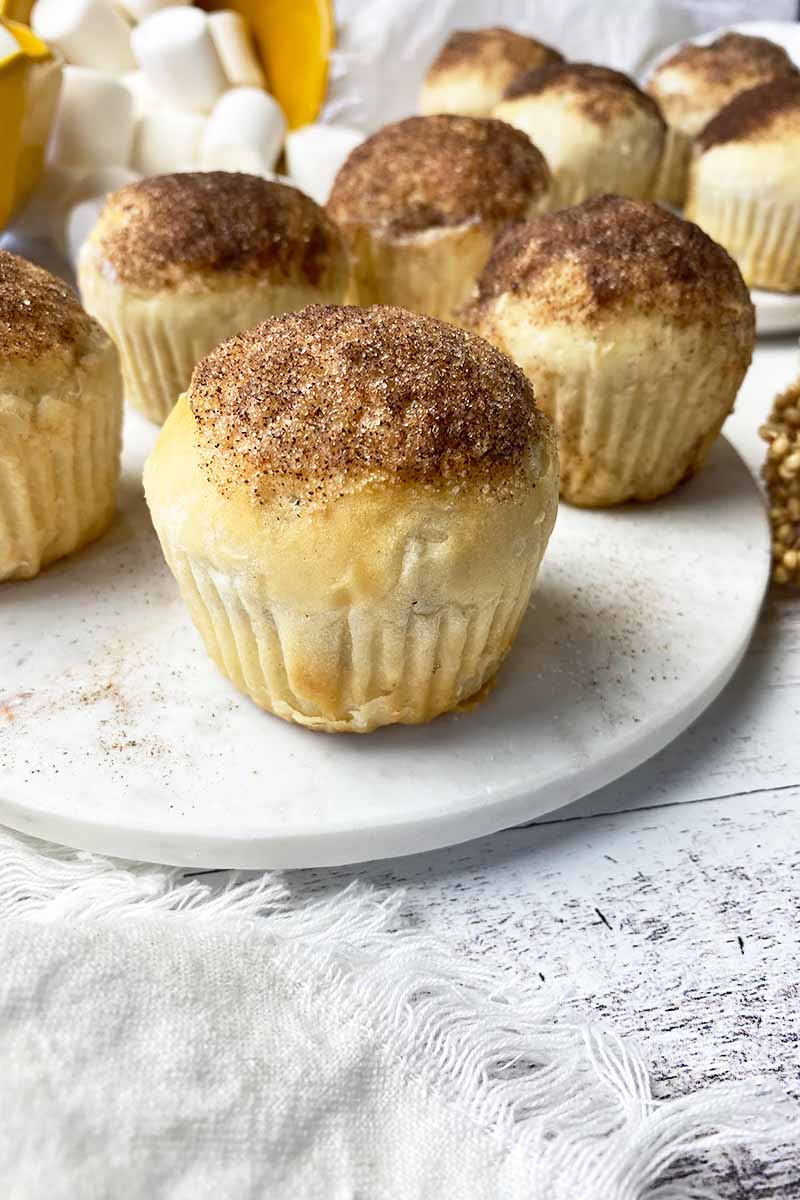
- Dip the smooth top of the roll in the butter, then dip it in the cinnamon sugar mixture.
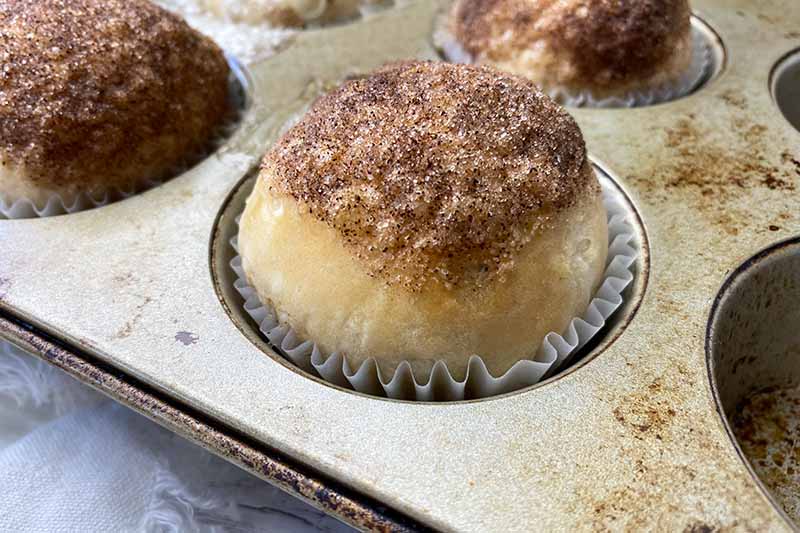
- Place in a lined section of the muffin pan, with the seam side facing down and the smooth, coated top facing up.
- Repeat with the remaining dough and marshmallows.
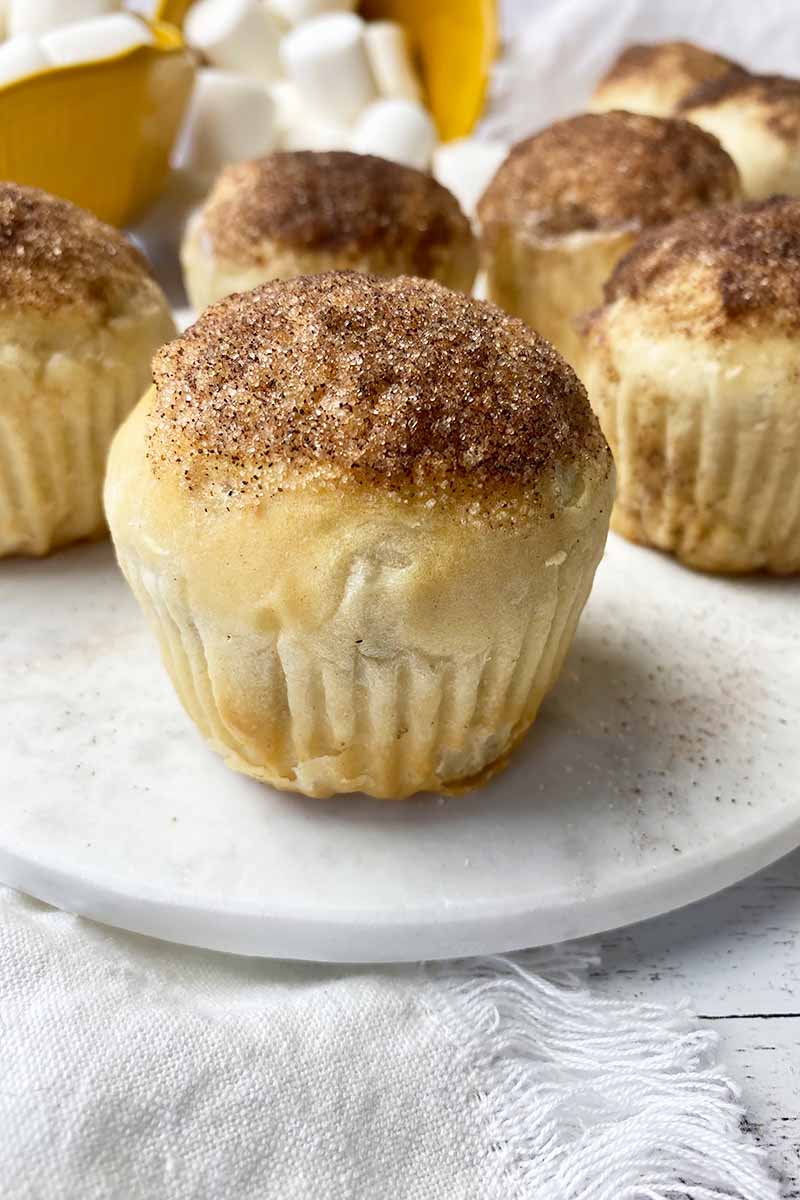
- Transfer the muffin pan to the center rack in the oven. Bake for 15-17 minutes, until the rolls are lightly golden brown. Melted marshmallow may start seeping out of some of the biscuits.
- Remove the muffin pan from the oven and allow the rolls to cool in the pan for 10 minutes before removing from the cupcake liners and transferring to a cooling rack to cool slightly, about 10 minutes.
- Serve while they’re still slightly warm, using a serrated knife to slice through the middle of each one to reveal the empty space inside.
- Prep Time: 25 minutes
- Cook Time: 15 minutes
- Category: Biscuits
- Method: Baking
- Cuisine: Breakfast
Cooking by the Numbers…
Step 1 – Prep
Preheat your oven to 375°F and place a rack in the center, or wherever your oven achieves the most even baking. Line 10 cups in a 12-cup muffin tin with cupcake liners.
I highly encourage that you place the muffin pan on top of a rimmed baking sheet lined with parchment paper, aluminum foil, or a silicone making mat. This acts as a safeguard to catch any melted marshmallow that may potentially spill out of the biscuits.
The cupcake liners will keep the rolls from sticking to the pan, and will eliminate a messy cleanup after baking – this is particularly helpful with a sugary, sticky filling!
Melt 2 ounces of unsalted butter in a small, heatproof bowl in the microwave. Allow it to cool slightly as you prepare the remaining ingredients.
Remove the round biscuit dough from the can and separate the individual portions. Place them on a large cutting board.
Avoid buying jumbo-sized or “grande” biscuits, as this amount of dough will be too excessive for each roll – it won’t bake evenly, and you’ll be left with a large mound of under-baked goo in each cup!
If you don’t have any other option, you can use crescent roll dough instead. We have instructions on that at the end of this article!
You should also avoid any added flavorings to the biscuit – stick with the buttermilk or plain options.
Place 10 large marshmallows in a bowl. To save time in the kitchen, you can use a store-bought version. But if you prefer, you can also make them from scratch, cutting them into 1 1/4-inch squares.
Measure and whisk together the granulated sugar and cinnamon in a small bowl.
Step 2 – Flatten the Dough
Using the palm of your hand or a rolling pin, firmly press down on each portion of biscuit dough to flatten it into a level disc shape about 1/4 inch thick.
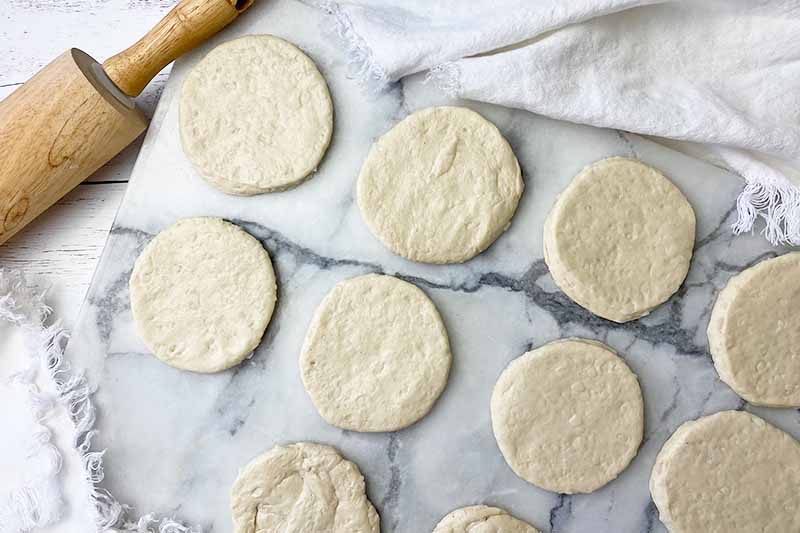
This process doesn’t have to be perfect – keep the ruler in the drawer. You will continue to stretch the dough as you wrap it around each candy piece.
Step 3 – Coat the Marshmallows
Create an assembly line: place the bowl of marshmallows on your left, then the bowl of melted butter, then the bowl of cinnamon and sugar, then a large plate on the right.
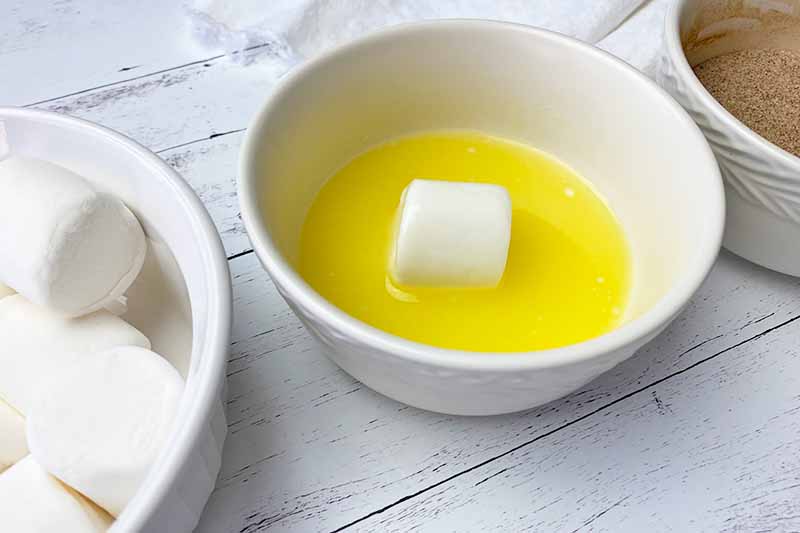
This will create the most streamlined process for coating by hand, and will reduce the mess.
Working with one piece at a time, roll and lightly coat its entire exterior in the melted butter.
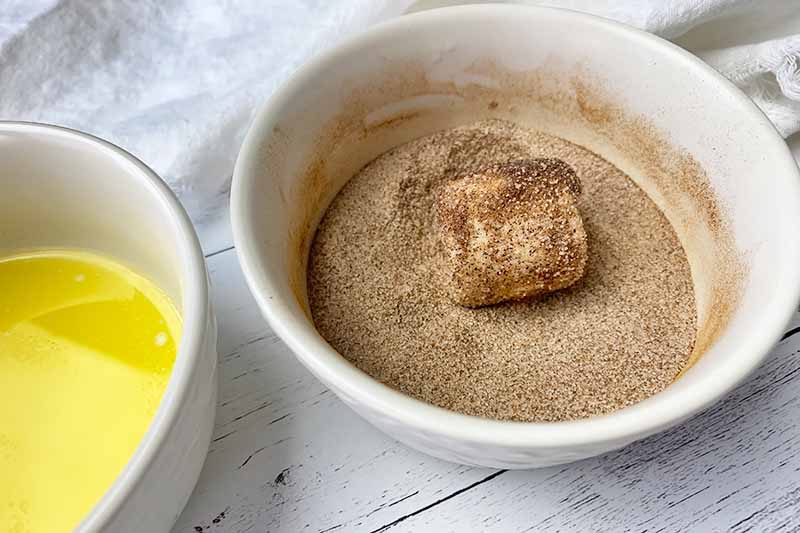
Then roll and lightly coat the same piece in the cinnamon and sugar mixture. The mixture will stick to the melted butter.
Place your coated candy on the empty plate, and repeat with the remaining pieces.
Step 4 – Wrap in the Biscuit Dough
Place one coated marshmallow in the center of a disc of biscuit dough. Use both hands to help you stretch and wrap the dough around it on all sides.
Gather the ends towards the top of the coated piece, and pinch it together to fully cover and seal the marshmallow inside.
There should be no exposed marshmallow – anything that is exposed will melt out of the biscuit. But it’s a good thing we lined the muffin pan, just in case that does happen!
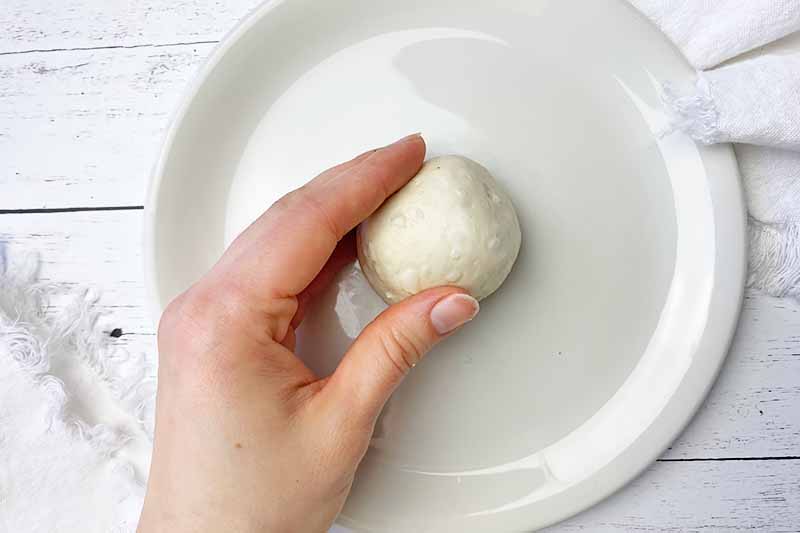
Flip the filled mound over and gently roll the sealed end on the cutting board to close and flatten the extra ends. This will be the bottom of the roll.
Repeat with the remaining rolls before continuing to the next step.
Step 5 – Coat the Top of the Roll
Dip the smooth top of one roll – not the end that you’ve sealed – into the melted butter, then dip it into the cinnamon sugar mixture.

Both of these final coatings should create a very thin layer.
Step 6 – Place in Muffin Pan
Place the filled mounds, coated top facing up and sealed bottom facing down, into a muffin cup lined with a cupcake liner.
Repeat Step 5 and Step 6 with the remaining rolls.
Step 7 – Bake
Once all of the rolls are coated and placed in a cupcake liner, transfer the muffin pan on the baking sheet to the oven in the center of the rack.
Bake for 15 to 17 minutes – the rolls will be puffy and light golden-brown in color when they’re ready.
Melted marshmallow may start to seep out of some of the biscuits. Don’t panic! The rolls will still set properly even if some of it escapes, and the baking sheet that you set below will catch any melted marshmallow that falls over the muffin pan.
Step 8 – Cool and Serve
Once the rolls are fully baked, remove the muffin pan from the oven.
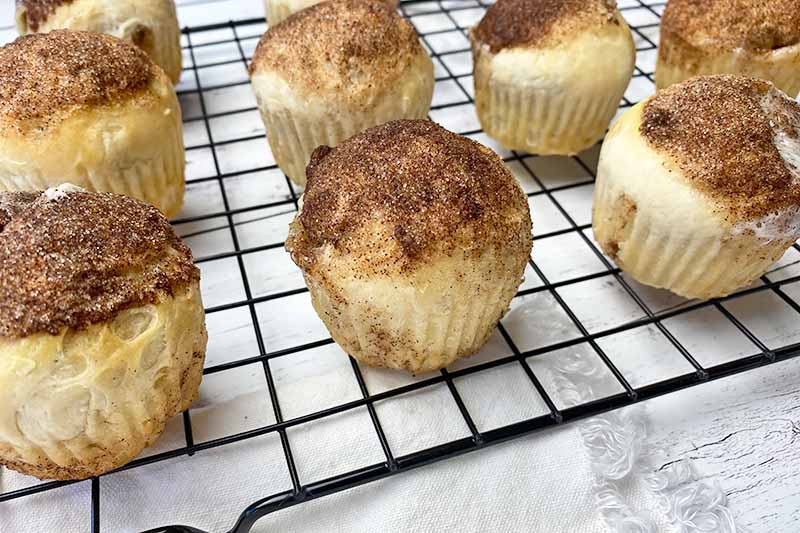
Let the rolls cool in the pan for 10 minutes, then remove the rolls from the liners and transfer them to a cooling rack.
Removing them from the liners now will prevent the bottom of the rolls from steaming, which could lead to soggy bottoms. But don’t rush the process to remove the liners – any hot marshmallow and butter that leaked out may burn you!
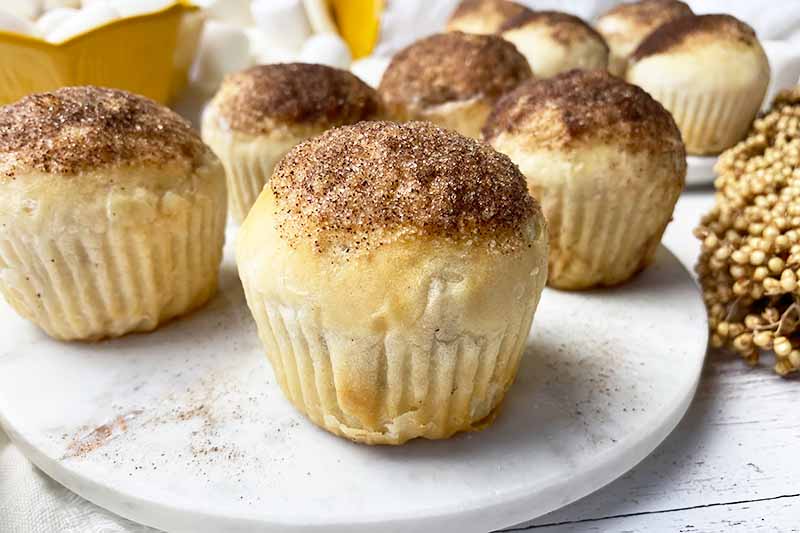
Let the rolls cool slightly, for about 10 minutes, before serving. They need this time to set, or else the biscuit will collapse, and you won’t be able to see the full effect of the empty space.
![]()
These are best served while they’re still slightly warm. Carefully rip one in half, or use a serrated bread knife to slice one in half for a cleaner presentation. See the empty space inside before devouring it all!
Try with Crescent Roll Dough
Take advantage of another pre-made, store-bought dough product at the store – biscuit dough is not the only option you can use here.
This recipe can also be made with plain canned crescent roll dough. Canned crescent roll dough typically comes in an 8-count format, so you will have 2 less rolls.
You’ll need to wrap the marshmallows more strategically, since each piece is cut into a triangular shape.
Place the coated marshmallow on the wider end and wrap the crescent triangle evenly around it one or two times to completely cover it, stretching as needed.
Once wrapped, continue with the recipe.
Have you ever made empty tomb rolls for Easter? Will you use biscuit or crescent roll dough? Leave a message in the comment section below.
If your holiday table is not complete without freshly baked biscuits, Foodal has recipes aplenty for you to make! Stock up on butter, bring out the baskets, and make these recipes for your next festive gathering:
- Layered Buttermilk Biscuits
- Quick and Easy Sourdough Biscuits with Cheese and Chives
- Flaky and Buttery Vegan Biscuits
Photos by Nikki Cervone, © Ask the Experts, LLC. ALL RIGHTS RESERVED. See our TOS for more details. Originally published by Ashley Martell on March 28, 2015. Last updated on March 12, 2023.
Nutritional information derived from a database of known generic and branded foods and ingredients and was not compiled by a registered dietitian or submitted for lab testing. It should be viewed as an approximation.
About Nikki Cervone
Nikki Cervone is an ACS Certified Cheese Professional and cheesemonger living in Pittsburgh. Nikki holds an AAS in baking/pastry from Westmoreland County Community College, a BA in Communications from Duquesne University, and an MLA in Gastronomy from Boston University. When she's not nibbling on her favorite cheeses or testing a batch of cupcakes, Nikki enjoys a healthy dose of yoga, wine, hiking, singing in the shower, and chocolate. Lots of chocolate.