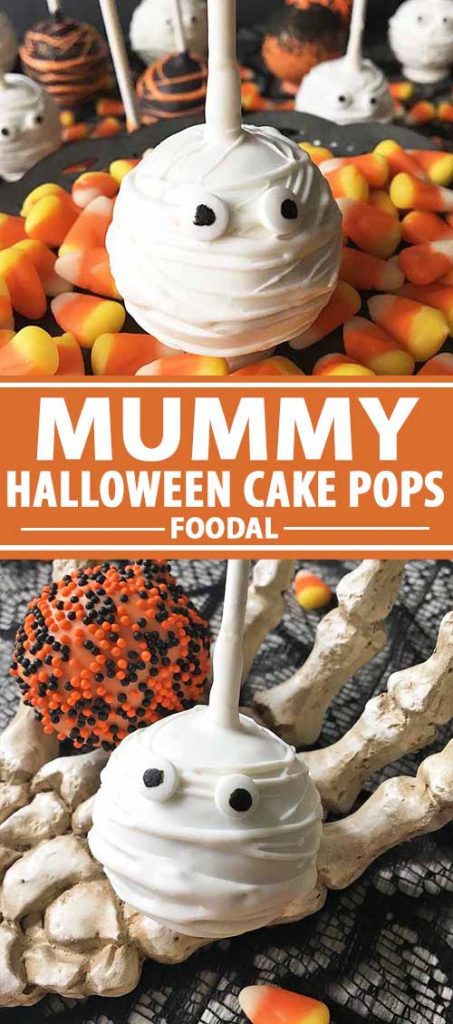
In addition to all the creamy chocolates, sugary candies, and the occasional caramel apple (you know, for when I want to eat healthy), there’s one new dessert I will be enjoying this upcoming Halloween holiday:
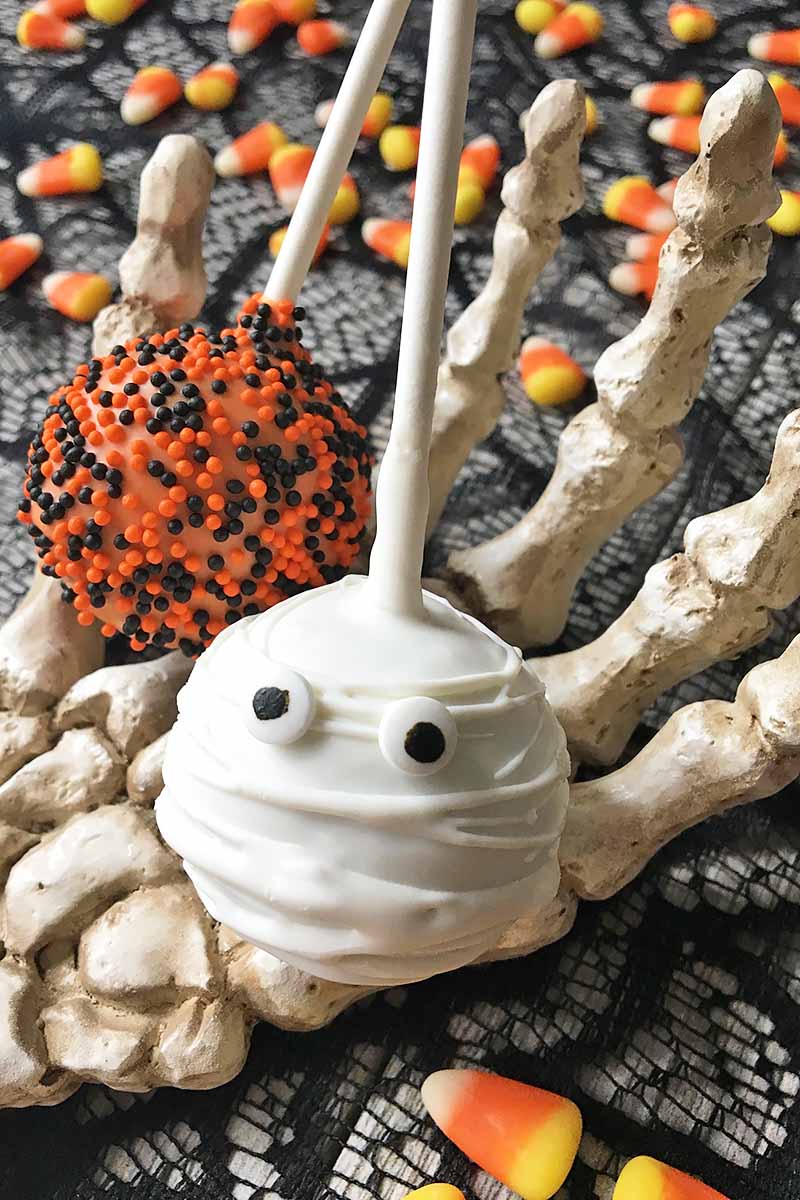
My sweetly scary mummified cake pops!
With just a few simple “tricks” to make these “treats,” my devilish desserts are so much fun to make. And you can definitely get the kids involved with helping you decorate!
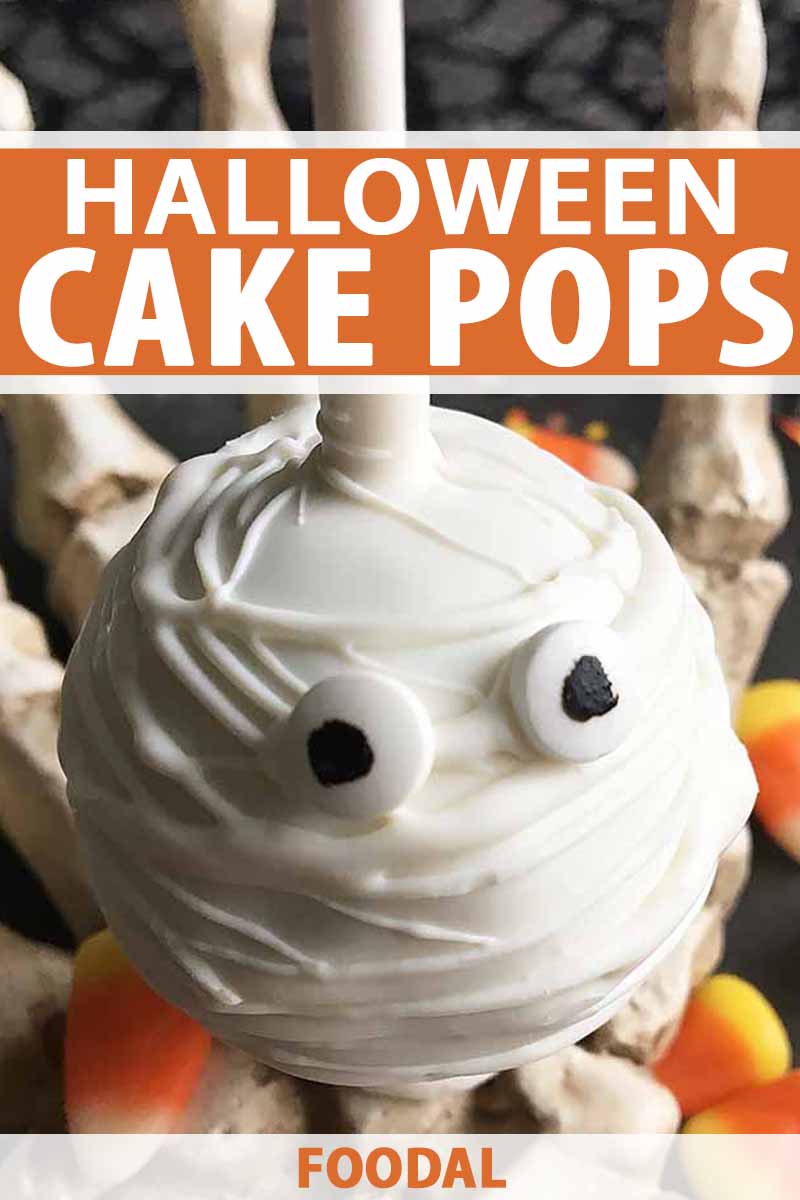
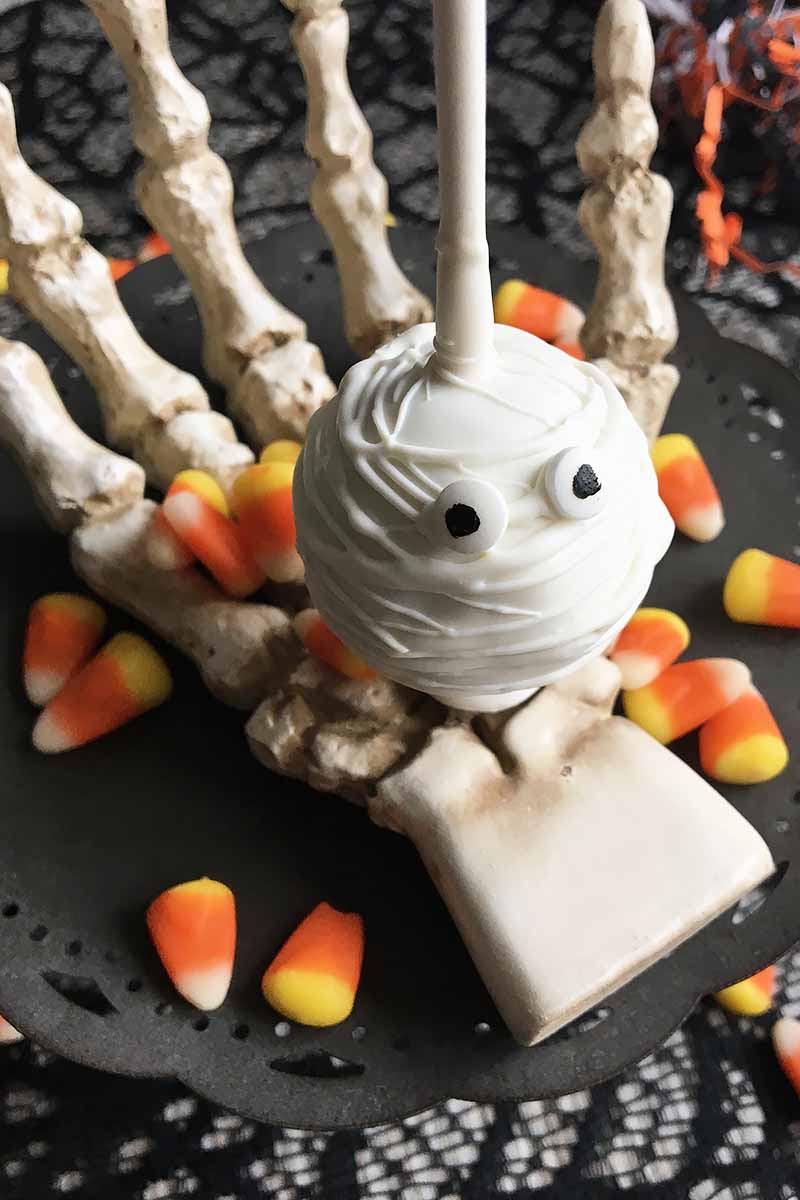
A few fast swooshes of melted white candy coating, a pair of sprinkles for the eyes, and you’ll soon have dozens of cute mummies that anyone will be dying to eat.
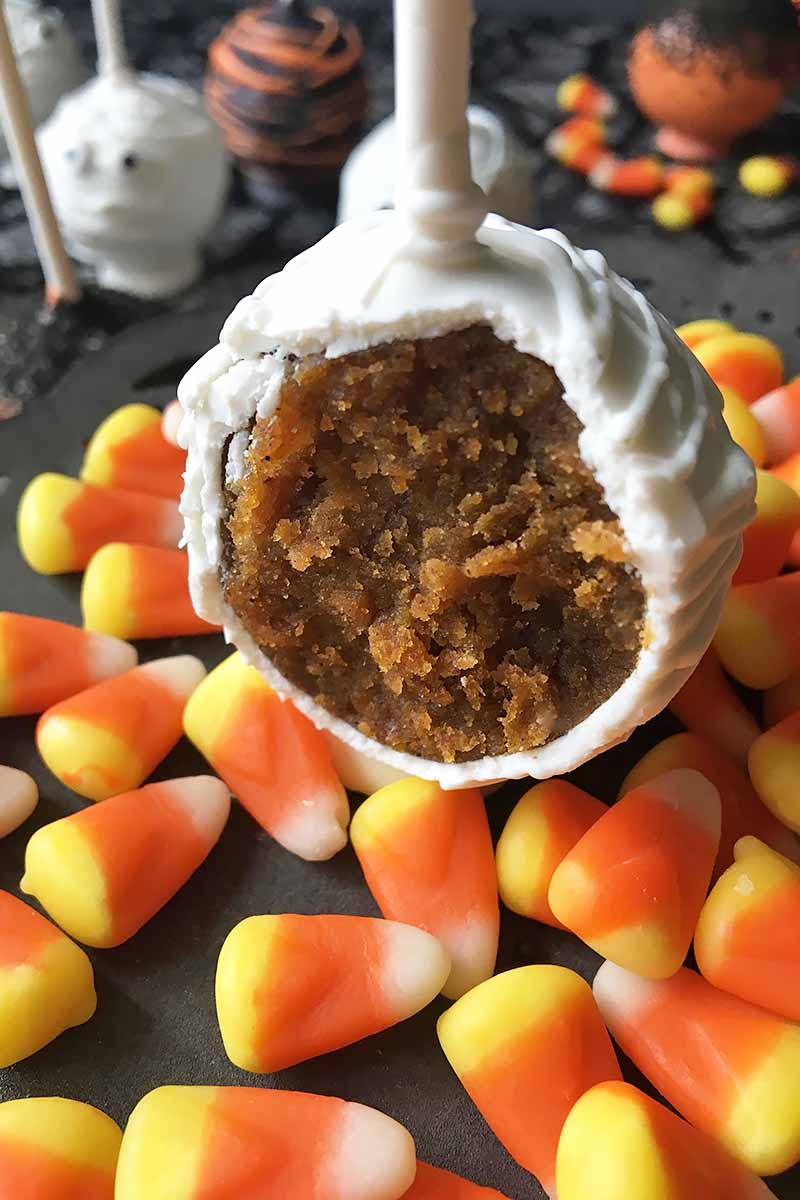
Try any cake flavor you prefer, but I suggest playing with a Halloween theme. Use your favorite pumpkin-flavored recipe combined with warming spices for the perfect taste of the fall season.
For another fun idea, use a red velvet base – every time you take a bite, it will look so garish, yet taste so good!
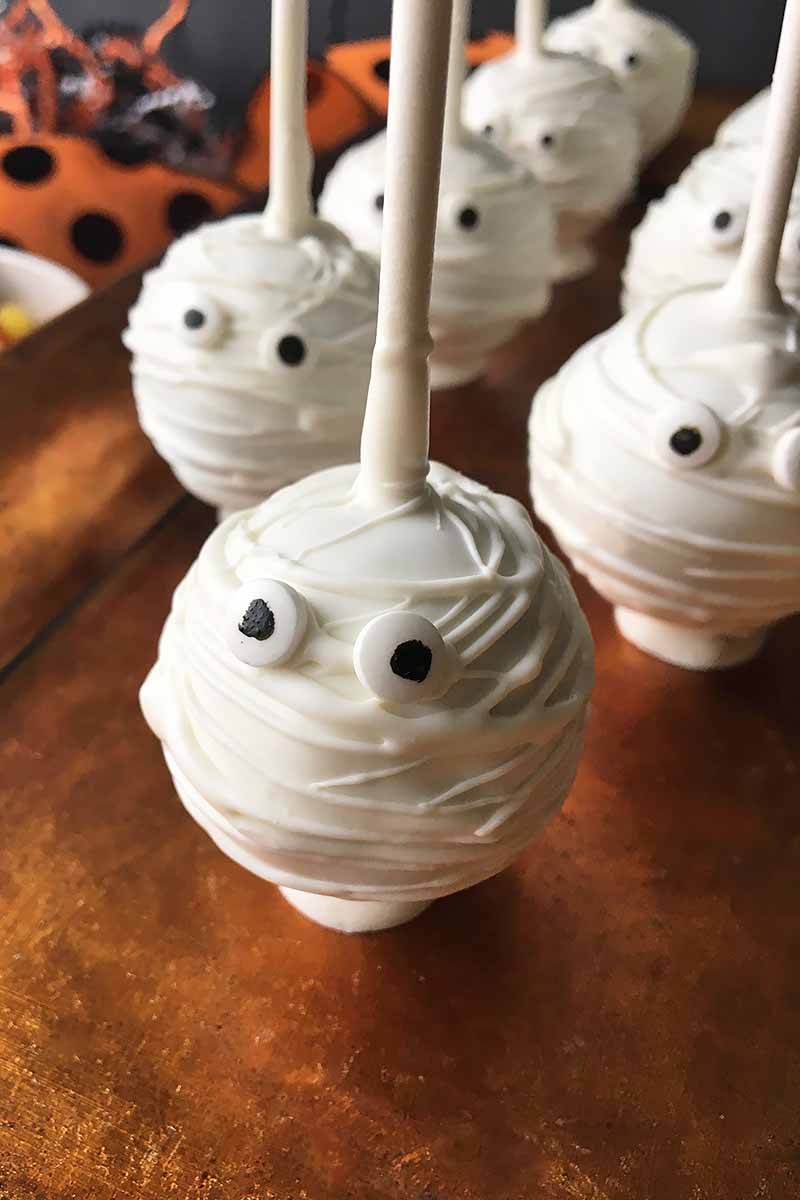
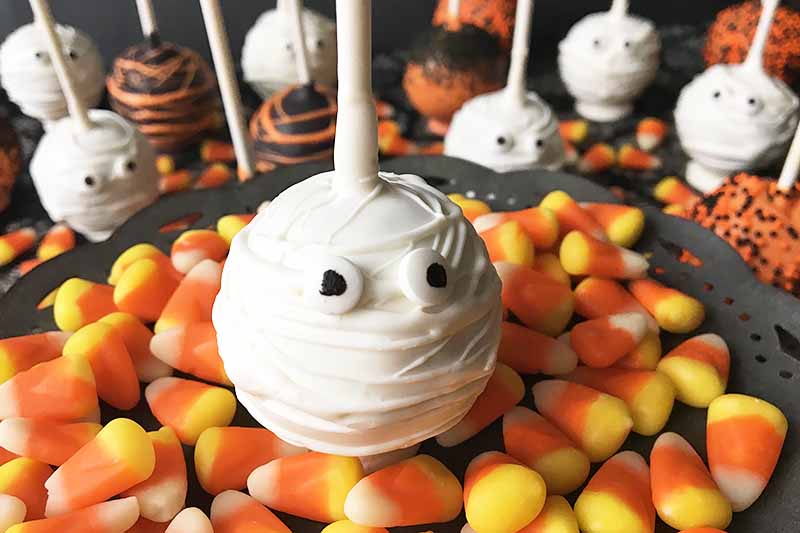
I like serving these with other playfully decorated dessert pops, using an assortment of Halloween-themed sprinkles and decorations in the same color palette. The variety of designs create a fun and festive display that is demonically delicious.
Join me in celebrating one of my favorite holidays – make these boo-tiful mini mummies now!
Print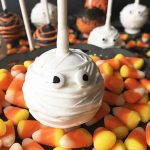
Halloween Mummy Cake Pops
- Total Time: 2 hours 5 minutes
- Yield: 30-40 cake pops 1x
Description
Looking for a Halloween-themed dessert that’s frightful and delightful? Make these easy cake pops, designed to look like mini mummies.
Ingredients
- 1 recipe Pumpkin Cake with Spiced Vanilla Cream Frosting
- 3 12-ounce bags white chocolate candy wafers
- Vegetable shortening
- Sprinkles, for the eyes
- 30–40 skinny wooden lollipop sticks
- Large foam board
Instructions
For the Cake Base:
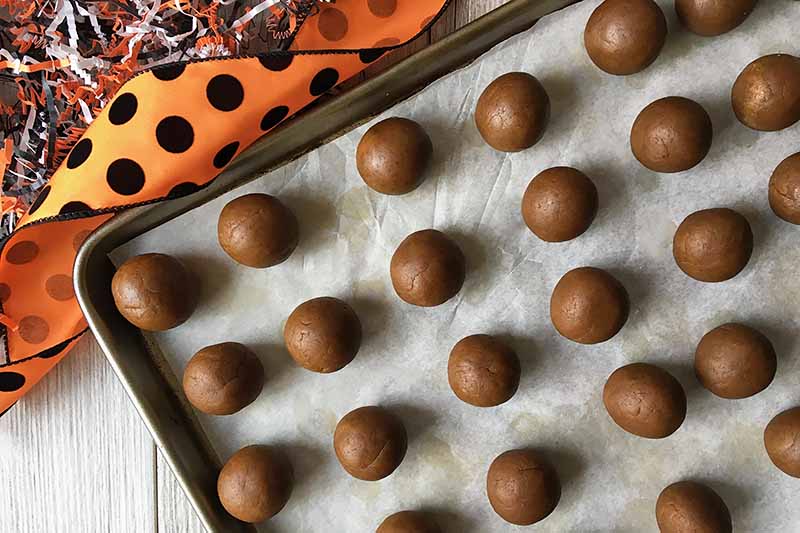
- In a large bowl or in the bowl of a stand mixer, crumble the cake until no large chunks remain.
- By hand or with the paddle attachment, mix in the frosting a little at a time, starting off with just a couple of tablespoons. Mix until a dense but still crumbly dough forms that you can mold into balls with your hands. Be careful to avoid adding too much, so the mixture does not get too soft and moist. You will not need to use all of the icing. Refrigerate the mixture for 30 minutes, until chilled.
- Measure about 2 tablespoons of the cake mixture and roll into a tight, uniform ball with your hands. Place the balls on a baking sheet lined with parchment paper. Refrigerate for about 1 hour.
- When ready to dip in chocolate, remove the chilled balls from the refrigerator and let sit at room temperature for about 5 minutes.
For the First Candy Coating Layer:
- Melt the chocolate candy wafers according to package instructions. If it looks too thick for dipping, mix in vegetable shortening 1 teaspoon at a time to thin it. Let cool slightly, stirring occasionally, for 5 minutes.
- Dip a lollipop stick in the melted chocolate, and insert in the cake ball, pushing halfway to stop at the center. Allow to harden at room temperature, or place back in the refrigerator for a couple minutes.
- Dip the cake ball in the chocolate until completely covered. Gently tap the stick against the edge of the bowl to remove excess melted chocolate.
- Optional: For cake pops that stand up on their own, apply one chocolate wafer on the top of each cake pop, flat side facing up, using some additional melted chocolate as the glue.
- Stick each pop upright in the foam block to harden and set for about 10-15 minutes.
For the Mummy’s Wrappings:
- Apply a second layer of chocolate coating to make the mummy’s wrappings. Holding the cake pop in one hand, dip a fork in the melted coating and quickly move it back and forth to drizzle chocolate onto the pop while you slowly turn it around, to form scattered, irregular lines across the surface.
- Carefully stick two sprinkles on the front of the cake pop for the mummy’s eyes.
- Allow the cake pops to set completely at room temperature before serving, for about 15 minutes. Or, once the pops have set, you can store them in the refrigerator until ready to serve for up to one week.
- Prep Time: 2 hours
- Cook Time: 5 minutes
- Category: Cake
- Method: Baking, No-Cook
- Cuisine: Dessert
Keywords: cake, icing, pumpkin, Halloween
Cooking by the Numbers…
Step 1 – Prepare the Cake Balls
Follow Foodal’s step-by-step guidelines on how to make perfect cake pops: prep and chill the balls, insert the sticks in the center, and chill for an additional 5 minutes to set the sticks.
Step 2 – Apply the Base Layer Coating
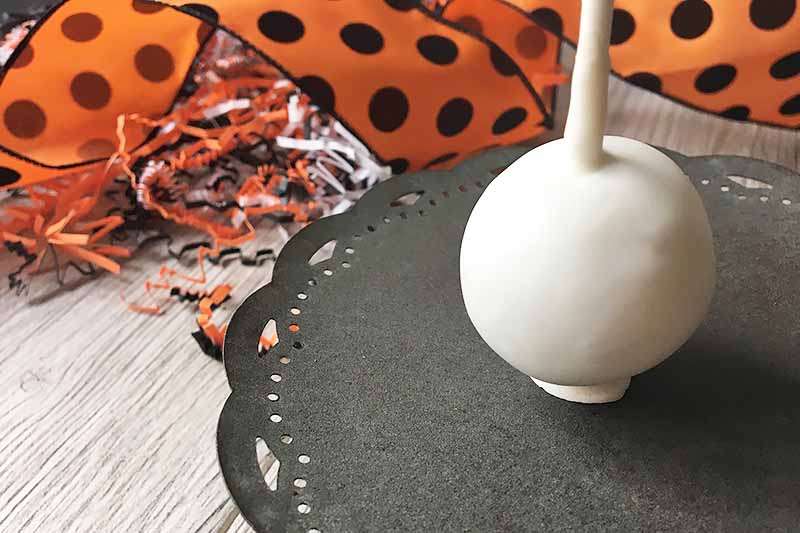
Remove them from the fridge.
Melt the white chocolate coating and let cool slightly for about 5 minutes. Once it has cooled slightly, dip each one in the chocolate, swirling it to completely coat the surface.
Gently tap it on the side of the bowl to remove any excess, using your fingers or a toothpick if necessary to guide the excess melted coating back into the bowl. Keep tapping and swirling the stick until all excess chocolate is removed, and you have a smooth, even layer.
If the chocolate gets too thick or too cold to work with, re-warm in the microwave, and stir in a little vegetable shortening.
If you want your pops to stand up on their own, apply one extra chocolate wafer on top of each pop with a little melted chocolate, with the flat side of the wafer facing up.
Insert each stick in the foam board, and allow the coating to set for 10-15 minutes at room temperature before applying the second layer of decorations.
Step 3 – Create the Mummy’s Wrappings
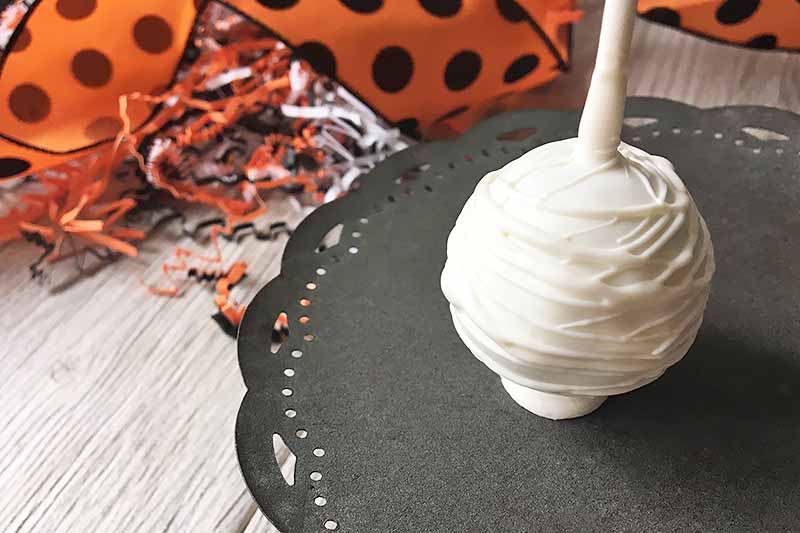
Hold the stick of one pop in one hand. With the other hand, dip a fork in the melted candy coating. Quickly move the fork back and forth over the ball as you slowly twist the stick in your hand, to drizzle chocolate onto the pop and create multiple horizontal lines across it.
Repeat with the remaining pops.
Step 4 – Apply the Eyes
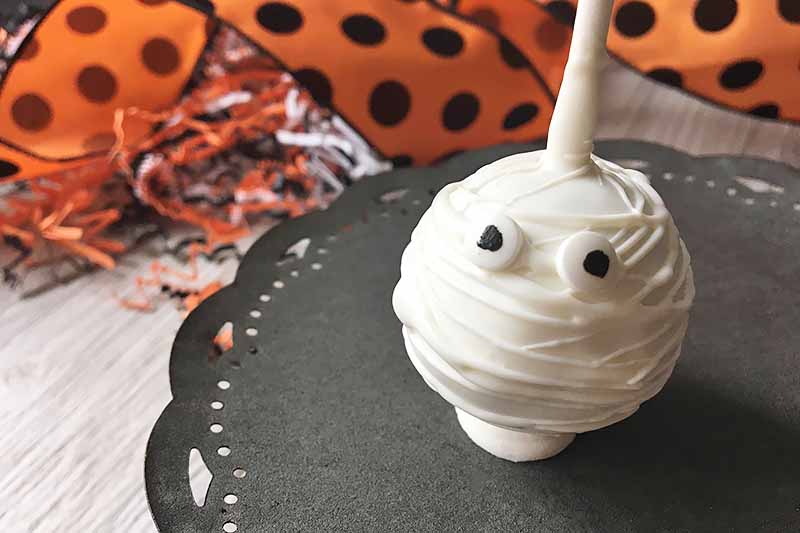
Working quickly before the wrappings layer sets completely, apply two sprinkles for the mummy’s eyes. You can use plain, dark, flat sprinkles, or candies decorated to look like eyes.
Step 5 – Set and Serve
Once the chocolate has completely set, your bite-sized desserts can be eaten immediately, or they can be stored in the refrigerator for up to a week.
You can carefully wrap each individual treat in cellophane and store on a large platter. Or, you can keep them upright on the foam block, and gently cover with a large sheet of plastic wrap or aluminum foil.
Mum(my)’s the Word
For Halloween, it’s so much fun to serve tasty desserts that are both frightful and delightful! My cake pops have the best costume this year, decorated as cute little mummies. And a combination of chocolate with orange candy coating accents is the perfect complement to this spooky cake pop spread.
Fun, festive, and tasty!
Please be sure to follow my tutorial to understand the basics of decorating these, as well as how to avoid any mistakes, like cracks and misshapen pops. You want these ghoulish treats to be scary for all the right reasons.
For even more garishly good recipes, serve beet monkey bread brains to really scare your guests. And make sure you have options for those who have allergiesas well.
What style of Halloween-themed cake pops will you make this season? Do you like these mummies, or will you try some other festive designs, like pumpkins, ghosts, or witches?
Share your thoughts below, and don’t forget to rate my recipe. And check out my cake pops for both Christmas and Valentine’s Day, too!
Photos by Nikki Cervone, © Ask the Experts, LLC. ALL RIGHTS RESERVED. See our TOS for more details. Originally published in October 2010. Last updated: August 7, 2023 at 9:01 am.
Nutritional information derived from a database of known generic and branded foods and ingredients and was not compiled by a registered dietitian or submitted for lab testing. It should be viewed as an approximation.
About Nikki Cervone
Nikki Cervone is an ACS Certified Cheese Professional and cheesemonger living in Pittsburgh. Nikki holds an AAS in baking/pastry from Westmoreland County Community College, a BA in Communications from Duquesne University, and an MLA in Gastronomy from Boston University. When she's not nibbling on her favorite cheeses or testing a batch of cupcakes, Nikki enjoys a healthy dose of yoga, wine, hiking, singing in the shower, and chocolate. Lots of chocolate.
I made a batch for my kids’ virtual school Halloween party. All three were delighted.
★★★★★
We’re so happy the kids enjoyed these cute and spooky treats! Thanks for the sweet comment, Kelli.