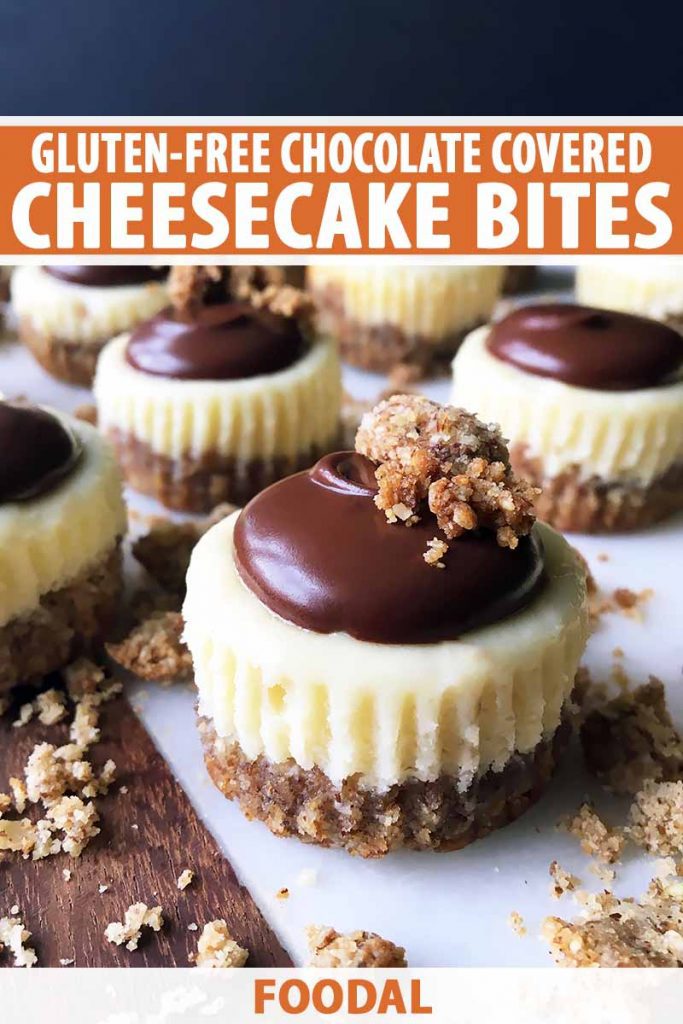
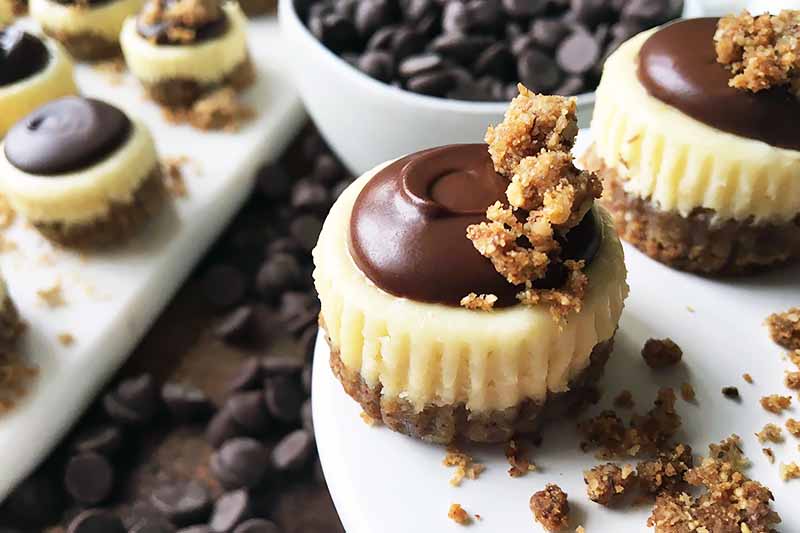
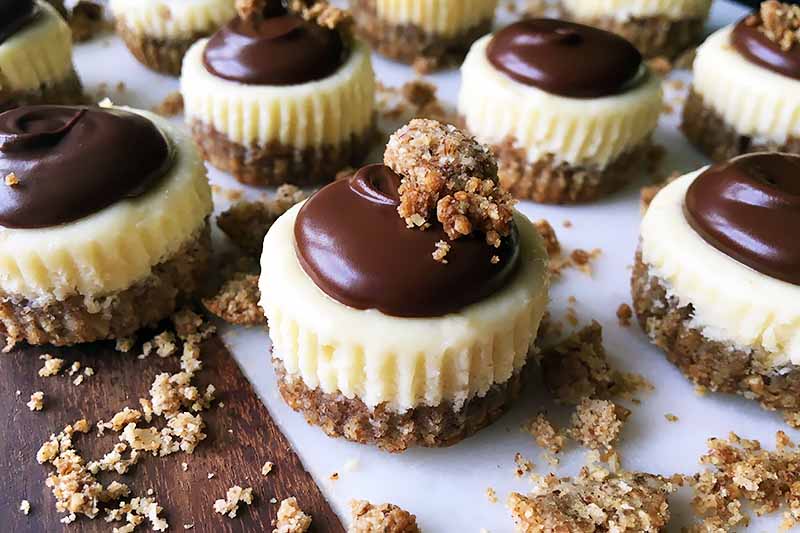
These mini cheesecakes have A LOT going for them!

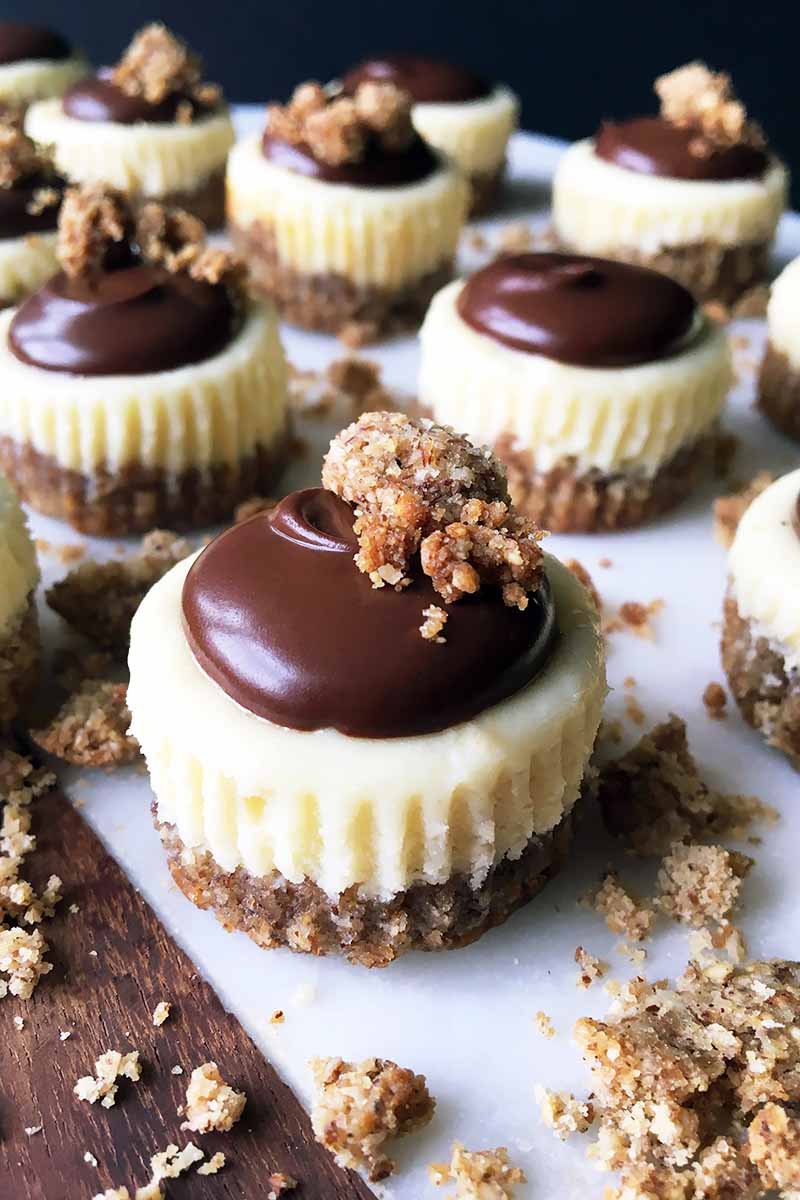
First, they’re covered in deep, delicious dark chocolate. Already a winner in my heart.
Second, the mini size makes them easy to bake, a big relief if you don’t want to tackle the difficult task of making a full-sized cheesecake.
And since these little fellas bake in just a few minutes, the recipe doesn’t require a dangerously teetering pan that could lead to a hot water bath tsunami.
Phew. Your skin is saved.
Third, they’re gluten-free. But you would never guess that!
The crust is a homemade almond meal base, using toasted almonds ground in a blender or food processor, along with some oats, flaxseed meal, and just a little brown sugar for sweetness.
The taste and texture will fool you into thinking it’s a graham cracker crust. While we love making homemade graham crackers, it’s smart to have a wheat-free option in your baking repertoire!
Fourth… Fourth… Ummm, fourth… Oh, my – lost my train of thought. No one to blame but myself – shouldn’t have left a tray of these sitting just inches away from where I’m working…
But do you really need any more reasons to understand that these creamy, chocolaty cheesecakes are something special?
No, sir!
You don’t need me to explain any further. Go on and make the recipe. I have more important matters that require my attention.
I’ll just be sitting here, nibbling on a couple of cheesecakes, trying not to get chocolate all over my keyboard.
Print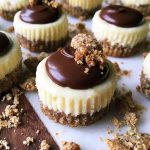
Gluten-Free Chocolate Covered Cheesecakes Bites
- Total Time: 1 hour, 10 minutes
- Yield: 24 mini cheesecakes 1x
Description
Love cheesecake, but struggle making it at home? Scale down the size with our easy gluten-free cheesecake bites covered in chocolate. Read more now.
Ingredients
For the Crust:
- 3/4 cup raw slivered almonds
- 3/4 cup gluten-free old fashioned oats
- 1/4 cup packed light brown sugar
- 1/4 cup ground flax seed
- 1/8 teaspoon salt
- 3/4 stick (6 tablespoons) unsalted butter, melted and cooled
For the Cheesecakes:
- 8 ounces cream cheese, softened to room temperature
- 1/3 cup granulated sugar
- 1/8 cup sour cream
- 1 teaspoon vanilla extract
- 1 large egg
- 3/4 cup dark chocolate chips or chopped chocolate
Instructions
For the Crust:
- Preheat oven to 350°F. Line a 24-cup mini cupcake pan with mini cupcake liners and set aside.
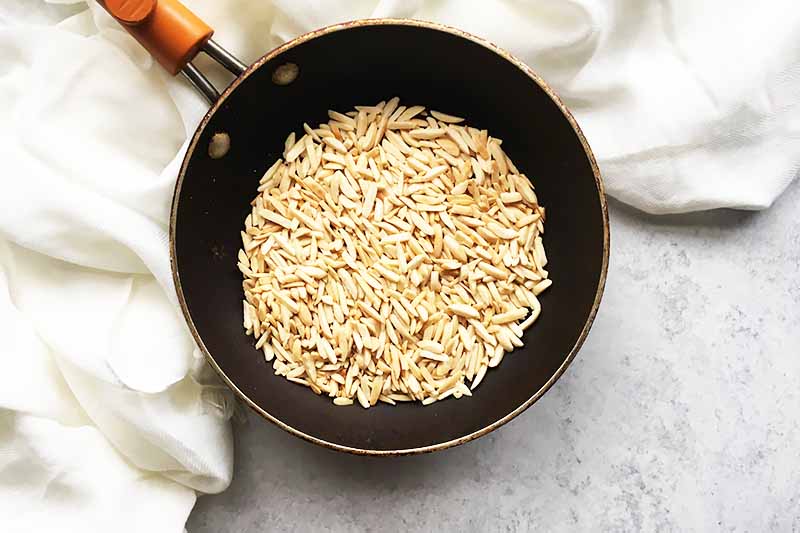
- Add the slivered almonds to a dry skillet over medium-low heat. Toast, stirring often, until fragrant and the almonds begin to brown, about 2-4 minutes. Remove from heat, and let them cool.
- In the bowl of a food processor or blender, add the toasted almonds, oats, sugar, ground flax seed, and salt. Pulse for just a couple seconds until the mixture is finely ground.
- Add the melted butter to the food processor. Process until the mixture begins to stick together, about 1 minute.
- Drop about 1 teaspoon of the mixture in the bottom of each cup of the muffin pan. Firmly press the mixture into the bottom of the cup to create a crust.* Set aside.
For the Filling:
- In a large mixing bowl of a stand mixer fitted with a paddle attachment, beat together the cream cheese and sugar until smooth. Mix in the sour cream and vanilla until incorporated. Beat in the egg until just combined.
- Divide cream cheese mixture among the muffin cups, filling close to the top of each cup.
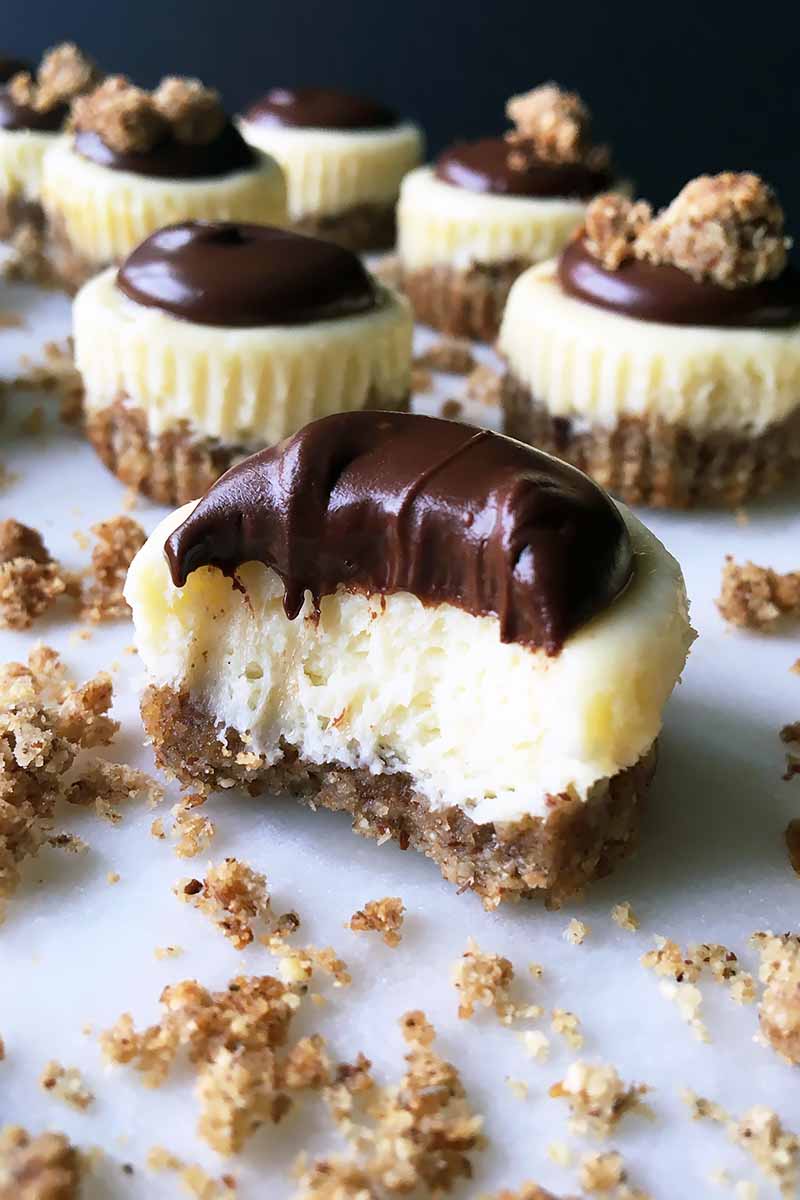
- Bake for 8-10 minutes, or until tops are puffed and just about set, but with a slightly wet and jiggly center. Remove from the oven and let cool for at least 10 minutes before removing from the pan.
- Place cheesecakes on a cooling rack and let cool completely at room temperature. Once cooled, refrigerate in an airtight container for at least 30 minutes or overnight.
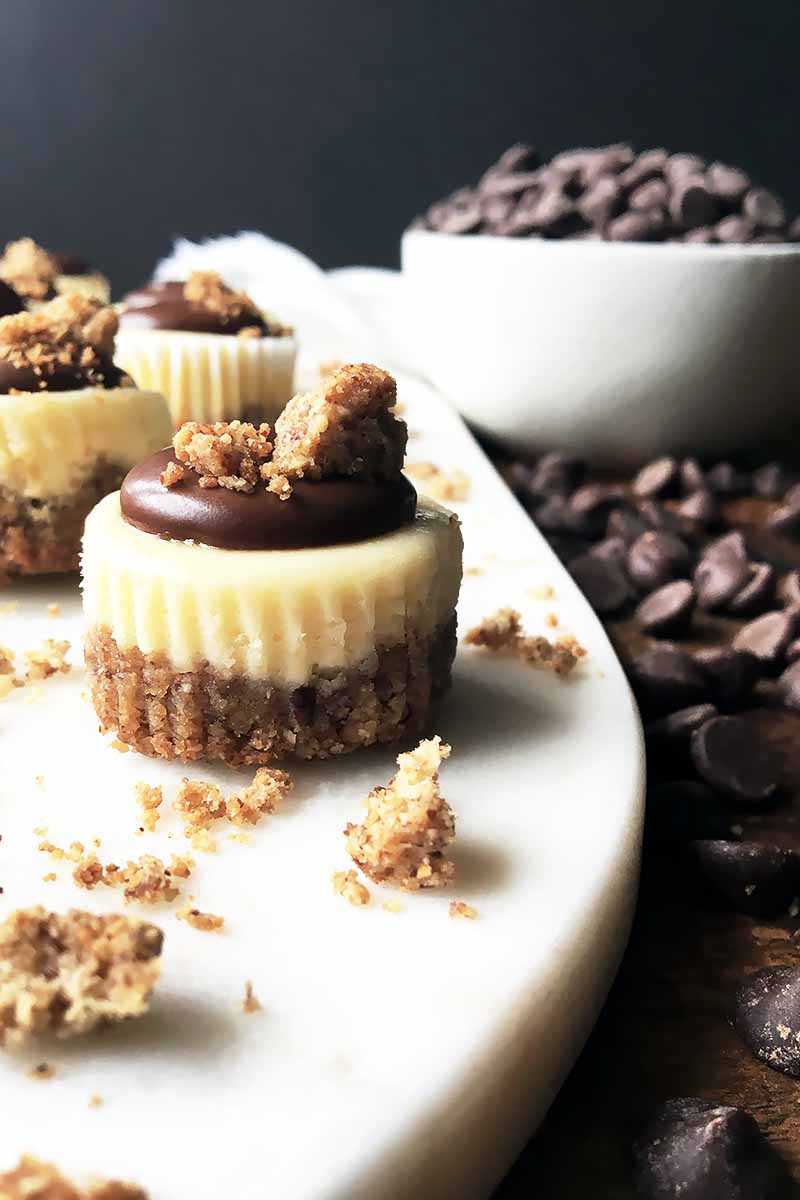
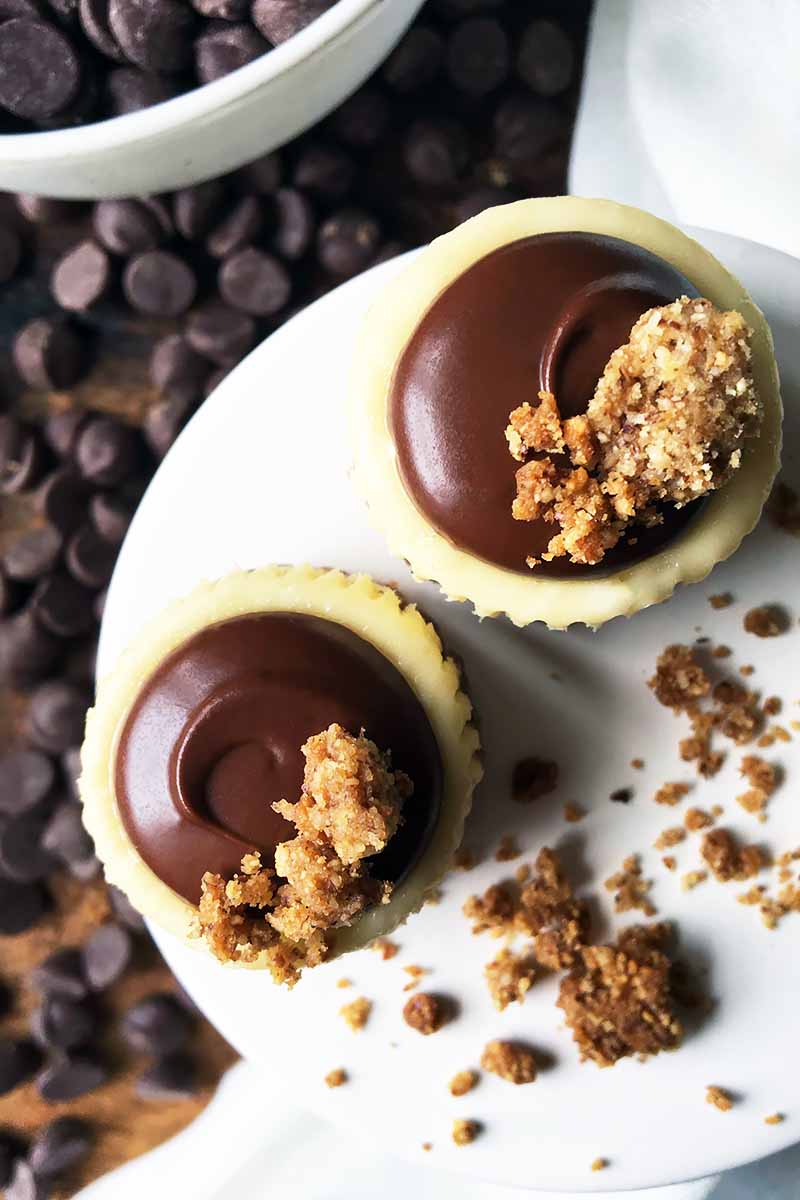
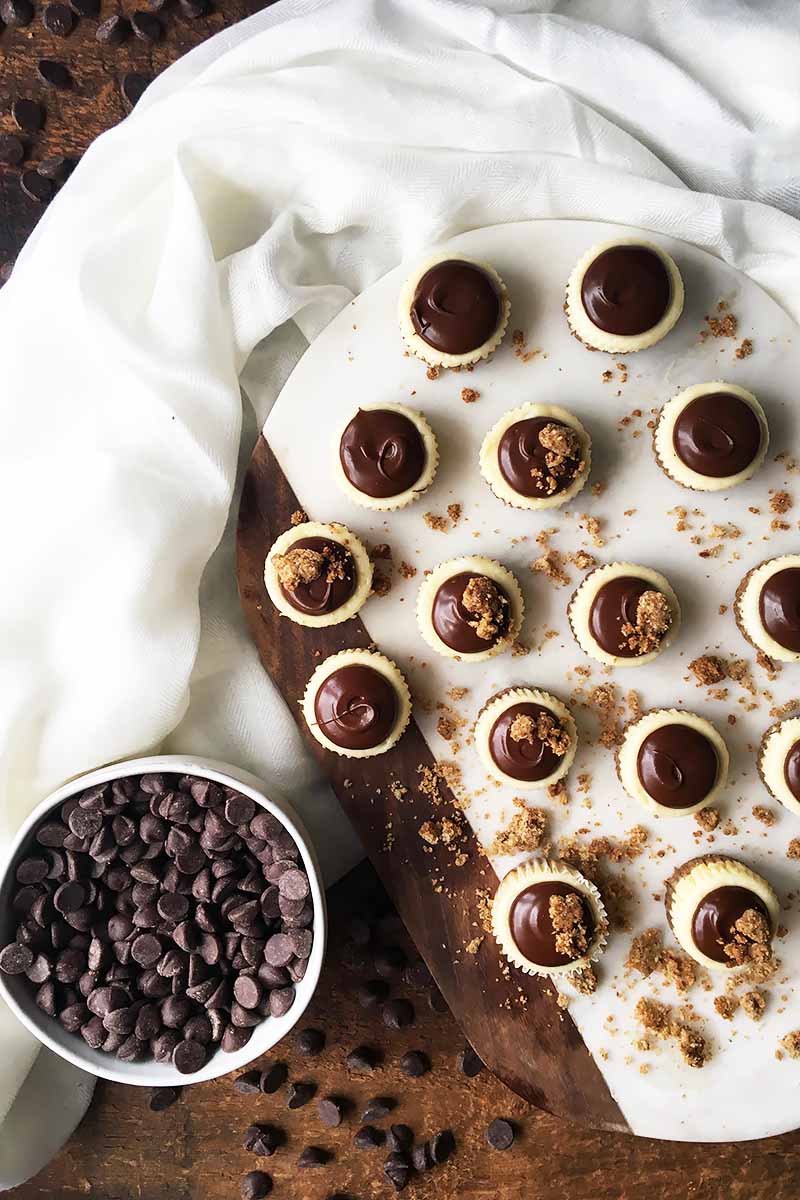
For the Garnish:
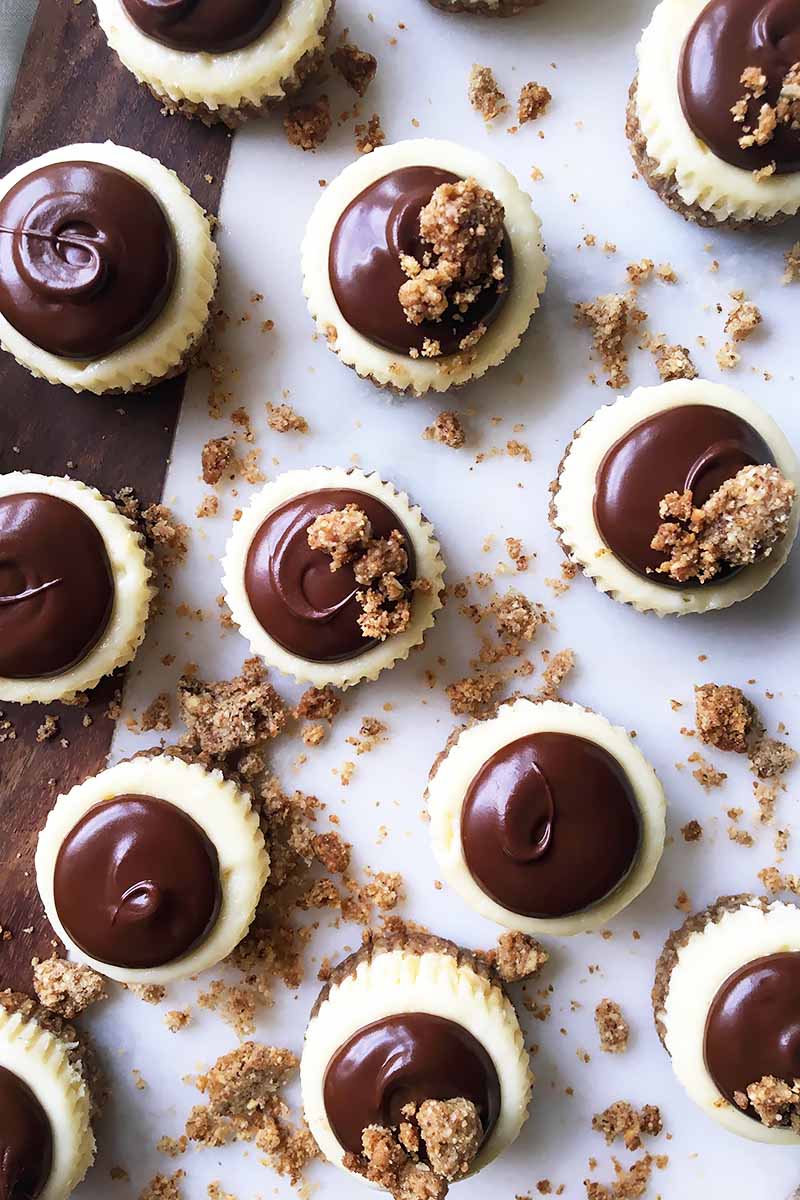
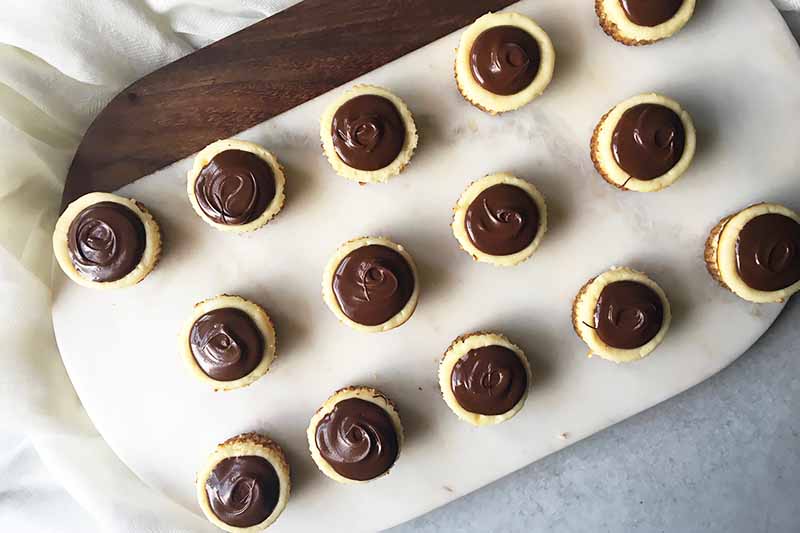
- Melt chocolate in the microwave. Using a spoon or piping bag, garnish the tops of each cheesecake with a thin dollop of melted chocolate. Refrigerate until the chocolate sets. Serve and enjoy!
Notes
*Optional: The remaining crust mixture can be used as a garnish. Spread it out on a baking sheet pan lined with parchment paper and bake at 350°F for 5-8 minutes, until toasted slightly. Cool and sprinkle on top of the chocolate.
- Prep Time: 10 minutes
- Cook Time: 10 minutes
- Category: Cheesecake
- Method: Baking
- Cuisine: Dessert
Cooking by the Numbers…
Step 1 – Prep
Preheat oven to 350°F. Line a 24-cup mini cupcake pan with mini paper liners and set aside.
Toast the slivered almonds in a dry skillet over medium-low heat. Stir often, and don’t walk away! They can go from perfectly toasted to burnt in just a few seconds.
Remove from heat, and let them cool.
Step 2 – Make the Crust
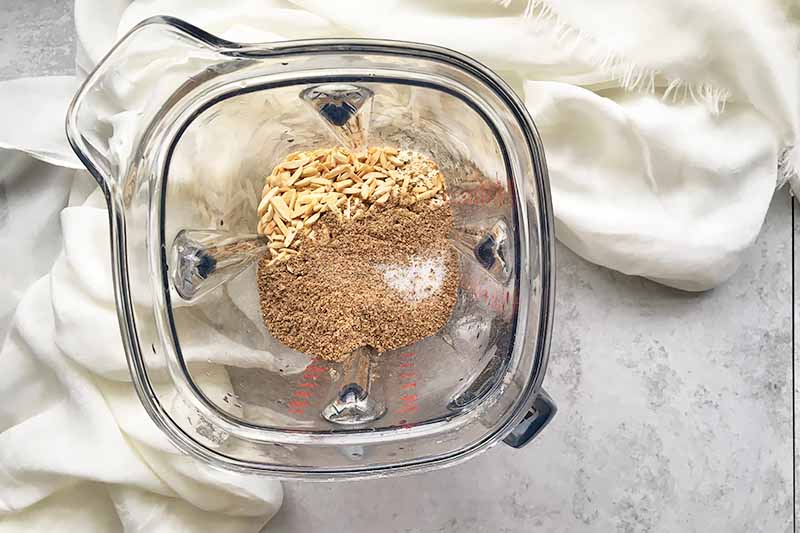
In a food processor or blender, add the toasted almonds, oats (make sure they’re gluten-free!), brown sugar, ground flax seed, and salt. Pulse for just a couple seconds until the mixture is finely ground.
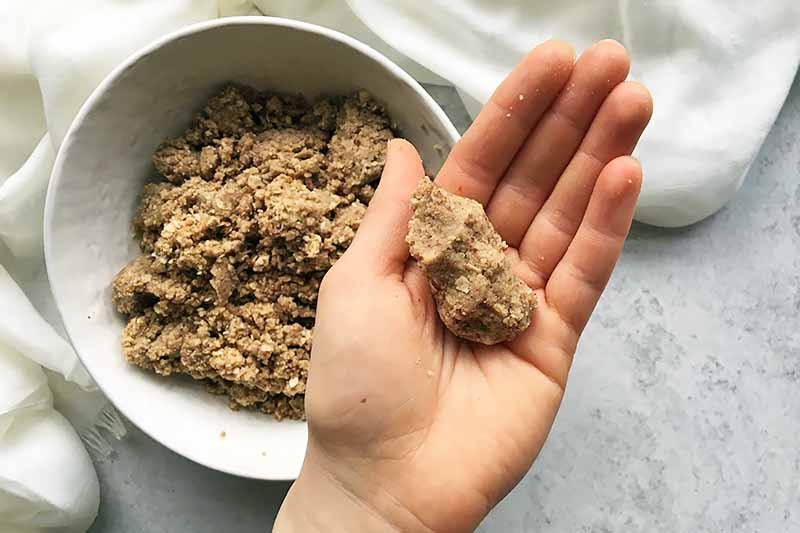
Add the melted unsalted butter. Process until the mixture begins to stick together, about 1 minute. Place the mixture in a large bowl.
Step 3 – Press the Crust into the Cups

Drop about 1 teaspoon of the mixture in the bottom of each cup of the muffin pan. Using your fingers, press the mixture into the bottom of the cup to create a crust. Set aside. Reserve any extra crust mixture for an optional garnish in Step 7.
Wondering why you don’t have to pre-bake the crust? You really don’t need to! Because they are so small, and you pre-toasted the almonds, you are already a few steps ahead in the baking process.
Step 4 – Make the Filling
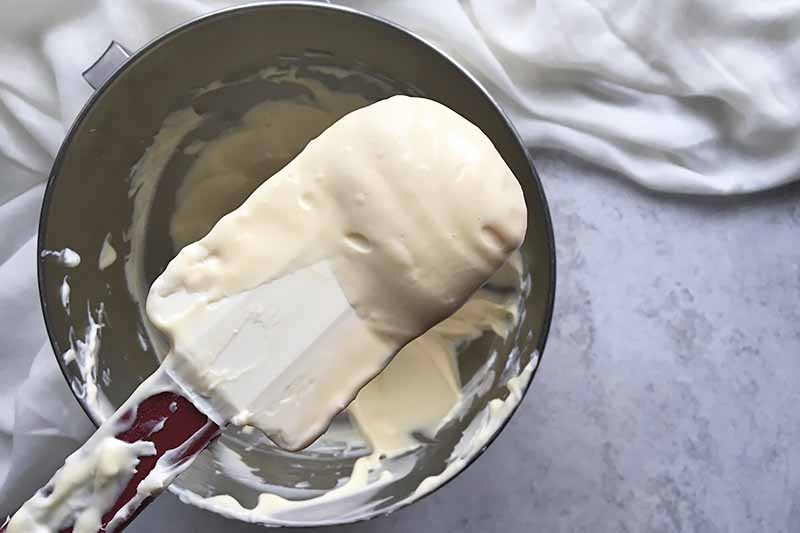
In a large mixing bowl of a stand mixer fitted with the paddle attachment (or with a hand mixer!) beat together the room temperature cream cheese and granulated white sugar until very smooth.
Make sure your cream cheese is softened to room temperature – cold cream cheese will be more difficult to mix thoroughly until smooth. We don’t want any lumps!
Mix in the sour cream and vanilla extract until incorporated.
Beat in the egg until just combined. Don’t overmix once the egg is incorporated. Overmixing with the egg will cause too much air development, which will risk cracking the base as it is baking.
Step 5 – Divide the Mixture in the Pan
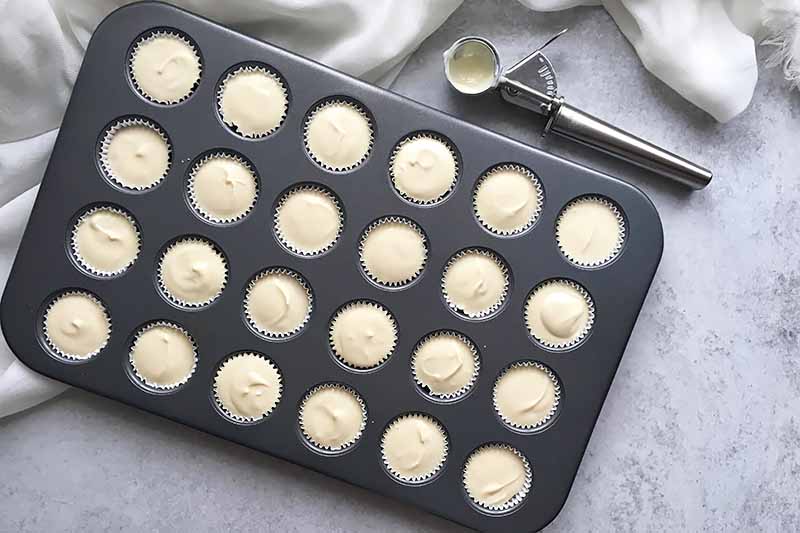
Divide cream cheese mixture among the muffin cups, filling close to the top. To help you fill the cups as evenly as possible, use a mini cookie scooper.
Step 6 – Bake and Cool

Bake for 8-10 minutes, or until the tops are very puffed and just set. The tops will still look a little wet, and will be slightly jiggly in the center.
Keep your eyes on them as they bake! Because of the mini size, they don’t need to much time in the oven. If you over-bake, the filling will be too dry, and you may risk getting cracked tops.
Any cracked tops can be fixed easily, though – you’ll be covering them with melted chocolate!
Remove from the oven and let cool for at least 10 minutes before removing from the pan. Place cheesecakes on a cooling rack and let cool completely at room temperature. Once cooled, refrigerate in an airtight container for at least 30 minutes or overnight to set the base.
Step 7 – Bake Extra Crust Mixture (Optional)
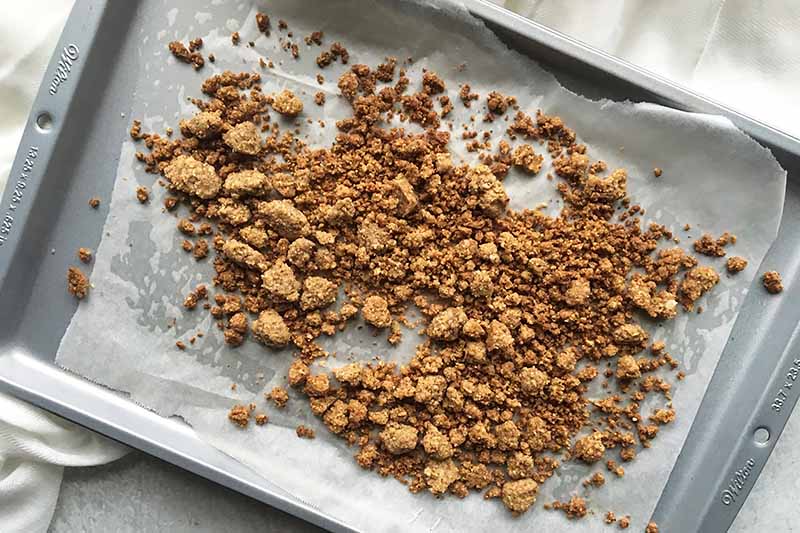
While the oven is still set to 350°F, evenly spread the reserved crust mixture on sheet pan lined with parchment paper.
Bake for about 5-8 minutes, stirring occasionally, until the mixture is toasted. Cool completely before using as a garnish.
Step 8 – Decorate
Melt chocolate in the microwave. Having any difficulty with this? Check out our tips for saving seized chocolate.
Using a spoon or piping bag fitted with a small round tip (get all of our recommendations for basic cake decorating tools!), decorate the tops of each cheesecake with a dollop of melted chocolate.
If using, garnish with a few crumbles of the cooled crust mixture. Place the cheesecakes in the refrigerator to set the chocolate.
Serve and enjoy!
Mini Dessert, Grand Finale!
If you struggle with making cheesecakes at home, ditch the full size, and make this easier mini version instead!
For such small treats, these little sweets will be the big stars at your next party. It’s the perfect size if you don’t want to eat a whole slice of cheesecake.
In just a bite, you get all the flavors and textures of the creamy base, the nutty crust, and the chocolate on top.
This format would work wonders with your favorite cheesecake recipe. With a few alterations, you can transform any cheesecake into a mini design.
If you live in a dairy-free household, try it with our dairy-free chocolate cheesecake, and use Oreo cookie crumbles as the topping.
If you’d rather skip the chocolate, go for a sweet fruit topping instead by using the recipe for our cherry garnish in our Classic Cherry Cheesecake. One cherry for each cheesecake bite will look adorable!
When will you make these flavor bombs of sweetness? I’m excited to hear back from you, especially with what you think about the gluten-free crust. Let me know in the comment section below!
Fore more mini treats, try these:
- Brownie Bites
- Vegan Key Lime Whoopie Pies
- Mini Blueberry Maple Galettes
- Blueberry Almond Cookie Dough Truffles
- Hazelnut Truffles
Photos by Nikki Cervone, © Ask the Experts, LLC. ALL RIGHTS RESERVED. See our TOS for more details. Originally published on December 22, 2011. Last updated: January 29, 2023 at 19:21 pm.
Nutritional information derived from a database of known generic and branded foods and ingredients and was not compiled by a registered dietitian or submitted for lab testing. It should be viewed as an approximation.
About Nikki Cervone
Nikki Cervone is an ACS Certified Cheese Professional and cheesemonger living in Pittsburgh. Nikki holds an AAS in baking/pastry from Westmoreland County Community College, a BA in Communications from Duquesne University, and an MLA in Gastronomy from Boston University. When she's not nibbling on her favorite cheeses or testing a batch of cupcakes, Nikki enjoys a healthy dose of yoga, wine, hiking, singing in the shower, and chocolate. Lots of chocolate.
Can you make the filling the night before? Or should it be made and baked immediately?
Hi, Gretchan! It’s best that you bake the filling immediately.
When do you remove the yummy treat from the cupcake liner? Also, if made in a full size cupcake pan, how long would the baking time be?
Hi Colleen,
The liners can be removed after the chocolate sets, just before serving.
We haven’t tested this recipe in a full-size pan, so attempting this will require some experimentation on your part. Check for doneness the same way we recommend above, and check every 2 minutes or so for a total bake time in the 12- to 16-minute range.