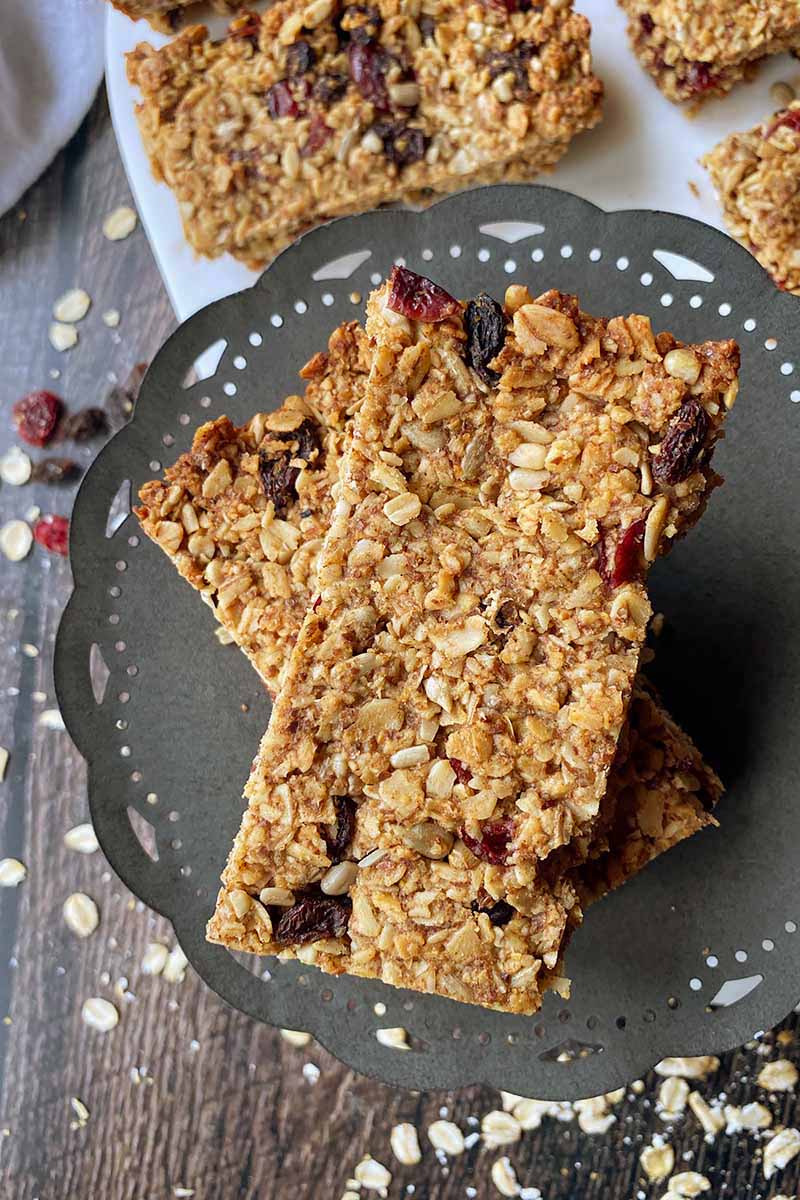
These gluten-free dairy-free granola bars will become a favorite snack morning, noon, and night if you and your family live with food allergies.
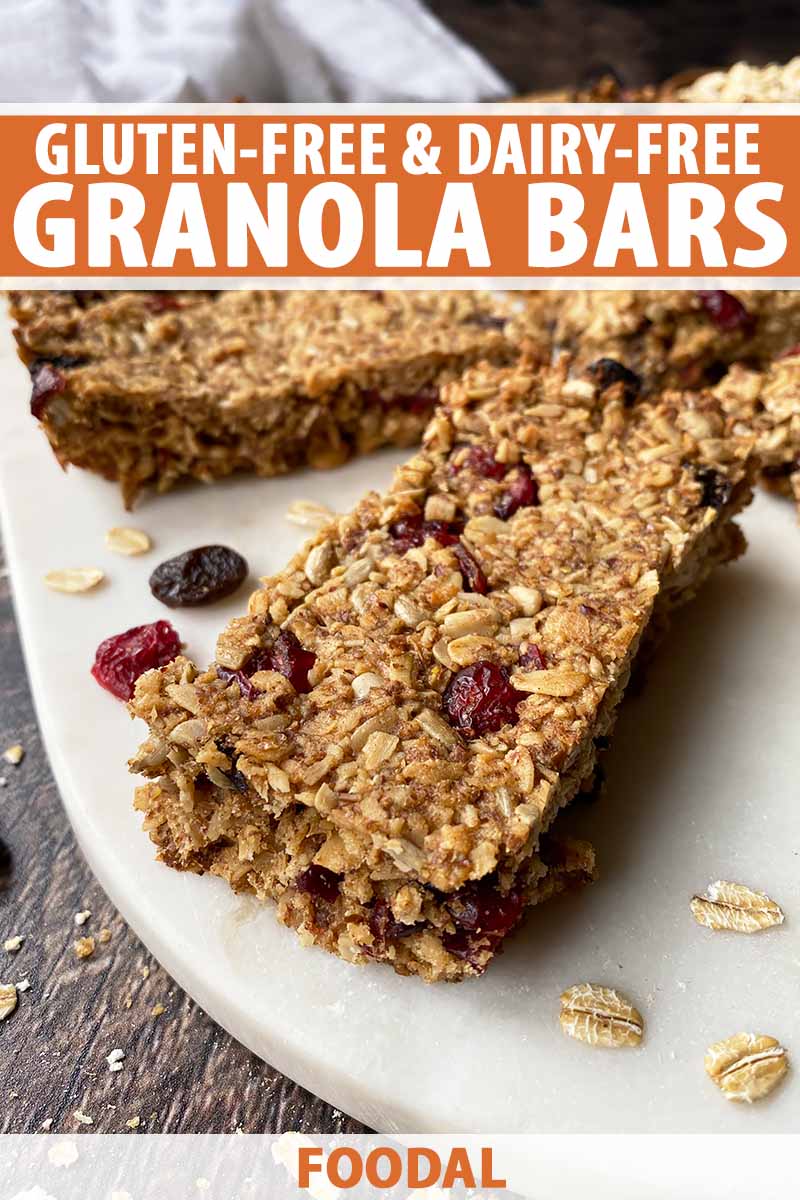
This recipe is not just free of wheat and dairy products – it’s also free of other top allergens like eggs, tree nuts, peanuts, and soy.
It doesn’t have any of the ingredients that are common causes for concern in the US, but the granola bars are still packed with plenty of delicious flavors and wholesome ingredients.
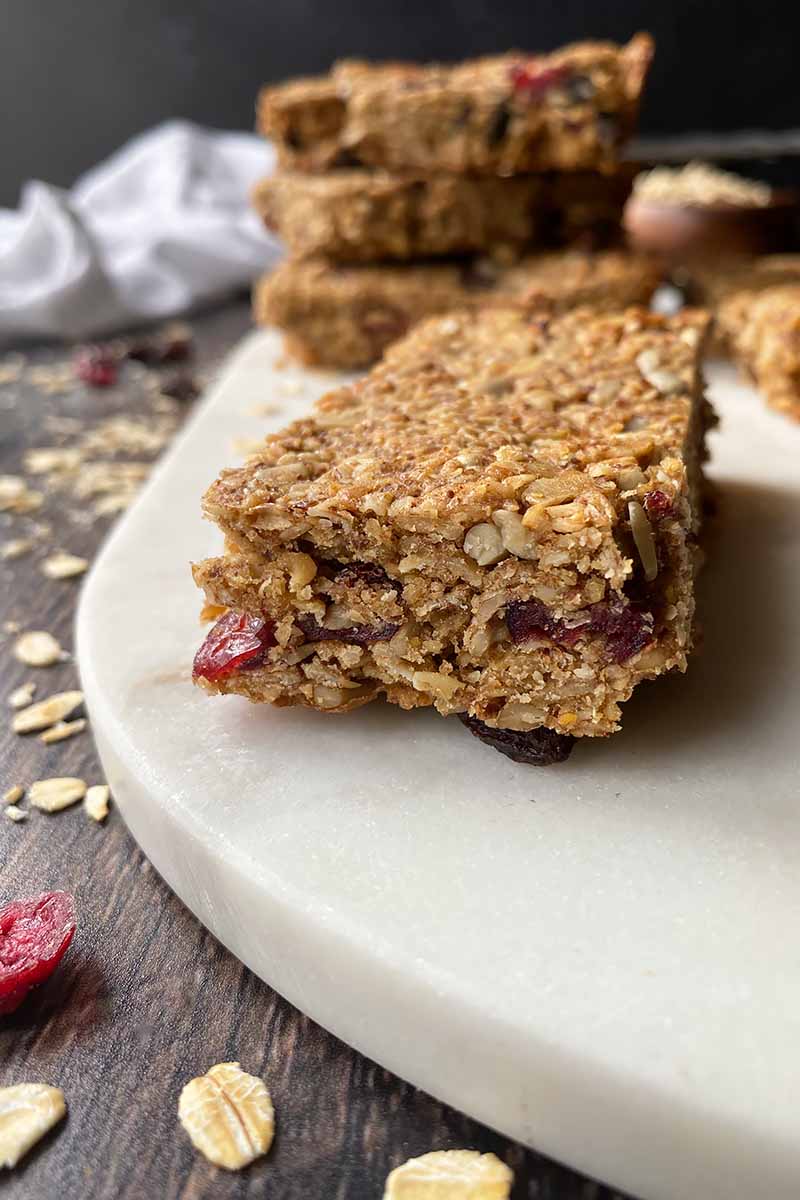
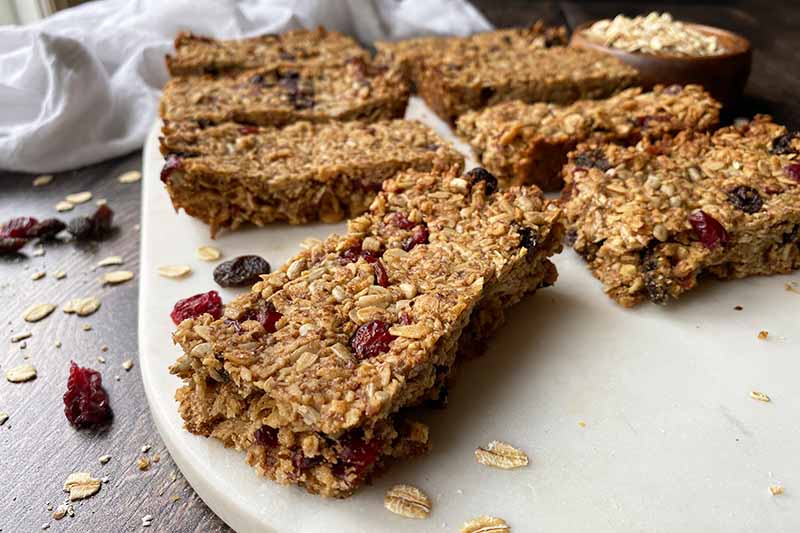
The oat and ground flaxseed base is packed with dried fruit, sunflower seeds, and unsweetened coconut shreds, and coconut oil binds everything together.
The recipe has just a little agave nectar for sweetness, and dashes of cinnamon and vanilla extract for their warm and enticing aromas.
Even if you don’t have to deal with any allergies, this will still be a popular recipe to make for a quick, healthy, and sustaining treat.
I keep a permanent stash of these in my drawer at work!
When I’m running around for the first few hours of my work day, trying to beat all of my morning deadlines, I don’t have time to sit down and eat breakfast.
And when I’m getting hungry before my lunch break, or when I’m running out of energy during the last hour of my shift, I need to have something in my system to recharge.
It’s easy for me to grab one of these granola bars so I can have a nutritious, wholesome boost while I’m on the go at my job.
It’s a snack I definitely need – I’ve been told I power walk very quickly at work!
These granola bars freeze well, too. Just place them in an airtight bag with a piece of parchment paper in between each layer and store flat in the freezer.
They’re so easy to whip up as part of your weekly prep. With just a little planning ahead of time, you can have an easy breakfast or snack to grab all throughout the week.
Print
Gluten-Free Dairy-Free Granola Bars
- Total Time: 35 minutes
- Yield: 8 bars 1x
Description
Need an allergen-free snack that is packed with tasty and wholesome ingredients? You’ll want to make a couple batches of these granola bars.
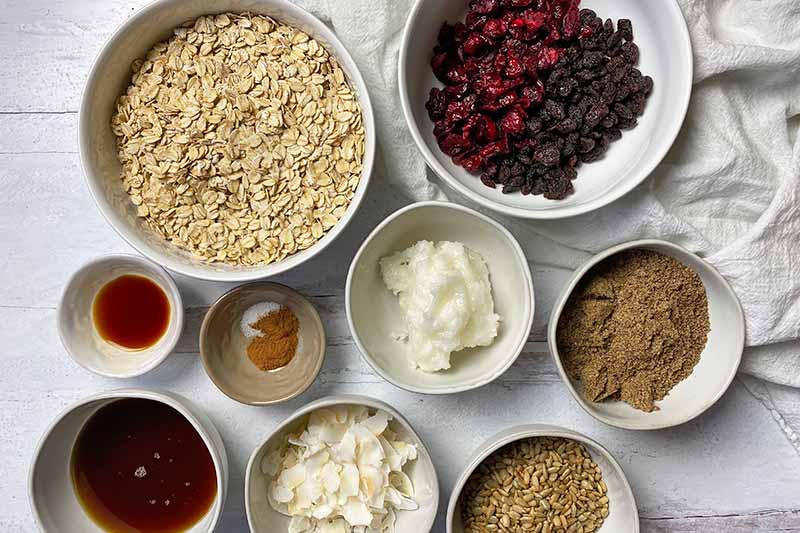
Ingredients
- 2 cups gluten-free rolled oats
- 1/2 cup ground flax seed
- 1/2 cup raw sunflower seeds
- 1/2 cup unsweetened coconut flakes
- 1/4 teaspoon salt
- 1/4 teaspoon ground cinnamon
- 1/2 cup raw agave nectar, plus more as needed
- 1/2 cup coconut oil, plus 1 teaspoon for the pan
- 1 teaspoon vanilla extract
- 1/2 cup dried cranberries
- 1/2 cup dried raisins
Instructions
- Preheat the oven to 300°F. Coat an 8-by-8-inch baking dish with 1/2 teaspoon of coconut oil. Line with parchment paper, leaving an overhang on two sides for easy removal, and coat the paper with the remaining 1/2 teaspoon of coconut oil. Set aside.
- In a food processor, add the oats, sunflower seeds, flax seeds, coconut, salt, and cinnamon. Pulse for about 30 seconds, or until finely chopped. Pour mixture into a large mixing bowl and set aside.
- Place the agave, 1/2 cup coconut oil, and vanilla in a small sauce pan over medium heat. Heat and stir until warm and everything is combined, about 1 minute, stirring constantly with a spatula.
- Pour the agave mixture into the bowl with the dry ingredients. Add the dried fruit. Stir everything together until all ingredients are completely combined.
- Spread the mixture evenly into the prepared baking dish, pressing down very firmly.
- Bake for 20-25 minutes, or until lightly browned on the top and edges. Remove pan from oven. Place on a wire rack to cool in the pan for 30 minutes.
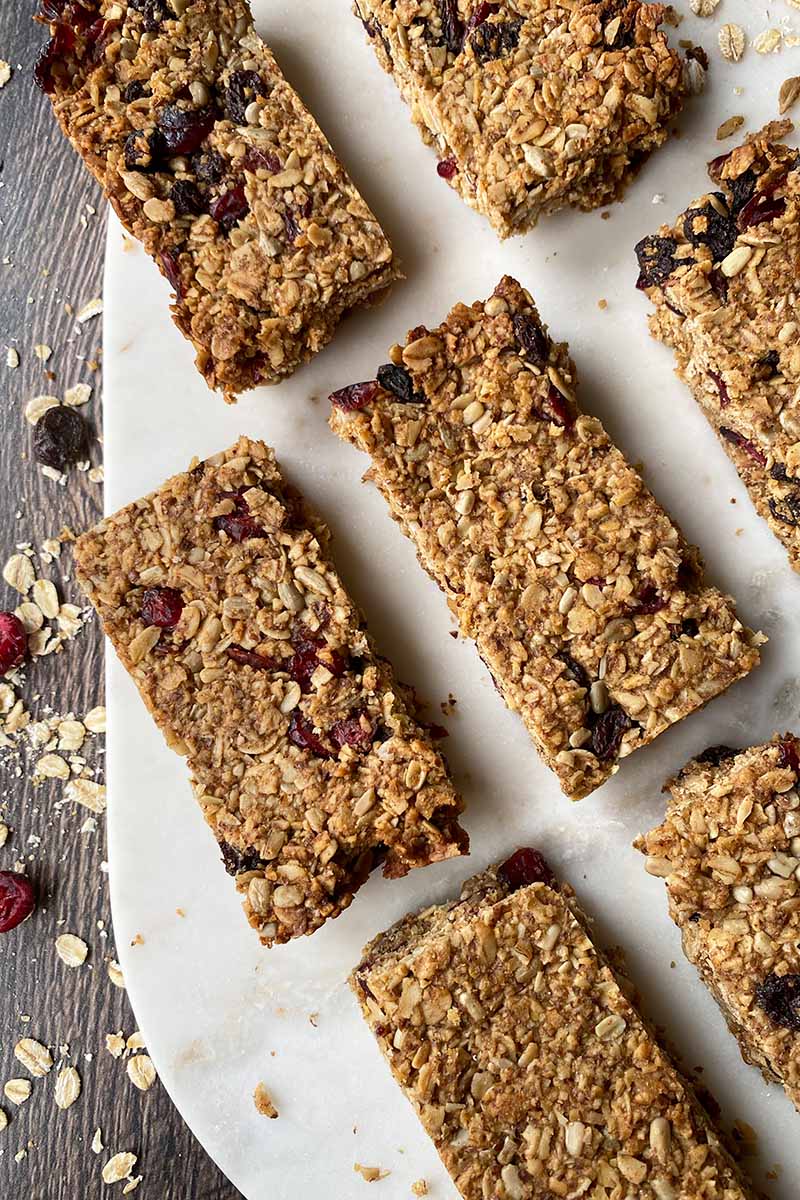
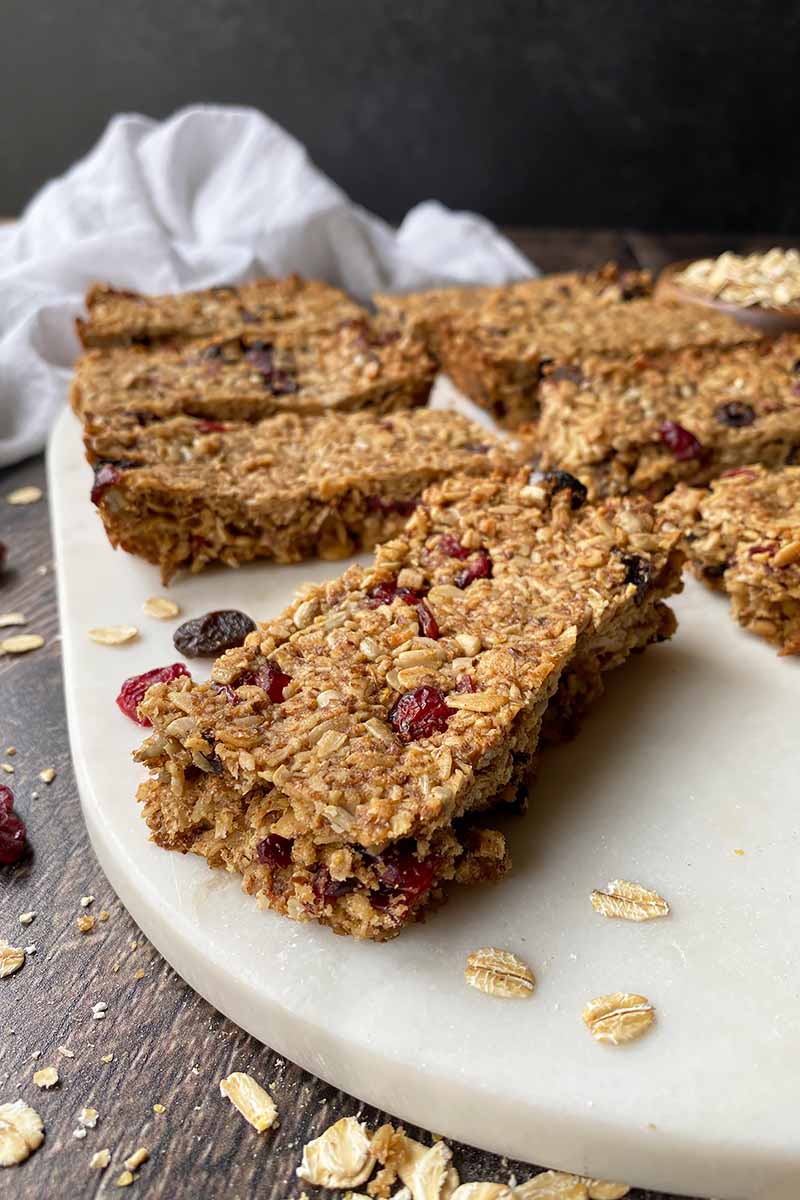
- Once cooled, use the overhang of parchment to carefully lift the baked mixture from the pan. Cut into 8 long bars and serve.
- Prep Time: 10 minutes
- Cook Time: 25 minutes
- Category: Granola Bars
- Method: Baking
- Cuisine: Snacks
Cooking by the Numbers…
Step 1 – Prep
Preheat the oven to 300°F. Coat an 8-by-8-inch baking dish with 1/2 teaspoon of coconut oil. Line with parchment paper, leaving an overhang on two sides, and coat the top of the paper with the remaining 1/2 teaspoon of the coconut oil. Set aside.
The overhanging parchment paper paper will help to easily and cleanly remove the granola bars from the pan so you can cut them.
Measure out all of the ingredients.
Note: If you decided to use dried cherries, apricots, dates, or any other types of larger dried fruit, chop them into smaller chunks with a sharp knife and sturdy cutting board.
Step 2 – Pulse Together Dry Ingredients
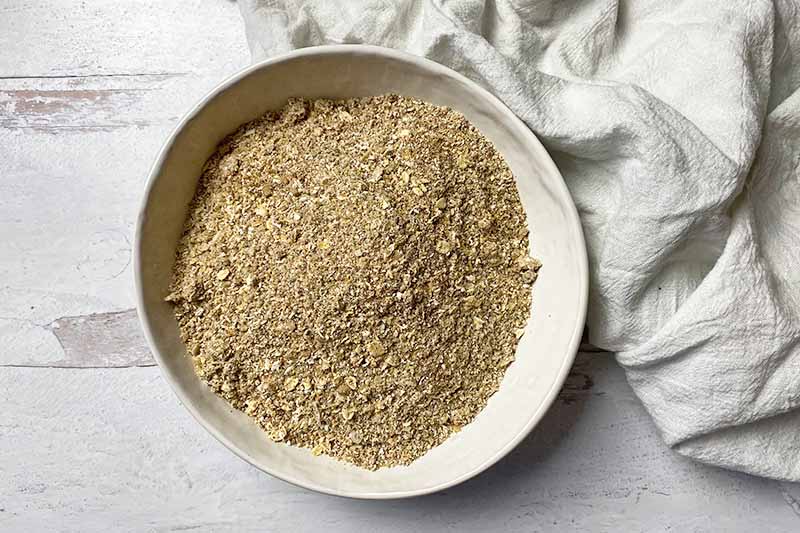
In a food processor, add the oats, flax seeds, sunflower seeds, coconut, salt, and cinnamon. Pulse for about 30 seconds, or until finely chopped. Pour the mixture into a large mixing bowl and set it aside.
Don’t pulse for too long – you still want all of the ingredients to have a lot of texture for the granola bars, rather than a fine and sandy consistency.
Step 3 – Heat Wet Ingredients
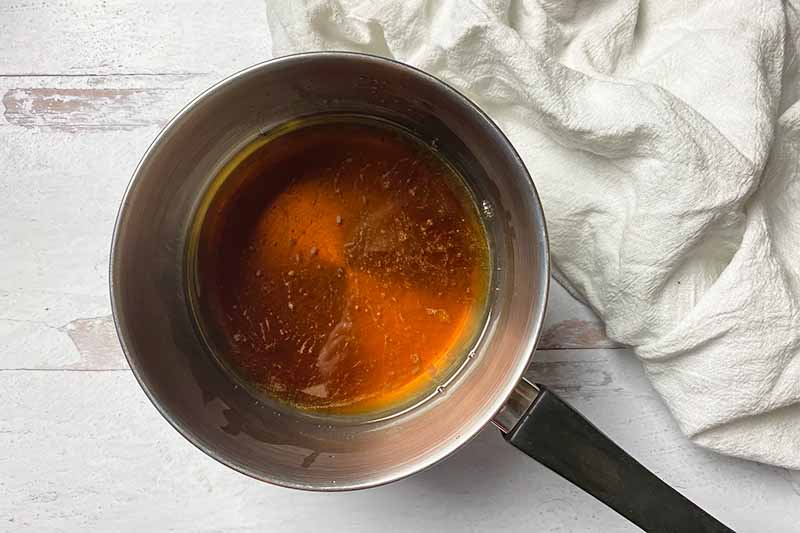
Place the agave, 1/2 cup coconut oil, and the vanilla in a small sauce pan over medium heat. Heat and stir until warm and everything is combined, about 1 minute, stirring constantly with a spatula.
We’re keeping things vegan with this recipe by using agave, but feel free to use honey instead if that is your preferred sweetener.
Step 4 – Combine
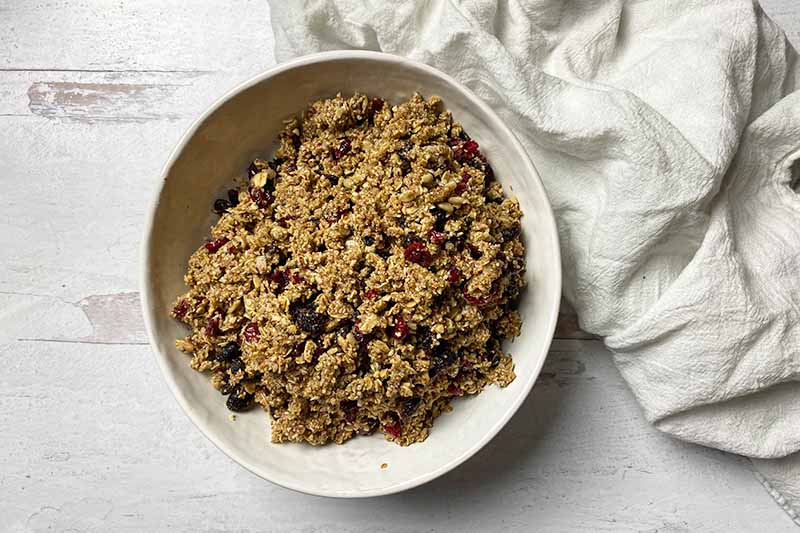
Pour the agave mixture into the bowl with the dry ingredients. Add the dried fruit. Stir everything together with a sturdy spoon or spatula until all ingredients are completely combined and stick together easily when pressed.
Does the mixture seem too dry? If the mixture is not sticking together easily, add 1-2 more tablespoons of agave nectar.
Step 5 – Shape and Bake
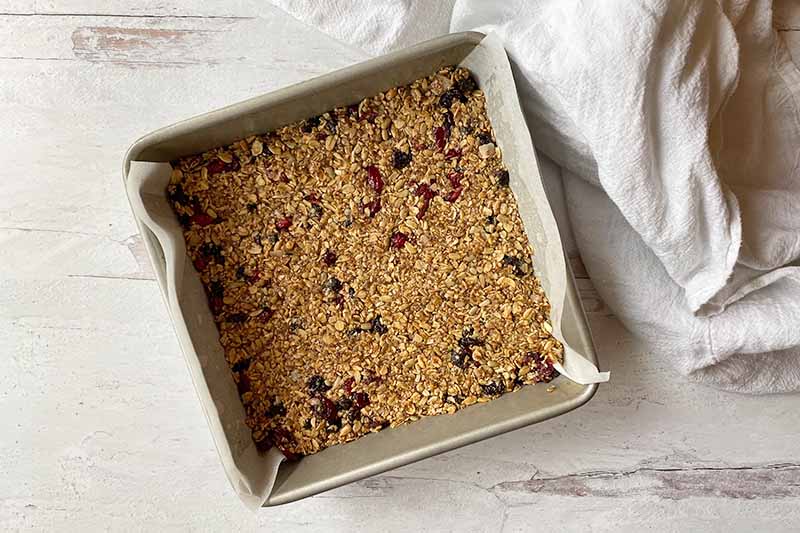
Spread the mixture evenly into the prepared baking dish, pressing down very firmly. You want to create a solid and even surface across the entire dish. You can choose to press down with your hands, or use a large spoon or the back of a measuring cup to help.
Bake for 20-25 minutes, or until lightly browned on the top and edges. Place on a wire rack to cool for 30 minutes in the pan.
Step 6 – Cut in Equal Portions

Once cooled, use the parchment to carefully lift the baked mixture from the pan.
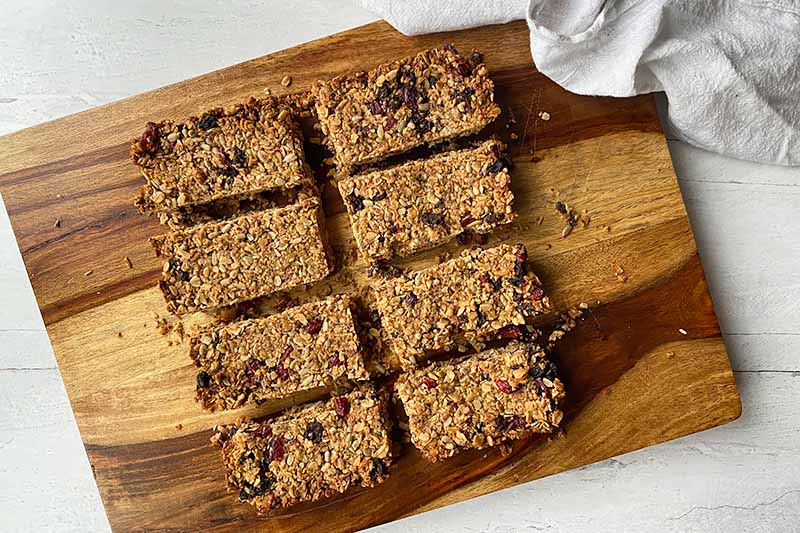
Cut into 8 long bars with a sharp knife on a cutting board, and store or serve.
Easy to Make, Easy to Customize
Do you have a favorite type of dried fruit you love to eat? Are you a fan of chia seeds, toasted pumpkin seeds, or hemp seeds? Or maybe you prefer dark chocolate chunks or cacao nibs for an extra bit of healthy indulgence?
Change the ingredients as much as you please!
This recipe is easily customizable with your favorite add-ins for a snack that is truly and uniquely yours, to be enjoyed whenever and wherever you need it the most.
Have a stash ready on your kitchen counter, store a few in your car, or keep some at work. As long as you keep them in an airtight container or bag, they will certainly come in handy when you need something healthy to eat in the case of a sudden snack attack.
Need more healthy snacks to stash in your own drawer? Grab and go with the following bar recipes:
What are some of your favorite allergen-free recipes to make for you and the family to enjoy? Do you think this will become a regular on your list? Comment below – I can’t wait to hear from you!
Photos by Nikki Cervone, © Ask the Experts, LLC. ALL RIGHTS RESERVED. See our TOS for more details. Originally published on October 16, 2012. Last updated on April 24, 2021.
Nutritional information derived from a database of known generic and branded foods and ingredients and was not compiled by a registered dietitian or submitted for lab testing. It should be viewed as an approximation.
About Nikki Cervone
Nikki Cervone is an ACS Certified Cheese Professional and cheesemonger living in Pittsburgh. Nikki holds an AAS in baking/pastry from Westmoreland County Community College, a BA in Communications from Duquesne University, and an MLA in Gastronomy from Boston University. When she's not nibbling on her favorite cheeses or testing a batch of cupcakes, Nikki enjoys a healthy dose of yoga, wine, hiking, singing in the shower, and chocolate. Lots of chocolate.