
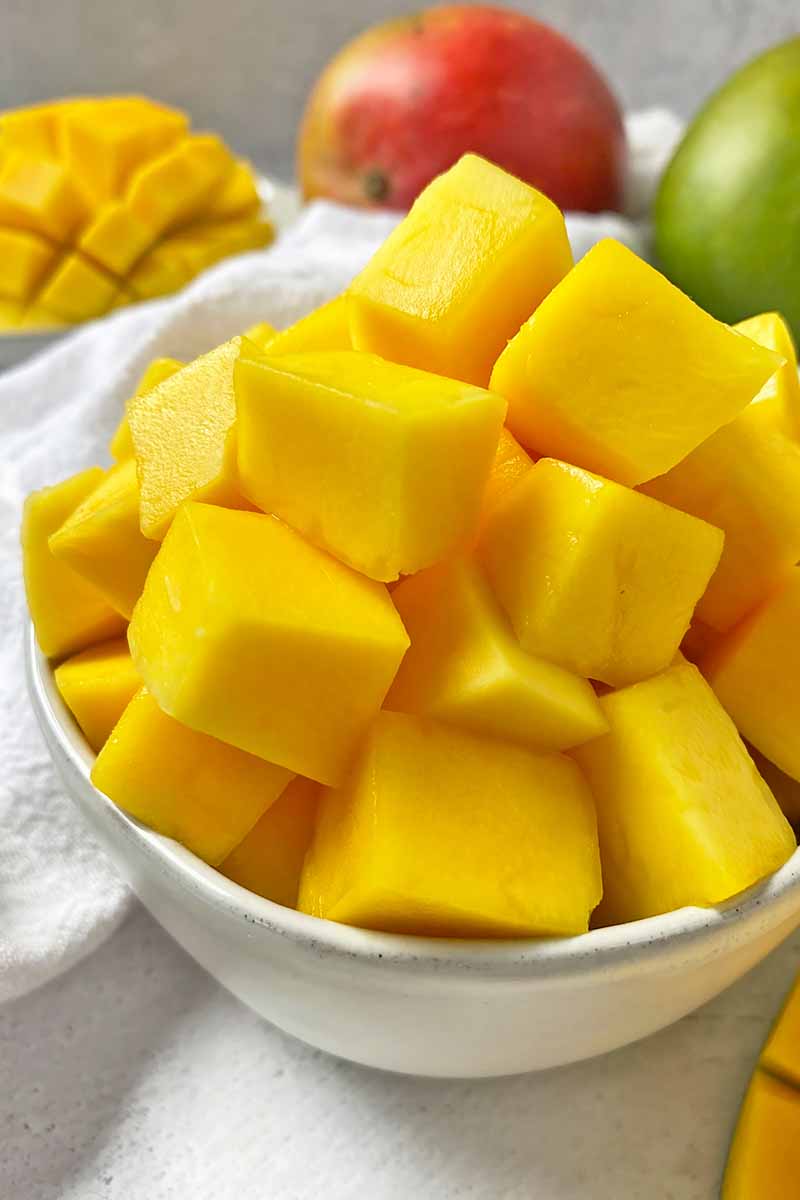
So sweet, so juicy, so tender! There is nothing quite like a fresh, ripe mango, dripping with succulent, syrupy juice.

It really is the epitome of pure joy – how can you not be the happiest version of yourself when you’re slowly savoring luscious chunks of this tasty fruit?
That happiness needs to be earned, though. Prepping a mango is no easy feat.
The mere thought of slicing a ripe mango can instantly erase the smile from your face as soon as you get home from the grocery store and realize you have to be the one prep it in order to release the glorious flesh from its annoyingly clingy skin.
But we’re here to make cutting your grocery store haul a breeze!
Once you know how to properly select, store, and cut fresh mangoes, you’ll actually look forward to the whole process in its entirety.
Starting with your grocery store run and ending at the final cut, we’ll be with you every step of the way in this detailed guide and tutorial.
Turn that frown upside down – you’ll learn everything you need to right here.
From a keen eye for picking out perfectly ripe mangoes at the store to well-practiced and methodical knife work, you’ll discover the skills you need to be a mango master!
Ready? Delicious fruit awaits…
How to Prep Mango
How to Select and Store Whole Fruit
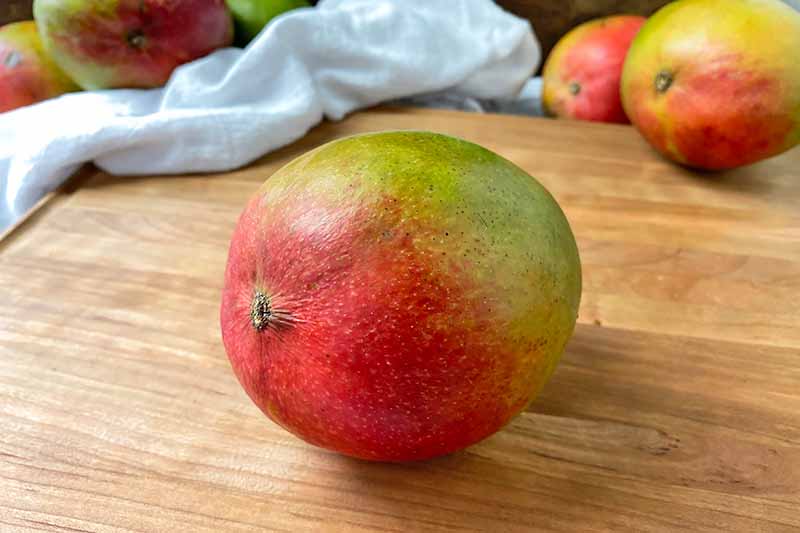
Mangoes can come in a variety of colors, including yellow, orange, green, and red – but a red hue doesn’t necessarily mean it’s ripe!
When shopping at the store, ripeness is best determined by feel.
To judge ripeness, squeeze gently. A ripe fruit will have a slight give when you squeeze. It shouldn’t be hard as a rock, but it also shouldn’t immediately yield to slight pressure.
Choose fruit with fully intact skin that is free of any bruises or gashes.
One that is unripe will have a sour taste and an astringent effect on your tongue and lips, so choose carefully if you’re planning to eat it the same day.
Mangoes that are unripe and rock-solid will ripen more quickly if placed in a brown paper bag out of direct sunlight. Otherwise, store them at room temperature for a few days before you prep and eat.
You can also slow down the ripening process by putting them in the fridge.
Whole mangoes should not be frozen. Thawing and prepping whole, unpeeled frozen mangoes would be a tough task to complete. Avoid that ordeal, and adhere to the suggestions you’ll find below instead.
How to Cut
If you’ve ever chopped up a mango before, you know already that they are slippery little suckers!
It can be a bit tricky, and a little scary – you certainly don’t want to have any slip-ups with a sharp kitchen knife in hand!
The key is to pick a piece of fruit from the grocery store that is ripe, but still firm. If it is too ripe, then cutting it will be excessively sloppy, and the beautiful salsa you want to make for your friends will be a mess of mush!
Follow the steps outlined below for our favorite method of cutting a fresh mango. It may take a few tries for the movements to feel natural to you, but you’ll get the hang of the process with every new fruit you slice.
We have plenty of recipe suggestions for you to make with all the fresh fruit you’ll soon be piling high on your kitchen counter, so keep reading!
Step 1 – Prep and Clean
Gather your fruit, tools, and the materials you’ll need to make your prep work a breeze. Consult this checklist before you start slicing:
- Cutting board: for a safe and sturdy foundation while you are peeling and slicing
- Chef’s knife: for making larger slices into the fruit
- Paring knife: for making smaller slices and scoring the fruit
- Dump bowl: to collect peels and pits for disposal so you can keep your work surface free of debris
- Dry towel and wet towels: for wiping and drying in between cuts of this very juicy and sticky fruit!
- Airtight containers: for storing prepped fruit
Among these materials, a sturdy work surface and a sharp knife are both incredibly important.
In case you haven’t already heard this a million times, a sharp kitchen knife is always safer to use than a dull one, since it will do the work for you. Needing to press too firmly or hacking away at your food as you chop or slice into it leads to accidents.
We recommend avoiding glass cutting boards – for this, and for most kitchen tasks. You can also lay down a damp kitchen towel or damp paper towels on your work surface before putting your cutting board in place, to prevent slipping.
Rinse the whole fruit under cool water and it pat completely dry with a clean towel before you carry on to cutting!
Step 2 – Cut a Small Portion from the Bottom
One of the best and most efficient ways to prep a mango is to cut it while the fruit is standing upright and vertical, with the stem end facing up.
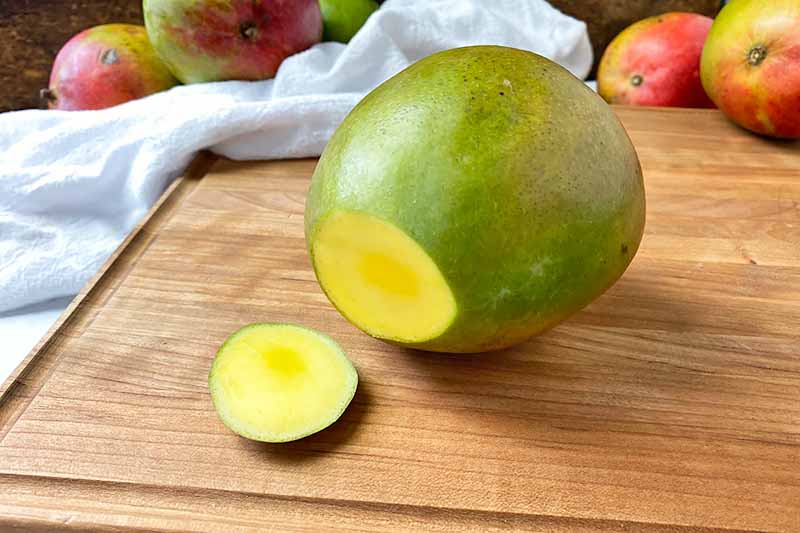
To create a flat and sturdy base before making your cuts, slice off the bottom tip. You can cut about half an inch from the bottom towards the middle before you reach the pit.
This cut should be as even and straight as possible, since the bottom will form your flat foundation as you are slicing.
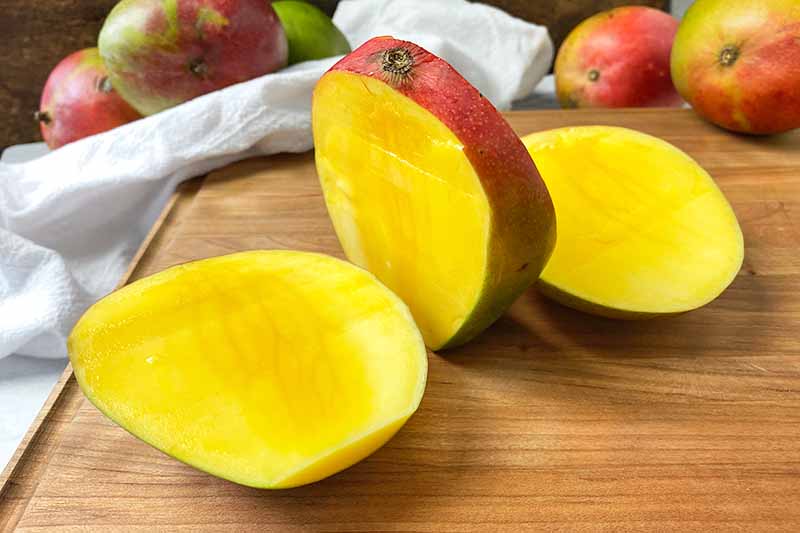
Step 3 – Slice Along the Longer Sides of the Pit
The next step is to cut two large slices with your chef’s knife, making one slice down each of the long, flat sides of the pit.
Mangoes have one large, flat pit inside. Because it is a fibrous fruit, this giant seed is attached firmly to the flesh.
But how can you tell how the pit is oriented?
A mango is shaped like a small football. It has two longer, flatter sides, and two rounder, shorter sides.
Place the fruit in a vertical upright position, with the stem end facing upwards and the sliced bottom positioned directly on the cutting board. Hold it firmly with your non-slicing hand.
Analyze the shape, and where the longer sides versus the shorter sides are. You will be cutting across the length of the mango on either side from end to end first for this step.
Use the stem as your guide. Your first cut will start on one side of the stem, and the other long cut from end to end will start on the other side.
Slice beginning on one side of the stem, making a long cut through the flesh parallel to and as close as you can get to the side of the pit without cutting into it.
Repeat on the other side of the stem.
You should now have two large rounded halves – also called cheeks – with the skin still intact. Set these aside as you slice the remaining flesh.
Step 4 – Slice Along the Shorter, Rounder Sides of the Pit
Once you remove the longer, flatter sides of the mango, it becomes very easy to see what else you need to cut.
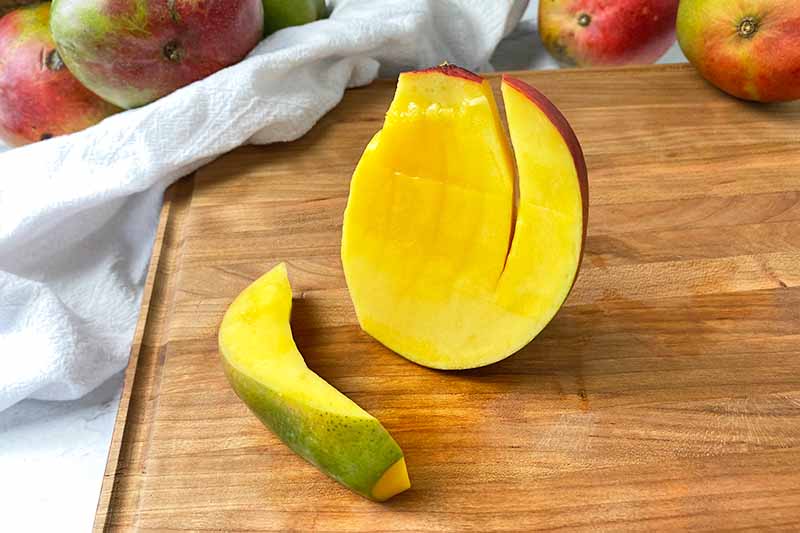
The narrower, rounder sides still remain – and those are exactly what you need to cut next!
Keep the fruit upright, and use the shape of the pit as your guide to slice along one side of the remaining flesh, starting from the top near the stem and cutting all the way to the bottom. Slice as close to the pit as possible.
Repeat on the other side.
You should now have two small and curved strips of flesh, with the skin still intact.
Step 5 – Nibble/Discard the Pit
Now that you have removed the majority of flesh from the pit, you can dispose of it. But before you do…
Enjoy it as a tiny snack!
There will always be some flesh clinging to the pit. I usually like to quickly nibble and suck on it before I throw it away – why waste it?!
Just have some floss nearby.
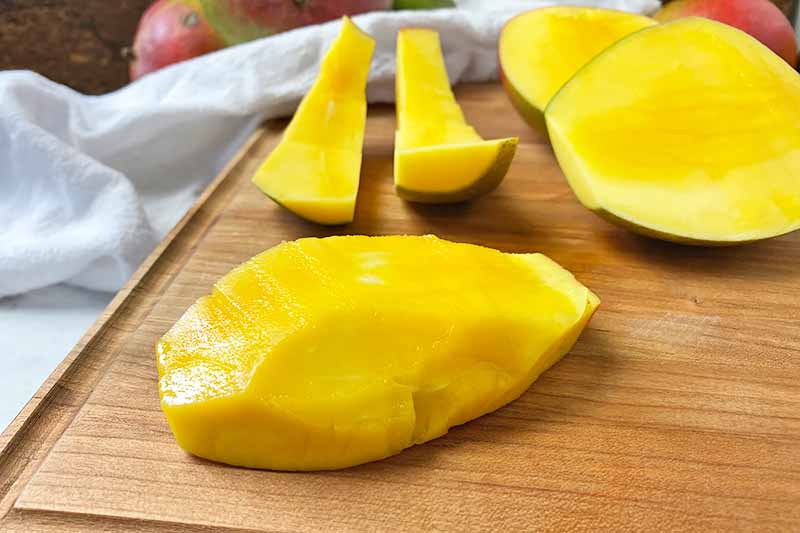
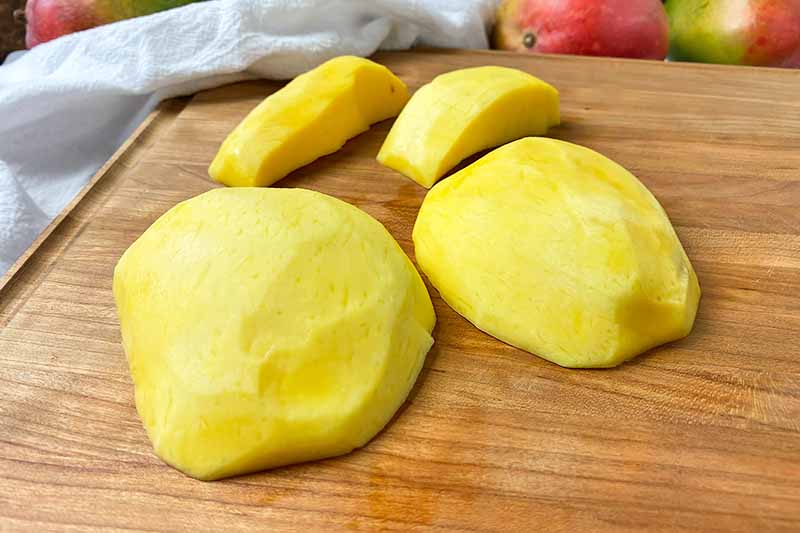
Step 6 – Remove the Skin from the Flesh
You now have four total pieces of fruit: the two larger, rounded cheeks and the two smaller strips. Time to peel!
Removing the Skin from the Cheeks:
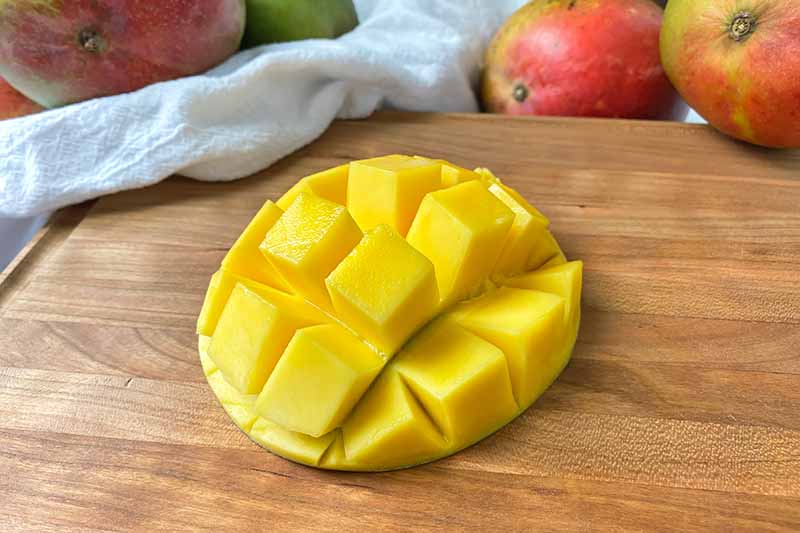
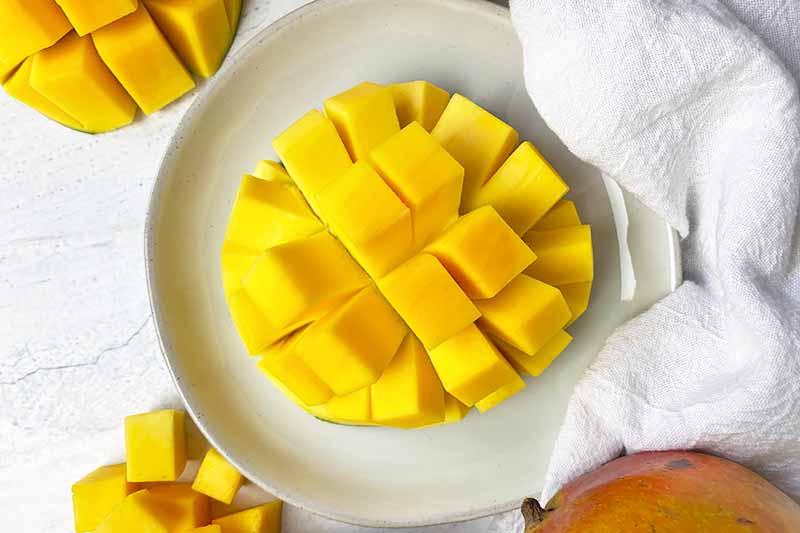
With your paring knife, score the flesh into a grid of cubes, cutting as close to the peel as you can without slicing completely through it.
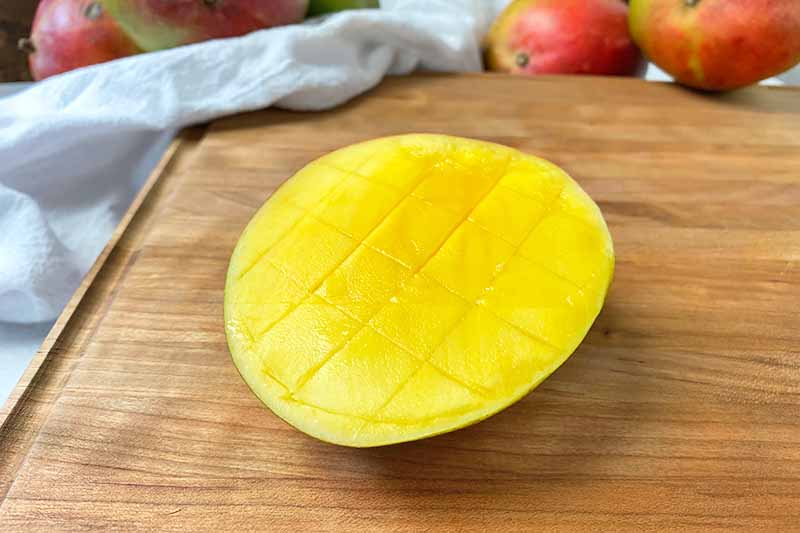
Cut the cubes as big or as small as you would like, depending on how you will be using the pieces. You could also opt to cut the fruit into long, thin slices instead, pre-slicing these from end to end without going through the skin rather than creating a grid.
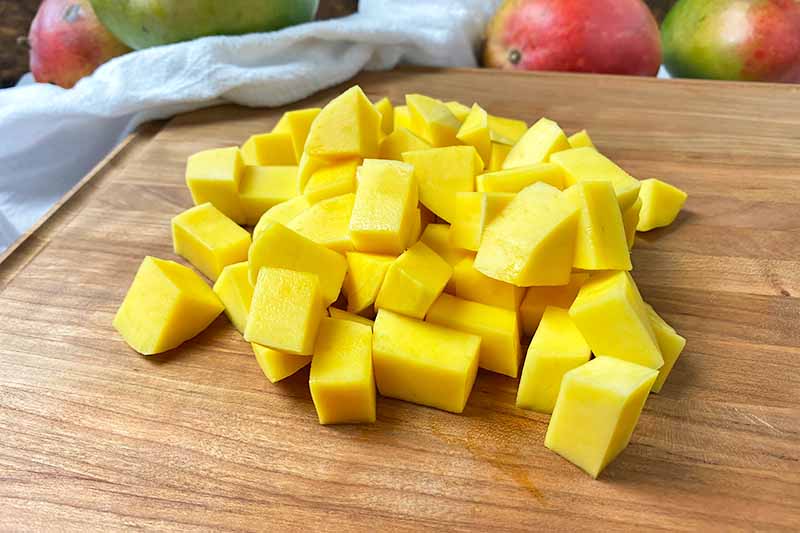
You can either scoop out the pieces with a spoon, or use your paring knife to separate the cubes from the skin at the base where they’re attached.
Repeat with the remaining cheek and discard the skins.
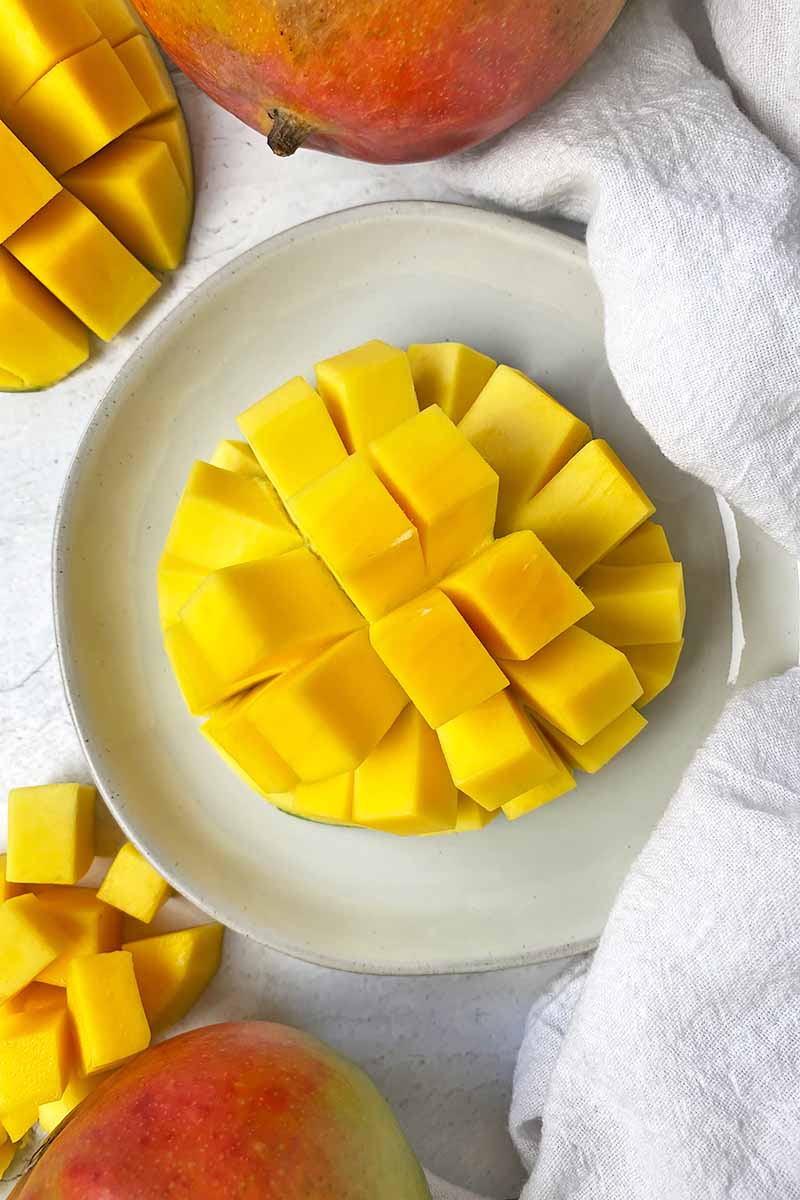
If you prefer not to remove the cubes of fruit, you can also score the flesh and then flip the cheeks inside out, for a pretty presentation that makes it easy to eat the fruit with a spoon.
Removing the Skin from the Smaller Strips:
Insert the tip of your paring knife between the skin and the flesh, starting at either end, getting as close as you can to the skin without slicing through it.
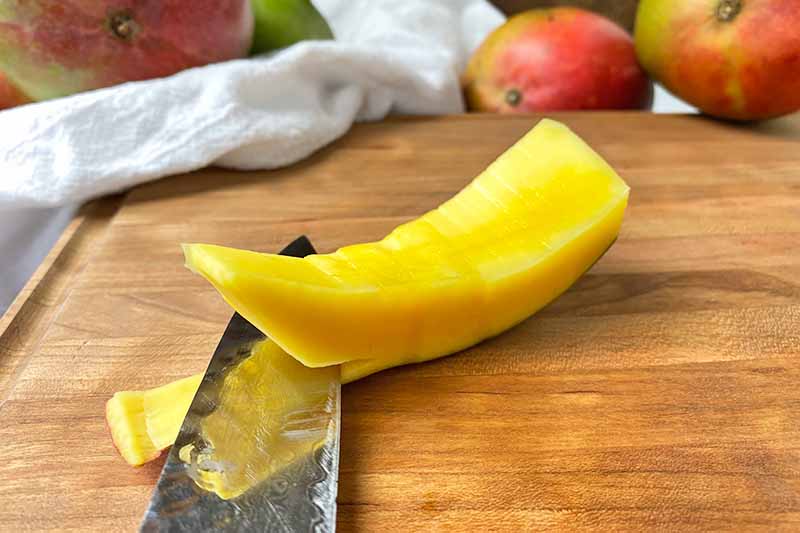
Continue to push the knife through the flesh, keeping the blade parallel to the skin as you glide the knife in between.
Repeat with the remaining strip and discard the skins. Chop the strips into cubes, or keep them in long slices if you prefer.
Here’s a Quick Peeling Alternative!
Removing the flesh like this after separating the various pieces from the pit can take some time to master. With your first few rounds, it may be a little messy, but continue to practice for more efficiency.
If you keep trying this method and you still hate it with a burning passion, there is an alternative!
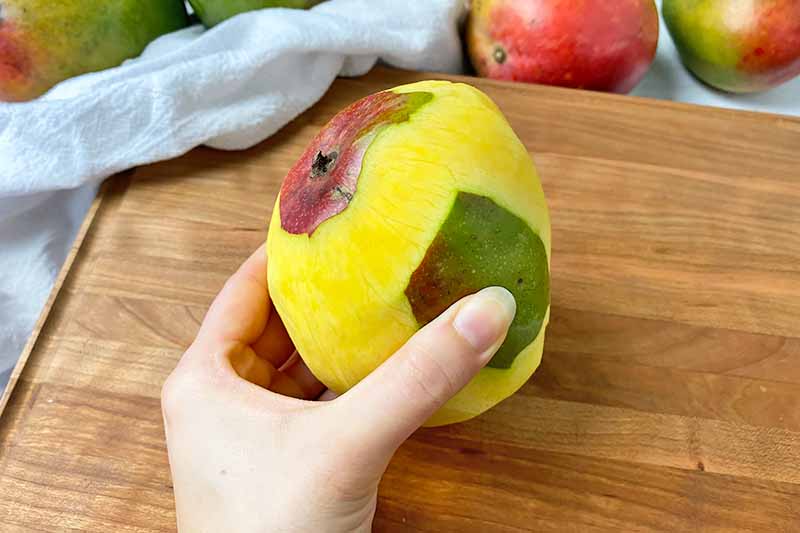
Another option is to peel the majority of the mango with a vegetable peeler before slicing into it, leaving a small portion of peel at the center around the stem to hold onto as you cut.
The peel is less slippery than the flesh of the fruit, so this can help to make the following prep steps easier by giving you something more secure to hold onto.
You can also leave small circles of the peel at the center of each cheek, for additional nonslip areas to cling to as you’re slicing.
Then, continue slicing as described above to remove the pit, peel away any small remaining portions of skin, chop or slice, and enjoy.
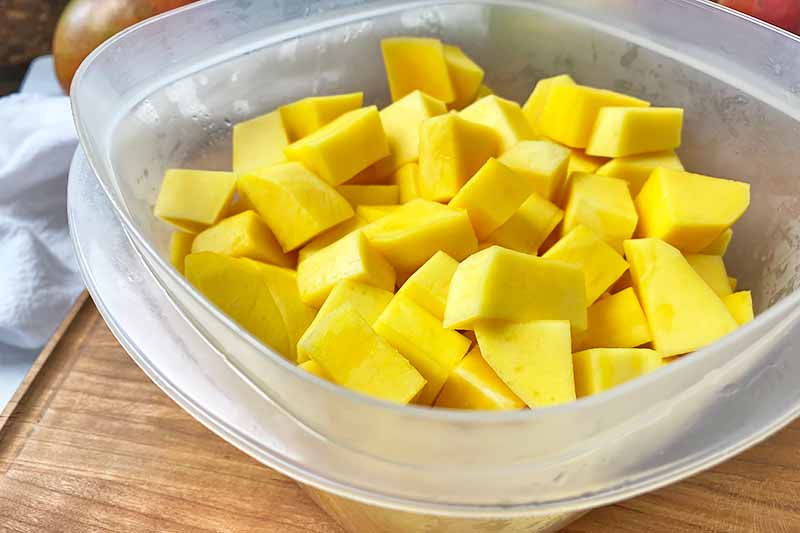
How to Store Cut Pieces
Once cut, the fruit should be stored in the refrigerator in an airtight container as soon as it is prepped if you don’t plan to eat it right away.
Peeled and sliced mango is best enjoyed within a week after cutting, depending on how ripe the fruit was when it was cut.
If the mango was not too ripe and still pretty solid, the pieces will hold up well within that time frame.
However, the riper the mango, the faster it will diminish in quality once cut. A very ripe fruit is best eaten within just a few days after peeling.
Freezing mangoes is a great option when you want to take advantage of storing very ripe fruit for longer periods of time.
The freezing process will be very similar to freezing bananas.
For the best results, place cut and peeled pieces on a baking sheet lined with parchment paper or a silicone mat with enough space in between each piece so they are not touching, and place in the freezer until completely solid and frozen, for at least 3 hours.
Once frozen, transfer the pieces to an airtight bag or container and store in the freezer for up to 6 months. Pre-freezing in a single layer before storing helps to prevent sticking.
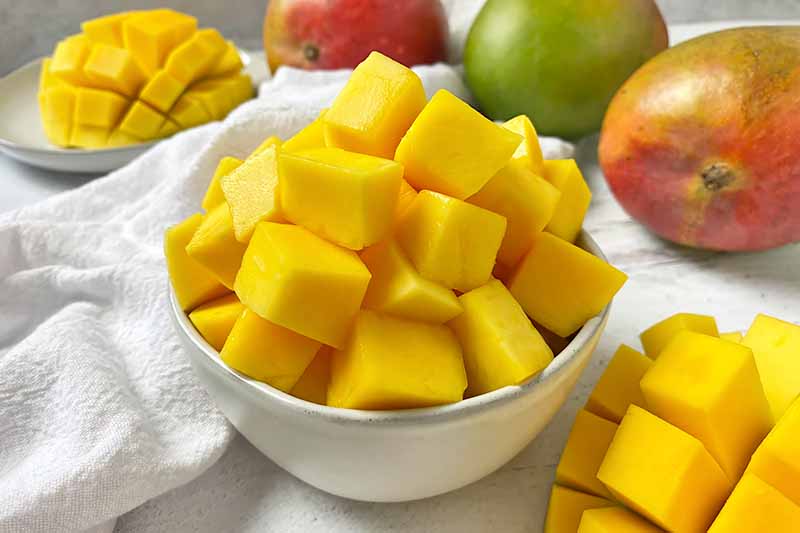
Make the Most of Mangoes
Let’s be real here: one is never enough.
If you’re already set up to prep one mango, you might as well prep a bunch all at once!
And how could anyone pass up a 5 for 5 deal at the grocery store?! What a steal!
Cutting multiple mangoes in a single prep session has multiple advantages:
For one, you’ll get faster and more confident with the entire process each time you exercise those knife skills. I’ll never tire of the saying “practice makes perfect,” especially when you’re dealing with a challenging fruit shape that requires some extra knife work.
Second, the more fruit you prep, the more tasty inventory you’ll have on hand for future use!
Refrigerate half of the prepped pieces to enjoy fresh throughout the next few days as a snack on their own, stuffed in an avocado, or mixed into rice pudding.
Freeze the other half to store them long term, and to whiz up in your smoothies, shakes, and no-churn paleo ice cream for body and flavor.
Find even more tasty mango recipes here.
Cutting beautifully ripe and sweet mango will give you the best results that you can freeze for later – far better than the pre-cut bagged frozen options at the grocery store, which are usually prepped from unripe fruit with an unpleasant texture and little to no flavor!
What are your favorite ways to use fresh and juicy mango? Do you have your own nifty methods to quickly (and safely!) cut the fruit? Your suggestions are welcome! Leave a message in the comment section below right now.
You’re on a roll – let’s prep even more! Our lineup of how-to articles will keep you busy in your kitchen. Spend some quality time with these ingredients next:
- How to Prep Onions
- How to Get the Most out of Fresh Berries
- How to Cook Broccoli, Three Different Ways
Photos by Nikki Cervone, © Ask the Experts, LLC. ALL RIGHTS RESERVED. See our TOS for more details. Originally published by Lorna Kring on June 7, 2015. Last updated on September 18, 2022.
Nutritional information derived from a database of known generic and branded foods and ingredients and was not compiled by a registered dietitian or submitted for lab testing. It should be viewed as an approximation.
About Nikki Cervone
Nikki Cervone is an ACS Certified Cheese Professional and cheesemonger living in Pittsburgh. Nikki holds an AAS in baking/pastry from Westmoreland County Community College, a BA in Communications from Duquesne University, and an MLA in Gastronomy from Boston University. When she's not nibbling on her favorite cheeses or testing a batch of cupcakes, Nikki enjoys a healthy dose of yoga, wine, hiking, singing in the shower, and chocolate. Lots of chocolate.