We occasionally link to goods offered by vendors to help the reader find relevant products. Some of these may be affiliate based, meaning we earn small commissions (at no additional cost to you) if items are purchased. Here is more about what we do.
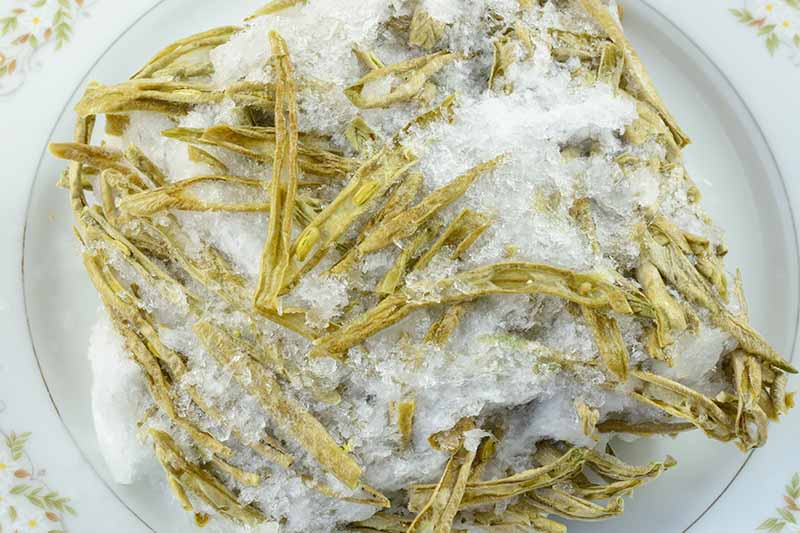
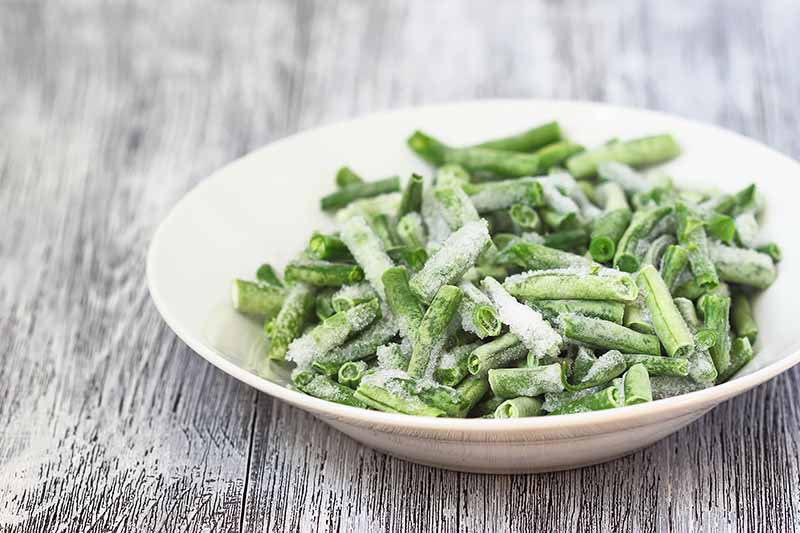
So you open the carton of ice cream you’ve been saving, or pull out the frozen leftovers you thought you were going to eat for dinner, and you see those telltale grungy-looking ice crystals. Lo and behold, freezer burn has formed, yet again.
What’s a meal prepper, bulk buyer, or careful food saver to do, to prevent this common food storage issue?
Read on, friend. I’m going to share my favorite tips for preventing freezer burn, so you can enjoy high-quality frozen vittles without off flavors, or a crunchy crust of snow on top.
According to Harold McGee’s “On Food and Cooking: The Science and Lore of the Kitchen,” – a highly recommended tome that I’ve been eager to crack the spine of since I received it as a gift last Christmas, and that you can snag a copy of on Amazon – freezer burn is caused by sublimation of the water.
Sadly, this is a lot less exciting than it sounds, merely the technical term for when moisture evaporates at temperatures below freezing.
McGee also mentions that “Well-frozen meat will keep for millennia, as has been demonstrated by the discovery of mammoth flesh frozen 15,000 years ago in the ice of northern Siberia.” Trust me when I say that you are in no way going to be able to pull off that type of long-term storage at home. But you do hold the power within you to prevent freezer burn.
First of all, it’s important to remember that at least nine times out of 10, if not significantly more often, freezer-burnt food is safe to eat. It won’t hurt you!
Those ice crystals may look unappetizing, and may even make your foods taste a bit stale or otherwise off (this is the case for ice cream in particular, in my opinion). But that frosty fur is in no way an indication of foodborne pathogens or spoilage.
Instead, think about what’s going on inside your freezer. It’s cold in there! But usually not consistently. And the air is rather dry compared to, say, the ambient air in your kitchen or the conditions that you’ll find inside a crisper drawer in the fridge.
Most foods are jam-packed with moisture, and as time passes, that moisture is going to begin to evaporate – even when foods are frozen.
Pair that with temperatures that can fluctuate often – when you hold the door open for long periods of time, or depending on the regular temperature cycling that’s normal for the operation of your given appliance – and you’re going to get a sort of snow that collects on the outside of foods from whence that wily moisture escaped.
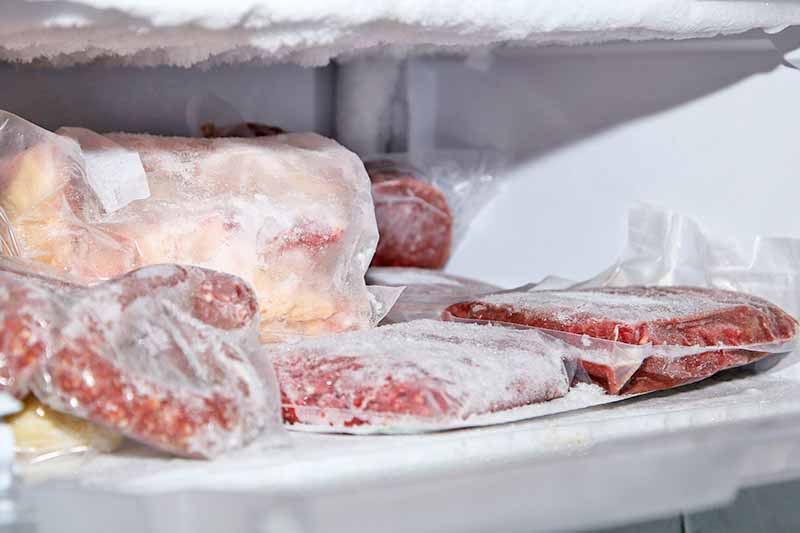
Nobody wants to eat dried-out food (unless, maybe you dehydrated it intentionally), and particular frozen items like proteins will decline in quality if you’ve left them in the freezer for too long. Certain foods like beef and poultry may even turn a bit brown or pinker than usual, indicating that something is up. And those portions should be removed when you defrost, unless you’re in the mood for disappointment in terms of texture.
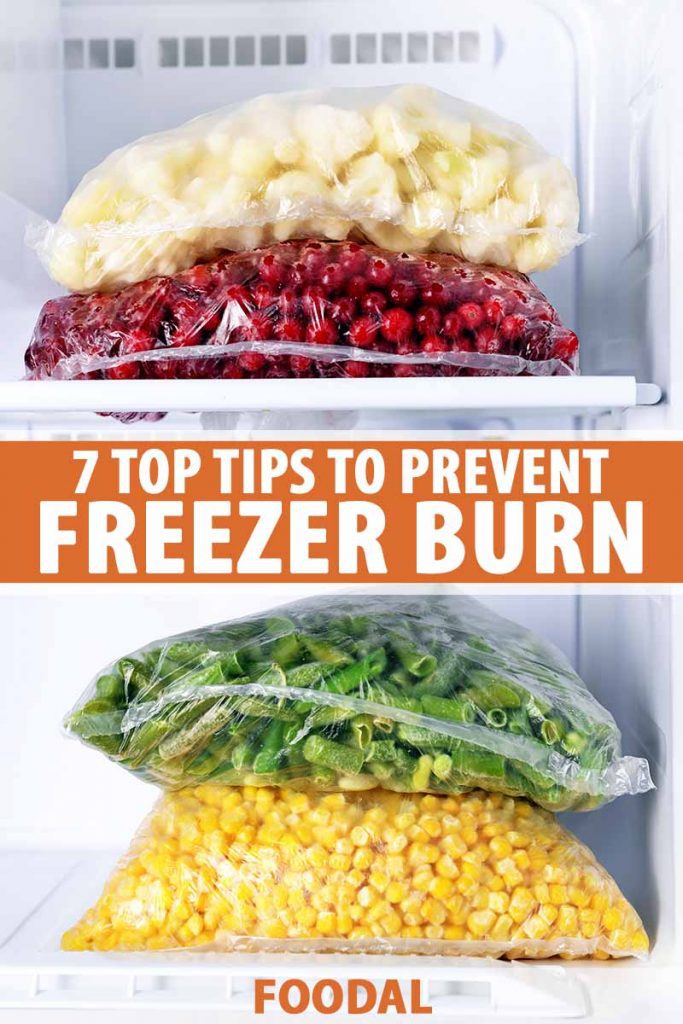
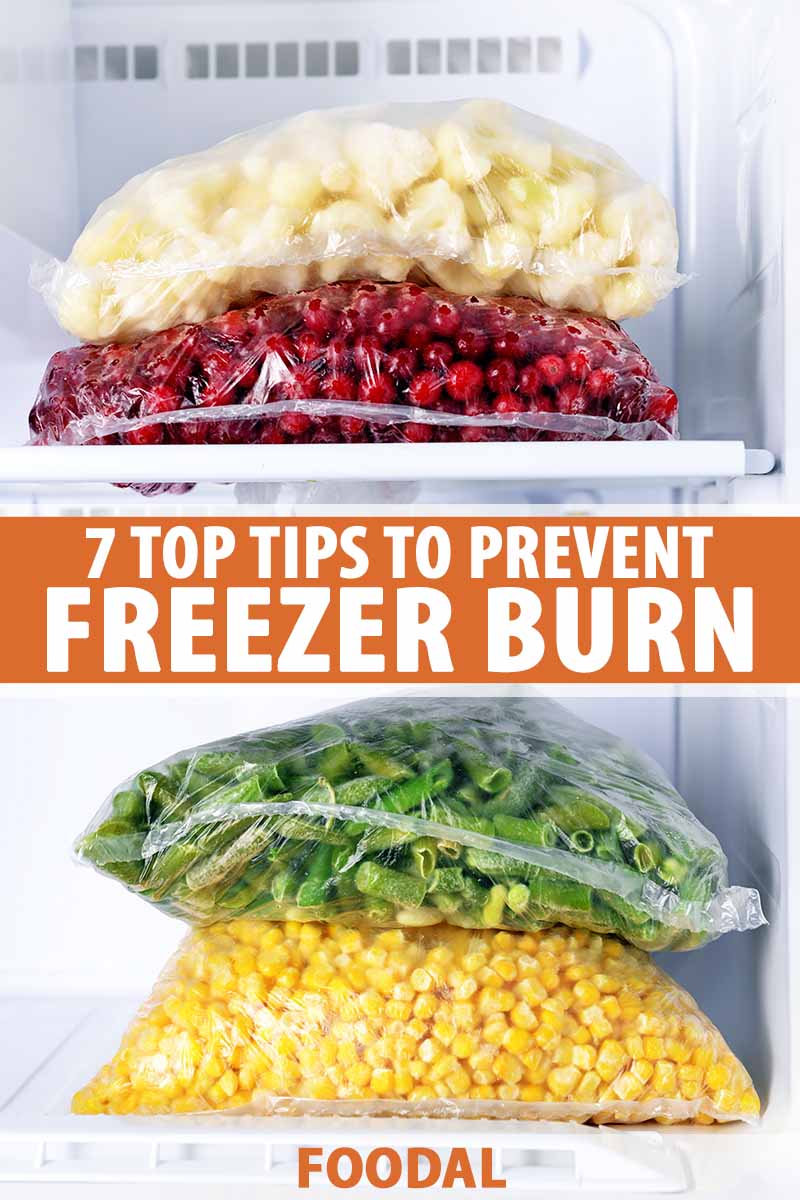
Rather than losing your handily hoarded foodstuffs, let’s take a look at seven of the top ways to prevent freezer burn from happening in the first place.
Here’s a quick rundown of the recommendations that I’ll cover:
How to Prevent Freezer Burn
1. Keep the Temp in Check
It’s easy enough to set the temperature on your freezer and take a peek inside to make sure the food’s frozen. But do you know what’s actually going on in there?
Most freezers have a temperature gauge that offers a “normal” setting with numerical increments above or below that rather than a span of specific degrees, while some are even more vague, prompting you to select a setting that’s merely labeled “cold,” or “low,” or “witch’s tits.”
Okay, maybe not that last one. But we all can dream…
Even if you have a fancier appliance that may claim it’s set to a temperature at or below freezing by a certain specific amount, can you confirm that this is actually what it’s doing?
If there’s a digital thermometer in there already, then you’re all set. What I like to do is place my own battery-powered digital thermometer in the freezer to find out how cold it is inside.
Digital thermometers are best for this – you don’t want to risk adding broken glass to the mix along with your containers of soup and boxes of freeze pops. I prefer to use one that can be reset easily, and that shows not only the current temperature, but the highest and lowest temperatures that it’s recorded as well.
My favorite option is available in a two-pack on Amazon. Turn it on, pop it in, close the door, and check it periodically. If your freezer’s running too warm, turn it down just a smidge, wait 24 hours, and check again.
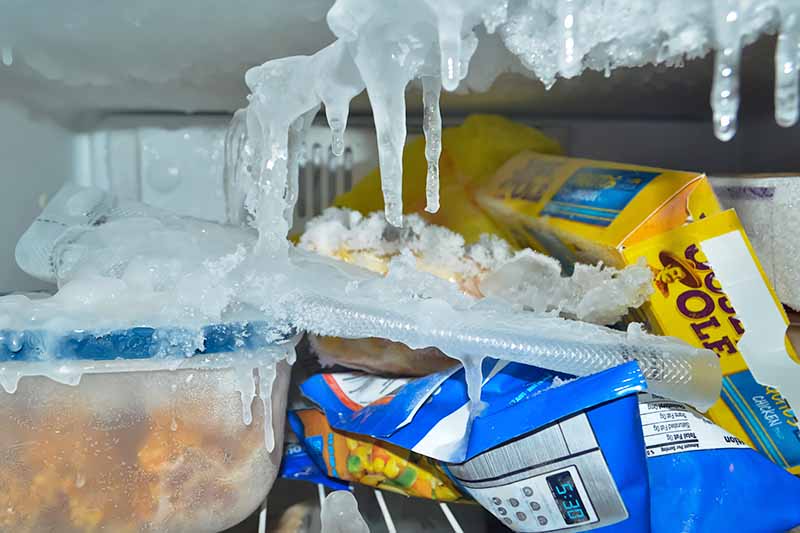
Restocking your fridge so the foods inside aren’t blocking the air vents or congesting the available space too much will also lead to better freezing, and higher quality leftovers. And if there’s any built-up ice in there, it’s time to do a defrost, and get that baby cleaned out thoroughly.
Still suffering temperature woes based on the data provided by your handy thermometer? It may be time for a tune-up, or a new appliance.
2. Fill ‘Er Up
Have you ever brought a cooler to the beach, filled to the brim with frosty canned beverages and a bag of ice, only to find that your carefully selected brews were lukewarm by the end of the day? Let’s take a quick look at why that might be, because it also applies here.
Though the cooler itself may be to blame, and any box that’s meant for chilling will become increasingly warmer every time you open the lid or door, the quantity of stuff inside said box is also a key factor in keeping everybody nice and cool.
The more beers you drink, the less space those cans are taking up inside your cooler. The more ice cream you eat, the more air space there is inside the carton – we’ll go into more detail about this below. And the emptier your freezer becomes, the more likely the food inside is to become infected with Yeti Pox. Er, to develop freezer burn.
Cold stuff helps to keep other stuff cold, like the beers at the beach or the blocks of chicken, sticks of butter, and who knows what else you’re storing in your handy appliance at home. So use those shelves wisely, try to avoid keeping stuff shoved to the back or near the vents so it blocks airflow entirely, and aim to keep it about three-quarters of the way full for best results.
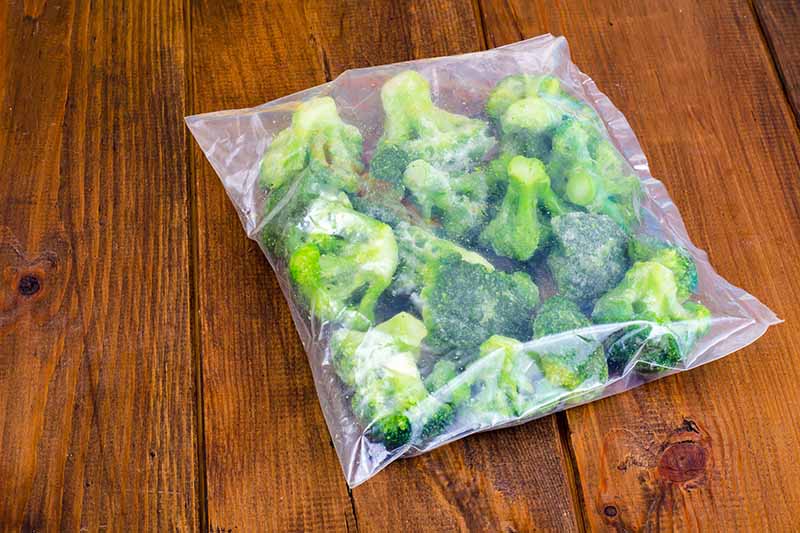
3. Keep Things Wrapped Up
Plenty of foods that we like to store at temperatures below 32°F come pre-packaged individually, and that’s just fine. But what about when you open something and use just a little, or you’re packing up and storing your own homemade creations for later use?
What might fly in the fridge or for shorter periods isn’t necessarily going to work for long-term storage here.
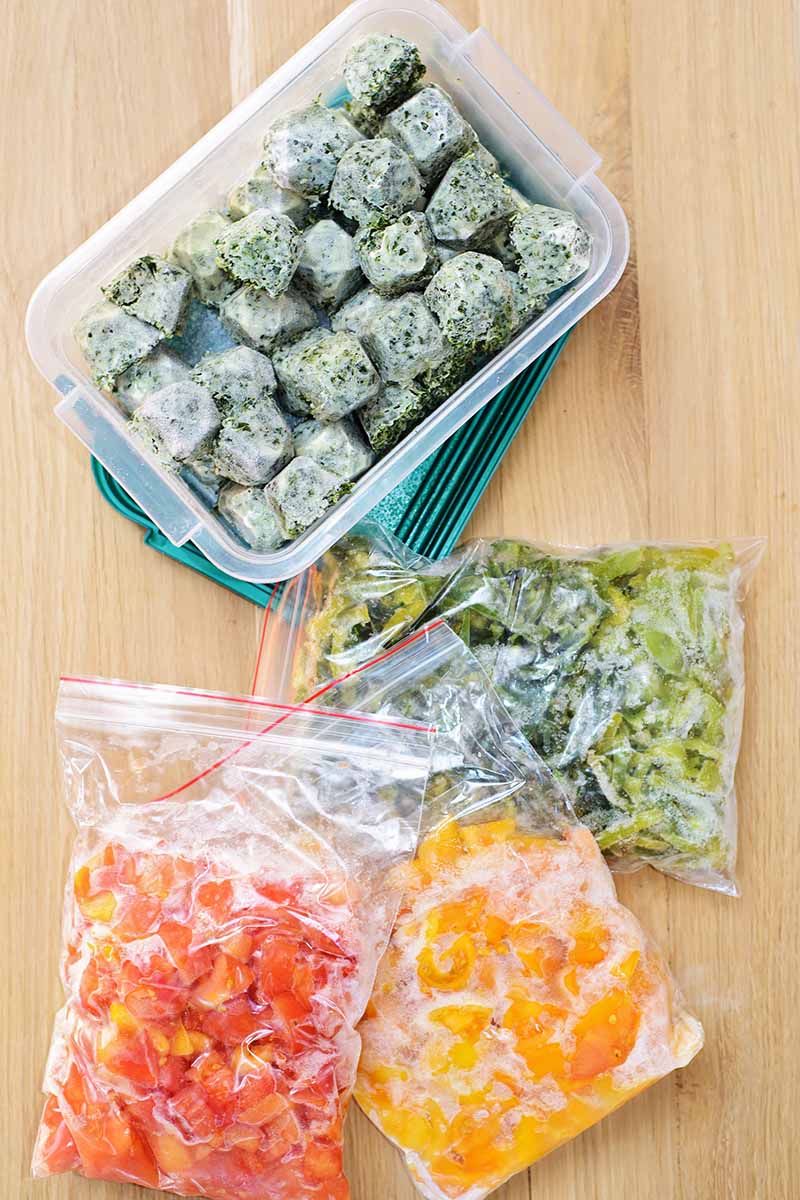
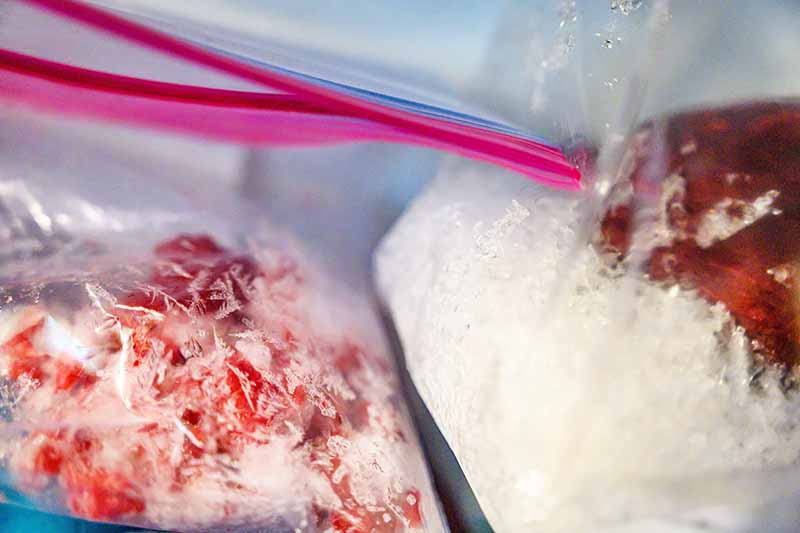
To keep the moisture inside whatever you’re storing where it belongs, wrap foods up tight, and use the smallest containers you can find.
This goes for rewrapping when you use just a bit of something before you put it back as well. Exposed portions on the surface of foods or big gaps of air space inside overly large containers let that evaporating moisture flow freely, resulting in the dreaded freezer burn.
As an added bonus, smaller containers mean you can pull out just what you need for a given meal, rather than letting a whole lasagna or a quart of soup defrost in the fridge, only to be tossed at the end of the week because you weren’t able to eat it all.
Depending on the container you’re using, employing a vacuum sealer may also come in handy to remove those air pockets before you tuck your sides, snacks, and entrees in for a long winter’s nap. Read about the best vacuum sealer models recommended for home use in our roundup.
Keeping tightly wrapped, smaller packaging in mind also goes for premade items. Try to choose things that are packed well and in a way that meets your needs when you’re doing your grocery shopping, or plan to repackage them before storage.
In a household of two, that gallon of ice cream that’s on sale may look like a good deal, but you’re not really saving any money in the long-run if it develops freezer burn thanks to those big air gaps in the carton that are left behind after you take out a few bowlfuls, particularly if you decide to toss what’s left when you notice that it’s become a frosty fur baby.
4. Choose Packing Materials and Vessels Wisely
In addition to size, you want to consider what your storage materials and containers are made of, and whether they really belong in the freezer in the first place.

If you’re into prepping meals in advance or you like to make stocks, sauces, baked goods, and snacks that you can freeze, look for packaging options that are labeled as freezer safe, and use the smallest containers you can find to meet your needs.
You might be a plastic fan, or a foil aficionado, but other alternatives may be better when you’re wrapping things up tight. Waxed butcher paper, for example, is a savior when it comes to cold storage for meats and seafood in particular.
Look for zip-top bags, wraps, and lidded vessels that are labeled freezer safe. Not only will this help to ensure that they won’t crack or shatter, it’s also a good indicator that they won’t easily become unzipped or unwrapped, or that they’re overly porous, unbeknownst to you as they huddle in the cold dark, hoping and dreaming that an eager eater might come along and save them.
I like Ziploc quart-size freezer slider bags and Reynolds freezer paper, if you’re looking for options to add to your igloo arsenal. Both of these are available on Amazon.
Though eco-friendly beeswax-coated cloth wraps can be used in the freezer, I avoid it. Frozen beeswax is brittle and prone to cracking, and I find it’s more difficult to use to create a tight seal than most of the other options that I have available. It’s also not typically recommended for storage over 30 days.
Silicone zip-top bags and containers can go in the freezer, and they’re reusable since you can wash them. They provide a less permeable barrier than many plastic options, but they are also generally more expensive.
I find that these can be somewhat lacking depending on what you’re trying to store, since they’re relatively inflexible. A plastic bag can be wrapped tight, folded, or closed with a twist tie whereas a silicone alternative typically cannot. Personally, I stick with refrigerator use for these.
5. Skinny Dip, as Needed
Before packaging and wrapping, certain foods benefit from a quick dip in an icy bath, while others prefer a visit to the culinary hot tub that is your favorite stockpot bubbling away on the stove.
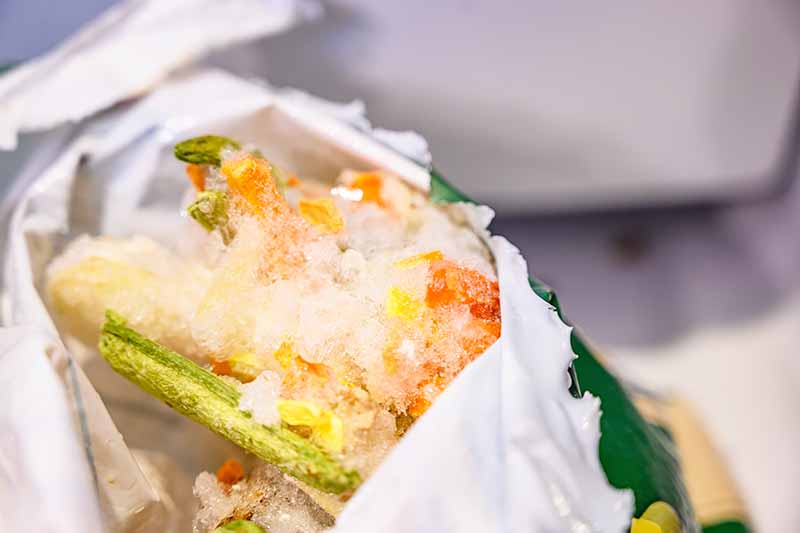
When certain fresh vegetables and other whole foods freeze, the ice crystals that develop can burst their cell walls, resulting in a less than desirable texture when you’re ready to eat them. Add to that a crisp coating of frosty ick thanks to moisture loss, plus potential browning and other markers of a decline in quality due to enzymatic action, and it’s no wonder so many people think they don’t like vegetables or frozen foods!
Blanching sturdier vegetables like broccoli in a boiling water bath for a few minutes before dunking them in ice water to shock them into submission (i.e. to stop the cooking process) will help to make them more freezer-friendly. Per McGee, this serves to inactivate the enzymes that they contain, to help preserve color and certain vitamins.
Just be sure to allow them to dry thoroughly, or give them a nice rubdown with a clean kitchen towel or paper towels, before storing. It wouldn’t hurt to quickly research whatever type of produce you have on hand to determine what’s best in terms of blanching times, recommended prep work, and other details, since all types of vegetables that you’d find at the greengrocer contain different levels of moisture.
Fruit, on the other hand, isn’t typically a good candidate for blanching. But you may have noticed frozen fruits at the grocery store that are packed in sugar syrup, and this is for good reason. It can help to counteract browning and preserve texture.
Wet seafood and chicken in particular can benefit from a cold dip before you wrap them up tight, as a solid layer of ice will serve as a protective barrier that will evaporate before the moisture begins to escape from the food encased inside.
Multiple dunks between freezes can even help to thicken this layer if you’re down for that. But in my book, slicing open the package from the butcher or fishmonger and risking dripping potentially salmonella-infested or seafood-infused stinky water all over my kitchen does not outweigh the potential benefits here.
I was a vegan once, so sue me. I’ll stick with the veggie blanching, thank you!
If you go for it and accidentally drop that slippery chicken on the floor, read our article to find out what to do so you can skip tossing it in the trash.
6. Cold Only, Please
When you’ve made that big batch of homemade marinara after a long day of work and you realize that it’s already long past your bedtime, you might be tempted to shove it all into whatever Tupperware you can find as quickly as possible so you can throw the dirty dishes in the sink, turn off the light, and say goodnight.
Crusty struggle dishes aside, this is yet another one of those nasty habits that can lead to freezer burn.
How, you ask? While anything that’s already been chilled, or even foods that are room temperature, are excellent candidates for tossing in the freezer ASAP, anything that’s still warm to the touch – let alone steaming! – will spread its warmth around, heating up the surrounding foods and the inside of your freezer.
In other words, freezers shouldn’t be used to chill hot foods. And anything else that’s in there that’s heated up in the process of attempting to do this will increase in temperature as well. Though the shift may be slight, we’ve already discussed how temperature fluctuations can lead to more rapid moisture loss, and so on and so forth.
Do your frozen foods a favor, and keep the cold stuff cold. Let cooked foods come fully to room temperature or refrigerate them first before freezing.
7. Skip It
Only freeze what you have to. That’s right, I said it!
Though there are certainly deep freeze chest-owners out there who have their cold storage game down pat and know how to do it such that they could feed an army at a moment’s notice if they had to, most of us have relatively dinky-sized freeze-boxes with associated temperature fluctuations – due to frequently opened doors, or otherwise – to match.
Do yourself a favor and avoid the disappointment altogether by planning wisely. Even items stored in the freezer have an expiration date, and though it may not be an indicator of anything inherently dangerous or potentially unhealthy about the food, most of us prefer to get to it before it’s coated in unseemly frost.
I like saving the turkey bones after Thanksgiving to make copious amounts of stock and soup as much as the next guy, but I’ve also had years when this healing elixir simply didn’t get eaten, grew frost fur, and was tossed. (Failing to label your frozen items with the pack date and some sort of ID of the contents doesn’t help either.)
Beyond the realm of the dreaded burn, many foods do not benefit from freezing for other reasons that are also related to moisture content. Though it may be true that you can technically freeze all kinds of things from egg whites to mayonnaise to cheese if you want to, and you will undoubtedly find oodles of advice for doing these things all over the internet, here’s my advice:
Don’t.
Freeze the bread that you’re able to use up within a few weeks, a few extra meals’ worth of well-packed proteins, a bag or two of frozen veg, and maybe a frozen dessert and a breakfast item or two if you’re feeling frisky.
Stick your baking chocolate and semi-sweet chips in there, if you don’t mind a bit of white bloom on the surface.
Grains, nuts, and seeds that would go rancid on the shelf if you’re not able to use them up quickly enough thrive over longer periods if frozen properly, and these are much less likely to incur freezer burn since they’re lower in moisture to begin with than fruits, veggies, and straight-up liquids like juice or soup.
Beyond that, don’t say I didn’t warn you. Don’t overpack the freezer, and don’t abandon anything that’s in there altogether. Despite your best efforts, careful prep and packaging is a life shelf-life extender but not an altogether foolproof deterrent for freezer burn.
Oh, and those old ice cubes that look like Shrinky Dinks that have clearly evaporated beyond repair? Please toss those. And keep that ice maker clean.
Though these ancient cubes may actually help to keep the foods that are in there with them frost free (and many food storage experts advocate for “freezing a cup of water” or something along those lines for this very reason) this robs them of their frosty vigor and crisp flavor, to say the least. And if you ask me, they’re no longer fit for human consumption.
Beware the Burn
Armed with these brrrrrr-illiant pieces of advice (if I do say so myself!) you’re going to be so far ahead of the game in avoiding having to serve freezer burnt food to your family, able to enjoy the many enticing options that you so lovingly packed away.
Consider what you’re storing, avoid overfilling the available space (or underfilling it too significantly), and wrap everything up well to prevent exposure to air on the surface.
Check to make sure your appliance is operating as it should be, do a little research if any prep work is recommended for certain ingredients, and never stick anything in there that’s above room temperature to start with.
And now, it’s time to say goodbye to those frosty fuzzies! Within reason, at least, for the non-mastodon hoarding long-haulers among us. I heard there’s a big block of mint chocolate chip in there with your name on it – better eat up!
Do you have a storage tip to share that I missed here? What’s your favorite thing to portion out and store for those busy nights when you just don’t have time to cook? Let me know in the comments section below.
Piqued your interest? We’re here to help you boost that kitchen knowledge! Read even more of our helpful how-to’s now on Foodal, starting with these:
- How to Prepare Make-Ahead Snack Packs
- How to Get the Most Out of Fresh Berries
- How to Stock a Healthy Pantry
© Ask the Experts, LLC. ALL RIGHTS RESERVED. See our TOS for more details. Uncredited photos via Shutterstock.
About Allison Sidhu
Allison M. Sidhu is a culinary enthusiast from southeastern Pennsylvania who has returned to Philly after a seven-year sojourn to sunny LA. She loves exploring the local restaurant and bar scene with her best buds. She holds a BA in English literature from Swarthmore College and an MA in gastronomy from Boston University. When she’s not in the kitchen whipping up something tasty (or listening to the latest food podcasts while she does the dishes!) you’ll probably find Allison tapping away at her keyboard, chilling in the garden, curled up with a good book (or ready to dominate with controller in hand in front of the latest video game) on the couch, or devouring a dollar dog and crab fries at the Phillies game.